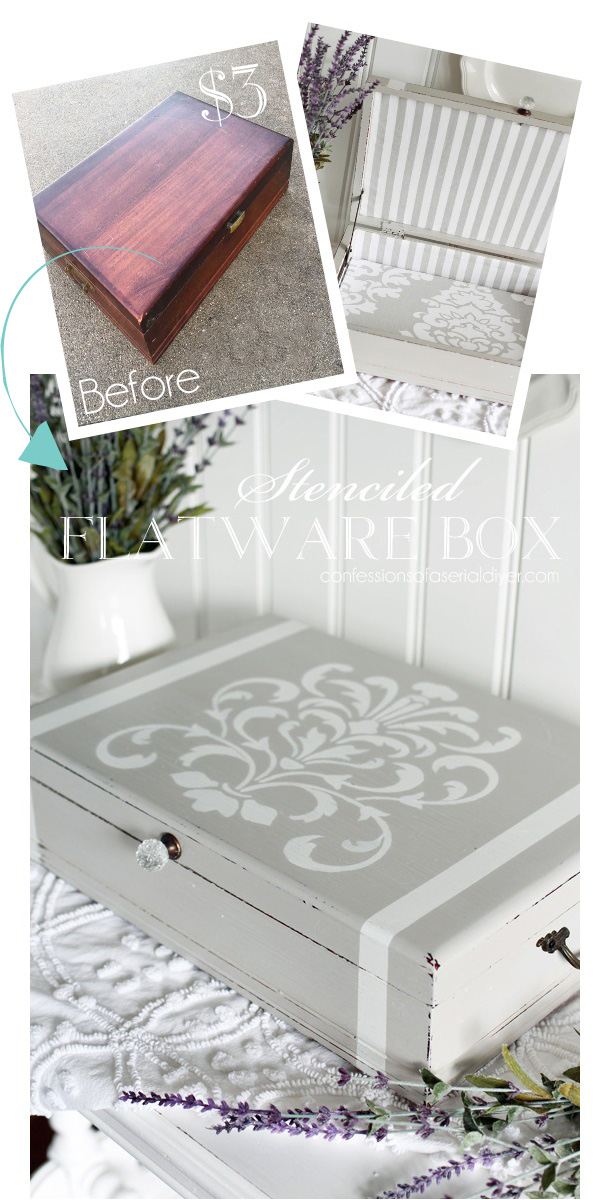
Hello lovely friends! If y’all have spent any time here at all, chances are you’ve seen a flatware box makeover or two or five. I just cannot pass them up when I see them! As I was looking through my storage room to find my next project, I found three of them, and decided this one would be my next makeover:
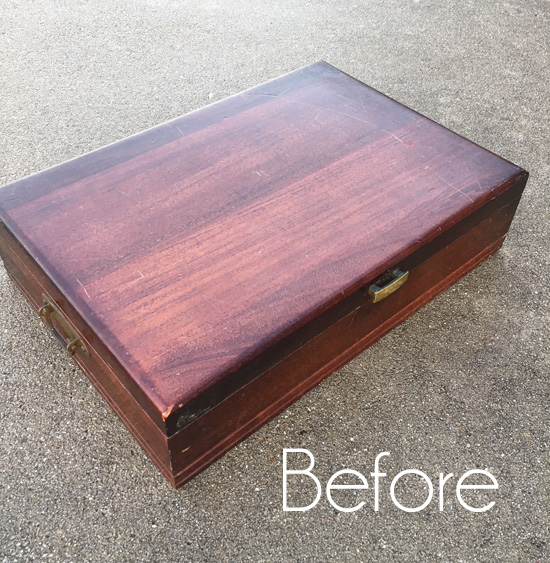
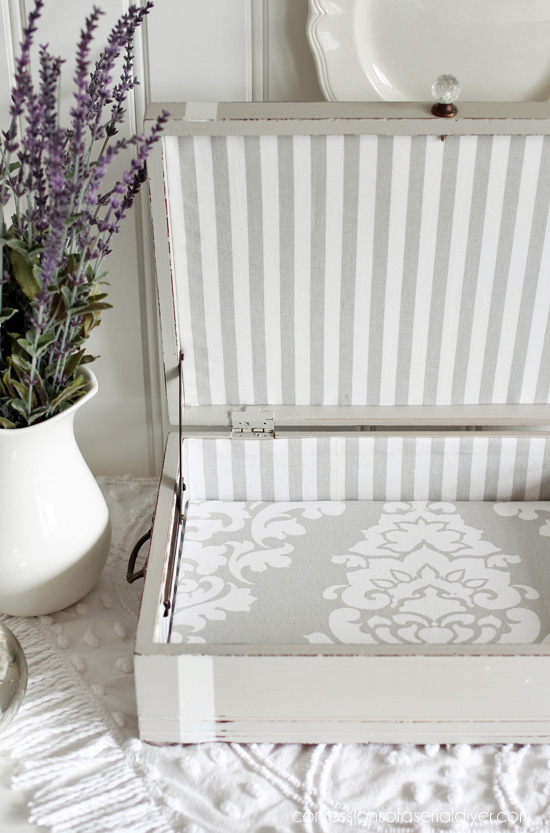
Seems easy enough, right? That is until you open it:
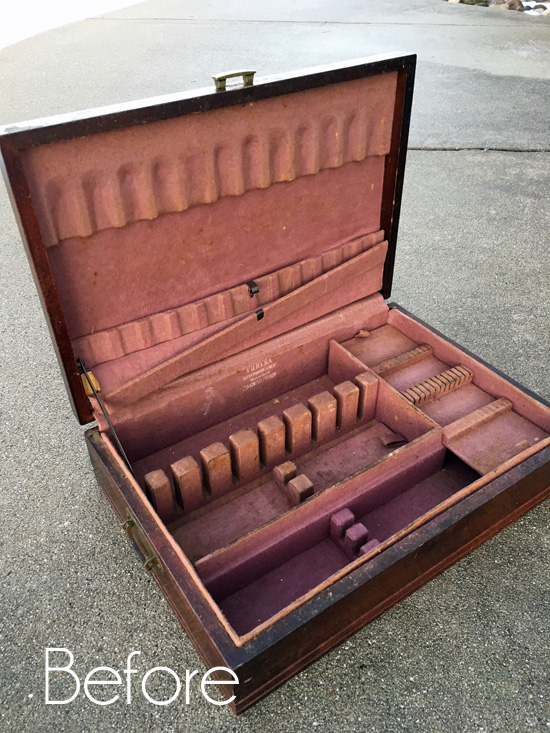
Yikes…that is where all the hard work takes place.
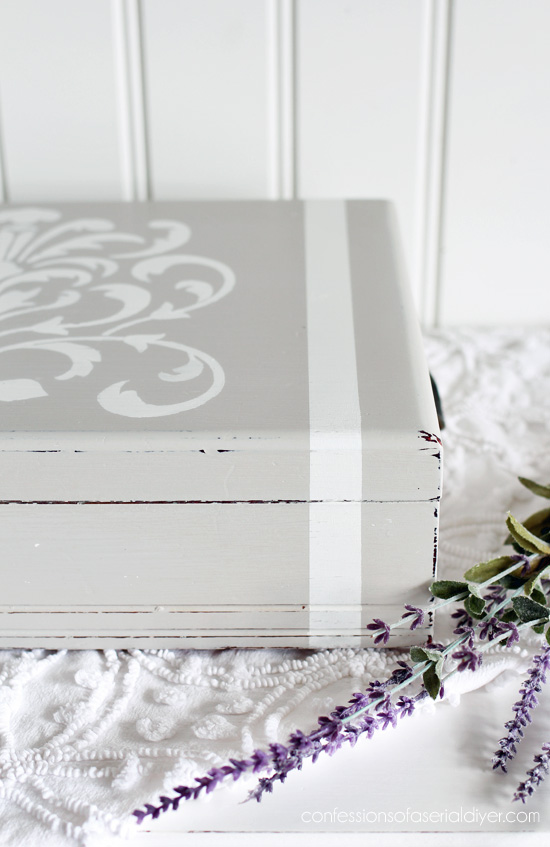
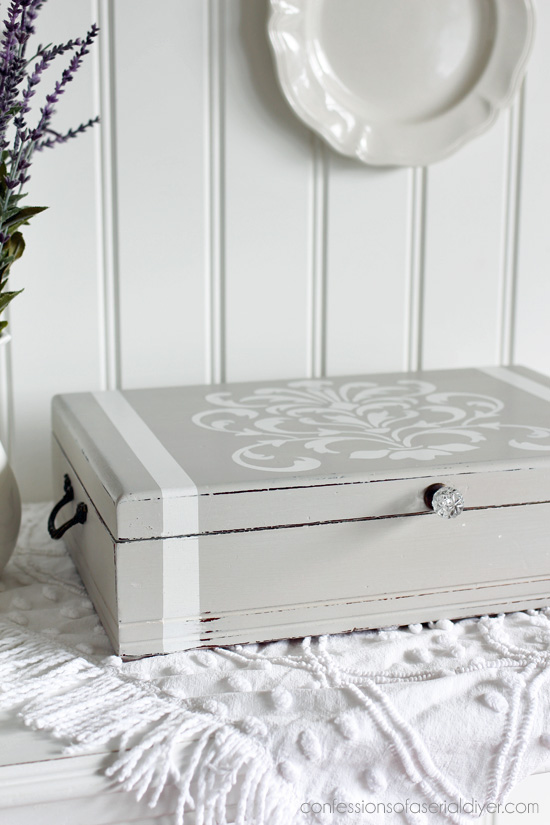
Let’s see how this baby turned out, shall we?
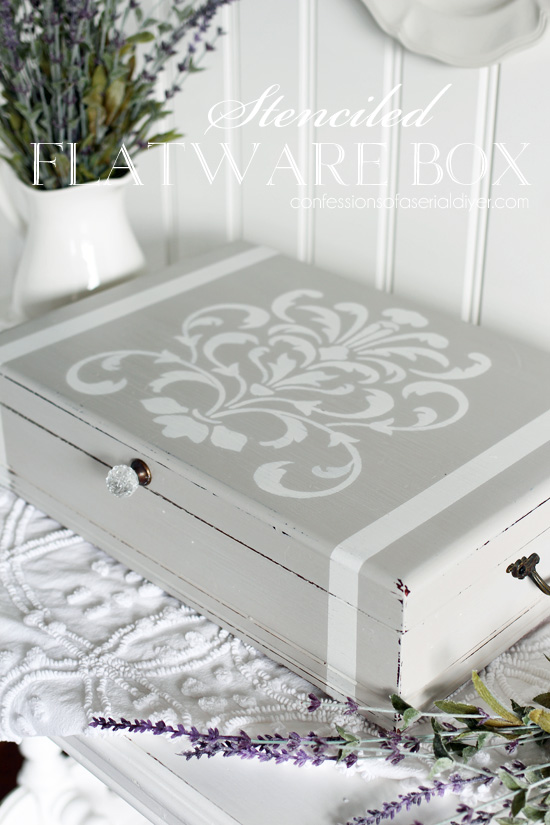
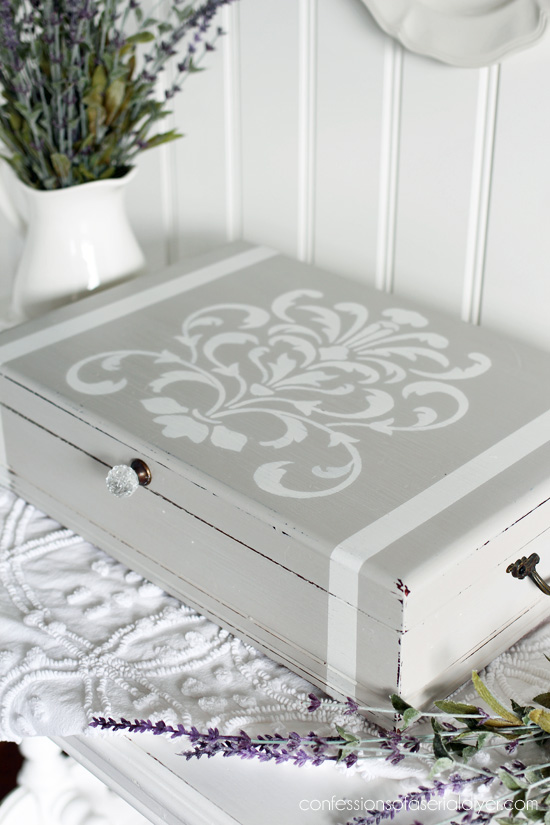
Ooh la la…stencil to the rescue! I’ve included a few affiliate links so you can find the products I use.
Before painting, I knew I wanted to change the dated pull on the front and the brass handles on the sides. To do this I filled in the holes with this wood filler…
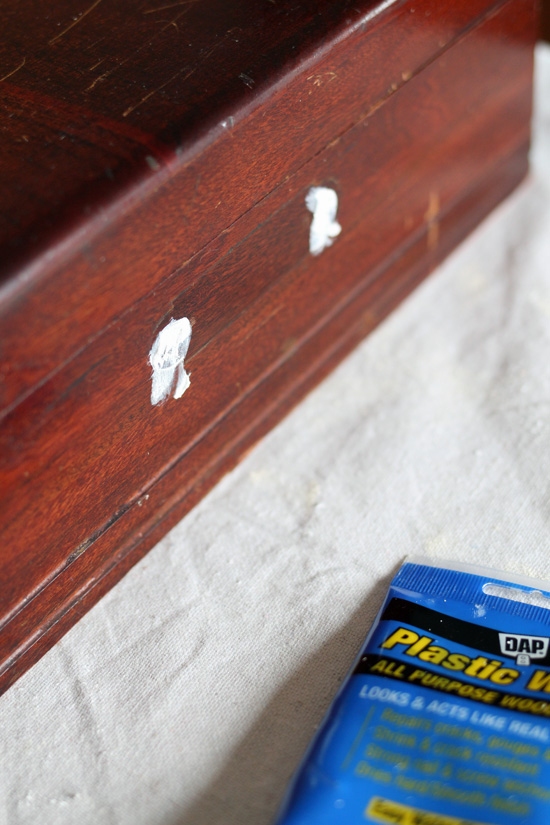
It dries pretty fast. Then I sanded the filled holes smooth.
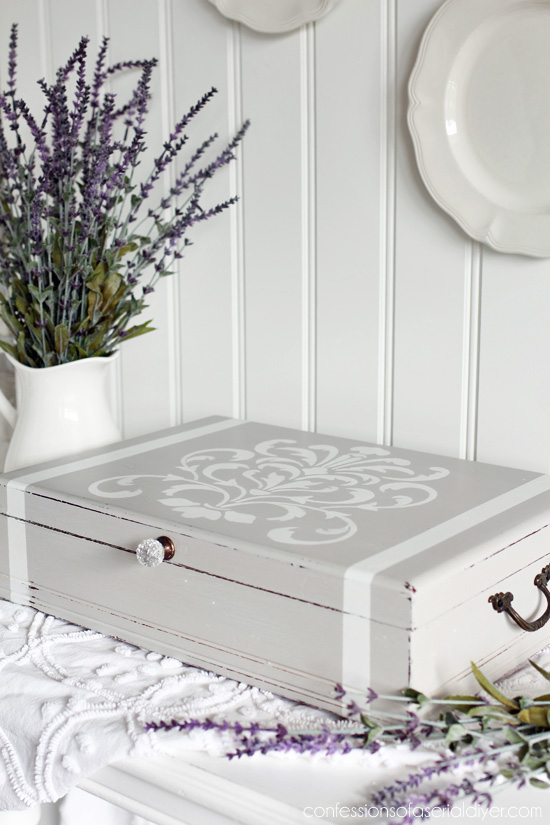
I love using these soft hues for pieces that will possibly end up in a bedroom. This is one part Annie Sloan’s French Linen, and two parts Pure White.
I don’t recall where I found this stencil, but this one HERE is similar and pretty also. To fill in the stencil, I used a small brush and my Bit of Sugar by Behr made into DIY chalk paint. (Recipe HERE.)
I like to use a brush because I don’t love the stippled look you can sometimes get with a regular stencil brush. I use this spray adhesive to hold my stencils in place and try to brush away from the edges as much as possible when I am filling them in. (Spray the back of the stencil.)
Pull the stencil away immediately after the second coat:

(Clean the stencil right away with warm water and an old rag or washcloth, and lay sticky side up to dry on a paper towel.)
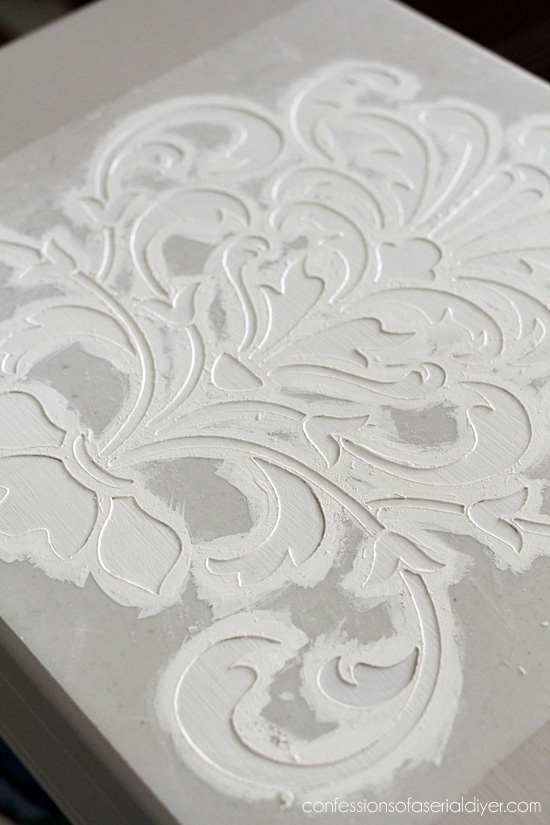
You can see there are lots of raised areas from stenciling, but sanding the surface will smooth all of those imperfections out:
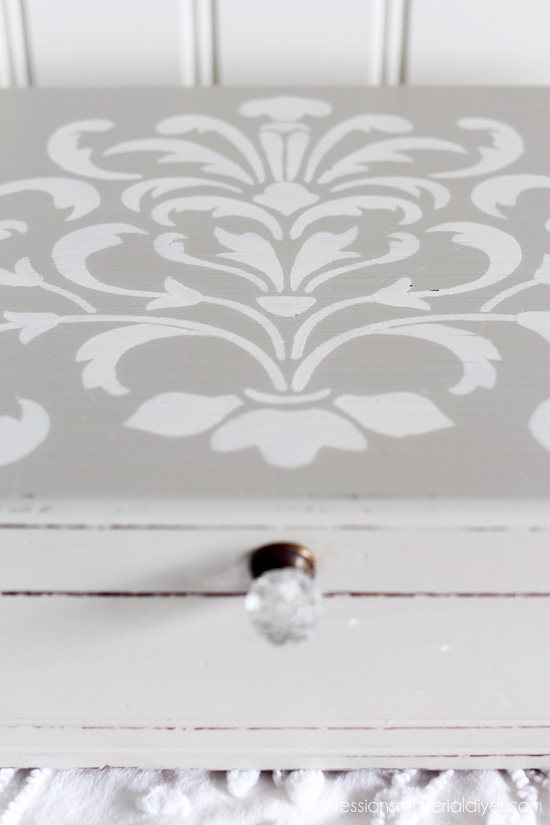
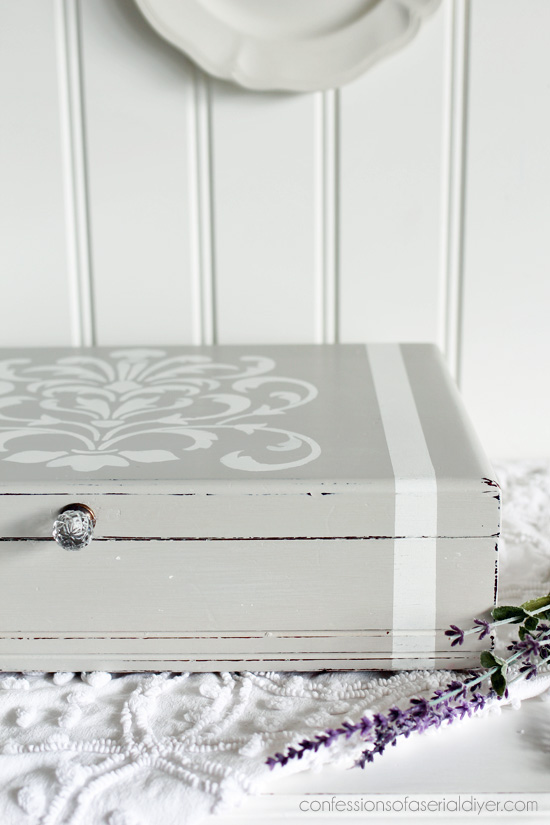
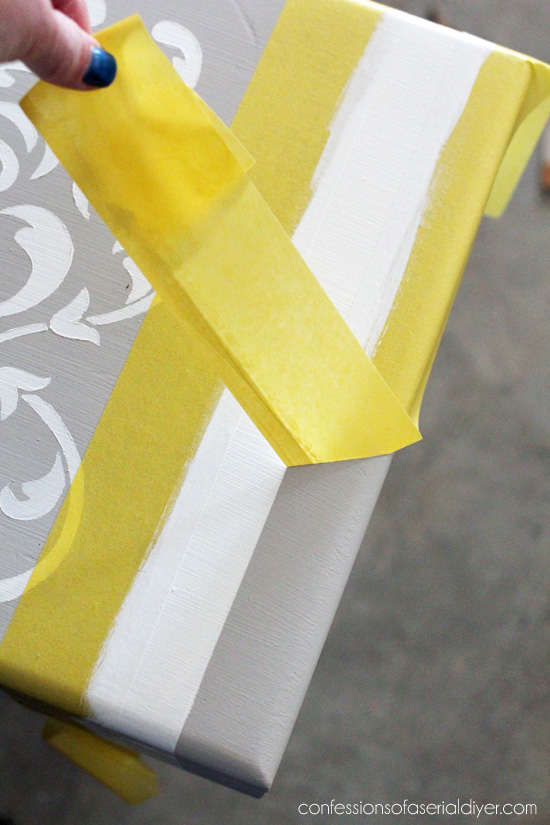
Because this stencil wasn’t quite wide enough to fill out the top of the box the way I would have liked, I added a simple stripe on each side to fill in the space, using FrogTape:
After sanding the entire box with 220 grit sandpaper, I sealed the surface with Annie Sloan’s clear soft wax.
I chose to switch out the original dated pull for this pretty little glass knob…
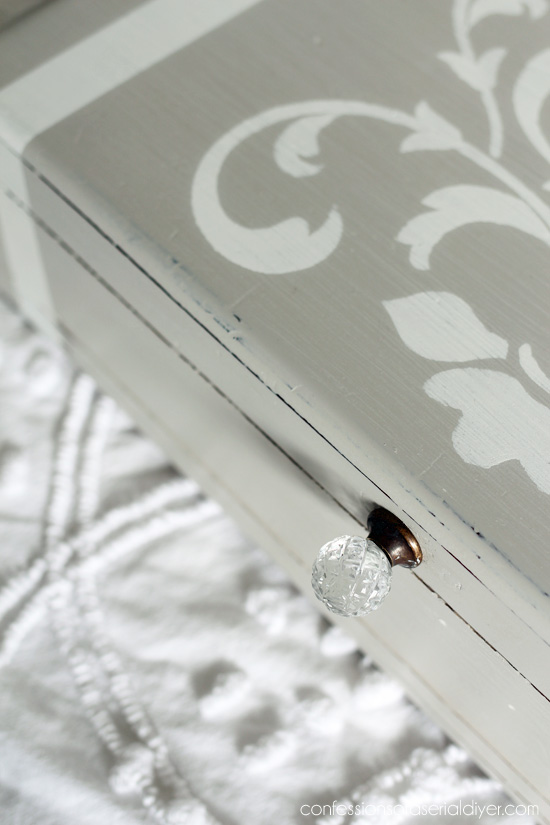
The glass knob is from Hobby Lobby and the metal piece it is attached to is from my stash. I decided to find handles to match, and found these that came off of another piece I redid long ago:
And remember what the inside looked like? Here ya go so you don’t have to scroll back up:
U-G-L-Y!!
Here it is now:
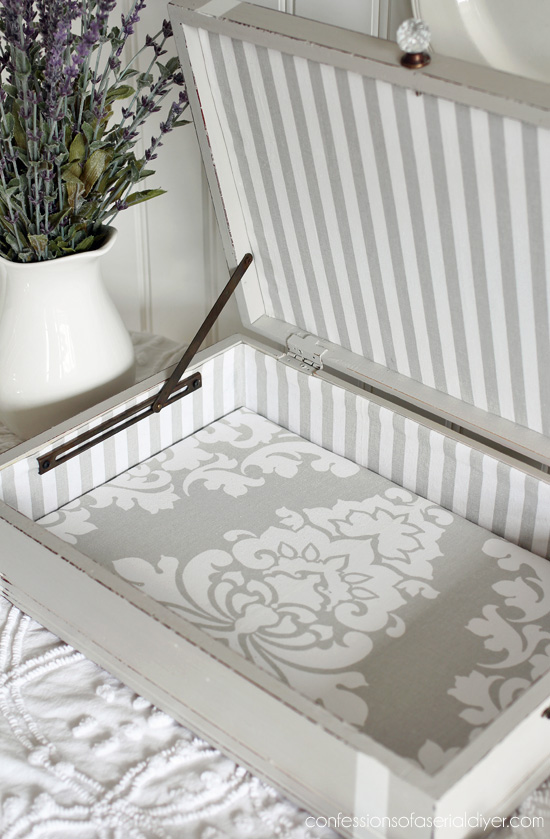
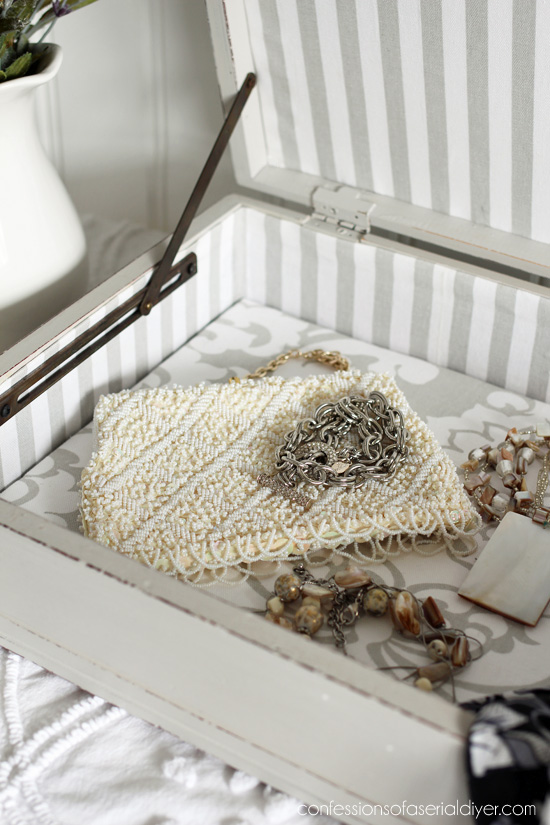
I had enough fabric scraps from my desk bulletin board (See my desk makeover HERE.) and my dining room chairs (See my dining set update HERE.) to cover the inside…

See in detail how I line the inside of these boxes in this post. The only difference is I used Matte Mod Podge instead of hot glue to adhere the lining on the sides here, and I think I like that better.
These can hold all kinds of things like precious mementos, photos, jewelry, and other accessories.
These boxes have so many possibilities, and I still have two more in my storage room!
My little chenille throw got another chance to shine. 🙂
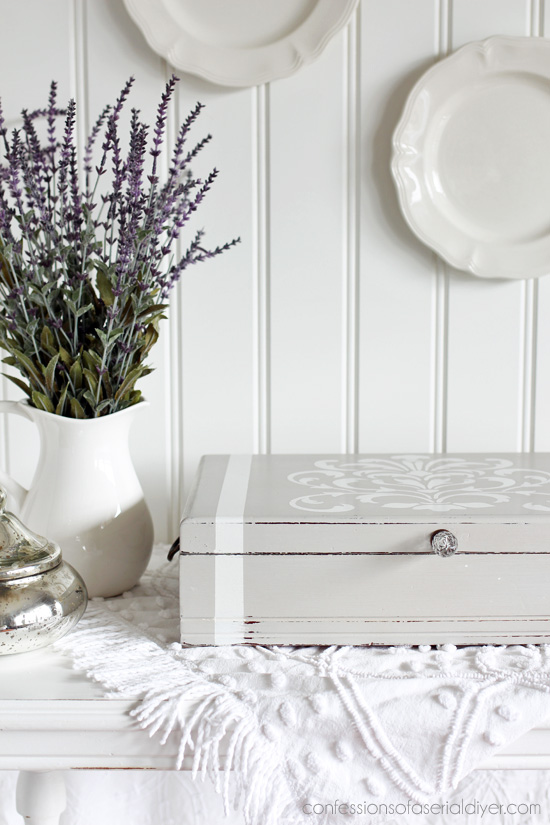
Not bad for a $3 thrift store find, right?
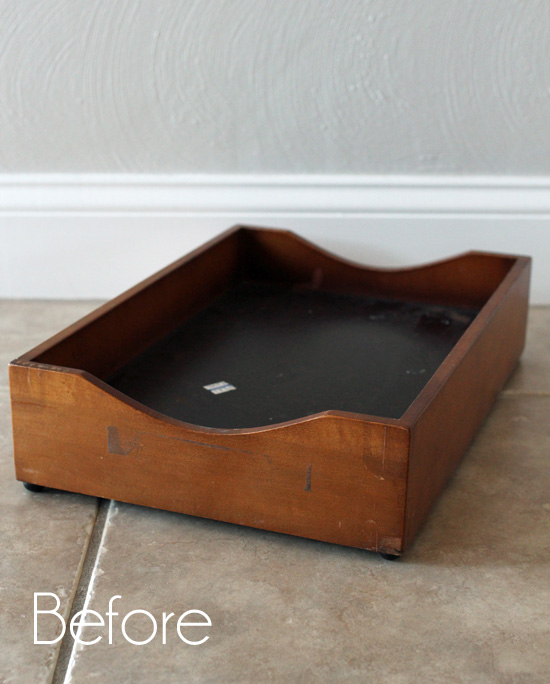
Meet me back here on Thursday to see what I did to update this wooden inbox:
Have a great day, and I’ll see ya then! 🙂
UPDATE: You can see how I repurposed this inbox HERE now!
XO,
![]()
Don’t Miss a Thing!
If you like what you see, there are several ways to follow along!
Email * Facebook * Instagram * Pinterest * Twitter


Mary Kaiser says
Wow what a difference. I actually have a old silverware box to redo, I know what my project will be this weekend. I LOVE how that turned out. Thanks for the great inspiration.
Christy says
Thanks, Mary! This is a great weekend project! 🙂
Norma Rolader says
That is adorable and thank you for sharing your how to
Christy says
Thank you, Norma! XO
Christina in SW FL says
Another winner Christy! Beautiful box that someone is going to snap up in a heartbeat. I like the use of the modpodge (or acrylic matte medium) to adhere the fabric to the inside.
I want to try a small roller with a stencil soon.
Love your colors as well.
Enjoy your week & create on!
Christy says
Thanks, Christina! I prefer the MP as well…and I actually bought a small stencil roller to try it and never did. I actually forgot all about it lol. Have a great week! XOXO
Paula says
Another great flatware box makeover! Someone is going to love this and I’ll bet it won’t last long at all in your booth.
Christy says
Thank you, Paula!! I need to fill that poor booth back up, and this will help! Have a great week! XOXO
Jennifer says
What a great transformation! I have a stash of silverware boxes myself but have only ever repurposed one. You have inspired me to pull them out and get to work! Can’t wait to see what you do with your letter box – I have several of those in need of an update too! Thanks for sharing ????!
Christy says
Thank you, Jennifer! I actually sat and removed the insides of the other two while I was at it to encourage myself to get them all done! XOXO
Gwen says
This is beautiful!!! Love this kind of transformation. Outstanding!!!
Christy says
Thank you so much, Gwen! XO
Dorothy Loose says
Hi Christy-
you are doing a wonderful job on the new house – thanks for sharing. I like what you did with the flatware box. I have a question for you. I am redoing a 3 drawer chest and was wondering about lining the drawers. Do you just use the modge podge under the fabric or do you use wallpaper. Just wanted to know what would work best for a project such as a dresser drawer. Thanks,
Love your work.
Christy says
Thank you, Dorothy! I prefer fabric for lining drawers, and I adhere it with matte Mod Podge just like a glue. You can see how I do it in this post: https://www.confessionsofaserialdiyer.com/oval-french-provincial-side-tables-makeover/ I used an old paint brush there, but a cheap chip brush works great as well. Hope that helps! XOXO
Marcie Lovett says
Love this one, Christy! Good thing this isn’t smell-o-vision, because those old flatware boxes often smell as bad as they look inside. I don’t think anyone can truly appreciate how dramatic the change is until they’ve seen what it takes to get that nasty lining out. Eeeeeew.
Christy says
Thank you, Marcie! You are so right lol…those inards were stanky! And yes…a pain in the you-know-what to get out, as you know! Worth it in the end though! 🙂 XOXO
Susan Williams says
Wow! Great make over. I too have a box given to me that I had forgotten about. I am now inspired to make it over. Thank you for sharing!
Christy says
Thanks, Susan! Yes…go find your box and give it a makeover! XOXO
Patti says
Christy I have a old wooden coke crate in really good shape I would like to use it for something any ideas? Love your ideas. Thank you
Christy says
Thank you, Patti! To be honest, I ended up donating an old wooden crate back to the thrift store because I just could not find a way to reinvent it. I have seen them hung on the wall as shelving and also turned up on their sides and used as a small side table, but I don’t have any original ideas for ya. Sorry, friend! XOXO
Rosemary Nisbet says
Ohhhh…my goodness! That is over the top beautiful!!!
Christy says
Thank you so much, Rosemary! XOXO
Donna says
Christy, this is so cute! Pinned it to my Let’s Make Something board. xoxo
Christy says
Thank you, Donna!! XOXO
Marie says
It’s so pretty, Christy! You always do such a lovely job on these flatware boxes. I’m currently working on one for my son’s wedding next month. Hope it turns out as pretty as yours (finger’s crossed).
Christy says
Thank you, Marie! I just cannot resist them when I see them! I have no doubt yours will be fabulous! XOXO
Andrea Loewy says
Did you have to prep the box (other than filling in the holes) before you painted it?
Christy says
Hi Andrea! There is no prep needed other than a good wipe down when using chalk paint. See my chalk paint tutorial here for more info: https://www.confessionsofaserialdiyer.com/how-to-paint-furniture-using-chalk-paint/ Hope this answers any questions you may have! XO
ROSE LEFEBVRE says
Beautiful rehab. I can see this being used to hide all those remote controls from sight and keep them from being misplaced!
Christy says
Thank you, Rose! And yes that is a perfect use for one of these boxes for sure!! XOXO
Carrie says
Oh so pretty! Great idea, I have one of these too. Maybe I have missed this but do you always sand every time after you paint furniture or just the stencil and stripe? and do you use a sanding block to do this? I look forward to the inbox too! Have a great day too, thank you
Christy says
Thank you so much, Carrie! When I use chalk paint, which is most of the time, I do always sand after painting. It smooths out any imperfections. You can find my tutorial for painting furniture with chalk paint here: https://www.confessionsofaserialdiyer.com/how-to-paint-furniture-using-chalk-paint/. That should answer any other questions you might have! 🙂
Linda says
Hi Christy,
I just love your blog. You’re so clever and up-beat! Thanks for giving us a little peek into your creative world.
Christy says
Aww thank you SO much, Linda! You just made my day!! 🙂 XOXO
Vivian says
Boy could I kick my myself in the rear!! I just saw one of these that was just as ugly at Goodwill last week and passed it up because I wasn’t sure what I could do with it!! I think it was $3.00. Bet if I go back this week it will be gone. Sometimes when I see something like this I want to call you, or send you a picture and say, ” Christy, what can I do with this?” :0 Love what you’ve done and can’t wait to see what the in-box turns out be.
Christy says
Thank you, Vivian!! That stinks you passed on one for a great price…maybe it will still be there? I love that you think of me when you find something you don’t know what to do with ha ha…maybe I need a hotline lol! XOXO
Vivian says
That would be a great idea Christy!!
Christy says
Ha ha! 😀
Debbie in TX says
Oh so pretty! These little gems are perfect for storage and display. And I love that chenille throw with its pattern and texture. It looks great in all these photos. Have a wonderful week, and stay warm!
Christy says
Thank you, Debbie! They really are fantastic storage pieces! I had forgotten all about that chenille throw and then found it the other day when I was unpacking a couple of boxes that were in my storage room closet, and I’m so glad…I just love the texture of it! See ya Thursday!! XOXO
Cherie says
So cute !!! Love it. I’m going to try and find one for myself. Where do you get your knobs and handles?
Christy says
Thank you, Cherie! I find most of my knobs and pulls at Hobby Lobby (They have them 50% off every other week.), but I can find pretty knobs at TJ Maxx and HomeGoods sometimes too. The small glass knob on this piece came from Hobby Lobby, and I paired it with an older brass piece that I had from an old piece of furniture. The handles on the sides came off of a huge flatware box I redid last year. They were too small on that one, so I replaced them with larger ones. XO
Nancy Cannell says
Hi Christy – I love your refashions of these cutlery boxes. I have my great aunt’s, and I’d like to do something like this on it, however, I’d still like to keep it for the silverware that came with it. Do you think I’d be able to do this up and still keep the original use? Would be much prettier for display if it was updated.
Christy says
Thank you, Nancy! You could absolutely just paint the outside and still use it to store your great aunt’s silverware. Ripping out the insides is the hardest part, so you’ll be able to skip that step! 🙂
At Rivercrest Cottage says
Love how it turned out and especially adore the glass knob. So pretty!
Christy says
Thank you so much, Sugar! XOXO
MaryJean says
OMG Christy! I was at my local Amvets today and I saw an “inbox” just like that. I stared at it and thought what could I do with this? I couldn’t think of anything, although I have bought things even though I didn’t know what to do with them and later was glad I did. Now after seeing your sneak peek I’m wondering if I shouldn’t go back tomorrow to see if it’s still there. I did buy a few things I will be posting on my blog in the next few weeks and I am so excited about my finds! Just finished a little stool on wheels. Hope you have a chance to check it out.
Christy says
Oh too funny! Spoiler alert…I turned it into a cute tray…go back and see if yours is still there! Looking forward to checking out your latest project! XOXO
Julie Briones says
SO pretty, Christy! I have a box just begging for a makeover! 🙂 Soon!
Christy says
Thank you, Julie! How exciting… Only a couple days left, right?
Julie Briones says
Yes… tomorrow now! Eeek! (I’m getting a little shakey… 😉 )
Christy says
You got this!! 😀
Carla J. says
Oh, this is pretty! I absolutely love your makeovers!
Christy says
Aww thank you so much, Carla! XOXO
Robin says
And just think…I threw away my wooden silver box (the hinges were loose) just a few years ago before it was fashionable to repurpose items… 🙁
Christy says
Oh no! I can’t tell you how many things I’ve gotten rid of over the years that I wish I had back!
Linda says
You inspire me to want to get so many things done. I’ll be on the lookout for a box because I could set it on the coffee table to hide all the hand sewing or knitting that I work on at night. Would be so much neater! I’ve been scrolling backwards to see all your wonderful makeovers!
Christy says
Aww thank you so much, Linda! I love that you are feeling inspired! XOXO
Mary Helene says
Christy, this such a beautiful transformation. Very lovely.
Christy says
Thank you, Mary! XO
Maria says
So pretty, love the gray and white combo!
Christy says
Thank you, Maria! XO
Desiree says
I love everything you do! So beautiful!
Christy says
Thank you so much, Desiree! XO