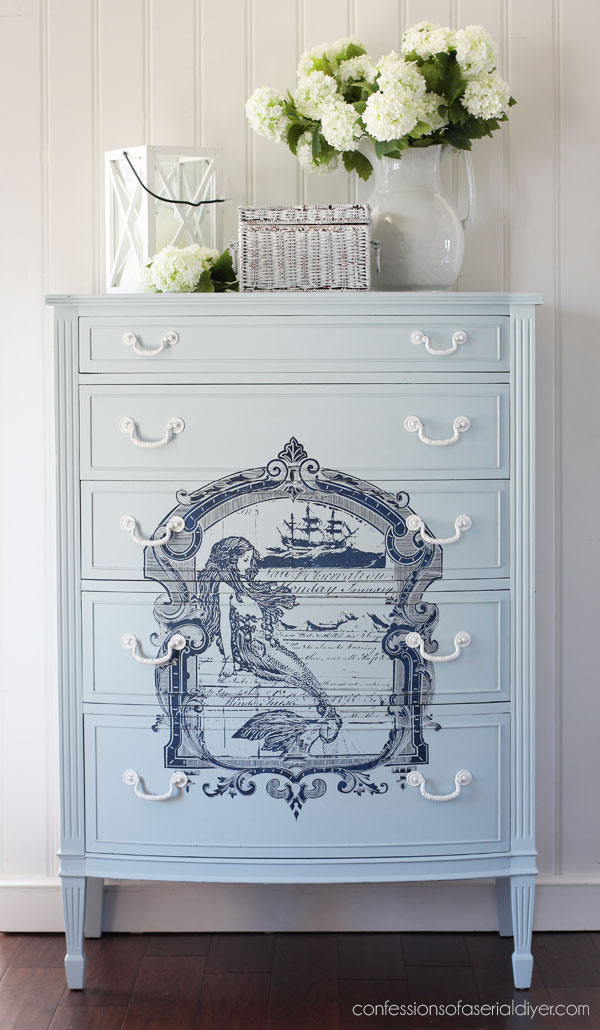
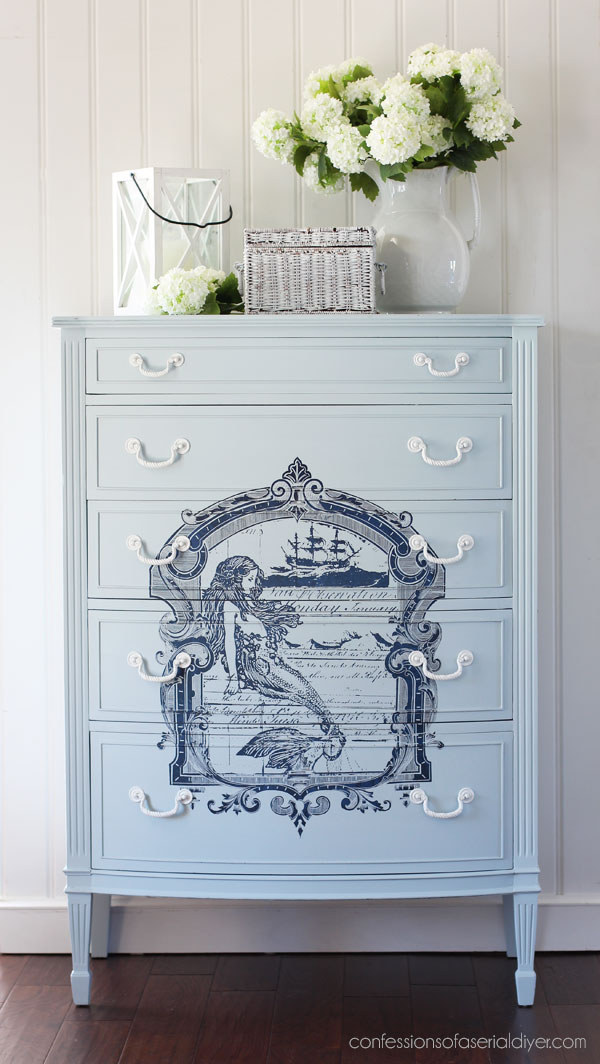
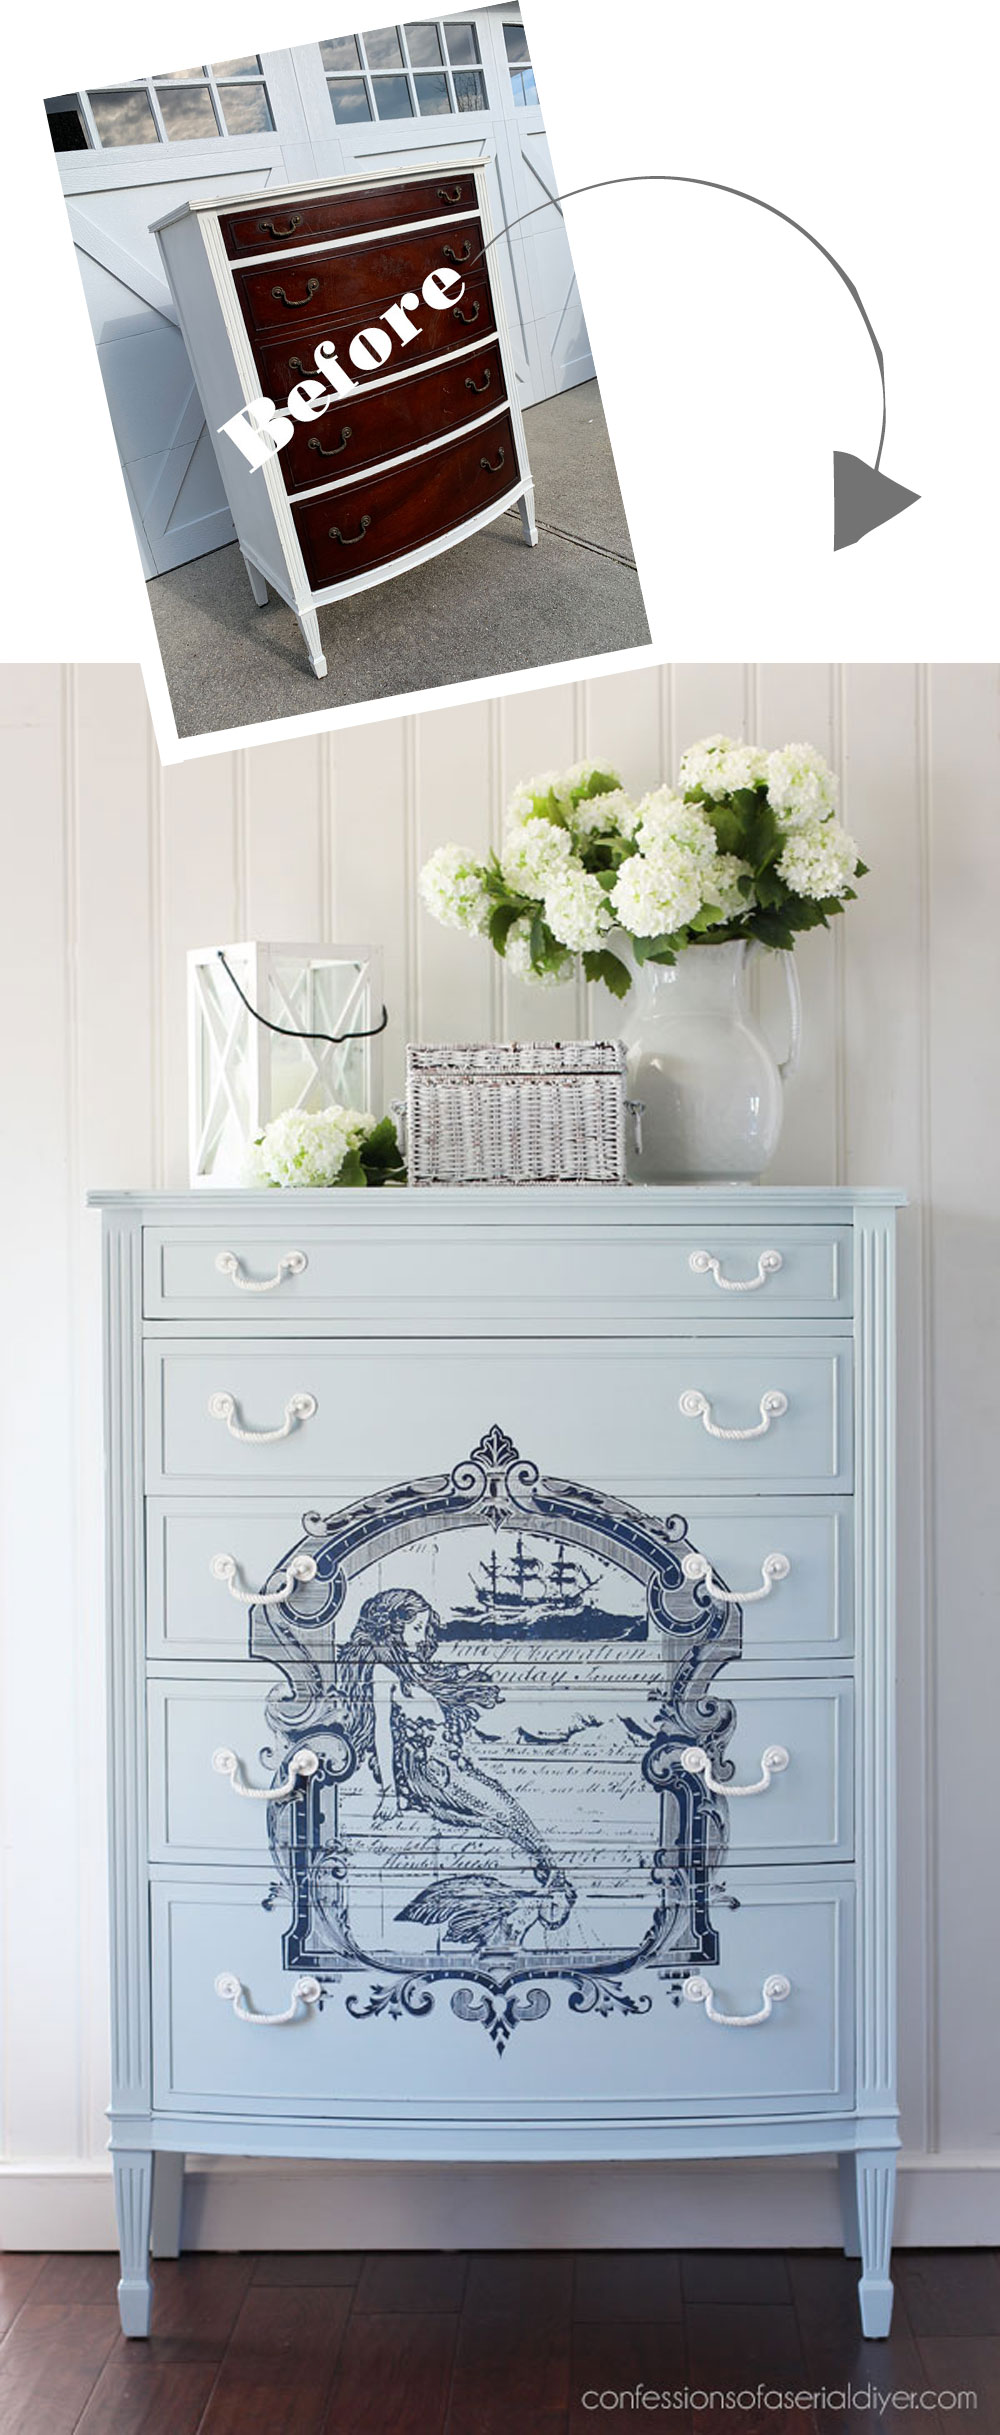
Hello amazing friends! While I am gearing up to head out of town tomorrow, I thought I’d share an old favorite: The Mermaid Dresser!
There’s a reason I chose this one as I have some exciting shop news to share!
But first, here is today’s project piece…this gorgeous dresser I picked up for the unbelievably wonderful price of only $25!!
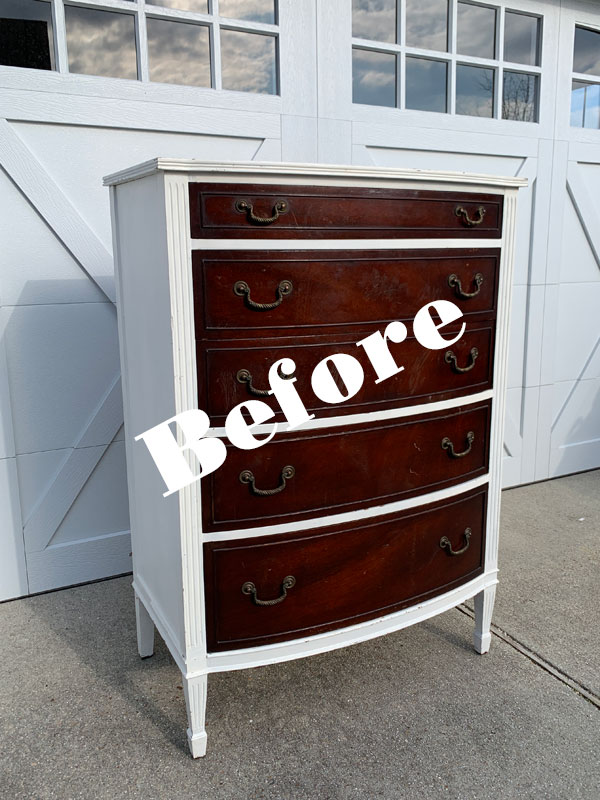
Can you believe my luck?? It appears to be in great condition here, but don’t be fooled! This girl was a hot mess!
I’ve included a few affiliate links so you can find the products I love.
The paint job was not the best. Here is the top:
![]()
It did appear that they had used a primer though, so that was good and meant that the paint was well-adhered and I would not have to sand it down to the bare wood.
However, the drawers had what appeared to be clear glitter nail polish painted on them:
![]()
See how that first before photo was deceiving?
The Prep
I started by giving everything a good cleaning with White Lightning.
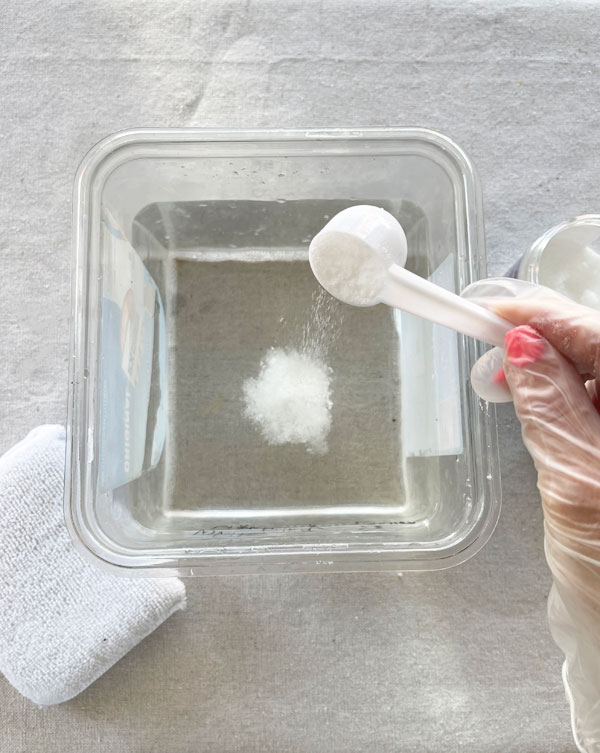
This was pretty dirty to start, and I just wanted to remove all that grime. Nothing does that better than White Lightning. Then I swapped out my water for clean water and gave it a good wipe down once more to remove any residue.
I knew I would have to sand this piece all over to smooth out the rough paint job. To do that, I used my orbital sander and 220 grit sandpaper.
![]()
I sanded until it was smooth to the touch all over. I did not want any of the sloppy brush marks from the previous paint job to show through.
Repairs
This dresser was also missing some trim detail on the left side, so I removed what was left and replaced it with something very similar that I found at the Home Depot, attaching it with wood glue:
![]()
Then, I sanded the glitter nail polish off the drawers and decided to fill several small nicks and scratches. I used Dixie Mud for that…
![]()
What I love about Dixie Mud is that I don’t have to throw out the container midway through because it hardened up on me like other wood fillers.
Once that was dry, I hand sanded the areas that had been filled.
I gave everything a good vacuum with my shop vac and brush attachment, then wiped it down with a clean, soft cloth.
Paint
I knew already that this piece would be a heavy bleeder. I wanted to use Silk Mineral paint for this piece which has the equivalent of one coat of BOSS built in.
So, I painted one coat and let it dry overnight. Here is the result:
![]()
Can you see the bleed-through?
I tested a second coat on one of the back legs to see if it would cover the bleed:
![]()
It did cover the bleeding a bit more…compare it to the leg on the right, and a third coat might have done the trick, but I was pressed for time on this one, so I needed to use something I knew I could count on.
Combatting the Bleed-through
To combat the bleed through, I reached for my favorite stain blocker… BOSS to the rescue!
With regular chalk paint, I would have prepped this piece with BOSS first, and while one coat is usually enough, on rare occasions, it will take two coats. This piece was such a heavy bleeder that I think it would have needed two coats, which means another coat of Silk may have done the trick.
I gave everything one coat of Clear BOSS.
I would normally allow it to dry overnight as proper dry time is key, but instead, I pulled everything out into the warm sunshine and let it dry for about four hours.
![]()
Look at those drawers!
![]()
I told you this was a really bad bleeder!
I then tested one of the back legs and it was good to go! The one coat of BOSS in the Silk combined with the one coat of clear BOSS was enough to tame this beast!
I used Silk in Bay Breeze on this one:
![]()
It is a beautiful soft blue! One coat of Bay Breeze over the BOSS is all it took for solid coverage.
So, one coat of Silk, one coat of Boss, and then one more coat of Silk. That is amazing to get solid coverage over all that bleed-through!
Read more about Silk paint and how it compares to chalk paint HERE.
I used FrogTape to tape off the insides of the drawers t get a nice, crisp line on the inside:
![]()
I liked it when it was done…
![]()
And I almost stopped here, but I had planned to add a transfer to the front, so I kept going.
Adding a transfer
I was so excited to have something to use this Redesign Mermaid transfer on:
![]()
It was just the right size for this dresser.
My exciting news!!
Here’s where the exciting news comes in!! I am now a Redesign with Prima retailer!
They have SO many gorgeous transfer designs to choose from, and I have been asked a ton if I’ll be carrying them, so I am happy to report that now I am!
I ordered 35 different transfers, but just a few of each to start, and they are listed in my shop right now, including this gorgeous mermaid transfer!
I’ll see what y’all really like and then I plan to place another order next week. I mainly stuck to the ones I personally love, and I will show a couple at the bottom!
Back to the task at hand…
To apply a large transfer like this over all the moulding on the drawers, I made lots of cuts with a sharp razor blade as I went and added it in pieces.
![]()
I would roll a bit out, burnish it with the included tool, and when I got to an edge, I would cut it. Then I would match the design and continue on, cutting as I went to make it more manageable.
Because Silk has a built-in topcoat that dries to a lovely eggshell sheen, there was no need to seal, but I did go over just the drawers with Satin Clear Coat using my sponge applicator, to protect the transfer.
The final result
Here is the finished dresser:
This was definitely $25 well spent!
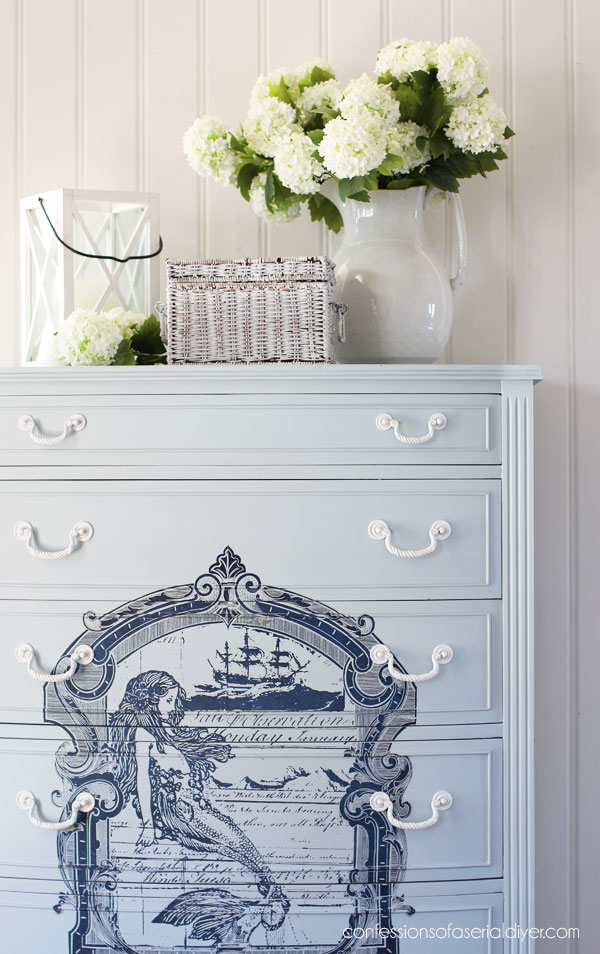
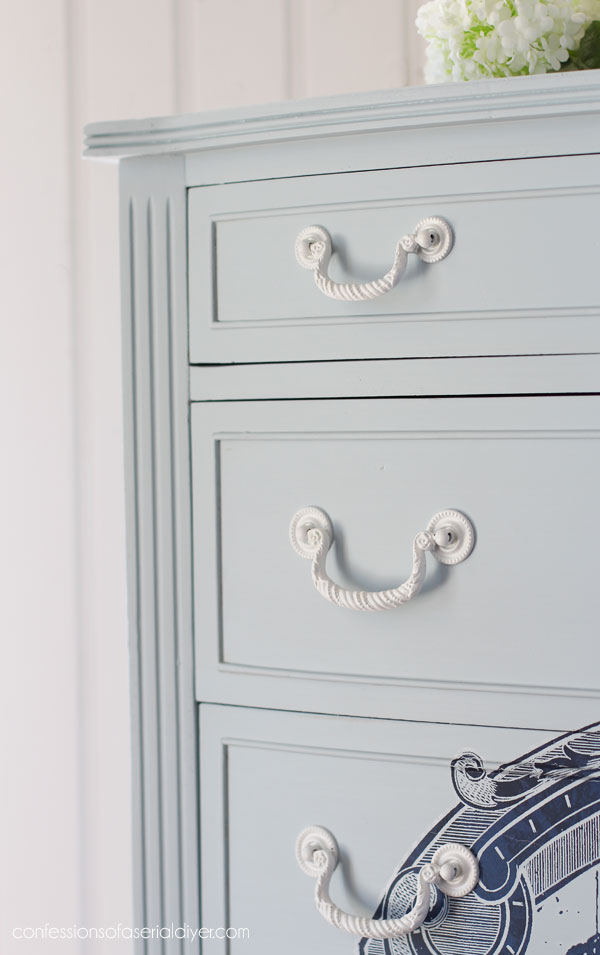
I decided to keep the original hardware since it had almost a rope-like detail on the pulls that felt nautical to me:
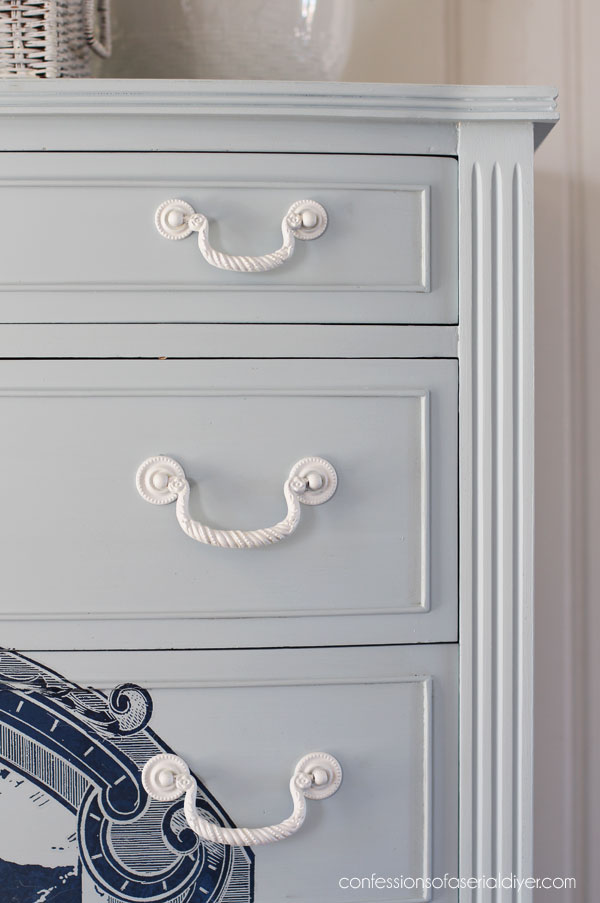
They got one coat of Rustoleum spray primer, followed by a coat of Silk in Salt Water:
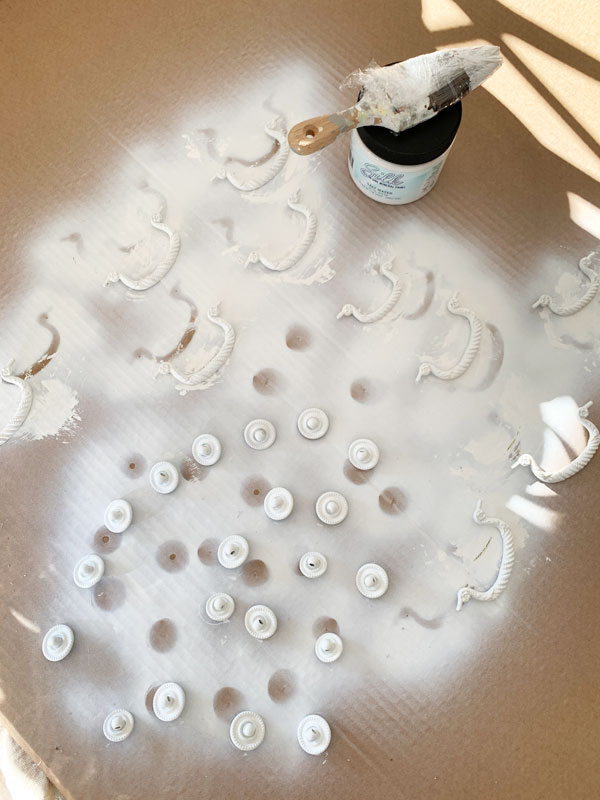
I followed that up with Pearlescent Glaze to give it some shimmer…
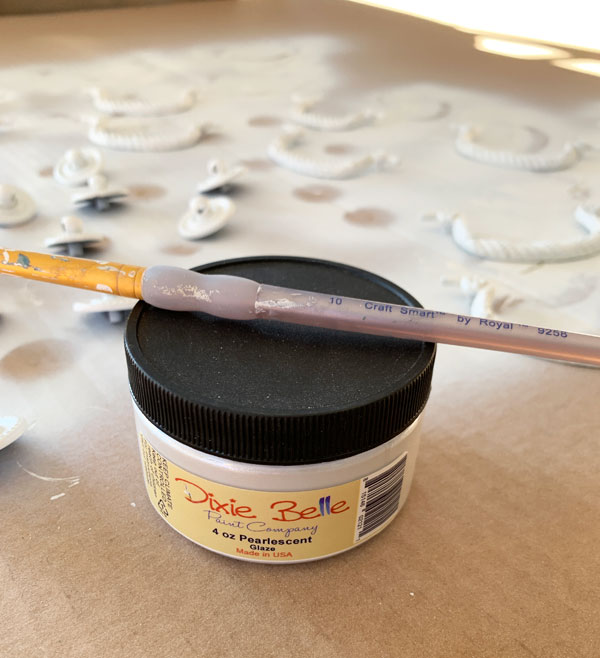
It’s hard to capture in photos…
![]()
It almost appears as though I did a fade effect with it being lighter at the top than on the bottom…
That is just the way the light is shining through the door onto the top part, making it appear lighter. The bottom color is a more accurate representation of this beautiful blue.
And I wanted to point out that these transfers don’t always go on perfectly, but from a distance, you would never know.
Here’s a close up…
![]()
As I was applying it, it pulled apart a bit at the flower in her hair, and just below that, on the top of the ridge that runs right across her mouth, the transfer pulled apart also. It doesn’t have to be perfect to still have a beautiful outcome!
I usually enjoy adding life to the insides of the drawers with pretty fabric or even paint, but the insides of this piece were immaculate:
![]()
It would have been a shame to cover it up.
I hope you enjoyed this replay today!
Shop Update
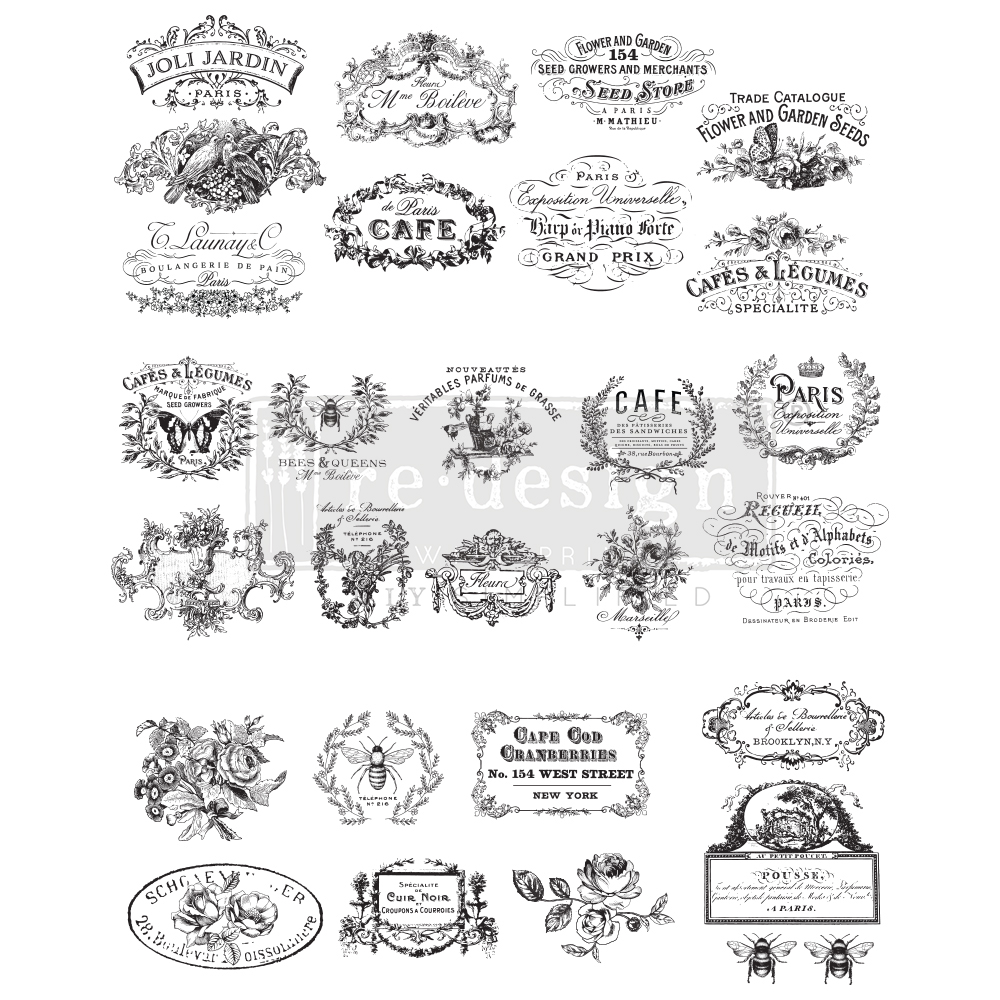
There are over 30 newly listed Redesign transfers in my shop right now! Some are brand new releases that just released THIS WEEK, and I’ve included some classic favorites also. Twenty of them are full size designs.
Here is one of my favorite classics, this French Ceramics transfer I used on this desk back in 2019:
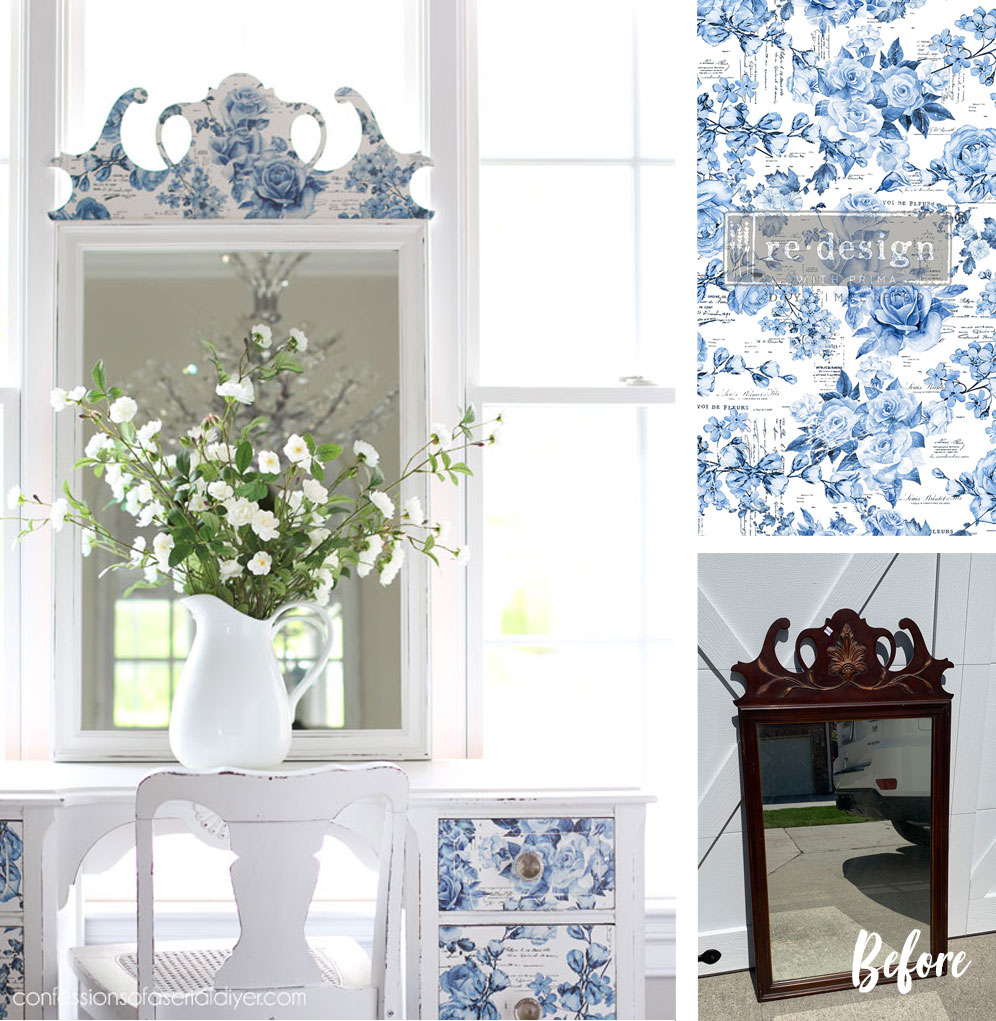
$6 Mirror Makeover
I also have a couple I used just recently like this gorgeous Blossom Botanica Transfer:
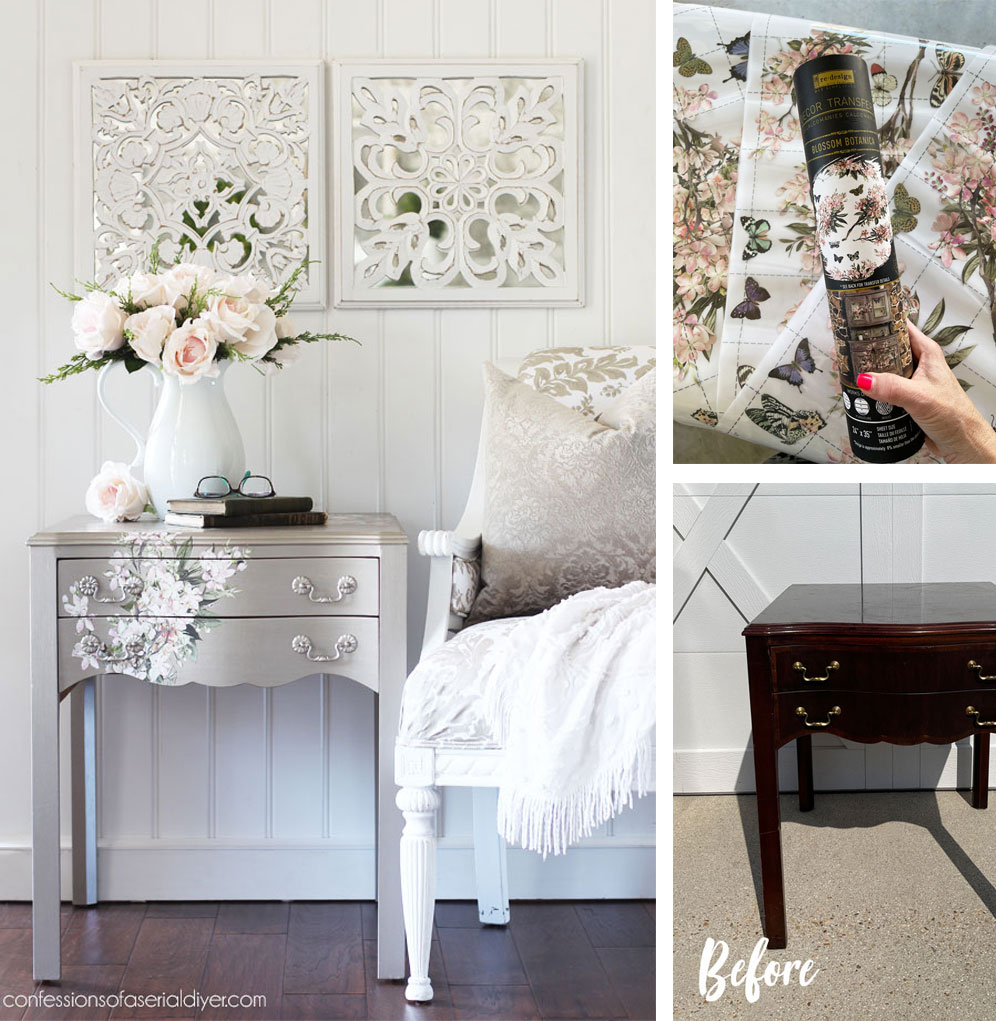
Side Table with Transfer Makeover
And also this stunning Vigorous Violet transfer:
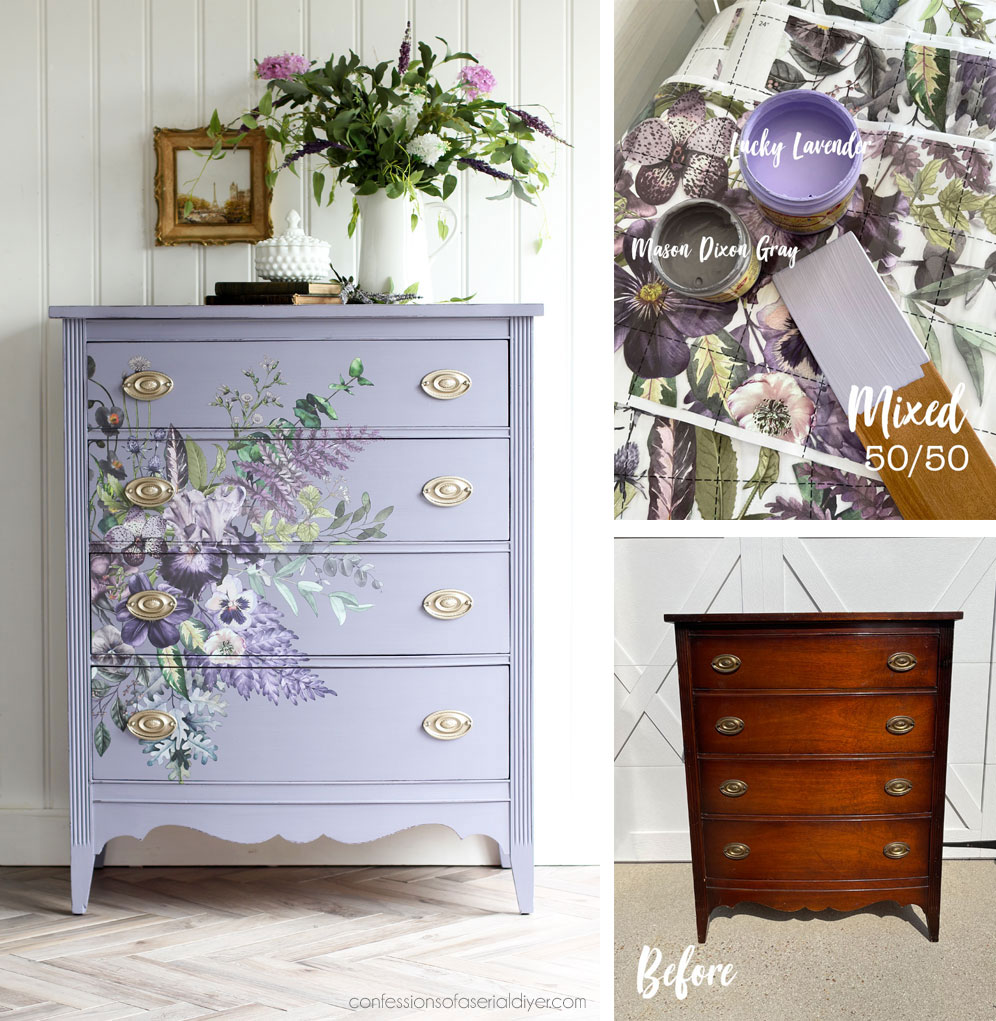
Painted Dresser with Transfer
I’m also super excited that Redesign also has smaller transfers!!
I’ve chosen to carry 13 to start and they are all so beautiful! There are three 6″ X 12″ sheets in each pack and they retail for only $12.99!
Here are three of my favorites (photos courtesy of Redesign and their talented content creators):
This is Wild Flowers:
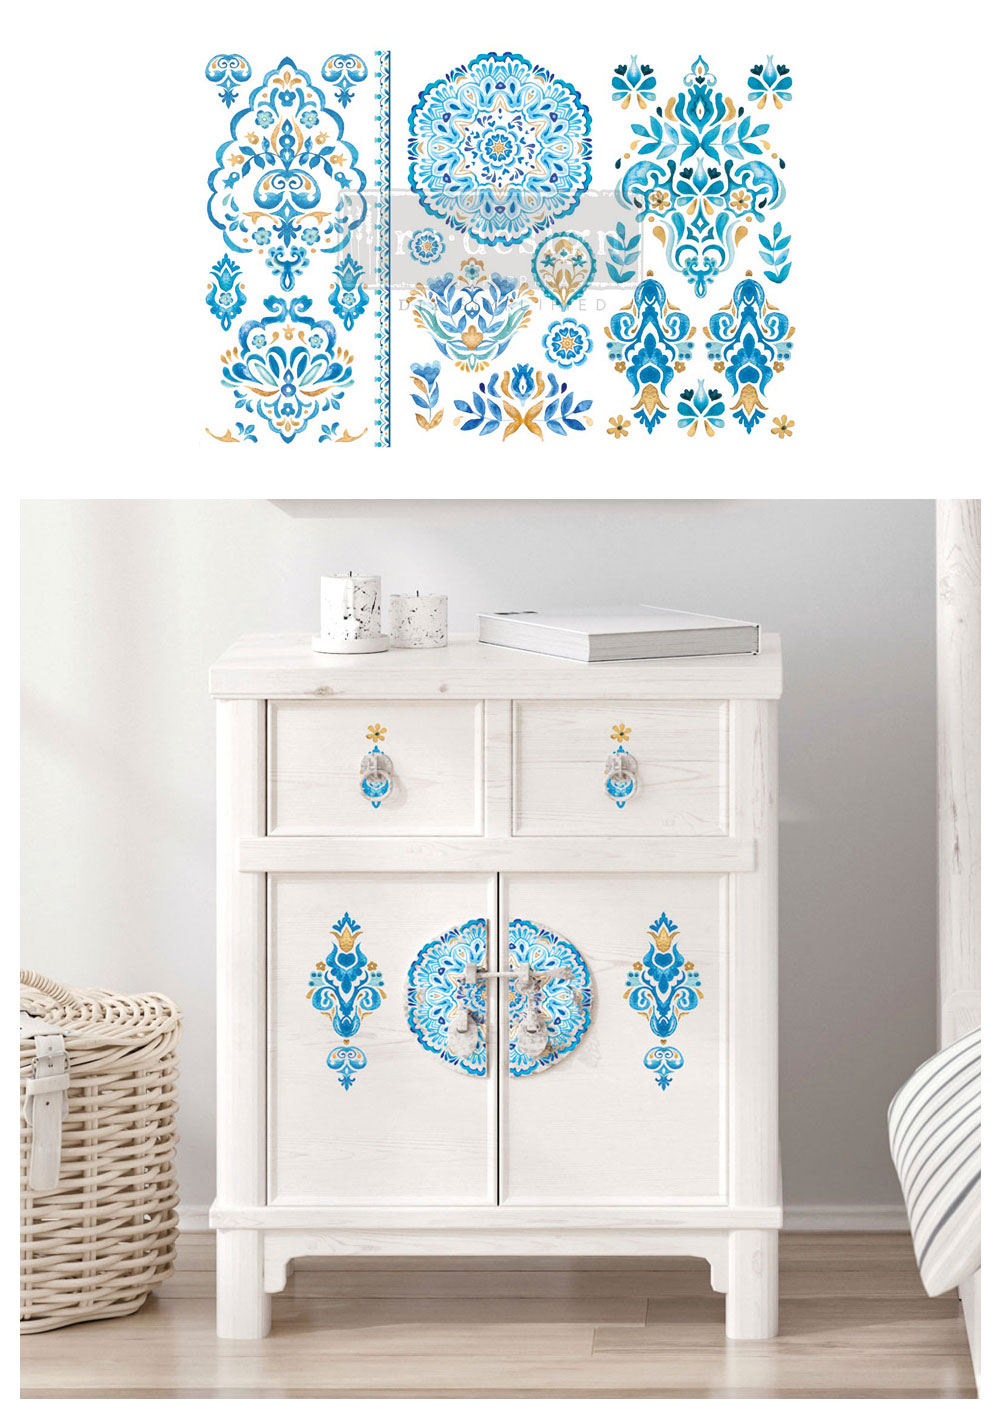
This beautiful blue one is called Artisinal Tile:
And I love this one so much! It’s called Rare Birds:
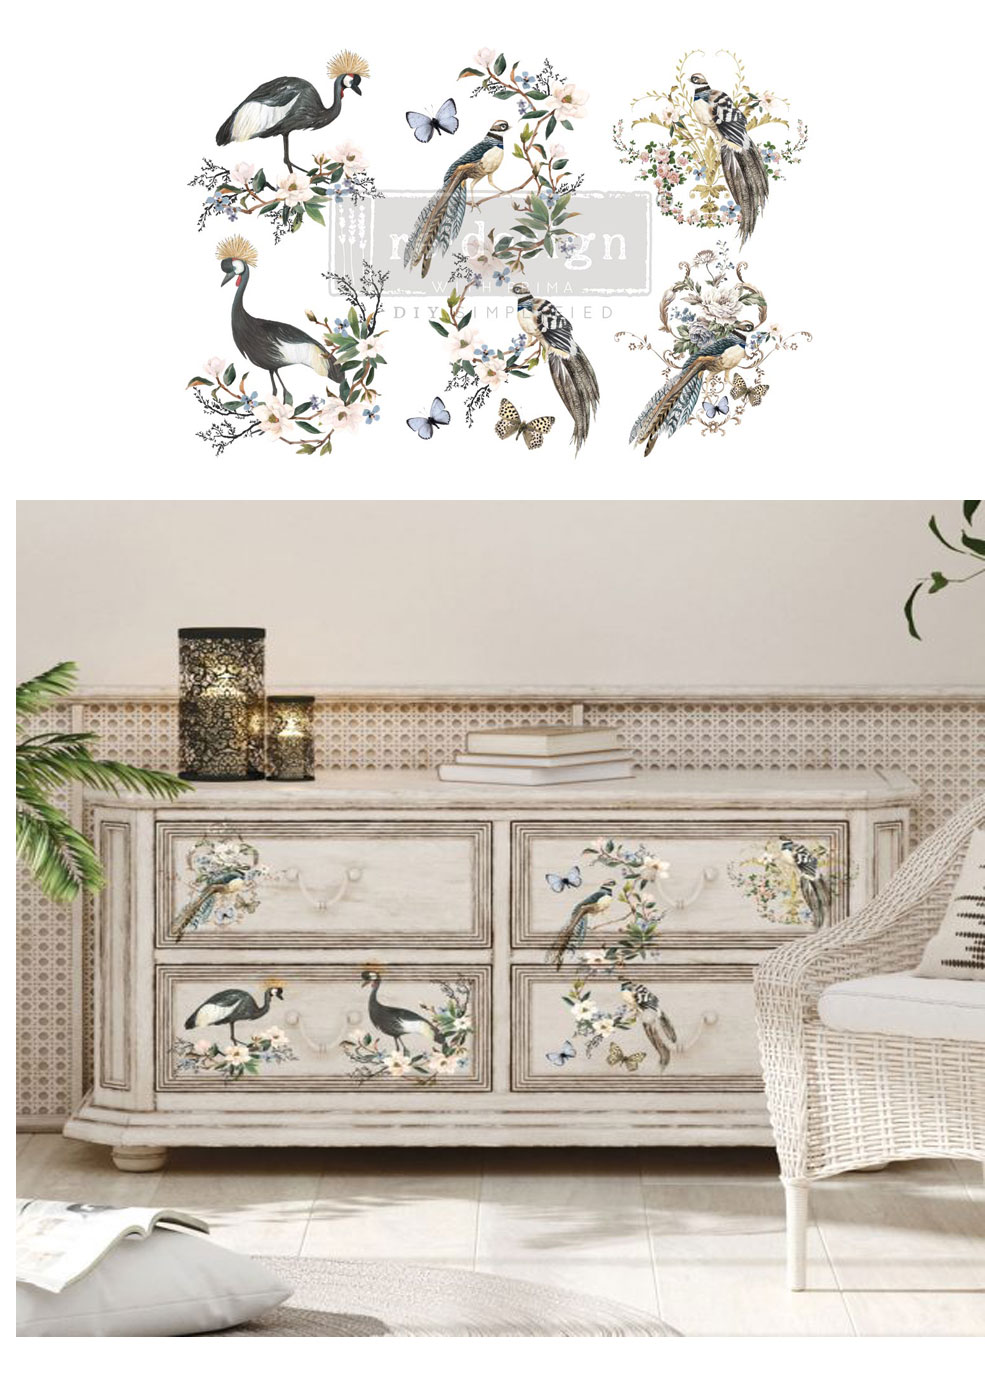
There are 10 more styles of this smaller size to see in my shop!
See all the new transfers I have in stock HERE!
Quantities are limited, but I’ll be placing another order early next week!
Meet me back here on Tuesday for a fun round of projects made from this one set of mini transfers!
UPDATE! See ten fabulous mini makeovers using these transfers HERE now!
Have a fabulous weekend!!
XOXO,

Don’t Miss a Thing!
If you like what you see, there are several ways to follow along!
EMAIL * INSTAGRAM * FACEBOOK * PINTEREST


Get FREE SHIPPING on all orders over $50. No code needed at checkout! Orders under $50 always enjoy $8 flat rate shipping! Most orders ship same or next business day!


Denise Cox says
Love!! I’ve always loved mermaids since a kid, so I really like your transfer. And the ‘rope” handles look perfect with the nautical theme.
Christy says
Thank you, Denise! I love mermaids too! And I was so pleased at how the “rope” handles worked so well with the overall theme…lucky coincidence! XOXO
Mary Kaiser says
That dresser turned out so beautiful! Fun to hear your having smaller designs for less money, I will have to check them out! Have a fun time away!
Christy says
Thank you, Mary! Yes, there are some beautiful smaller designs that are perfect for smaller projects! XOXO
Gayle says
I’m really excited that you are selling these transfers now. I have been wanting to give them a try. I do have one quick question. On the transfers that are not a “spray” of items, for lack of a better term, do you just cut them apart and start laying them out for the best look? Your placement is always so beautifully laid out when you use the transfers. But I just didn’t want to start arbitrarily start cutting. Thank you for your sharing your expertise.
Christy says
Me too, Gayle!! I have been wanting to take the plunge for a while, but space was an issue. I finally remedied that and here we are! Yes, you can cut them apart in any way you choose. It takes me a while to decide on placement sometimes! XOXO
Tracey A. says
STUNNING!
Christy says
Thank you, Tracey! XOXO
Susan C says
I love all of your projects, but I have a real soft spot for mermaids and this is one of my favorites–and you are right about the hardware; it fits the new nautical theme perfectly!
Christy says
Thank you so much, Susan! I love mermaids too and I was so pleased at how the hardware worked with the theme so perfectly! XOXO
Sharon L Austin says
That turned out awesome; super exciting news too. Congrats!
Christy says
Thank you so much, Sharon! XOXO
Cyndi says
This one really made you work for it, didn’t it? 😉 But it was worth it. It’s beautiful!
Christy says
Ha ha it sure did, but yep, totally worth it! Thanks, Cyndi! XOXO
Lisa says
I just bought two of the $12.99 transfers!!! Excited to get them and get creative!!
Christy says
Yay!! They are already on their way! I can’t wait to play with them too!! XOXO
Rita says
Simply beautiful, I love everyone of these.
Christy says
Thank you so much, Rita! XOXO
Darla says
Absolutely stunning! I’m so glad you are going to sell transfers now! I am always looking for coastal/nautical as I live on the Gulf Coast of Florida. I am so appreciative to how descriptive you are in the process. It really helps newbies like me!
Christy says
Thank you so much, Darla! I am so excited about this new venture. They have the most beautiful designs! And I am so glad all the details I share are helpful! XOXO
Caye says
another WONDERFUL and epic piece! What a save that was! Thank you.
Christy says
Aww thank you so much, Caye! XOXO
Mary says
Wow! It is now deemed for royalty Christy! Seriously. You did an amazing job…I was feeling frustrated with all the bleed-through you had to contend with, but boy, it was worth it in the end! Beautiful piece! Bet it will sell quickly 🙂
Christy says
Thank you so much, Mary! I was so relieved when my tried and tested BOSS worked its magic lol! XOXO
Debra Hubbs says
So pretty! Love that color. Love what you did with the hardware. I must try the silk paint. Love that rare birds transfer.
Christy says
Thank you, Debra! Silk is wonderful! And I can’t wait to try that birds transfer on something! XOXO
Addie says
A lot of work….but so worth it in the end!!! I don’t think the “tear” by her mouth is necessarily a mistake…I think it adds to it. It gives it an old world appeal. That purple one is my favorite!!! BUT I would have no where to put!!! I just love pansies!!!
Have a Great weekend!!!!~~And going for the win tonite with my WARRIORS!!!!…I may have moved but they are still my team!!!!…xxx
Christy says
Thank you so much, Addie! I was really trying hard to find a place for that purple one ha ha! It has been a good back and forth…good luck tonight!! XOXO
Rose Lefebvre says
It sure does look great! You are a pro with the transfers. Always lines up perfectly.
Christy says
Thank you, Rose! Lots of contemplating before I get started ha ha! XOXO
Beth Smith says
Absolutely gorgeous!! You do such great work!!
Christy says
Aww I appreciate that, Beth! Thank you! XOXO
Marietta says
I m just “WOW’D”. First the color, mixing those two together gave it a beautiful Dusty Lavender color that makes me want to hug the dresser! AND keeping the original handles was def the right choice. You rocked…again!
Christy says
I’m so glad you love it, Marietta! Thank you so much! I really enjoyed painting in this beautiful color! XOXO
Lisa says
Such a beautiful piece of furniture. The color, transfer and handles work so well together. You are so talented Christy😊 I always look forward to your transformations👍
Christy says
Aww I appreciate that so much, Lisa, thank you!! XOXO
Val says
Stunning work Christy! I have myself applied some transfers and I totally know that at times they don´t go on perfectly, it depends on our skills to deal with them and also on the surface we are applying them on. But in the end, when people look at the whole piece of furniture with all the work that has been done, everything looks like it sould! Congrats on your work! (and forgive me for my english, not always the best!)
Christy says
Thank you so much, Val! Yes, transfers can be tricky sometimes, but probably only we notice those small imperfections. And your english is perfect! XOXO