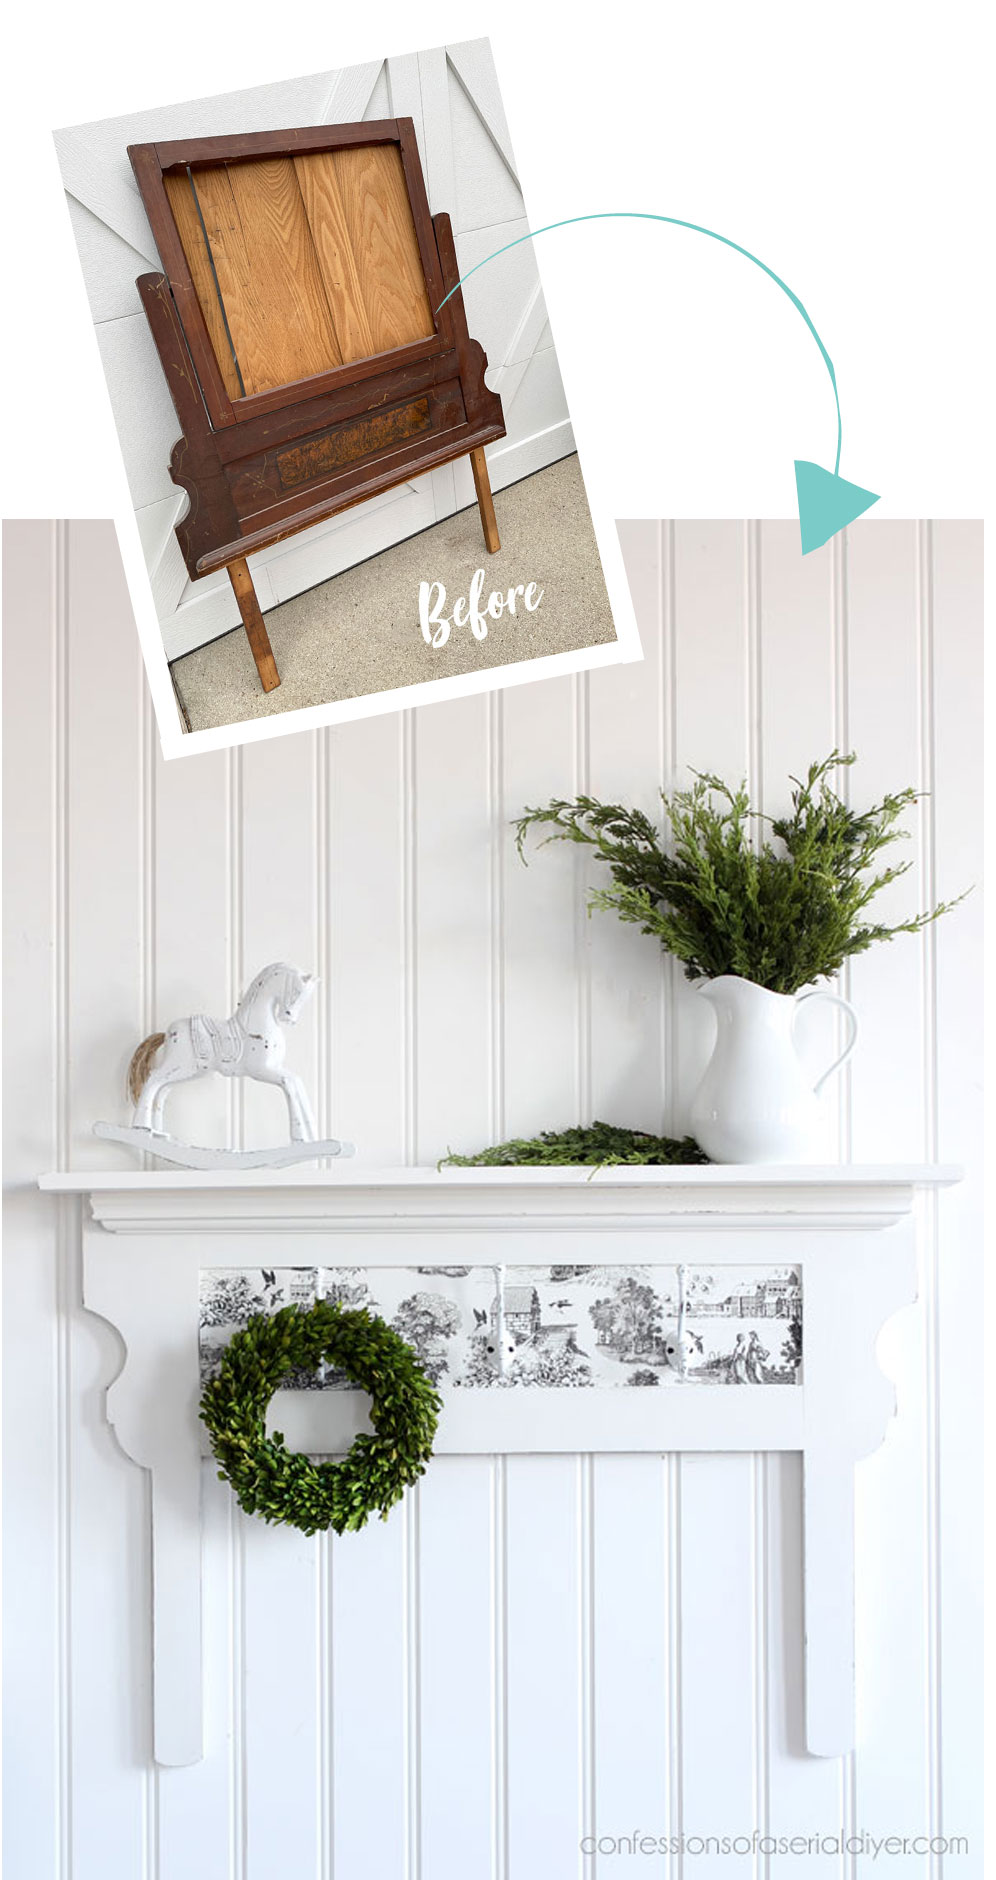
Welcome back, amazing friends and happy February! Can you believe it’s February already?? Today I’m back with another item that cost me nothing, and it is the perfect piece to share how to turn a mirror harp into a shelf!
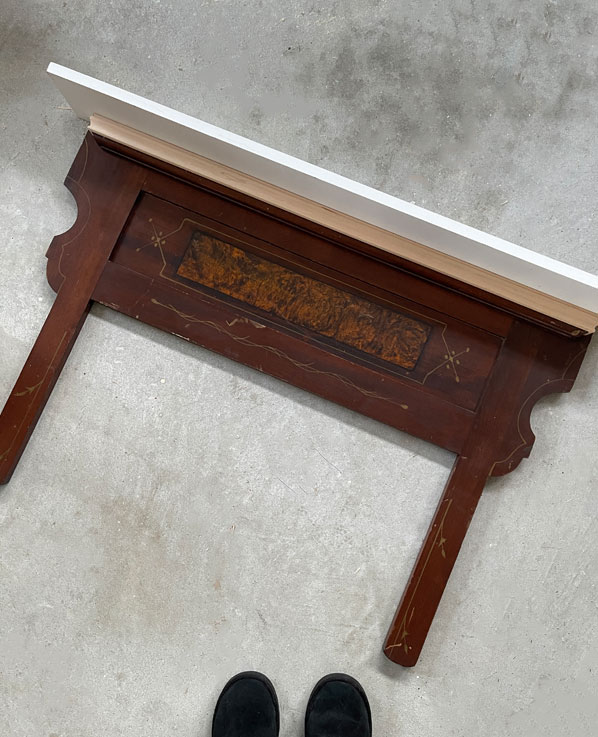
Here’s what it looked like before:

Cool piece, right??
The harp is the piece that supports the mirror. I always thought the harp on this this mirror might make a good mantel for a faux fireplace on one of the walls in our dining room, but my staging dresser lives on that wall now, so it has just sat in our garage.
I knew I wanted to add a shelf to it, so the first thing I did was remove the mirror and the two support pieces:

That was easy to do just by removing a few screws.
I’ve included a few affiliate links so you can find the products I love.
Clean
Next, I gave the harp a good cleaning with White Lightning using an applicator pad:
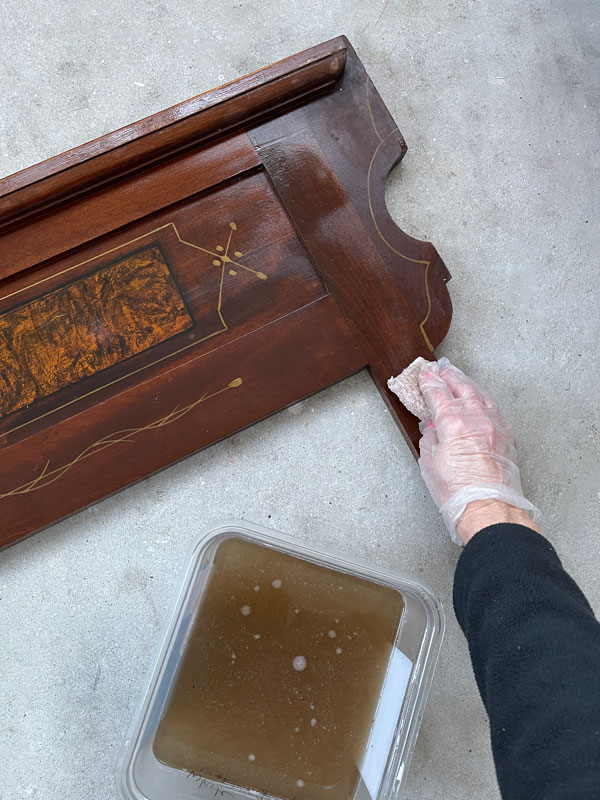
I used to use Lysol type wipes to clean my pieces before the pandemic made them like gold, but I would have easily gone through about ten wipes to get all that dirt and build up off. Since switching to White Lightning, I know my pieces are clean!
I swapped out my water for clean water and gave it another wipe down to rinse any residue.
Let’s turn that mirror harp into a shelf!
To turn the mirror harp into a shelf, I used my Kreg Jig Jr to create pocket holes along the top, on the back side of the harp. This is ideal for connecting two pieces.
The Kreg Jig kit includes a special drill bit that you use with your own drill:
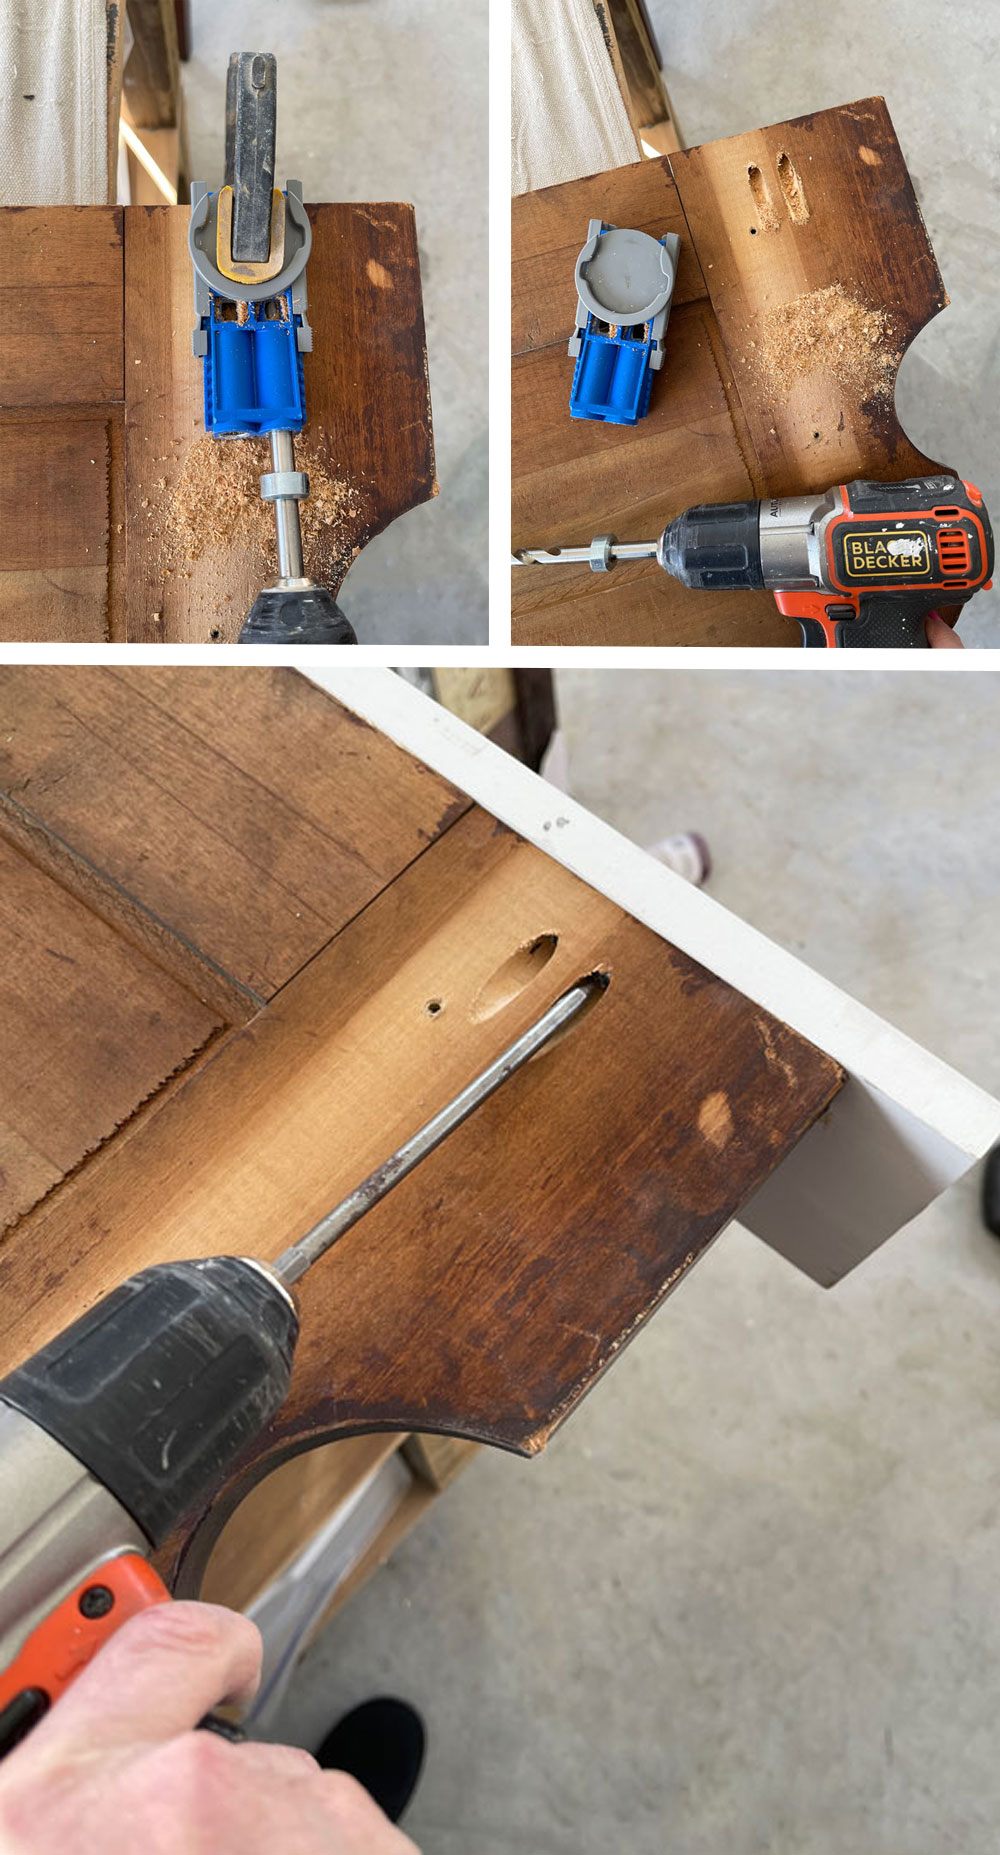
Once you’ve created your pocket holes, you just drill your screws through the pocket holes into the piece of wood you’re attaching, and that’s it! (I did add bead of wood glue between the pieces first.)
I shared another way to add a shelf to a harp in a similar makeover HERE.
Next, I had a gap that I needed to fill below the new shelf (see the first photo below), so I cut a piece of scrap wood to fill it in and secured it with wood glue.
Then, I cut a piece of trim that I had in my stash (originally from the Home Depot) using my miter saw.
I attached that with wood glue also:
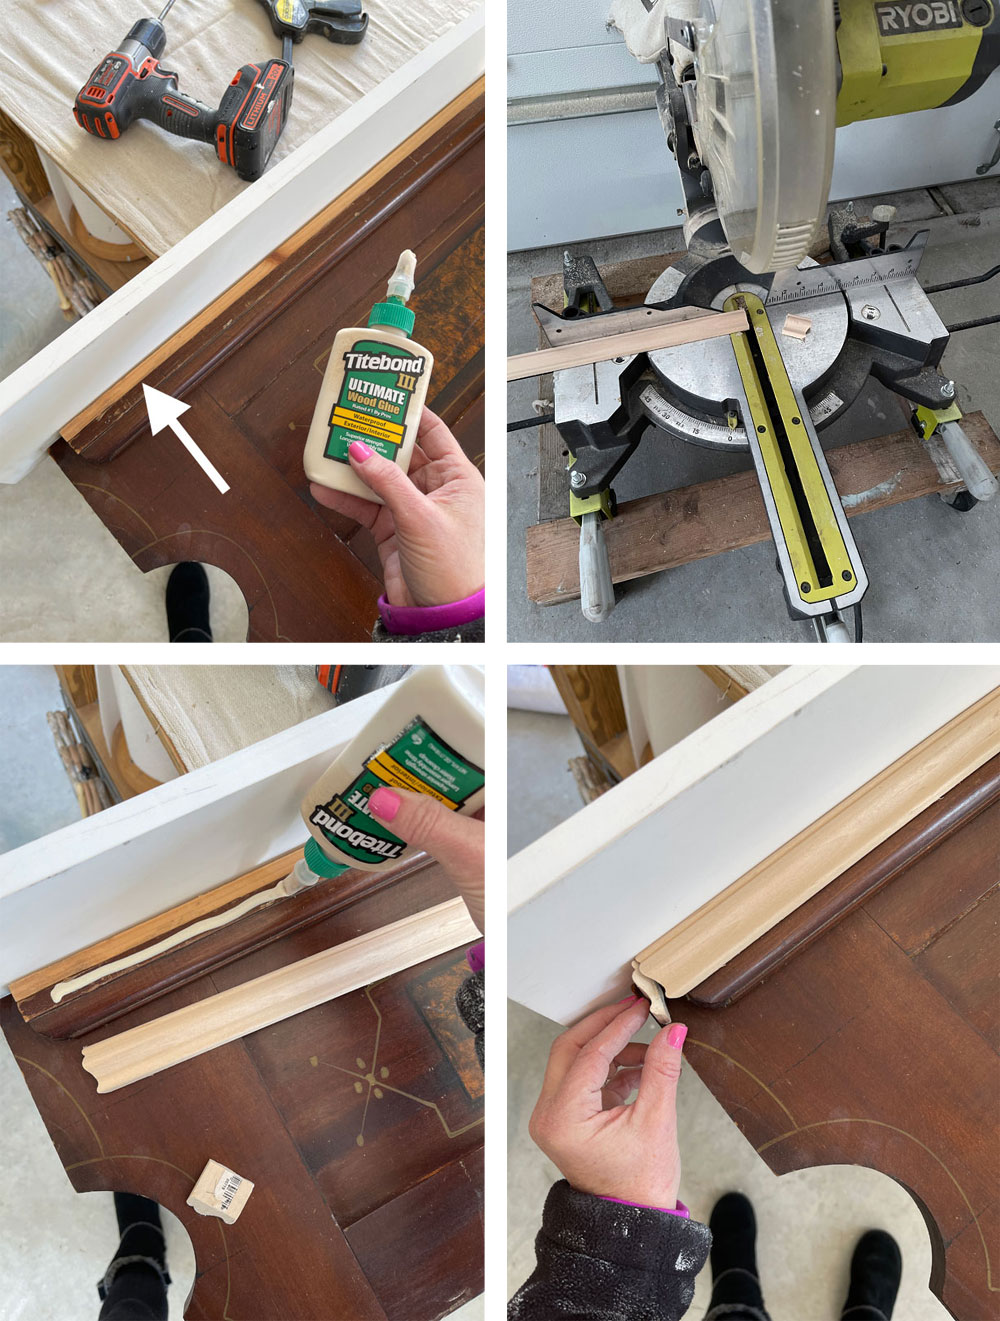
What’s that about Measure twice, cut once?
How about measure once, cut six times ha ha:
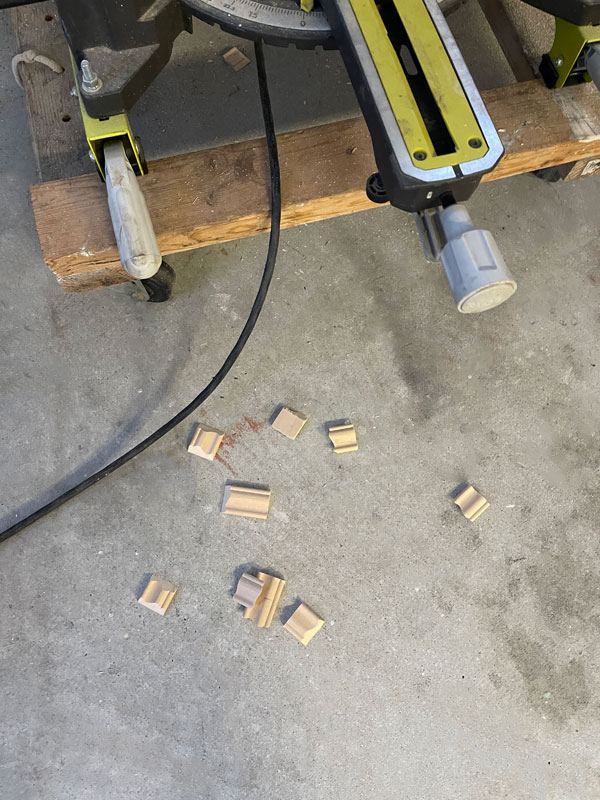
Oh well, I did finally get it right!
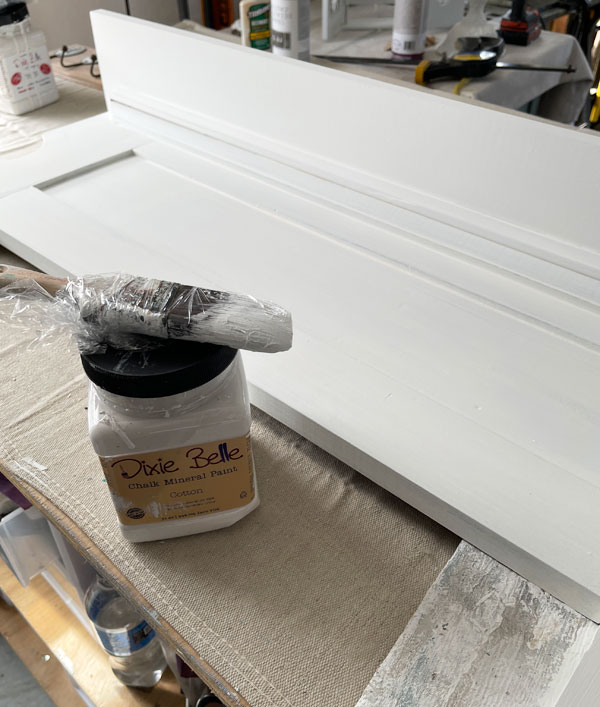
The white shelf I added was a piece of already primed lumber I already had in my stash also.
Paint
Onto the good part, paint! Well…not quite yet.
I was so excited to have my new shelf built that I went right to painting on the left side. I immediately got a yellowed hue coming through my paint.
I switched to BOSS in white to seal in those pesky tannins that like to come through these older pieces…

I should have know this would happen here. I let the BOSS dry overnight (Proper dry time is key!), and then painted the next day with two coats of Cotton:
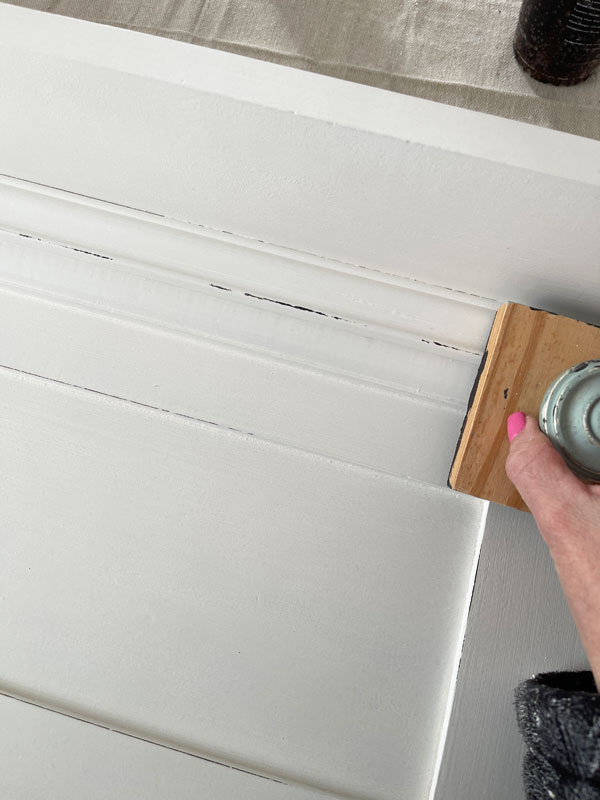
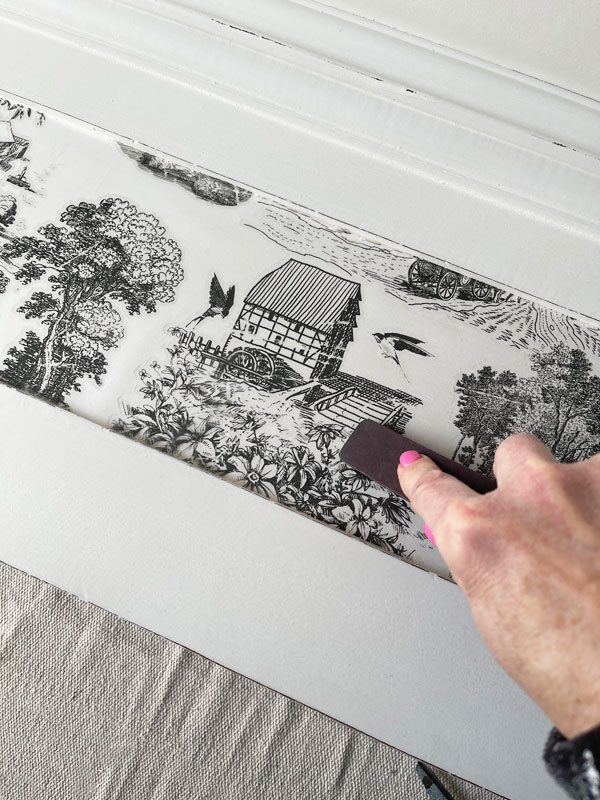
Once the paint was dry, I sanded all over using 220 grit sandpaper wrapped around an old sanding sponge to smooth everything out.
Then I chose to use the cheat method to distress using my distressing block since some of the parts were new wood and even white underneath, and I did not want that to show through:
Adding a Transfer
Then I decided to pull out one of my surprise transfers for this project!
One of my super sweet readers reached out to me a few weeks ago asking if I would be interested in some transfers. She is pursuing a new hobby and was going to donate them if I couldn’t use them. Of course I said yes!!
When the box arrived, it had a bunch of transfers in it! Surprise! So I’m calling them my surprise transfers! If you’re reading this, Ashley, thank you SO much again!! I will definitely put them to good use! ❤️
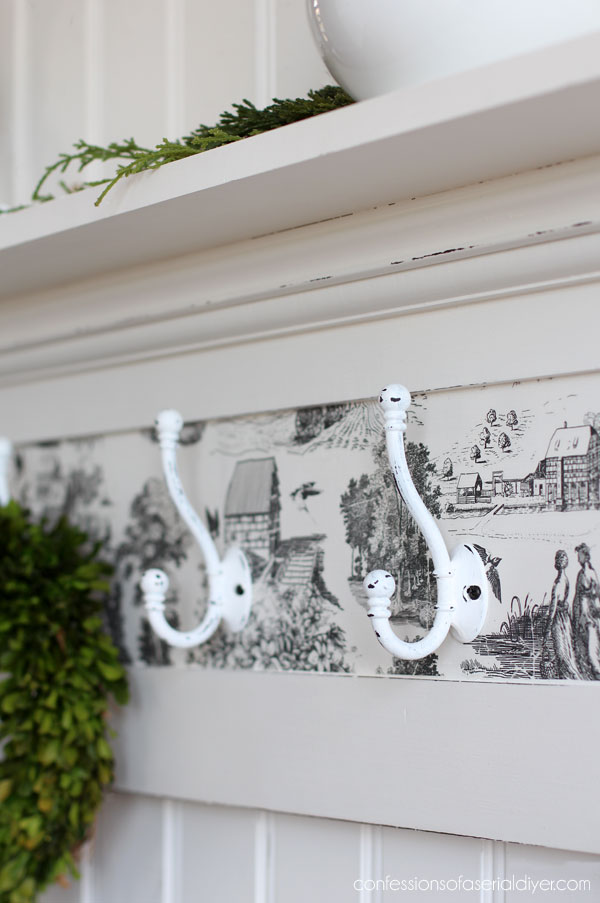
This one is reminiscent of toile:
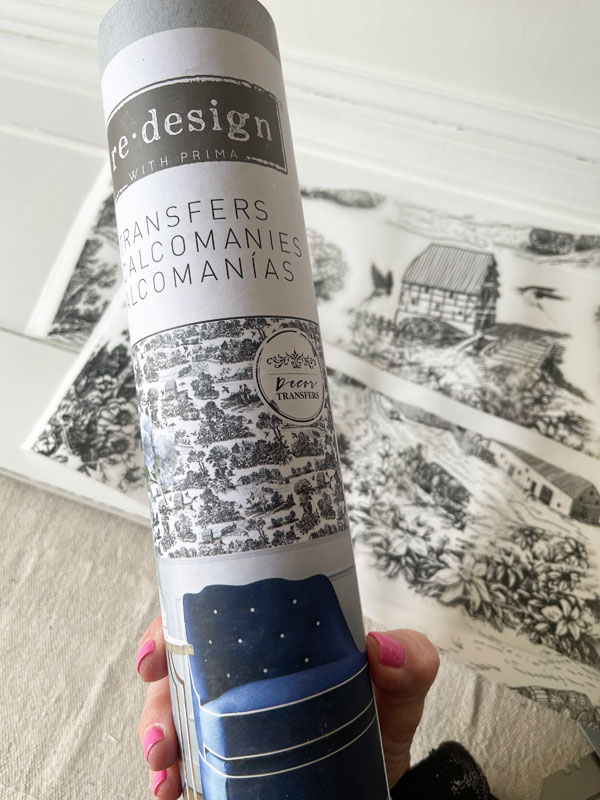
It doesn’t have a name on it, so I don’t know if it is still available to purchase, but it’s by Redesign with Prima. UPDATE!! It is called Simplicity! 🙂
I thought it would be lovely in the center panel of this piece!
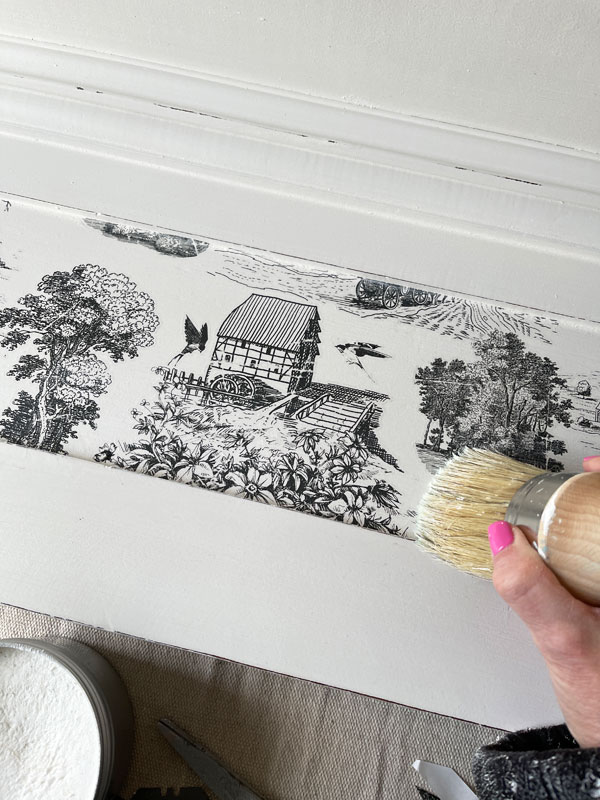
I cut it to fit before removing the backing this time.
Once it was applied, I ran a finishing pad across it to make sure it was adhered well all over.
Seal
Then, I sealed the entire piece with Best Dang Wax in clear including the transfer using my Best Dang Brush to apply the wax:
I removed the excess wax by buffing with a soft cloth.
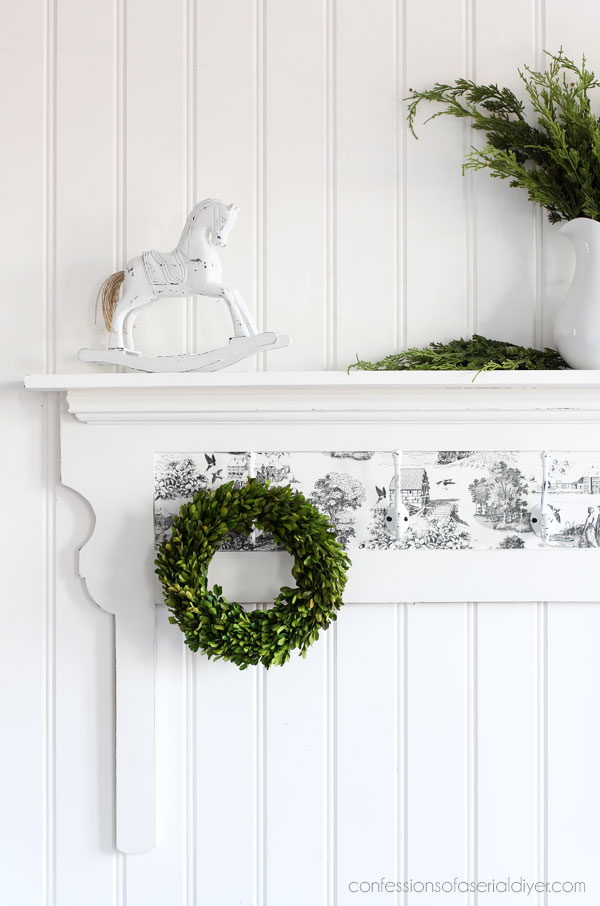
Adding Hooks
All that was left to do was add hooks I found at the Home Depot to the center panel.
They started out black, but I painted them Cotton:
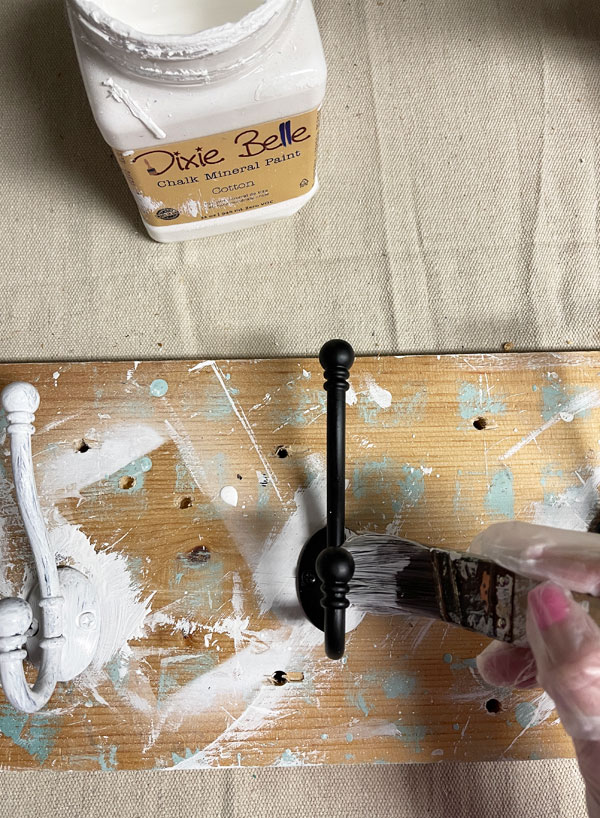
Screwing them into a piece of scrap wood made them easier to paint. I used a little sandpaper to shabby them up a bit once they were dry. Then I gave them a quick spray of Rustoleum’s Matte clear sealer to seal them.
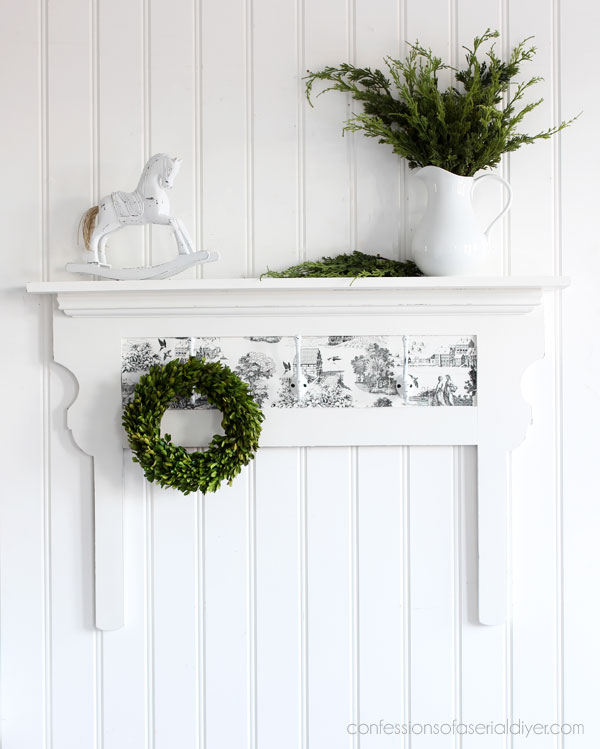
After attaching those, I added hanging hardware to the back of this piece, and this transformation was complete!
The after

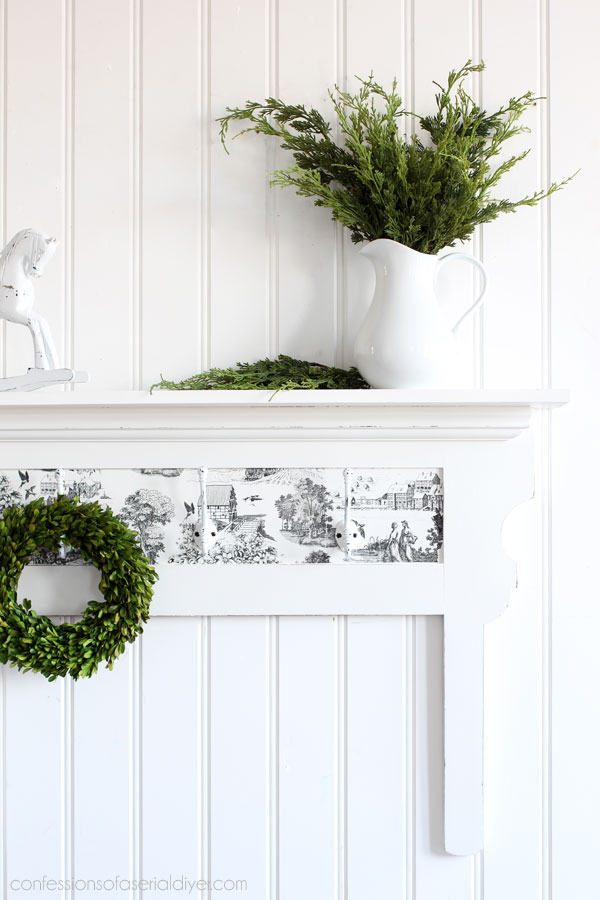
I love a classic toile pattern!

And here’s my take six on that corner trim cut lol…

This could have been used as an actual mantel on a smaller fireplace or for a faux fireplace, but the hooks add more function:
Of course, the hooks could hold stockings if it were used for a mantel!
Remember this little guy?
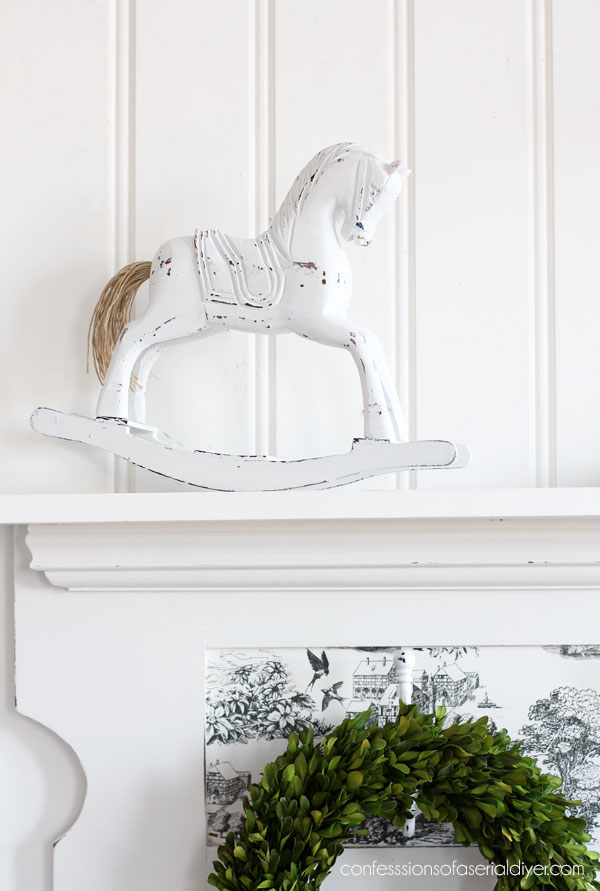
He was a 99¢ thrift store find, and he was missing his tail. I just painted him and then gathered some jute twine with a rubber band and stuck it in the hole.
I hope y’all enjoyed this one today!
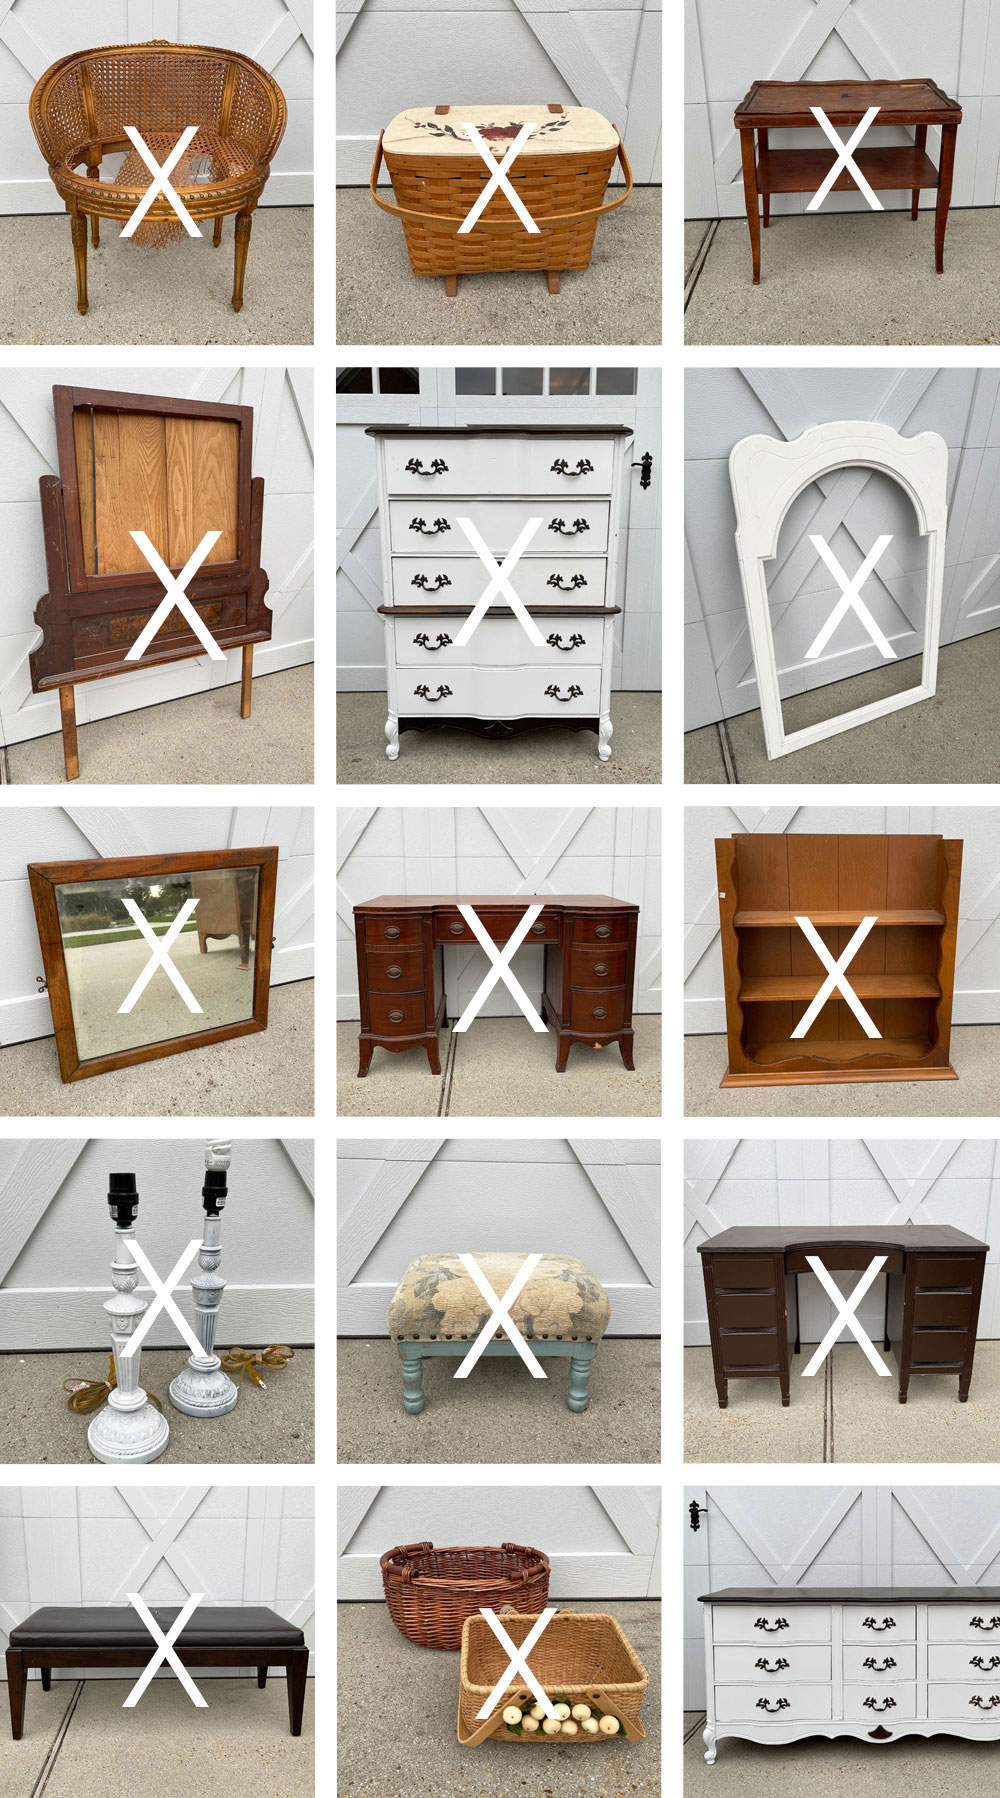
I’ve still got the mirror frame I can do something with eventually!
And that puts me down to ONE piece left from my FREE haul!!
You can find all of these completed projects at the links below:
Painted French Provincial Dresser
Four Basket Makoevers
Curbside Table Makeover
Grandma’s Mirror Makeover
How to Upcycle a Secretary Desk Hutch
Stenciled Stool Makeover
Antiqued Christmas Mirror
STENCILED BENCH MAKEOVER
STENCILED DESK MAKEOVER
CURBSIDE LAMP MAKEOVER WITH WAX
LONGABERGER BASKET MAKEOVER
HOW TO “FIX ” A BROKEN CANE CHAIR
I’m not quite ready for the final piece. I need some warmer temps so I can get it outside, so instead, I’ll be back with this oldie but goodie on Thursday:
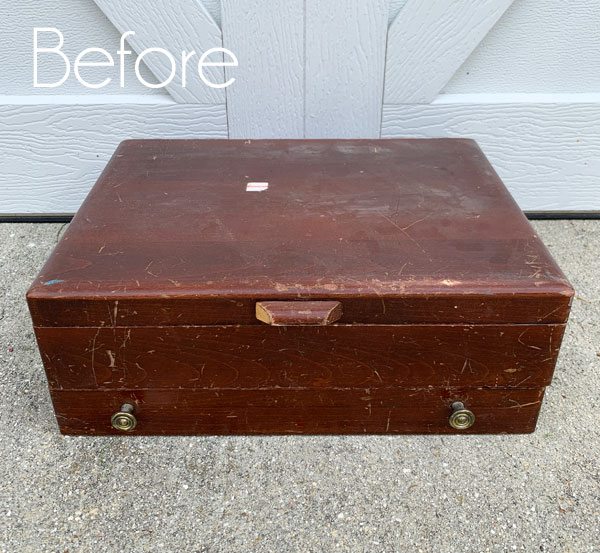
UPDATE: See the brand new look I gave this box HERE now!
See ya then!!
XOXO,

Don’t Miss a Thing!
If you like what you see, there are several ways to follow along!
EMAIL * INSTAGRAM * FACEBOOK * PINTEREST


Rachel - Tea and Forget-me-nots says
Love that transfer, beautiful job as always!
Christy says
Thank you so much, Rachel! XOXO
Mary Kaiser says
I love how that turned out, it is so beautiful now. I think it would make a great mantel also, I love the black and white toile in that panel. You are an amazing artist!!
Christy says
Aww thank you, Mary!! Toile is one of my favorites! XOXO
Janice Holt says
Wow what a great job. Turned out so pretty and toile is my favorite pattern; it’s so classic.
Christy says
Thanks so much, Janice! Yes…I love toile too! XOXO
Denise Cox says
Love it!! I’ve always loved toile as well… ever since I was a little girl. Geez… how long ago was that… lol?! 🤭😂😝
Christy says
Ha ha thank you, Denise! Me too…so classic! XOXO
Cecilia says
I actually have a mirror harp turned faux mantel for my bedroom. It was narrow enough not to stick out to far and I can pretend I have a fireplace in my room. Yours turned out pretty as a shelf. I like the transfer. Nice touch!
Christy says
Oh perfect! I bet it adds so much charm to your bedroom! Thank you Cecilia! XOXO
Cathy says
Oh my goodness…absolutely beautiful. You are so talented Christy and I have loved each and every one of your projects…
Christy says
I appreciate that so much, Cathy, thank you! XOXO
Toby says
I freaking love this!! I kept expecting you to cut off the long pieces on the sides…but you didn’t and it all totally works!! Amazeballs Christy!
I love what you do!! 🙂
Now time to to go brace for the snow, ice and wind! Ugh…..
Have a great week!
Christy says
Aww thank you, Toby!! Stay warm out there!! XOXO
Angee Cox says
Good morning 🌞
I absolutely love how this piece turned out, beautiful 😍! That transfer made it so classy.
Christy says
Thank you so much, Angee! XOXO
Denise - Salvaged Inspirations says
I love the toile transfer you used as well! This is a must try for me. I STILL haven’t used my brand new Kreg Tool yet…ugghhh..lol.
Christy says
Thank you, my friend! Girl, you need to bust that thing out lol! XOXO
Denise says
I know right!?!😂
Christy says
Ha ha yes!!😆
Ashley says
Christy! I adore mirror harps and what you did with this one is gorgeous! Once again, another stunning project by you. ❤️
Christy says
Aww thank you so much, Ashley!! And again, thank you SO much for the transfers, my friend!! XOXOXO
Rose Lefebvre says
So classy. I love this
Christy says
Thank you, Rose! XOXO
Phyllis says
As always, wonderful!
Christy says
Aww thank you, Phyllis! XOXO
Marcie Lovett says
Love the idea of a faux mantel; hooks do make it more practical, though. That transfer actually looks like fabric. What a generous gift!
Christy says
The transfer does look like fabric! And wasn’t that so kind?? It was like Christmas!! XOXO
Dalila says
Nice, Christy! That transfer really makes it.
Christy says
Thank you, Dalila! XOXO
Sharon L Austin says
That really turned out cute with that transfer! Oh, and I forgot to mention earlier that because of you, I got a miter saw for Christmas. LOL
Christy says
Thank you, Sharon! And yay!! A miter saw is a must have ha ha! XOXO
Constance Colvin says
Another A+ for the DIY star pupil! I have a question: how did you decide to put the hooks in the center as opposed to on the wood below the center? Inquiring minds and all that! 😀
Christy says
Thank you, Connie! Hmmm…good question lol! I never even thought to add them to the space below! XOXO
Robyn Wright says
CUTE! CUTE! CUTE!
Christy says
Thank you, Robin! XOXO
Christy says
Oopsie darn autocorrect…Robyn! 😀
Val says
That is so beautiful! You are so creative! I would love a piece like that in my home,
Christy says
Aww thank you so much, Val! I was so happy to be able to salvage this piece! XOXO
Petra says
This is one of my fave pieces of yours! Love it. Transfer is perfection.
Christy says
Aww thank you, my friend!! I am in love with this transfer!! XOXO
Michele M. says
WOW! You sure have vision.
That’s remarkable, Christy.
Christy says
Thank you so much, my friend! XOXO
Meredith Gesterkamp says
Hi Christy, Love your work. Everything of it up to now.
This is a lovely piece. Its just a pity you didn’t use the whole. I’m sure that you would have make something beautiful with it if so. Keep us fascinated.
Christy says
Thank you, Meredith! If you know me, you know the rest of it will get used too! XO