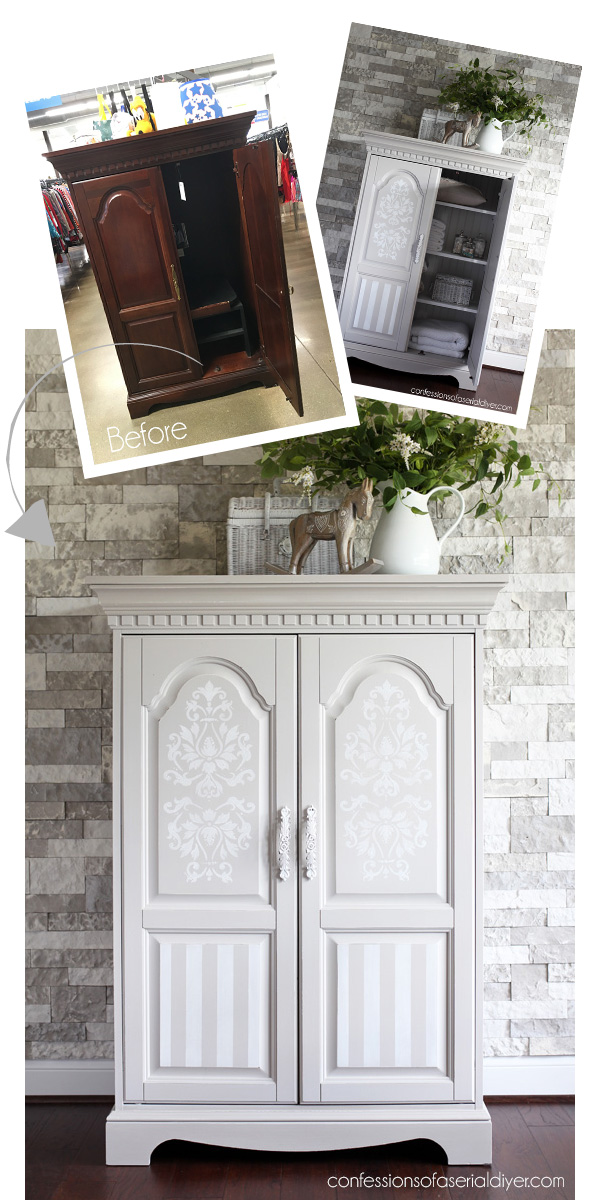
I see old TV cabinets every time I visit thrift stores. They have usually been marked down a time or two and are really cheap. The poor things are becoming obsolete and I just want to rescue them all! I always think what great storage pieces they could be if only given the chance.
Awesome friends, I finally found one that would actually fit in my jeep:
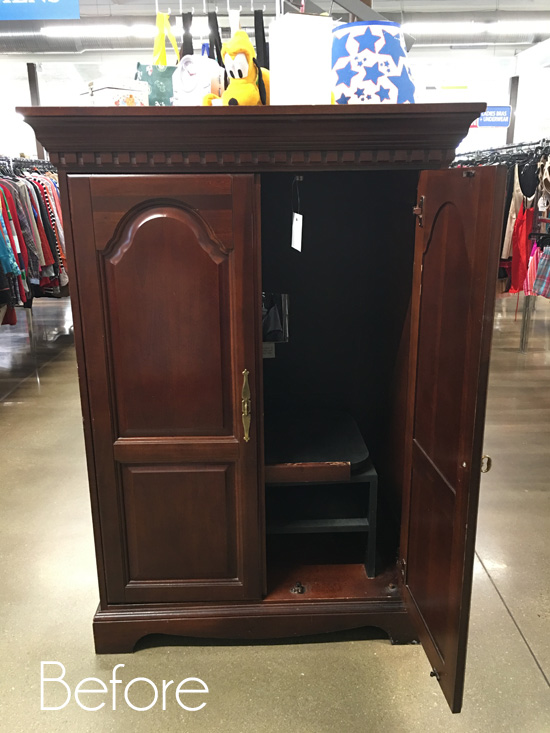
Although it was more than I wanted to spend at $50, I knew Furniture Fixer Upper Day was coming and I thought this would be a fun one to rescue. Well today is the day! (Be sure to look for my friends’ makeovers at the bottom!) I’ve included a few affiliate links so you can find the products I love.
The size of this cabinet makes it perfect for extra storage in just about any room of the house, and so I set out to transform it.
First I removed the innards:

They were held in with several screws. I also removed the back since it screamed TV cabinet.
Then I busted out my HomeRight spray tent and sprayer. It can get quite windy around here so it isn’t the easiest place to spray furniture, but this past weekend was unusually calm so I took a chance. I sprayed one coat of Behr’s Bit of Sugar made into DIY chalk paint. (Recipe HERE.) I make a fresh batch to use in the sprayer since it is a bit thinner when I first make it.
Then I gave it two coats of a mix of Annie Sloan’s French Linen and Bit of Sugar:
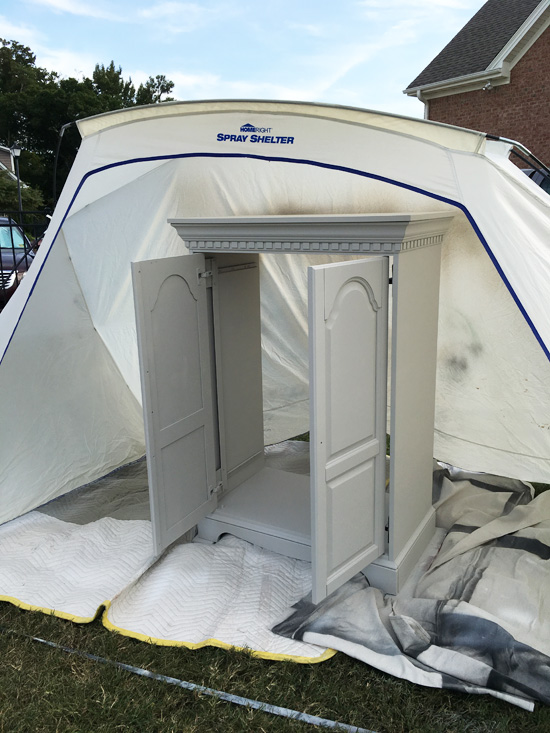
I did add just a tablespoon or so of water to the mix to thin it first.
Cleaning your sprayer is so much easier if you have this tool HERE. I use it with a five gallon bucket and clean up is super easy.
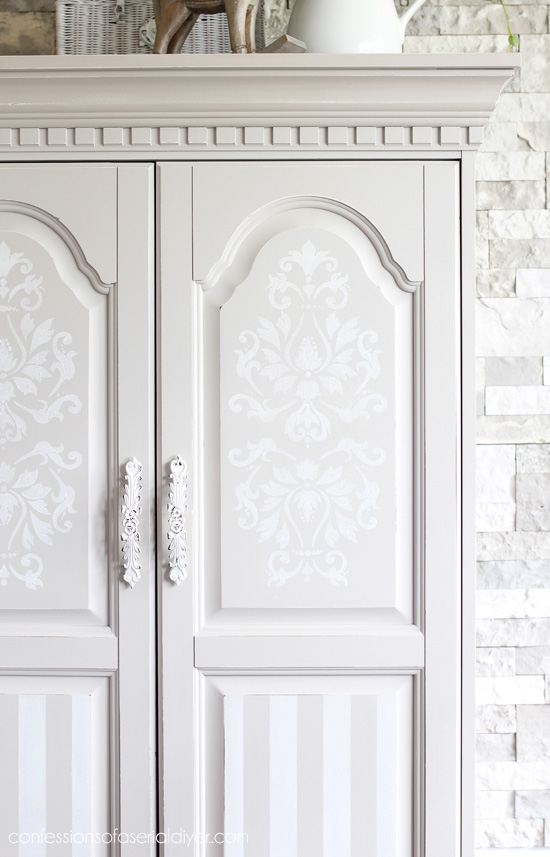
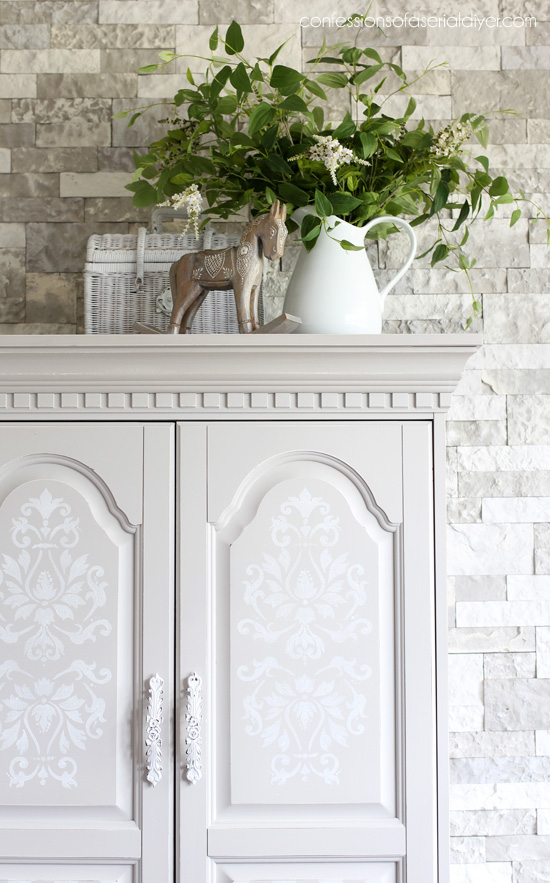
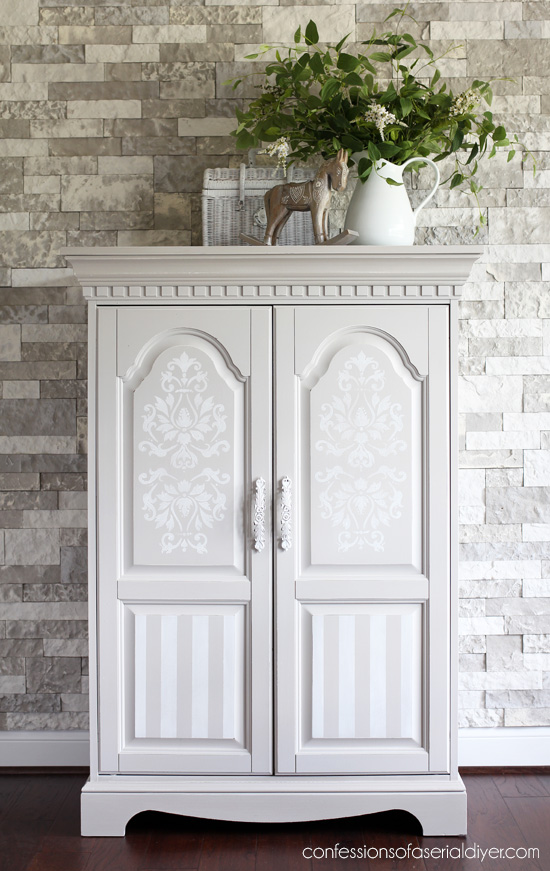
After it was dry, I decided to add a damask stencil to the top panels:
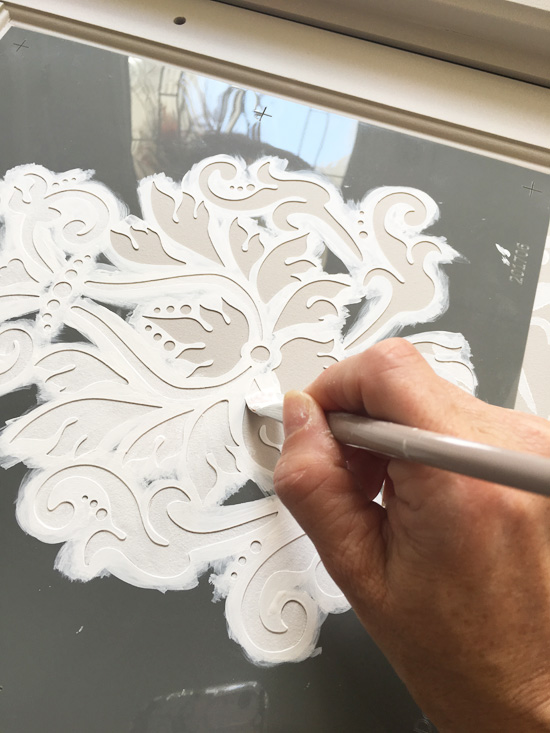
I used this one HERE. I used spray adhesive to hold the stencil in place, spraying the back of the stencil. Then I used a small brush and my white chalk paint to fill it in. I tried to brush away from the edges as much as possible. I used the full pattern at the top, then flipped it around and used a portion of the same stencil on the bottom of the top panel so it would fit.
Then I added my favorite… stripes to the bottom using FrogTape for a little more interest:
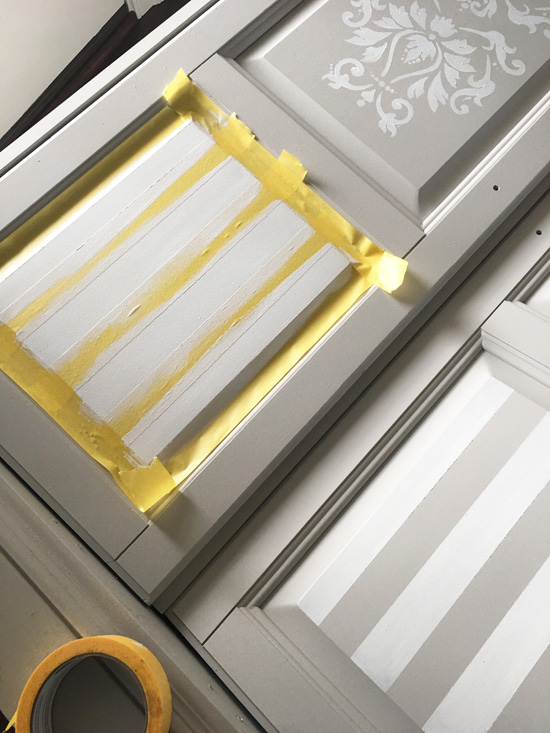
You can see how I easily measure out my stripes in this post HERE. I only added one coat of paint, and then removed the tape as soon as I was done.
I sealed with something new this time: Clear Coat Satin Finish by Dixie Belle Paints, using this brush made especially for sealers to apply it. I bought it a couple of months ago and had finally decided to give it a try.
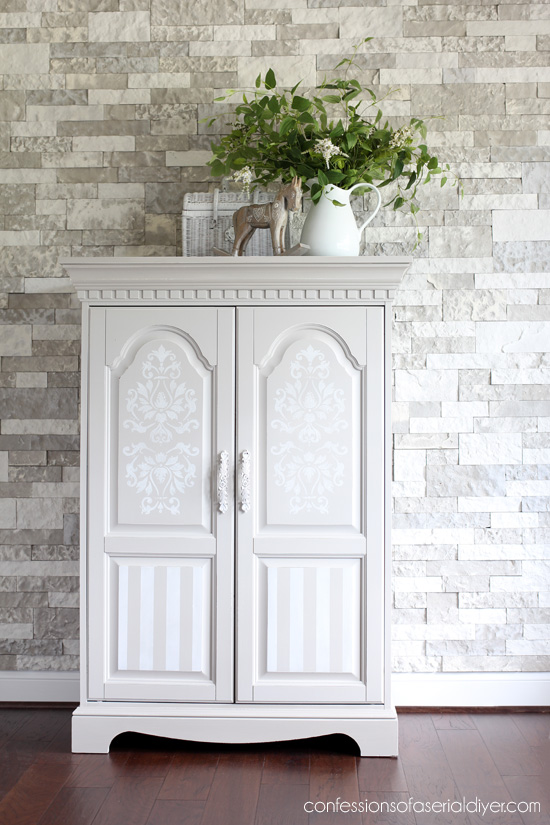
And here she is:
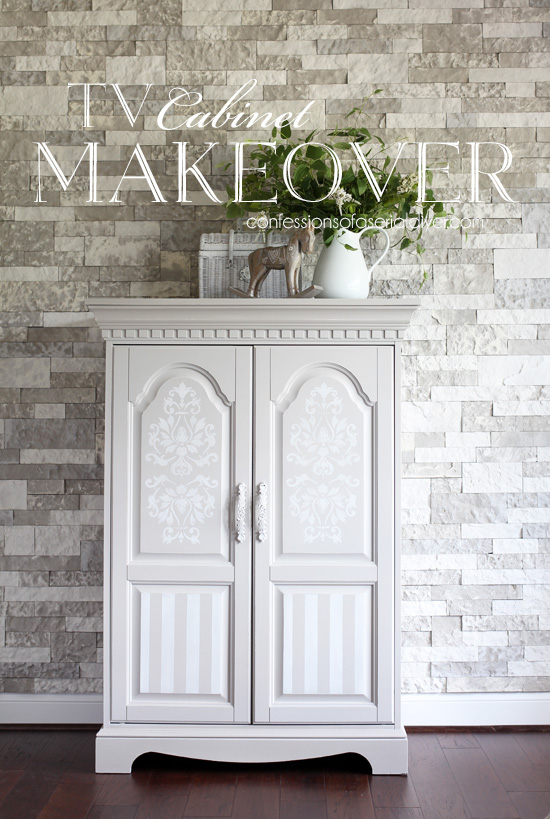
I quite liked the ease of using a brush-on sealer this time, and I noticed no yellowing so far. That has always been my fear when using brush-on sealers with chalk paint, and probably why I had taken so long to try it out. I’ll try it on something white next and report back. UPDATE: It works awesome over white pieces and NO yellowing! 🙂
This color combination is so soft and it is nice and neutral to match any color scheme.
I picked these handles up at Hobby Lobby…
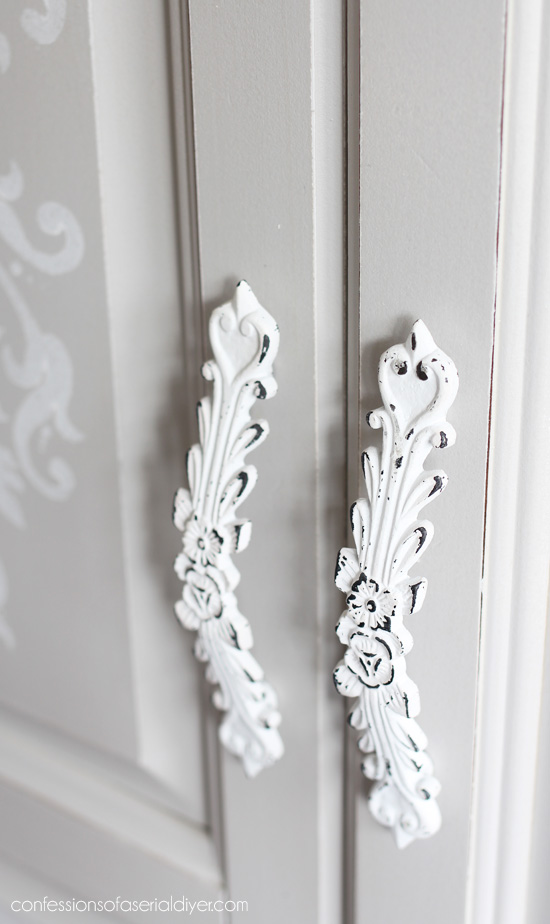
These are one of my favorites of theirs!
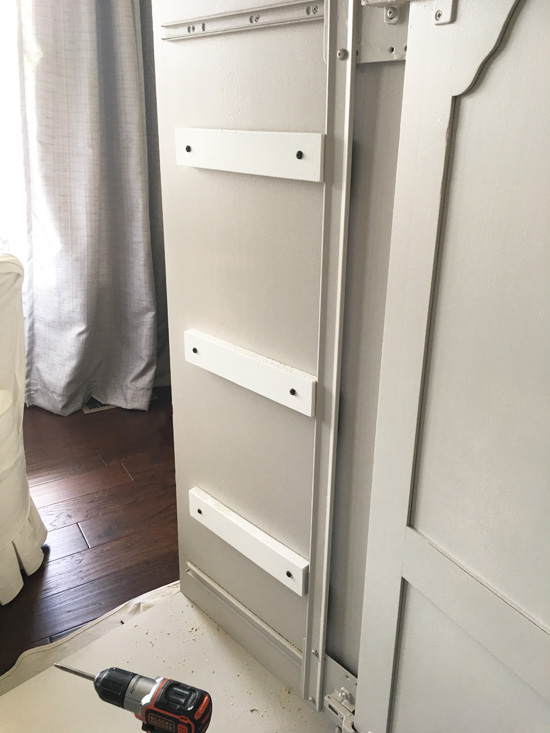
For the insides, I cut three shelves out of 12″ X 48″ pine pieces from the Home Depot, using my miter saw. Then I cut two supports for each shelf out of the scraps:

I cut those 2″ wide.
Everything got a good sanding, a coat of primer, and two coats of Behr’s latex enamel in satin in Ultra Pure White. (Leftover from my kitchen cabinets.) I used that since the shelves might take some abuse over time.
Then I predrilled the shelf supports and the inside of the cabinet before attaching them to the inside with screws…
Ready to see how the inside turned out??
Tada!!
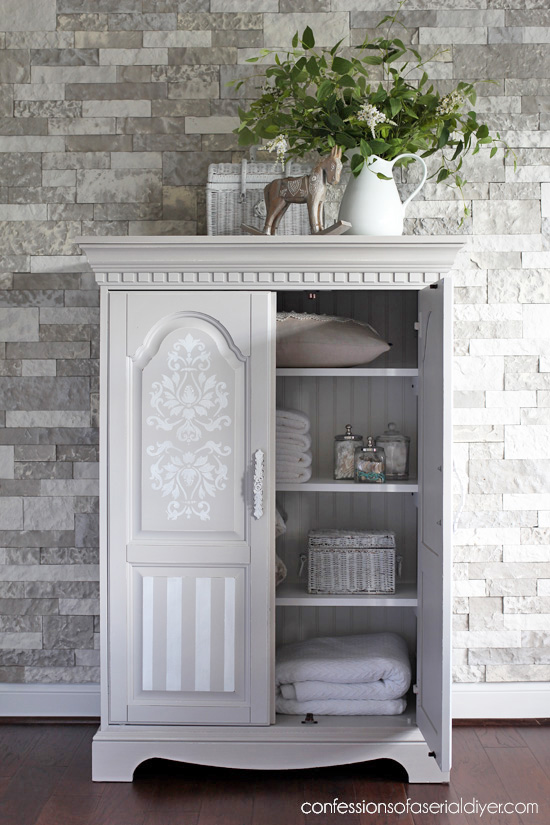
This sad throw-away is functional again!
You can see I added a new beadboard backing that I had cut to the size I needed at Lowes…
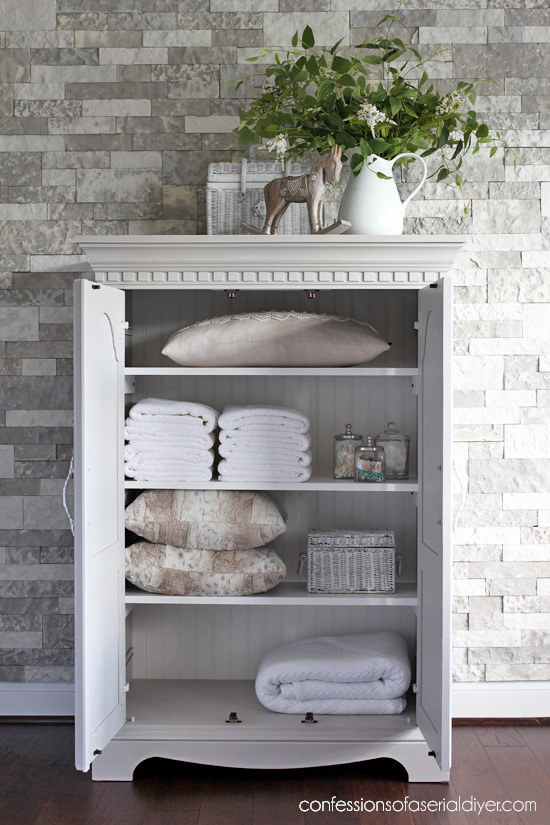
This is perfect for linens, games, clothes, or even as a pantry if you don’t already have one!

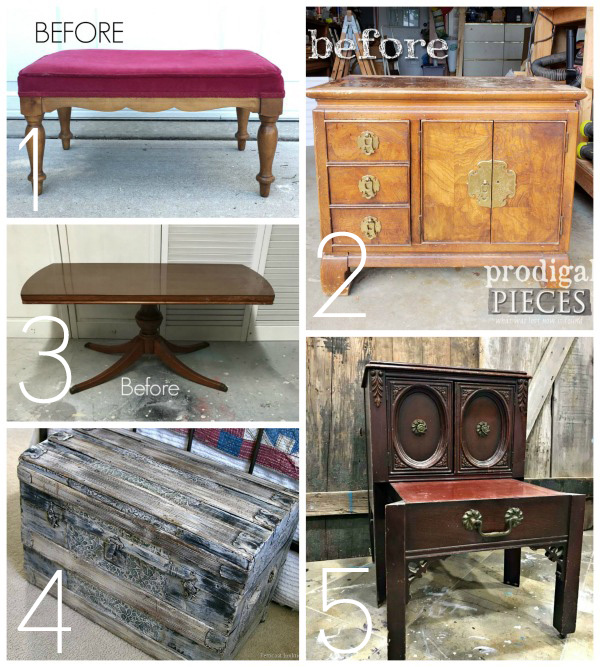
Don’t forget my Furniture Fixer Upper Gal pals are sharing furniture makeovers of their own today:
If you liked this makeover you’ll like this one too:
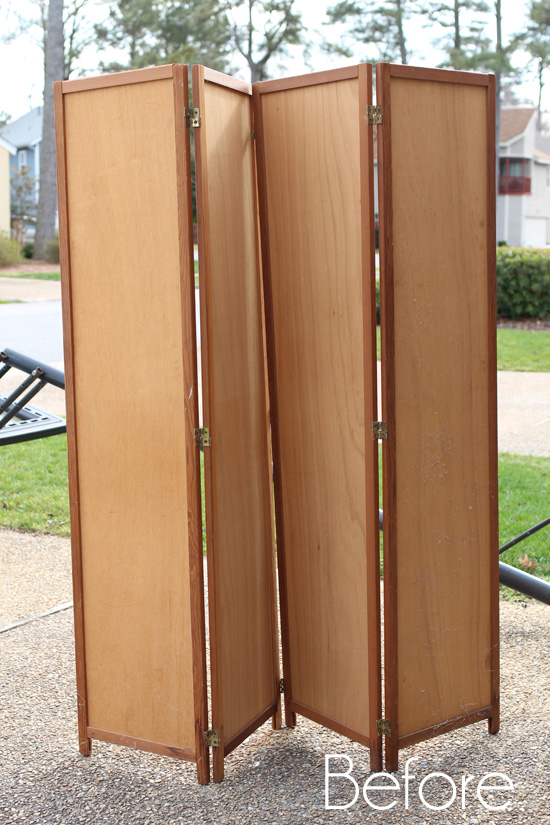
See how I transformed this thrift store screen HERE.
I’ll be back on Tuesday sharing what I made with this old backing to a mirror I turned into a chalkboard:

UPDATE: See what I created with this HERE now!
Have a great weekend! 😀
XO,
![]()
Don’t Miss a Thing!
If you like what you see, there are several ways to follow along!
Email * Facebook * Pinterest * Twitter * Instagram


Mary Kaiser says
Wowza! It is beautiful now. I see them all the time at the thrift store, I wish I had a spot for one in my home. I might just have to go look for a way to redesign my rooms so I can get me one of them and refinish/re-purpose it! Love all your ideas.
Christy says
Thank you, Mary!! I see them all the time too, but they are usually so incredibly big. This one was perfectly petite! Enjoy your weekend! XOXO
Petra says
Wow, you’re really churning them out 😮 🙂 You’ve made this a totally different “style” which is fabulous – and those handles that came with it now look much better – French style methinks! Well done.
Christy says
Right?? It feels great to be creating again now that house projects are under control! Thanks, Petra! XOXO
Christina in SW FL says
Christy this is absolutely remarkable! You are so right, these entertainment centers are everywhere and, usually, very heavy. I adore the bead-board backing. Someone is going to snatch this up in a hurry!
Christy says
Thank you, Christina! Although this one is quite petite for a TV cabinet, it is still very heavy! Hope it sells quickly! XOXO
Jamie says
It is Gorgeous! ❤️❤️ I had one similar once and wanted to add shelves but the sides were one board, not very thick – so I could never figure out how to make it happen. Your piece would be a perfect piece for any room. Love ❤️
Christy says
Thank you, Jamie! Hmmm…I’m not sure how you could add shelves if the sides were thin? Too bad! XOXO
Claudine says
I LOVE this! Absolutely gorgeous And it is a nice versatile size.!
Christy says
Thank you, Claudine! It is a great size for sure! XO
Janice says
Beautiful. Always love the stripes. Never disappointed with what you do.
Christy says
Thank you, Janice! You know stripes are my favorite, and you are always so sweet! XOXO
Debbie says
Hello friend!
I was just going to try a napkin project for 1st time, until I saw your result w/stencil!! Was meant to be, because I’m using a similar piece for it.
Thanks again for another inspiration, Christy!
Christy says
Oh yay! Good timing! XO
Larissa ~ Prodigal Pieces says
I feel the same about them, Christy. Just too cool to pass up transforming them. You certainly did this one justice. Beautiful!
Christy says
Thanks, Larissa! They are usually massive, but this one was a great size so I had to bring it home! XOXO
Lori Sawyer says
I’ve used that sealer on several projects and no yellow! I look t these cabinets all the time but don’t have space til we move next year
Christy says
Good to know, Lori! It was so much easier than waxing! XOXO
Cecilia from Georgia says
Lori, I am glad you shared that the sealer works. I bought some but have been chicken to put it on anything. Now I can use it with confidence. I have learned so much from the bloggers and the followers. Thanks!
Christy says
Ha ha Cecilia! I was too chicken too! I really like it, and it has a nice soft sheen to it. 🙂
Barbara Holmes says
WOW!!! You are amazing. This came out beautiful, love the stenciling and stripes. I love seeing all your projects.
Christy says
Aww thank you so much, Barbara!! XOXO
Vicki says
Christy, Just beautiful! As always, you took an ugly old beast and created a classy looking gem!!!
Christy says
Thank you so much, Vicki!! These ugly ducklings are always the most fun to work on! XOXO
Michelle says
Great makeover. Amazing! You are so talented!
Christy says
You are so sweet, Michelle, thank you!! XOXO
Lisa says
I love your stripes. I want to stain darker a wood piece and then paint stripes on it. Would you paint first and then stain the whole thing (which would darken the stripes) or stain first, then paint on stripes. Just wasn’t sure about painting over stain.
Thanks!
Christy says
Thanks, Lisa! If you wanted to paint stripes over stain, I might consider spray painting the stripes on with a regular spray paint like Rustoleum. It should adhere to the stained surface. Maybe try a test piece first? Good luck!
Robyn Wright says
Christy! WOW! That is so beautiful!
Christy says
Thank you, Robyn!! XOXO
Marcie Lovett says
Wowee wow, what a beauty! Amazing what some paint and beadboard can do.
All the rain we’ve had has put a cramp in my painting – I’ve got to get a tent! I think I might actually use my sprayer if I had that cleaner, too.
Christy says
Thank you, Marcie!! The tent is awesome and it is huge! HomeRight also makes a medium sized tent that is the same height but narrower. It would easily hold a nightstand for painting. And yes, that cleaning attachment makes cleaning easier! XOXO
Nancy @ Artsy Chicks Rule says
Such a great makeover Christy!! I love that you turned it into storage. I see those TV armoires ALL the time but I’m not brave enough to bring home the big stuff anymore like I used to!! Big, heavy…daunting! I’m too old for it!! 😉 I always say to myself, if only I had movers to move all these great (big) finds! I wish!! haha xoxo
Christy says
Thank you, Nancy!! The ones I usually see are gigantic and I can’t haul those things home either, but this one was perfectly petite! If it fits in my jeep, it can come home ha ha! And wouldn’t it be great to have someone to call on for those big pieces?? XOXO
Paula says
What a great update for this TV cabinet. It’s ready to be enjoyed for many more years!
Christy says
Thank you, Paula! I am so tickled that I took a chance on it! XOXO
sharon austin says
Love it! I could totally see that in a trendy salon/spa for storage.
Christy says
Thanks, Sharon! Oh yes…that would be perfect! XOXO
Marie-The Interior Frugalista says
Oh wow, if only the former owner could see their tv cabinet now! Love how you breathed new life into this dated cabinet, Christy. So pretty!
Christy says
Thank you, Marie! I know, right?? I think that about a lot of pieces! XOXO
Debra A Wise says
Gosh, Christy, so breathtaking! Such an amazing transformation!
Christy says
Aww thank you so much, Debra! I’m so thrilled you like it! XOXO
Janet Schen says
Oh my goodness! The cabinet is just beautiful. I love the stencils and the stripes. The beadboard backing gives it a vintage vibe that I adore. It’s just gorgeous! Fabulous makeover!
Christy says
Thank you, Janet! Beadboard always adds so much! XOXO
Addie says
WOWSER!!!! AGAIN!!!….of course!!!! Yes, you can see/find so many of those cabinets. I use an old one for my sewing fabric. I wish people would understand they are useable and STOP sending them to the landfills!!!!
You did a great job on this one…dark and ugly to bright, light and beautiful!!!!
Addie XXOO…..have a good weekend!!!! God Bless!!!
Christy says
Thank you, Addie!! Good for you for finding a new purpose for yours. I have our old one in the garage and it actually is holding fabric also lol, among other things! If only we could save them all!!! Happy weekend!! XOXO
Cecilia says
Oh my gosh! How pretty! The paint combo is perfect.
I’m still trying to figure out where I can use one. I was going to get one for the art studio but then I found a set of lockers for $50. A little clean up, reattaching with new screws and it’s perfect. But oh those tv cabinets…so many possibilities!
Christy says
Thank you, Cecilia! Lockers sound like amazing storage pieces! XO
kandice kullmann says
Shut the front door! This is a game changer! Youd never even know that it was one of those dated TV things. I love it! Its so pretty now.
Christy says
Ha ha you are funny! Thanks, my friend! XOOX
Naomi S says
Amazing! What a change for the better!
Christy, what kind of spray adhesive would you recommend? I’ve never used it before and I want to use it on a stencil.
Christy says
Thanks, Naomi!! XOXO
Brenda Johnson says
You always do such an excellent job! It’s so fun to see what you will do with something that looks so bad, like turning a pumpkin into a coach!
I didn’t think you could use chalk paint in a paint sprayer…do you just thin it more?
Christy says
Thank you SO much, Brenda! When I make a fresh batch of chalk paint, it is a bit thin already so I usually make a new one when I use it in the sprayer. The sprayer comes with a tool to measure if your paint is thin enough for the sprayer. You may need to add a little water if it is too thick. XO
Peggy Sanders says
I just love it. It is really pretty, great job.
Also Love your blog.
Christy says
Thank you so much, Peggy! XO
Cecilia from Georgia says
The cabinet is beautiful!! I see these all the time and I hesitate to get it because the last one I saw looked like it may have been fake wood (like a composite). It looks good but it appears that it is a type of laminate. I was given a bunch of drawer fronts off desks and they are the same composite/laminate stuff. I guess I could try one out and see how it takes the paint like you did the little sewing bench. Do you only choose solid wood pieces? I love everything you do.
Christy says
Thank you, Cecilia! Parts of this one are pressed board as well, although I didn’t realize it until I was helping to load it and it was super heavy. I do try to stick to solid wood when I can, but chalk paint works great on any surface! XOXO
Allison Anselmo says
Love this idea! They keep showing up in our thrift stores too at high prices but this idea might make a moderate sized one work! Thanks for showing us a great idea to repurpose something so easily found!
Christy says
Thank you, Allison! They are everywhere here too, and I wish I could save them all, but most are just so big! This one was just the right size! XO
Julie Briones says
SO pretty, Christy… love the color, accents, AND bead board! Perfect!
Christy says
Thank you, Julie!! I’m so glad I took a chance on it! XOXO
Jen @ Girl in the Garage says
This turned out so super cute, Christy! I always think the same thing about those old TV armoires – most people just don’t have the vision or desire to upcycle them into something functional again. I also love the GIF you made! 😉
Christy says
Thanks, girl! Honestly this was a lot more work than I expected, but I had never tackled one before so it was kind of fun. Glad you liked the GIF! XOXO
Christie says
I love this converted entertainment center! I have a beautiful one that I want to make into a bench someday. I just have to figure out how.
ASCP French Linen is my absolute favorite color of all time. I never dreamed it could look so delicate/feminine mixed with a bit of white. I have 2 of those same Damask stencils and love them. I used it to make a raised stencil on my bathroom vanity door insets. To hive it a more stream-lined delicate look, I omitted the outer parts that swoop up and the lower parts that swoop out – stopping the stencil on the side after the leaf-like parts in the middle – leaving just the center portion from top to bottom. I’m having a hard time describing what part I used but it changed the entire look of the stencil (which I’ve used on a hutch, roll-top desk and numerous other projects). I’d never thought of flipping it & repeating just the bottom portion below the entire stencil. It looks very nice.
I’m impressed that you were able to convert the old e-center into a beautiful linen cabinet/storage. Your color and stencil choices are magnificent!
Christy says
Thank you so much, Christie! I love French Linen too, and I discovered how pretty this color was mixed with white when I was running low on it and decided to add white to be sure I had enough for my project. Now I mix it with white every time! Love that you use only parts of stencils too…most people don’t think to do that! XOXO
Olga says
she turned out gorgeous!! so beautiful!
Christy says
Thank you so much, Olga!! XOXO
June Causey says
Hello. I a big fan of you. I saw your Christmas tree last year and it was outstanding. Could you please tell me the name. I know you said it was Walmart. Thank you for your time.
Christy says
Thank you, June! You may have mistaken me for someone else regarding the tree as I do not have a Walmart tree. So sorry! XO
Donna says
Another fabulous makeover! Hooker Furniture used to make enormous entertainment armoires and they were very high quality. It seems a shame to ditch a good piece of furniture and you have given this one a new life.
Christy says
Thank you, Donna! I see beautiful ones all the time for dirt cheap…if only they weren’t so large, because it really is a shame that they no longer serve a purpose! XOXO
Kristina says
Absolutely amazing! The color is the bomb! So many different uses for storage in these entertainment centers! I’m planning on downsizing my home very soon but my main concern and reason for putting it off is storage. Storage in smaller homes is always so very limited! 🙁
This has given me new encouragement that maybe I can make a small home work. I’ll just put one of these in each room lol! Great projects to keep me busy as well, win win! 🙂
Christy says
Thank you, Kristina! I would love to have one of these in every room!! They can store so much! XOXO
Becky says
That is just BEAUTIFUL! I love the shelves!!!
Christy says
Thank you, Becky!! Just dropped it off at my booth…hope it sells quickly! 😀 XOXO
Susie says
LOVE it! I also love and bought the same handles.Gorgeous as usual – your work is such an inspiration. This should sell in no time, but I don’t know how you let such beautiful pieces go. 🙂
Christy says
Thank you so much, Susie!! I absolutely adore these handles and you cannot beat the price when they’re half off! I just dropped this off at my booth today…it is hard to let some pieces go for sure, but easier when I don’t have a spot for them! XOXO
Marty K says
Beautiful! I love this make-over…so gorgeous!
Christy says
Thank you, Marty!! XO
Darlene Badgley says
You are amazing and so talented!! I have a question?? How did you add the shelf supports inside the entertainment center? I’m just wondering if there is a problem with the screws showing in the outside, if so, how do you cover them up?
Thank you so much for posting results all of your beautiful furniture pieces…you’re inspiring!!!! ????????
Christy says
Aww thank you, Darlene!! I used screws that stopped just before going through the outside of the cabinet, so there was nothing to cover. This cabinet sold already in my shop…guess I should keep my eyes out for another! XOXO
Naomi Alvarado says
Morning,
I absolutely love your diy’s, ????. Thank you for sharing all your wonderfully creations. I’m glad I found your blog and Instagram two years ago. Blessings from Nazareth, PA
Naomi Alvarado
Christy says
Thank you so much, Naomi! I am so glad you found me too! Thank you so much for choosing to follow along with me! Best of luck on the giveaway! XOXO
Susan says
I just love the transformation! And, I am so intrigued with the idea of spraying the chalkpaint. How do you decide which pieces to spray and which to paint by hand? I just love your blog, we recently moved from Hampton Roads to sunnier Florida. We left all of our furniture behind, and I am thrifting my way thru the area and having a blast. You have been such an inspiration!
Christy says
Thank you SO much, Susan! I don’t spray pieces very often because I actually enjoy the quiet lost-in-thought process that comes with painting by hand. However for this piece, I was in a time crunch and needed to get it done. The sprayer certainly is much faster! And how fun that you got to start from scratch and look for new furniture. I often think how fun that could be! XO
Susan says
Thank you so much, Christy! I agree with you about getting lost…but after getting lost in 2 bedroom sets, a 3 piece china cabinet, dining table, dresser turned entertainment center and coffee table I need to find my way out! I just ordered your recommended sprayer, tent and cleaning tool. Oh, happy day! Our color schemes are so similar. You have been such an inspiration!
Christy says
Oh wow, yes you have quite the to-do list ha ha! Have fun! XO
Lizzy Leff says
The transformation is amazing. I love everything about it, especially the color. I hope others will be inspired to rescue all those old TV cabinets out there, instead of going to the landfill.
Christy says
Thanks, Lizzy! I see these cabinets all the time for super cheap, but they are too big for me to get them home! This one has actually sold already, so I’ll have to be on the lookout for another one! XO
Suzy Mark says
I wish someone would start a business to remove half of the back side of these large armoires. I have a beauty but it’s for the huge computer monitor.
Christy says
Oh it would be awesome if someone could do that! They are often way too deep!
Shirley says
I’ve looked at this post several times now knowing full well I had seen it before but something kept brining me back to it. Every time I see it I wish I had one to makeover, not even realizing that I do have one. Sitting right here in front of my face every single day and it just didn’t dawn on me to use it until now. I really need some extra storage in my main bathroom. It’s not a big bathroom but it’s not small either. I think it will actually fit well and will give me a place to really keep my towels where they are needed. My cabinet is sort of a plain Jane but with a little bit of embellishment I think it could be exactly what I need!
Christy says
Oh funny! It was right in front of you the whole time. No wonder you kept coming back to this post! Good luck with your transformation! XO
Lisa Greene says
Hi Christy! What a beautiful makeover as always! I have a paint sprayer problem though, I purchased the same sprayer you use (on your recommendation) and love it although when following the directions for the thickness of the paint (so many seconds etc) the paint is water thin. Do you thin it that much? What are your rules when thinning paint for your sprayer? Thanks so much for your time AND inspiration!
Christy says
Thank you, Lisa! I have only used my DIY chalk paint in my sprayer, and I found that if I made a new batch that it was perfectly thin enough to go in the sprayer. If you are using regular paint, I would just thin it down a little bit with water. I don’t think it has to be water thin at all. I’m sorry I can’t be more exact! Good luck! XOXO
Lisa Greene says
Thanks so much for the info and quick response Christy!! You are a gem! I will try that.
Christy says
You’re welcome! Good luck! 🙂
Carolyn Bleeker says
I am so glad I found you!! Everything turns out simply beautiful.
I have 2 bookcases about 6 feet tall and 3.5 feet wide. In between them is a buffet I use as a TV stand. When I got them I was pleased that the wood grain color all matches.
Now I’m wondering about modifications.
But maybe that would be too much white and gray?? Just wondering what you might recommend for three pieces in such close proximity to each other.
And I know this is tough without seeing them.
Any feedback appreciated!! Thank you.
Christy says
Thank you so much, Carolyn! I’m thinking if they were all painted the same color, they would look like one solid unit? XO