Hello lovelies! It’s the first day of September, and I know I should have fall on the brain, but since it’s still in the 90’s here at the moment, I’m sneaking in another project with a summer vibe! I hope that’s okay with you. I’m sharing how I updated a tray with silkscreen stencils!
Have you ever used a silkscreen stencil before??
I love them because they yield super crisp results and are SO easy to use! I’ve included a few affiliate links so you can find the products I love.
My subject for today is this tray that I picked up at the thrift store for $6:
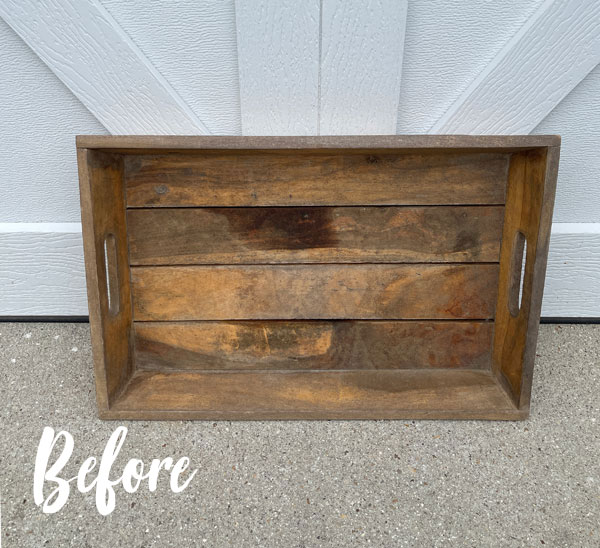
It was super chunky and reminds me of one I bought at Target years ago that I no longer have.
However, it was filthy!
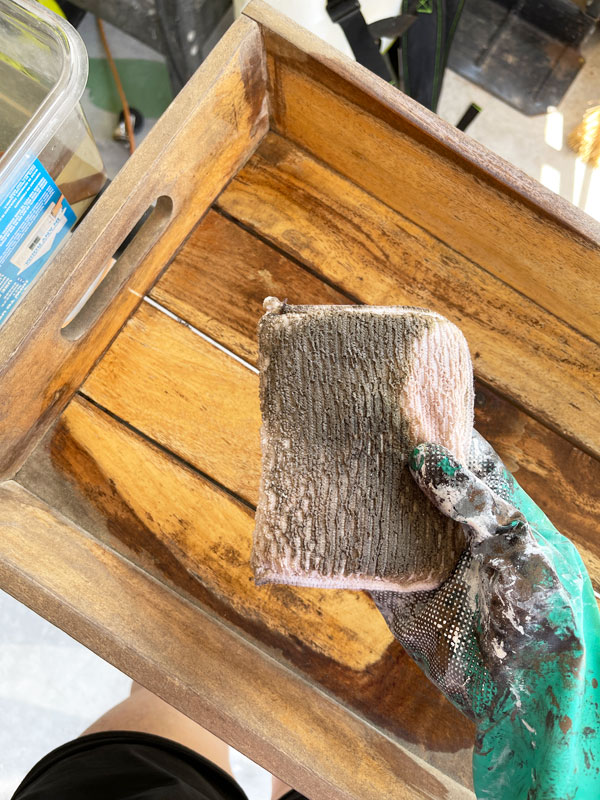
Clean
A good cleaning was definitely needed first.
I cleaned this tray with White Lightning using an applicator pad and you can see here just how dirty it was:
Paint
Once it was clean, I gave it two coats of Farmhouse Green:
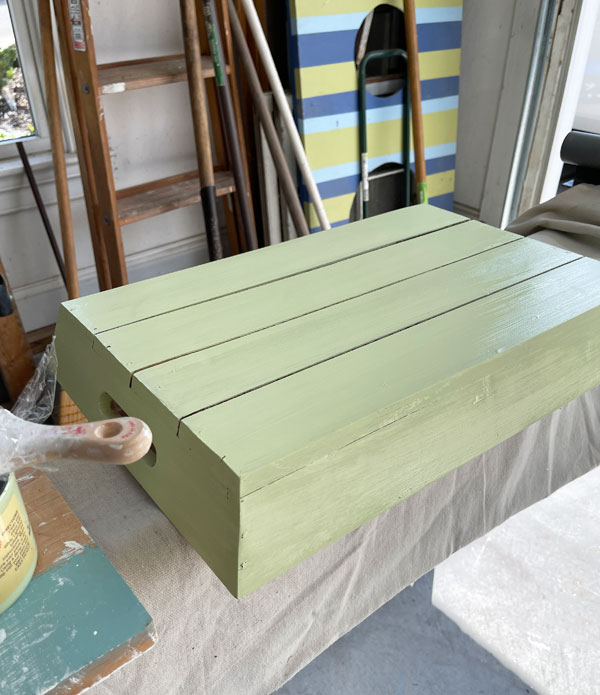
I told y’all I was still feeling summer!
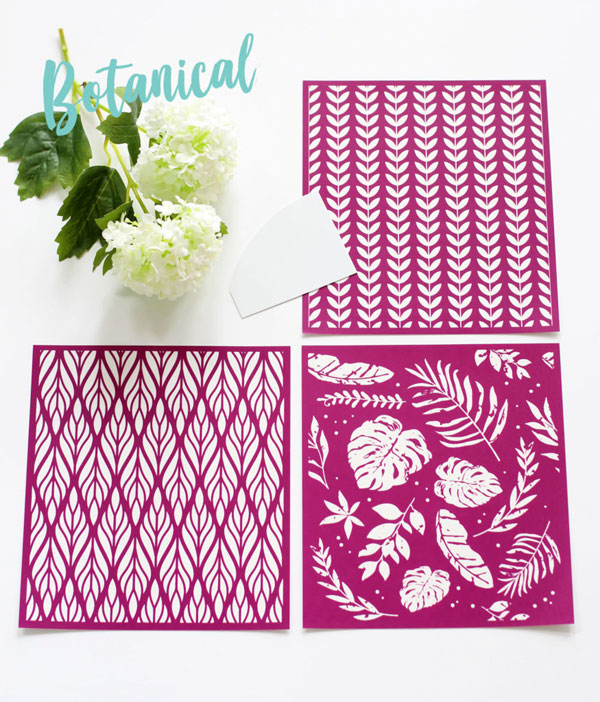
Silkscreen Stencil
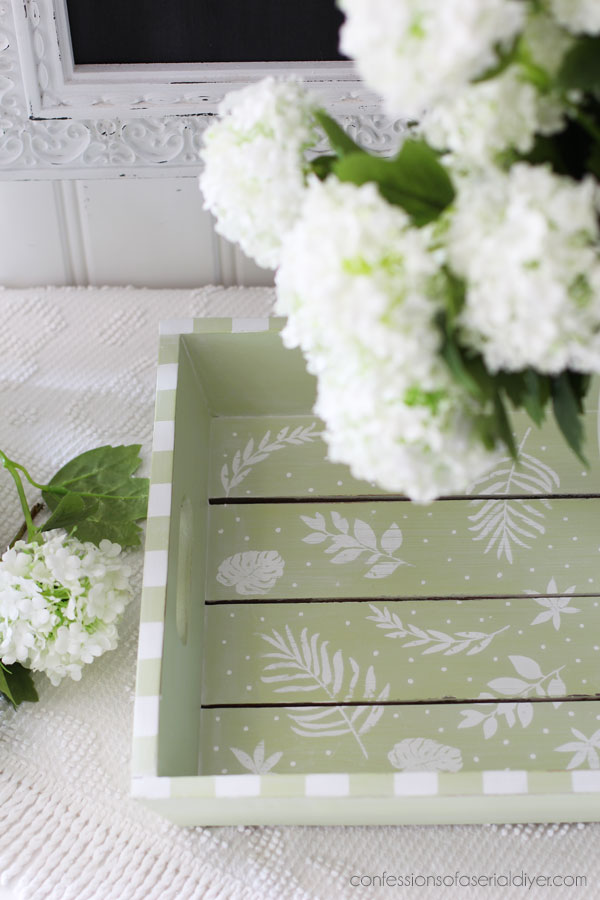
Then I decided on the Botanical silkscreen stencil from Dixie Belle’s Belles and Whistles line:
What are silkscreen stencils?
- They are adhesive and can be used up to 10 times (I’ve pushed that!)
- They have a tiny mesh screen where the cut outs are
- They yield super crisp lines
- Very user-friendly
Because there is a tiny mesh screen in between the pattern which holds it together, you don’t have the weird breaks you see in traditional stencils that are normally holding those together.
But also, that means you will need to push the paint through the mesh screen.
Applying the paint is super easy to do using the enclosed tool.
I like acrylic craft paint for this as it has a longer dry time and washes off easily. I like to pour some onto a paper plate.
You just pick up a little paint with the included spatula tool and spread it across the surface:
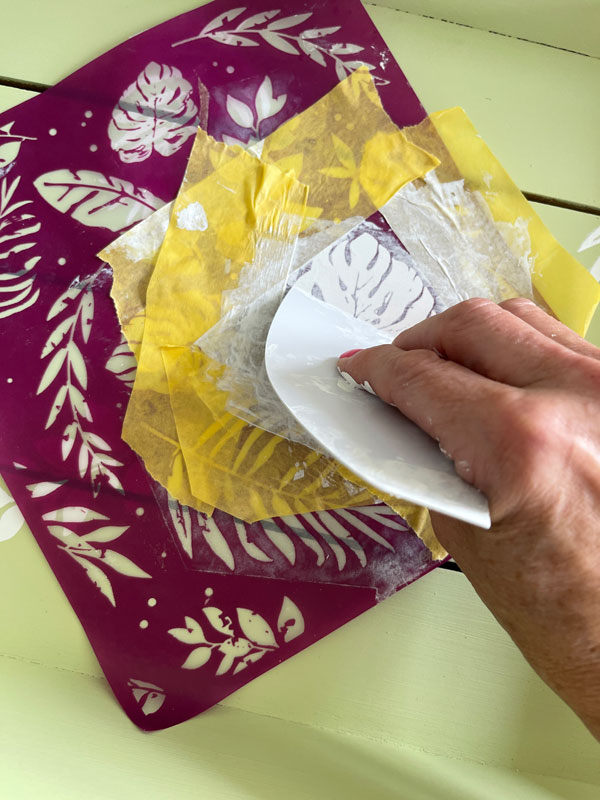
Then use a clean edge and go across the surface a couple more times to remove any excess paint. You can also use this silicone thing-a-majig tool if you plan to do a lot of stenciling.
Then, just pull the stencil off!
I isolated the leaves I wanted to use using Frogtape and then continued adding flora in a random pattern. You could use the pattern as-is also. Each edge matches the opposite edge, so you can create one larger continuous pattern by matching the edges if you like.
No need to rinse in between uses!
You can keep reusing the same stencil over and over…about five or six times and then you may want to give it a rinse. Blot it dry with paper towel on both sides and you can get right back to it. Your surface will still be tacky!
Then, I used Frogtape to add a striped border all the way around the top edge. I pulled the tape off as soon as I applied the second coat:
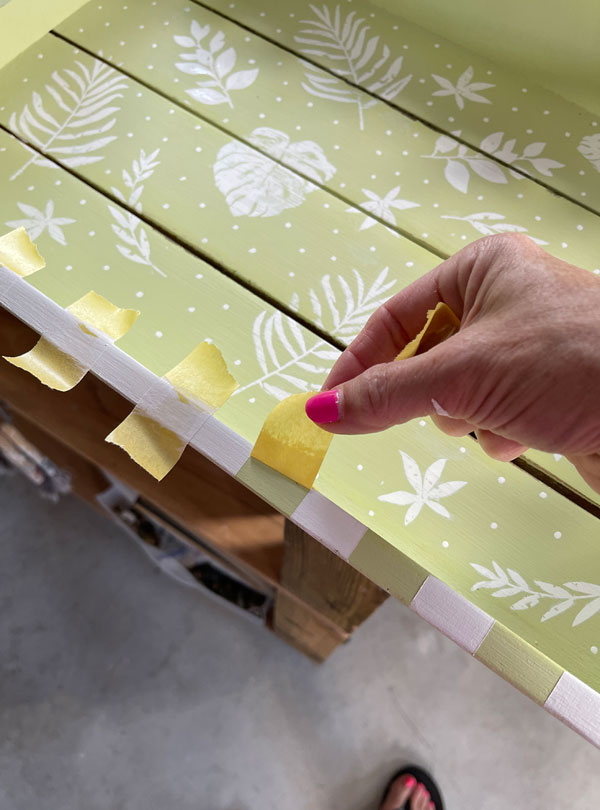
You can also see that I went back with my stylus and added dots in between the pattern as well.
Sand
I sanded lightly all over with 220 grit sandpaper.
Glaze to Seal
I decided on Whitewash Glaze to seal this piece. Glaze adds effect, but it also acts as a sealer.
I brushed it on and then wiped it off with a soft, clean cloth:
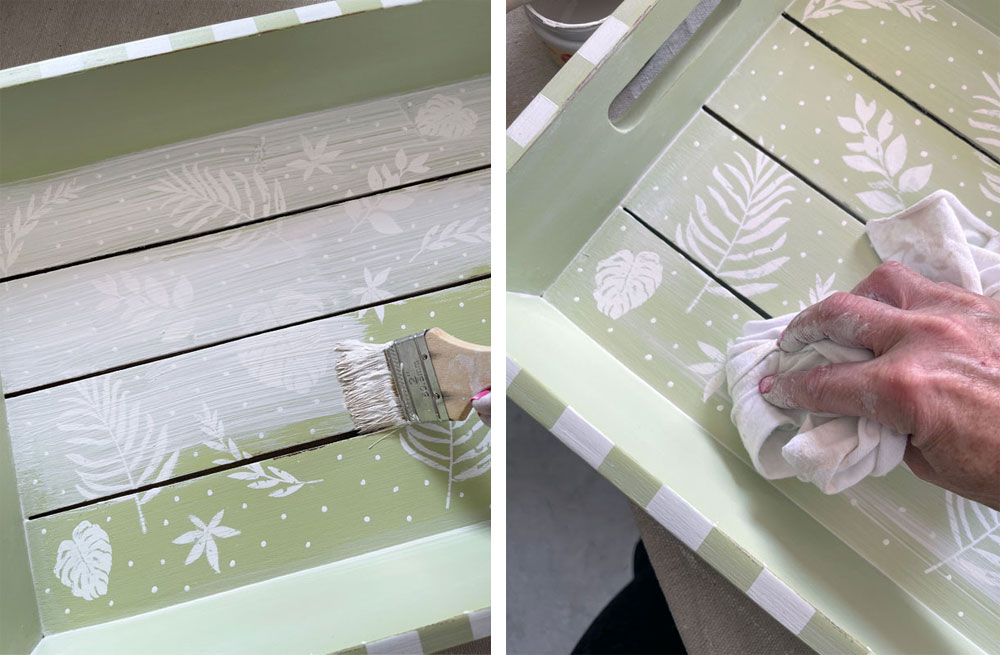
I just wanted a bit of a softer look, and this accomplished that.
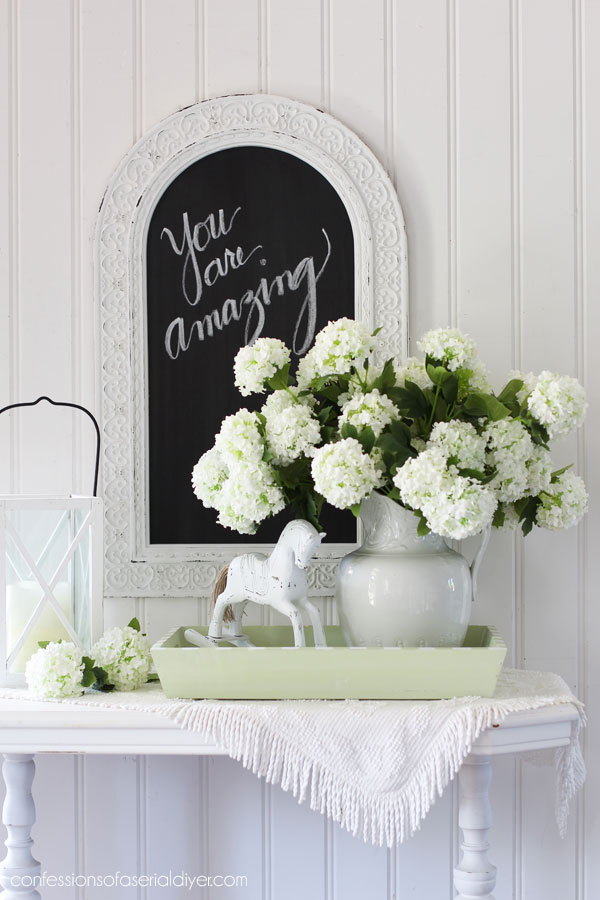
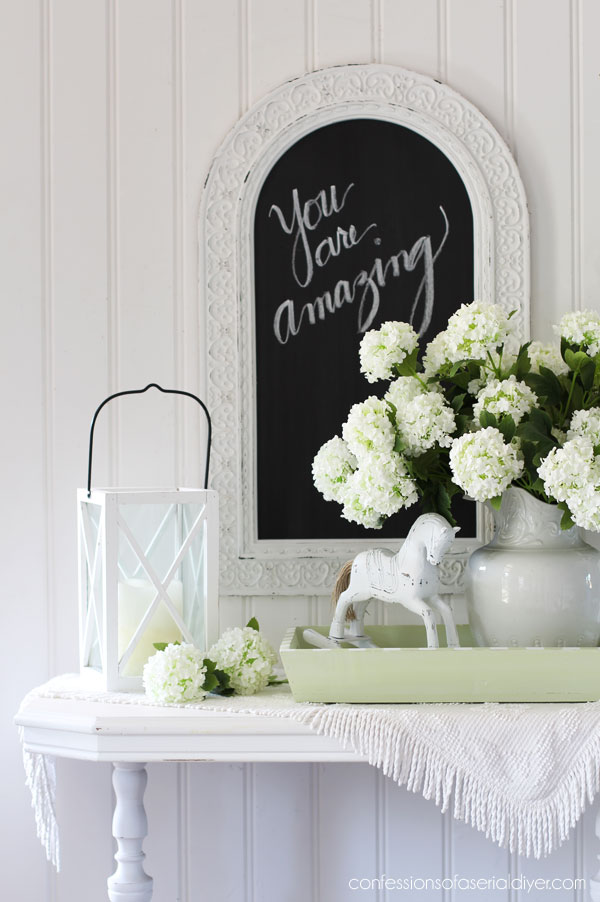
The after
Here is how this dirty old tray looks now!
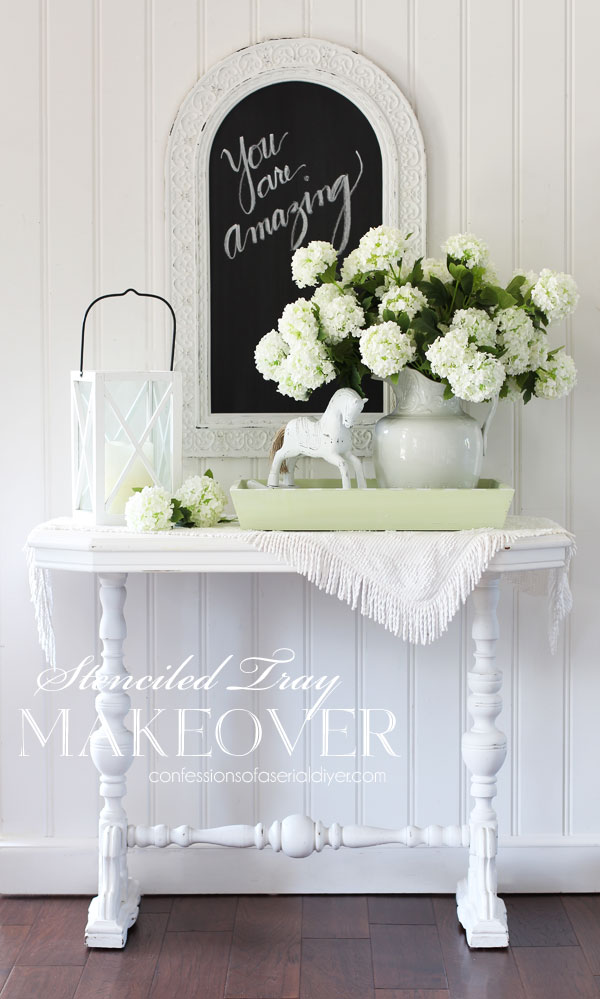
So fresh and so clean clean!
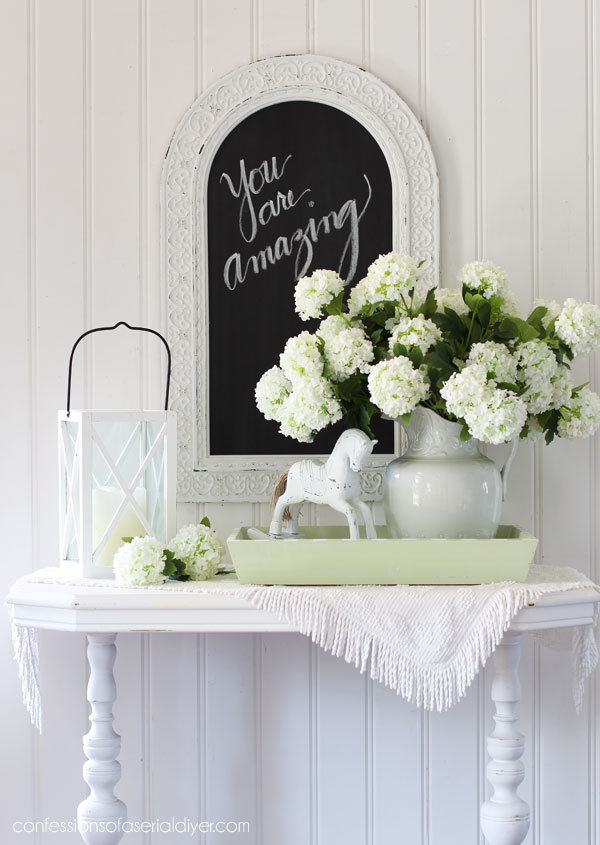
The stripe detail adds a touch of whimsy…
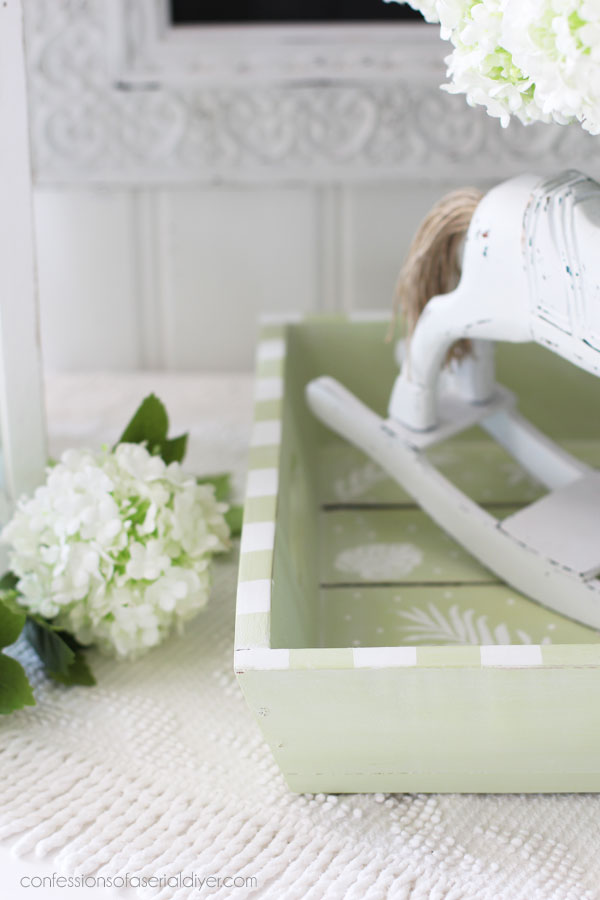
An overhead view shows off the pretty stenciled bottom:
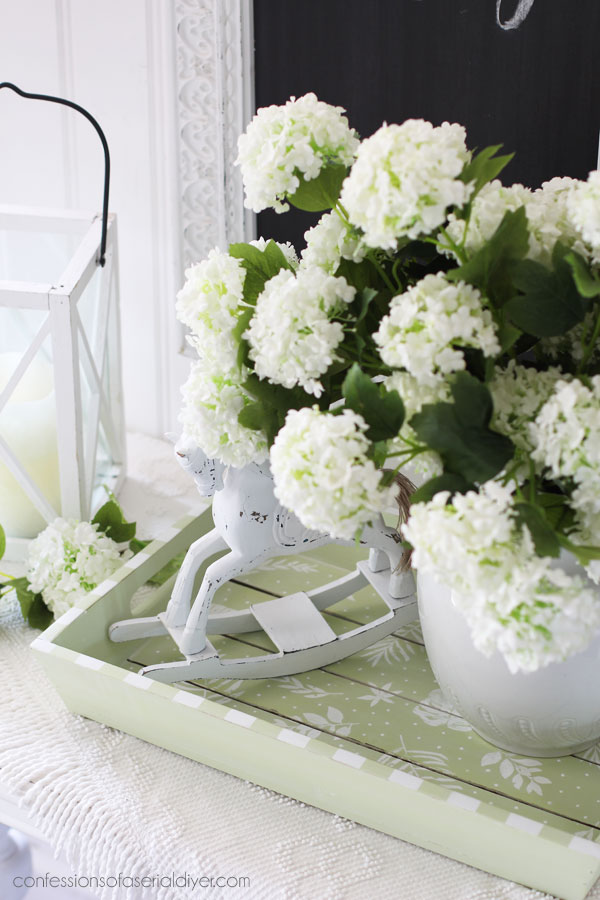
This was a fun one to play with. I can imagine it in a sunroom or on a covered porch, maybe?
You can see all the stencils I have in my shop HERE! There are 10 silkscreen designs to choose from!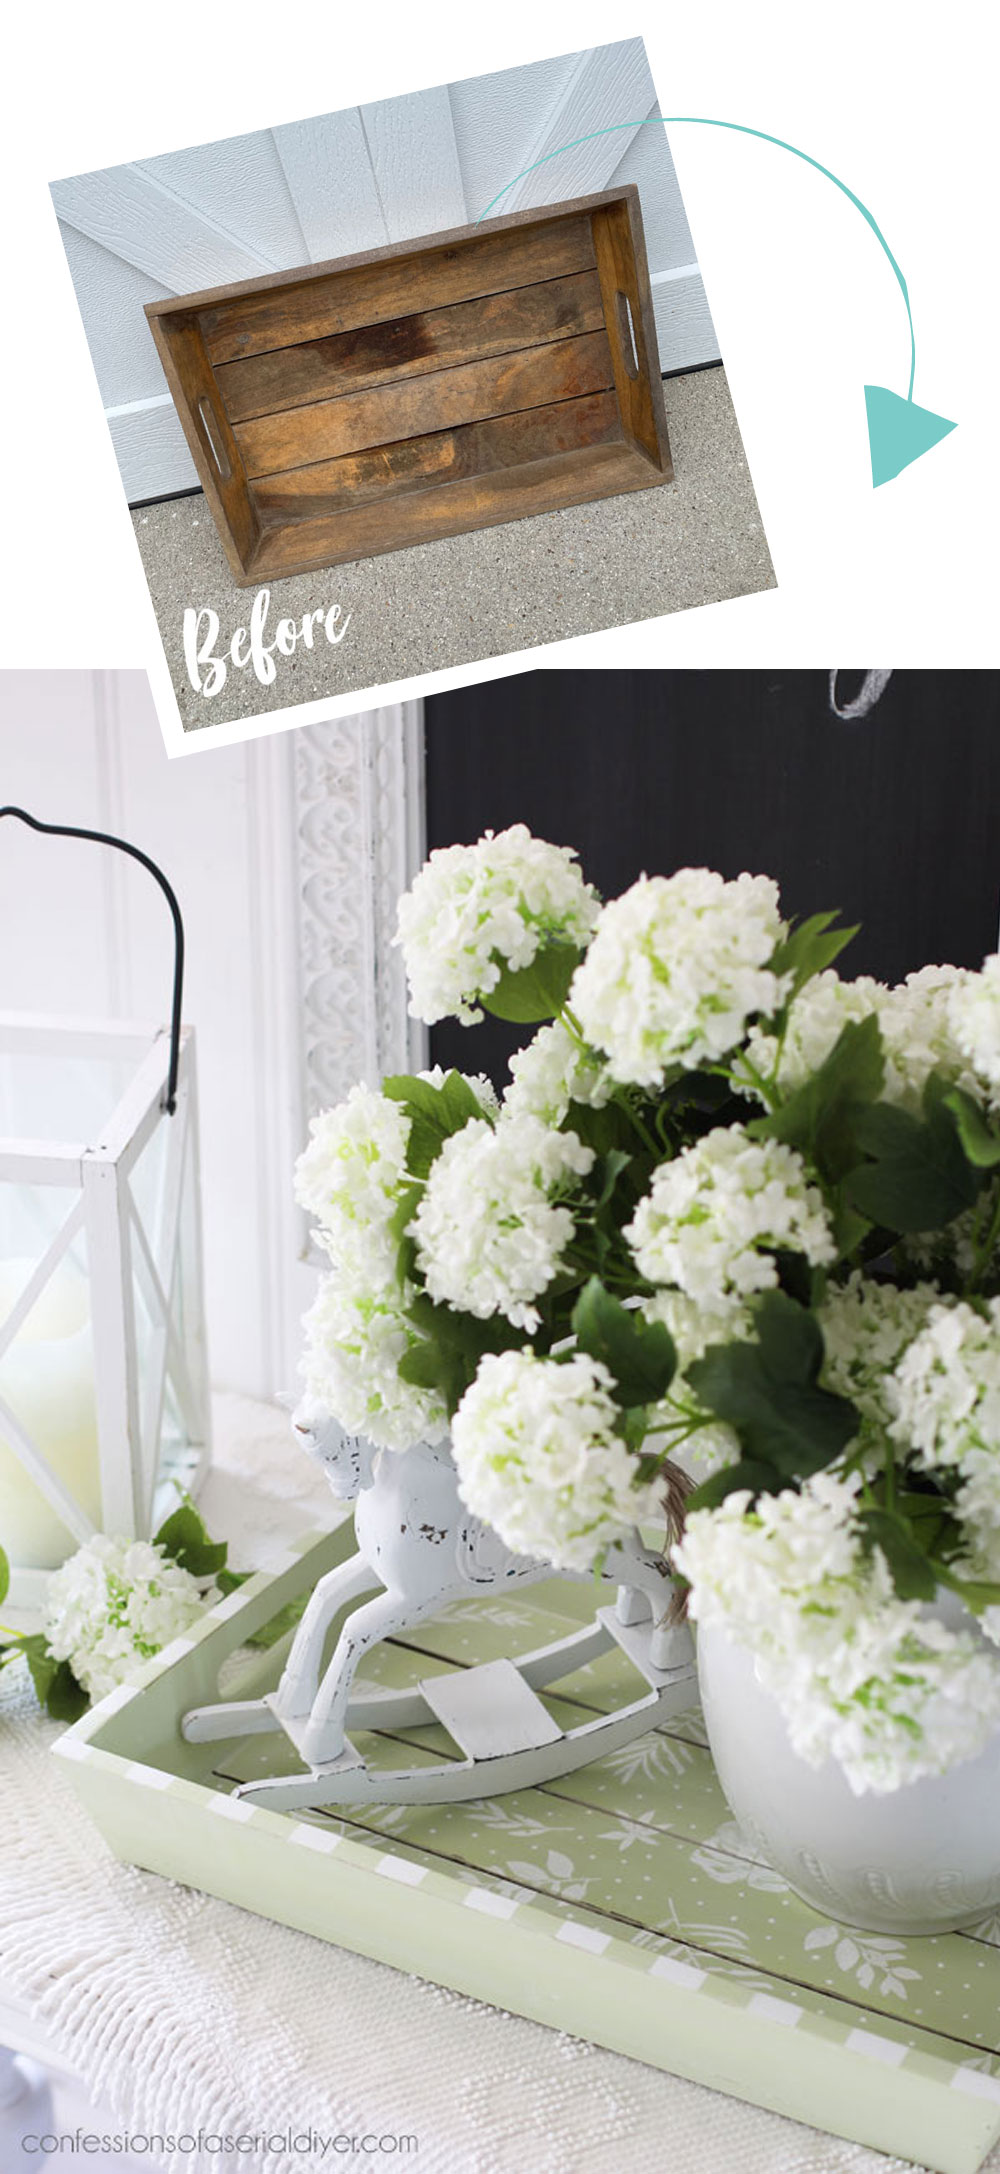
This table and this dresser are two of my favorite silkscreen stencil projects!
That’s one more done!
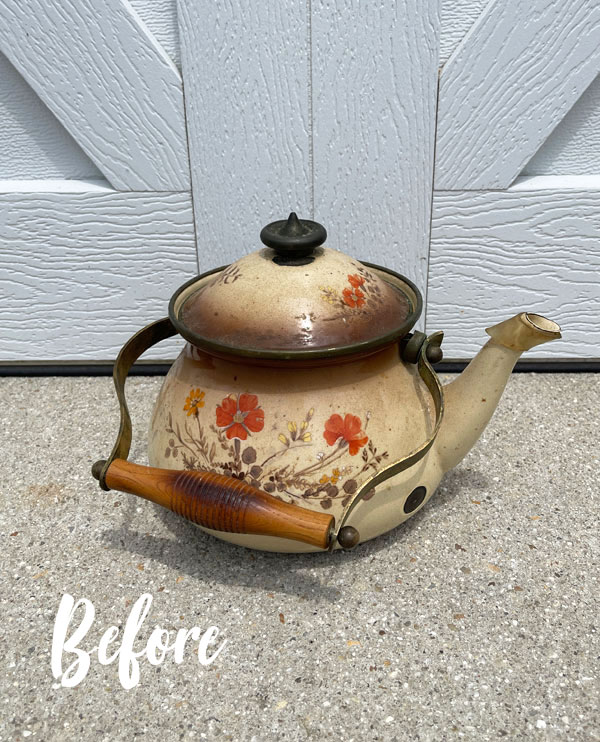
I’ll be back on Tuesday with the tea kettle:
Have an amazing weekend, dear friends!
UPDATE: You won’t want to miss this fantastic makeover!! See it HERE now!
XOXO,

Don’t Miss a Thing!
If you like what you see, there are several ways to follow along!
EMAIL * INSTAGRAM * FACEBOOK * PINTEREST


Get FREE SHIPPING on all orders over $50. No code needed at checkout! Orders under $50 always enjoy $8 flat rate shipping! Most orders ship same or next business day!


Mary Kaiser says
Oh my, it is so fresh, clean, and beautiful now! It sort of has a cottage type vibe now, I Love it!! That color is so fresh and pretty! It looks like a pretty good size tray with all the beautiful items you have displayed in it. Are those fresh flowers, or fake? They are beautiful! I love how this tray turned out!!
Christy says
Thank you, Mary! This green is so fresh and pretty for sure, and it is a really nice sized tray. The flowers are fakies ha ha and usually live on my dining room table! Have a fantastic weekend, my friend! XOXO
Janette says
So pretty, love the colour and gorgeous design, so glad you rescue these ‘old’ pieces. x
Christy says
Thank you so much, Janette! XOXO
Rose Lefebvre says
What a lovely tray! You scored another good find and did a wonderful redo on it.
Christy says
Thank you, Rose! XOXO
Carol says
OMGosh that’s beautiful!
Christy says
Thank you, Carol! XOXO
Cecilia says
I love how that turned out – the green is one of my favorite colors. Just beautiful! We finally got a break from the heat with some much needed rain. Looking forward to Fall but it’s not here yet!
Have a great weekend!
Cecilia
Christy says
Thank you, Cecilia! This color always reminds me of summer lol. I’m so ready for some cooler temps for sure though! XOXO
Cyndi says
That is SO cute! I am working on a tray right now and I want to try some of your ideas on it! 🙂
Christy says
Thank you, Cyndi! It screams summer lol! XOXO
Karen Moore says
So pretty! I love botanicals.
Christy says
Thank you, Karen! XOXO
TRACY A TOTTY says
I love the arrangement of the leaves and the green color. I was wondering if you used the stencil for the dots as you have many more than the stencil has. You have a great talent for staging and you are quite inventive with your creations
Christy says
Thank you so much, Tracy! I used a stylus to create the dots. XOXO
Cheryl Atkinson says
Hi Christy! I haven’t used the mesh stencil yet. I have the dreamcatcher one. I don’t know why I chose that one but I love this one. It’s a little tropical but the dots give it a kind of winter look. Thank you for the inspiration.
Christy says
Hi Cheryl! This is a bit tropical for sure…I know I’ll be more ready for fall when the cooler weather sets in lol. It feels better today already! And I love the dreamcatcher one…I hope you get to use it soon! XOXO
Denise - Salvaged Inspirations says
That one WAS filthy but you cleaned her up beautifully my friend. 💕 I love using silk screen stencils. Such a crisp look and so easy, right?!😃
Christy says
Thank you, Denise! It was so gross lol. Yes…silkscreen stencils are amazing! Have a wonderful weekend!! XOXO
Mary Smart says
I really love that new Green color! I have never used those types of stencils yet and I will have to branch out soon.
Christy says
Thank you, Mary! I was skeptical of them at first as I had never used one. And then I did…they are fantastic! XOXO
Roger Lloyd says
I have been a do-it-yourselfer for many years and have kept some projects and sold others…… I sincerely want to thank you for your website…… you are my inspiration and mentor and I look forward to making new creations with ideas you share with us. You are truly a gifted artist!!!! Thank you so much!!!
Christy says
Aww I appreciate that so much, Roger! Thank you! Happy creating! XOXO
Peggy says
Love the fresh green color! Refreshing!
Christy says
Thank you, Peggy! It really is! XOXO
Jennifer Hamill says
That is just gorgeous.
And really looks easy to do.
Will definitely give that a go.
Jen
Christy says
Thank you, Jen! It is so much easier than traditional stencils for sure! XOXO
Niki says
It’s sunny and 75 headed to 98 here today….Thank-you for not rushing ahead to fall in your design for this tray! And eeeewww was it ever filthy. Anyway I like the soft green botanical theme. The hydrangeas go so well with it.
Christy says
Thank you, Niki! It is really hard to scream fall when it is so hot outside lol! Glad you enjoyed this summery redo! XOXO
Diana Cosgrove says
Good Morning Christy… You are amazing! Your tray is so lovely! I am inspired to try one from my stash. I am tackling my first project, a wood stool with a lace transfer and am wondering at what stage do I sand with 220 grit sandpaper? After the transfer is applied or before? I tend to paint too heavy and think that I should smooth it out before the transfer. Need your advice! Thank you. Your student, Diana
Christy says
Hi Diana! Thank you SO much!! You want to sand before applying your transfer. You can sand after, but it will give your transfer a distressed appearance. Enjoy! XOXO
Cecilia from Georgia says
I always look forward to your creative designs that make a simple item into a beautiful piece for someone to enjoy for a long time. The green is such a soothing color and the botanicals are perfect with that color.
Christy says
Thank you so much, Cecilia! It was nice chatting with you yesterday! Have fun with your hutch! XOXO
dodie says
darn cute!
Christy says
Thank you, Dodie! XOXO
Michele M. says
LOVE LOVE LOVE LOVE LOVE THIS TRAY. Sorry but I just had to shout.
It is so cute now!!!!! That color green is awesome. Well done, lady.
Christy says
Ha ha I love that!! I’m so glad you enjoyed it, Michele! XOXO