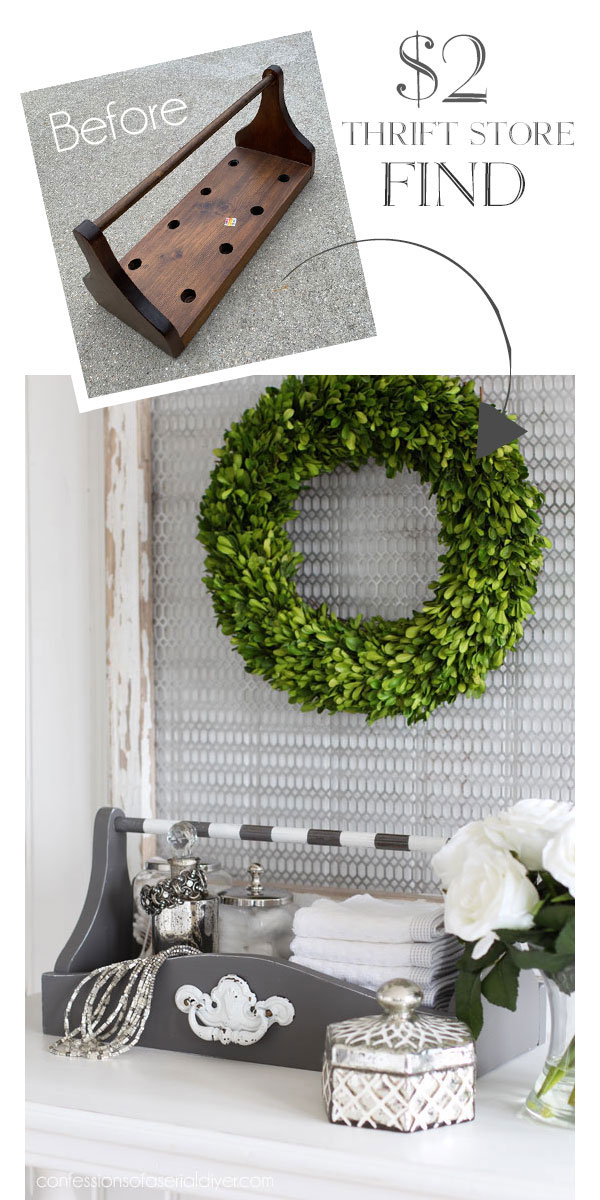
Hello sweet friends! I am continuing to work through my latest thrift store haul, and today’s project is this weird tote thingy:
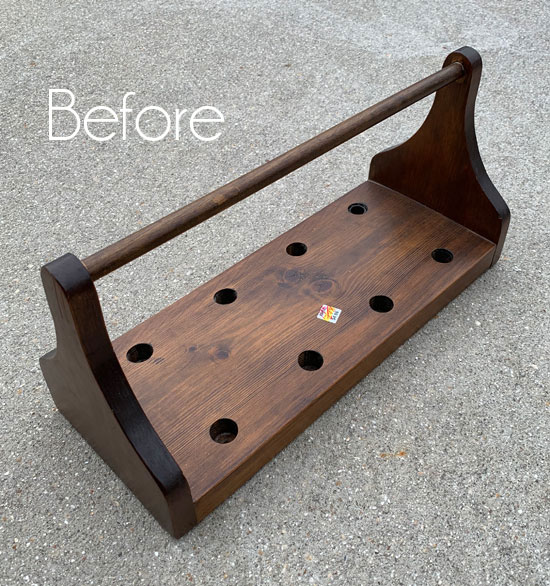
Inside one of the holes at the top right in that photo was one of those rubber things that you would find around the base of a votive holder to make it fit inside a candlestick. I am assuming this held eight votive holders with candles at one time, but what would you use that for? And would the handle get hot? I’ve included a few affiliate links so you can find the products I love.
Anyway, because I am always drawn to wood pieces at the thrift store, and because this was on clearance…marked down not once, but twice to the bargain basement price of $1.98, I brought it home.
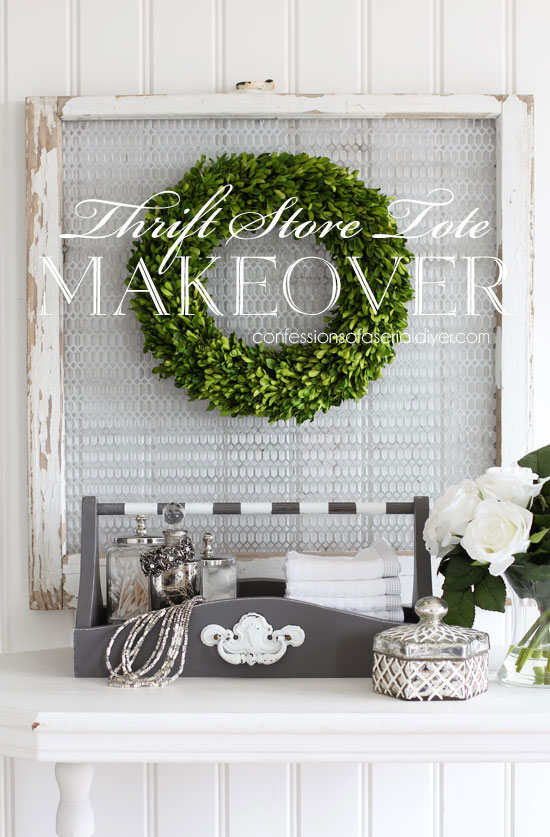
I decided to attempt to turn it into a regular, functional tote, and I think I did okay!
Right?
First I had to cover those holes on the bottom, so I found a scrap piece of luan that was perfect. I cut it with my table saw…
Next I needed something to use for the sides. I found this curved side piece left over from our old coffee table (See the new version HERE.) and used it as a pattern to create two new sides:
I used my jig saw to cut these pieces out. Then I attached the bottom and new sides using wood glue. I also used my nail gun to secure the sides.
I found this jar of Hurricane Gray from Dixie Belle in my stash and decided to give it a go for something different:

Looking better already!
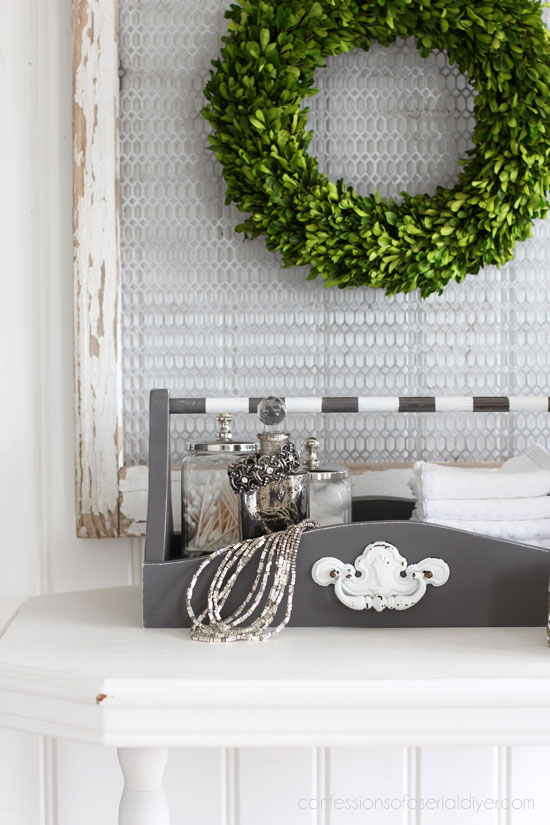
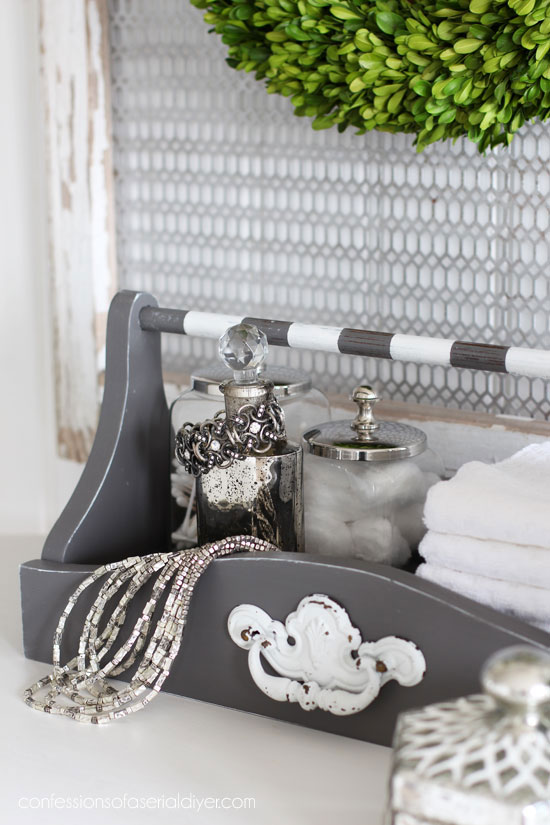
I decided to add a few stripes to the handle for a fun touch using FrogTape for delicate surfaces, and I chose a pretty paper to add to the bottom using matte Mod Podge:
I also dry-brushed the edges very lightly with white paint and a very dry brush.
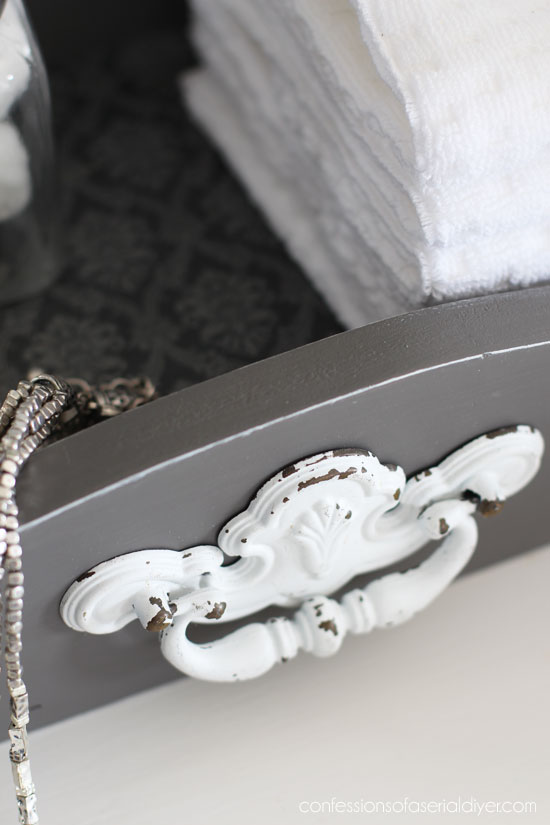
Then I found an old handle I had painted white ages ago. It has just been rolling around in my hardware bin getting perfectly chippy.
I sealed everything with Dixie Belle’s Clear Coat in Satin using this brush…
It dries to a lovely subtle sheen.
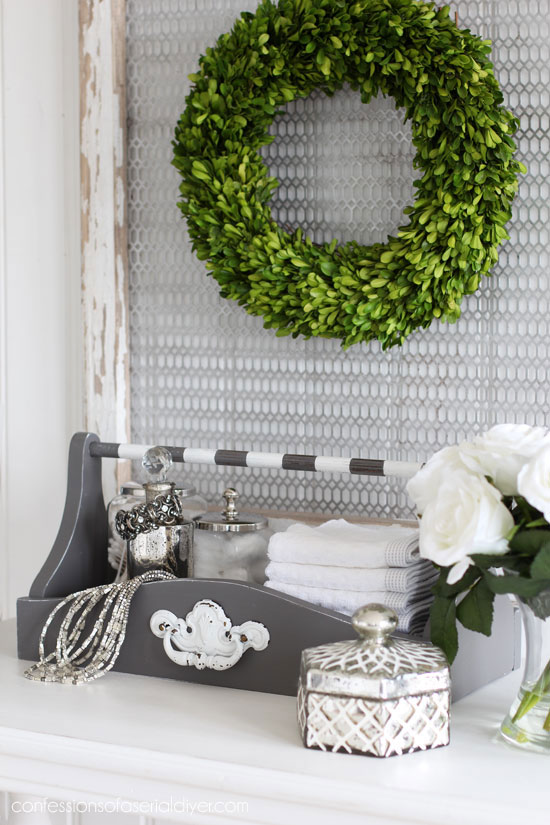
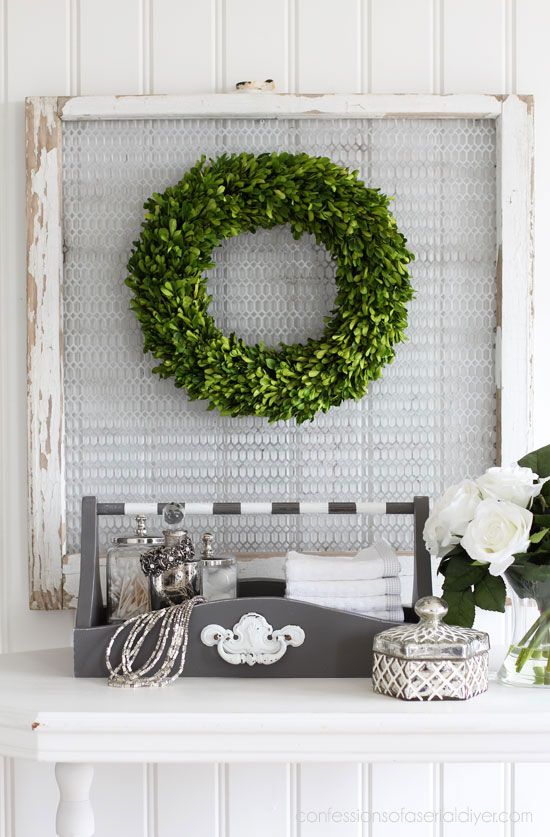
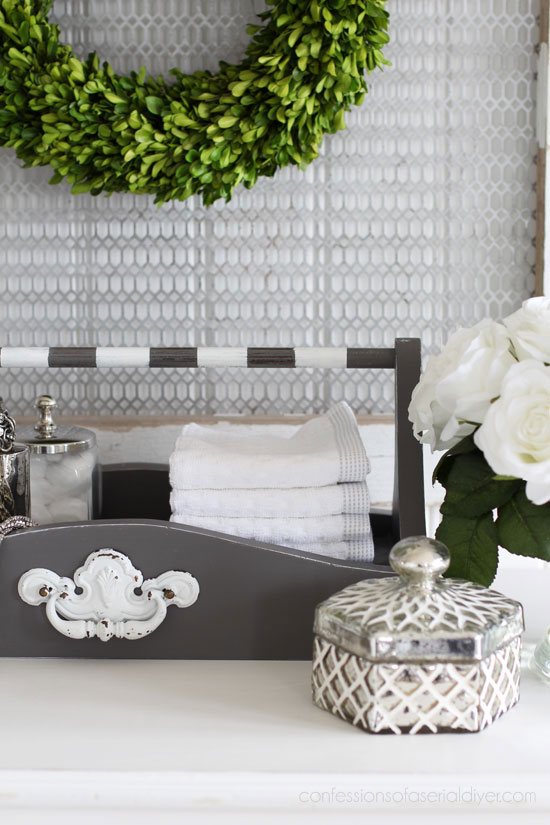
I staged it for a dressing area, but it would be great holding extra TP or in the kitchen holding napkins or jars with cutlery in them.
Here’s a closer peek at the bottom…

I sealed that with the satin clear coat as well.
The stripes on the handle add a touch of whimsy, but if that’s not your thing, it would still be cute without them.
That’s one more project from my latest thrift store haul complete:
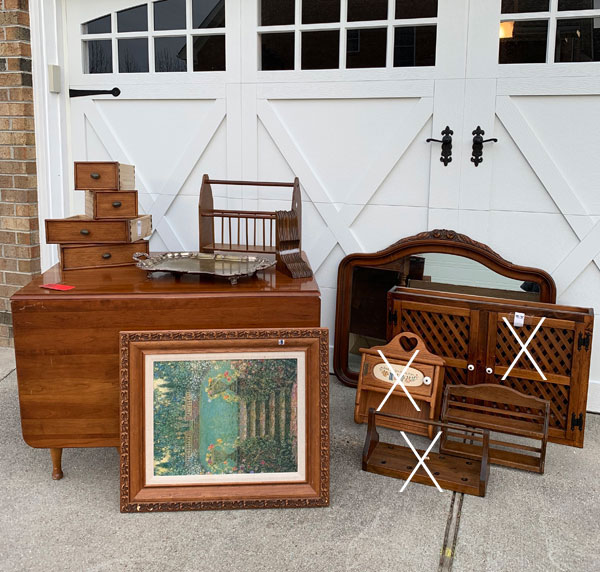
See the other two makeovers HERE and HERE if you missed them!
I’ll be back on Thursday sharing the mirror!

See ya then!
UPDATE: See how this mirror turned out HERE now!
XO,
![]()
Don’t Miss a Thing!
If you like what you see, there are several ways to follow along!
Email * Facebook * Pinterest * Twitter *Instagram


Mary Kaiser says
That is adorable now, so creative. I was shocked when I saw the color you used. It is very pretty. Have I told you lately that you are amazing?
Christy says
Aww thank you SO much, Mary!! You’re the best cheerleader! I don’t pull out the darker colors too much, but it’s fun every once in a while! XOXO
Petra says
That’s delightful 🙂 and I bet your little shop is getting quite full 😀
Christy says
Thank you, Petra! It would be except these makeovers are piling up in my office lol…need to make a drop off to the booth this week! XOXO
Sheila DelCharco says
I could not imagine what you could possibly do with that but we’ll done! That’s quite a change!
Christy says
Honestly I didn’t know either when I found it ha ha. Glad I was able to give it a new life. Thanks, Sheila! XOXO
Paula says
What a strange piece! When I first saw it I thought that maybe it came with glass vases and that it was used for flowers. I like the update you gave it and it’s sure to be a hit when you put it in your shop.
Christy says
Oh dang…I bet you could be right about the flowers. That would have been pretty, actually! Thanks, Paula! XOXO
Christina in SW FL says
Christy, this tote is adorable! SO many uses! Some faux succulents in the bathroom… hmmmm…. I need to get busy! 🙂 Love the stripes on the handle!
Way to go!! Can’t wait to see the mirror.
Christy says
Thanks, Christina! Yes this would be perfect for faux succulents! XOXO
Claudine says
Adorable, as usual, Christy! 🙂
Christy says
Thank you, Claudine! XO
Dee Hoertz says
Hi, Christy. I enjoy reading your posts and especially your clear, concise directions. I have tried to mod podge paper to the inside of a tray, and even a small drawer and got a wrinkled mess! My mod podge is not super new and was thick. What’s your secret for the smooth surfaces you end upwith?
Christy says
Thank you, Dee! I have found that if you use the bare minimum of Mod Podge, you get less wrinkles. I usually use fabric instead since it is woven and wrinkles are not an issue at all. XO
Joni says
You are my hero, Christy. I love waking up on Tuesdays to an email from you. I’m sure I’m not the only one who would enjoy a look behind the curtain. Would you be willing to ever do a post on what your workshop looks like and how you store your materials and supplies?
Christy says
Aww you just made my day, Joni, thank you!! My workspace is just the garage, but it might be fun to share it! XOXO
Joni says
I’d love to see it! I’m always amazed at how much you get done.
Christy says
I might just have to share then! 🙂
Tonya Taylor says
Christy, I love all your wonderful fines and make overs. I to love a good thrift store bargain and hope to be able to start redoing some pieces I have bought. Thanks again for all your inspiration!!
Christy says
Thank you, Tonya! Good luck with your finds! XO
Cecilia says
Hm, I can’t imagine candles in that thing. Love what you’ve done with it!makes much better sense as a real tote plus it looks great with all your special touches. I love seeing how you transform pieces!
Christy says
Thank you so much, Cecilia! I’m glad you enjoyed this one! XOXO
Ange says
That is a sweet little tote. Could be perfect for coffee/tea too.
Christy says
Thank you, Ange! Yes…perfect for K cups too! XOXO
MJHoop Hooper says
Talk about a sow’s ear to a silk purse!
I couldn’t even imagine what you might do with that piece!
Chalk up another winner. Well done.
Christy says
Thank you so much, MJHoop!! XO
Leslie Connolly says
Beautiful. I get so inspired reading your posts. I am also drawn to the wooden items in the thrift shop.
You do such nice work. Looking forward to seeing the mirror on Thursday.
Christy says
Aww yay! Thank you, Leslie! XOXO
Ann Williams says
Very neat!! Good job. I can’t wait to see what you do with the table!!
Christy says
Thank you, Ann! The table will be coming next Thursday! Stay tuned! XOXO
Nancy @ Artsy Chicks Rule says
Perfectly tote-y now!! Love what you did with this one! 🙂 xo
Christy says
Ha ha yes…it is now what is always should have been! Thanks, Nancy!! XOXO
sharon girvin-davison says
this looks fantastic! love the added drawer pull. makes me want to. get some saw skills too!
Christy says
Thank you, Sharon! It took me a while to get comfy with the saws…but practice helped! XO
Sharon gievin-davison says
oh, i forgot to ask….what is the wire or metal in the window frame? it looks great ans i could see something like that being used with moveable hooks for holding necklaces too.
Christy says
That metal was left over from a project we did at our old house. You can see more of that window transformation here: https://www.confessionsofaserialdiyer.com/one-more-use-for-an-old-window/ It would be great for organizing jewelry! XO
Marcie Lovett says
Nice save, Christy! I thought you’d take it apart and use it for some other purpose, but adding and upgrading was the answer. Functional and beautiful! That coffee table just keeps on giving back, doesn’t it? ????
Christy says
Thanks, Marcie! I stared at this thing long and hard trying to decide what to do with it, but in the end, it needed to be what it always should have been…a simple tote! And yes that coffee table has been very generous lol! XOXO
Debbie in TX says
Yep, you saved it!! It looks wonderful, and I am loving the gray color. I really like the curved sides you added, and the handle is the cherry on top. Such a wonderful makeover. Have a great week!!
Christy says
Thanks, Debbie! I enjoyed playing with this darker gray for a change. Hope you enjoy your week too! XOXO
Becky says
Oh this came out SO stinkin’ CUTE!!! I love the curvy sides… the handle on the front… the stripes! So much pretty… and all in one piece! I need to make a copy-cat. It would be absolutely perfect for the table behind my couch. Well done!
Christy says
Thank you, Becky!! Go right ahead and copy away, my friend! XOXO
Joanne D. says
You girls just crack me up! I love your videos & blogs. I love the same things you do and wished I lived closer to you. thanks for your great crafting talents!
Christy says
Thank you so much, Joanne! And I’m so glad you enjoyed the videos! XOXO
leslie says
Your work is A-MAZ-ING!! Just wish I had access to some equipment. I see so many things at my thrift store where I think if only … sigh!
Can’t wait to see what you come up with next …/leslie
Christy says
Aww thank you so much, Leslie!! A few of the right tools can make big changes! XO
Mary says
Excellent job! Can’t tell how much I appreciate your talent and work ethic. You always do such a good job on the outside and the inside, really like the paper. Keep up the good work!
Christy says
Thank you for that, Mary! I really appreciate your kind words! XOXO
Mariele Storm says
Yes! It is a centerpiece. You put votives in it, maybe put some greenery around for the holidays… that is how I always saw them used. I see them occasionally when I visit my grandmother at a retirement center. 😛 Why they’re shaped like a tote, no idea, maybe so you can pick it up easily once dinner is over with??
Anyway, love what you did with it. It’s much more useful now! I bet your booth is looking sparkling. 🙂
Christy says
I kind of love that idea! Oh well too late lol! Thanks, Mariele! I need to take a trip to my booth…my new pieces are collecting in my office! XOXO
Neva says
I believe this is a pipe stand (smoking pipes). The bowl of the pipes would sit down in the little divots on the base, sometimes the divots would have rubber in them to secure the pipes. The pipe stems would lean against the handle/bar across the top. Just my thoughts. Very pretty transformation.
Christy says
Thank you, Neva! That makes total sense. Guess we’ll really never know, but you might be right! XO
Mariele Storm says
It does look a bit like this pipe stand https://ae01.alicdn.com/kf/HTB1mYExIpXXXXXkXVXXq6xXFXXX8/221776199/HTB1mYExIpXXXXXkXVXXq6xXFXXX8.jpg
But given how small the holes are and how they aren’t rounded… definitely a DIY piece. 🙂 I love all the theories on this mystery item. Watch it turn out to have been a DIY failure/accident someone found in their parent’s attic and dropped off at the thrift store! 😉
Christy says
Could be! And yes it is fun to dream up the original purpose, but it very well could have been a DIY gone wrong lol. XO
Cecilia from Georgia says
Cute as pie! I have a piece I’m itching to pair stripes on but scared I’ll mess it up ????. I’m reading back over your tutorials for stripe and hope they look good. Thanks for sharing your process for transforming beasts to beauty! XOXO
Christy says
Go for it!! Using the tape to measure the stripes out makes it so much easier. You know I love to share…thanks, Cecilia! XOXO
Sandi says
So inspiring. I like you posts a lot
Christy says
Thank you, Sandi! XO