Hello lovelies!! I love that y’all seem to be as excited as I am about my new pile of treasures I shared last week! I can’t wait to get started, but first, I wanted to share a project I did for one of my dearest friends.
I get a lot of people asking me to redo things for them or help them redo things, but honestly, as much as I would like to, I just don’t have the time to help everyone. Plus, I don’t want the pressure of being responsible for someone else’s vision, you know? I don’t mind showing someone the basics to get started so they can tackle a project on their own, but I try not to take on other people’s projects as much as possible. (My sister is different because she lets me do what I want ha ha!) This friend I’ve known since before I was married the first time, before babies, and we’ve both helped the other navigate the rocky road of divorce, so when she mentioned she wanted to update a cabinet, I made an exception.
I’ve included a few affiliate links so you can find the products I love.
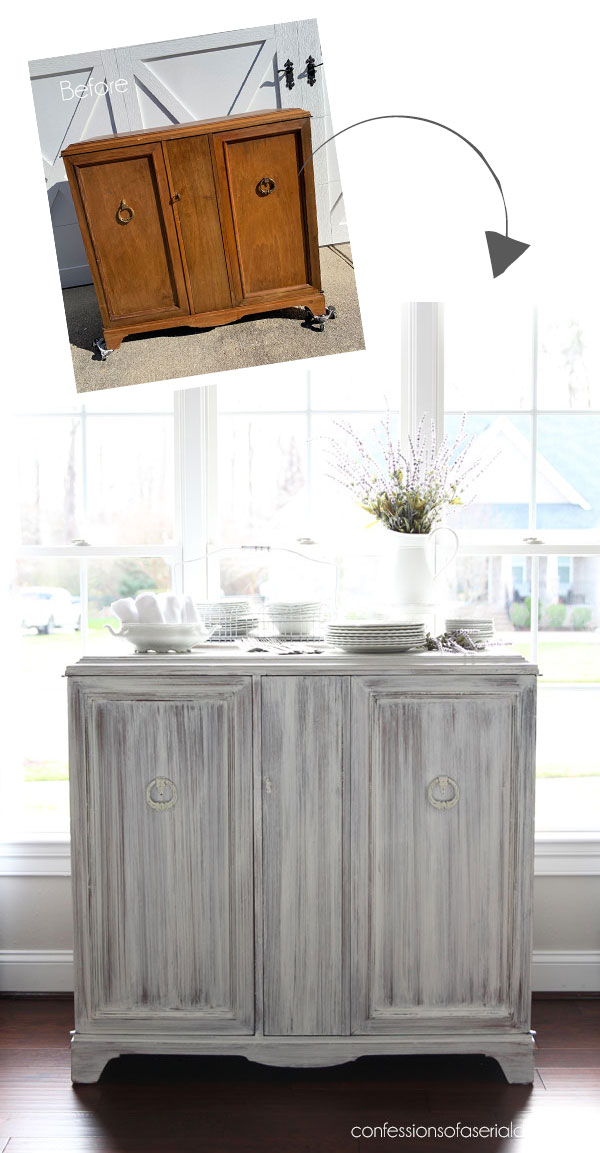
Here is what she wanted to breathe new life into:

(You can find those furniture wheels HERE.)
And here is the inside:
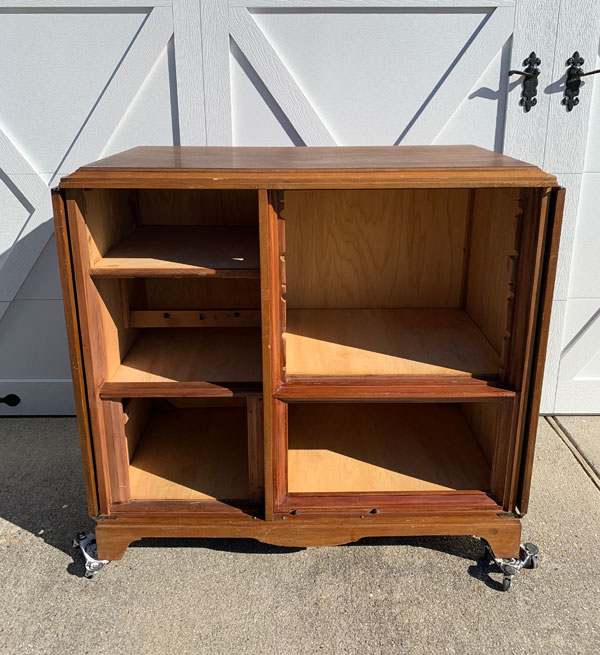
I’m not sure what kind of cabinet it is or what it was made for. She believes it held a small TV at one time. It looks like it may have been handmade because of the raw wood and odd moldings on the inside.
She wanted to lighten this cabinet up and requested a whitewashed look.
Here is what I did to lighten up her cabinet:
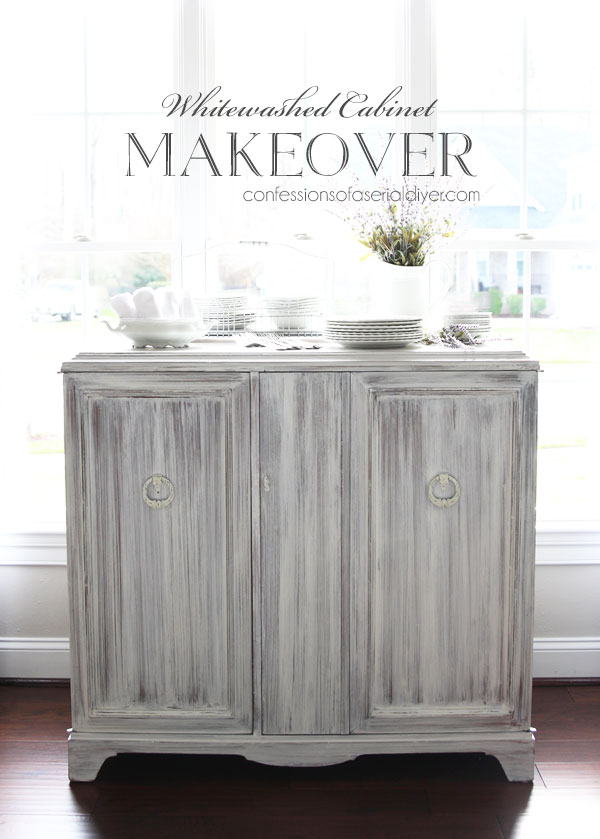
I normally prefer to use a gray base for whitewashing (You can see my process for that in this post HERE.), but my friend wanted the base to stay brown so it would tie in with her existing wood furniture.

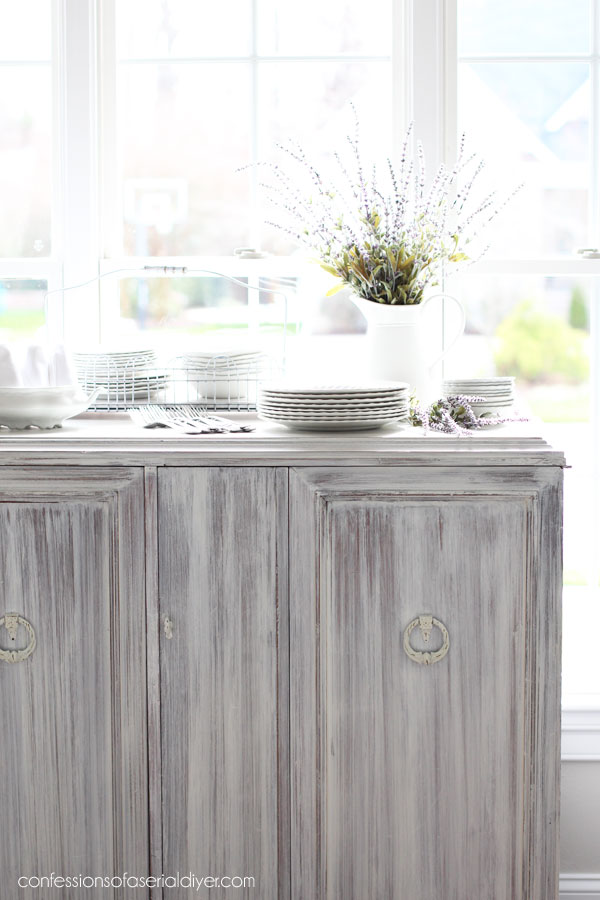
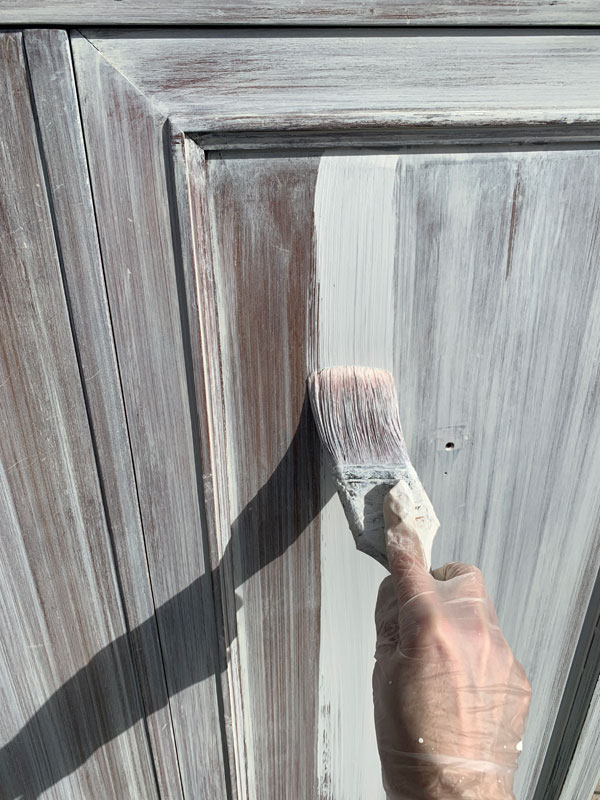
To get this look, I mixed water and Dixie Belle Cotton with about one part water to three parts Cotton. Then I applied it with a brush and simply wiped it back off right away with a cotton cloth.
Here is what it looked like after one application:
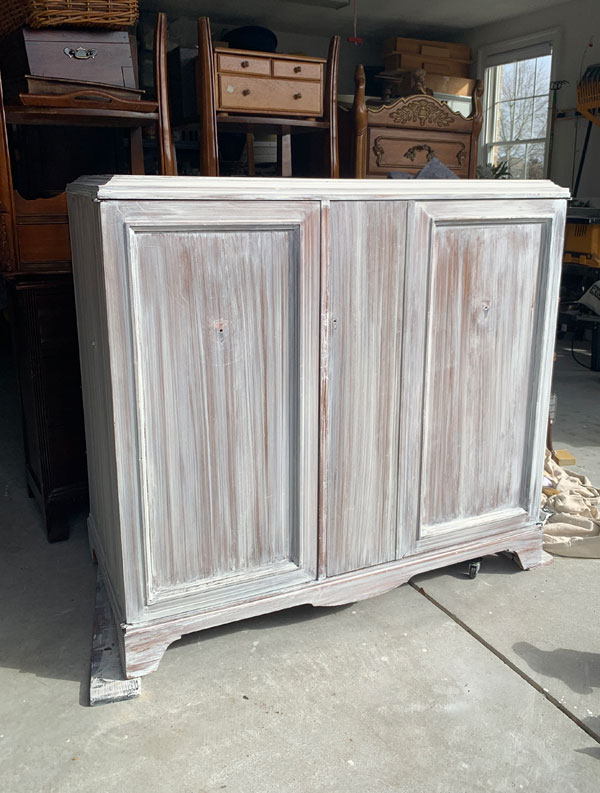
It needed a second coat, so again, I applied the watered-down paint with a brush:
Then I went over it right away with a cotton cloth:
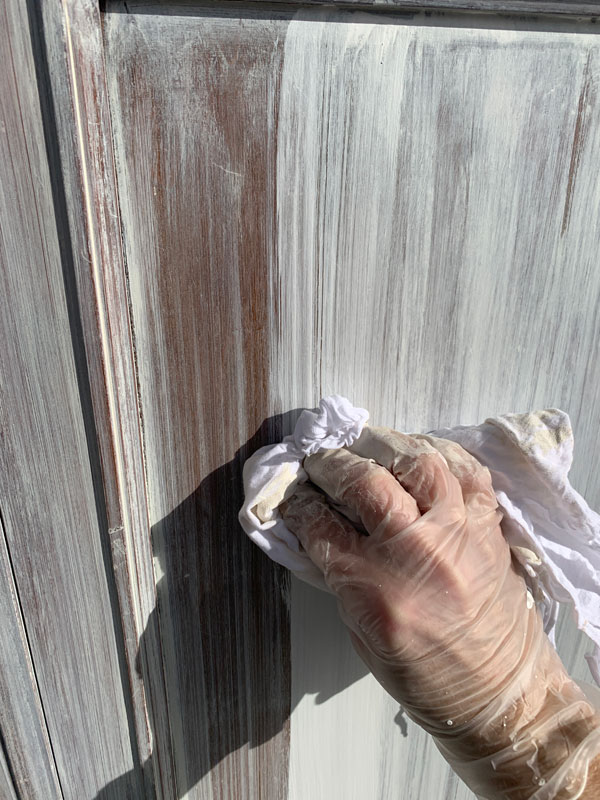
I wear gloves because removing the paint with a cloth can get pretty messy.
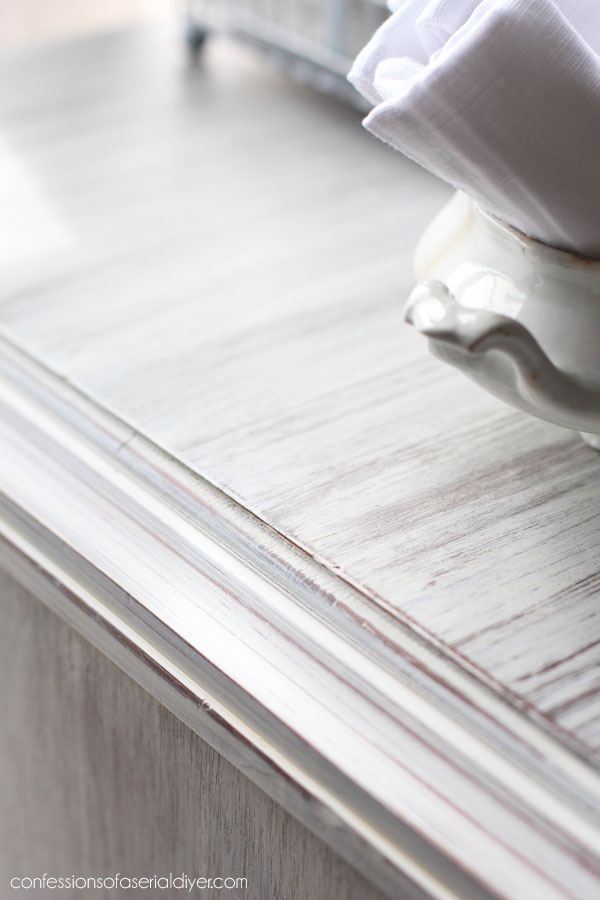
I try to wipe in nice straight lines since you will see the marks left by the cloth.
If you don’t like the way it looks, simply add more paint and wipe off again. You can also use a cloth dampened with water to remove any paint if you get too much in one area.
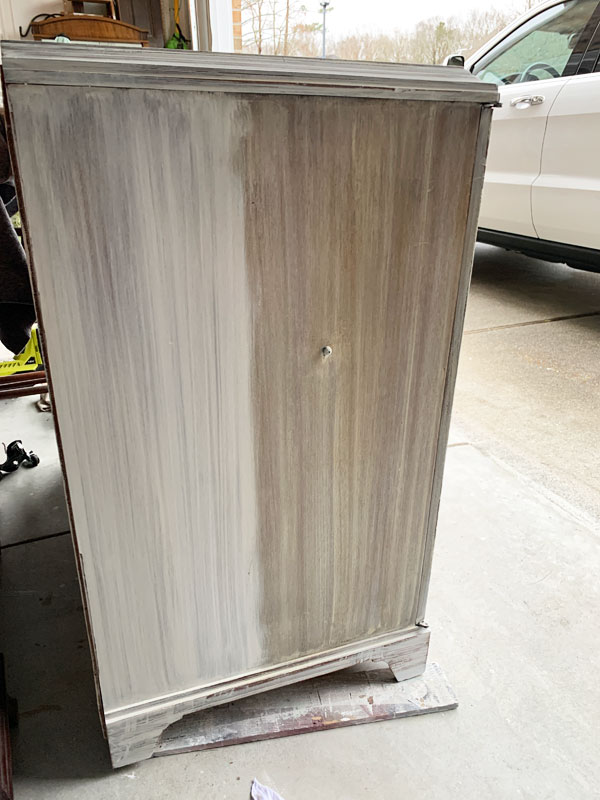
Here is where trouble set in. I went to apply clear coat in satin on the side of the cabinet to seal, and it yellowed. I have never experienced this with Dixie Belle clear coat. The sealer did NOT cause the discoloration. It was the tannins from underneath coming through, and that is when I realized that this cabinet or the sides at least were made of cherry.
If I were painting it solid white, I would likely have noticed the discoloration right away, and I would have taken another step before proceeding, but because we were going with this whitewashed look, it was hard to tell. Had I realized it was going to bleed, I would have used Dixie Belle BOSS in clear first. Had I given this cabinet a coat of the BOSS in clear before getting started, that would have sealed in those tannins and still let the brown show through like my friend wanted.
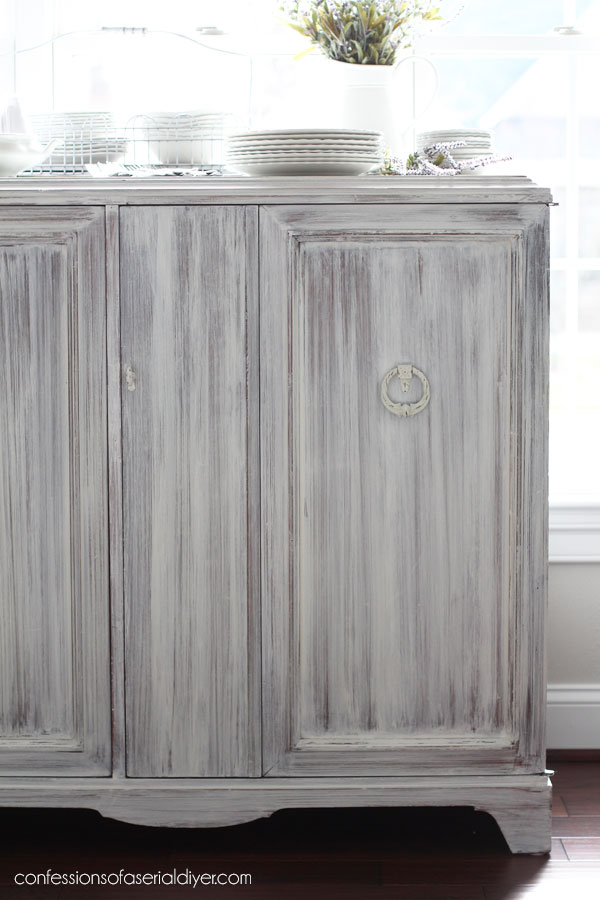
Luckily, I was able to paint right over it with the whitewash technique:
I instead sealed with Dixie Belle’s Best Dang Wax in clear. Problem solved.
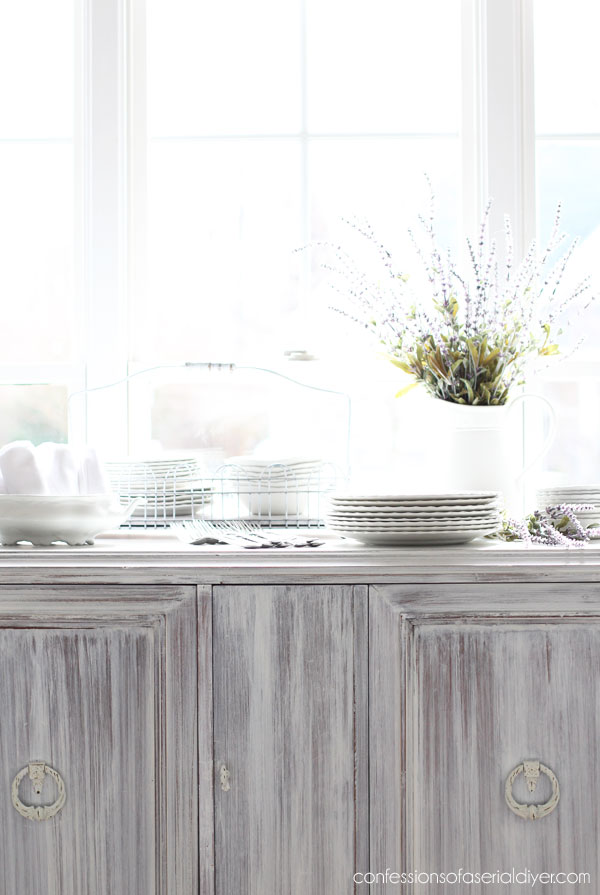
If I were painting this for myself, I might have painted the doors solid white, and maybe even added a graphic to them, but this is what was requested. It looks way better than it started!

I didn’t take any after photos of the inside since I didn’t make it all pretty like I normally do for pieces I would sell. My friend picked up her cabinet on Sunday and was very happy with it.
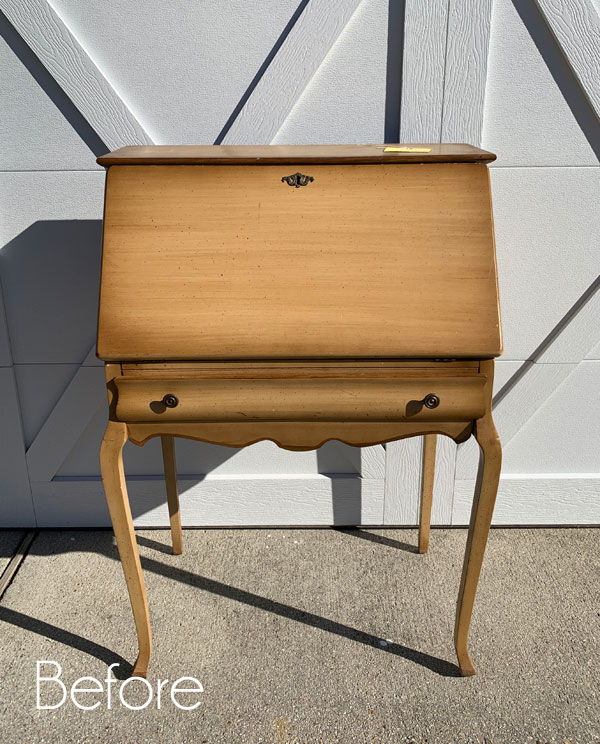
Now I’m excited to get started on my haul!! I asked y’all which piece I should start with, and you mentioned both the secretary and the Bombay table, so I will be starting with the secretary and will be back to share what I did with it on Thursday!
See ya then!
UPDATE! This pretty lady is all done and ready for you to see HERE! 🙂
XOXO,
![]()
Don’t Miss a Thing!
If you like what you see, there are several ways to follow along!
Email * Instagram * Facebook * Pinterest * Twitter


Mary Kaiser says
What a difference a little paint can make. I like you would have painted it and graphics on the doors and prettied up the inside, but your friend got what she wanted and am glad she is happy about it! Your such a good friend. I am looking forward to seeing what you do to the secretary on Thursday, I am sure it will be amazing.
Christy says
What would we do without paint, right? I’m glad my friend was happy with it too! I’ll see ya Thursday!! XOXO
Maryellen says
Beautiful transformation!!!
Christy says
Thank you, Maryellen! XOXO
Christina in SW FL says
What a great friend!! Through thick and thin!! And I bet she is thrilled with the cabinet!! Great job!!
Christy says
Thanks, Christina! She is so dear to me and she was really happy with the results, which makes me happy! XOXO
Denise Cox says
It’s lovely, as usual! A shame she didn’t allow you license to
‘glam’ it up a tad more. With your skills with stencils, etc, it had a lot more potential. But that’s okay, we all have different tastes. It also depended upon how she was going to use this piece of furniture.
Well done, girlie!!! 😊
Christy says
Thanks, Denise! This is just what she wanted and it’s the only painted piece she will have, so I think it will work well for her space, but yes, I could have gone to town on this one ha ha! XOXO
Sheila DelCharco says
Ohhh I love the whitewashed look! I like it simple just like you did it! What a good friend you are! Hmmm… what can I paint around here….
Christy says
Thank you, Sheila! Ha ha! XOXO
Wendy says
Turned out pretty great Christy. I am sure your friend was happy with it.
The wood is definitely Cherry from what I can tell on the wood grain, hence why it is a heavy piece. May not have been hand made but definitely less of an ornate piece. If the handles were original I figure it was made sometime in between the 40’s to the 50’s. A great cabinet as a breakfast hutch for a small dining room.
Waiting to see the secretaries desk. I love those pieces.
Hugs to you
Wendy
Christy says
Thank you, Wendy and I appreciate the info! It is a great storage piece! See you Thursday, my friend! XOXO
Renee says
Wow!!! MUCH prettier now! I’ve tried this white-wash technique before but never had such gorgeous results. Will try it again and follow your plan! 🙂 Looks great!
Christy says
Thank you, Renee! It does take a little practice at first. I started with the backside to get into a rhythm and then worked my way around. Good luck! XOOX
Judy says
Thx for including the problems you encounter on your projects and your solutions. I find your posts so much more helpful and interesting than most.
Christy says
Thank you so much, Judy! Not all projects go according to plan lol, but there is usually a fix for just about everything! XOXO
Tammy Ganci says
Hi,
This came out beautifully!!! I also love the whitewash look without all the fussiness. My question to you is: I know when you say 1 part this and 3 parts that but in this case what was your part measurement? 1 cup, 1 pint etc.
Thanks,
Tammy
Christy says
Thanks, Tammy! I actually just added some water to a 32oz jar of Cotton that was about a third full, but if I were to mix it from scratch, I would probably start with 3/4 cup of paint and add a 1/4 cup of water to it. And you can always mix more if needed. You just want your paint to be thinned a bit. Hope this helps! XOXO
Gail says
Not what I would have liked but maybe setting against your friend’s other decor, it will all come together. (I have an idea that she will be coming back for you to do a different technique, after awhile!). Still, thanks for sharing, several problems identified so learned a great deal!
Christy says
I’m glad this was helpful, Gail! I think this look will work well in her space and it is just what she was looking for! XOXO
Robin says
Wondering why you didn’t use the Voodoo Gel Stain product that you used on your sister’s kitchen island or seats of her kitchen chairs? You said that gave a whitewashed effect. For my taste the cabinet has too much striation but I guess that’s the look your good friend was striving for and maybe the gel stain was just too plain?
Christy says
Hi Robin! The stain gives more of a pickled look. My friend like our kitchen table which has a lot of striation like this cabinet, but she wanted brown to show through rather than the gray that I have, so that’s why I did it that way! XOXO
Karen says
I’ll bet that was a stereo cabinet and the current shelves were added after the stereo was gone. I have a similar piece that my mother refinished for me and I love it.
Christy says
You could be right! That is the fun of finding these older pieces…you never know what their history is! I bet yours is beautiful! XOXO
JAMALA WALLACE says
Excellent makeover! I love the new look..
Christy says
Thank you so much, Jamala!! XOXO
Christa Peachy says
It turned out exactly as I had envisioned and you made it a reality! Thank you my dear, talented, sweet friend! I feel so privledged you made an exception for me. Thank you SO much! Love you!
Christy says
Aww only for you, my beautiful friend!! I’m so happy that you are happy with it!! It is such a great piece! Love you too!! XOXO
Christa Peachy says
It had good bones for sure and now I have renewed love for it! And a piece of your loving work in my home makes me a happy girl!
Christy says
Aww yay!! XOXO