Hi friends, remember me? I’m still here! I’ve been busy with a bigger than usual project. If you follow me on facebook, you may have seen what I’ve been up to. If you missed it, it went something like this…
Hey guys, what do you think of this dining table and chairs??
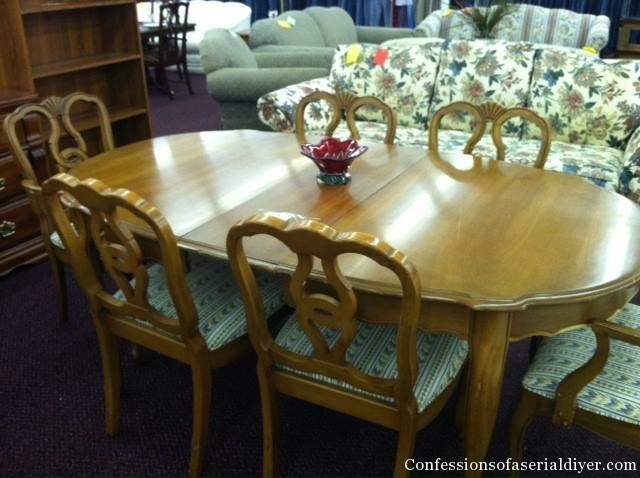
“Ooh ah… yes!!” That’s all I needed to hear…
This dining set was at a thrift store across the street from my son’s Tae kwon do class. I was just taking a quick walk through when I spotted this. It was originally $139 marked down to $85!! What a steal!
Then I shared this photo of us squeezing all the chairs in the car. My son was cracking me up! I knew they would all fit!

I spent two days and $35 stripping the table top down to prep for stain. You know what I discovered?
I’m lacking some serious staining skills, y’all!
I cried a bit about my results on FB and shared this photo…

I was going for a deep esspresso color to match the TV console and my desk. We have very open concept and I thought this would tie the two areas together. Here’s my desk:

AH…remember my chair? Something I did so right…those were the good old days…
So my problem with the table is that I used minwax polyshades. Even though my husband warned me not to. (What does he know?!) Apparantly he knows more than I thought. I used the right brush and I kept a wet edge…
The problem is I put it on too thick. Then as I was brushing, it became goopy almost and I had major streaking.
Once it was dry, I sanded it by hand and reapplied the stain in a very thin coat. Still streaky! You can’t see a single hint of the wood grain beneath. What’s the point of staining if you can’t see the beautiful wood grain?
It looks antique-y I guess, but I’m not loving it.
I moved on to the chairs and shared this on Instagram:
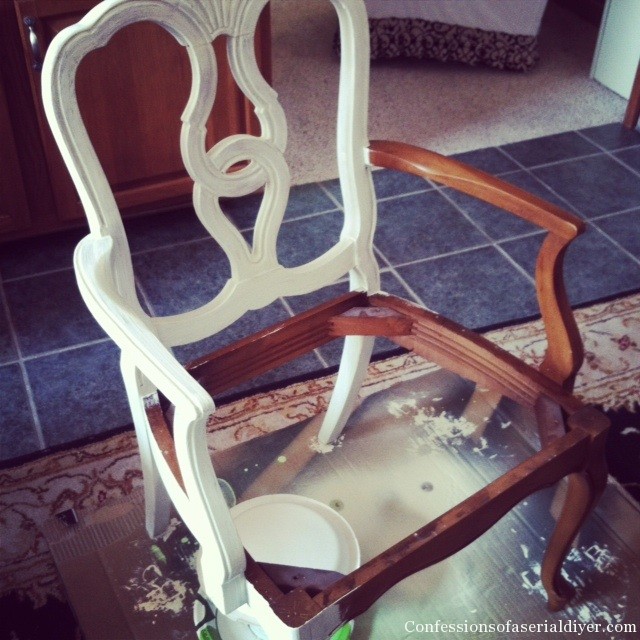
I had one and a half chairs done at this point.
Then I told everyone to remind me about all the work involved in making over a dining set the next time I Fall in love with one that is stuck in it’s “vintage” state.
So there you have it. I’m still here. I’ve been painting my little fingers to the bone!
I finished sanding all of my chairs today. Now I need to wax them. I ordered fabric for my chairs online. I hope I like it when it gets here!
Hopefully I will have the finished set to share soon. Don’t be too surprised if the stained table top and I break up. We just aren’t getting along!
Scroll over (or down) and give me a ‘like’ so you don’t miss a thing! 🙂
XO


Terry says
The best way to ruin any staining project is to use a stain with the sealer in it…a one step process. The sealer does not allow for the stain to get into the grain of the wood and show its beauty. Always and only use oil base stain first then put the sealer on separately. I love the lines on the chairs and think it will come out great in the end.
Christy K. James says
Where were you before I started ha ha?! I had seen a similar set done using this product and the gal was singing its praises. I should have listened to my husband! Next time I’ll take your advice! Thanks, Terry! 🙂
Patti says
Don’t give up on the table! You love it, remember? Take your time, sand it all down and start again!
Christy K. James says
Thanks, Patti…I still love it! I’m working on a solution. 🙂
Kathryn says
newbie here, but happy to find ya! as for staining, it’s always a guess how it’ll turn out. I grew up with a stain-a-holic father and have observed his many projects and expertise. so this is what I have learned. Sand well. Tack off. Sand well again, Tack off. Then sand again. Tack off. If the grain is not open, put something on it to open the grain (not water as it swells the actual wood, but another product…don’t know what it is, but a good paint dealer should or you can google it). Then apply stain liberally and wipe quickly. Sand between coats and whip off the dust with a tack cloth. Stain again if not dark enough. Apply stain liberally and wipe quickly. Then after it’s dry. Sand with a fine grit (300 grit) and seal or wax. He liked lacquer, I like wax. Good luck. But you probably already know all this. If it were me, I’d paint the whole thing.
Christy K. James says
Oh I love you! I really want to paint it, just don’t want to hear the gasps when I do! I’m thinking thats what I’ll end up doing anyway. I have an idea in mind…thanks for the support, Kathryn! 🙂
Tina @ Living Life Wright says
The dining set is beautiful and will look more beautiful when you are finished. Hang in there! And to Kathryn … thanks so much for the advice you gave Christy. I am getting ready to tackle a dining set and wanted to stain the top darker and paint everything else. The written directions will help me a lot. BTW … what type of stain do you recommend?
Christy K. James says
Thanks, Tina! (Don’t use Minwax poly shades lol!)
Stephanie @ Simply Swider says
I totally thought I was already following you on Facebook and I was thinking “geez she doesn’t update very often,” when I realized today that apparently I hadn’t actually hit Like. Well problem rectified. I can’t wait to see how this project comes out! Our new house has a dining room and we have no dining room set, so this will be one of the top projects on my to-do list soon!
Christy K. James says
Lol! As you can see, this set has given me a bit of trouble. Before I went ahead with the staining, I had thrown out the idea of painting the top in a particular design and my mom and MIL poo pooed it, so I stained it. Needless to say I’m moving on to plan B, which was plan A to me! Hope to get it finished up this week! I’ve enjoyed your mood boards for your rooms. I’d love to be able to start fresh. Can’t wait to see your new house! 🙂
Sherrie says
I don’t know how I got it but I also grabbed gel stain once for a pretty desk. A one of a kind desk, I careful stripped it and applied the gel, it was warm out not hot and it melted into the desk. I now only use good quality stain. That pretty little desk is still sitting out in my garage. I guess I need to face it. I hate giant mistakes like that but at least it wasn’t on someone else’s piece of furniture. I keep,a list of my mistakes and problems so I can always refer back to them, I also keep a list of good quality products that I use.
But I have seen many people rave over the stain your talking about…not me.
Christy K. James says
I’ll know better next time for sure! The table still turned out pretty actually in the end, but you can’t see the beautiful grain beneath the stain. That’s the disappointing part. You can see the finished table here if you like. https://www.confessionsofaserialdiyer.com/dining-table-makeover-take-one/
wanda ll says
Use a product called Restore to change the color. You don’ have to take the finish off. It goes right down to the wood and changes the color with stripping(leaves top finish on take cares of water stops too). The darker you want it the more you put on. All the antique dealers use it on all their stuff. It is not expensive about 9 dollars a can. Works like a charm on kitchen cabinets too.HTH
Christy K. James says
I’ll have to remember that next time, Wanda! Thanks for sharing.