Hello there and welcome to part two of my Sectional Slipcover Tutorial: Covering the Cushions! If you missed part one, you can catch up here.
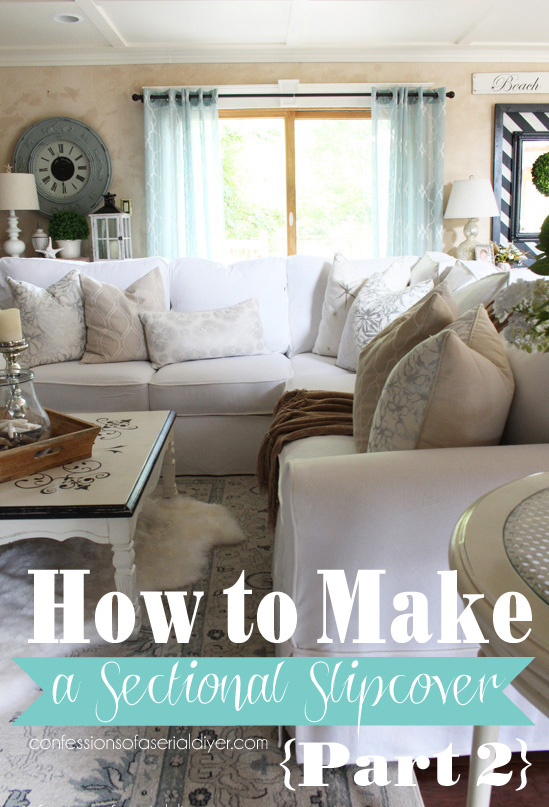
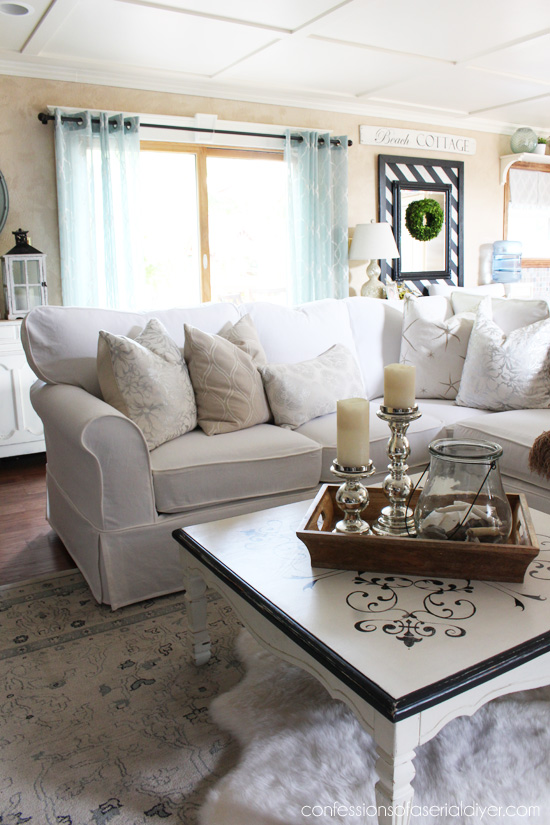
There is nothing unique about covering sectional cushions verses sofa cushions, except maybe that the cushions may not all be created equal as often is the case with a standard sofa. For this reason I measured each sectional cushion individually, so each cover is custom to that cushion. That accounts for the very tailored fit my cushions have.
Let’s get started!
Measure & Cut Fabric
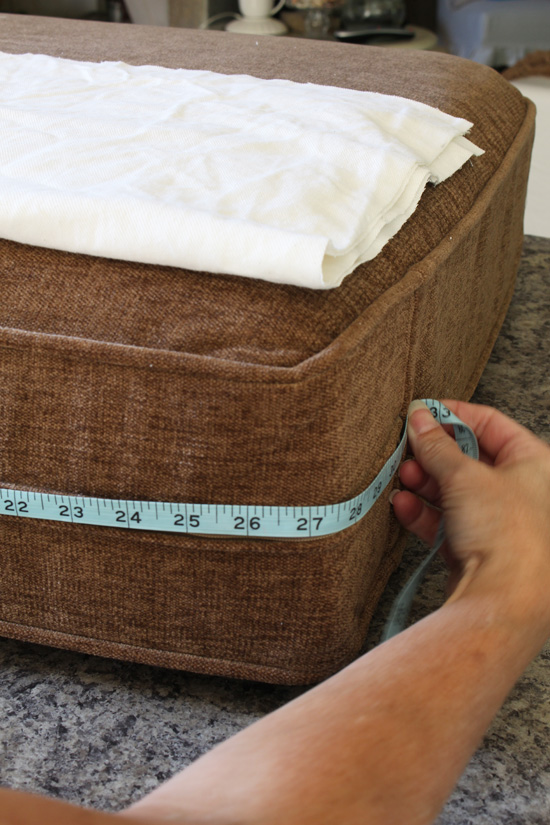
The first step in creating a custom cushion cover is to measure the cushion length, width and height:
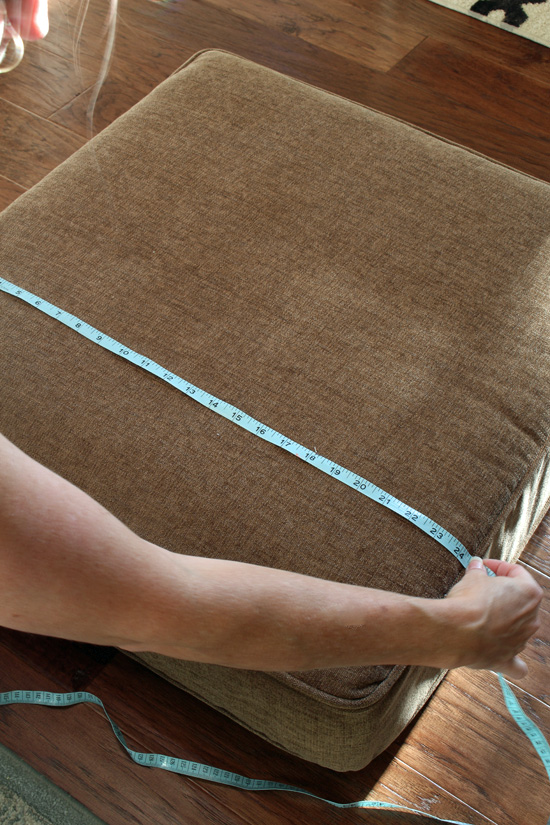
Add a 1/2″ to each measurement. This will allow for a 1/4″ seam allowance on all sides and create a nice snug cushion cover.
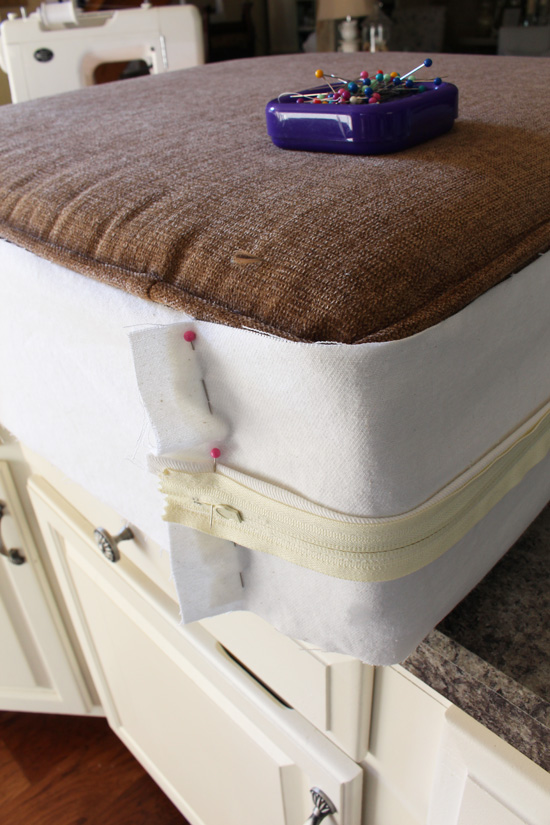
I used the original cushion as a guide for where my zipper should start and end:
Yes I did just say, “zipper”. Don’t freak out…zippers are easier to add than you think!
You will need to cut five pieces for each cushion: a top, a bottom, a piece for each side of the zipper, and a piece for the rest of the band around the middle:
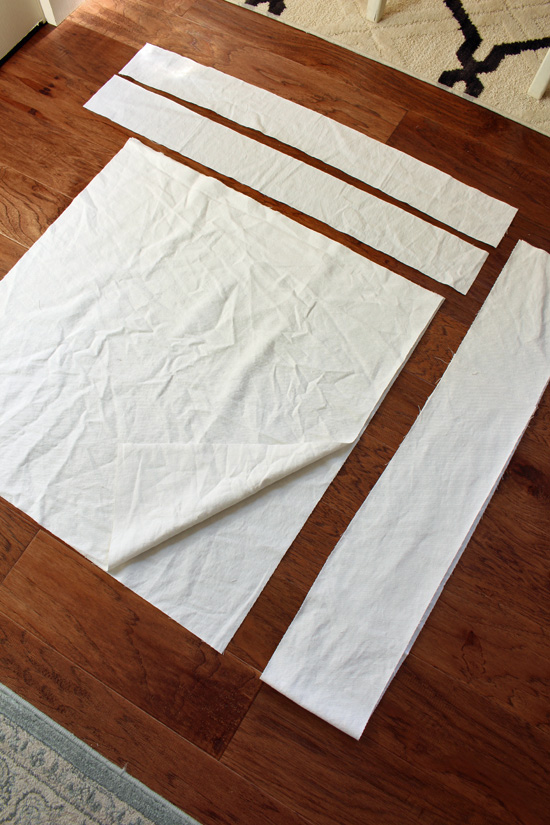
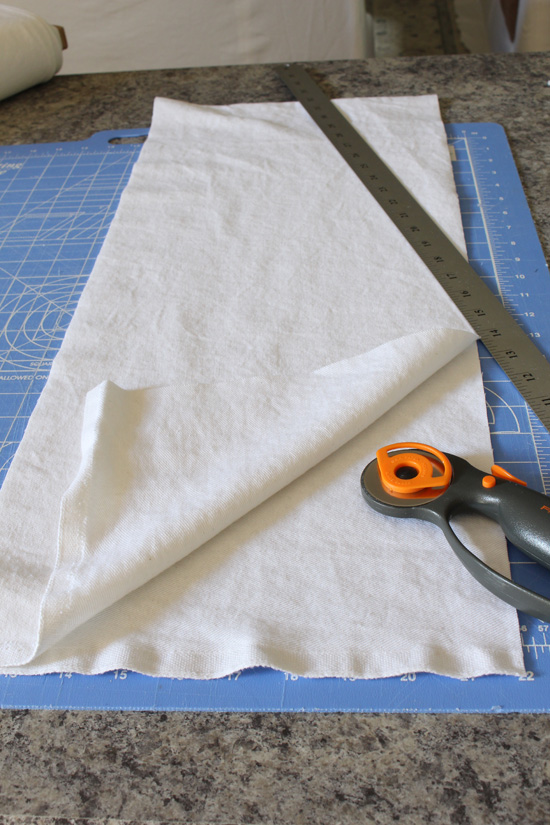
I measured each side and marked my fabric with a pencil to see where to cut, then used my rotary cutter and straight edge to make my cuts. (I found this awesome metal yard stick in the craft section at Walmart for $5. It worked great for those longer pieces.)
Add Zipper
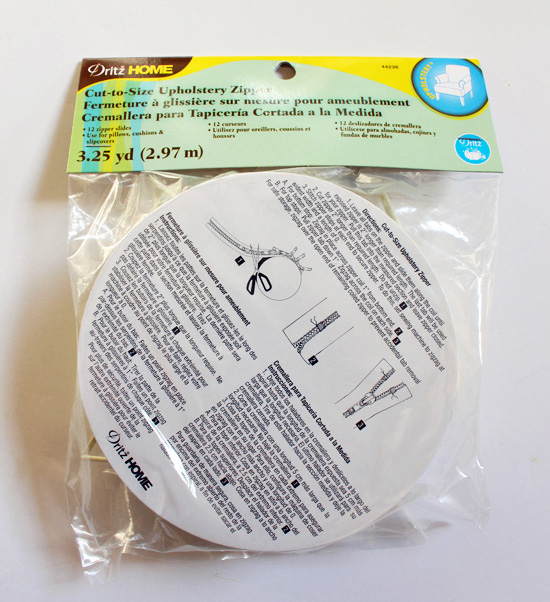
If you are making white covers, you will inevitably need to wash them. A lot. Adding a zipper will make your cushion covers so much easier to remove and put back on. And adding a zipper really is easier than you think!
I used cut-to-size upholstery zippers I found at JoAnn Fabrics. There are over three yards in each package, so I was able to get zippers for three cushions out of each one:
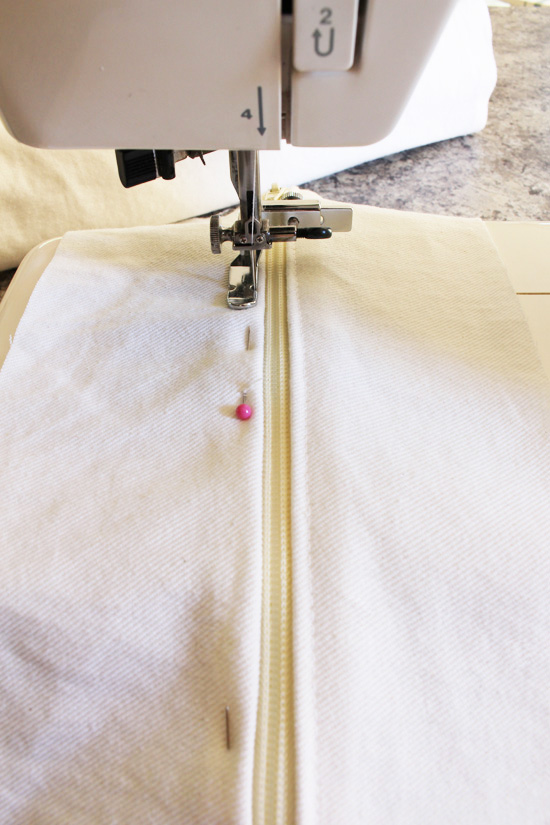
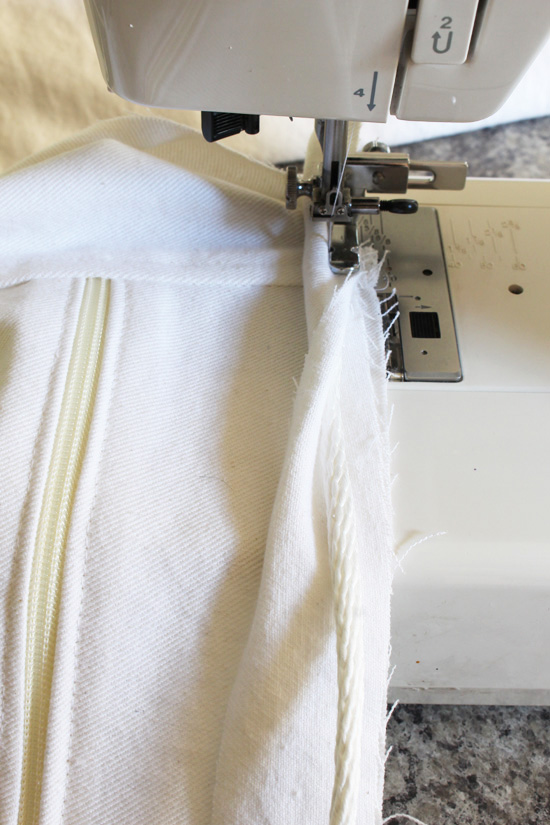
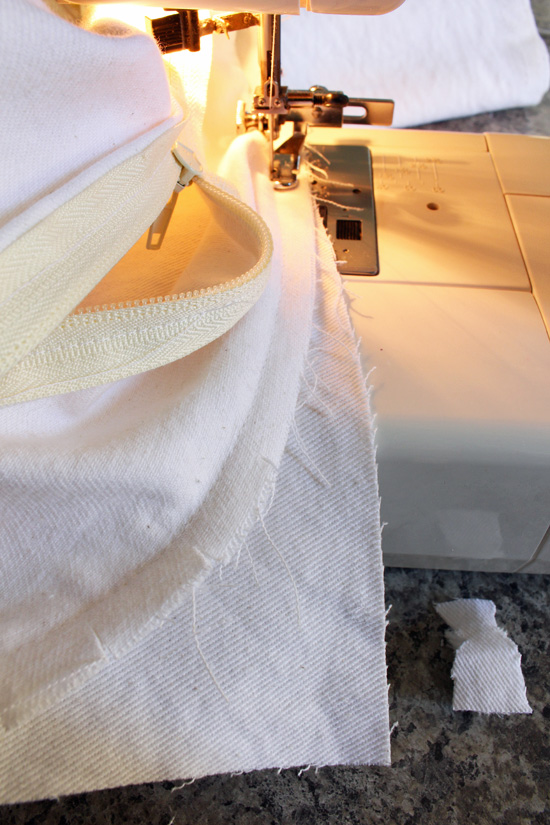
I double folded (so there are no raw edges) one edge over and pinned to the zipper. It helps to iron the first small fold first.
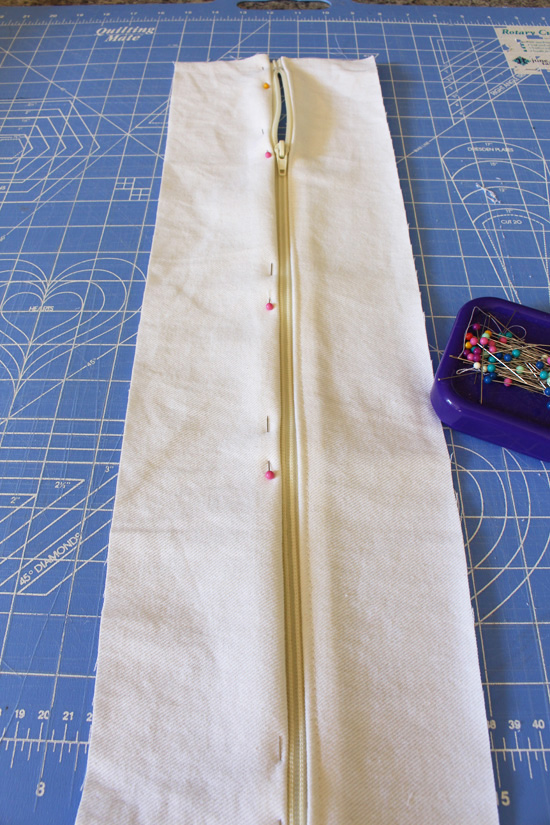
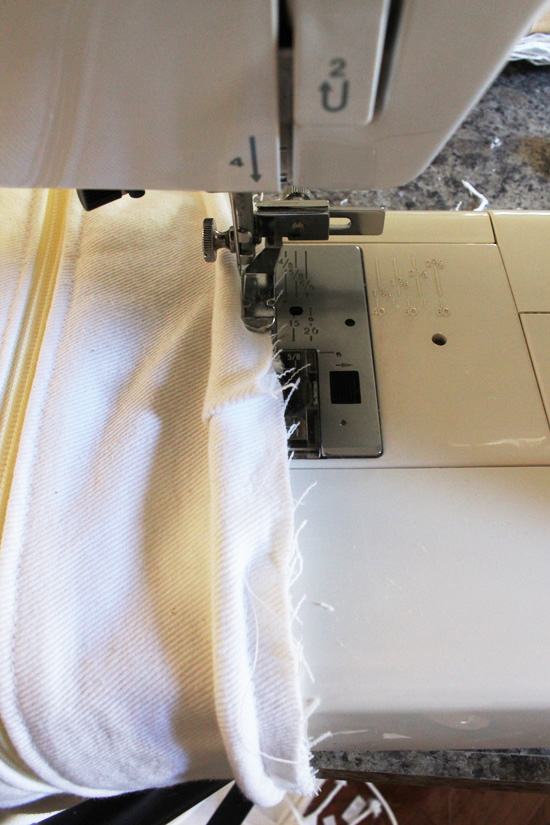
Then I sewed the fabric to the zipper using my zipper foot:
I didn’t see the need to try to hide the zipper since it will be at the back, and no one will ever see it.
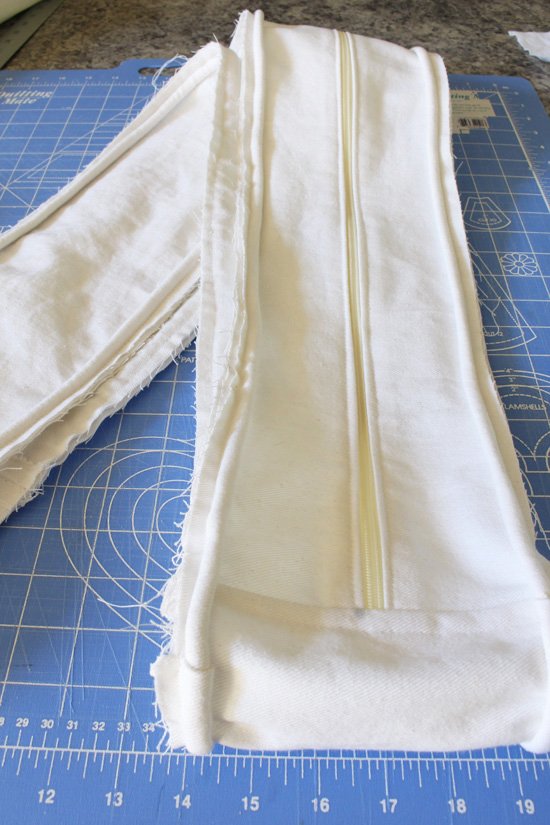
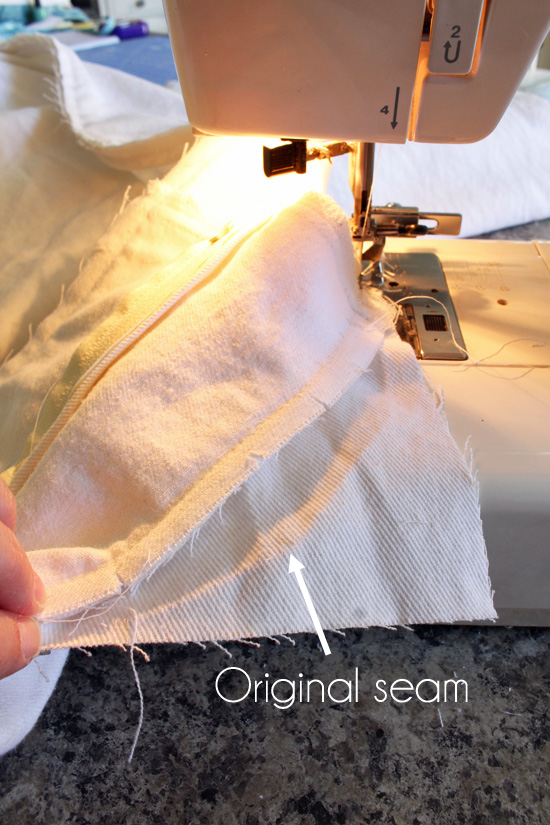
Next I pinned the piece with the zipper to the rest of the band (right sides together) that will go around the center:
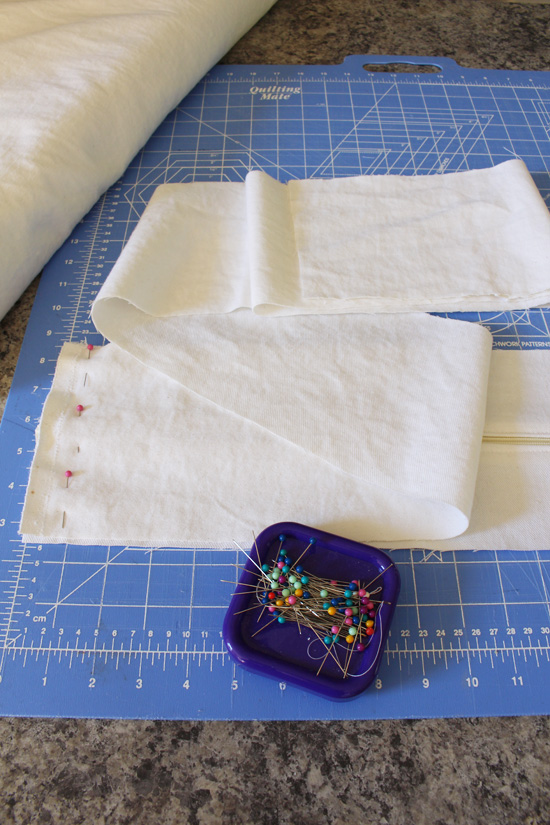
And sewed:
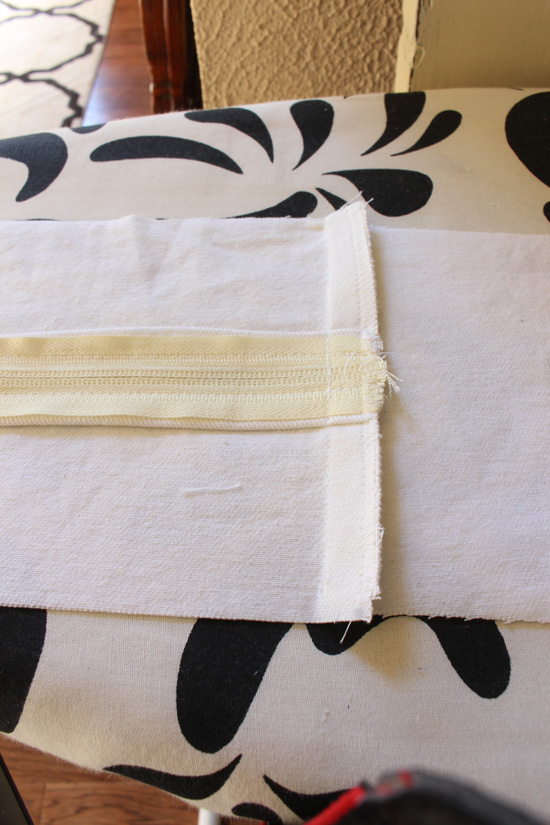
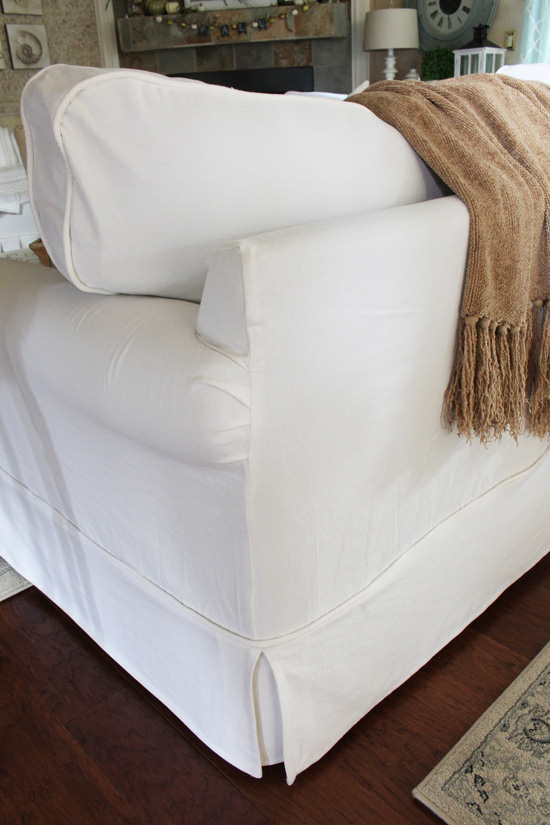
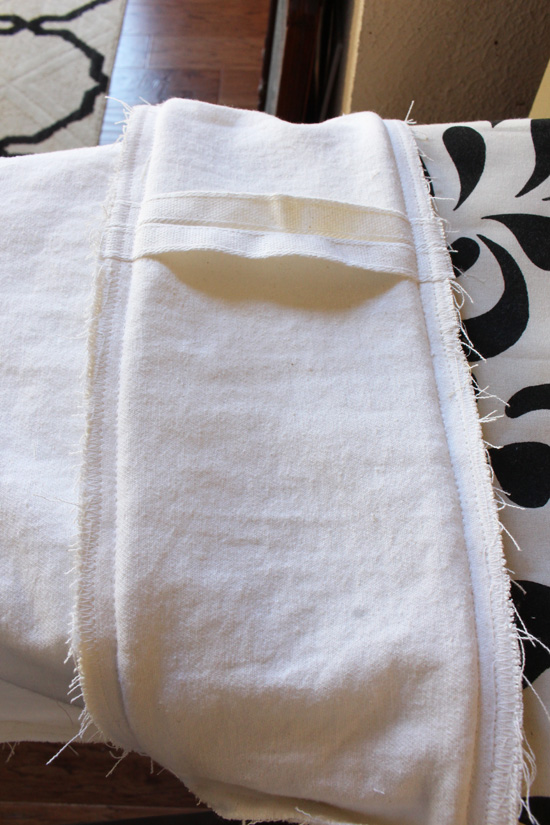
For the sectional “base” covers, I waited until the very end to go back and seal all of my raw edges. For the cushion covers, I sealed the raw edges on the seams as I went by zigzag stitching them on the widest, but shortest setting. You can see how the seam above has been “sealed”.
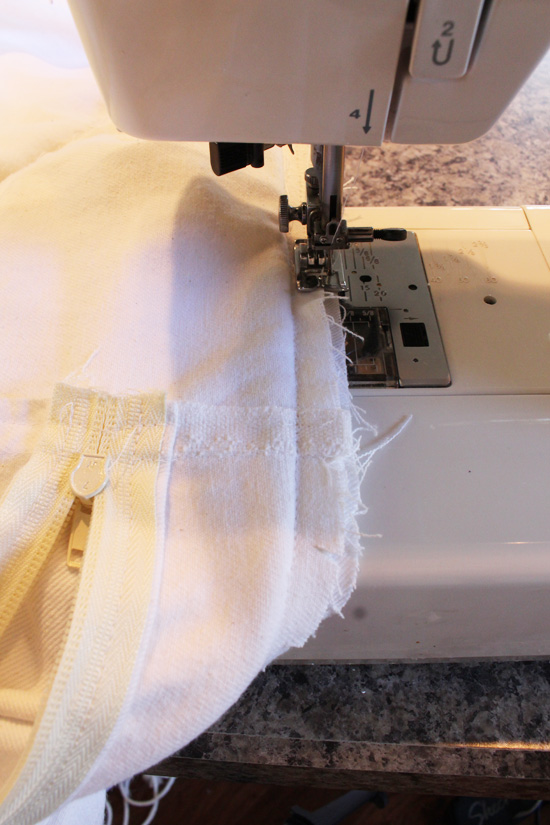
I ironed the seams flat…

And ran a stitch across so the seam would lay flat. (Not pictured here, but you’ll see at the end.)
The next step was to fit it to the cushion by wrapping the band around the center and pinning where it met the other side…
I sewed that seem as well, sealed the edges, iron the seam flat, and sewed a stitch across to keep it nice and flat as well. Now you should have a circular band.
Add Piping
I shared the how-to for making piping in part one, however, I found this awesome time-saving tip for adding piping to your cushions in a video.
Check it out:
Isn’t she a genius? Thank you, Peggy! 🙂
So all you need to do for the piping for your cushions is cut the strips and sew them together, which I share the how-to for in part one here.
Then add the cording and attach the piping at the same time! That’s how I added the piping to my cushion covers.
Starting somewhere on the zippered side, I added piping to one side of the middle band all the way around:
She also shares in the video above how to finish the piping off when the ends meet. I just folded the top piece under, wrapped it around the bottom piece, and sewed:
I added piping to both sides of the middle band:
Add Top and Bottom
Next I added the top piece, starting at the back where the zipper is, and sewing all the way around. When I got to the squared off corners, I took the corners a bit more rounded, cutting small slits in the band portion to help the fabric take the turn more easily:
Then I added the bottom. Don’t forget to unzip the zipper before adding the bottom or you will sew it shut.
Trouble Shooting TIP: It is very likely that you will either have too much band or too much fabric left on the top or the bottom. (This statement may not make sense until it actually happens.) There will either be a big gap, or not enough fabric to sew the top or bottom to the band all the way around. In this case (which WILL likely happen more than a few times), unstitch the back corners where the zippers are and either take the turns wider or tighter to give or take up fabric as needed.
In the picture below, you can see that I had to undo the stitching and take my corner a little wider for the bottom piece of fabric to fit perfectly.
I tried to keep all the corners on the front of each cushion the same, and made the adjustments at the back where they wouldn’t be seen.
That’s what worked for me anyway.
Test fit your cover.
If everything looks good, trim your seams and seal the raw edges with a zigzag stitch, or you will have an unraveling mess the first time you wash your covers. (Trust me.)
Here is what your edges should look like:
Because a sectional can have many varying sized cushions, I measured and made each one individually. In the event that I have to remove several cushion covers to wash at once, I used colored embroidery floss to match each cushion cover to its cushion:
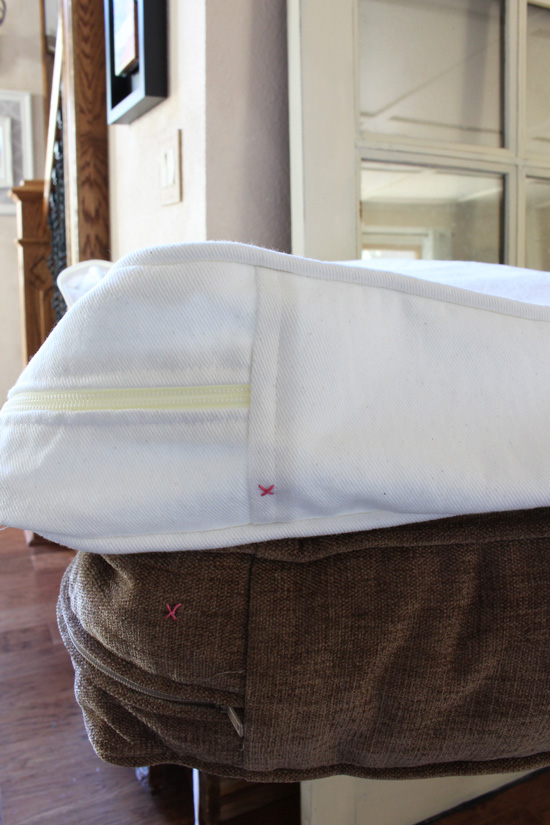
That will make it easy to match them back up!
The cushion covers were the most time-consuming part of this sectional slipcover project. It easily took me over two hours to finish the first couple, but I got faster as I went. With 11 cushions, it took me about three and half days to finish them all.
Are you curious how much my brand new custom slipcover cost?
If I did the math correctly, I spent around $275. That includes fabric, zippers, thread, and piping. I call that a worthwhile investment. 🙂
If you have any questions at all, ask in the comments below and I’ll be happy to answer them!
I’ll be back on Tuesday sharing what I did with this gem:

See you soon! 🙂
UPDATE: You won’t believe what this set looks like now…check it out HERE!
XO,
![]()
Don’t Miss a Thing!
If you like what you see, there are several ways to follow along!
Email * Facebook * Instagram * Pinterest * Twitter


")

Marie from The Interior Frugalista says
Appreciate this post too Christy. You make it look so easy! Thanks to you I’m getting a little braver about tackling that club chair slipcover. Peggy’s video was AWESOME! Thrilled to finally know how to properly end the piping. Pinned to share and to refer back to when I get my brave on.
Christy K. James says
You are so welcome, Marie! You can totally tackle that club chair!! XO
Shirley Dunn (England). says
You did a great job Christy. All that sewing!!! But you saved yourself a fortune. I once had a suite recovered professionally & it cost as much as a new suite would.. That colour goes much better in your room.
Christy K. James says
Thanks so much, Shirley! I can imagine it would cost a pretty penny to hire this job out. I know it would take big money for me to do this for others on a regular basis. 🙂
Becky says
Wow, I’m still so impressed! Beautiful work!
Christy K. James says
Thank you, Becky XOXO
Addie says
Really??!!! You should be ashamed of yourself……do you realize how many people will try to attempt this because you made it look so easy!!! YOU HAVE SKILLS ~ GIRLFRIEND!!!!!
AND you are a nurse!!!! AND your beautiful too!!!…..okay…this NOT fair!!!!
I can’t even get over the fact that you did it let alone stopped and took pics along the way….
totally would mess me up.
Addie 🙂
Christy K. James says
Addie you are SO good to me, and I always appreciate the chuckle you give me! 😀 You know my aim is to push people to do things they never thought they could! Taking pics was a little extra work, but ya’ll are worth it. 🙂 Hope you have a fantastic weekend! XOXO
Michele says
We’re the sofa back cushions detached? How did you figure that out if they were? Ours are and I’m not sure how to slip cover them. Thinking to detach them and use heavy duty Velcro to keep them in place instead. Love to hear what you did!
Christy K. James says
My sofa cushions were not attached. I don’t think there are a lot of options if they are other than to detach them and cover them separately. The Velcro is a great option!
Mary Meusburger says
My goodness Christy! You are amazing! The sectional cover looks beautiful and your tutorial is so detailed and helpful! I have been sewing for nearly 50 years and have never had the confidence to tackle such a huge project. Now I feel inspired to try! I do have one question though – how did you determine the amount of fabric you needed for the cover? I just have a standard sofa, so I will need a lot less fabric, but I want to make sure I order enough.
You are one of the most talented DIY-ers I have ever seen. Your projects always come out so jaw-dropping beautiful and you are so generous with all your pictures, tutorials and helpful hints. You truly are an inspiration to me (and many others, I would guess)!
Have a wonderful weekend!
Christy K. James says
If I could come through this screen and hug you Mary, I would! Thank you SO much for the very sweet comment, it made my morning! Knowing that there are three feet in a yard, and my fabric was 58″ wide, I just roughly measured each section, and then added a couple of yards to be safe. I still under estimated by about three yards, which I was able to purchase off the bolt at the store. I wish I had a secret formula ha ha. Have a great weekend!! XOXO
Mary Meusburger says
Thanks, Christy, for the info. I thought I might need to make a guesstimate, but it’s helpful to know you also needed additional material. I think I’ll order extra from the get-go and then will (hopefully) have some extra for pillows or whatever.
Thanks again for all your inspiration – you really are an amazing person!!!!
Hugs to you!
Christy K. James says
Sure! You can always find something to use the extra on and thanks again, you really are so sweet! XO
DebraShoppeno5 says
Wonderful tutorial. I can’t believe the cost. I don’t even want to tell you what I paid having 3 sets made so I could change out for different looks.
Christy K. James says
Thanks, Debra! I can imagine how expensive it would be to have one made. I cannot imagine actually being the one who makes them for a living though! I bet it’s nice to be able to change out the look though. 🙂
MaryJean says
I definitely will be back on Tuesday to see what you do with that table and chairs. I can’t imagine what it will look like!
Christy K. James says
Ha ha I am really excited to share…think seaside cottage. 🙂
Jo says
I have been looking for a tutorial , and this is the best one I’ve seen! I do have a question though. The cushions on the back of the sofa where they sewed onto the sofa to begin with? f so, did you sew them back on, or use then like throw pillows? If they are used like throw pillows, how are they holding up?
Thanks, Jo
Christy says
Thank you, Jo! My cushions were already separate, and they are holding up perfectly! Good luck! XO
Jo says
Thanks, Christy! We live in a “tiny house “, and it took me forever to find a piece that worked for us. Think I’ll give this a try, and get some dense foam for the back cushions.
Christy says
Awesome! I love watching the Tiny Houses show on HGTV! If you have any questions along the way, feel free to ask…good luck! XO
Marianne Chandler says
This is the very BEST tutorial I have seen on Pintrest, and believe me I have watched just about everyone. Going to do this in December. Thank you so very much for an EXCELLENT article.
Love Marianne Chandler from Phalaborwa South Africa (bordering the Kruger National Park)
Christy says
Thank you SO much, Marianne all the way from South Africa!! I’m so glad you found it helpful! Best of luck to you on your project! XOXO