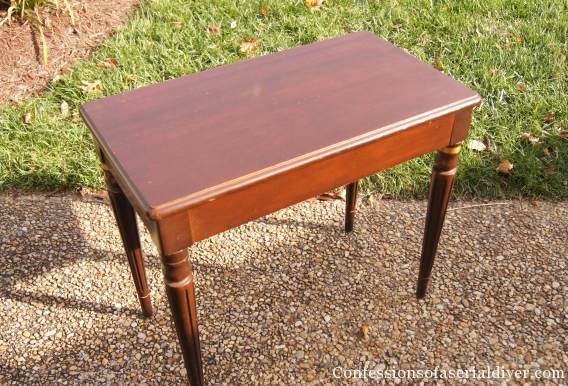
I am excited to finally share this little makeover with you. This was one of the pieces I redid for the Christmas Market. It was a plain dime-a-dozen piano bench I picked up from the thrift store. I liked that it had hidden storage, but had no idea what I wanted to do with it:
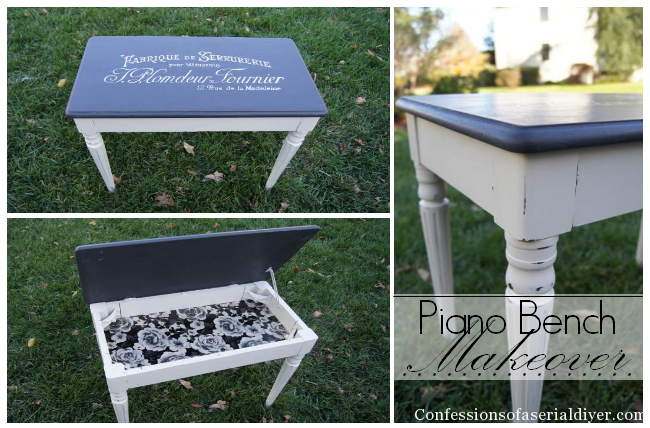
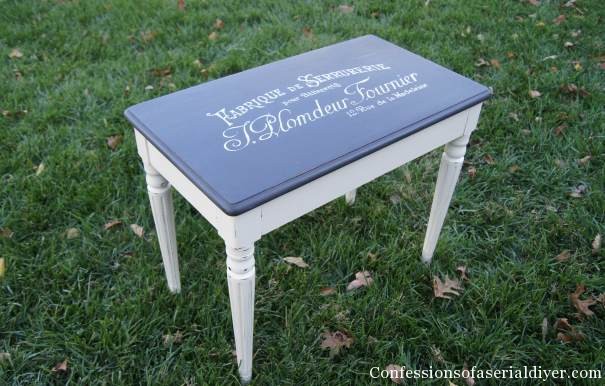
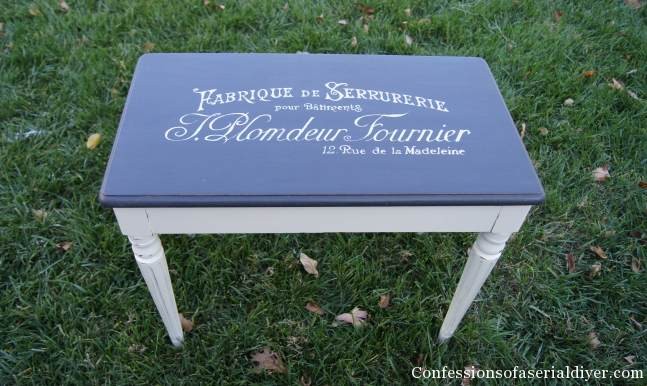
Here is how she turned out:
I love it!! You may have seen my drop leaf table makeover I shared recently that I painted very similarly to this. I painted this piece first, and liked it so much that I decided to paint that piece much the same.
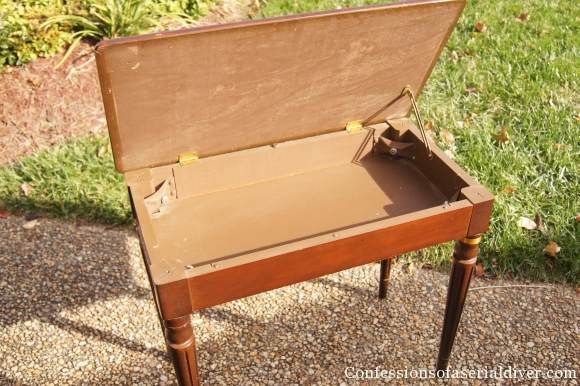
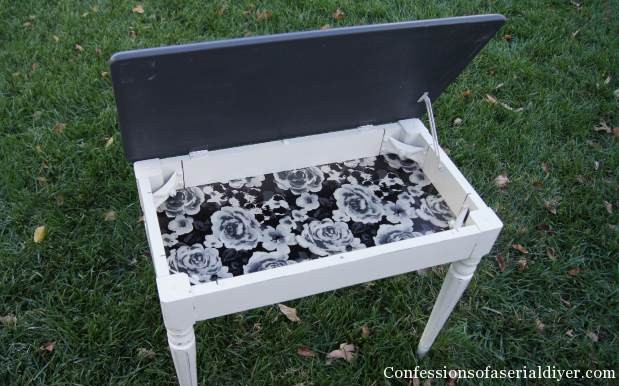
Here’s the inside before:
And after:
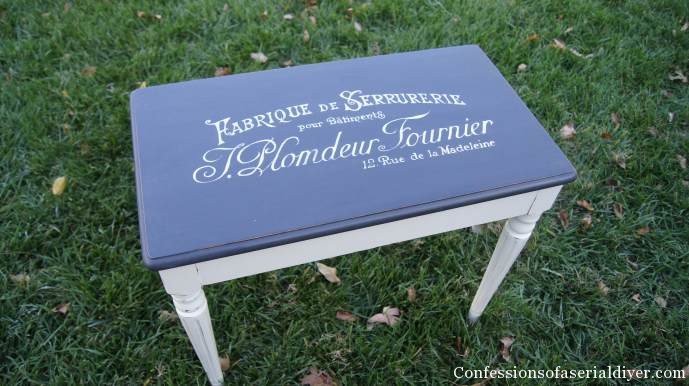
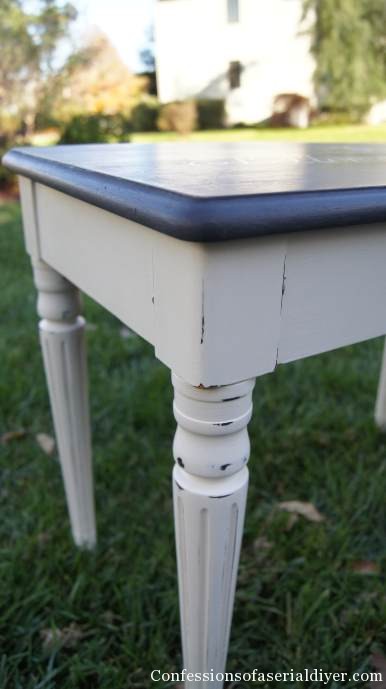
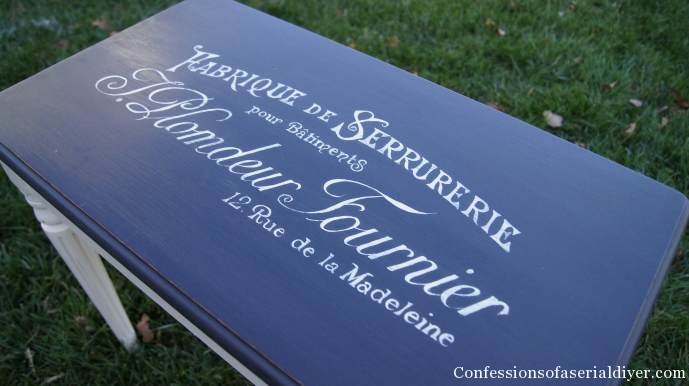
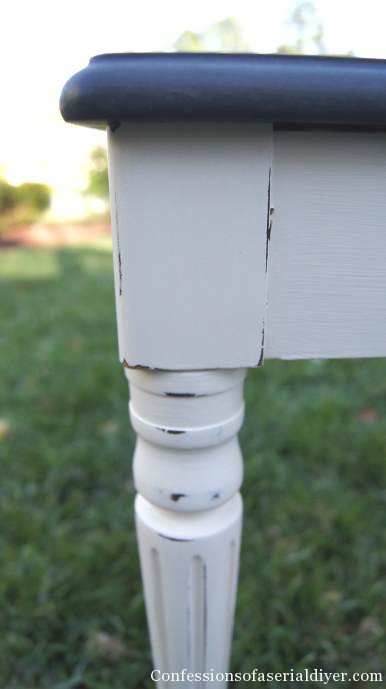
I painted the base with DIY chalk paint in Cottage White (my favorite by Behr) and the top in Annie Sloan’s Graphite, which I love also. It’s not a true black, more of a dark dark gray. A coat of clear wax seals it perfectly.
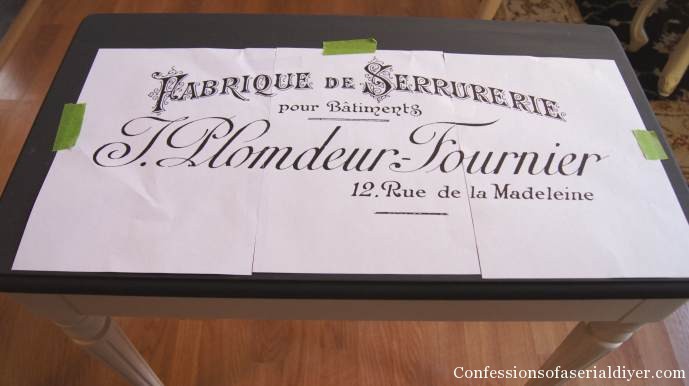
To add the graphic (thanks Graphics Fairy!) to the top I used my new favorite tool, blockposters.com.
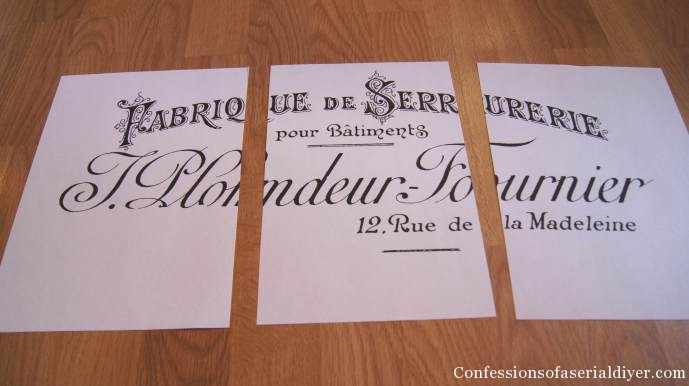
It’s so easy to use and you can make your print out any size you want. Then since my surface is dark, I rubbed chalk across the back of each image:
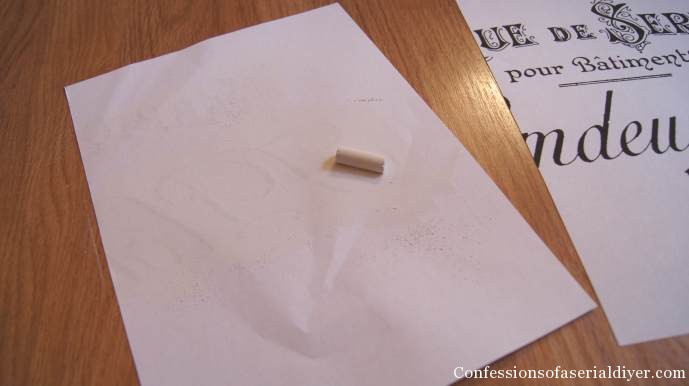
Then taped it in place with a little frog tape:
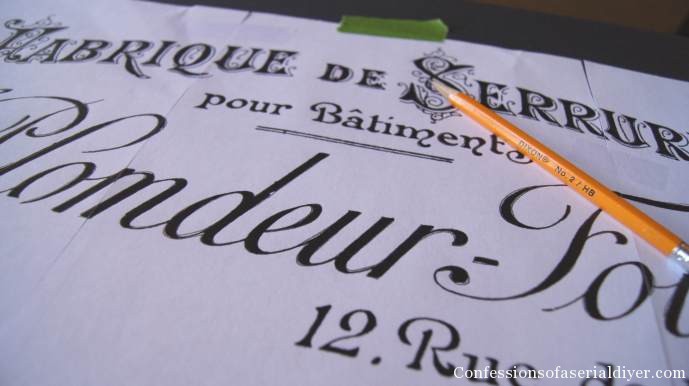
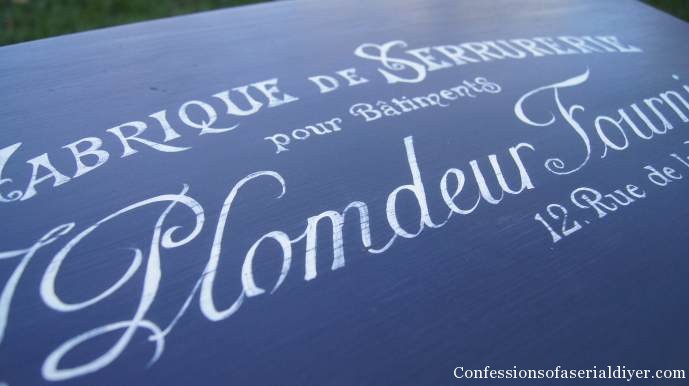
And traced the outlines of the letters with a pencil:
Then I painted the letters in using a script liner brush and acrylic paint:
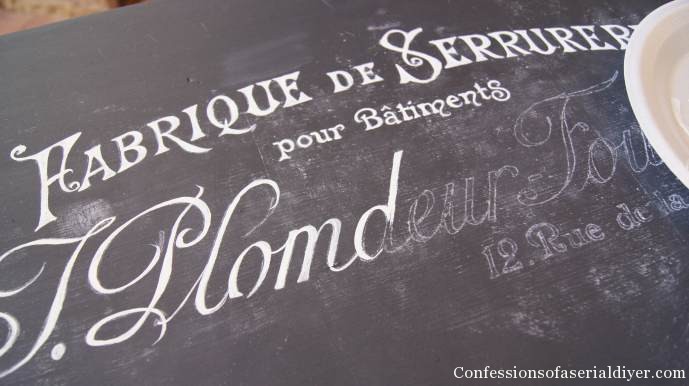
Tada:

I sanded lightly with 220 grit sandpaper and a sanding block to smooth everything out.
It actually did not sell at the show and I was thrilled because it was my favorite piece and I really wanted to keep it.
I thought it could be perfect beside the door to put gloves and hats in the Winter.
Or at the foot of the bed as a place to sit to put on shoes…
It has so much character now and would still make great piano bench…if only I had a beautiful piano like my friend Andi 🙂
I love makeovers! It doesn’t really even look like a piano bench to me anymore!
I’d love to know what you think! Plus, your comments always make me smile 🙂
XO,
![]()
If you like what you see, there are several ways to follow along! ![]()
Email * Facebook * Pinterest * Hometalk * Twitter * Instagram
I love to share at some of these great parties:
Home Stories A to Z Not Just a Housewife Kammy’s Korner The Happy Housie Design Dining and Diapers Liz Marie Blog Funky Junk Interiors Savvy Southern Style Tatertots and Jello DIY Show Off Redoux Interiors Between Naps on the Porch The DIY Dreamer Oh My Creative Little Miss Celebration Just a Girl and Her Blog Sand and Sisal Interior Frugalista House on the Way Addicted 2 DIY I should be Mopping the Floor Miss Mustard Seed


Dee says
I love your beautiful piano bench. So worth all the work you did to it.
Christy K. James says
Thanks, Dee! I’m glad I got to keep it 🙂
Kathy T says
I love this bench! The makeover is awesome
Christy K. James says
Thanks, Kathy! 🙂
Celia says
Very nice! Even lining the inside – nice touch!!
Christy K. James says
Thanks, Celia! 🙂
Cindy Eikenberg says
Just beautiful, Christy, but everything you do is simply stunning! I’m glad you got to keep this piece because not only is it gorgeous we can always use a little extra, hidden storage. Love it and pinning! Have a happy Monday!
Christy K. James says
Amen to extra storage, Cindy! Thanks for your sweet words! I hope you are having a great week! I know it’s been cold…we are in Disney right now and it’s been so nice to get a break from the cold! 🙂
Cora says
Fantastic! Love it! You do such a beautiful job. I wanna try that, but I don’t know if I have a steady enough hand. I guess I will try something small. I would have bought that bench…I have a cream colored piano with a very boring bench and pad lol.
Christy K. James says
I wish you could have come to my show to buy it! But I really love it so I guess it wasn’t meant to sell. I’m thrilled you like it too…thanks 🙂
Beverley Leonie says
Love it, love it, love it. You did a fabulous job. Great creativity and the lettering is first class.
Christy K. James says
Thanks so much, Beverley! XO
Lisa @ Practically Perfect Home says
I love the chalk transfer method! I just figured out something similar on pallet art I made and could’ve sworn I was a genius…now I see everyone does it! Haha! Your bench turned out super cute, thanks for sharing! ~Lisa
Christy K. James says
Thanks, Lisa! I thought I was super clever the first time I did it too lol! 🙂
Ellen says
Oh my word! This is fantastic! I love what you did with the bench and thanks, also, for sharing your method.
Christy K. James says
Thanks, Ellen! This method makes it really simple to add graphics to your pieces 🙂
Kristin Ketilsdottir says
No! that’s right this looks nothing like a Piano Bench anymore … Just beautiful wherever it is used. Thanks for share !
Christy K. James says
Thanks, Kristin! XO
Pat Champagne says
Hi Christy. I have the same exact piano bench that I picked up for $5. last year at a thrift store. It’s in my bedroom and every day I look at it and wonder what I will do with it. I hope it’s OK with you, I would like to copy the same thing you accomplished. I love your bench so I know I would love mine. Only difference would be that I will use Annie Sloan “Old White” for the bottom. Thank you so much for the tutorial. Pat.
Christy K. James says
I’m thrilled you feel inspired, Pat! I think I’m going to keep my eyes out for another one…you got a great deal on yours! 🙂
June G. says
Lovely bench!! I love Graphite too! It really is beautiful with the dark wax also. Thank you for including your transfer method and link to block posters!! You have really inspired me to get going on some of the pieces I’ve had far too long.
Christy K. James says
Awesome, June! I’m so glad you feel inspired! This would be lovely with the dark wax also 🙂
Andi says
Awww….thanks for the shout-out!! I love the bench, and the graphic…I’ve used that one too! I’ve been trying to figure out what I can put in my foyer (it’s pretty small)…I think a re-made piano bench might just be perfect! Now I’m on the hunt….
I hope I don’t have to buy a piano to go with it… 😛
xoxo
-andi
Christy K. James says
I was so glad I could work you into my post…especially since you’re one of my favorites 🙂 I would live to learn how to play, but I’ll have to sit on my bench and pretend for now!
Susan says
I can’t believe it didn’t sell. You did a perfect job transferring the image and I love how you did white on black.
Christy K. James says
I know, I couldn’t either! But I secretly didn’t want it to anyway hee hee. Thanks, Susan!!
Marie @ The Interior Frugalista says
Another gorgeous makeover by Christy! I love your French piano bench and the lined storage underneath is so pretty too. It caught my eye over at the Give Me The Goods Party.
Christy K. James says
Aww thanks so much, Marie! 🙂
Val @ Love My DIY Home says
I’d love to do a project like yours – it turned out so well! I’ll have to check out the Graphics Fairy. Thanks.
Christy K. James says
Thanks, Val! This was a fun project! XO
Suzan says
Just beautiful – I’ve been used block poster for a long time – how do you not have pixels on your image after enlarging it????
XOX
Christy K. James says
Thanks, Suzan…I won’t even tell you what I went through to get a large image before I discovered blockposters! Its so much easier…I have gotten very pixelated images before and I’m guessing it’s the size of the original image? Some may be larger files than others and the smaller ones turn out with pixels? That’s my best guess ha ha! Enjoy the rest of your week 🙂
Amberly Steele says
WOW! That looks like a lot of work! Great job! Pinning!
Christy K. James says
Thanks, Amberly! XO
Lori Lehman says
Wow that looks fabulous!! What a unique bench!! You did a great job, I love this! Have a wonderful day!
Christy K. James says
Thanks, Lori! 🙂
Charlotte @ Charlotte's Chair says
Christy, I love this! The black and off white look great and classy! Thanks for sharing your “how to” instructions! Beautiful!
Christy K. James says
Thanks, Charlotte! XO
Deanna {sewmccool} says
Your makeover has transformed that ol’ bench into a gorgeous work of art!! The graphics are beautiful, too!
Christy K. James says
Thanks so much, Deanna! 🙂
Heather {Woods of Bell Trees} says
I love this! Great idea and tips! I need to get a script liner brush!
Christy K. James says
Thanks, Heather! 🙂
Diane | An Extraordinary Day says
Gosh girl….the inside of the bench too!!!!! You think of every little detail!! Love it!!
Thanks for sharing your inspiration at Project Inspire{d}!!!!!
Krista @thehappyhousie says
Gorgeous Christy!! You’re right, it doesn’t really look like a piano bench anymore. Love the typography/sign on it!
Christy K. James says
Thanks, Krista! I could put graphics on everything…I have to hold myself back. 🙂
Katie says
Hi Christy! I just love how this turned out! It’s gorgeous!! Thanks for sharing at DIY Sunday Showcase!! Hope you’re having a good week!
Christy K. James says
Thanks, Katie! Hope you’ve got something to share at our Get Your DIY on Party this Sunday. It’s trash to treasure and we always look forward to your projects 🙂
Karen says
Oh how I love this! I am definitely checking out this new site. It seems to be popular now! Featuring at my party tomorrow, thanks Christy!
Christy K. James says
Yay!! Yes, I love this site! I won’t even tell you what I went through before to get a large graphic. It’s awesome. 🙂
Mary says
Christy, Could you share how you got the legs to have that shabby chic look? Thank you!
Christy says
Hi Mary! I used 220 grit sandpaper to sand the paint off a bit in the raised areas. 🙂
Mary says
Thank you, Christy.
Christy says
You’re welcome! You may like this post on how to paint furniture with chalk paint which talks about sanding a bit too:https://www.confessionsofaserialdiyer.com/how-to-paint-furniture-using-chalk-paint/