Hello beautiful friends and welcome to Trash-to-Treasure Tuesday!! My friends and I have brand new makeovers to share today, and y’all know I love it when I have actual trash to share!!
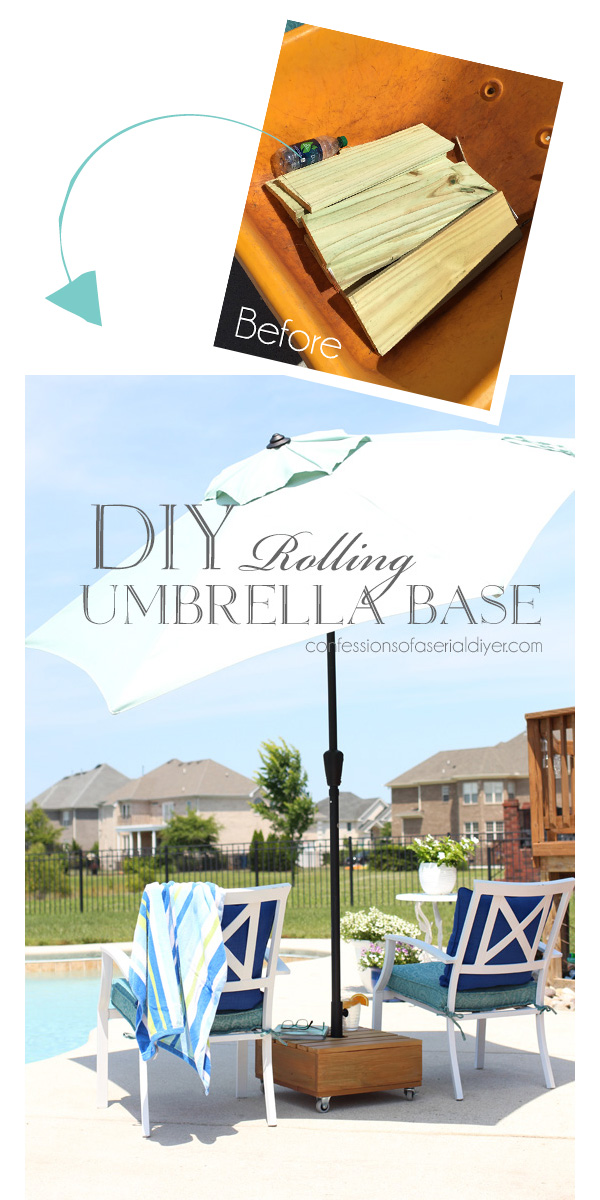
Today I am sharing something super functional I created out of these wood planks my Hubby was going to toss:
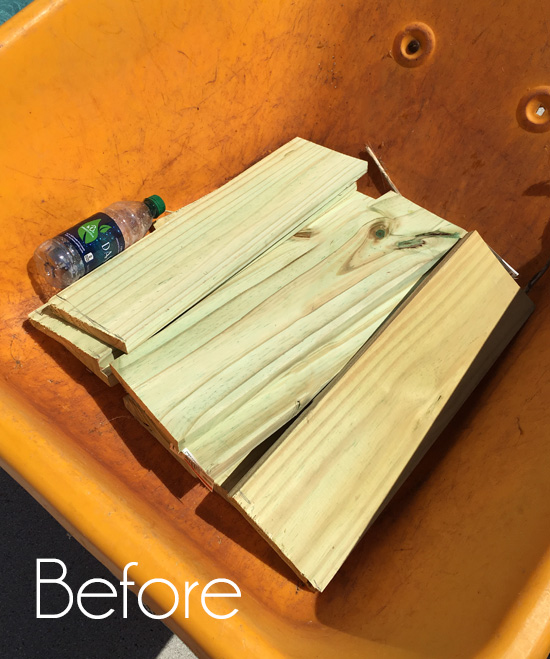
Just so there is no disappointment after the big reveal, I did not reuse that water bottle.
We were in desperate need of some shade in our back yard. The afternoon sun around here is relentless, so I got online and started searching for an umbrella base that we could move around as needed, and that was sturdy enough to weather the high winds we often experience here.
Seriously, the best option I could find that would fit our needs and had positive reviews was $139, AND it was just plastic. Apparently you can put bricks inside it?
There is just no way, so I decided to sketch up my own DIY version:
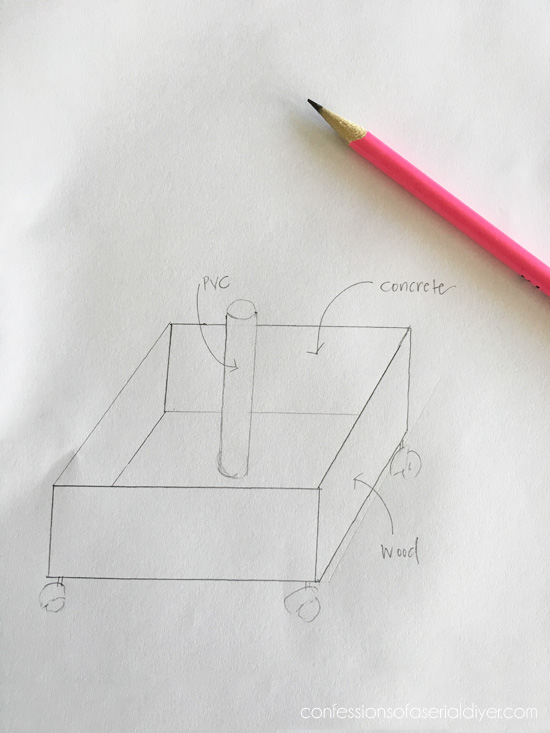
I needed it to be mobile so I started thinking about the materials I would need to create my own DIY version when I came across our wheel barrow filled with scraps of wood left over from a project my Hubby had been working on. He was just going to throw them away, but they were perfect for what I had in mind!
Here is what I came up with:
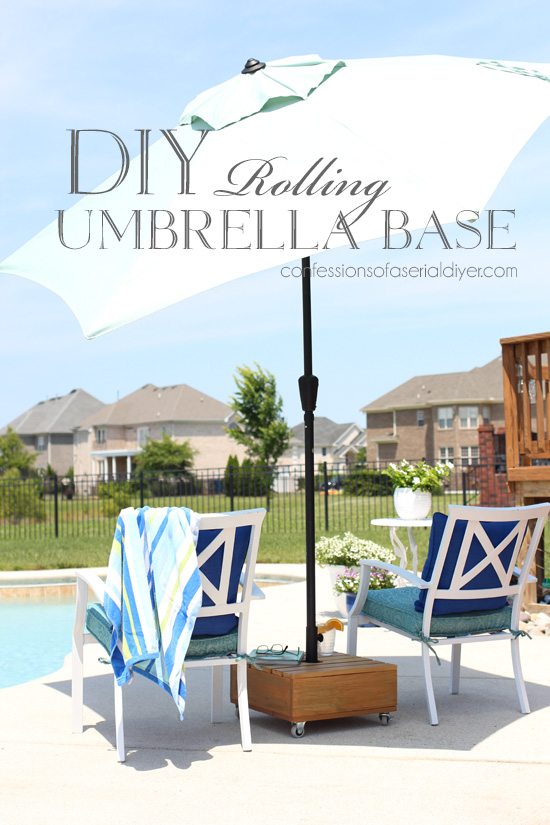
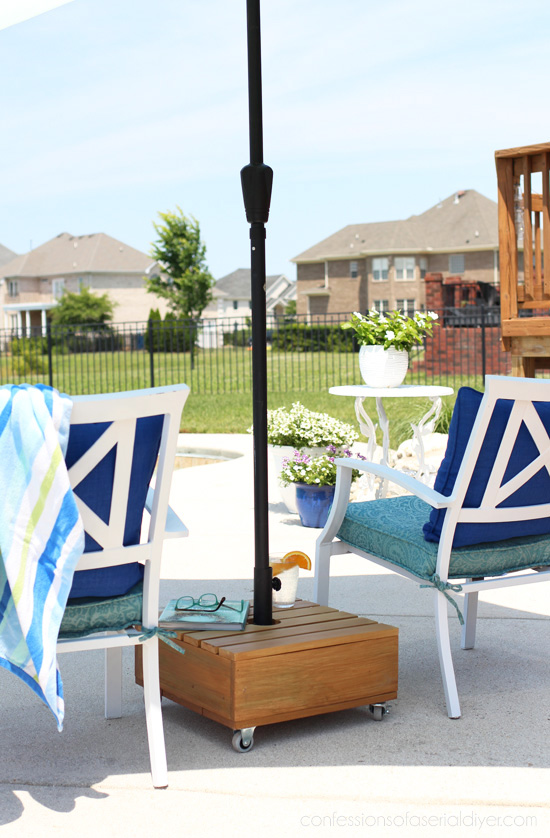
This is just perfect for our needs!
I like to be able to sit down here by the pool when my boys are swimming and with the umbrella, I don’t have to bake in the sun to do it!
I love that we can roll it around as the sun moves across the sky also. I’ve included a few affiliate links so you can find the products I love.
Here’s a quick run-down of how I made this…
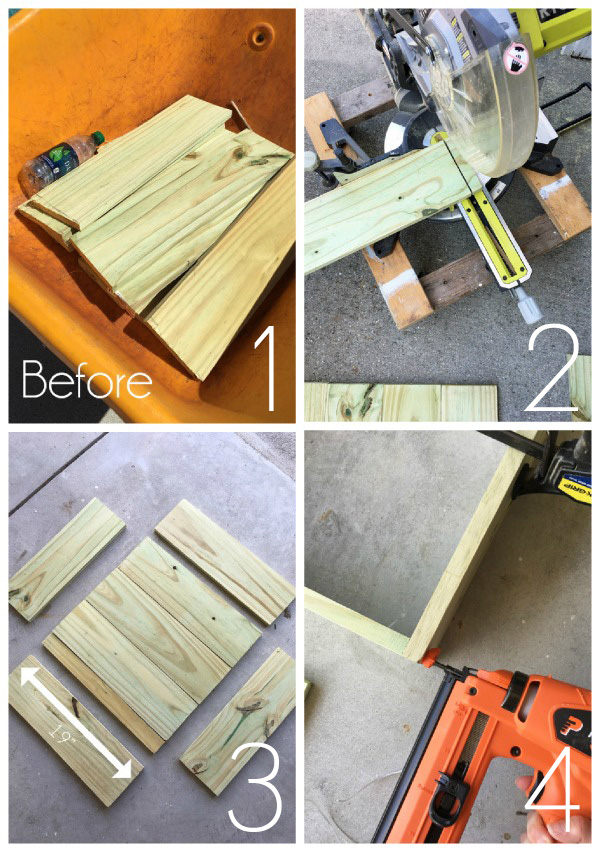
- I started with my Hubby’s wood scraps. This is pressure treated wood so it will withstand the outdoor elements.
- I used my miter saw to cut all but two of the pieces to a length of 19″.
- As you can see I also needed one smaller piece cut to make the bottom a perfect square. Also two of the side pieces are each about 1 1/2″ shorter to be able to fit in between the other side peices.
- I lightly sanded all pieces before starting to piece them together, especially the newly cut ends. Then I used my nailgun to attach the side pieces together to create the sides of my box.
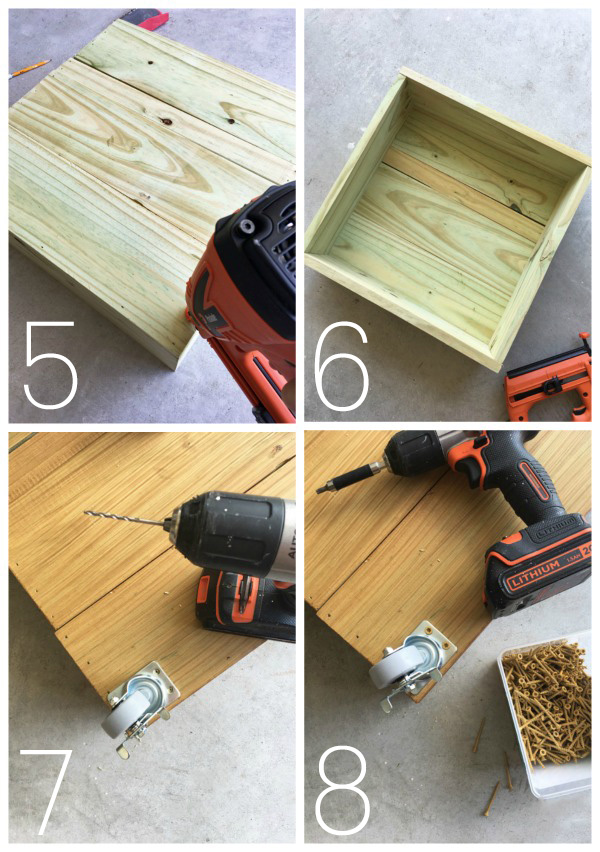
- I attached the bottom pieces across the bottom also with my nailgun.
- Tada…a square wood box!
- You can see I had stained my box at this point, but I would personally wait until the end. (You should actually wait 4-6 weeks before staining until the wood has had enough time to dry out, but I was impatient. The wood won’t take the stain quite as well when it is still new.) Here I pre-drilled my holes for the wheels. I used two locking swivel casters and two stationary ones, both recommended for outdoor use, from the Home Depot.
- I used deck screws we already had to attach the wheels.
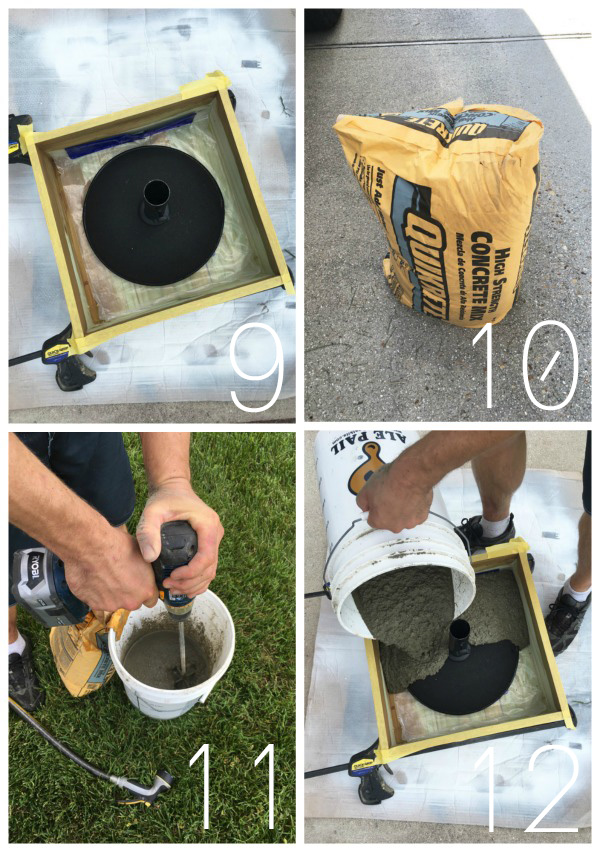
- I had originally planned to add a piece of PVC to hold the umbrella, however I already had this concrete base I purchased at Target for under our patio table. Unfortunately it wasn’t heavy enough to stop the wind from knocking our patio table over when the umbrella was up so it was pretty useless on its own…perfect for this project though! I put a layer of plastic under it to stop any concrete from seeping through the bottom planks. I also covered the edge with FrogTape in case any concrete spilled over the edge.
- I used one and a half bags of Quikrete concrete mix.
- My Hubby was happy to mix it for me using a grout mixing paddle and a five gallon bucket. I think he likes when I ask for help since I don’t do it much these days. 🙂
- It is very heavy so you may need to mix it in smaller batches if you have a hard time lifting anything heavy. He just poured right over the old base and continued to add more until it was flush with the top. **At this point, you could add pretty decorative stones or broken china to make a mosaic if you like. I never thought of that idea until my Hubby suggested it AFTER the concrete had cured.
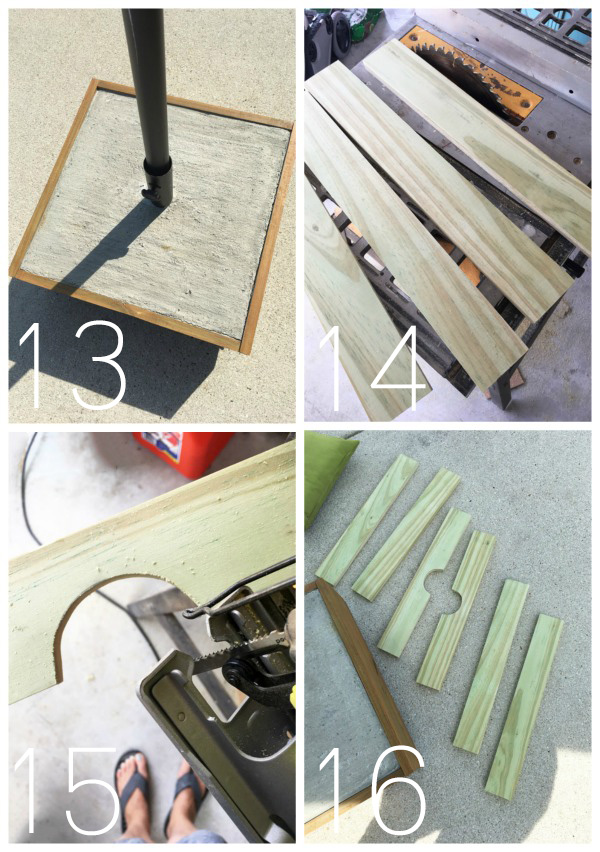
- You could call it done at this point, but I wanted cover the concrete.
- I cut Three 19″ pieces, then used my table saw to rip them in half lengthwise.
- I traced a half-circle on each piece that was going on either side of the umbrella and cut it with my jigsaw.
- All cut and ready to attach.
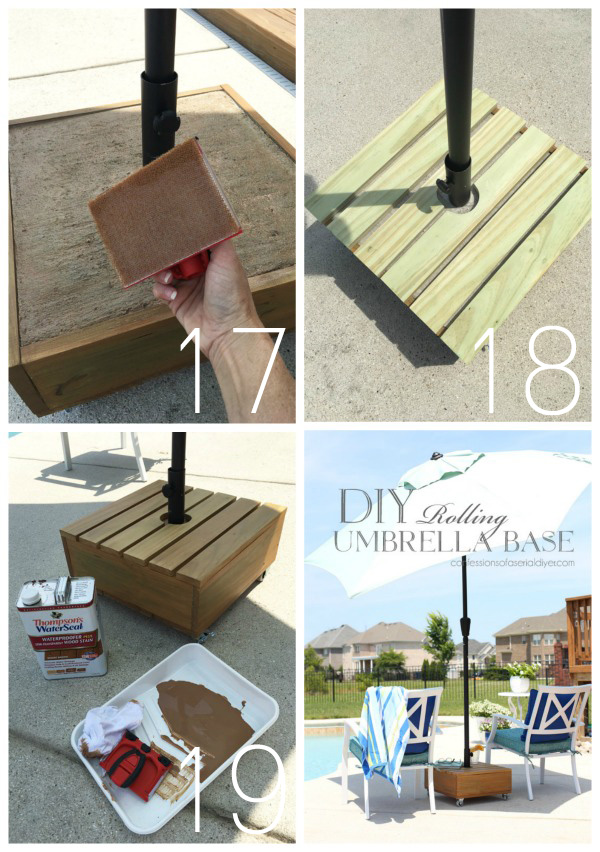
- Before attaching the top, I stained the concrete using the same Thompson’s Water Seal deck stain in Desert Brown that I used on the rest. I used this pad applicator (paint edger) from Shur-line and it worked great.
- I dry fit the planks before staining them.
- Then I stained the rest of the wood pieces. Again, you should probably let the wood dry out 4-6 weeks like suggested, but since this is just a small item and not our entire deck or fence, I went ahead and stained it. I attached them with my nailgun.
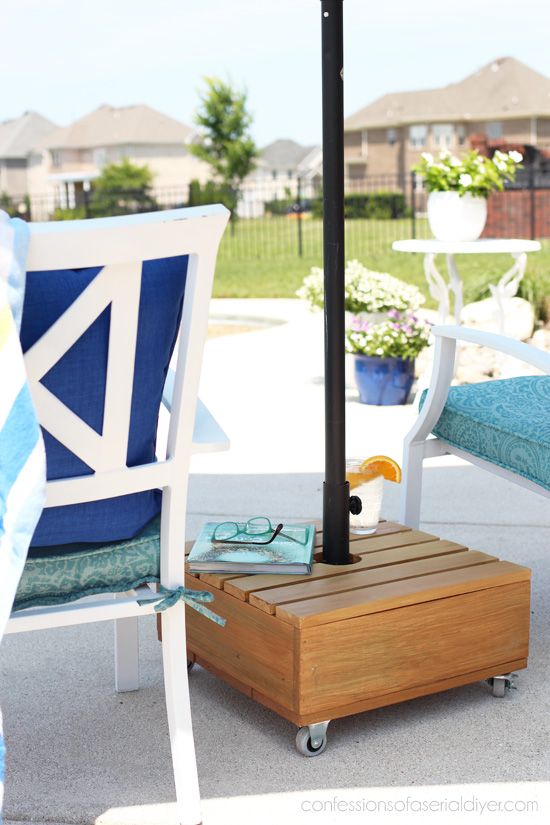
- I inserted my umbrella and voila!
And that is it! I spent about $26 for the wheels and concrete and the smaller concrete base I originally purchased from Target was $39. The wood was free and I had the deck stain left over from restaining our deck, so out of pocket for this project was around $65. Not cheap by any means, but certainly better than $139!
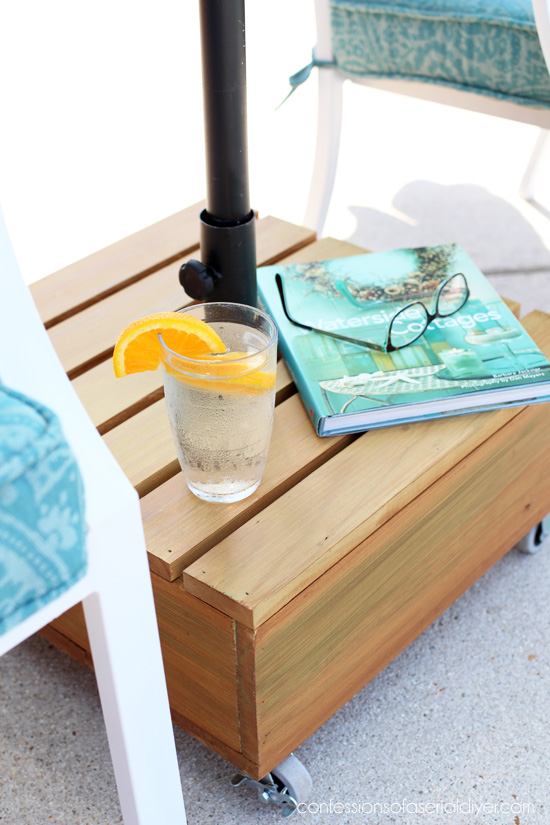
I like that it can even serve as a side table.

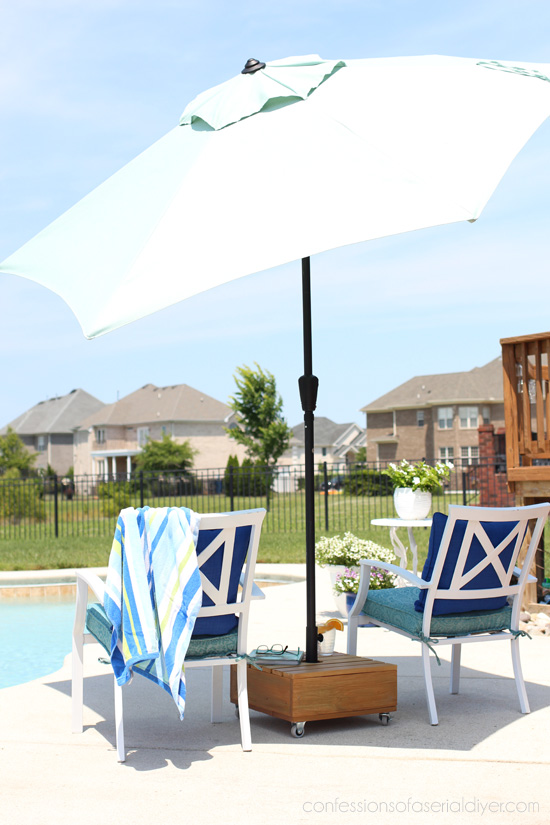
You can see the tree blowing in the background from the wind, but my umbrella has held firm! So far so good!
I’ll be sharing more of our outdoor space in the back next week.
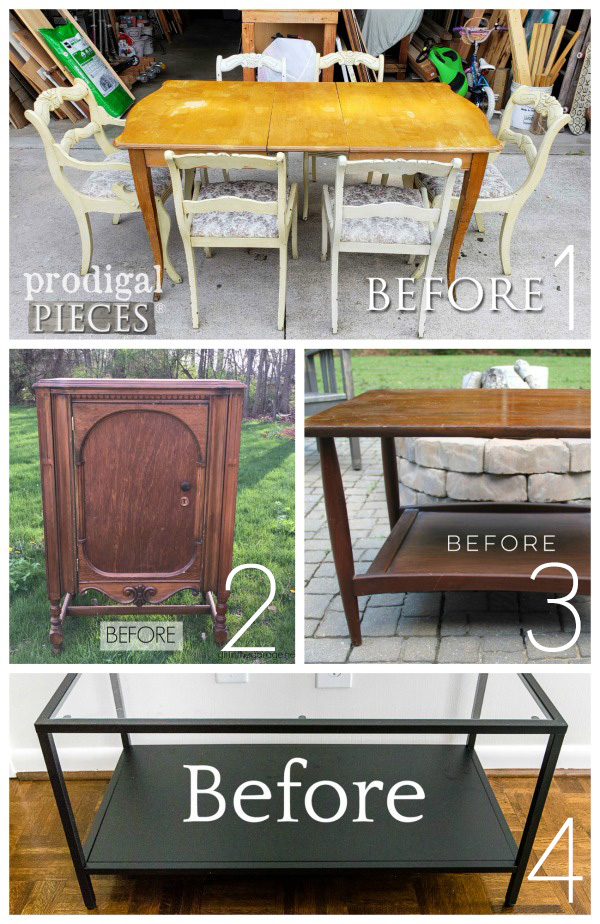
Don’t forget my friends are also sharing makeovers today…I can’t wait to see what treasures they have created from these pieces:
Looking for more Trash-to-Treasure goodness? Visit all of my Trash-to-Treasure Tuesday makeovers in on place HERE.
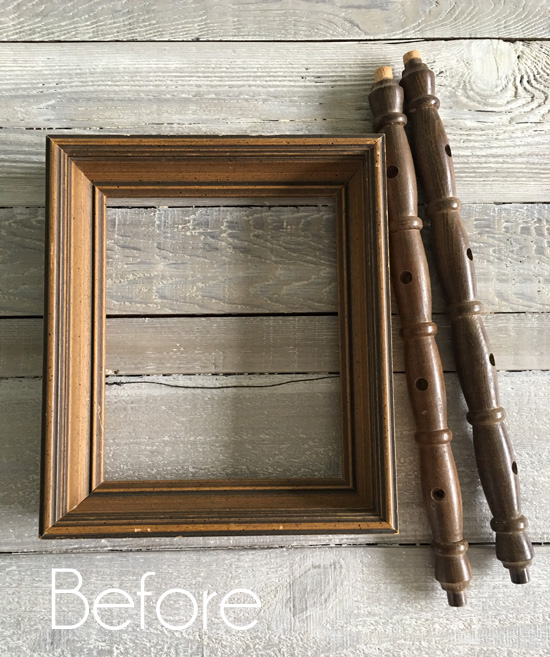
I’ll be back on Thursday sharing this little project:
Hope to see ya then!
UPDATE: Check out the cute after of this frame and spindles HERE now!
XOXO,
![]()
Don’t Miss a Thing!
If you like what you see, there are several ways to follow along!
Email * Facebook * Pinterest * Twitter * Instagram


Mary Kaiser says
Hello thrifty, and craft genius!! How amazing is that? It is so nice of your husband to mix the cement for you, I love how you “LET” him help you, so cute and clever, and I mean cute and clever, you and the project!!
Christy says
Aww you are the best, Mary, thank you! And ha ha yes, I ahem *let* him help ha ha…no really, I couldn’t have lifted that bag to save my life lol! XOXO
Bonnie Hipps says
What a clever girl are you. Is there nothing your mind can’t come up with lol. Really, great job and I know what that southern sun feels like ouch!
Hugs, Bonnie
Christy says
Aww thanks, Bonnie! I was so grateful for that thing this weekend, as that sun is brutal for sure! XOXO
Christina in SW FL says
Christy, I love the way your mind works! 🙂 Wonderful, pretty and useful umbrella stand. 🙂
Christy says
Thank you, Christina! My new stand really came in handy this weekend! XOXO
Larissa Haynes says
Absolutely fantabulous idea!! Love that you grabbed the scrap and even figured out a way to make it cute. Sharing this!
Christy says
Thank you, Larissa!! I totally was looking for function over form, but I am thrilled that it did turn out kinda cute too! XOXO
Janie says
Amazing! As always. So enjoy your blog!
Christy says
Aww thank you SO much, Janie!! XOXO
Ange says
That was a great post. We too get a lot of wind in our area and your wheeling umbrella stand would be perfect for our patio. Thank you for sharing.
Christy says
Thank you so much, Ange! This thing was a life-saver this past weekend…it wasn’t going anywhere! XOXO
Carolyn Price says
It’s the perfect umbrella stand. You’re so inventive!! Hubs should know by now not to pitch ANYthing because you are able to use EVERYthing! ; )
Christy says
Aww thank you, sweet Carolyn! And I know…could you believe he was just going to throw them away?? Gasp! Ha ha XOXO
Becky says
Great idea here! I too have an aversion to roasting in blazing sun, and a husband who wants to throw wood scraps away. They have to be pretty scrappy to not have use in them! What a great umbrella stand! I love the wheels too! Brilliant!
Christy says
Exactly…tiny blisters all over my exposed parts isn’t a good look at all lol, and my Hubby would throw away everything if I let him! Thanks, Becky! XOXO
Gin says
Love the umbrella base. This would work on my dock without the wheels. I have the wind problem too.
Taylor’s do it store at Fairfield had heavy umbrella based made out of rod iron that might work for your table. Going to try the on you made.
Thank you
Christy says
Thanks, Gin! It is VERY heavy to move, but I’m sure it would work great for your dock! Funny…my sister actually mentioned that she saw some at that Taylor’s also as she lives right near there! XO
Marcie Lovett says
Brilliant use of leftovers, Christy! It’s going to get a lot of use. I see the boys sitting on this one and racing it around the pool deck when you’re not looking. (Although I wouldn’t want to give them any ideas, if they haven’t already thought of it ????)
Maybe this is the next big hit for your booth – you could build the box a little higher and have a very functional side table. Crabs, whales, Frency chic, just think of it!
Christy says
Thank you, Marcie! It was put to good use this past weekend! And I never thought about the boys racing on it lol, but it is super heavy to move even with the casters so luckily I don’t think that will be an issue…and same with selling them…I’m not sure we could pick them up to get them to the shop ha ha, but great idea if we could! Wish there was a way I could weigh it! XOXO
Donna says
This has to be the coolest (no pun intended) thing I’ve seen in a long time. I would like to hang out with you just to watch your creativity at work!
Christy says
Aww thank you, Donna! You are so sweet! I really just intended it to be functional, but I’m glad it turned out kinda cute in the end! XOXO
MaryJean says
Christy, what a great idea! That umbrella ain’t going nowhere with the cement in it! I need a new umbrella. Although we don’t get the winds like you do since we are pretty secluded with a woods behind us and many trees around the sun does beat down relentlessly on our patio! My last umbrella has holes in it from the sun just eating at it. But if anyone is in the need of a mobile umbrella that is a great idea! Like they say, “Necessity is the mother of invention!”
Christy says
Thank you, Mary Jean! It didn’t budge this weekend, thank goodness! And there is no better saying…absolutely! XOXO
Robyn Wright says
Doesn’t he know better than to through perfectly good scraps?! That turned out perfect and nobody would guess it was DIY. Maybe you should add some to your booth?
Christy says
I know, right?? Thanks, Robyn! These would be great additions to my booth, but I’m not sure we could lift them ha ha! XOXO
Robyn Wright says
Without the concrete of course. The buyer could do that part. 🙂
Christy says
Oh duh ha ha…yep! 🙂
Debbie in TX says
Love how this looks so professional — like something you’d see in a magazine. The wheels are a necessity, and the table function is so useful. Superb idea, and many thanks to hubby for the heavy lifting! Stay cool!
Christy says
Thank you so much, Debbie! What a lovely compliment! And yes, thank goodness for my hubby! I couldn’t have lifted that concrete without him! XOXO
Nancy @ Artsy Chicks Rule says
I love that it’s also a side table!! Perfect!! Great job. I so needed that on Sunday…the shade and the pool!! lol xoxo
Christy says
Thanks, Nancy!! I wasn’t even thinking it could double as a side table when I was building, but after setting it up, that worked out perfectly! Yes you sure could’ve used a dip in the pool on Sunday! XOXO
ROSE LEFEBVRE says
What a great idea!
Christy says
Thank you so much, Rose! XOXO
Martha Rekni says
That is the coolest thing ever! I keep telling myself that when I travel from Richmond to the Virginia Beach area, I am going to make a special trip just to see your booth. I would just need to ditch the husband and two boys first! Thanks for sharing!
Christy says
Thank you, Martha! I hope you get a chance to stop by some time! XOXO
Patricia J Williams says
I LOVE this project!
Christy says
Thank you, Patricia! XO
Frances says
Great idea. Looks so good. I love the wheels.
Christy says
Thank you so much, Frances! XO
Jen @ Girl in the Garage says
So very creative and functional too! I’m glad you didn’t make the concrete into a mosaic 😉 – the wood planked top looks very chic and stylish as-is. xo
Christy says
Thanks, Jen! I’m glad I didn’t do a mosaic now also…I wasn’t even thinking it could work as a side table until it was finished, so the wood added even more function! XOXO
Paula says
Nothing you could have bought could be as cute and functional as what you made! I’d like to make one but would have to use old lawnmower wheels (axils etc.) or take some from the kids’ wagon, cause we don’t have any smooth terrain, only grass, dirt and gravel. I think it could work. We need some mobile shade. Thanks for sparking some ideas!
Christy says
Thank you so much, Paula! I love the idea to make it with larger wheels upcycled from something else! XO
Sheila DelCharco says
Well done, Christy! Looks great!
Christy says
Thank you, Sheila! XOXO
Carole says
This is one of the things I love about your blog – you always surprise me. This is way too clever – how do you keep coming up with these kinds of solutions for all of your needs… smart that’s it.
Christy says
Aww thank you, Carole! I wasn’t even sure I would share this project when I started…just took pics just in case! So glad I did now! XOXO
Jackie C says
Brilliant!! I LOVE IT!!!
I’ll betcha your husband is in awe of you! lol
Christy says
Thank you, Jackie!! I don’t think I surprise him anymore lol! XOXO
Dee Bell says
So smart! This is a real marketable idea. Wheels on an umbreela stand. Why didnt I think of that.? Thank you. I have heavy cast iron umbrella stands. Id like to figure a way to add wheels to them. They are so heavy. Once placed I dont try to move them around.
Christy says
Thank you, Dee! I hear ya! My old umbrella base was cast iron and I too didn’t dare try to move that outrageously heavy thing! XOXO
Norma says
Gorgeous Christy!!!
Looking forward to seeing your outdoor projects.
Links 1 and 2 of your friends’ makeovers do not work.
Christy says
Thank you so much, Norma! It was hard to photograph the rest of our outdoor space with the bright sun, but I did my best ha ha…looking forward to sharing it this week! And thanks for the heads up about my friends’ links…they both worked for my though…weird! XOXO
Jamie says
You are so smart! I agree, this is a marketable item! I searched high and low for an attractive, yet usable umbrella stand, I could not find it! I finally had to make my own coffee table and drill a hole in it, but it’s tough to move. Thank you for sharing your creativity, it inspires me!
Christy says
Thank you so much, Jamie! I appreciate that! I did find one online, but it was crazy expensive for just plastic that you fill. So glad I was able to DIY a much cheaper alternative. It has worked out wonderfully so far! XOXO
Julie Briones says
I am EXTREMELY impressed! Not only functional for SO SO beauitful!
Christy says
Thanks, friend! It has been a lifesaver out there so far! XO
Paula says
What a perfect thing to make for your new pool. I know you are enjoying having a bit of shade with the intense heat that we’ve been having lately.
Christy says
Yes! It has been so nice to have portable shade any time we need it and we have definitely needed it, my friend! XOXO
Susan says
Christy this is the best idea ever! Everyone needs one of these to move the umbrella from spot to spot. Now could you figure out a better umbrella idea for the beach? Maybe one that doesn’t blow away? LOL Thanks!
Christy says
Thank you, Susan! We have really gotten our use out of this already this Summer! And ha ha…I will work on that one lol! XOXO
Jeannie Wallace says
Great job on the umbrella base. My family always said with a little bit of elbow grease, some duct tape, super glue and a wire coat hanger there’s nothing we can’t make. Well, this might not use those items but you ladies prove that you don’t have to buy what you can imagine and make. Thanks for sharing.
Christy says
Thank you, Jeannie! And ha ha that sounds like me! XO
Lisa Huckstorf says
Hi Christy I love everything you make. my husband said that he would make it for me but he is asking you for all of the dimensions, width, length and height if you could send it to me I would be so appreciative!!!!! I enjoy all of your posts I look forward to them every morning that you put them out.
Christy says
Hi Lisa! Thank you so much!! When I was looking to build this umbrella base, I was working with scraps of pressure treated lumber that my husband had left over from another project, so the biggest I could make my base was 19”x19” based purely on the size of the leftover pieces. The size works perfectly though. I believe the pressure treated wood is 6” wide and that is how tall the umbrella base is. Hope this helps! Good luck…I have really enjoyed our new base!! XO
Karen says
What size bag of Quikrete were you using?
50 pounds? 60? 80?
Christy says
I believe it was a 60lb bag. 🙂