Hello, beautiful friends!! I’ve pulled out one of my favorite DIY projects to share with you today! This teapot garden art is so whimsical and fun!
With Mother’s Day not too far off, this is a perfect project to share since it would make a fantastic Mother’s Day gift!
Before we get to it, we had a lovely vacation last week in Key West! It was so nice to get away and unwind. It was also our first vacation without Jack, but we managed to have fun anyway.
Here are a few pics…

It was full of sunshine, sea breezes, and lots (and lots) of food! Ha ha! Isn’t that always the best part of a vacation? That photo in the center was our view from our balcony…I sure could wake up to that every day!
And I could have kept taking photos of all the cute houses…my dream, a cozy beach cottage!
Now I need to transition back into work mode ha ha! While I share a couple of old favorites this week, I’m also taking advantage of this time to get our landscape ready for the warm days ahead.
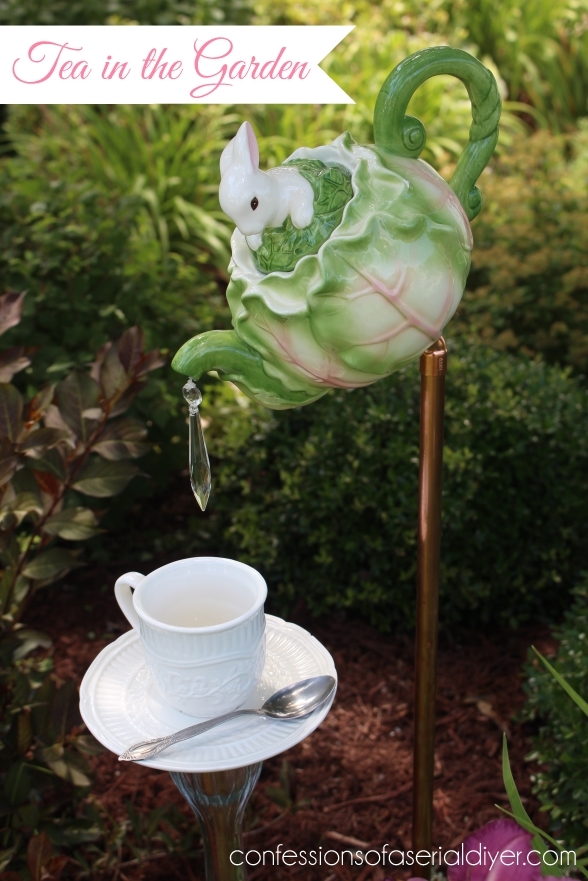
Teapot Garden Art
Now, let’s get to it!
There was a time when if you asked me what project I received the most emails about, I would say hands down, my Sew Easy Outdoor Cushion Covers tutorial. It’s a fantastic tutorial from 2013 when my blog was just a wee baby, sharing how easy it is to cover those worn out cushions for a fraction of the cost of new ones. Back then, I shared more of our outdoor spaces and projects to go with them. I eventually transitioned into doing mostly thrifty makeovers, which of course is my favorite!
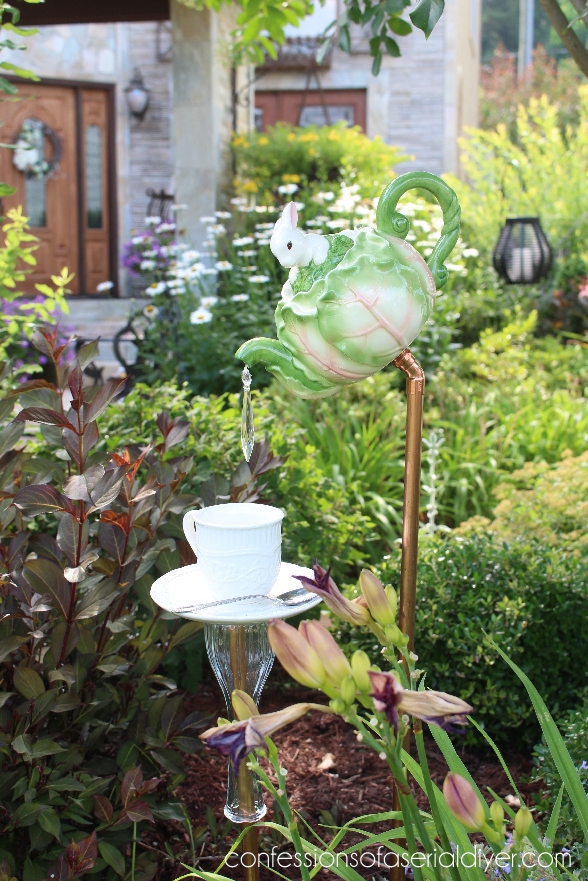
The second project I would get the most emails about was this teapot garden art:
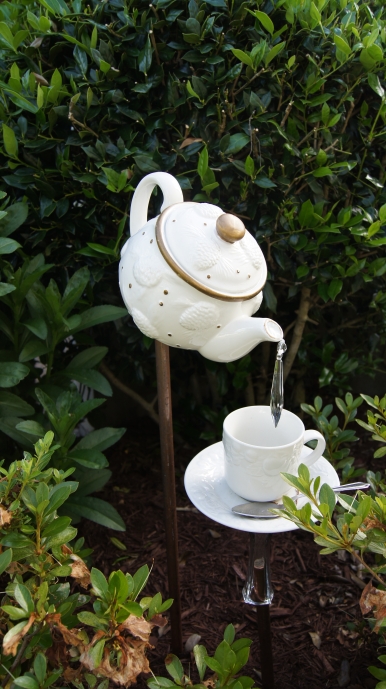
I shared it as part of my Front Yard Garden Tour, also in 2013, and I had countless requests for the tutorial.
Unfortunately, it wasn’t my own creation. I purchased it from a local craft market.
So, I finally decided to see if I could replicate it to share the how-to, and I did it!
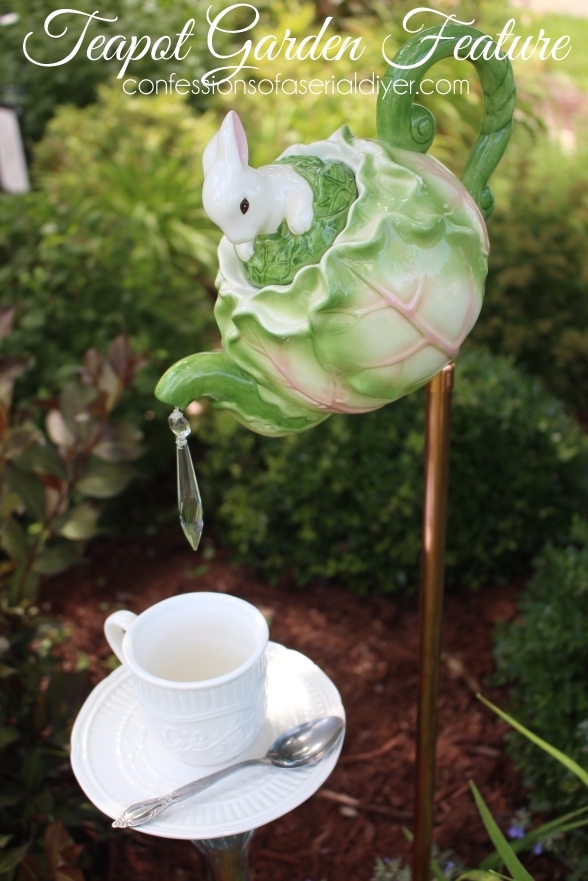
How cute is this bunny teapot??

It would make a fabulous Mother’s Day gift, right??
What You’ll Need
I’ve included a few affiliate links so you can find the products I love.
To get started, you’ll need the following supplies, most of which I found at the Home Depot:
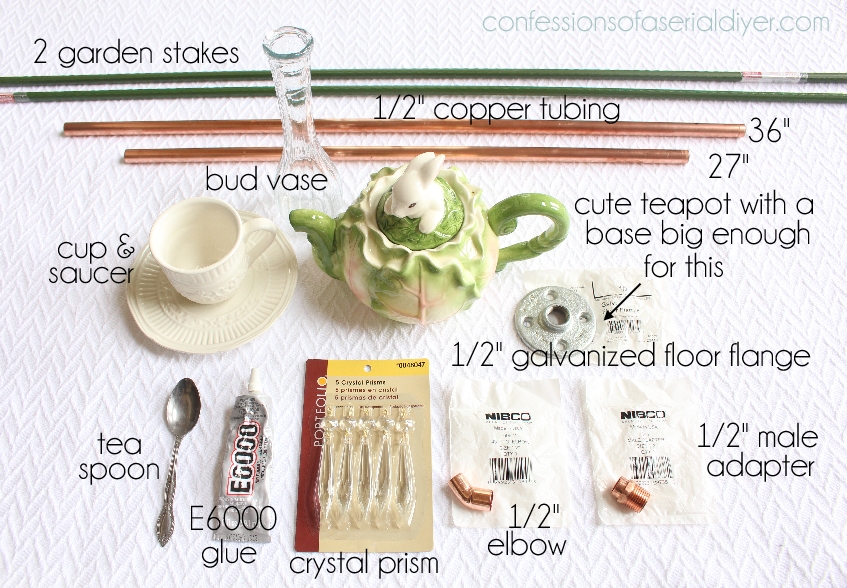
- Two garden stakes
- 1/2″ Copper piping cut to the lengths shown
- Clear bud vase
- Cup and saucer
- Tea Spoon
- Teapot with lid and a large enough bottom to fit flange
- 1/2″ Galvanized floor flange (or copper if you can find one)
- 1/2″ 45 degree Copper Elbow ( a sweet reader said it is called a “short sleeve” elbow)
- 1/2″ Copper Male Adapter
- E6000 Glue
- Crystal Prism (I found this in a pack of five at the Home Depot near the lighting, but this only requires one.)
- Cotton ball (not pictured)
- Cotton Swab (not pictured)
- Glue gun/ glue (not pictured)
- Fine fishing line
and one of these:

My hubby calls it a tubing cutter. This is what I used to cut the copper piping, which made it super easy.
Let’s Get Started!
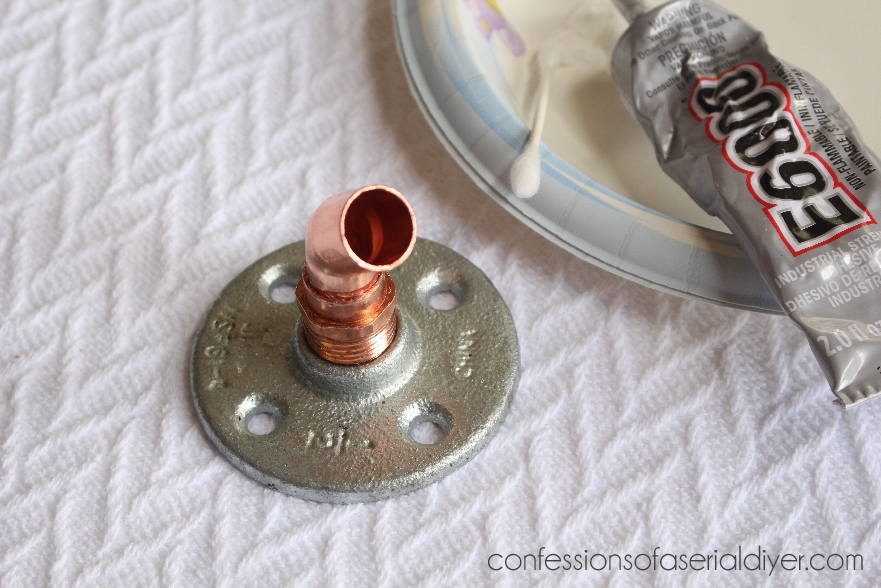
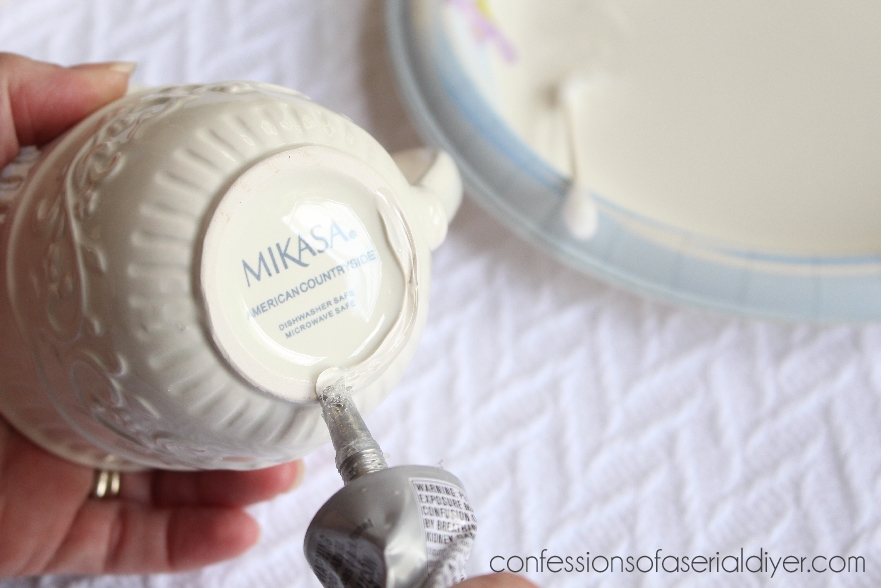
The first step is to add a little E6000 glue, using a cotton swab, to the threads of the male adapter, and then screw it into the floor flange.
Then, also using a cotton swab, add glue to smaller rim of the elbow:

Then, insert it into the male adapter and set them aside to dry.
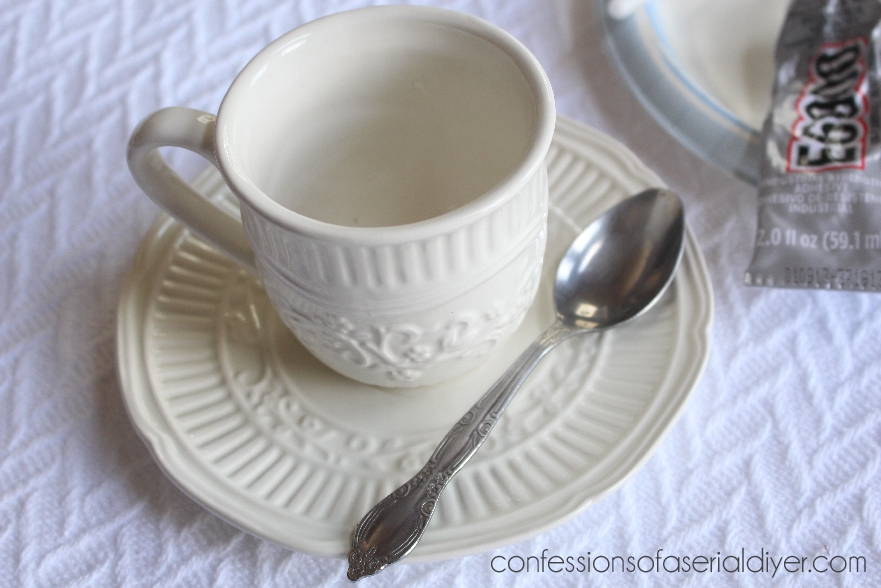
Next, grab your cup and saucer. Apply E6000 glue to the bottom of the cup.
Glue to the saucer. Then apply glue to the spoon back and the backside of the top of the spoon handle, and attach it to the saucer.
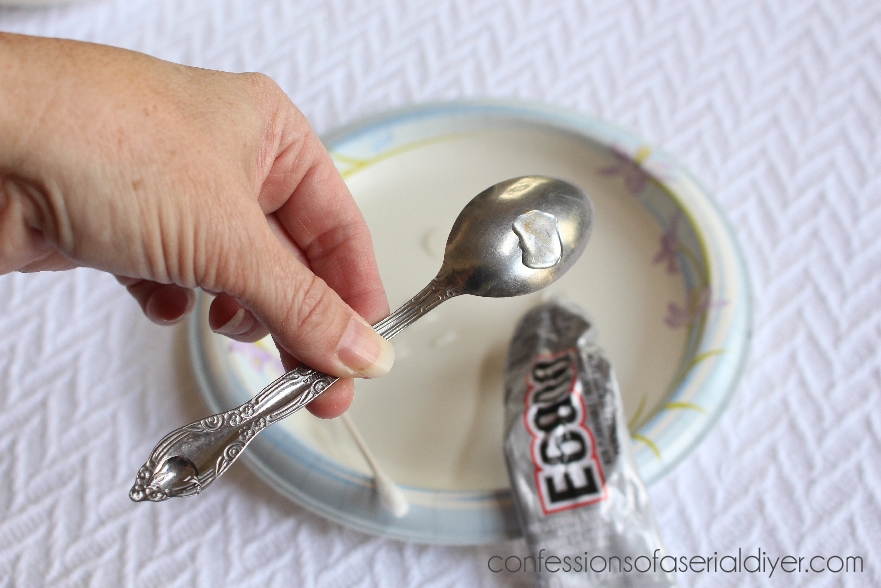
I found this cup and saucer at HomeGoods for $3.99, but you could probably get lucky at the thrift store. The spoon was a thrift store find.
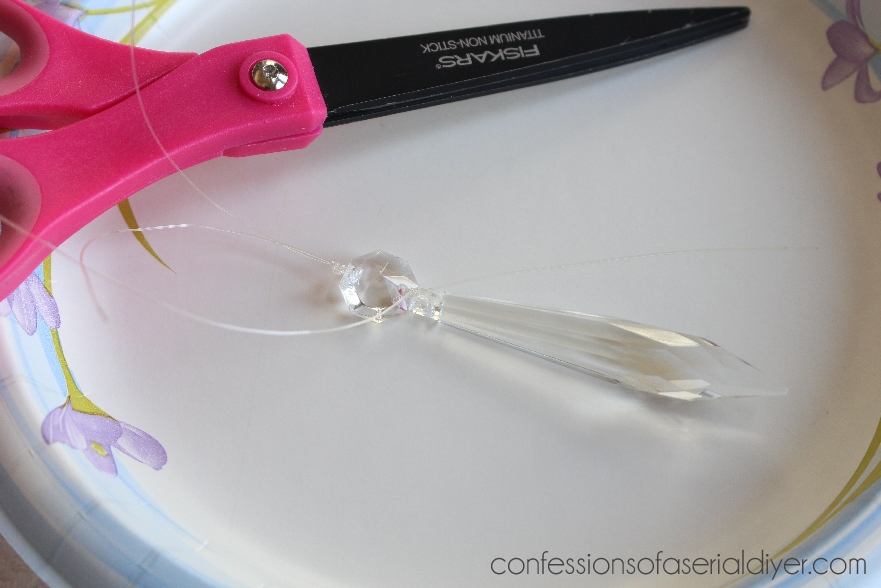
Set aside to dry. Replace the gold wire in one of the prisms with fine fishing line, so it will appear more water-like. Leave about six inches of thread attached at the top.
Grab your teapot and the cotton ball. Apply E6000 to the cotton ball.
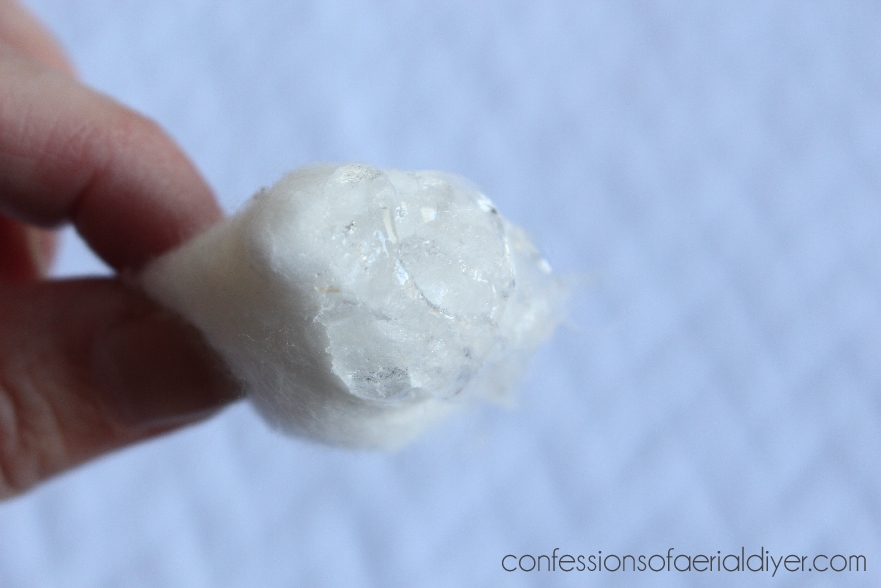
Insert the extra fishing line through the spout of the teapot, then insert the cotton ball into the spout from the inside:
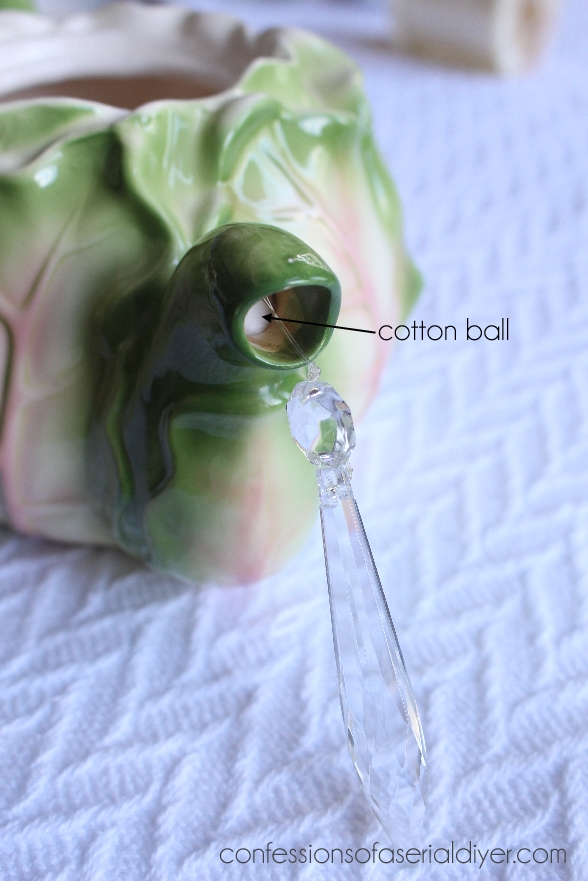
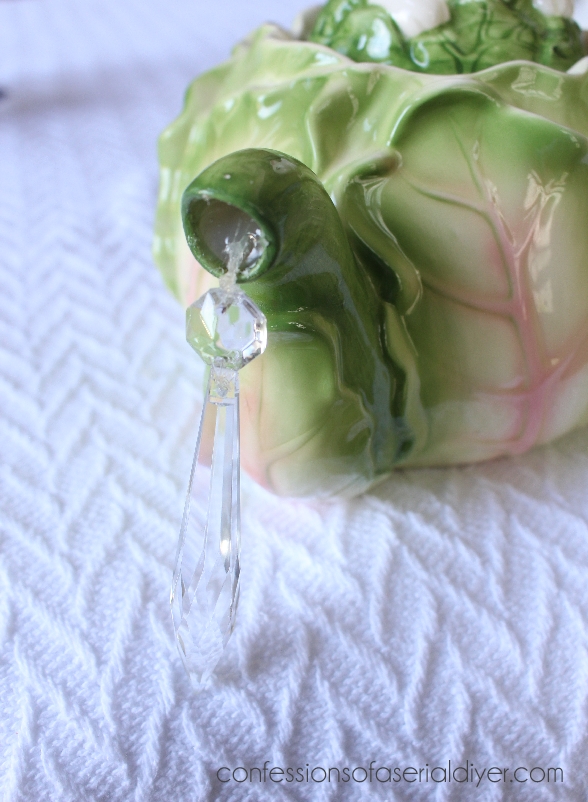
This will secure the prism in place. This small cavity will be filled with hot glue once the E6000 dries. Now you can glue the lid of your teapot in place.
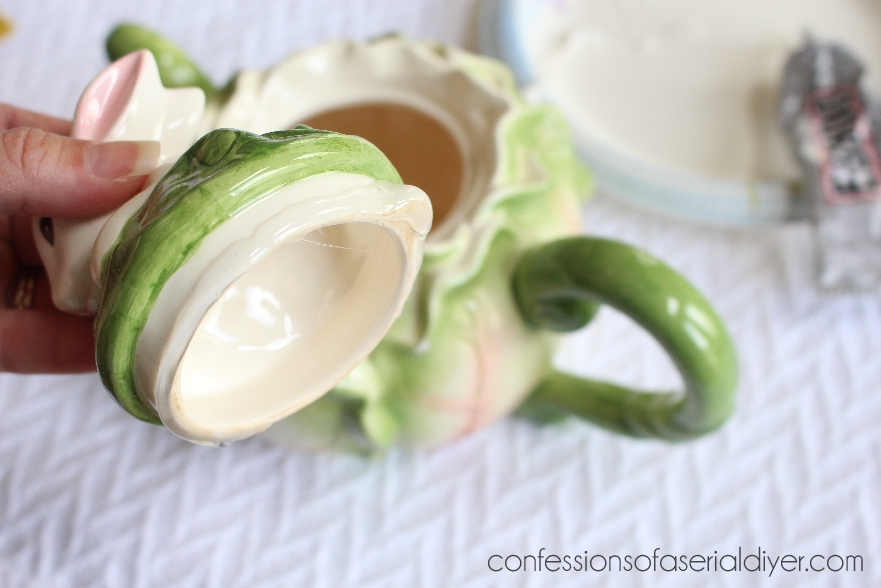
Once the glue has dried, fill the spout opening with hot glue. You will need to hold it at an angle so that it will not drip out, until it firms up, about 5-7 minutes.
Find a container that will hold your teapot upside down. I used a Rubbermaid container.
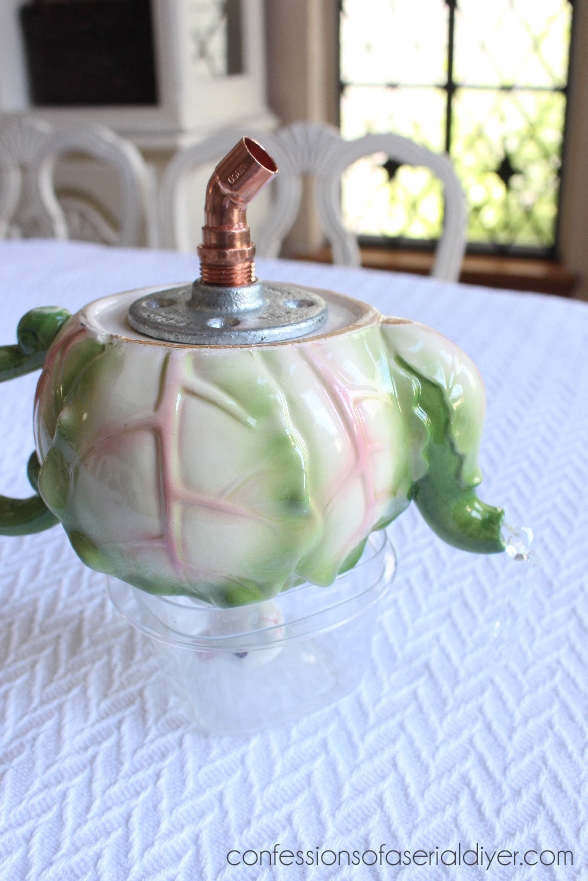
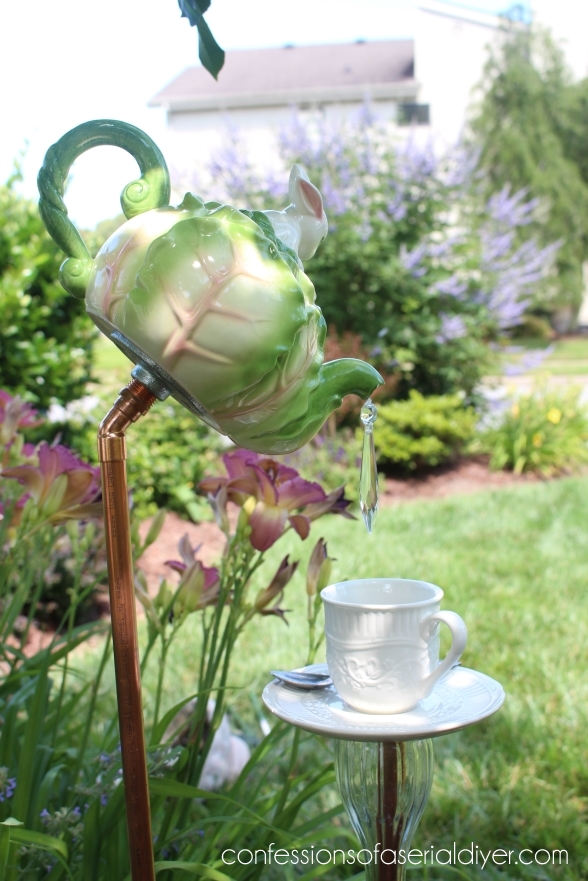
Apply E6000 glue to the bottom of the flange and attach to the bottom of the teapot, with the elbow angled toward the spout like so:
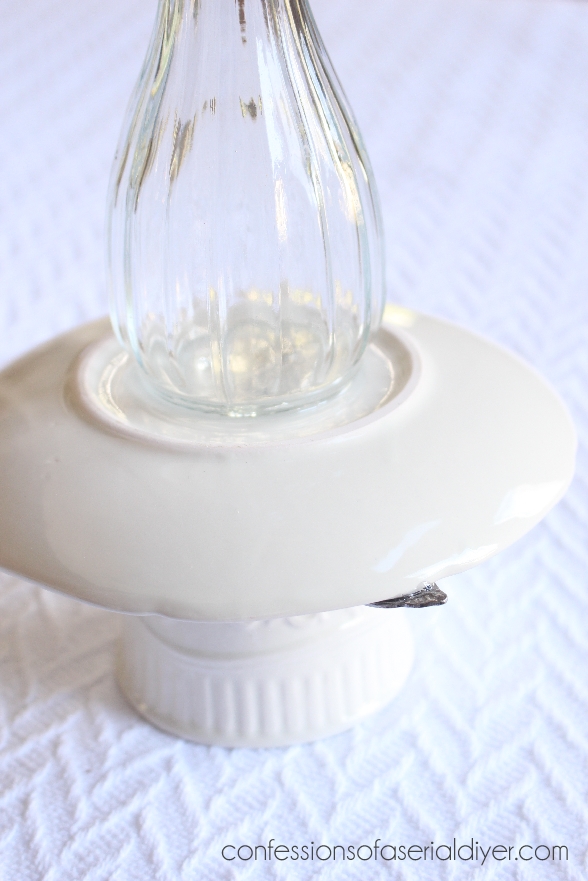
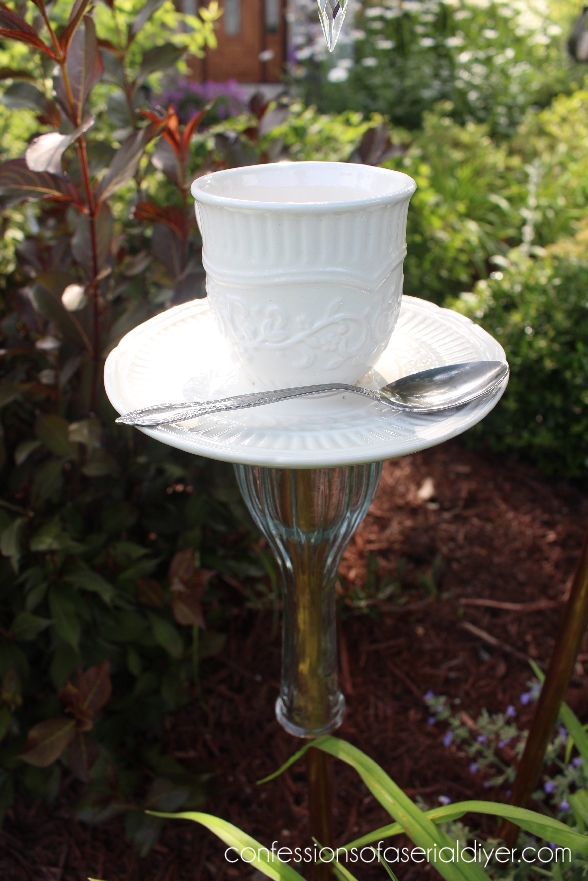
Next, turn your cup and saucer upside down and glue the bud vase to the bottom.
That’s pretty much it. Allow both pieces to dry at least overnight.
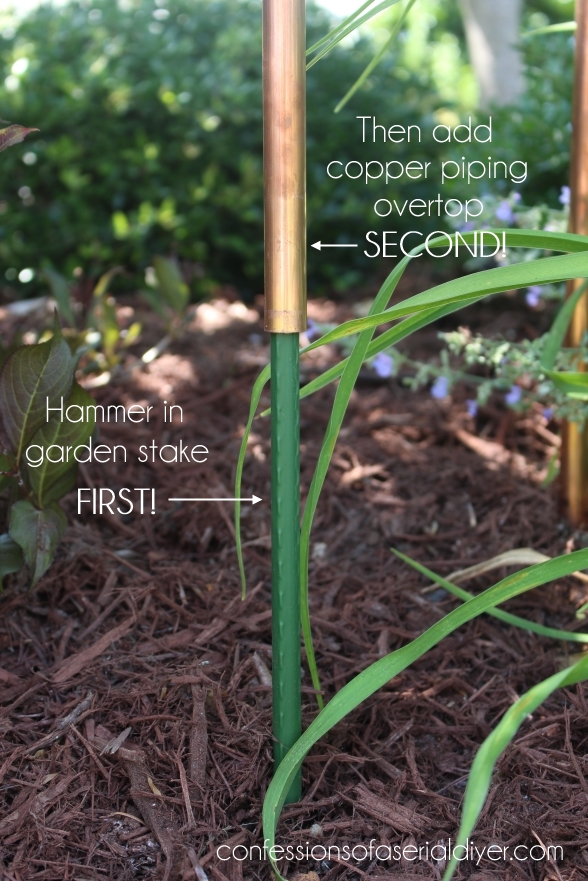
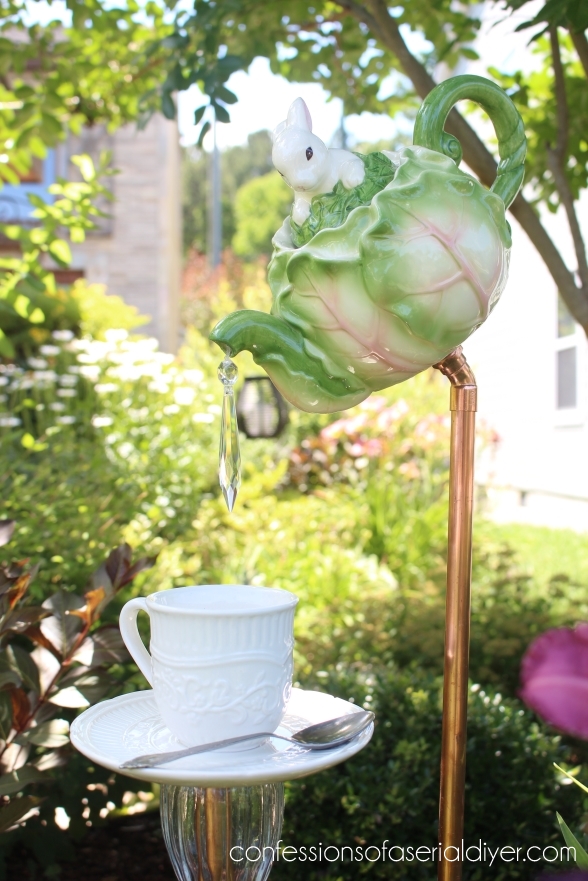
Install it Properly
To install your beautiful new creation, first hammer in the garden stake, then apply the copper piping over it. DO NOT HAMMER THE COPPER as it will become distorted and your teapot may not attach to the fitting properly.
Add teapot…
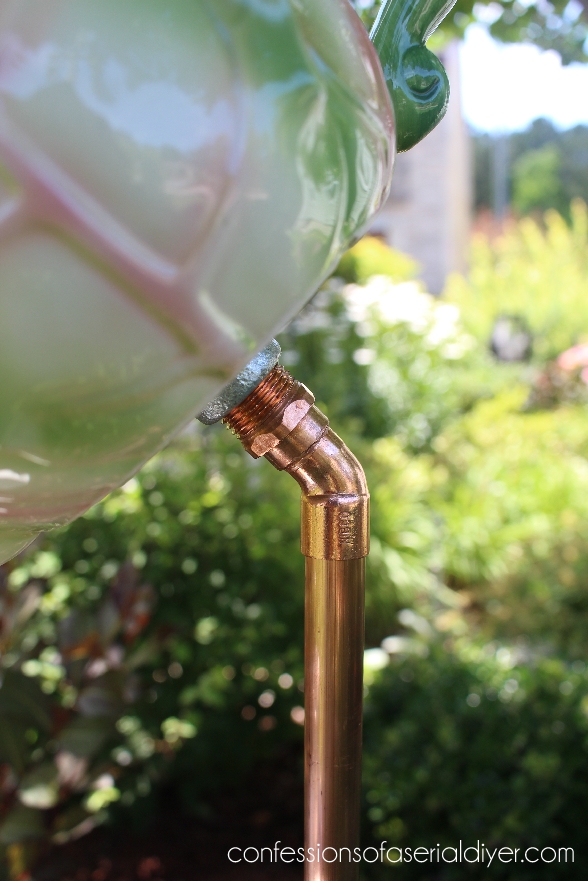
This is not glued in place for easier storage if you decide to remove it during the winter months.
Position the stake for the cup and saucer centered directly below the dangling crystal. The bud vase should easily slip over the copper piping.
And voila!
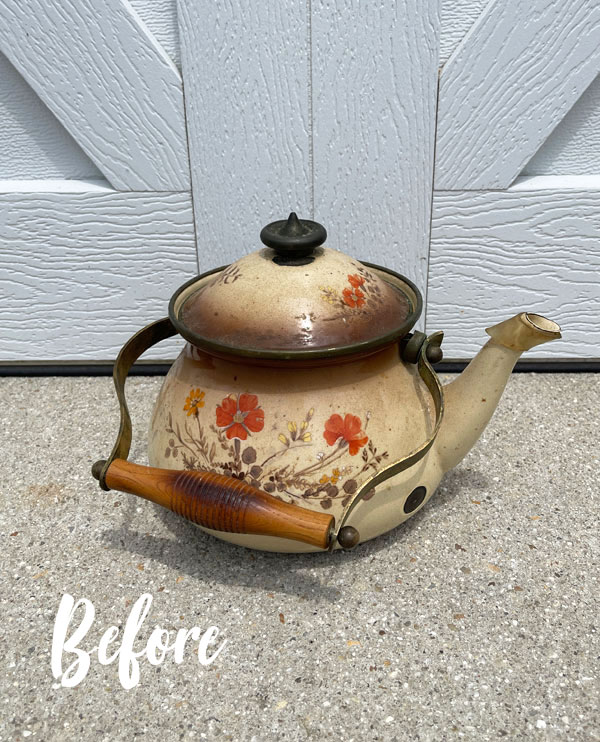
I found this teapot at a thrift store for $2.25 and knew exactly what I wanted to do with it when I found it…
Here is the view from the back:
This was in our front garden at our old house…
I’m so happy to finally have a tutorial to share! I originally linked to the site for the gals I purchased this from, but it is no longer active.
The total cost for this project was around $36 with my thrifted teapot being such a deal.
This should last for years and years outdoors, although we did bring ours in during the winter months. Unfortunately, the bunny teapot broke when it fell out of my hands as I was carrying it indoors to clean it, but sharing this has me wanting to make another!
I hope you enjoyed a sweet outdoor project today!
If so, you might like what I did with this tea kettle also!
See it HERE now!
I’ll be back with something else fun for Thursday!
XOXO,

Don’t Miss a Thing!
If you like what you see, there are several ways to follow along!
EMAIL * INSTAGRAM * FACEBOOK * PINTEREST


Get FREE SHIPPING on all orders over $50. No code needed at checkout! Orders under $50 always enjoy $8 flat rate shipping! Most orders ship same or next business day!

Mary Kaiser says
Oh I remember when you got those for your garden, I love that you showed us how do do it! It is so sad that it is broken! I am on the look out for a tea pot now because I need that sweet little tea pot and cup and saucer in my garden! I absolutely love what you did with the other tea pot as I am looking at it right now! I am so happy to have it and so happy you had a nice vacation with your lovely family!!
Christy says
Thank you so much, my friend! I was heartbroken when this one slipped from my hands. Now that our landscaping at our new house is more mature, I need to make another! I am so happy you have the other one…it is one of my favorite projects! Our vacation was very much needed and enjoyed, and I am now ready to get back to it! Have a great week! XOXO
Lilly T says
I’ve always loved your teapot garden art!! . I think I’m finally going to give it a try! Thanks for showing it again. <3
Christy says
Aww yay! Thank you, Lilly! I hope you’ll give it a try! XOXO
Cecilia says
Oh cute! I’ve seen these at craft markets or similar ideas. Good to have a tutorial. That way you can customize it using pieces that “speak” to you. I’m sorry the bunny teapot broke. If you make a new one, be sure to share what you found!
Christy says
Yes, it is really nice to be able to make one out of your own find for sure! I will be sure to share if I make another…I really want to now ha ha! XOXO
Lynette Foster says
I love the tea pot idea. What kind of price would you sell it for?
Christy says
Thank you, Lynette! If I were to sell them, they would have to be at least in the $65 or so price range to recoup the investment and make a little on them. Maybe if you were to buy the supplies in multipacks, the bottom line would be less. XOXO
Janice Holt says
Such a cute way to display a tea pot. Had forgotten about this one. Great job of course. Glad you had a great vacation. Loved the pics.
Christy says
Thanks, Janice! We had a wonderful time! XOXO
Sandra W Magle says
This is totally adorable Christy. I’ve pinned for a future project…Loving that particular tea pot also!!! Too cute, Sandi
Christy says
Thank you, Sandra! I was so tickled to find that cutie pie teapot! XOXO
Jackie C says
Such handsome fellas! Thanks for sharing a few pictures of your vacation. I know it was bittersweet without Jack. They grow up SOOO fast. We don’t realize it until it has already happened. Thankfully, there are grand babies ❤️
I love this project. I especially like the way you secured the water drop, preventing wasps and bugs from access to the inside. E600 is the best! Super cute!
Christy says
I’m glad you enjoyed the pictures! We didn’t take a ton, but I wanted to share a few. It was bittersweet without Jack for sure. And yes, I love E6000! Thanks, Jackie! XOXO
Patty says
Your teapot garden art is adorable!
Your Key West vacation looks so fun. Would love to have more information about your trip including where you stayed, where you ate, and any other pertinent tips.
Christy says
Thank you, Patty! We stayed at the Ocean’s Edge resort on Stock Island about 4 miles from the heart of Key West. Something we enjoyed was touring Truman’s “Little White House” where he often stayed while visiting Key West. We ate a great restaurant with lovely outdoor seating called First Flight just a couple blocks away afterwards. We didn’t hang around the hustle too much. We rented a boat from our resort for a day. We ate at a good italian restaurant called Roostica that was near where we stayed, visited the Hemingway House, did a Room Escape which had us escaping from a Cuban Prison lol…that was fun! There is plenty to do and see! XOXO
Robyn Wright says
Look at you! Making something whimsical and non-furniture. I LOVE IT!!
Christy says
Ha ha, right?? Thank you, Robyn! XOXO
Michele M. says
That is sooooo adorable!!!!!
So glad you enjoyed your vacay – sounds heavenly now our temps dipped to mid 30s again after teasing us with high 70s for a few days. Boo.
It snowed and hailed yesterday! Please, come back spring!!!!
Christy says
Thank you, Michele! Our vacation was wonderful…I would go back tomorrow ha ha! Oh no…30’s?? Hoping the warm weather comes back to stay soon! XOXO
Sharon Austin says
I made one for my sis in law a few years back when you posted this before; turned out so cute and she loved it! Thanks for sharing your ideas 🙂
Christy says
Oh yay! I love that! I’m thinking it’s about time I make another! Thanks, Sharon! XOXO
Robin says
Can you share thoughts on how we could modify this for a patio or terrace (no dirt or lawn)? I’ll be moving to a high rise with a terrace so I will transition to container gardening. How to ‘ground’ this sculpture?
Christy says
I would just stick it in a large planter. It would be so cute popping out of the top of a planter filled with flowers! XOXO
Jan Kinman says
Christy, you never cease to amaze me!!! Even though this teapot is from some time back the idea is so perfect for an outdoor space! I lov it! Thank you for such a great explanation of supplies & dyi. Then the tea kettle center piece do over as another project was beautiful as well! Definitely will be ordering me some transfers.
It’s funny to hear you were in Florida last week because so was I! I went to visit some old friends in Sarasota. The weather was perfect & I had a wonderful time!
Looking forward as always to your talented projects. (Or looking back at them). Hope you’re having a good week!
Christy says
Aww thank you so much, Jan! I am so glad you enjoyed this project! It is definitely a favorite of mine. We picked a great week to be in Florida…the weather was perfect! Enjoy your week too! XOXO
Lani says
That turned out perfectly adorable!! Thank you for the tutorial!
Christy says
Thank you so much, Lani! XOXO
Vicki says
This is so stinking cute, saving this tutorial for sure! Thanks for sharing!
Christy says
Thanks, Vicki! It is one of my favorite projects! I hope you make one! XOXO
Susan says
Love your teapot art! Thank you for such great informative posts — so many great ideas! Am so sorry the bunny teapot broke. I have been wanting to make one of these but hadn’t seen good instructions like yours. Am wondering what does the clear vase do?
Christy says
Thank you, Susan! I was so sorry the bunny teapot broke too. I am definitely wanting to make a replacement now though. The clear bud vase attaches to the bottom of the cup and saucer and allows you to just set it down over the garden stake. XOXO
Susan says
Thank you! I always look forward to your posts!
Christy says
You’re welcome, and thank you! XOXO
Sue says
Thank u for posting the instructions for the garden tea post. I a so doing this i
n my garden! Yours is so sweet!
Christy says
Oh yay! You are so welcome! Enjoy!! XOXO
Janet says
Christy
Thank you for sharing your vacay photos
I love Key West
A few years back, we kept our live aboard sailboat there and had so many fun monthly trips!
And as always … lived your teapot project !
Christy says
Thank you, Janet! We loved Key West too! I can see why you kept your sailboat there. I am ready to go back already ha ha! XOXO
Petra says
That looks so cute. I love using teapots/teacups in the garden for birds! Also Key West looks lovely – the architecture is so pretty 😊
Christy says
Thank you, Petra! They are perfect for garden projects and yes, they make great feeders too! I really loved Key West…I would fly out tomorrow and head back if I could lol! XOXO
Cory says
Girrrrrrl, this is fabulous!!! I started following you as a thrift flipper, so this garden art is brand new to me—and I LOVE it. Now I want to make one for me and my mom. Thank you so very much for your content, creative energy, and sweetness. You’re a delight. And I love your getaway pics!!
Christy says
Aww thank you SO much, Cory!! You are the sweetest! I’m so glad you enjoyed this project and your mom will love it!! Have fun! XOXO
Kathryn Buckland says
Christy,
First of all, your smile is gorgeous! I too had braces as an adult (mid 40s) and have been so grateful for a nice smile.
Second, this teapot project was one of the first things I tackled as soon as you sent the tutorial out! I made one for me and one for my sister. Unfortunately, mine has really yellowed over time. But I still love it. My sister’s is in better shape because she brings hers inside in the winter. I’m in Florida so mine stays up all year…for like how many ever years ago you first shared this! Thanks for your inspirations!
Christy says
Aww thank you so much, Kathryn! I’m so glad to be brace-free ha ha! And I love that you made some SO much! Mine broke, but I am now wanting to make another!! Enjoy the rest of your weekend! XOXO