Hello, amazing friends! It’s once again time for Trashy Treasures Tuesday with my dear friends! My trashy makeover for this round is a painted lingerie chest makeover. Be on the lookout for my friends’ makeovers at the bottom!

Let’s get right into it, shall we?
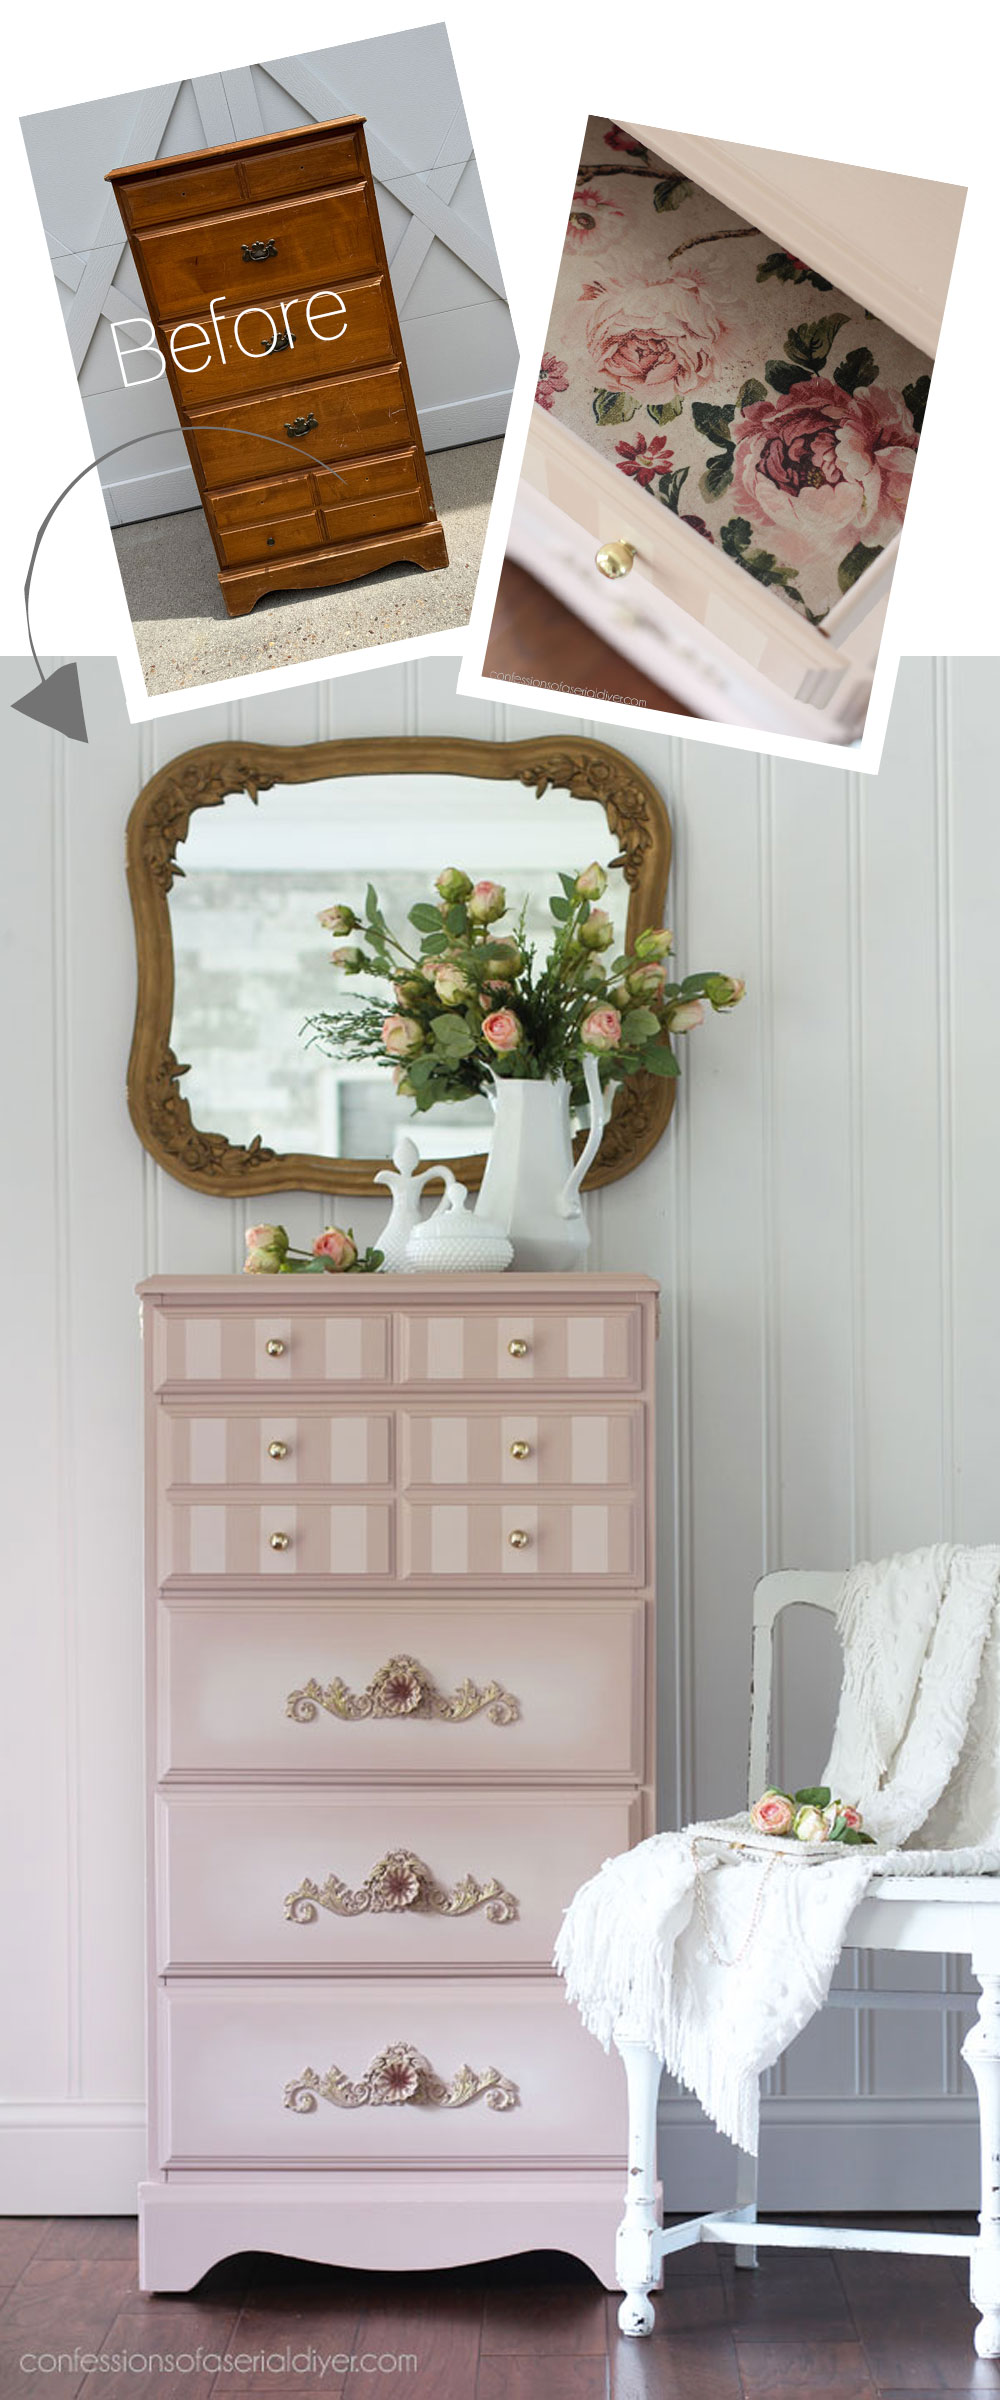
Here is how this piece looked when I found it at the thrift store for $15.99:

This was an excellent candidate for our trashy treasures makeover today, because it was quite trashy!
Here’s a closer look…
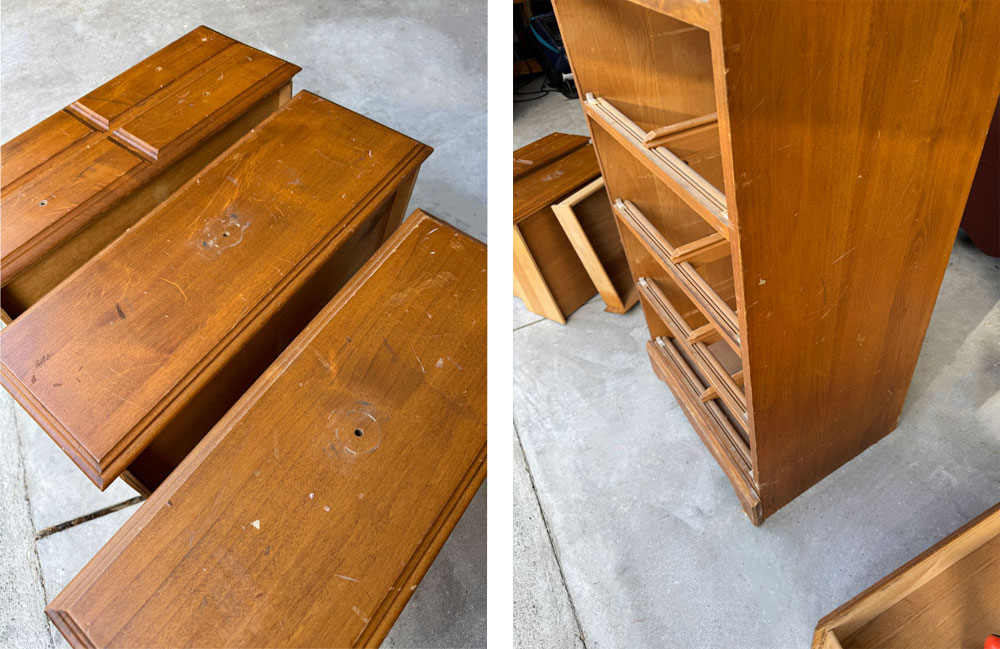
And you may have noticed that the bottom drawer was clearly out of place in the before photo. That was for good reason. Here was the status of that drawer:
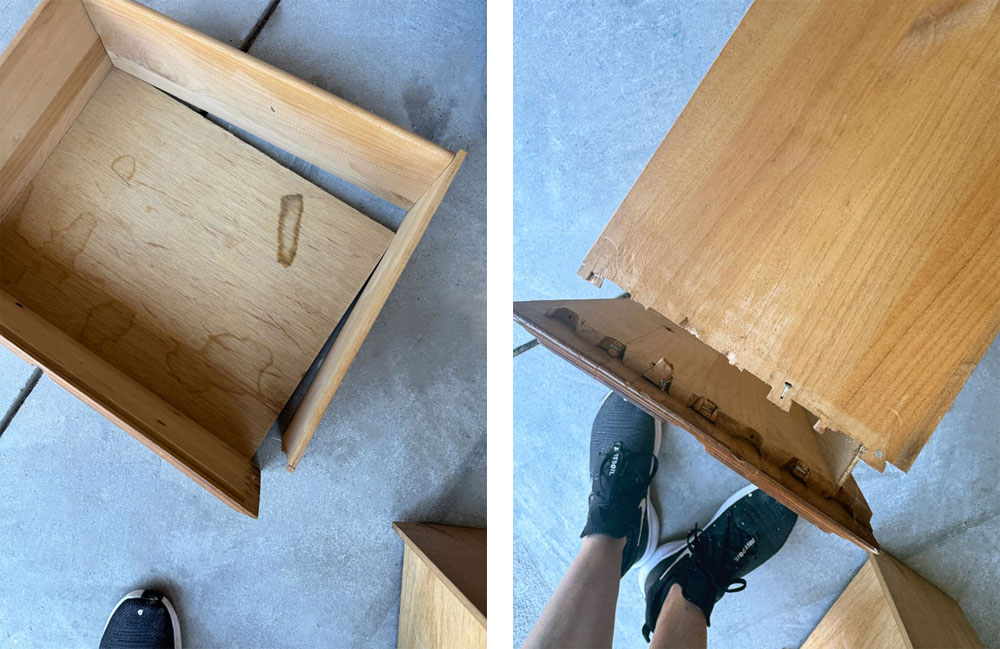
There was no way to just glue it back together like I usually can, so I found these L brackets in my stash that I had removed from another piece:
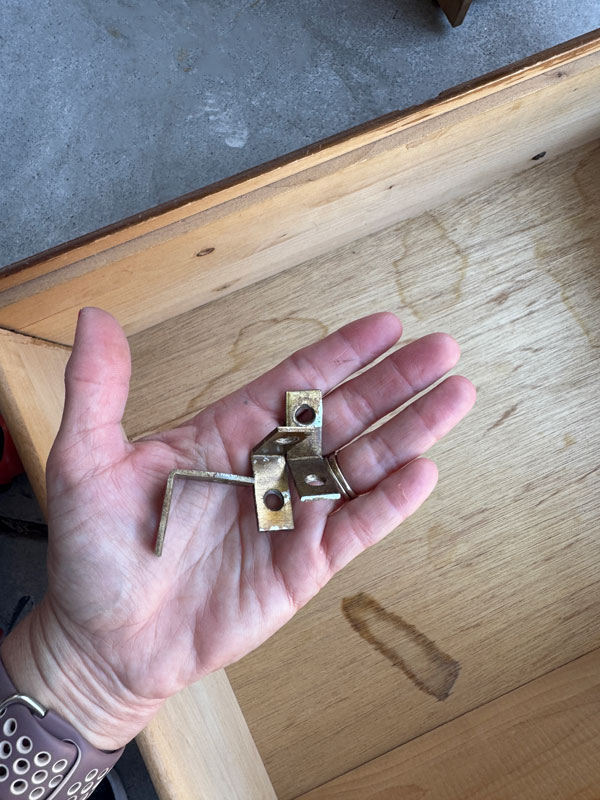
I save all the things lol! They were just what I needed to secure the corner of this drawer back together…
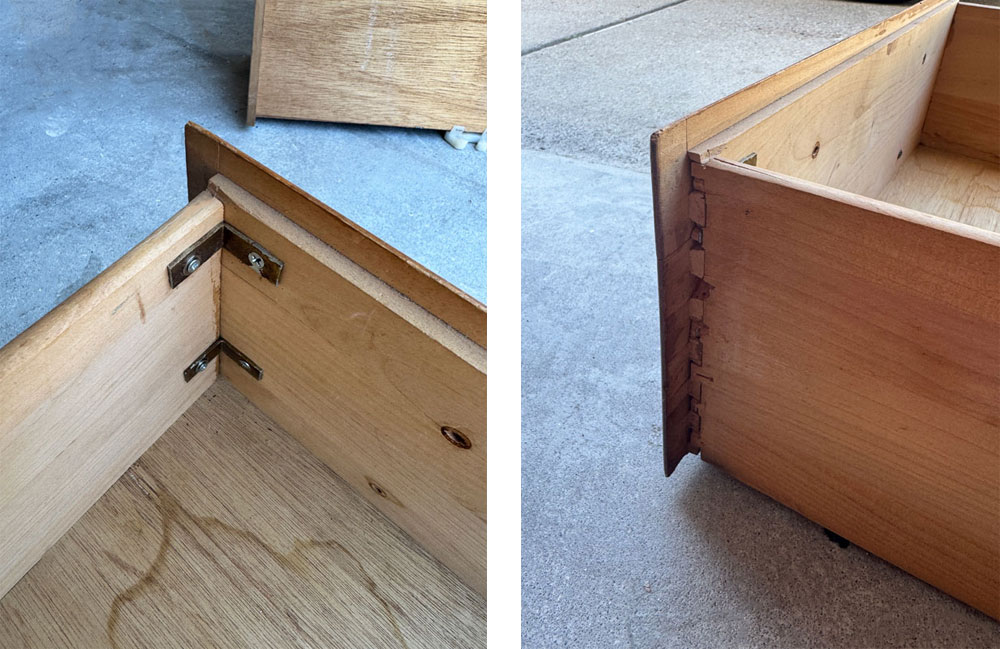
The outside didn’t look perfect, but paint would help!
I’ve included a few affiliate links so you can find the products I love.
Clean
Once that drawer had been repaired, it was time to clean! I did that using my go-to paint prep for furniture, White Lightning from Dixie Belle. I simply mix 1 tablespoon into a half gallon of warm water, and I’m ready to go.
These terry cloth applicator pads are perfect for the job and can be tossed in the wash:
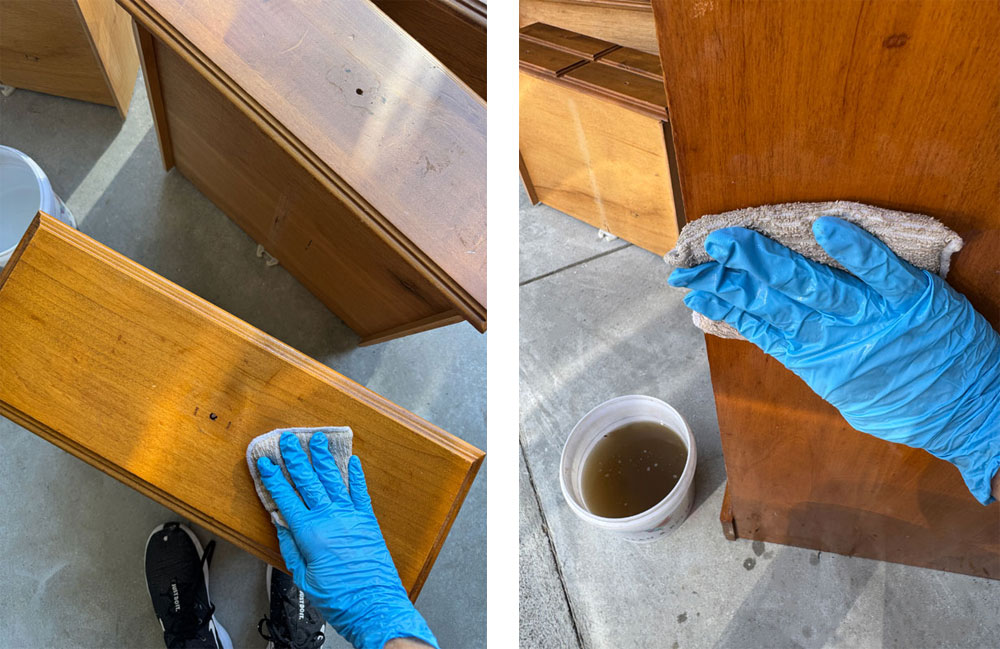
Do I need to point out the dirty water?? Be sure to swap that out for clean water and give your pieces another wipe down. This removes any remaining dirt and residue. Gloves are recommended.
Fill the scratches and gouges
Next, it was time to fill in all the imperfections, and there were a lot! I did that with Dixie Mud:
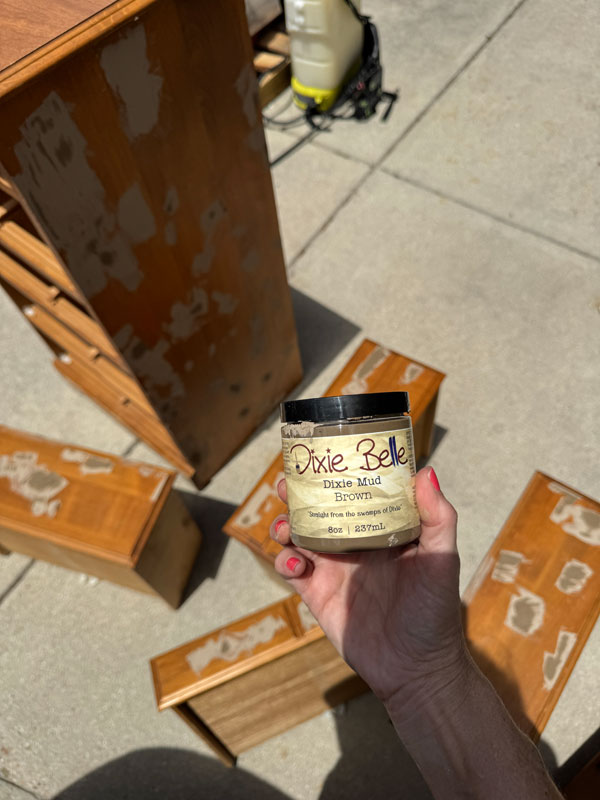
I told you there were a lot!
And here is what I love about Dixie Mud
Have you ever used an entire jar of traditional wood filler??
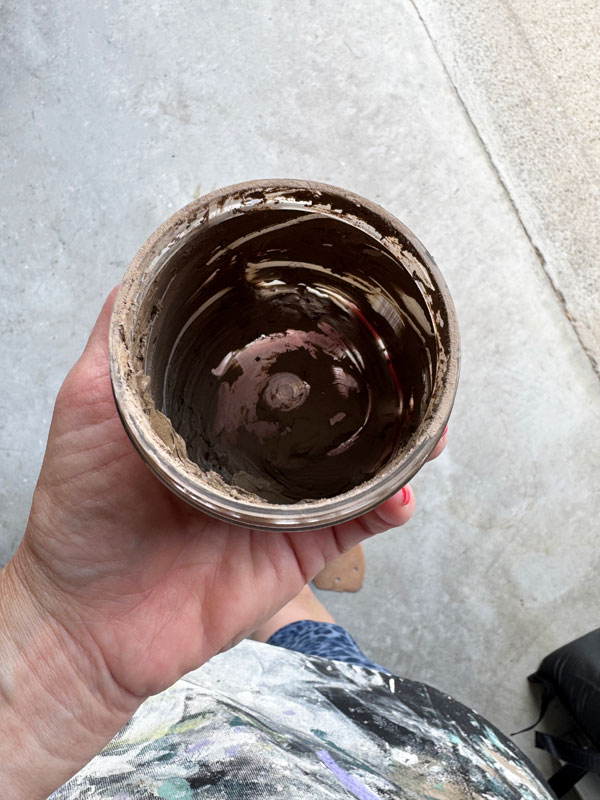
I know I haven’t because it always hardens halfway through, but this stays soft! (The jar says to refrigerate after opening because it can mold? I don’t and haven’t had any issues, but just an FYI because apparently someone has!)
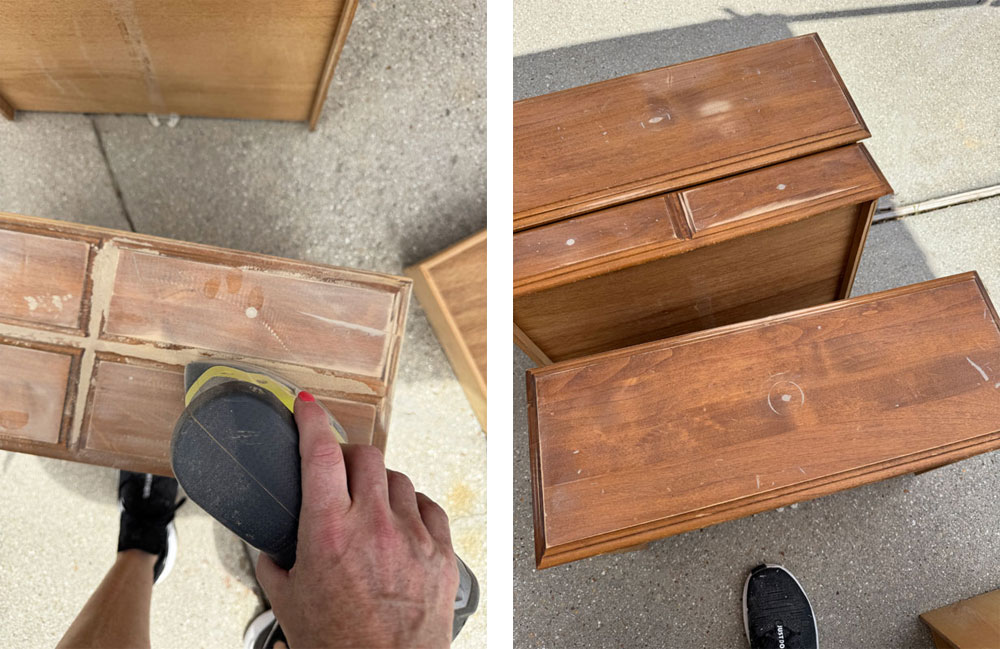
I left everything out in the sun to dry for about an hour and then sanded the mudded areas smooth with 220 grit sandpaper using my Ryobi Corner Cat Sander:
Prime with Bonding BOSS
Once the imperfections were taken care of, I opted to apply a coat of Bonding BOSS since there is often a risk of bleed through when you sand below the original finish. I chose Bonding BOSS in white for this lingerie chest:
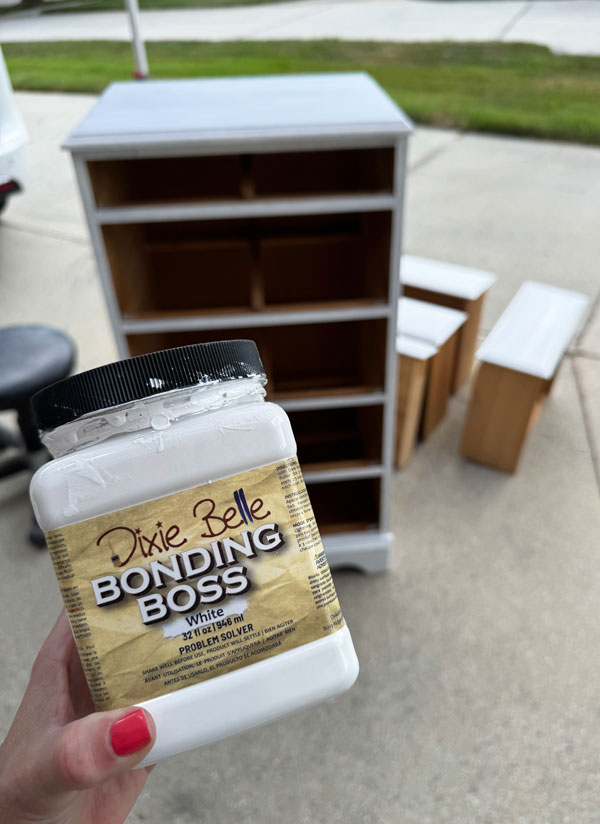
I applied just one coat and then waited the recommended 24 hours to paint.
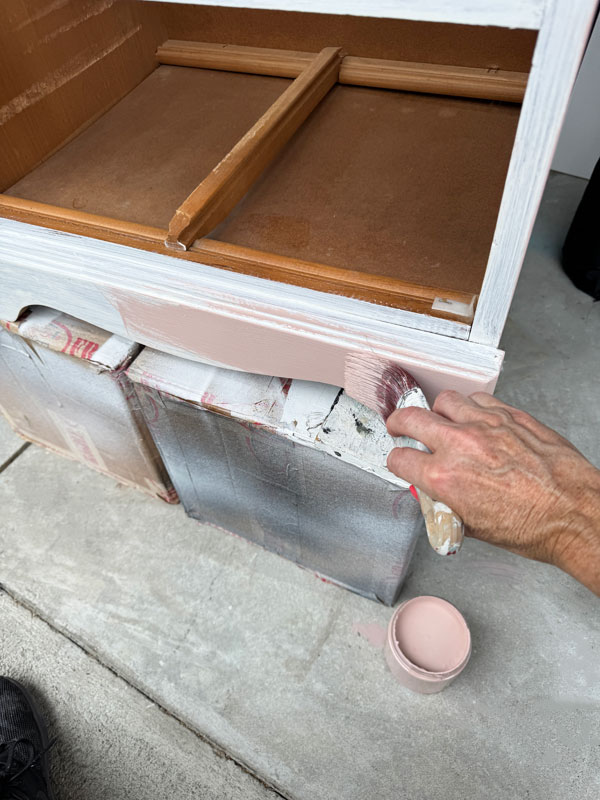
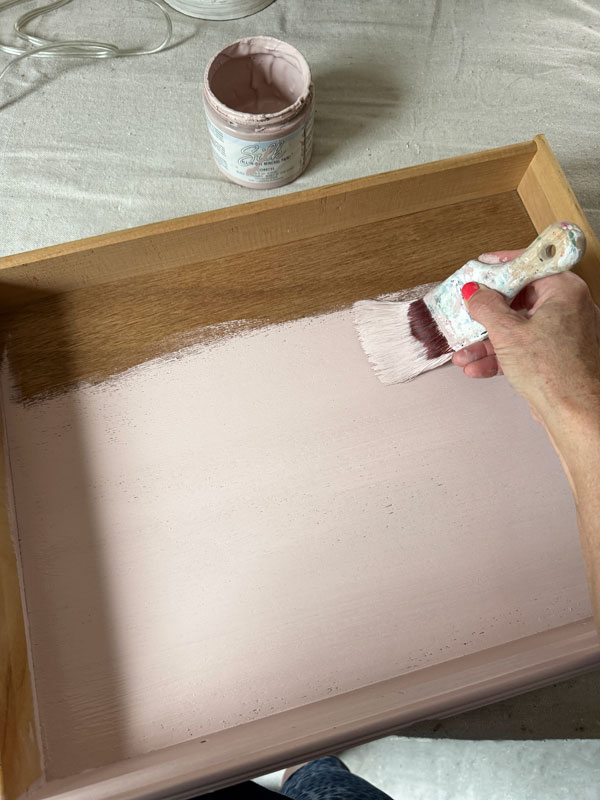
Paint
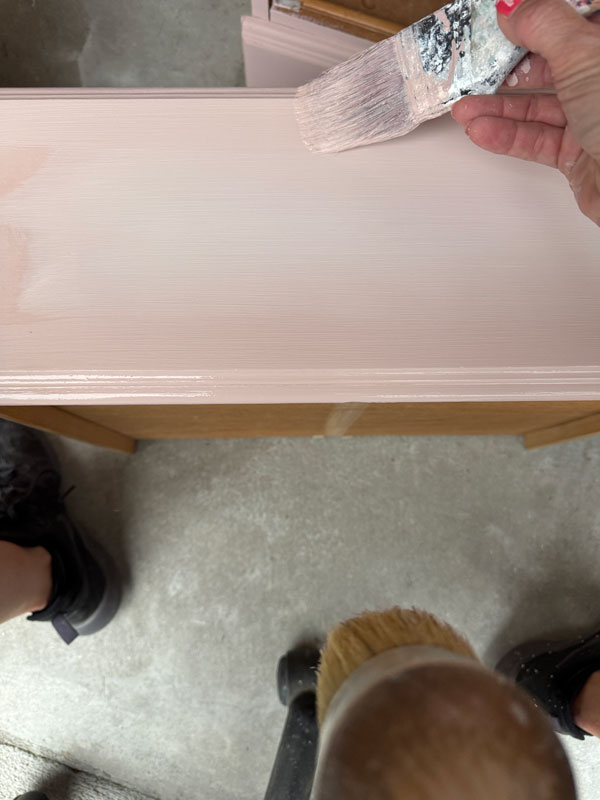
I guess I haven’t gotten enough of this gorgeous color, because I used it here too! And as you can see, I skipped the sprayer and opted to paint by hand with my mini angle brush instead this time…
This is Tea Rose, the chalk mineral paint version of Conch that I used on this secretary desk I shared recently.
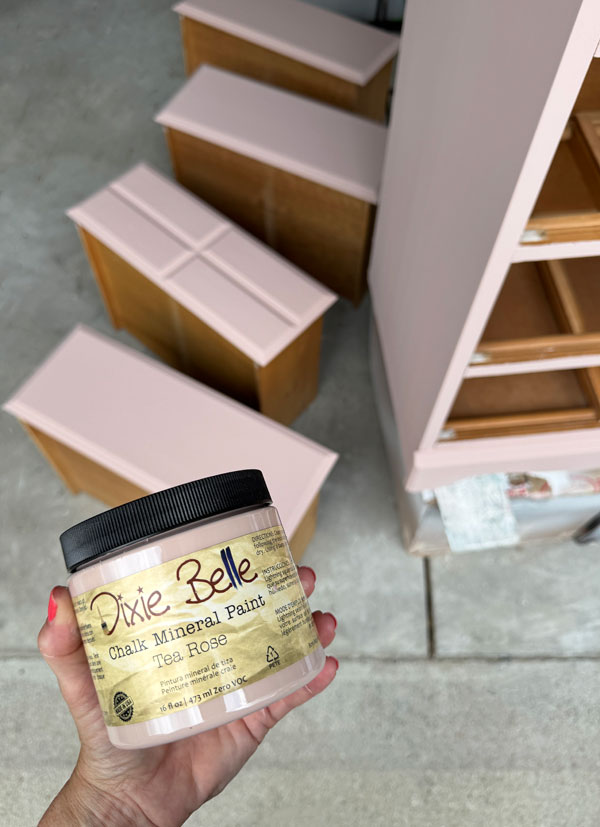
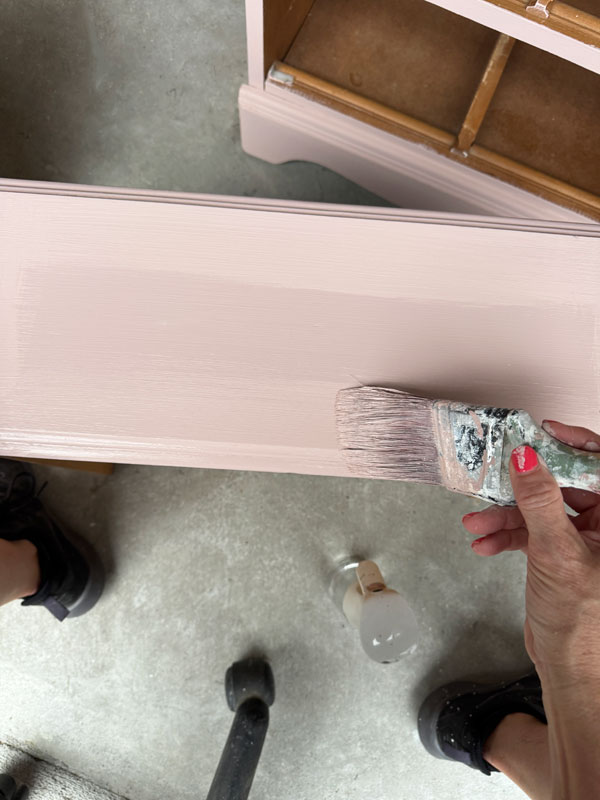
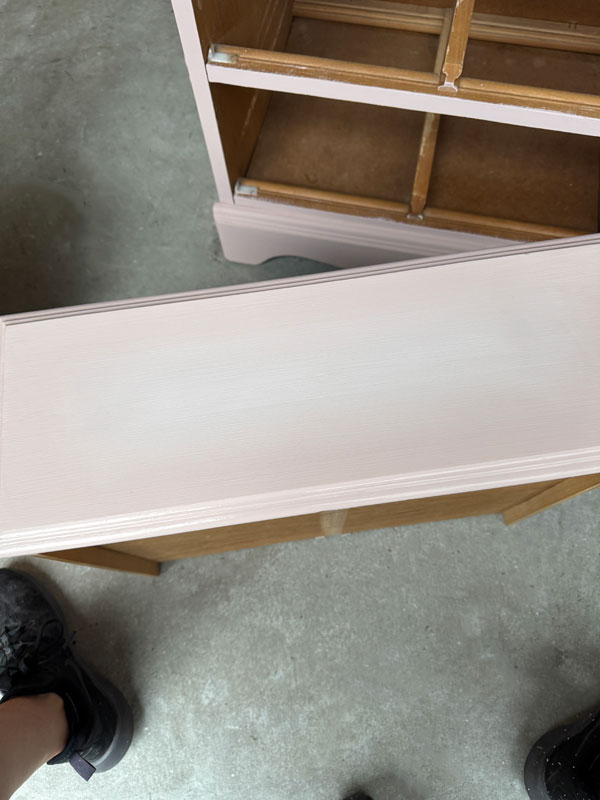
The white Bonding BOSS was such a nice base for this color that I almost could have gotten away with one coat, but I did give it two.
Blending the finish on the drawers
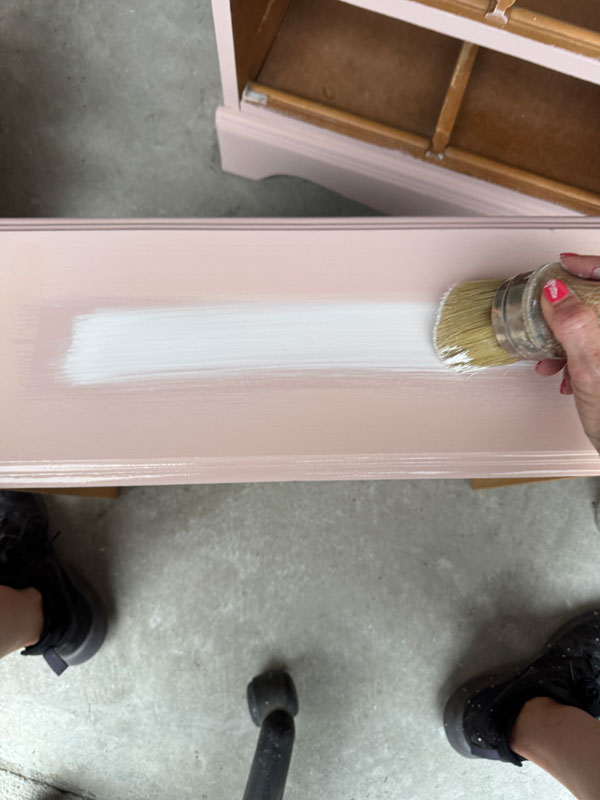
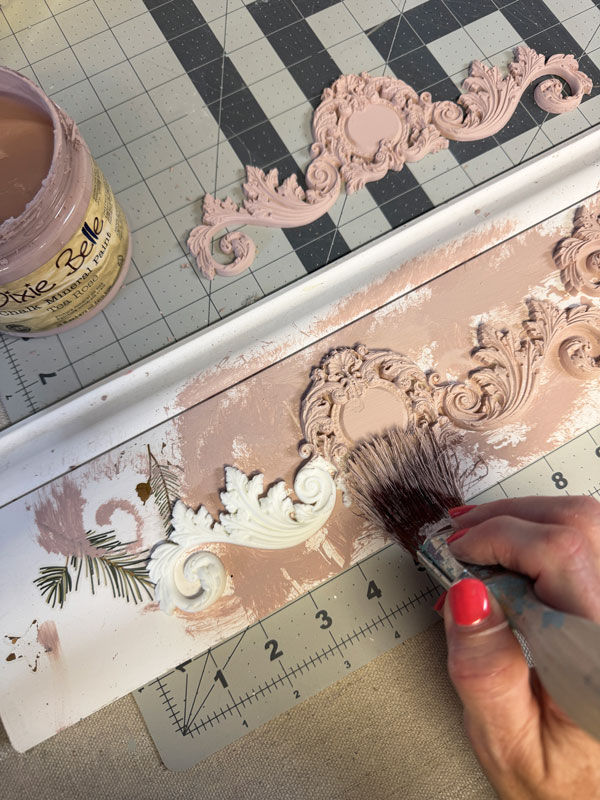
I was sure that I was going to use a transfer on this piece, and for that, I wanted a blended finish in the background. I chose to do it on just the three larger drawers on the bottom.
To do that, I added a fresh layer of Tea Rose all around the edges of my drawer:
Then, I spritzed water across the surface with my continuous mister:

I then added a line of Fluff to the center with my Best Dang Brush:
To blend the two colors, I started swirling the brush in circles all around the edge, pulling the paints into one another:
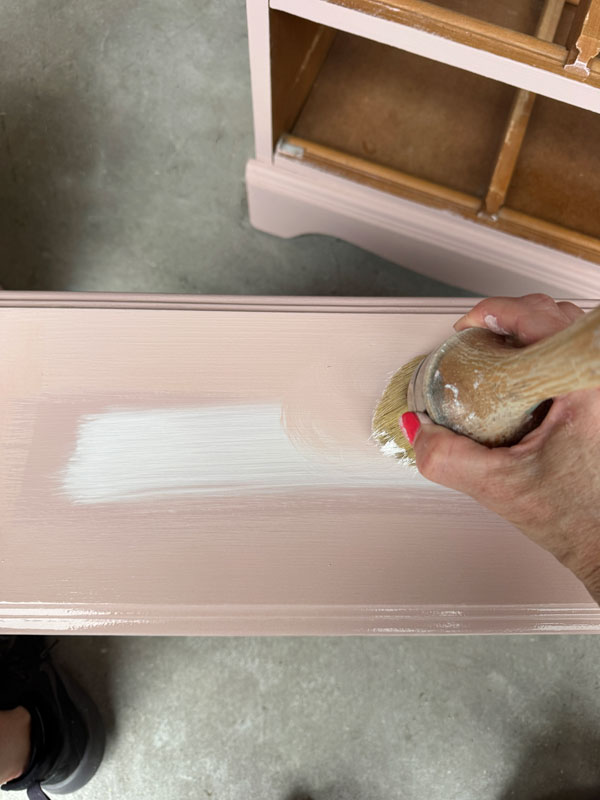
I kept going all the way around…
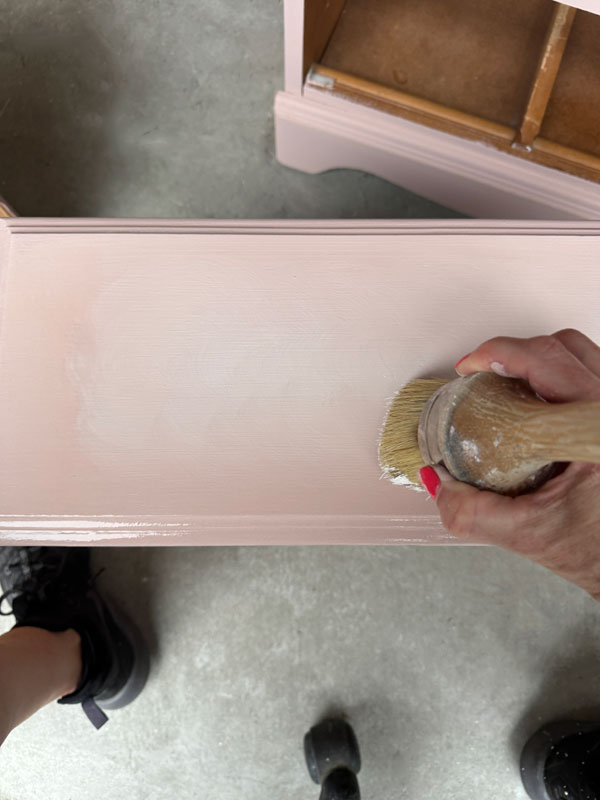
You can see the swirl pattern in the paint, so I went back lightly with the Best Dang brush going straight across…
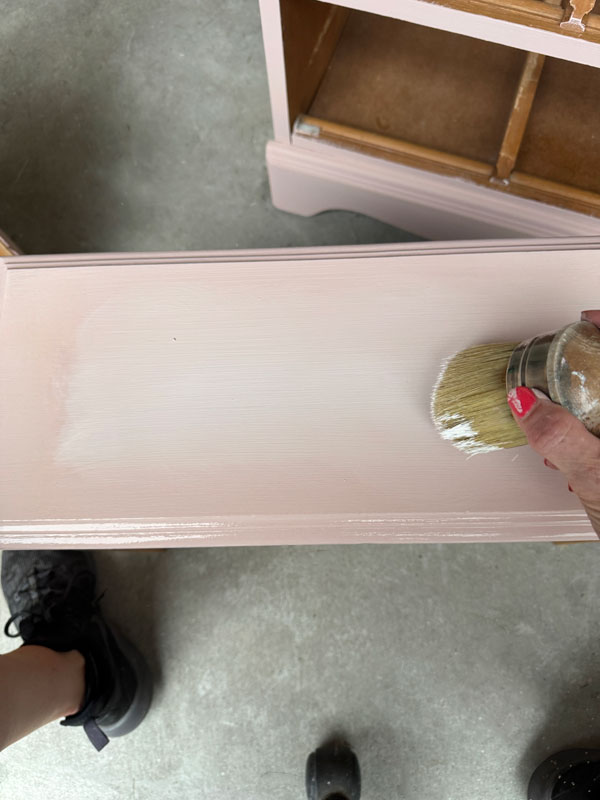
And then with the Tea Rose brush around the edges until I got a look I was happy with…
This step takes patience, but keep going until you get a look you’re happy with.
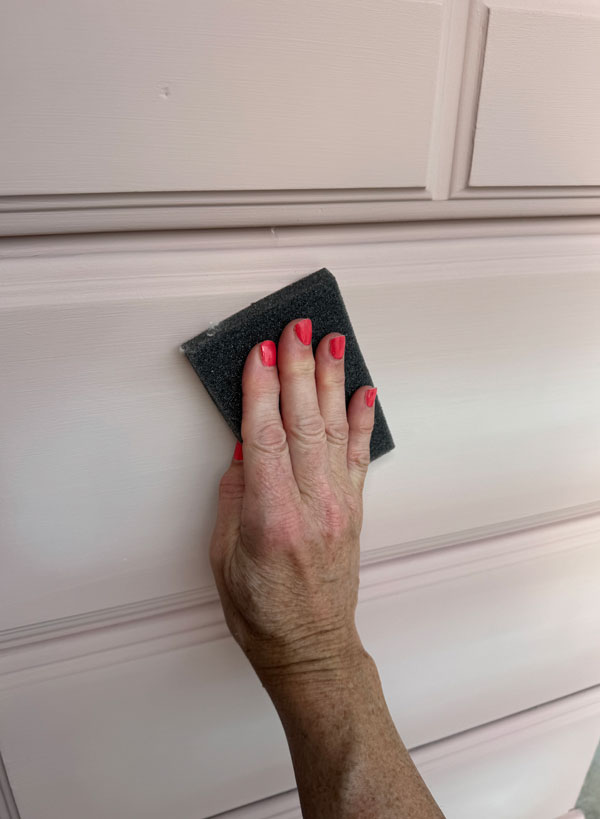
Sand
Once I had the drawers blended, I sanded everything all over with a fine grit sanding sponge:
Change of Plans
I paused here since Brennan had an orthodontist appointment across town, and while we were out that way, we stopped in at Hobby lobby to choose hardware for this sweet lingerie chest. I found the perfect hardware, however, I was now having second thoughts about adding a transfer. The new hardware would be perfect with some moulds that you’ll see in a bit, and the transfer would have been a bit much.
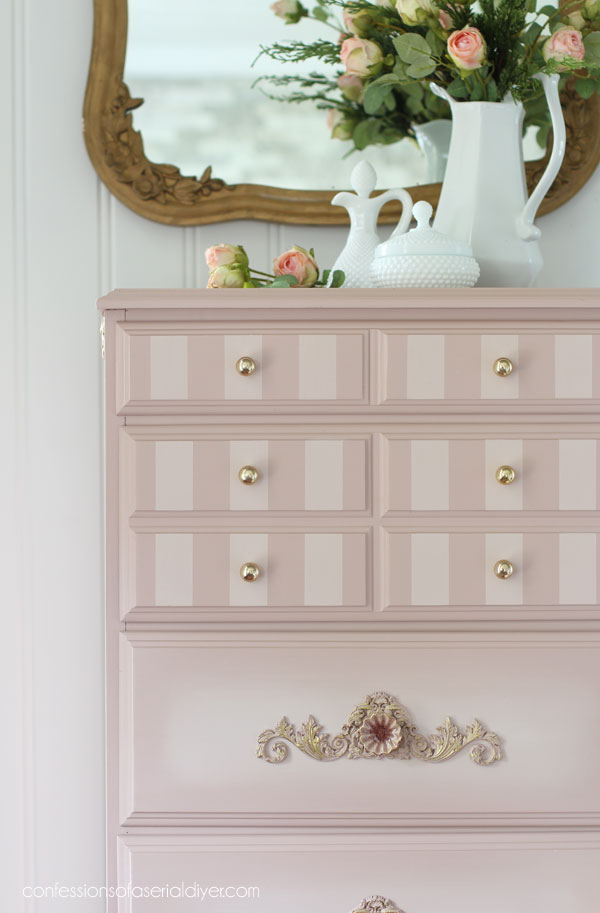
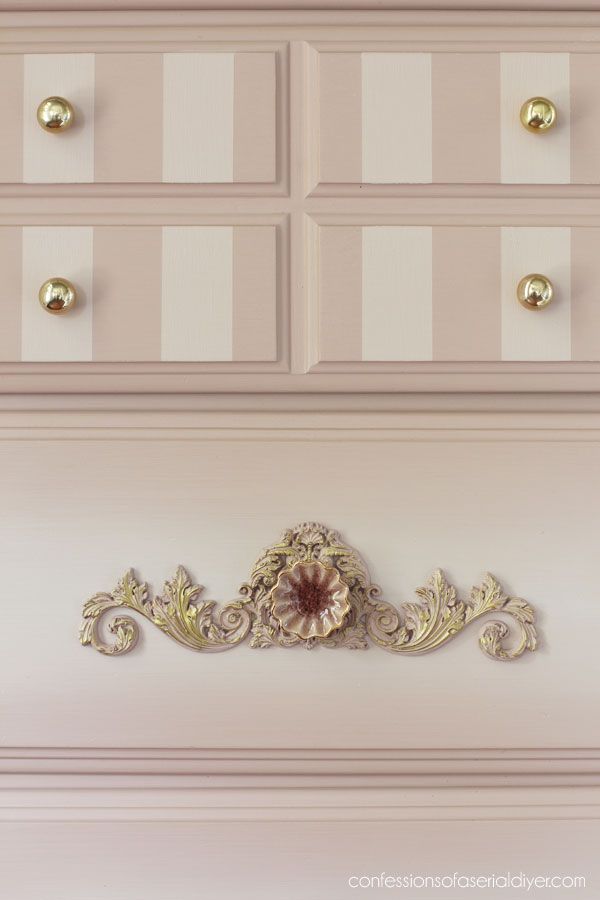
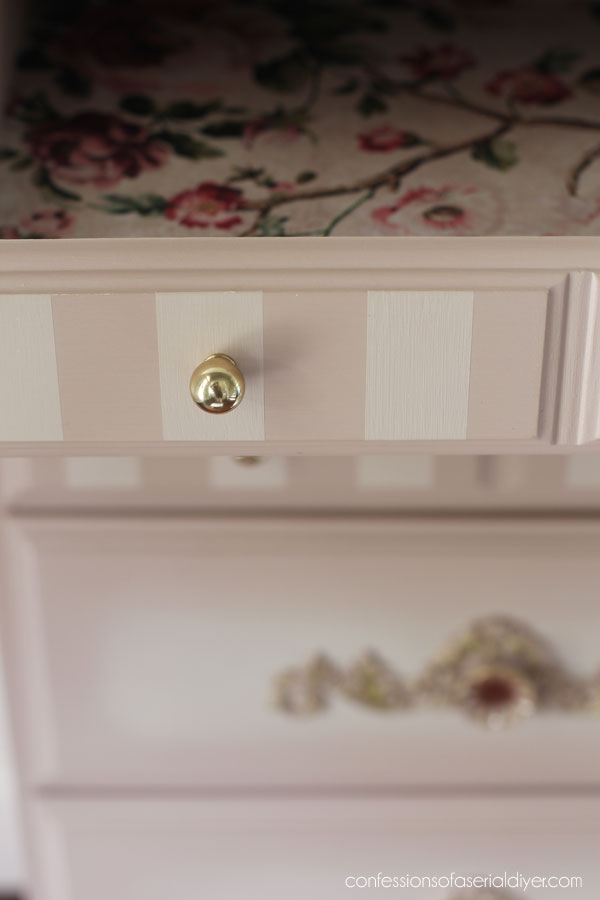
Adding Stripes Instead
Because plans were now changing and I already had the bottom three drawers figured out, I knew I needed to add a little something to the smaller, top drawers. I decided on one of the easiest (and one of my favorite) options, stripes!
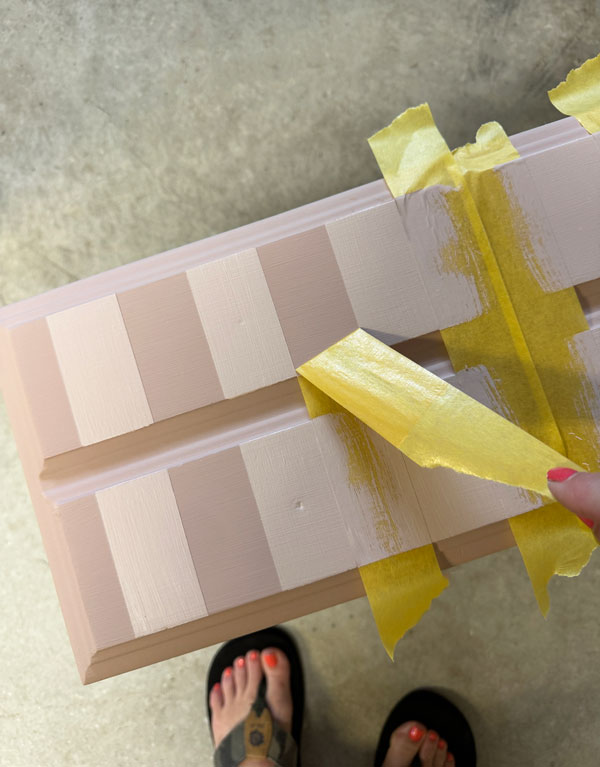
The stripes are Tea Rose mixed 50/50 with Fluff . I used FrogTape for delicate surfaces and removed it as soon as the second coat went on, while the paint was still wet.
Then, I lightly sanded the surface once again to smooth.
Seal
Everything was sealed in two coats of Clear Coat in the satin finish that applied using the blue sponge applicator:
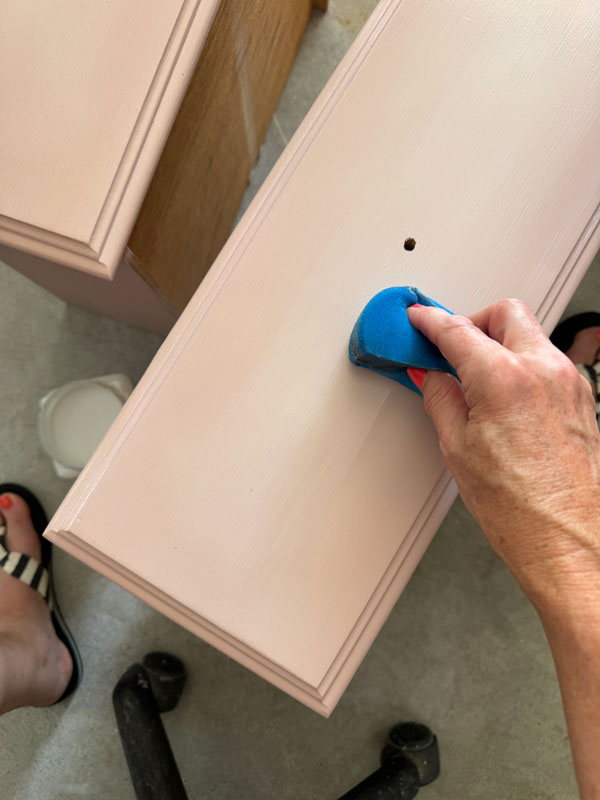
Be sure to apply it in long, smooth strokes, overlapping the previous row as you go. If you miss a spot, just get it on the next coat.
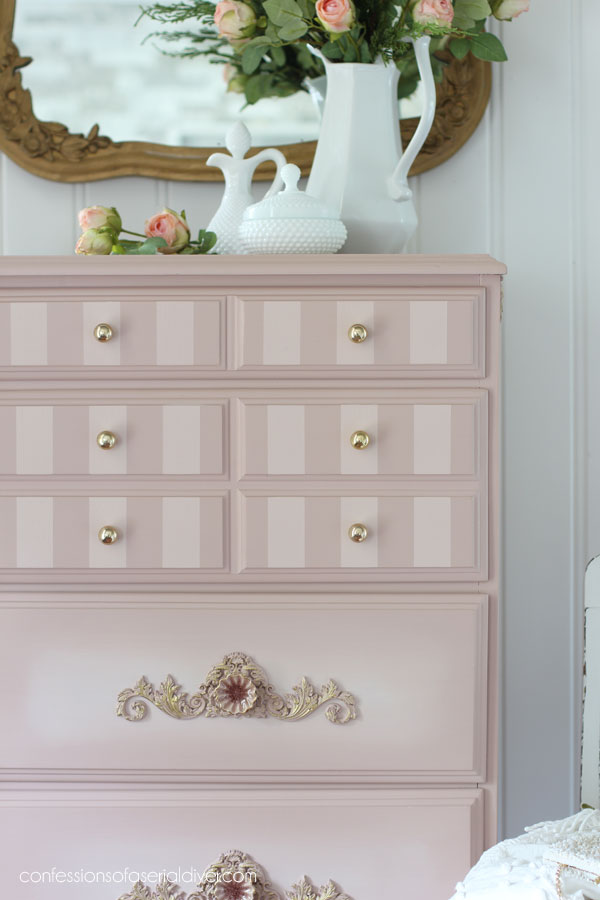
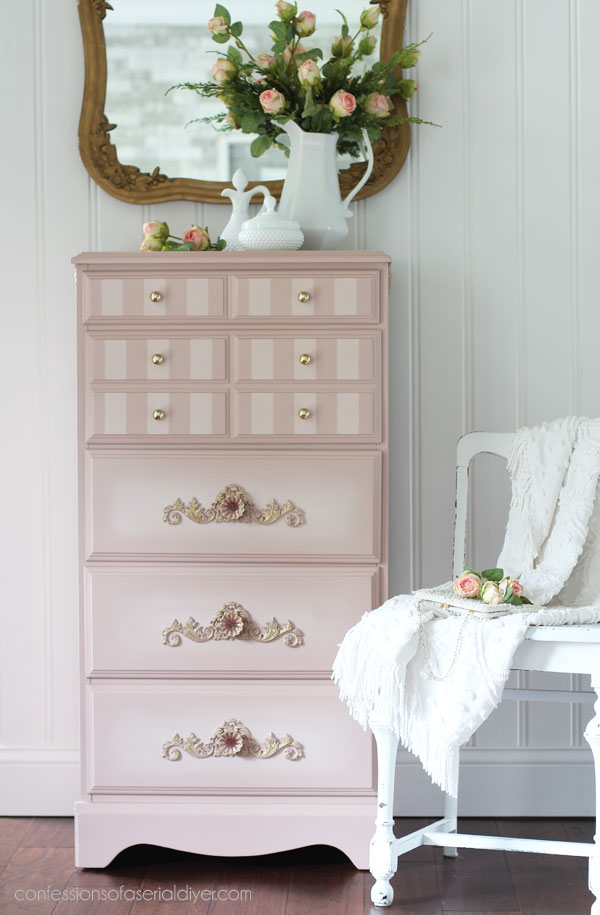
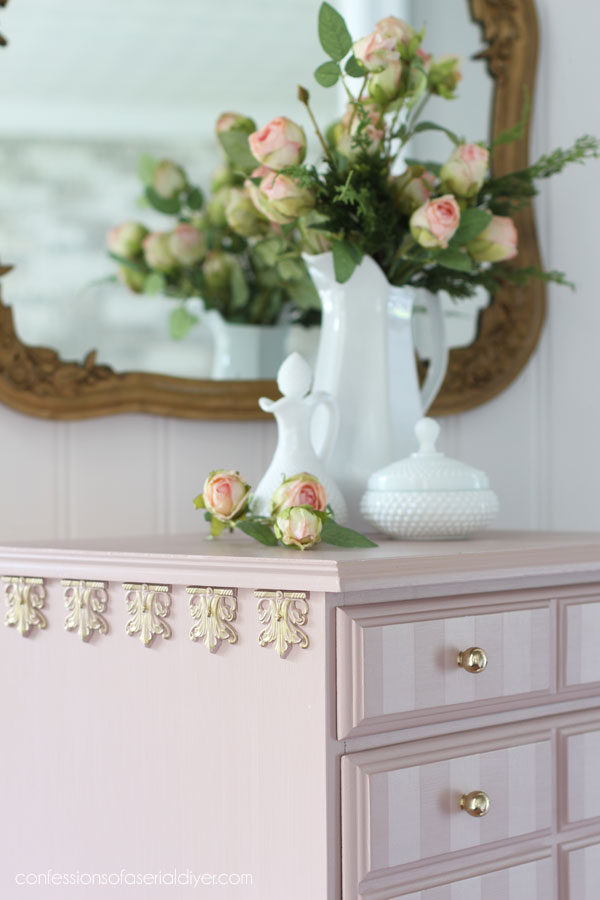
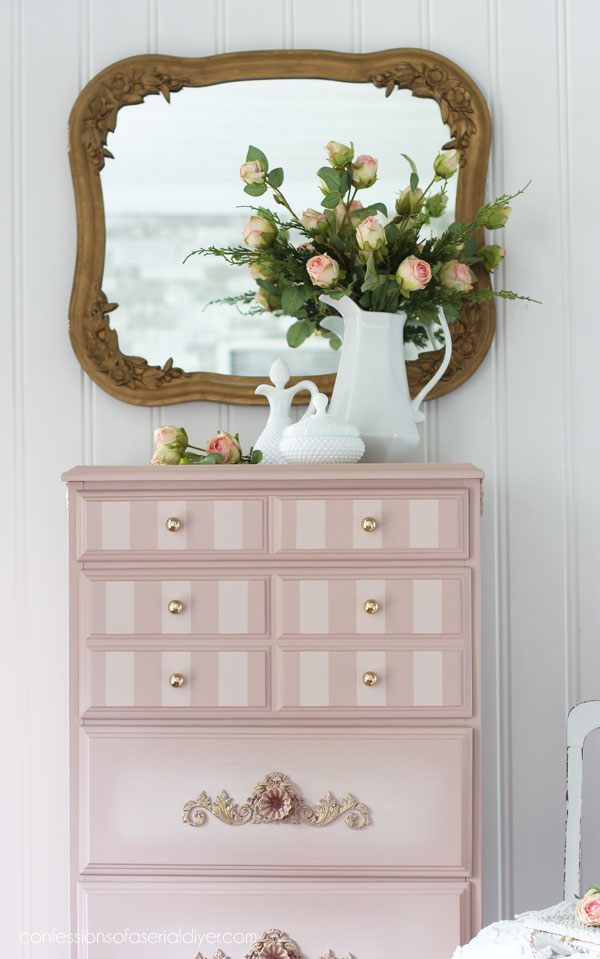
Let’s jump to the reveal of this gorgeous painted Lingerie Chest!
She looks quite different now!
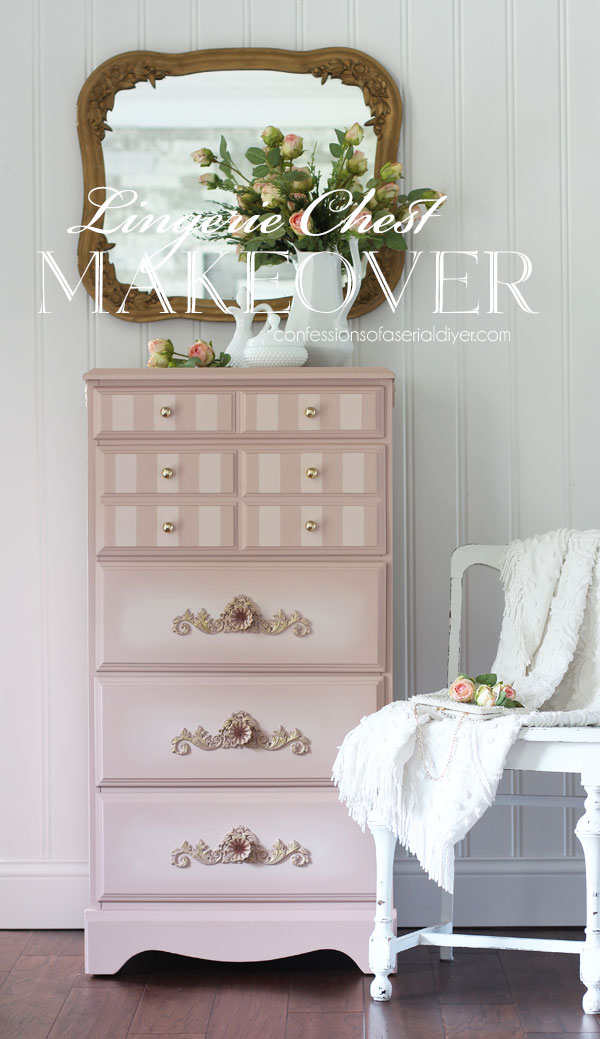
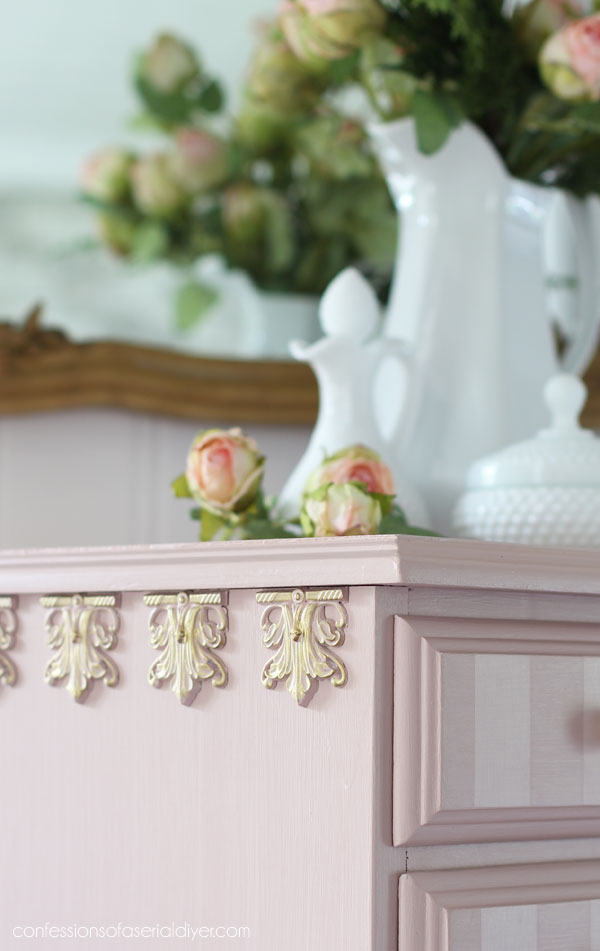
I was so lucky to find these ceramic knobs that match perfectly!
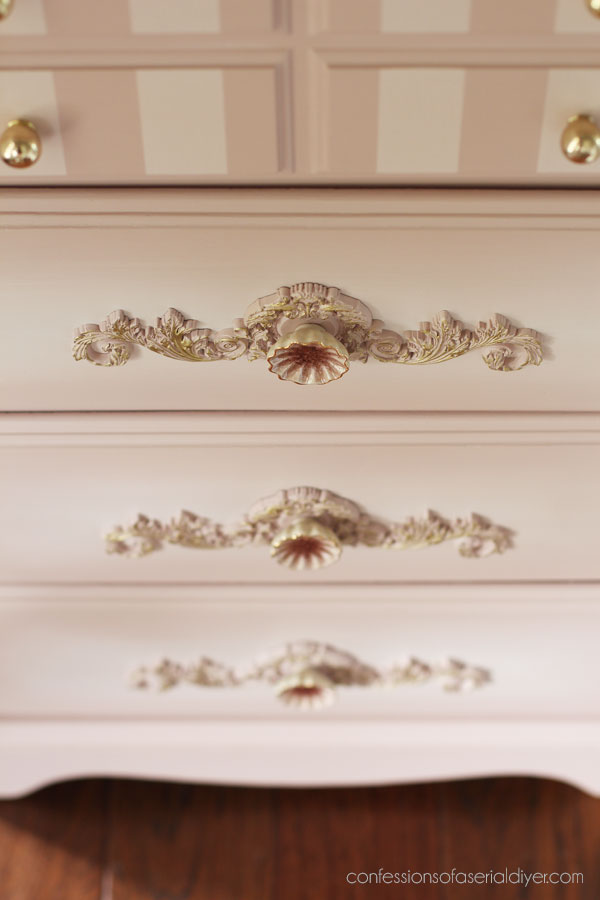
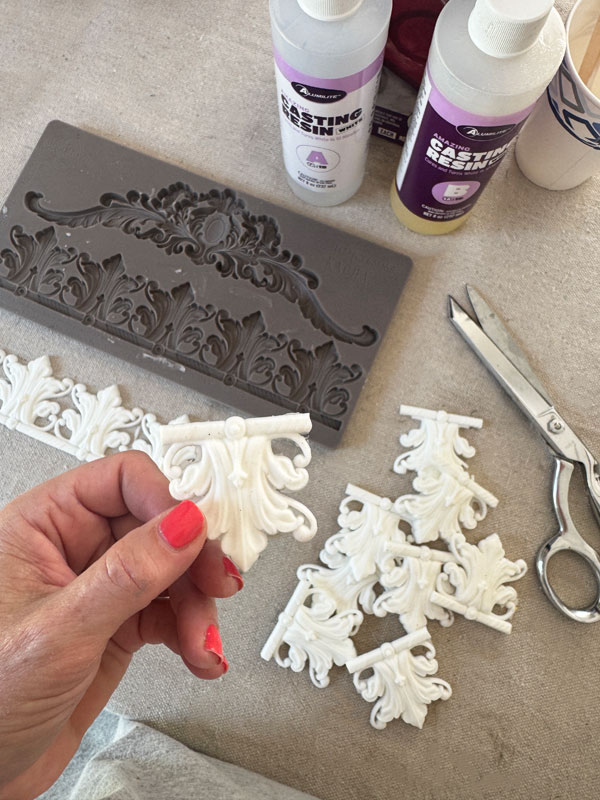
They wouldn’t have gone with the transfer I had in mind, but these Lavish Swirls moulds are the just the backdrop they needed to highlight them perfectly!
I made them using Amazing Casting Resin which is so EASY to use!

Simply mix Part A and Part B in equal amounts and pour. In 10-15 minutes you have a perfectly cast piece!
See all the moulds available in my Etsy Shop HERE!
Once the resin is dry, you can just flex the mould and pop it out. (These moulds are FOOD SAFE too if you bake!)
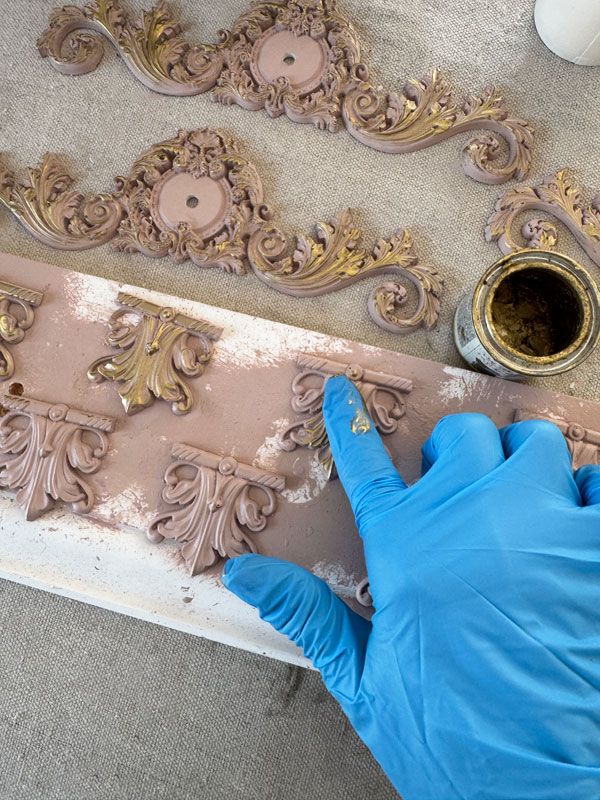
I painted these in Tea Rose as well:
 I gave them a quick spray with Rustoleum Clear Satin spray to seal and then drilled a hole for the hardware with my petite drill.
They also got blessed with some Gold Gilding Wax as well to highlight all that detail!
Aren’t they just perfect? They remind me of Cinderella’s carriage!
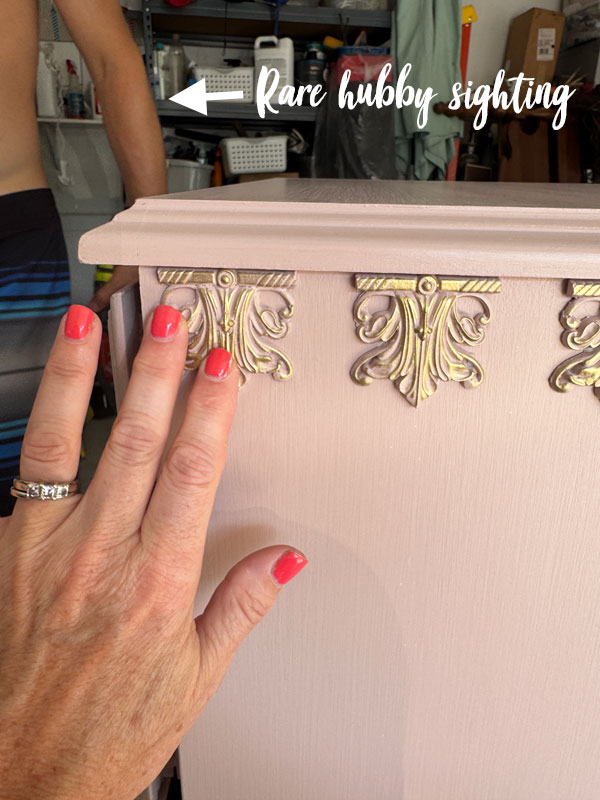
And the tiny gold hardware on the top were the perfect pairing…
The drawers
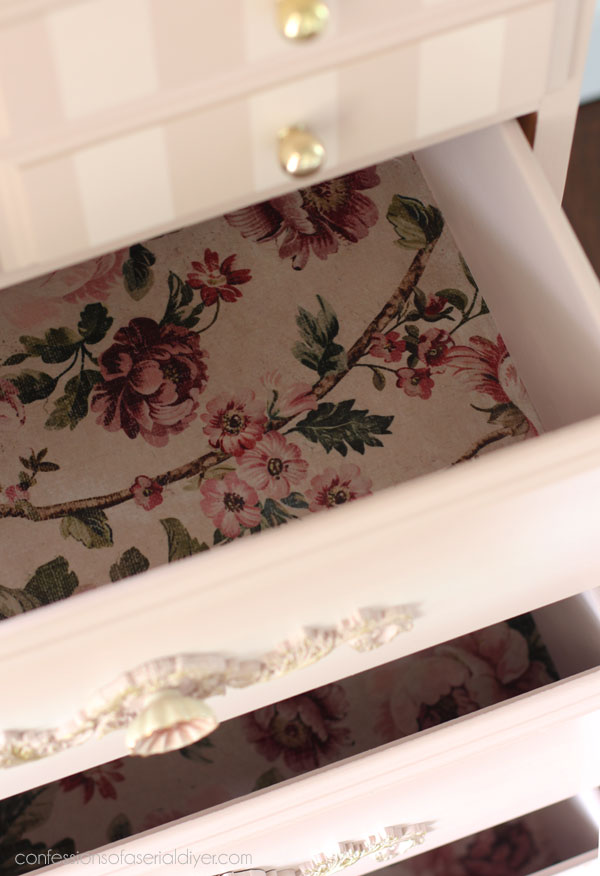
Of course I had to make these drawers pretty! And apparently I couldn’t get enough of this gorgeous Timeless Blooms decoupage paper I used on last week’s secretary either…
It just works so nicely with this color.
Lining drawers with decoupage paper
To start, I painted the rest of the drawers inside and out with the Silk version of this color, Conch. Since it adheres well to raw wood without sanding, and it doesn’t require a topcoat, it’s perfect for drawers!
While that was drying, I used a hairdryer on the WARM (not hot!) setting to get the folds out:
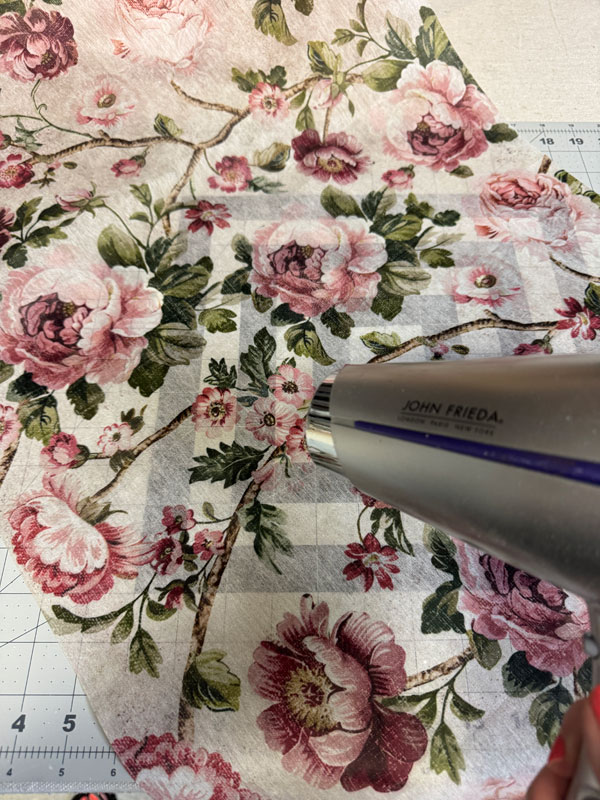
Or use your iron on the lowest setting to remove the folds.
You can see these papers are more like a fabric than a paper which makes them ideal for lining drawers. Then I cut it to fit each drawer using my rotary cutting mat set to get perfectly straight cuts.
To apply the paper, I first applied a layer of Redesign’s decoupage gel in matte using the 2″ Foam N Dandy brush:
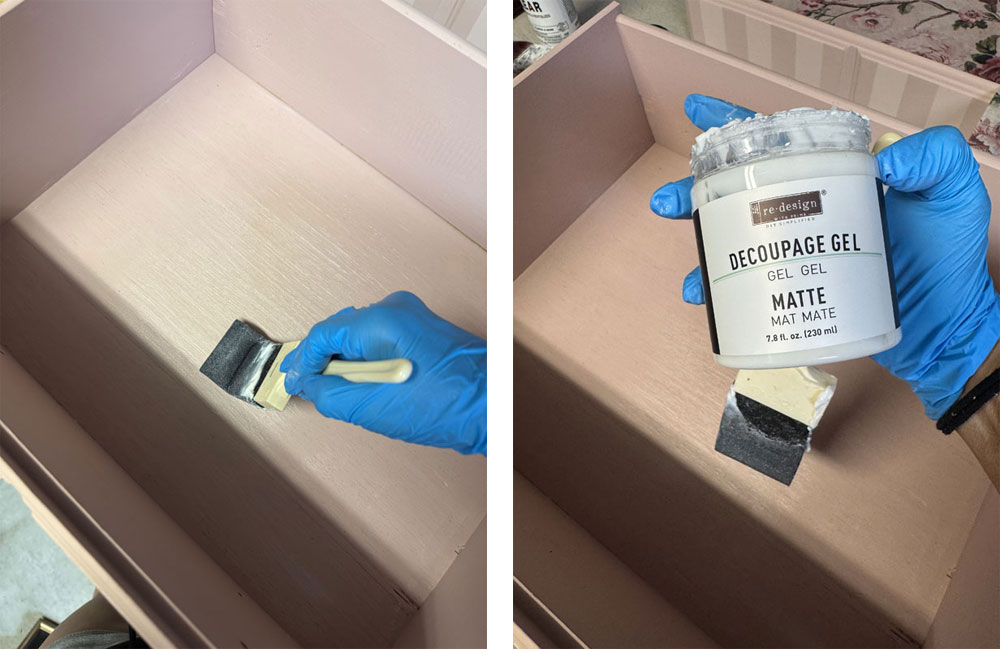
I then laid the paper in the bottom and added another layer of decoupage gel on top to seal, and that was it.
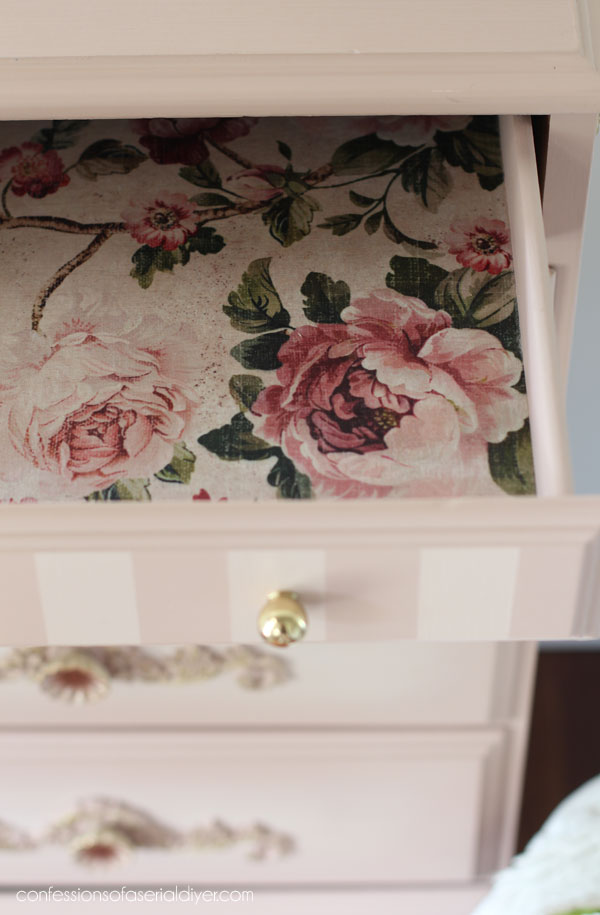
This paper is such a beautiful surprise when you open the drawers…

One more detail
Here’s one more detail to share, the addition of another mould on the sides…
These are from the Enlightened Etchings mould:
I cast them and then cut them apart:
They were painted, sealed, and highlighted with Gold Gilding Wax also…
These as well as the hardware backplates were secured with Liquid Nails. I used that this time since it sets up faster than E6000 and I couldn’t find my Titebond at the time…
I just had to hold each one in place for a few seconds. (And I later found my Titebond under my work table!)

I loved bringing this lingerie chest back to life!

I’d love to know what you think of this one!
It’s definitely an improvment!
Don’t forget to visit my friends’ trashy makeovers as well:
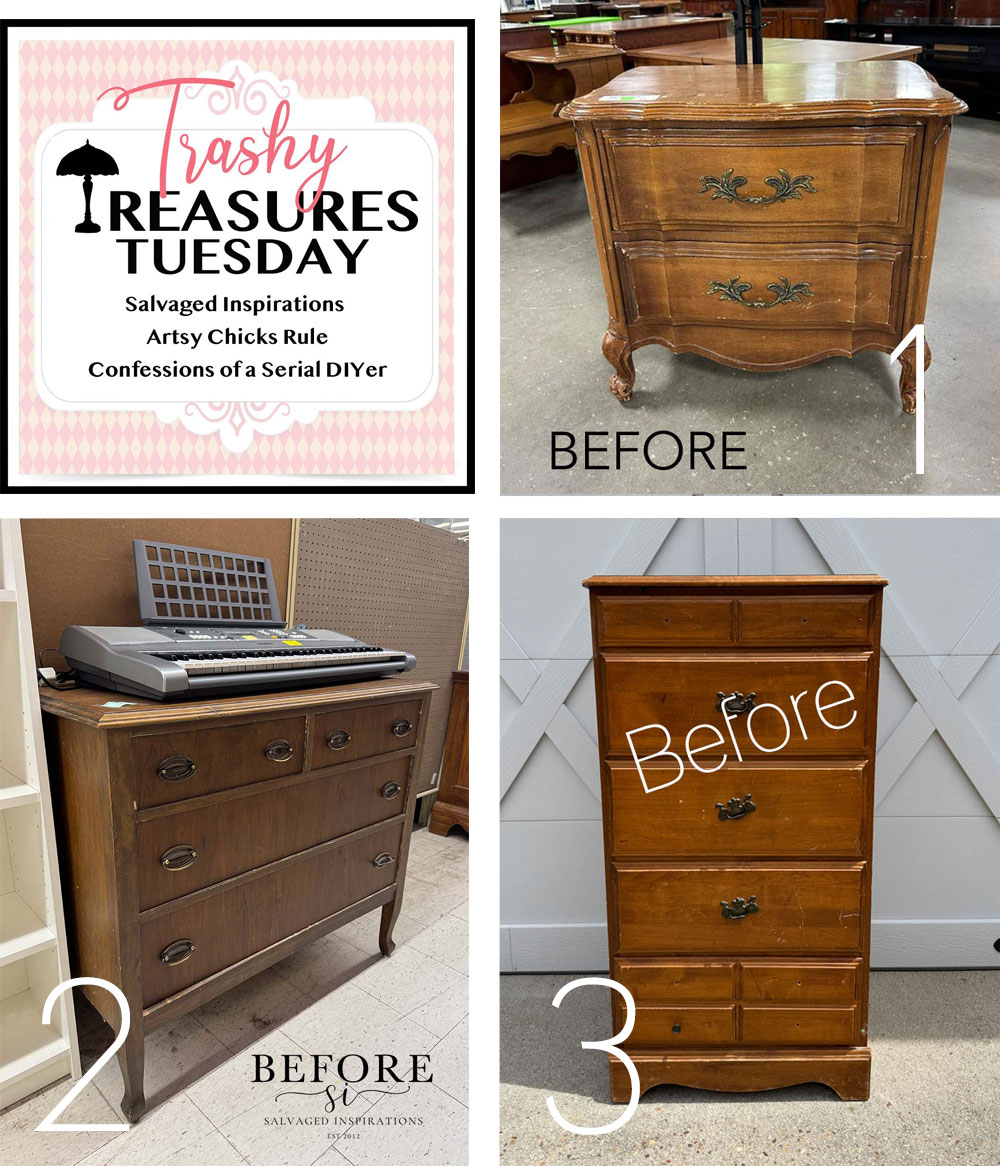
3. You’re here! 😀
We were out of town celebrating Brennan’s birthday for a couple of days, so I don’t have a new project, but I’ll be back with this one since he starred in it:

UPDATE: See how fantastic it turned out HERE now!
Hope your week is off to a fantastic start!
XOXO,

Don’t Miss a Thing!
If you like what you see, there are several ways to follow along!
EMAIL * INSTAGRAM * FACEBOOK * PINTEREST


Get FREE SHIPPING on all orders over $50. No code needed at checkout! Orders under $50 always enjoy $8 flat rate shipping! Most orders ship same or next business day!


Mary Kaiser says
WOWZA! It sure is a beauty now! Love the color, love the stripes, love the handles,love the paper in the drawers,Love every thing about it! That will sell qucik in your booth! Happy Birthday to Brennan, how are are we getting to be now? Have a fun time and I am sure that you will share something delightful!
Christy says
Thank you so much, my friend!! I had all the fun with this girly piece lol! Brennan turned 15. So crazy! We enjoyed a trip to a waterpark about an hour away and stayed a couple of nights…so fun! XOXO
Jackie C says
Oh my gosh! GORGEOUS!!!!
Those highlighted drawers add SO much! The rose paper is perfection. I’m glad you decided to do this instead of a transfer. This is a masterpiece!
Christy says
Aww I appreciate that so much, Jackie, thank you! I’m glad I skipped the transfer this time too! XOXO
Robin Stephens says
Never have I ever seen a more beautiful transformation. The vision for the “jewelry” on the piece sets it far apart. I sat here and wracked my brain trying to figure out….1) where I’d put it…and 2) how could I get to VA Beach w/o going through tunnels or over bridges (fears…phobias…LOL). Anyway, I bet it’s already sold….as it should be! Bravo on that gorgeous piece!
Christy says
Aww thank you so much, my friend! This one came together so nicely…like it was telling me what it wanted lol. The tunnels…I totally get it ha ha! They are a necessary evil around here! XOXO
Robin says
My daughter works for VDOT (out of Suffolk)….and when she has to go across the Bay Bridge Tunnel…she sends me pictures of her on it. She’s so mean. ???? ???? ????
Christy says
Oh no…so mean lol! We just came through it this afternoon on the way home from Williamsburg! 😀
Fran says
Haven’t seen this one before. Absolutely gorgeous. Love the stripes. You do amazing work.
Christy says
Thanks so much, Fran!! XOXO
B. Foor says
This. Is. Beautiful!!!
Christy says
Thank you so much! XOXO
Cecilia says
Oolala! How pretty! And yes, it’s a huge improvement. You know I love that decoupage paper. I’d have to leave the drawer opened so I could see it, lol. Great makeover!
Christy says
Thank you, Cecilia! I would have loved to use that paper the outside too! XOXO
Julie A. Henry says
Elegance with a touch of whimsy…..love it! Hope it was a nice birthday.
Christy says
Thank you, Julie! We had a great waterpark birthday trip! XOXO
Janice Redden says
Christy, this piece is just beautuful; some little girl will be lucky to have this! The way you decided to finish it is perfect and love the little touched on the sides!
It’s “beau-gorgeous” !
Christy says
Aww thank you, Janice! It was really fun adding all the details on this one! XOXO
Geri Davis says
Wow, this is probably my new most favorite piece! It looks amazing, I guess I’ll try that Dixie mud next time I order, my filler ALWAYS gets hard about 1/2 way through.
Happy Birthday to your Brennan!
Christy says
Aww I love that, Geri! I’m so glad you like it, thank you! Yes, I’ve never made all the way through a regular jar of filler, but the Mud stays wet in the jar. And thank you for the birthday wishes! XOXO
Kathryn Kirk says
Absolutely gorgeous! Love the moldings with the gold gilding wax used.
Christy says
Thank you so much, Kathryn! XOXO
Pam Emma says
Christy, I love how this chest came out. Since I have been following you, it is one of my favorites. You inspire me and I just love your style. If I had redone this piece, it would be hard to give up. Someone is going to scoop this up soon. Thank you for your talent and sharing it with us. Pam E.
Christy says
Thank you so much, Pam! I really appreciate that! It is hard to not want to keep all the pieces lol. XOXO
Thelma J Hoover says
You have wonderful ideas of how to redo things. I have been following you for a few years and have gotten some great ideas!! ????????
Christy says
I am so happy to hear you enjoy what I share, Thelma, thank you! This one was especially fun to work on! XOXO
Marcie Lovett says
Wow, what a deal, I thought – until I saw why ???? But even with all its flaws, I still think you got a great deal. You took it from Early American blah to chic and desirable, Christy! The color, along with the pulls and moulds, are a huge upgrade.
Christy says
Ha ha, right? I don’t often find uniquely sized pieces like this, so I was so excited to find this one. And it seems the worse off it is, the more I like it lol. Thank you so much, Marcie! XOXO
Kim Wollmer says
Oh my gosh, I think you outdid yourself! I love everything about it! It turned out so beautiful. Great job and have a relaxing time on your getaway!
Christy says
Aww I appreciate that so much, Kim, thank you! And we had a wonderful little getaway! XOXO
Laura J. says
Stripes are my favorite! Love it – inside and out!!!
Christy says
I’m so glad you like it, Laura, thank you! I do love stripes as well! XOXO
Denise - Salvaged Inspirations says
I couldn’t believe all that wood filler ????… I’ve never used an entire jar before but soooo worth it, this piece a absolutely GORGEOUS Christy! Love all the details you created. She’s beautiful! Pinned XOXO
Christy says
Right?? Ha ha! This thing was pretty banged up! And I think this is my third jar that I’ve gone through completely, but it seems to last forever. Thank you so much, my friend! XOXO
Anita says
Gorgeous! Pink can be tricky, but that is a perfect vintage pink! It goes so beautifully with the gold accents and decoupage paper. While I love transfers, it’s also nice to skip them now and again, I think. This has just the right amount of detail. And I am a personal fan of stripes. Timeless. Take care, Christy, and thank you for sharing your magic!
Christy says
Thank you so much, Anita! I agree…pink can come off as childish if it isn’t just the right one, but this one is so sophisticated! And yes, I love creating with transfers, but sometimes they just aren’t needed, and stripes are such a simple way to add a little something really easily. Thanks again, my friend! XOXO
Josee says
Wow, another amazing piece. You just keep them coming!
Christy says
Aww thank you, Josee! Since expanding my booth, I now have the room for more furniture, and I have really been enjoying that! XOXO
Janina says
This is SO pretty, Christy! Fit for a princess!!! You are my favourite DIYer – by leaps and bounds. You always go above and beyond.
You don’t cut corners. You make everything you touch extra special and really lovely.
You just dazzle us with your creativity!
We are so lucky you do this blog – you are such sweet inspiration.
Much love to you and enormous thanks for the joy you bring to my inbox week in and week out. ????????????
Christy says
Oh my goodness, you are the sweetest, Janina! Thank you!! I’m so glad you enjoy what I share…I couldn’t do this with out you guys!! Much love back!! XOXO
Jane Windham says
Amazing makeover! I have a white lingerie chest that needs some pizzazz!
Christy says
Thank you, Jane! Maybe it’s ready for a Cinderella makeover too?? XOXO
Debra Hubbs says
Wow this is so pretty! Love everything about it!
Christy says
I’m so glad you like it, Debra, thank you!! XOXO
Michelle M Barnes says
Wow, just wow! I have been following your projects for years and I am sure that this one is my favorite! It is absolutely beautiful! Love it!!!
Christy says
Thank you so much, Michelle!! This might be one of my top redos as well! So glad you like it! XOXO
Jewels L says
So sweet! I am absolutely gushing over this! Love the colors, stripes, details, drawer liner, well, EVERYTHING!
SUPER APPLAUSE!! ????
Christy says
Wow, thanks so much, Jewels! I really appreciate that! I love doing the girly ones!! XOXO
Debbie Pokerwinski says
Whoa! Love everything about this piece…color, stripes, details inside and out! Absolutely brilliant how you flip it upside down! She’s a beauty!!
Christy says
Thank you, Debbie! I appreciate that so much!! She was a fun one to bring to life! XOXO
Petra says
Wow a little girl will LOVE this! I’m sure it’ll be whipped up! Well done again ???? xo
Christy says
Thanks so much, Petra! I was thinking it’s such a great size for a nursery also! XOXO
Kay says
Everything about this make-over is beautiful, I would buy it in a heart-beat! My favorite part is the way you blended the paint on the three larger drawers. It is definitely eye catching.
Christy says
I’m so happy you like it, Kay, thank you! The blending detail definitely adds something special! XOXO
Nancy@ Artsy Chicks Rule says
I love all the pretty molding you added to this one! It definitely looks like it’s made for a princess, gorgeous!! xoxo
Christy says
Aww thank you, my friend! It definitely has princess vibes! XOXO
Carroll Xavier says
Wow! I’ve seen so many of your furniture transformations over the years, but this one is the most stunning change! Love all the different parts that made the whole…stripes, blending, moulds, and hardware…gorgeous! Bet it won’t last long in your booth 😉
Christy says
I’m so glad you like it, Caroll! Thank you! It seems the ones that are the most needy end up being my favorites to redo lol! This was a fun one! XOXO
Rose Lefebvre says
SO ADORABLE! a LITTLE BEHIND ON YOUR REDO’S AS WAS ON A VACATION! THIS IS CUTE AND PERFECT FOR A LOVELY GIRLS ROOM.
Christy says
Thank you so much, Rose! The girly ones are so fun to redo! I hope you had a lovely vacation, my friend! XOXO
Cyndel says
Soooo beautiful! I, too, see Cinderella’s carriage. Your choice of backplate for those gorgeous knobs is what my eye keeps returning to, but I love all the details and the way you brought them together. Not usually a fan of pinks, but you chose perfect colors for this piece.
Christy says
Thank you, Cyndel! I was so excited to find those knobs…they were just perfect. I’m so glad you like how this one turned out! XOXO
Heidi says
I know this has already been said, but this is my favorite piece you have done! (Though I love your stunning black pieces, as well.) You wowed the “little girl” in me with this fairy-tale-worthy piece but yet it is the most sophisticated of salvages! I will also echo that we appreciate how thorough you are with the prep and details, but how efficiently you explain things! And with a dash of humor, yet! I recently painted my foyer in a color like tea rose (3 small daughters approved!) and I am now obsessed with the color. Thank you for your work!
Christy says
Aww thank you so much, Heidi! That means so much to me! I bet your entry is stunning! My first home that I purchased had a bit darker more mauve tone to it in the kitchen, and while I didn’t love it at the time, as soon as I painted over it in a more neutral tone, it took all the warmth out of the space. Color can do so much! XOXO
Joy Kiggins says
This has got to be one of the prettiest pieces you have done so far, of course all your pieces are beautifully done but I love this one the most.
Christy says
Aww yay! I’m so happy to hear that, Joy, thank you!! XOXO
p says
Lots of repair work ! I would have been scared by the broken drawer – but you handled it well 🙂
I think I’ll need to try the Dixie Mud ! You are right that all other fillers are dried out – just when you need it.
This pink is soft and girly for sure. It would be a special add for a dressing area – full of all the special accessories.
I esp like the mouldings on the side, and the decoupage papered drawers.
The usually forgotten details – you always make special.
Christy says
Thanks so much, P! This one did have lots of repairs to do, but I am really drawn to those pieces for some reason…maybe because they’re cheap ha ha! But really, anything is an improvement! This one was so enjoyable to do with all the details! XOXO
p says
Cheaper is good esp when reselling, and it should sell pretty easily.
The details Totally made this piece.
Christy says
Exactly! I wouldn’t mind if it hung around a bit so I can visit it lol! XOXO
Michele M. says
That piece is absolutely STUNNING, Christy! What an incredible make-over!
You truly DID bring it back to life. Someone is soooo lucky to be able to buy that. Well done.
Christy says
Aww thank you! This one was SO fun to play with!! XOXO
Tia Trevallion says
I absolutely love the blended/fade paint finish. I have tried to do it myself a few times and always end up aborting the idea because I can never get it to look right. However, I have never tried to blend it with The Best Dang Brush before! I am now re-inspired by your technique and the results. Thanks for that! ????
Do you find it is easier to do a blended finish with light base colors as opposed to dark? I tried it (for days ????♀️) with the Caviar color as a base and it was disastrous. ????
Christy says
Thank you, Tia! It does take patience for sure! I did it with Antebellum which is a bit darker here: https://www.confessionsofaserialdiyer.com/vintage-sewing-notions-table-makeover/ and I think I explain it better there also. I do think the Best Dang brush makes a big difference! XOXO
Susan Ross Hill says
Breathtaking!
Christy says
Aww thank you, Susan!! XOXO
Heather Taylor says
This piece is absolute stunning perfection!
You are amazing!
It won’t be in the shop for long, please let us know how long it takes to sell.
Have a happy day 🙂
Christy says
Aww I appreciate that so much, Heather, thank you!! I just dropped it off last Friday, so we’ll see! XOXO
Holly says
So pretty! I’m a true girly girl who has always loved pink and this is the prettiest thing I have ever seen!!! You are amazing!!!
Christy says
Aww thank you, Holly! I am too! If my husband would let me redo our bedroom around this I would ha ha! XOXO