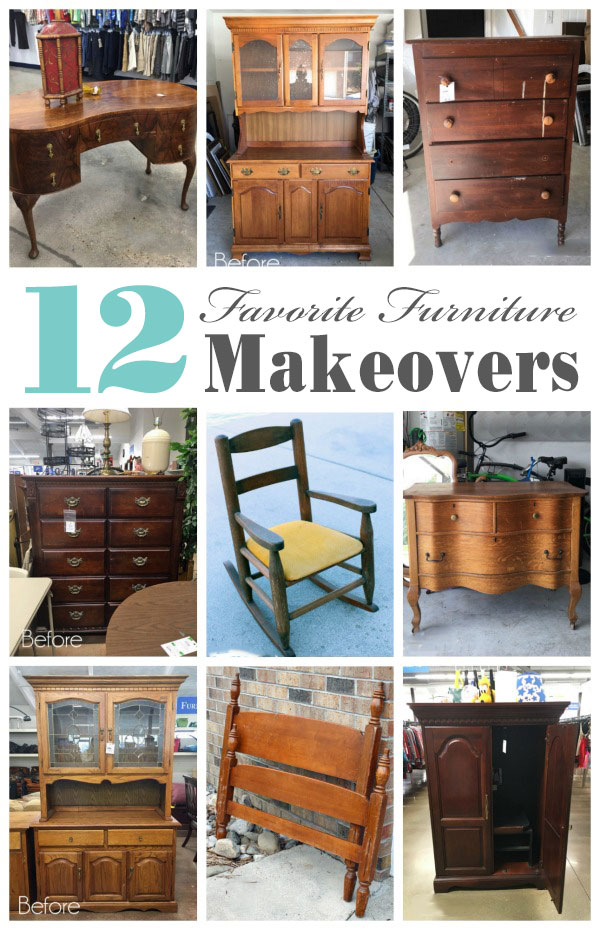
Hello amazing friends!! Today my Furniture Fixer Upper Crew and I are sharing our favorite Furniture redo of this year past from this series! That means there were 11 furniture makeovers to choose from.
There were a couple favorites actually. My all time number one favorite redo and the one that got the most love from you guys was our kitchen island:
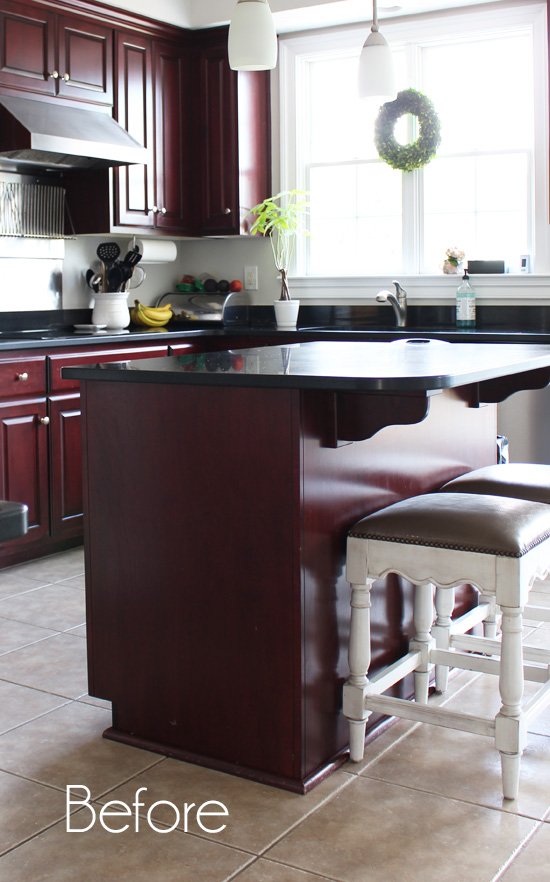
I beefed it up and added bead board, then brought it to life with color:
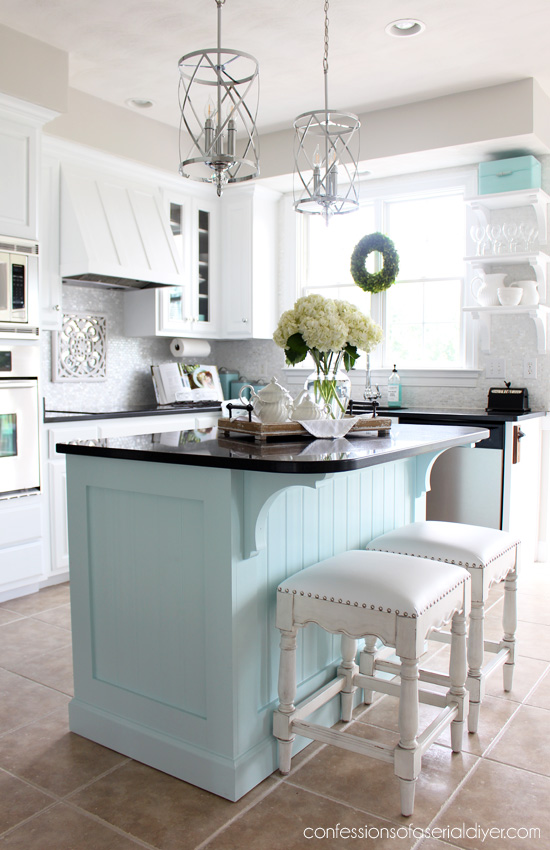
See more of this makeover HERE.
However we’ve seen a lot of our new kitchen lately, so I wanted to pick a makeover that would be fun to revisit that you may have forgotten about!
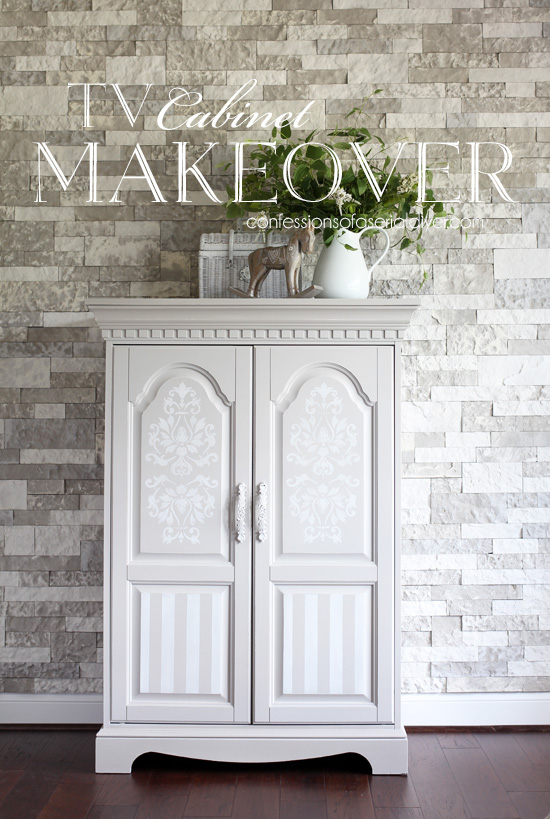
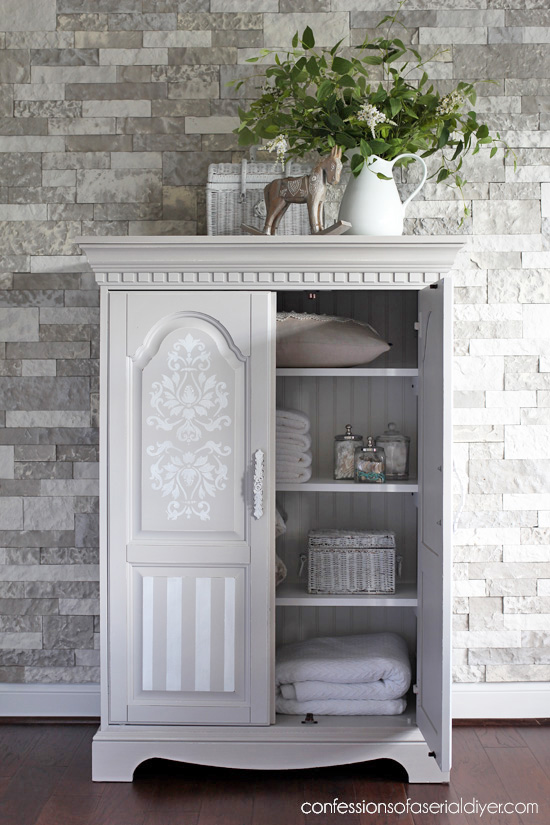
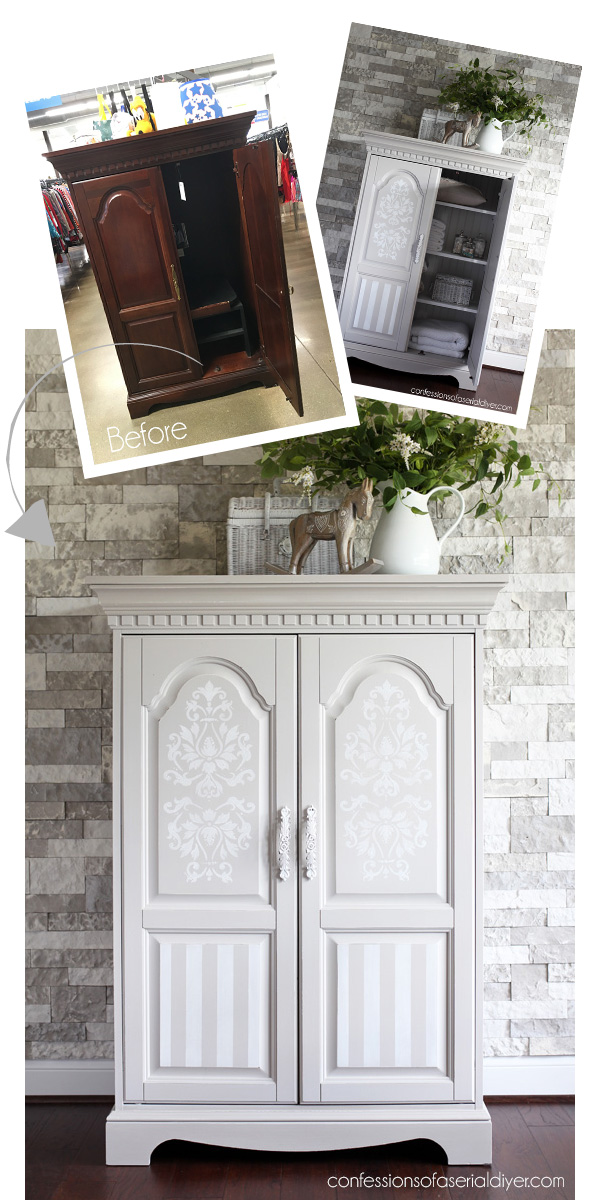
Ya’ll’s second favorite makeover and one that I loved too was this TV armoire:
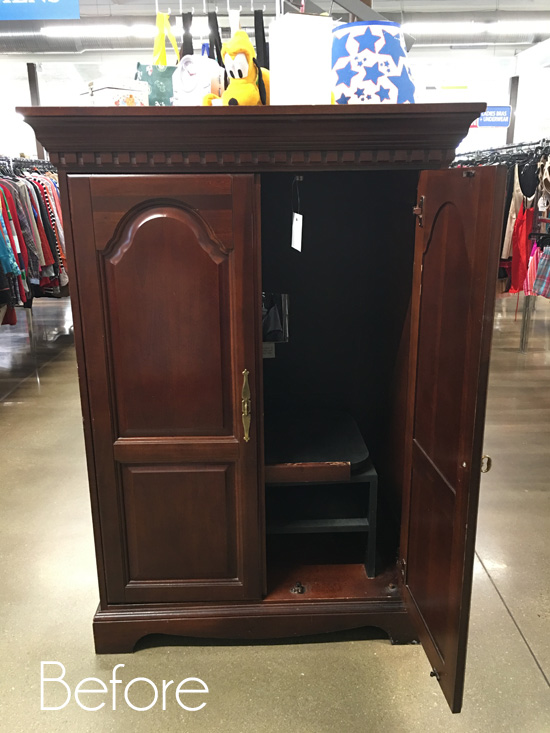
With so many of these old cabinets taking up space in thrift stores these days, I knew this would be a fun challenge.
I see old TV cabinets every time I visit thrift stores. They have usually been marked down a time or two and are really cheap. The poor things are becoming obsolete and I just want to rescue them all! I always think what great storage pieces they could be if only given the chance.
This one wasn’t super cheap at $50, but I jumped on it because with its petite size, I knew it would actually fit in my jeep.
Plus the size of this cabinet makes it perfect for extra storage in just about any room of the house, and so I set out to transform it.
First I removed the innards:

They were held in with several screws. I also removed the back since it screamed TV cabinet.
Then I busted out my HomeRight spray tent and sprayer. It can get quite windy around here so it isn’t the easiest place to spray furniture, but this past weekend was unusually calm so I took a chance. I sprayed one coat of Behr’s Bit of Sugar made into DIY chalk paint. (Recipe HERE.) I make a fresh batch to use in the sprayer since it is a bit thinner when I first make it.
Then I gave it two coats of a mix of Annie Sloan’s French Linen and Bit of Sugar:
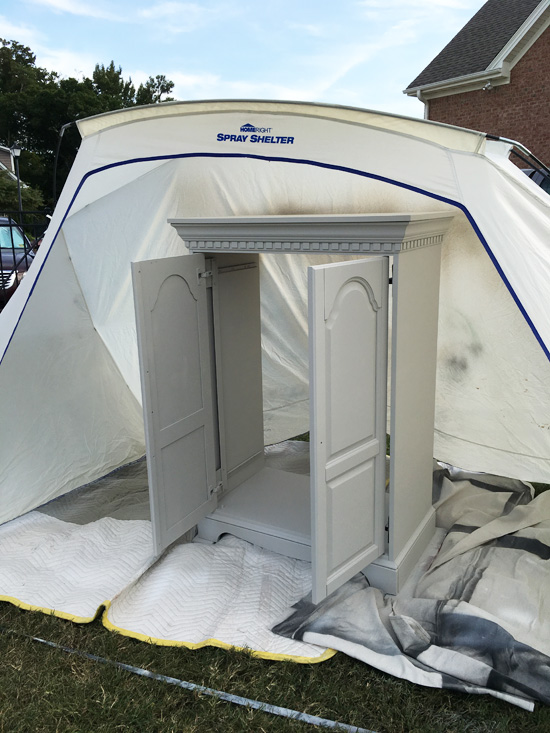
I did add just a tablespoon or so of water to the mix to thin it first.
Cleaning your sprayer is so much easier if you have this tool HERE. I use it with a five gallon bucket and clean up is super easy.
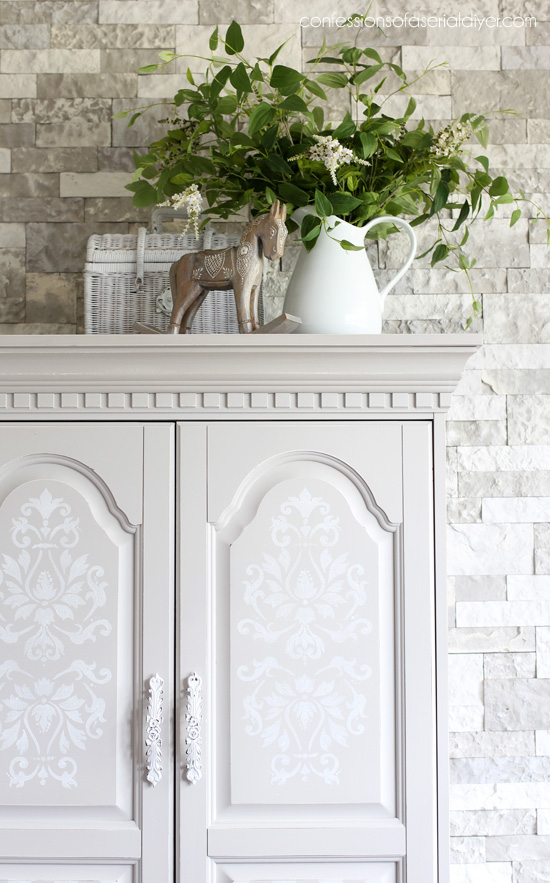
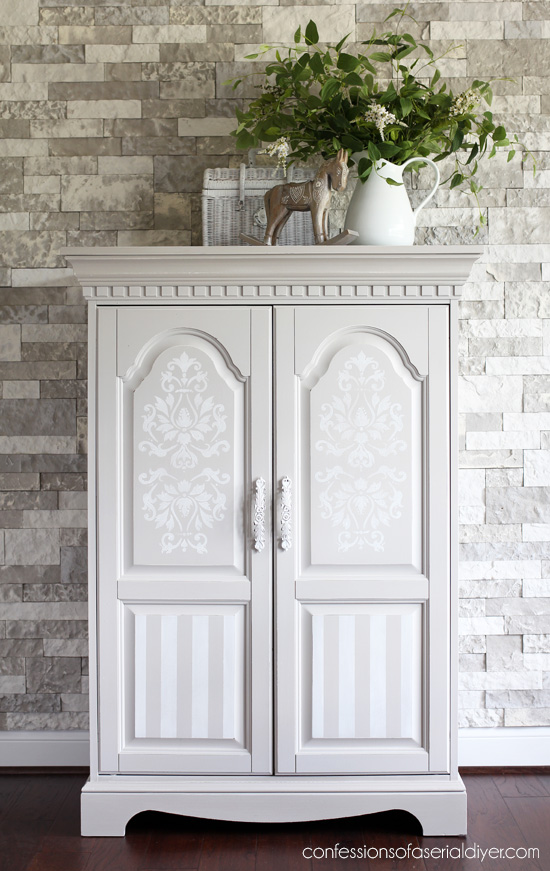
After it was dry, I decided to add a damask stencil to the top panels:
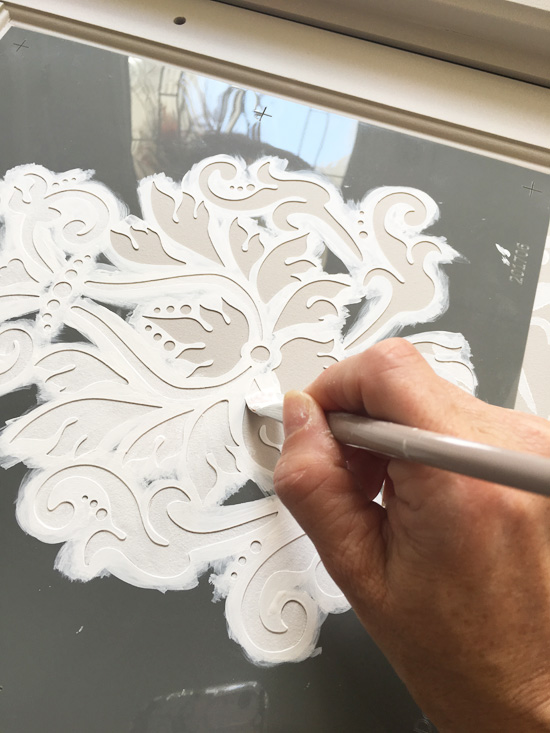
I used this one HERE. I used spray adhesive to hold the stencil in place, spraying the back of the stencil. Then I used a small brush and my white chalk paint to fill it in. I tried to brush away from the edges as much as possible. I used the full pattern at the top, then flipped it around and used a portion of the same stencil on the bottom of the top panel so it would fit.
Then I added my favorite… stripes to the bottom using FrogTape for a little more interest:
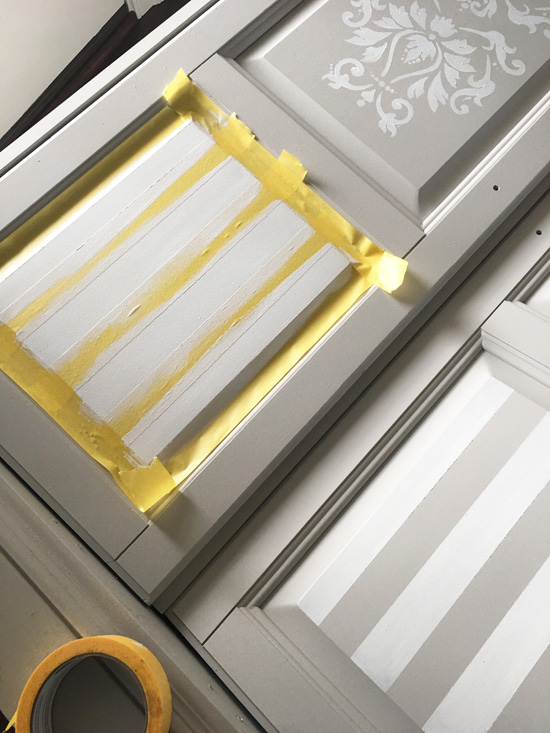
You can see how I easily measure out my stripes in this post HERE. I only added one coat of paint, and then removed the tape as soon as I was done.
I sealed with something new this time: Clear Coat Satin Finish by Dixie Belle Paints, using this brush made especially for sealers to apply it. I bought it a couple of months ago and had finally decided to give it a try.
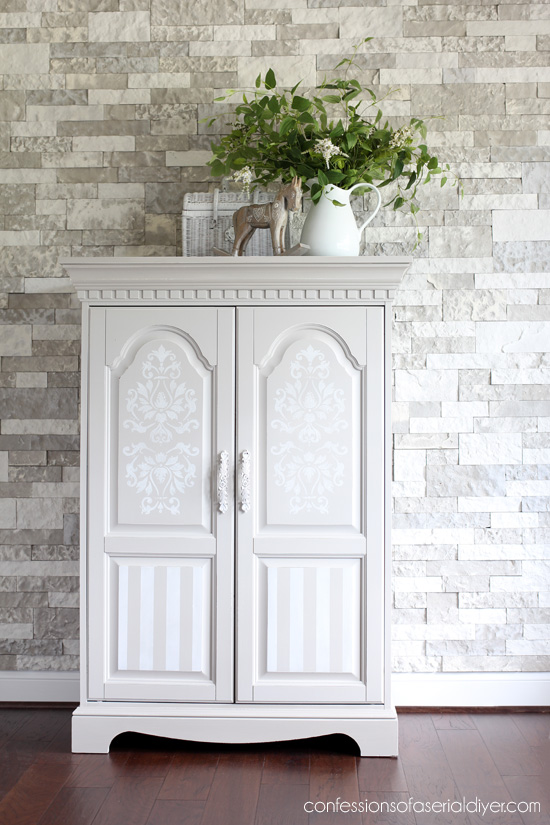
And here she is:
I quite liked the ease of using a brush-on sealer this time, and I noticed no yellowing so far. That has always been my fear when using brush-on sealers with chalk paint, and probably why I had taken so long to try it out. I’ll try it on something white next and report back. UPDATE: No yellowing on white woohoo!
This color combination is so soft and it is nice and neutral to match any color scheme.
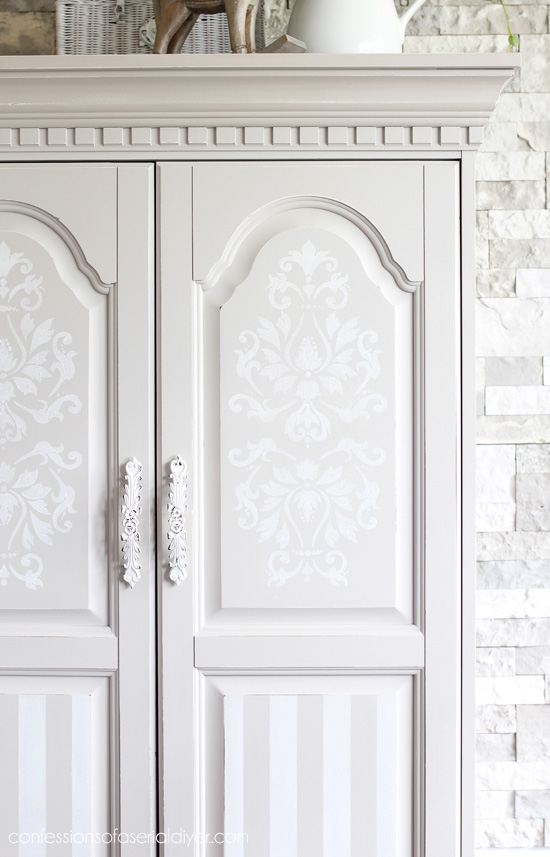
I picked these handles up at Hobby Lobby…
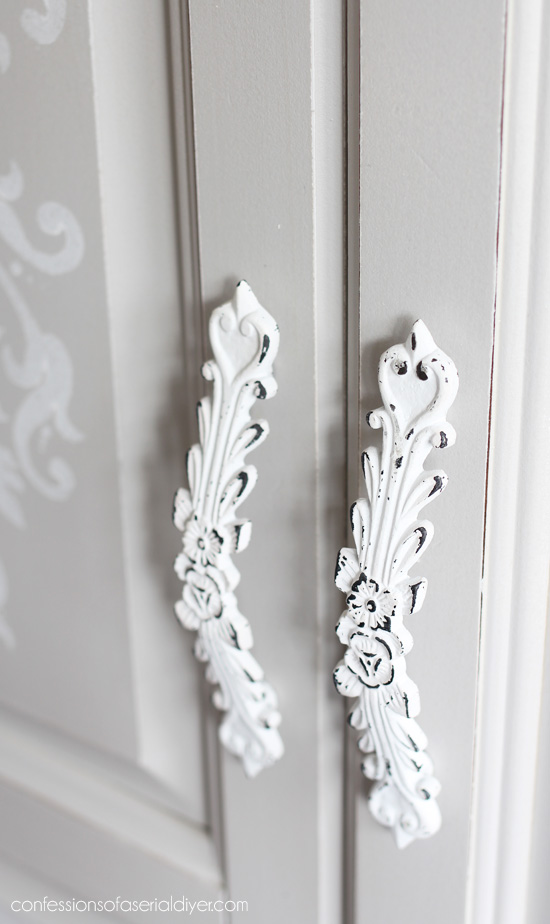
These are one of my favorites of theirs!
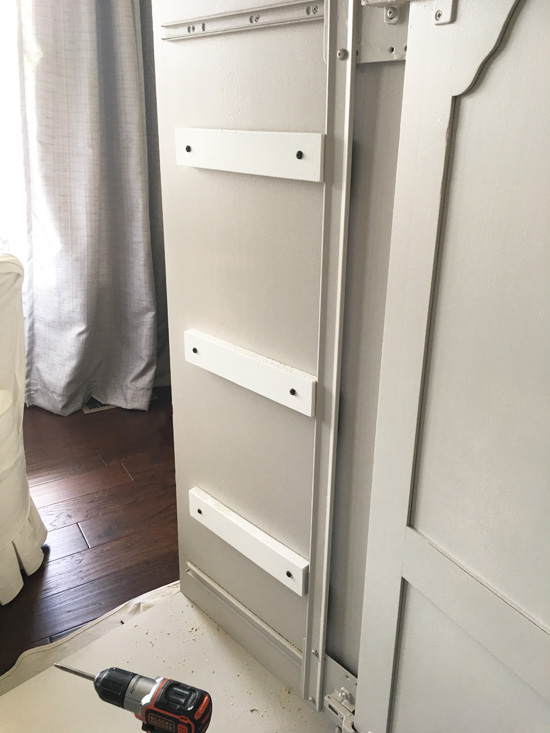
For the insides, I cut three shelves out of 12″ X 48″ pine pieces from the Home Depot, using my miter saw. Then I cut two supports for each shelf out of the scraps:

I cut those 2″ wide.
Everything got a good sanding, a coat of primer, and two coats of Behr’s latex enamel in satin in Ultra Pure White. (Leftover from my kitchen cabinets.) I used that since the shelves might take some abuse over time.
Then I predrilled the shelf supports and the inside of the cabinet before attaching them to the inside with screws…
Ready to see how the inside turned out??
Tada!!
This sad throw-away is functional again!
You can see I added a new beadboard backing that I had cut to the size I needed at Lowes…
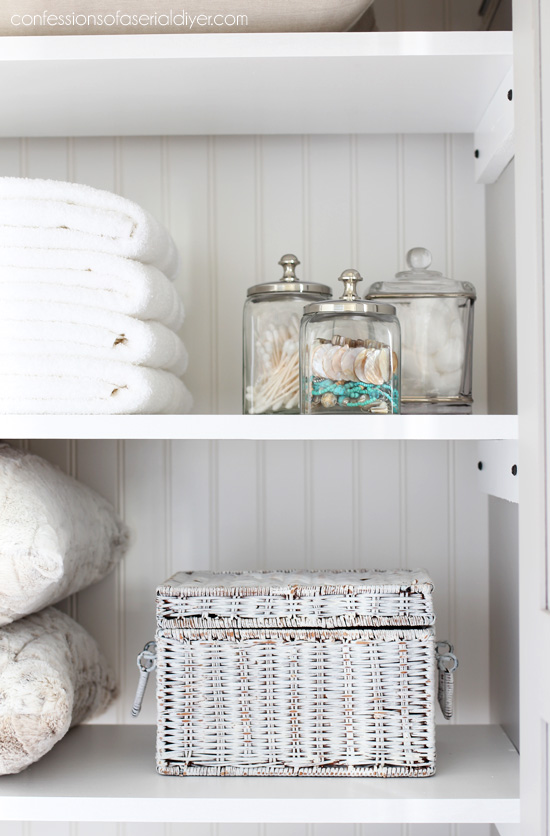
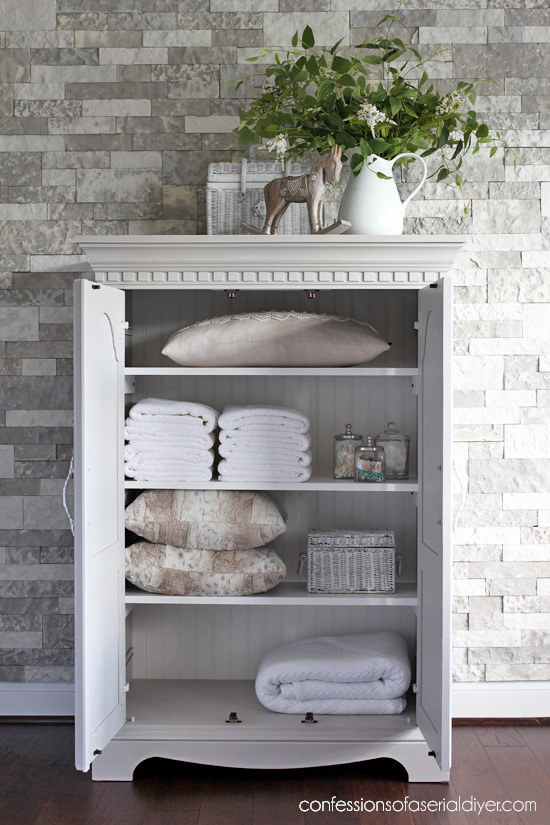
This is perfect for linens, games, clothes, or even as a pantry if you don’t already have one!

Did you enjoy seeing that one a second time? It didn’t last a week in my booth, so I’ll be keeping my eyes open for another one this size!
Don’t forget my Furniture Fixer Upper Gal pals are sharing their favorite furniture makeovers today too, and actually two of these are brand new and never seen before!
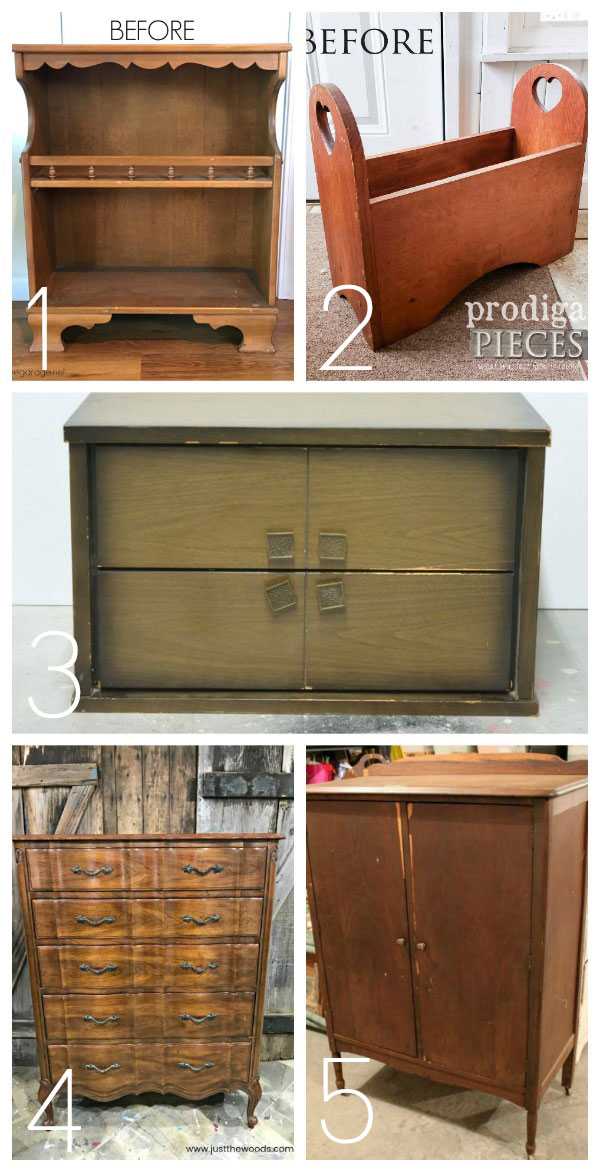
I always think it’s a shame that posts come and go never to be seen again, so it’s nice to reshare every once in a while!
Visit all of my past Furniture Fixer Upper makeovers in one place HERE.
I will be signing off until after the big day. Then I’ll be back with my Top Furniture makeovers for 2018:
UPDATE: Check out how these furniture pieces turned out HERE!
For those of you that celebrate Christmas, I wish you a blessed and wonderful holiday!
Love y’all, and can’t wait to start a whole new year together!!
XOXO,
![]()
Don’t Miss a Thing!
If you like what you see, there are several ways to follow along!
Email * Facebook * Pinterest * Twitter * Instagram


Mary Kaiser says
I Loved when you did this re-do piece and I love it again all over! I hope you and your family have a very Merry Christmas and I am looking forward to another year following you and all your creativity!!
Christy says
Thank you, Mary! I wish you and yours a wonderful Christmas as well! Looking forward to a fun new year! XOXO
Petra says
It’s really lovely – I love cupboards – so many uses! 🙂
Christy says
Thank you, Petra! Absolutely! XOXO
Larissa ~ Prodigal Pieces says
It’s a beautiful restoration, Christy.
Christy says
Thank you, Larissa! Merry Christmas! XOXO
Cecilia says
I’ve always wanted to redo a tv cabinet but sadly have no room for one. This one is definitely worth seeing again! It turned out beautifully! I’m curious – how much did it sell for?
Christy says
Thank you so much, Cecilia! This was fun to do. I believe I had it priced at $295. Have a wonderful holiday! XOXO
Jamie says
Absolutely Beautiful makeover! ❤️❤️❤️
Christy says
Thank you so much, Jamie! XOXO
Christina in SW FL says
Christy, I love your whole kitchen!! As for this cabinet, she’s a beauty!
I wish you and your family the best Christmas!!
Christy says
Aww thank you, Christina! A very merry Christmas to you and yours as well! XOXO
Ann Williams says
Thanks so much for all your posts! I look forward to Tuesday’s and Thursday’s!! Merry Christmas!
Christy says
Thank you so much, Ann! It is such a treat to be able to share with the nicest people! Merry Christmas to you as well! XOXO
Judith Nykiel says
I have one of those TV cabinets in our basement right now! You did a great job on yours. I love your work, I would give you ours if you lived a bit closer.
Christy says
Thank you, Judith! I would come right on over and take it off your hands too LOL! XO
Debra A Wise says
Enjoyed seeing this one again. It is a gorgeous piece! Hope you have a blessed, merry Christmas!
Christy says
Thank you, Debra! I’m glad you enjoyed seeing this one again! I hope you have a wonderful Christmas as well! XOXO
SM says
Cabinet looks great as do ALL your pieces! Love everything you come up with! Question on the applique. Does the adhesive used stay movable on the decal and does it leave a residue or damage the paint?
Christy says
Thank you!! I used a stencil on this piece. I wish I could answer your question about the appliqués, but I have yet to try one! XO
Becky says
Oooo yeah, that was a good one! No surprise that it didn’t last! I’d snap up a beauty like that! ????
Christy says
Thank you, Becky! I was glad to see it go so quickly! Hope you have a wonderful holiday! XOXO
Michelle says
You just solved my new (old) night stand dilema! Bead board backing! Why didn’t I think of that! ????
Christy says
Oh yay glad I could help! 🙂
Debbie in TX says
What a rescue! Love all the details, especially the handles and the beadboard on the inside. This is so pretty and now so usable for lots of different things. Great job!!
Christy says
Thank you, Debbie! These handles are probably my favorite of all time, and you know I love beadboard too! XOXO
Marie B. says
I remember this gorgeous makeover, Christy and because of it, I now take a second look at these old tv cabinets to upcycle.
Christy says
Thank you, Marie! I’ve been keeping my eye out for another one, but haven’t been lucky enough to find one that is on the small side like this one was! Hope you have a wonderful Christmas! XOXO
Susan says
Did you seal the whole piece, or just the stenciled & striped part? It looks fantastic!
Christy says
Thank you, Susan! I sealed the whole thing! XO
Marcie Lovett says
I’m so accustomed to seeing the new and improved kitchen, I forgot how far it’s come. I bet you’re enjoying all the updates you’ve made.
That cabinet was lovely, no surprise it sold so quickly! I rarely use my paint sprayer because I really don’t like to clean it, so I just ordered the cleaning tool. I hope that encourages me to use it more often because I have a backlog of projects that need to be finished.
Christy says
I really have been enjoying our new kitchen. It’s almost like I don’t even mind cooking now LOL. This tool does make cleaning the sprayer so much easier. For me to want to use the sprayer though, I have to have a bunch of pieces all lined up and ready for paint, otherwise I don’t really mind painting by hand. I like the quiet time while painting. The sprayer is way faster though for sure! XOXO
Cheryl says
I do have a question for ya! When you added the shelves to the inside, do you see the screws from the outside? Stupid question but I have wanted to do this on a few pieces but the sides are so thin I don’t know how to attached them.
Beautiful after pic, you always do a fantastic job!
Christy says
Hi Cheryl! Thank you so much! I know what you mean about the sides being thin on most of these pieces. Luckily the sides were a bit thicker on this one at around 3/4”, and I just made sure to use screws that were short enough that they wouldn’t go all the way through. XOXO
Sandra says
OMGosh, so incredibly pretty! I wish I had your creativity girl, what a gift you have!!
Christy says
Thank you so much, Sandra!! XO
Tami says
Brilliant! There are a lot of TV cabinets out there and now I see how pretty they could be, with a bit of paint. Thank you! Merry Christmas!
Christy says
Thank you, Tami! A lot of these pieces still have great storage potential! Merry Christmas to you too! XO
Jen @ Girl in the Garage says
Love this piece! It’s so charming yet modern too. Wishing you a very Merry Christmas, Christy! xo
Christy says
Thanks, Jen! Merry Christmas to you and your sweet boys! XOXO
Phillip Murray says
Reading about all of your projects makes me want to start on some new ones myself!
Christy says
Yay!!
Jean m Bailey says
I have a question regarding the spray adhesive. I bought that same one but on the couple of pieces that I stencilled it took the paint right off when I pulled off the stencil. They were just practice pieces so I wasn’t that upset but wondering if you ever came across this. I even used much less the second time but had the same result. Any suggestions? Thanks
Jean
Christy says
Hi Jean, oh no! Did you use the general performance in the blue can and did you remove it right away while your paint was still wet? I have not had that happen before. XO