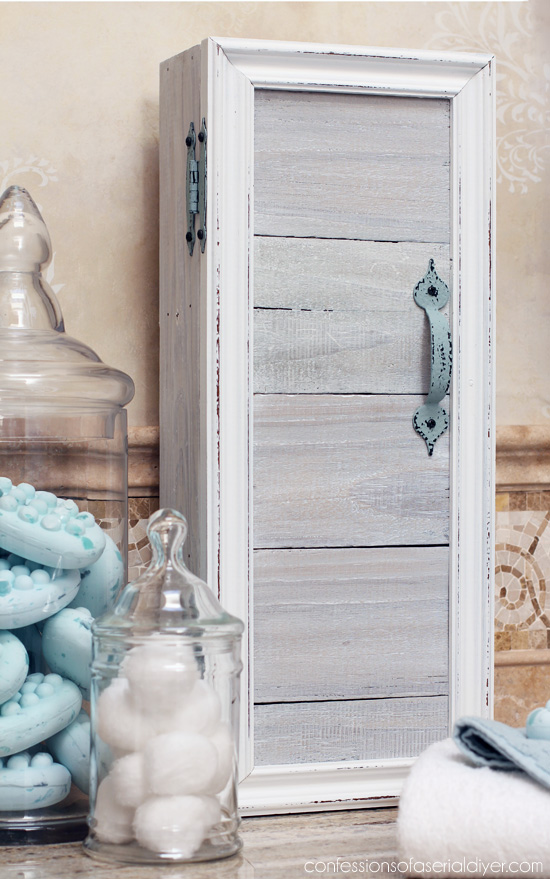
Hello beautiful Friends! I’m back today with a fun little project. This is from a couple of years ago. It’s one of my favorite projects because something cute and functional was created out of mostly trash!
I started with this:

This wasn’t the trash part. One of my favorite friends in the whole world saved a few things for me thinking I could reuse them in some way, and this was one of them. It became the perfect door frame for this sweet little mini cabinet: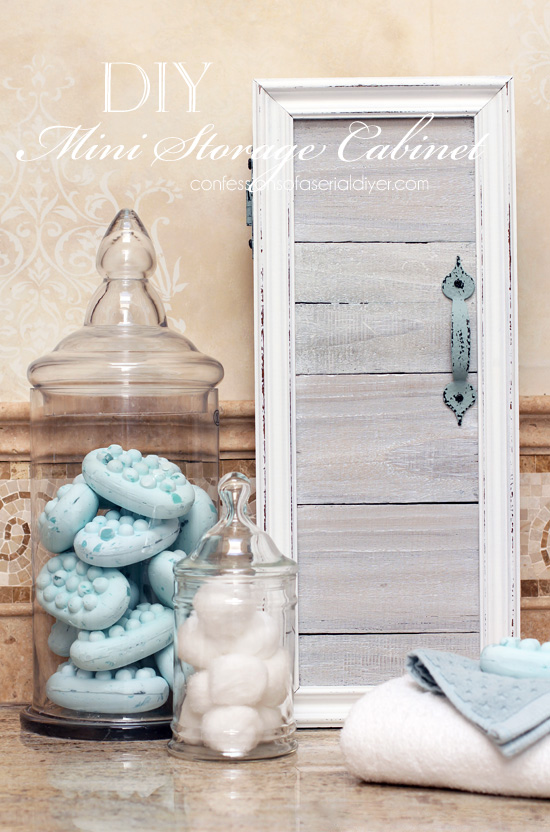
Isn’t it cute? That frame was my jumping off point.
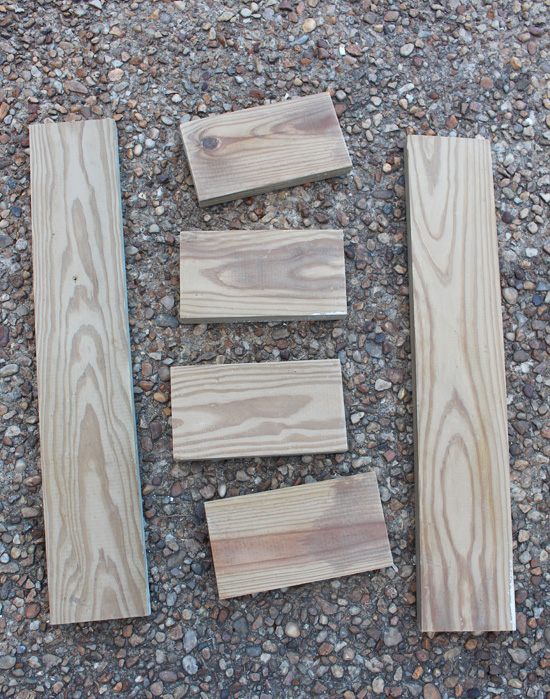
I had spent several days completely cleaning and organizing my garage. I purged a whole pile of junk, including this wood thingy that was left from the previous owner and stashed deep in a corner:
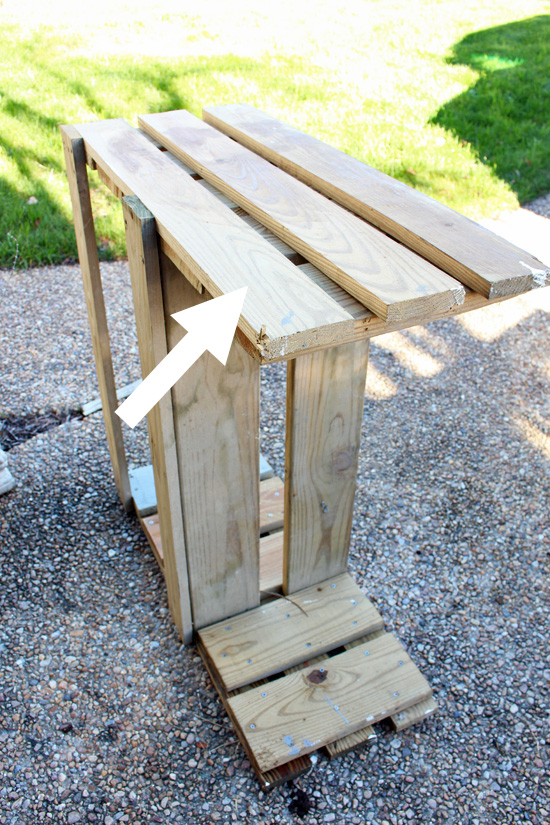
That arrow is pointing to the source of the wood for this cabinet! (See? I told y’all this cabinet was mostly trash!)
I gave my hubby a chance to get rid of it, but after five days of it sitting in our driveway, I told him he lost his chance and dragged it back in and dismantled it.
I used the wood from that thingy for the cabinet and shelves…
One of my favorite tools is my miter saw. It makes it so easy to make small cuts like these…
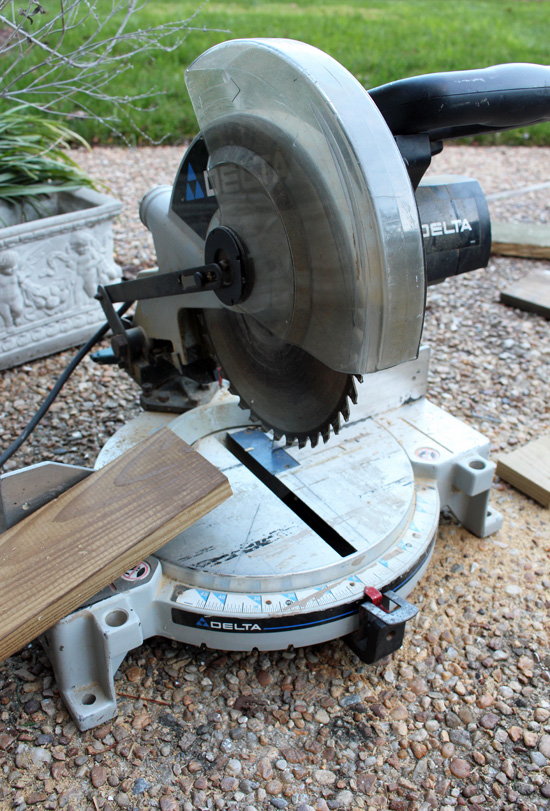
I filled in the door frame with reclaimed wood (aka old fence picket) that I also cut with my miter saw…

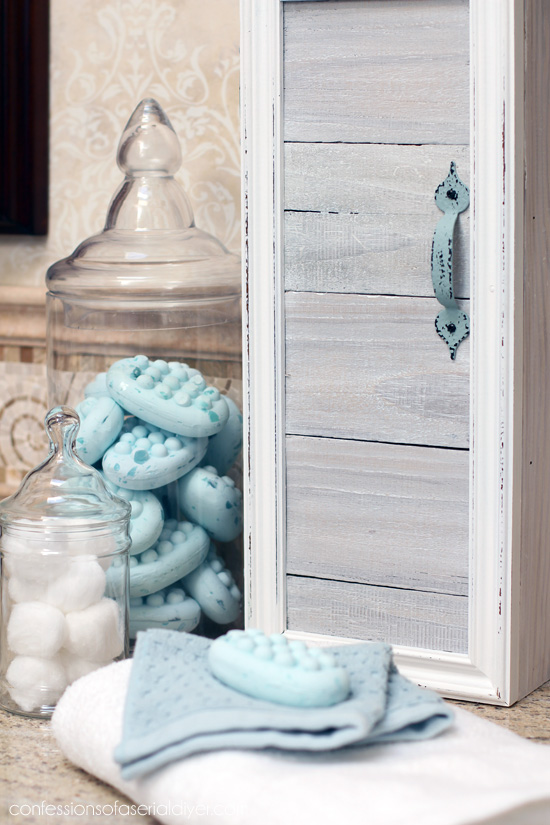
The frame was painted with pure white DIY chalk paint, then sanded and waxed with Annie Sloan’s clear wax. The rest was white-washed with flat white latex using this method. (That link leads to a cute tray I made similarly.) I did not seal any of those pieces.
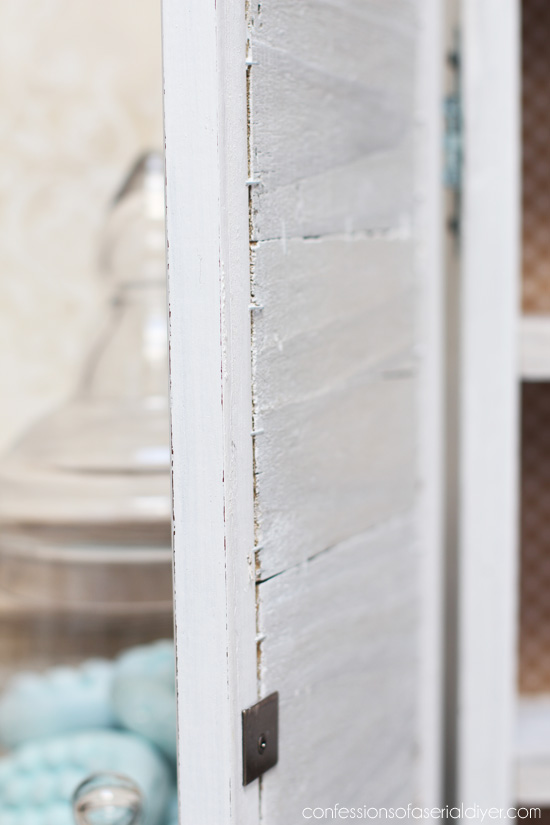
To build the frame of the cabinet, I simply made a rectangle the size of the frame I used for the door. I used wood glue and clamps to assemble it, then added the two shelves. I secured it all together further with my nail gun. Finishing nails and a hammer would do the job as well.
To attach the fence picket pieces to the frame, I used my staple gun since they were flush with one another.
You can also see I used a magnetic closure I picked up for 97¢ to hold the door closed.
For the back, I cut and covered an old picture that came out of another frame. It was thick like frame matting but a bit more stiff and perfect for the backing. I used spray adhesive to cover both sides with pretty brown wrapping paper, then staple gunned it to the back as well.
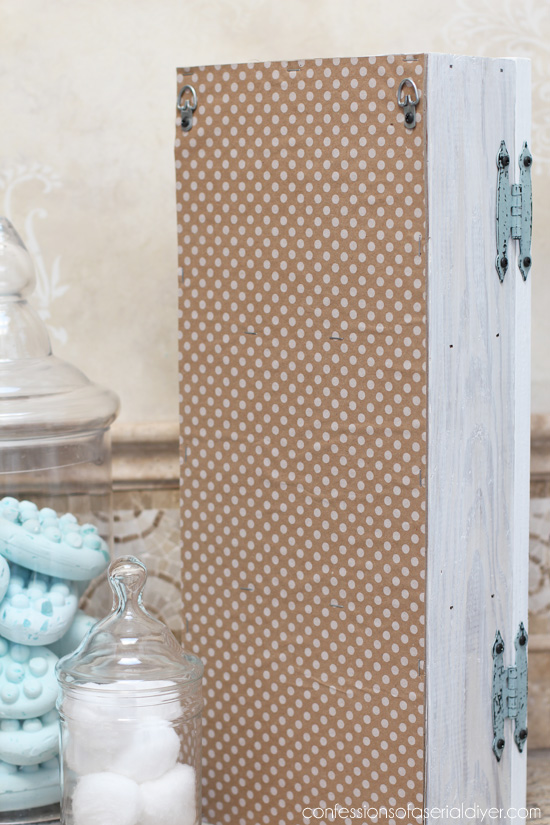
I also added a couple of D-rings for hanging.
But my favorite has to be the hardware!
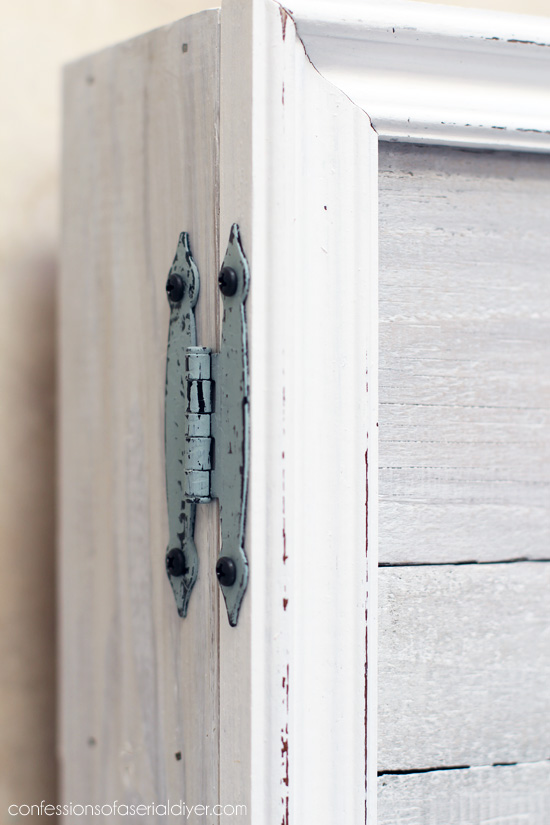
These were black hinges I already had, but didn’t love. I decided to paint them instead…
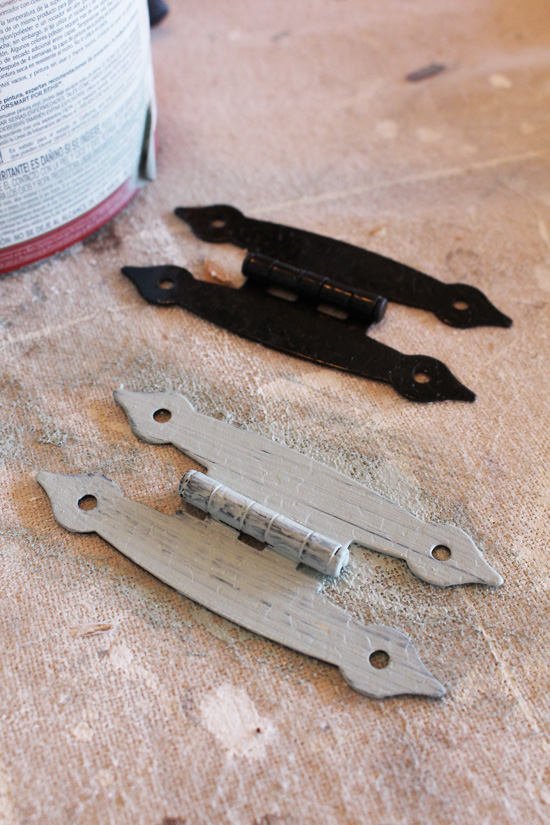
This is Behr’s Gray Morning. I did the handle the same way.
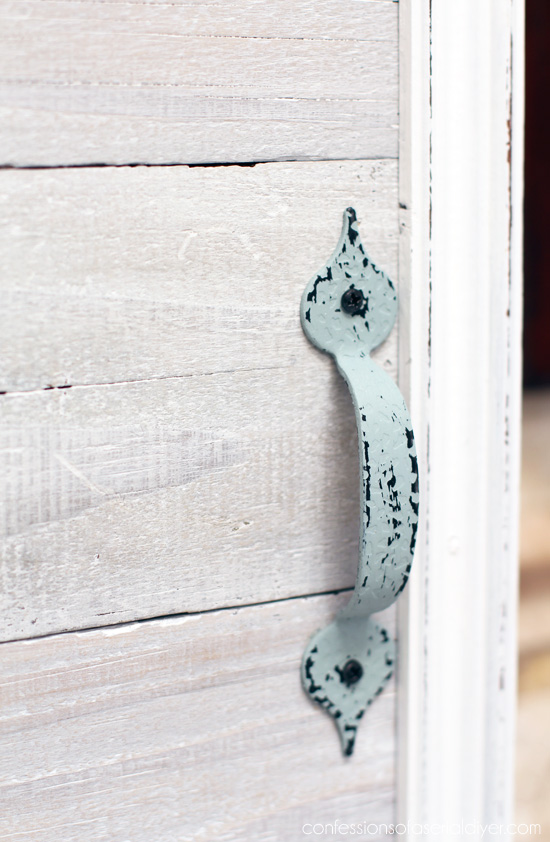
So much better and they really add a pretty pop of color to this cabinet.

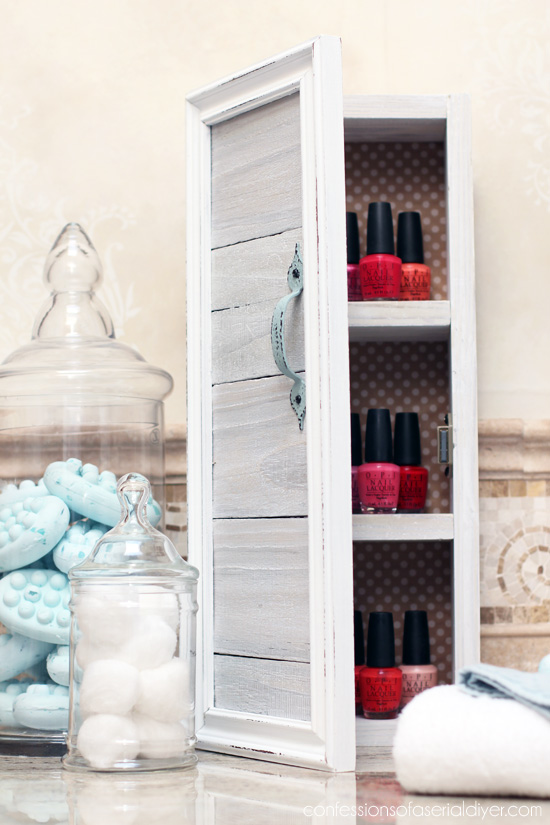
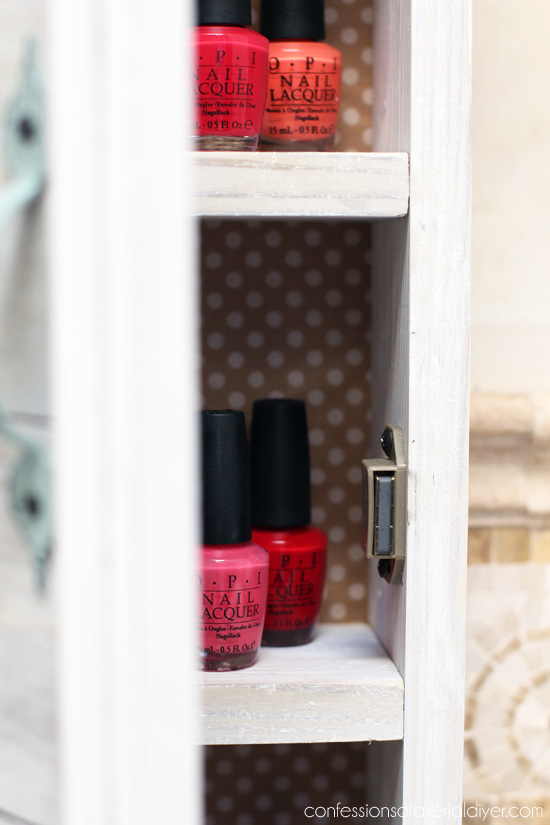
Perfect for holding nail polish…
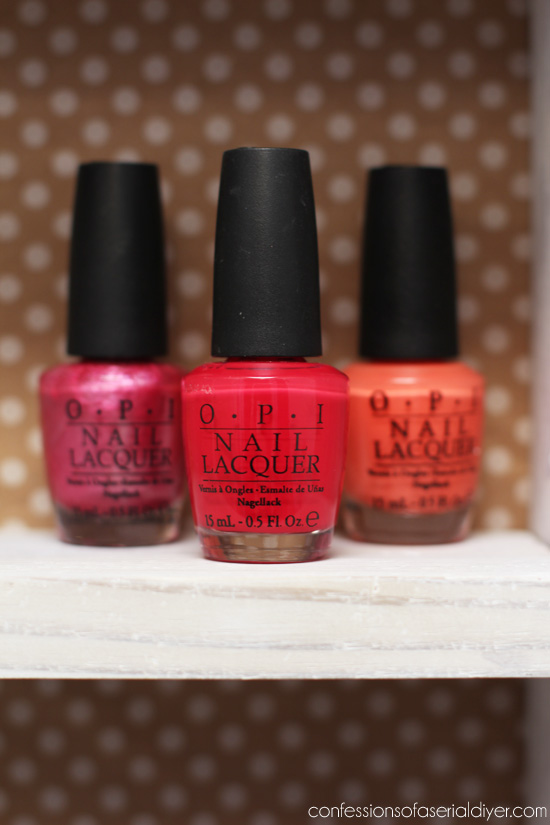
but this would be great for makeup as well, or in a kitchen for spices?
I built this cabinet similarly to hold my spices before I redid my kitchen. (That one hangs on the end of a cabinet…great use of unused space!)
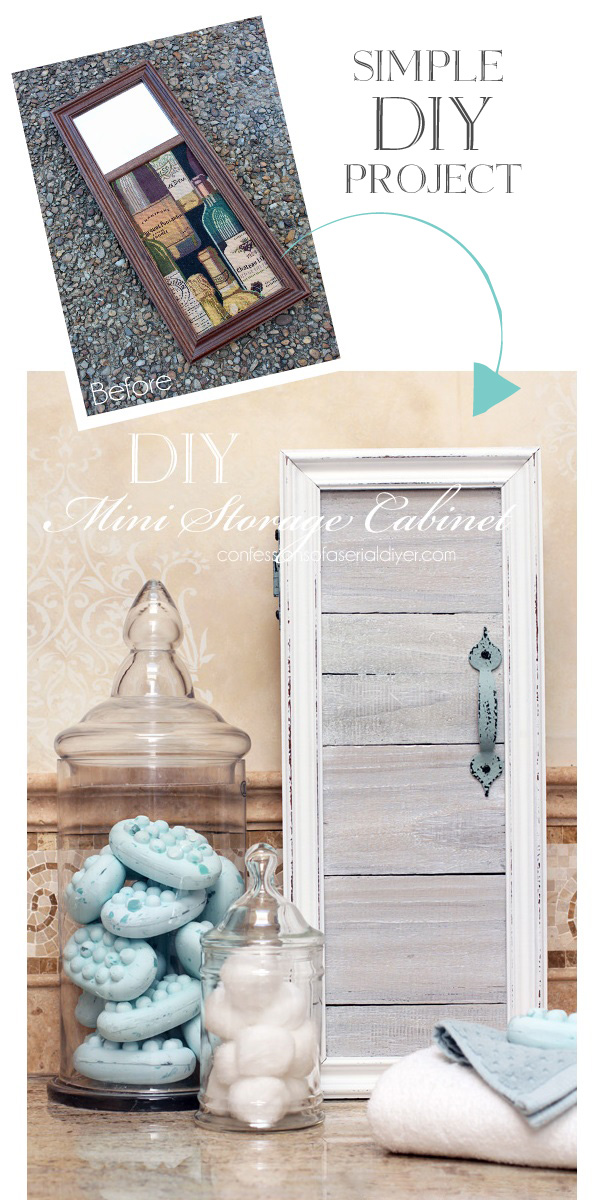
This was a pretty simple project, and it could be made in any size.
This project is probably new to many of you and I hope you enjoyed it! It was fun turning actual trash into something pretty and functional!
Have a great weekend, Friends! ????
XO,
![]()
Don’t Miss a Thing!
If you like what you see, there are several ways to follow along!
Email * Facebook * Pinterest * Hometalk * Twitter * Instagram


Cheryl says
Wow what an adorable cabinet! you’re so talented. thank you for sharing it and making clear for us readers. oh yest! the hardware is perfect!
Christy says
Thanks, Cheryl! It is always my pleasure! 🙂
Christina in FL says
Christy, i adore the way your creative mind works. 🙂 This is a brilliant little cabinet which could serve so many purposes. I bet it sells so quickly in your booth. 🙂 I adore the hardware and rustic charm.
Christy says
Aww thanks, Christina! I wasn’t a fan of the hardware before at all, but it was all I had…I was pleasantly surprised at what a coat paint did for them. 🙂
Mary Kaiser says
I remember this one and I still Love it!
Christy says
Thank you, Mary!! XOXO
Zefi Famelis says
Fantastic job!
Christy says
Thank you, Zefi! I love your blog name! XO
Jamie Kennemer says
That is genius! And pretty! Everyone needs one of those! Love Love ❤️❤️
Christy says
Thank you, Jamie! I agree ha ha! XOXO
Terry M says
I love boxes of any kind but this one has to be one of my favorites, so cute and functional, You did a great job on it, thanks for posting how you made it.
Christy says
Thanks, Terry, and you are so welcome!! XOXO
At Rivercrest Cottage says
As always, your projects are so inspiring! I’ve pinned quite a few just today. Thanks for sharing with us.
Christy says
Aww thank you so much! I’m so thrilled that you enjoy them! XOXO
Terri Hughes says
WOW…..great idea for an old picture frame. Very nice!
Christy says
Thanks, Terri!! XOXO
Rose Lefebvre says
You are amazingly talented! I am in awe of what you do.
Christy says
Aww you are always so kind to me, Rose, thank you!! XOXO
Addie says
You amaze!!!! I want a nail polish holder too!!!!…..you’ve got a lot of the same colors!!! …..surprised there’s no pastel blue in there!!!
God bless,
Addie
Christy says
Aww you are the best, Addie!!! Thank you!! I do have a few blues but they aren’t OPI ha ha…I just had to have all matching bottles! XOXO
Nancy @ Artsy Chicks Rule says
Such a cute project! You are so good at turning trash into such creative treasures! 🙂 xo
Christy says
Aww thanks, Nancy! XOXOXO
Cecilia says
Very cute cabinet! It’s perfect for smaller items. Btw, do you mind me asking what is the exact mitre saw you have? I’d like to get one and want one that’s easy to use. Thanks!
Cecilia
Christy says
Thanks, Cecilia! The one seen in this post is my old saw. I have this Ryobi now: http://www.homedepot.com/p/Ryobi-15-Amp-12-in-Sliding-Miter-Saw-with-Laser-TSS120L/205673791 It is a sliding miter saw so it will cut pieces up to 12″ wide and I love it! XO
Dee Bell says
Im inspired to go out and buy a mitre saw., Really beautiful piece. Thank you for sharing the how-to.
Christy says
Thanks, Dee! I use that one saw all the time! XO