When I shared my Master Closet Makeover (Part 1) last week I promised to show you what I did with all my husband’s clothes. Ladies, if you ever get the chance to have the closet to yourself, take it! Just be sure your honey’s clothes find a new home.
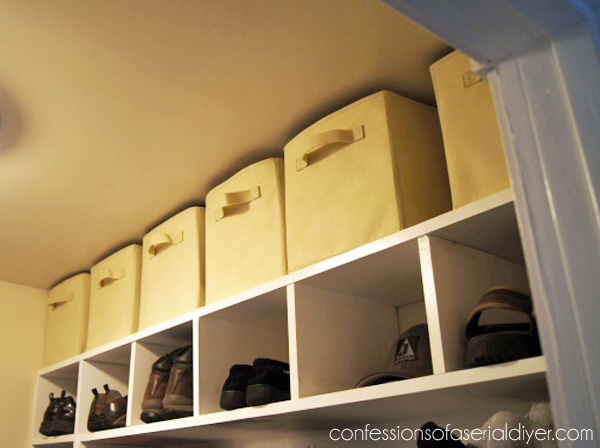
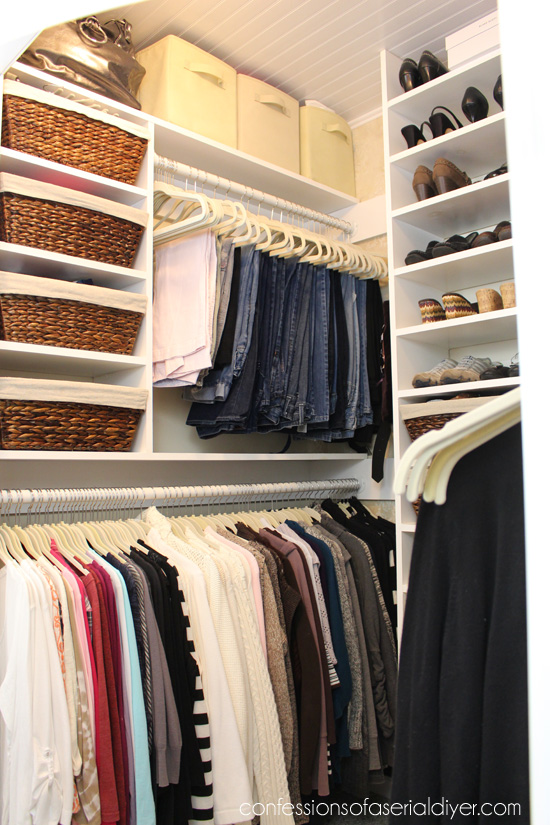
Here’s my husband’s new closet:

Do you know where this space came from? If you read about my master bath redo, you might already know.
Here is what this space used to be:
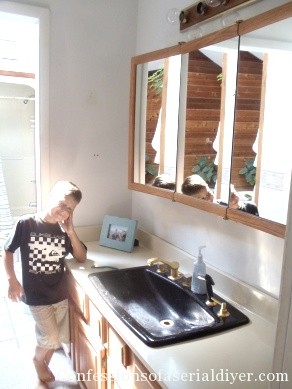
It was where our old vanity was before we moved it into the bathroom. (It’s across from the old master closet.)
Real nice…like straight out of 1984.
After taking a few measurements, I found that this would be a perfect new closet for my honey! (& a way for me to get more closet space!!!)
So again, I started planning it out on graph paper and got to work.
This is what I came up with:
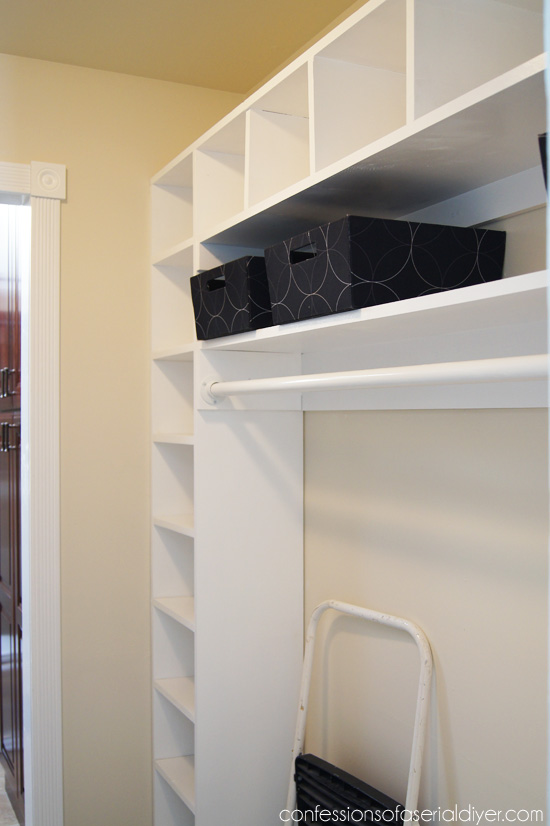
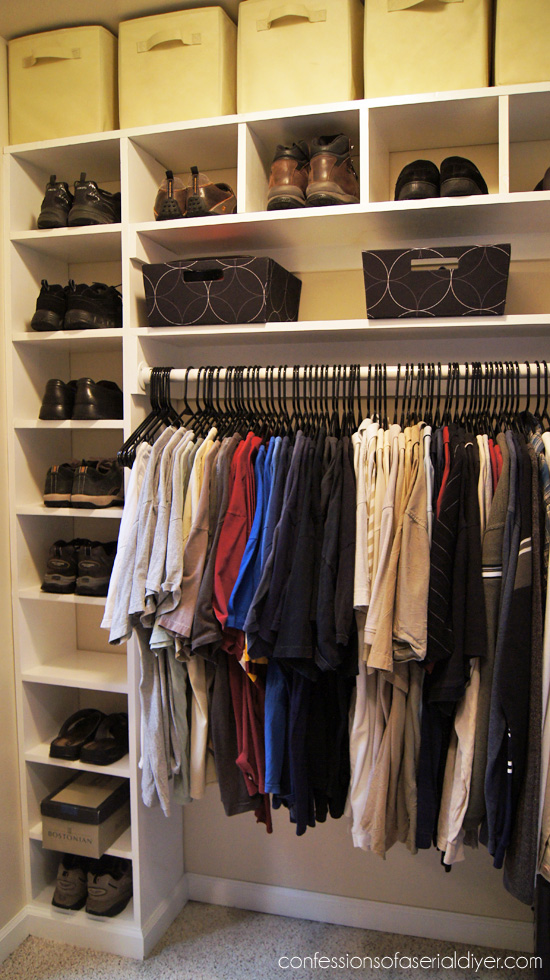
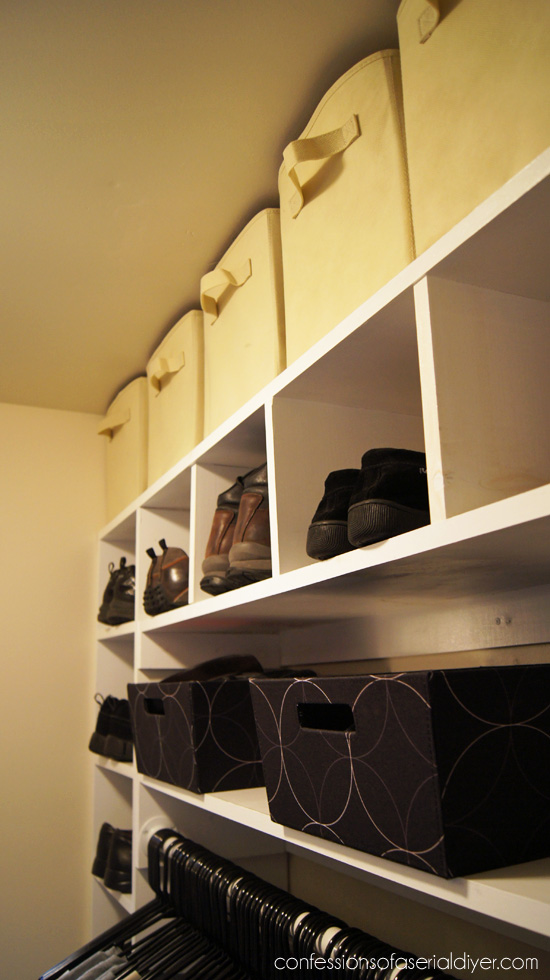
Now everything has a place.
I didn’t go into much detail about how my closet was constructed when I shared it last week. I was too busy showing off how pretty it was, but you can see how I built mine here.
All shelving is pine which I primed and painted prior to making any cuts.
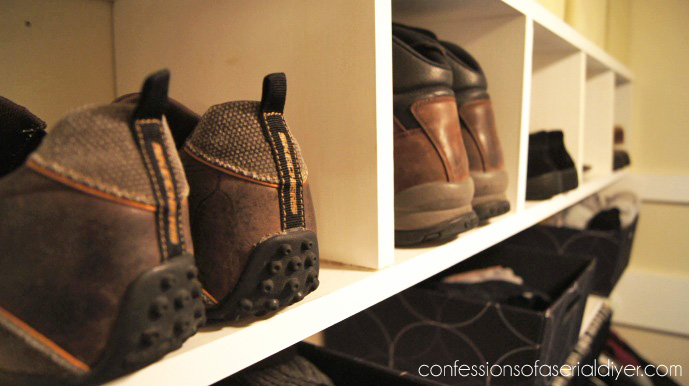
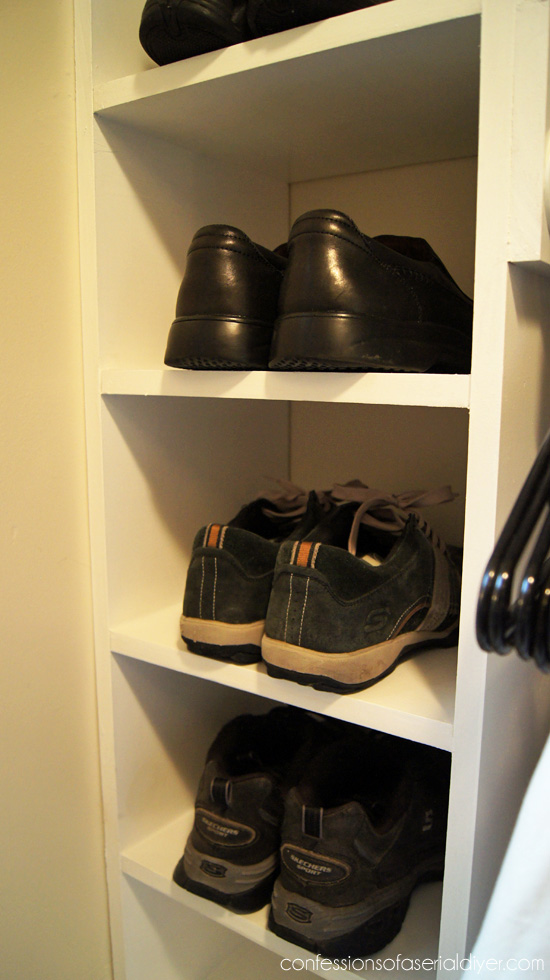
I put the shoe tower below together first and attached all other shelving to this. I just used a nail gun to attach the shelving to the sides. (I attached the left side of the shelving from the outside before placing the tower in the closet.) That’s plenty for just holding shoes.
I had a gentleman at the store where I purchased the wood make the cuts for the shoe tower. However, no two were cut exactly the same so I had to trim them when it came time to put this section together.
So a lessen from me: If you have someone else make cuts for shelving that is going to be installed flush to either side, make sure they know you need them to be EXACTLY the same size. I cut the shelving for my closet and the rest of this one myself.
After everything was installed, I did some touching up with caulk and gave it a final fresh coat of paint.
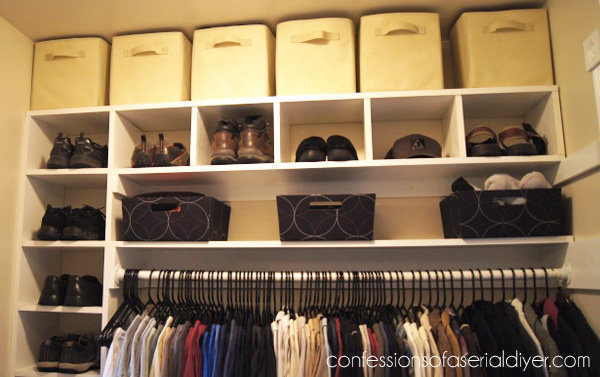
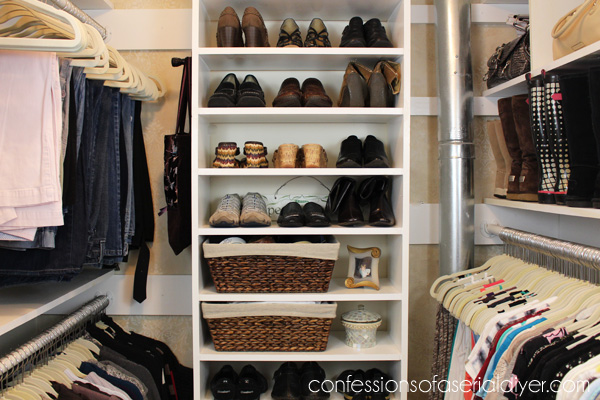
I used the same bins across the top here as I used in my own closet for continuity. The black bins came from Target.
You can see that the braces I used to hold the horizontal shelving came all the way out to the door frame on the right side. That was so I could attach them to studs.
This closet faces mine. I am actually standing in my closet taking this picture! To the left is the door to the bathroom and to the right is the door to our master bedroom. We walk through the closet area to get to our bathroom. I kept the same color scheme for both to make the two areas seem like one big room.
Here is what my closet looks like:
I know I made out in this deal but I made my husband happy too. 🙂
See more of my closet, including how I built it, here.
Check out my Top 10 Tips to a Better Closet here.

XO,
![]()
If you like what you see, there are several ways to follow along! ![]()
Email * Facebook * Pinterest * Hometalk * Twitter * Instagram


Jana Randall says
Hello Christie,
I am a writer for the SheKnows Home & Living page. Right now I am working on a few spring cleaning campaigns and would love to feature your closet as one of the “Tidy closets that leave you inspired”.
Please let me know if you are interested and if so, can you please send me the image without a watermark? I will ensure that your photo is credited as well as your blog.
Thank you,
Jana Randall: http://www.sheknows.com/authors/jana-randall/articles
Image interested in using: https://www.confessionsofaserialdiyer.com/wp-content/uploads/2013/01/closet-after-8.jpg
https://www.confessionsofaserialdiyer.com/master-closet-makeover-part-2/
Christy K. James says
I’d love that! I’ll send you the link:)
Annette says
What size is your closet? I am looking at expanding mine but I don’t know if it will be as big as yours. But I want to take some of your ideas and put them in my *new* closet.
Christy K. James says
Hi Annette! My closet is 6’wide by 4.5′ deep. I’d be happy to answer any more questions! Good luck with your closet 🙂
Tina says
Now that is one of the best closet makeovers I have EVER seen! Where did you buy the tan bins? Thanks
Christy K. James says
Thanks, Tina! I found the tan bins at Target 🙂
Kathy says
Hi Christy. First off, I have to give you props on a really nice job. I am presently trying to plan a remodel of my master closet, which is fun yet also frustrating as I try to make DIY closet systems work for my needs/space without breaking the bank. May I ask how much your closet system cost, and how long it took to build? Also, what kind of wood did you use? Thanks so much for all your help!
Christy K. James says
Thanks, Kathy! This came in at around $250, and I probably finished it in under a week. I did another post shiwing how I built it here: https://www.confessionsofaserialdiyer.com/how-a-girl-built-her-closet/ Hope this helps. Good Luck!
Beverly says
Christy,
Nice job creating his closet out of the bathroom space. Did hubby only get one side to his closet? Do you have pictures of the rest of his closet space? My hubby and I are building a house with his and hers closet spaces about the same size as yours. I am looking to organize our closets in a similar manner. Any details you can provide would be very helpful.
Christy says
Hi Beverly! Yes my hubby just has that one side, opposite that is my closet. It is plenty of space for him though, although he doesn’t have to wear dress clothes for work. Good luck with organizing yours! XO