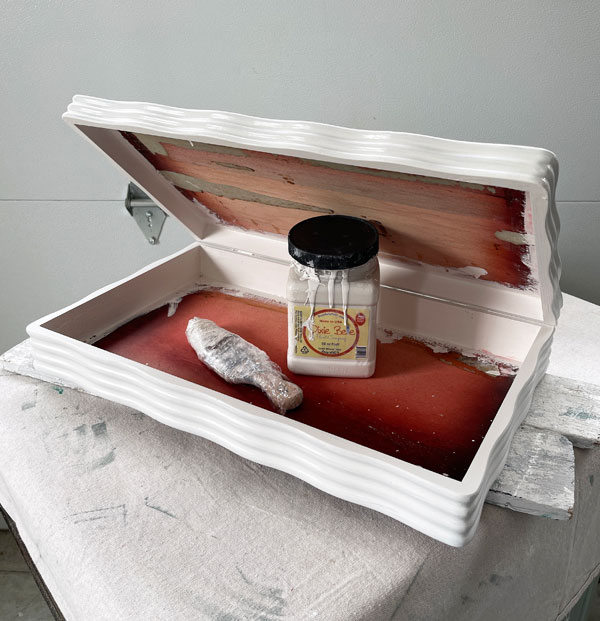
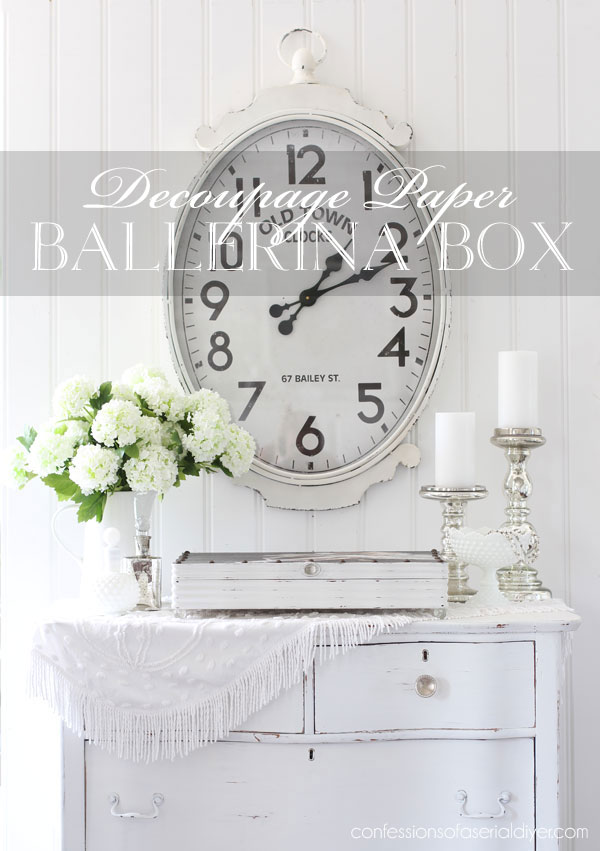
Welcome back, dear friends! I’m excited because I finally have a project for the ballerina decoupage paper we got in last fall! This flatware box was the perfect size!
It was also the cheapest item in my current haul at half off of $2.75! Now that is a deal. And a good one, because that $1.38 bought me this:

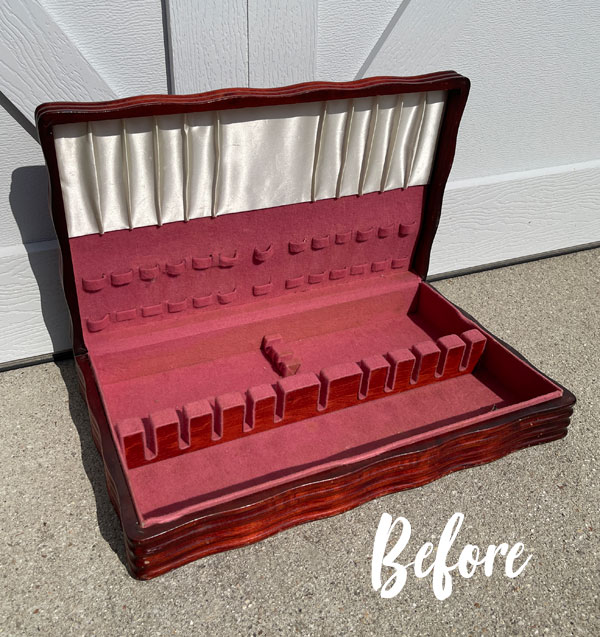
I love flatware boxes and have probably redone over a dozen of them, but I had never seen one like this before.
I’ve included a few affiliate links so you can find the products I love.
The Prep
The first step in this makeover was to remove the innards…undoubtedly the worst part!
I was actually able to pull the insides out of this one pretty easily though, thank goodness!

It’s totally okay if you can’t get every last morsel of glue out because most of the interior will be covered anyway.
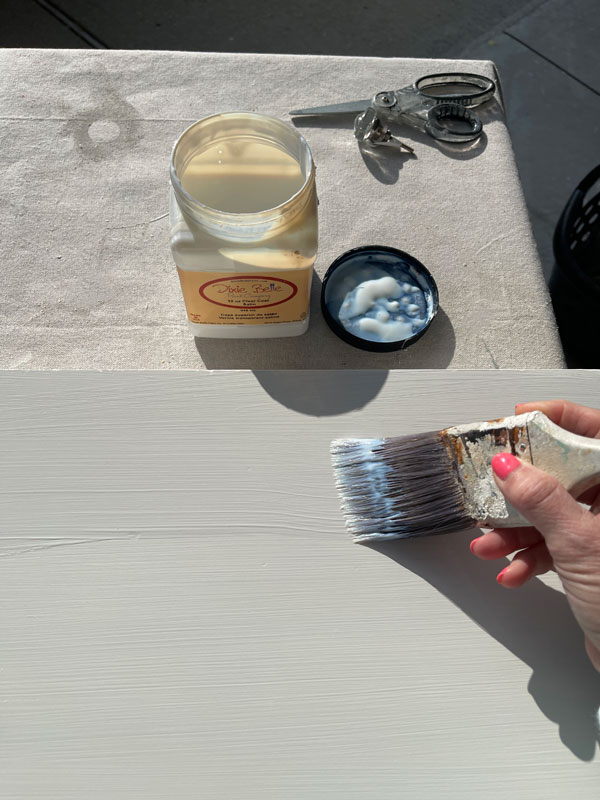
Next, I gave the outside a good cleaning with White Lightning.
We have a bleeder
This one was definitely a bleeder, so it got a coat of BOSS in white and I let it sit overnight to do its magic. Proper dry time is key!
Paint
The next day I gave it two coats of Fluff White.
Let’s decoupage!
I chose Fluff, not because it is one of my absolute favorite choices for painting just about anything, but because it was the perfect pairing for this pretty ballerina decoupage paper:
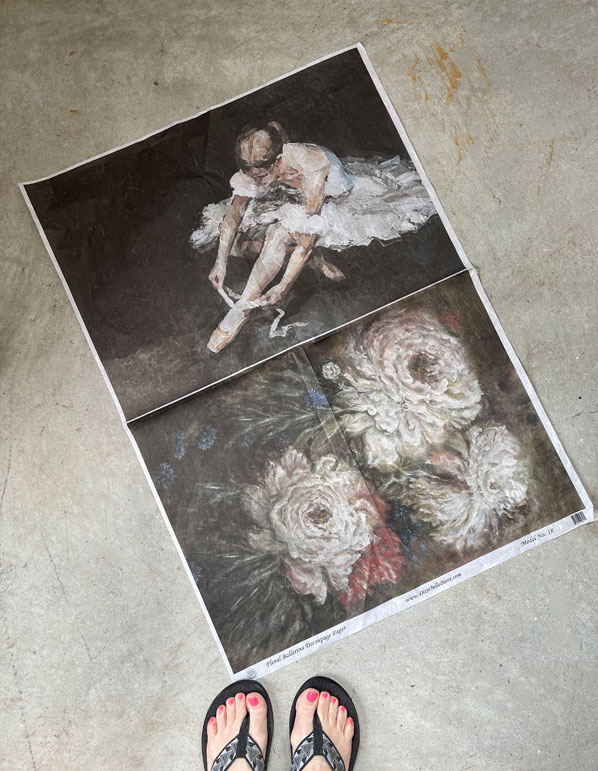
I’ve been wanting to use this paper since it came out, and I finally have the perfect piece for it!
This paper is nice because there are two different designs to use on two projects.
Step One
The first step in applying the decoupage paper is to add a liberal coat of Clear Coat in Satin:
Step Two
After positioning the paper the way I wanted, I smoothed it on from the center outward using this tool that I had bought for applying transfers:
It works great for decoupage!
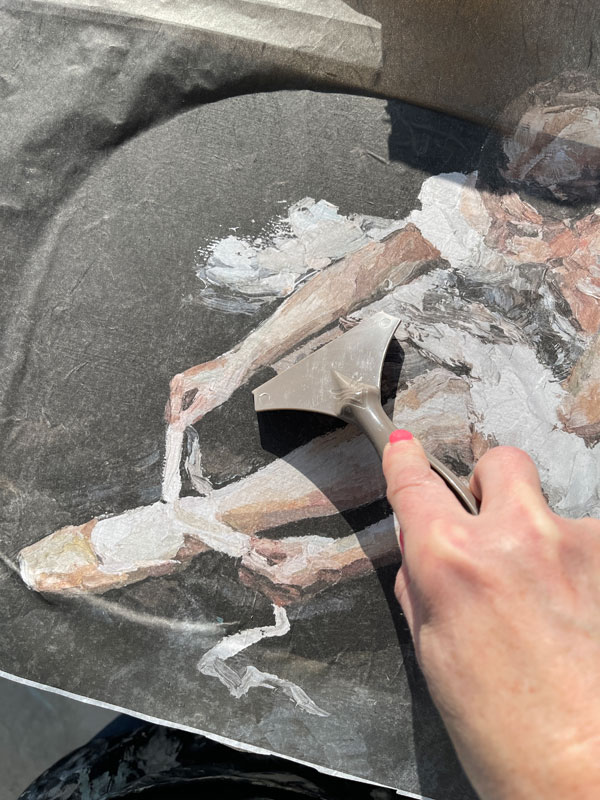
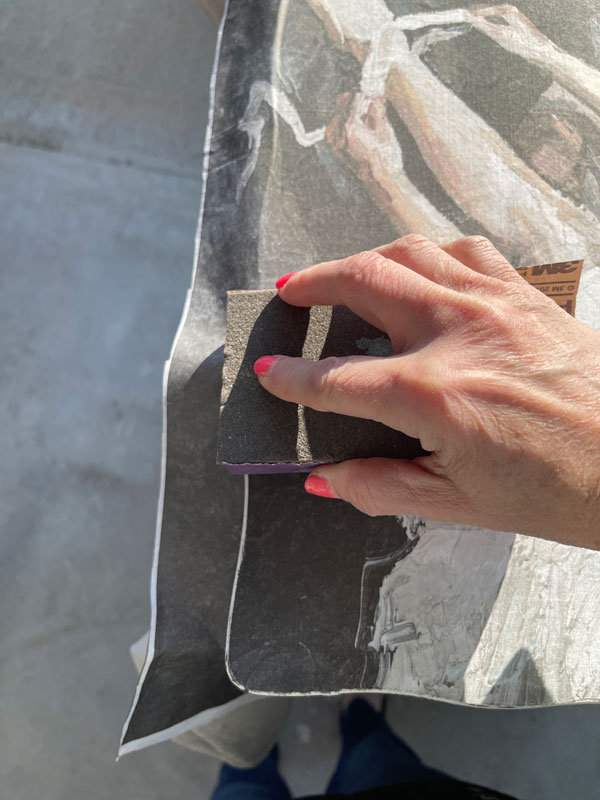
Step three
Then, I ran the metal post of a screw driver all the way around the edge to weaken the paper, and then I just sanded it right off:
Step four
Lastly, I applied another coat of Clear Coat in Satin to the top to protect the paper. I just did one coat since I used a brush to apply it rather than a sponge, and that applies it a bit thicker.
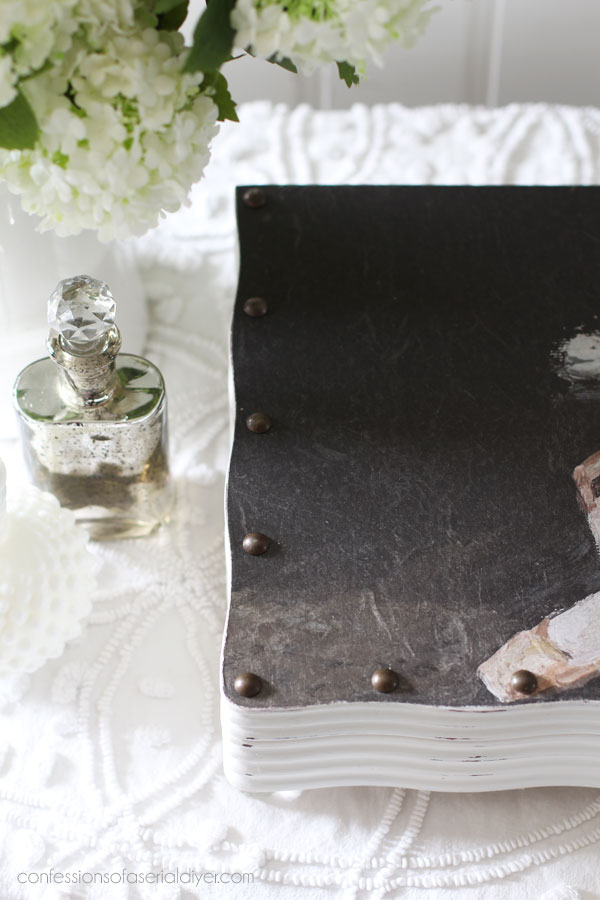
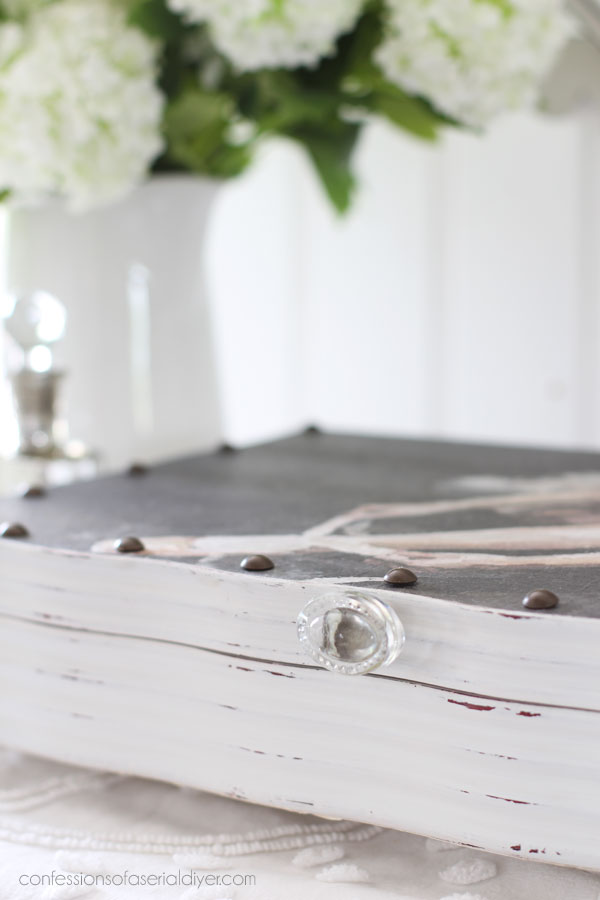
Adding Nail heads
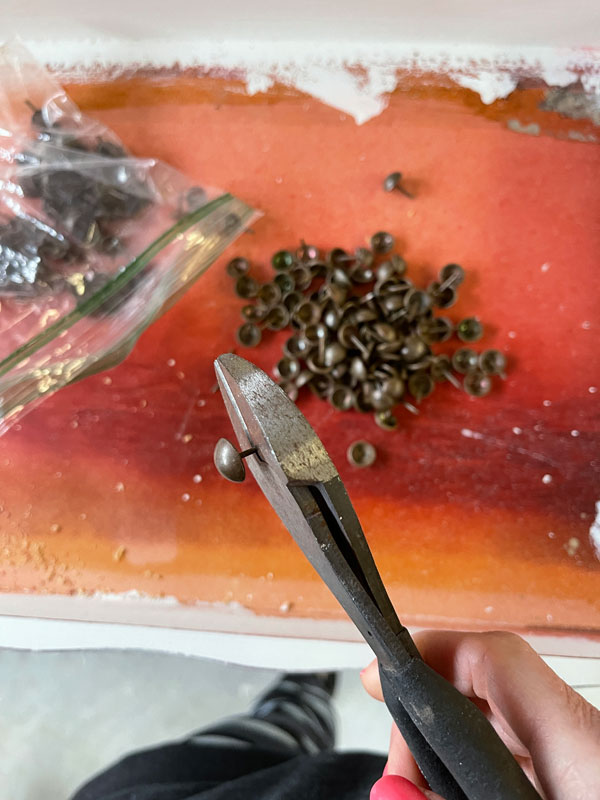
I wanted to add a little something else to the top, so I dug around and found a stash of nail heads that I had removed from another project forever ago. (I keep everything!!)
They needed to be cut so that they wouldn’t protrude through the thin wood lid too far, so I used wire cutters to do that:
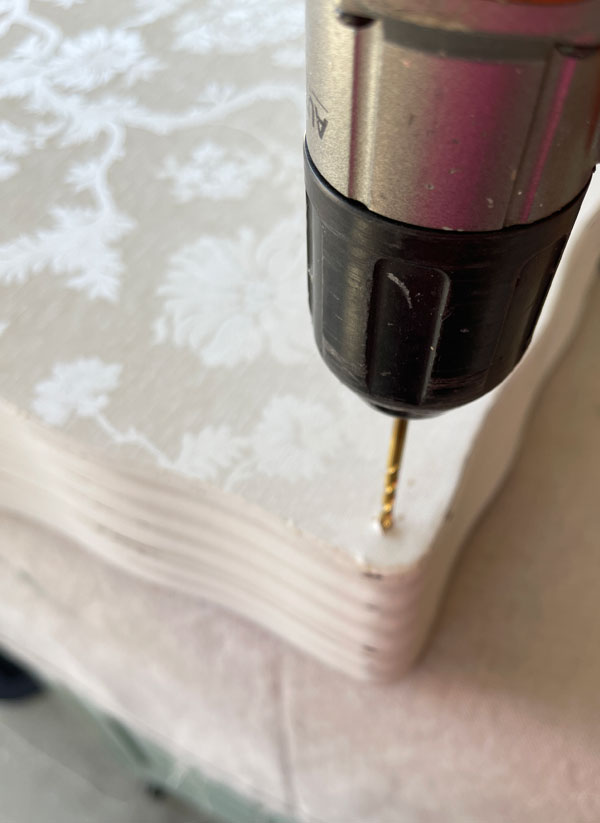
To add them to my box, I predrilled my holes since I had cut off the sharp point on my nailheads…
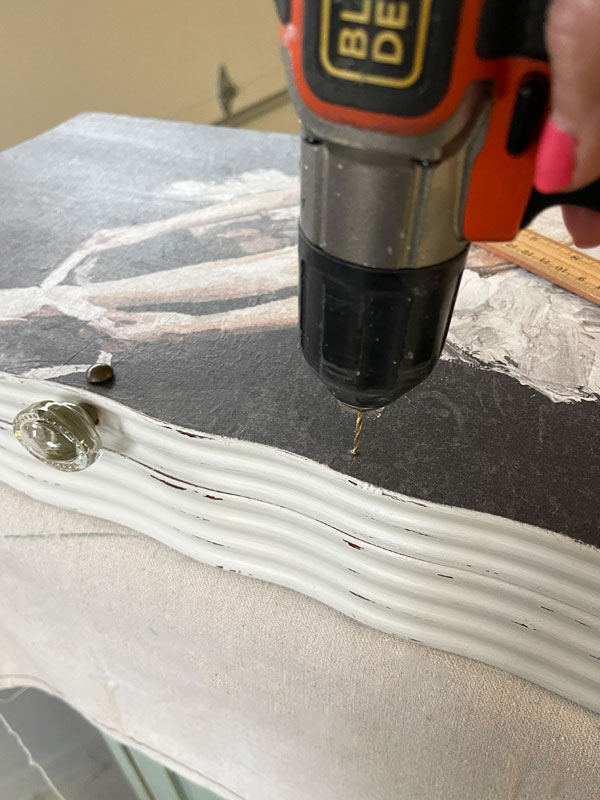
This is my absolute favorite drill. It is more petite and easy to handle!
Then I used E6000 glue on the posts to hold them firmly in place:
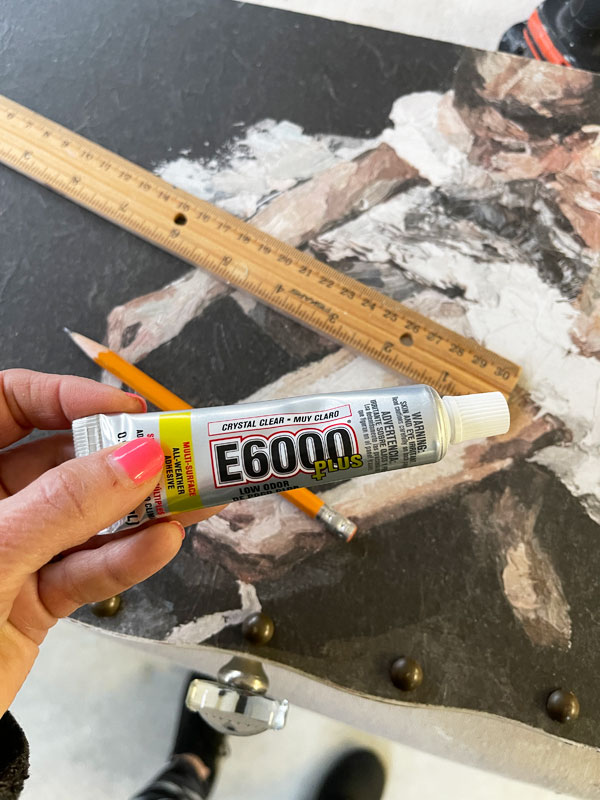
E6000 glue is stinky, but I found a NO ODOR formula!
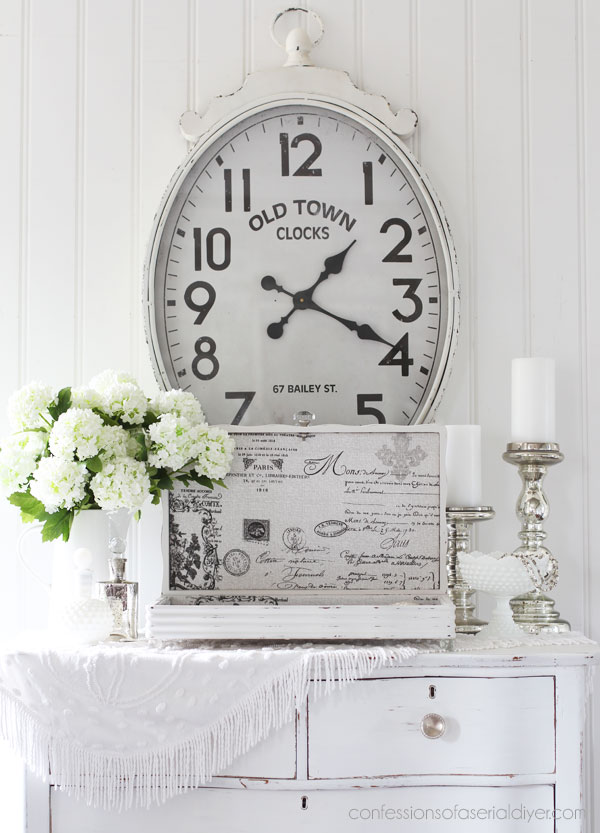
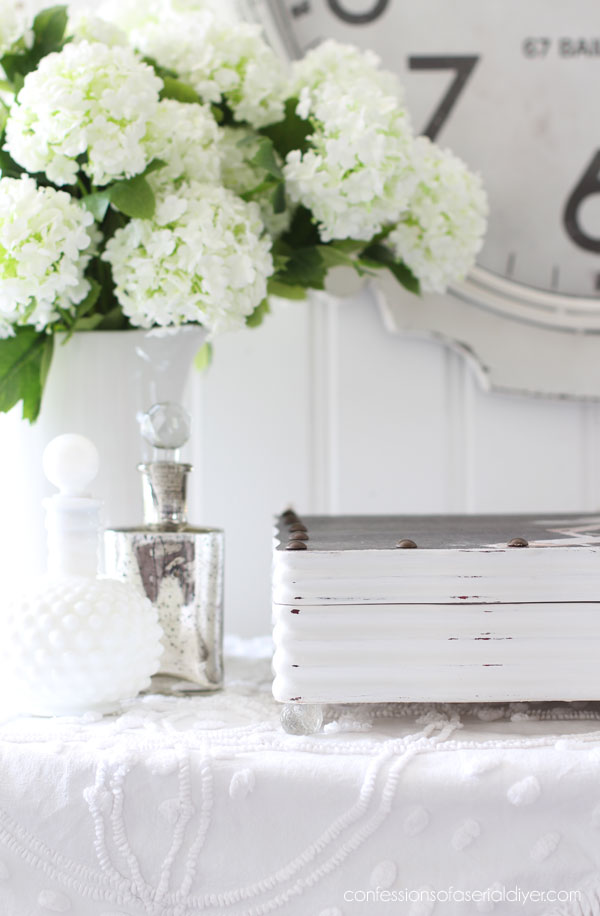
Ballerina Decoupage Paper Box: The After
Let’s jump to the after of this transformation!
Of course, it doesn’t look like much there, but let’s get in closer…
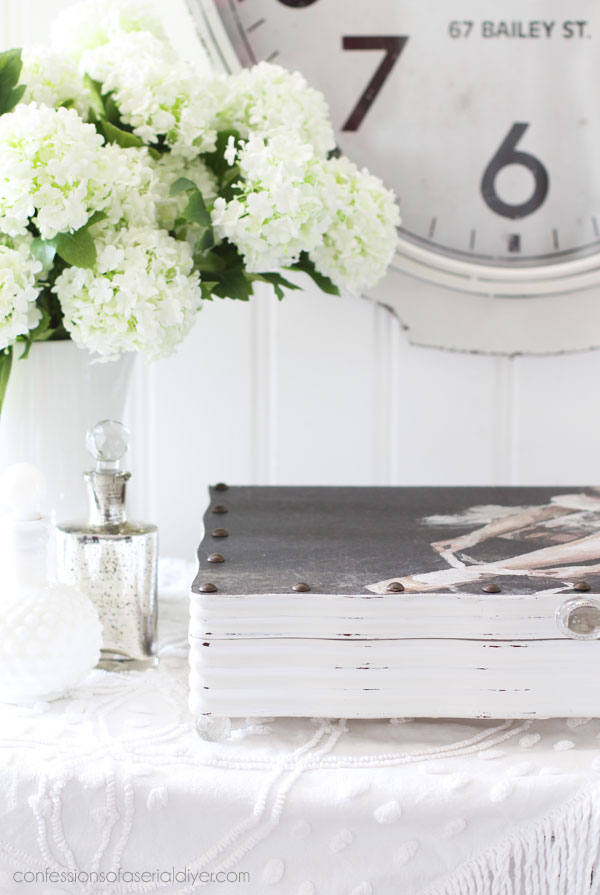
There she is!
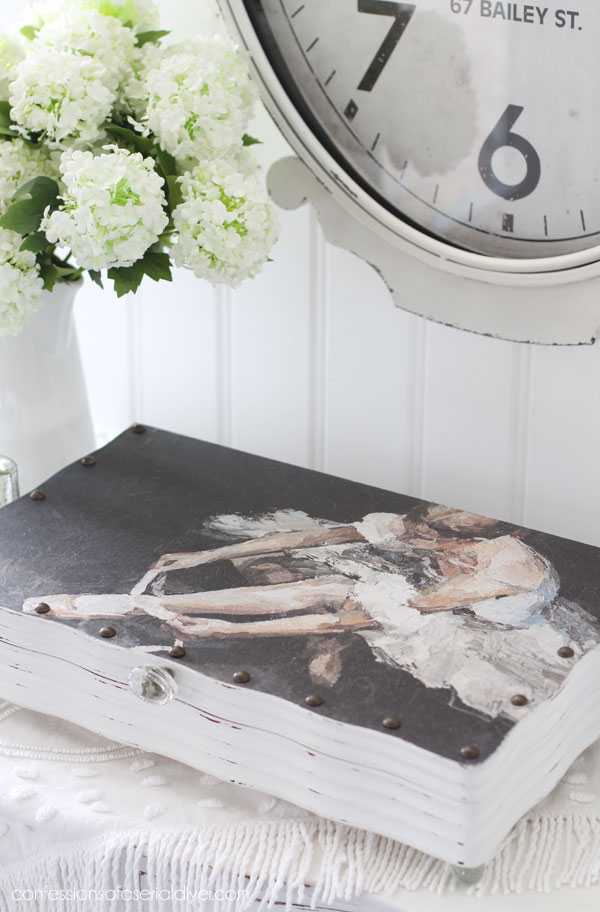
Ooh la la! I love her on this box!
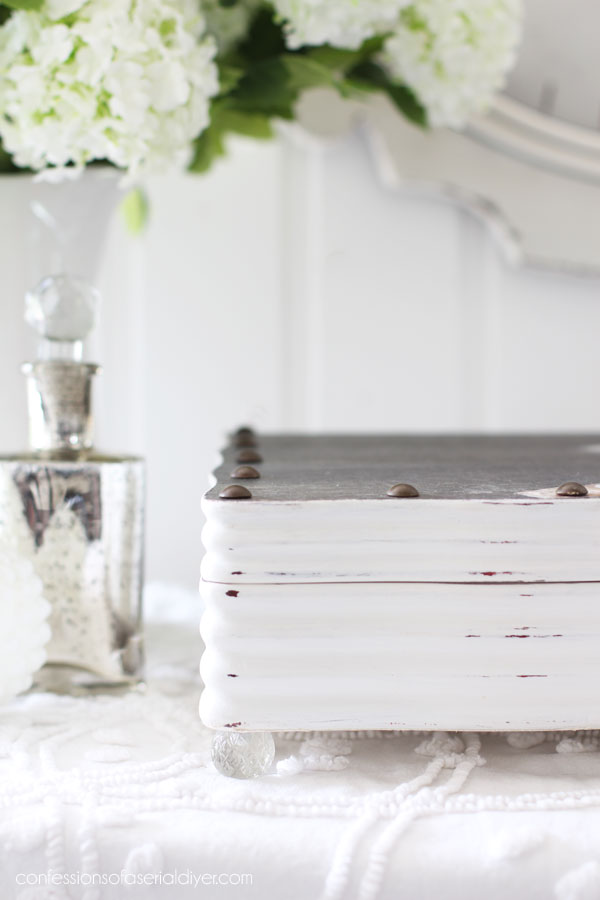
And the nailheads just add a little something extra…
Spacing the Nail Heads
To space them evenly, I started with one on either end. Then, I centered another between those two. I then centered one in between each of those, and that is all that was needed.
There was no handle or pull previously, but it was easy enough to add one, and this glass one from Hobby Lobby was perfect:
The Inside
The inside started out like this:
After ripping out the insides, I chose some fabric I had leftover from some curtain panels I purchased ages ago to line the inside:

Lining these boxes is not that hard at all.
You can see my full tutorial on how to line a box with fabric in THIS POST.
And here is the after!
It’s okay that the nailheads poked through the top a bit because the inside of both the top and bottom are lined with fabric covered foam core.
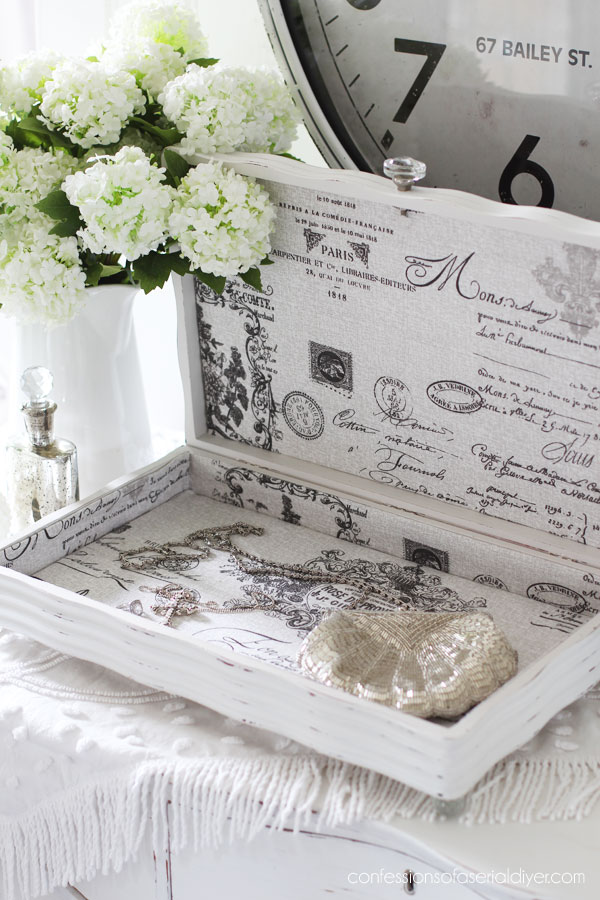
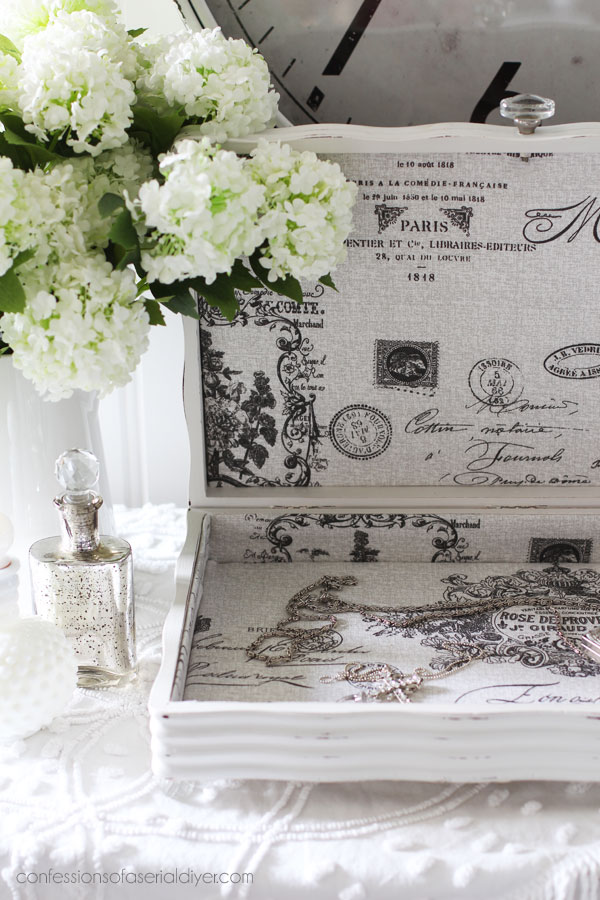
Did you notice those sweet glass feet??
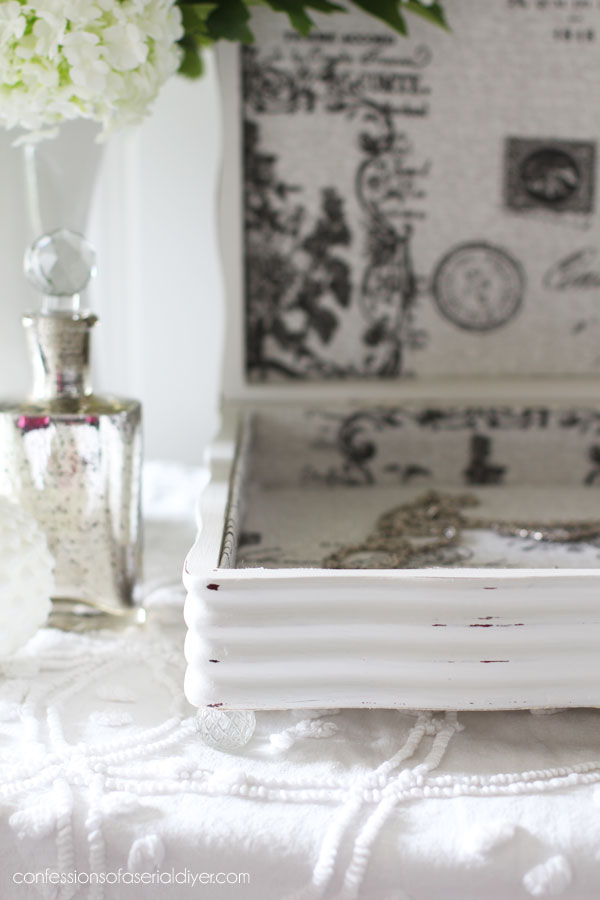
They started out as pulls that I found at Hobby Lobby.
I had to cut the posts down which I normally do with a dremel tool, but for these, since I was cutting much closer to the glass part, I did it a bit differently.
I scored the post really well with my wire cutters. You can see where I started to score the threads here…
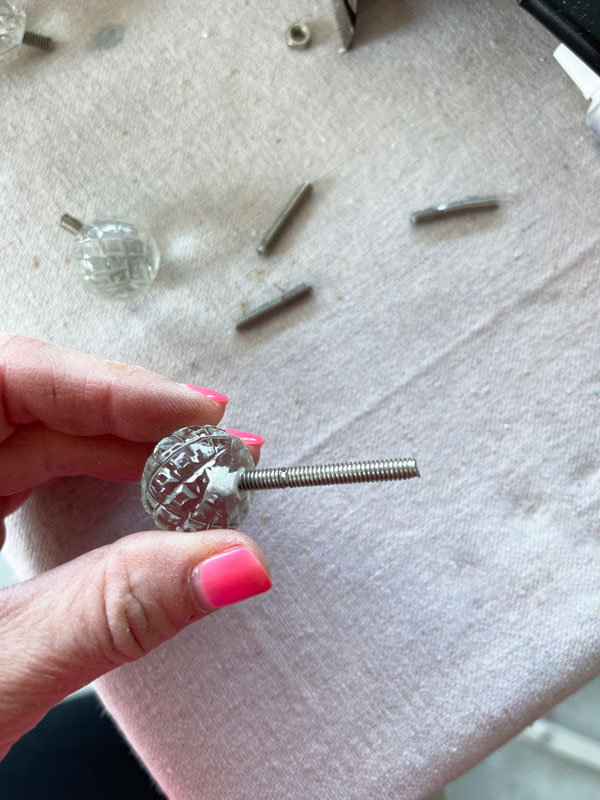
Then, I laid it down and took a small hammer to the area that was scored…
It took flipping it over and hitting it a couple of times for it to break off.
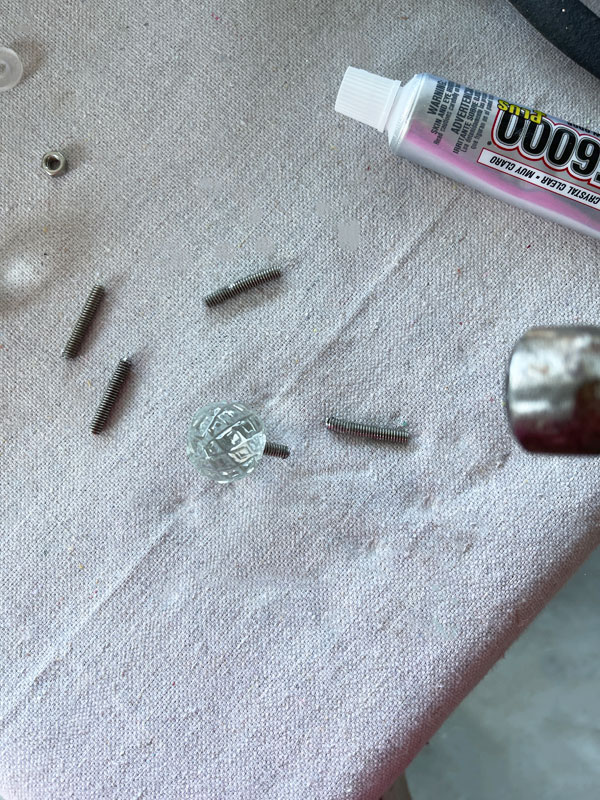
Then I predrilled holes in the bottom:
(I also covered the bottom in pretty wallpaper I had in my stash to cover ugly paper that was there.)
Then I applied a small bead of the E6000 glue and screwed them right into the holes!
They worked out perfectly!
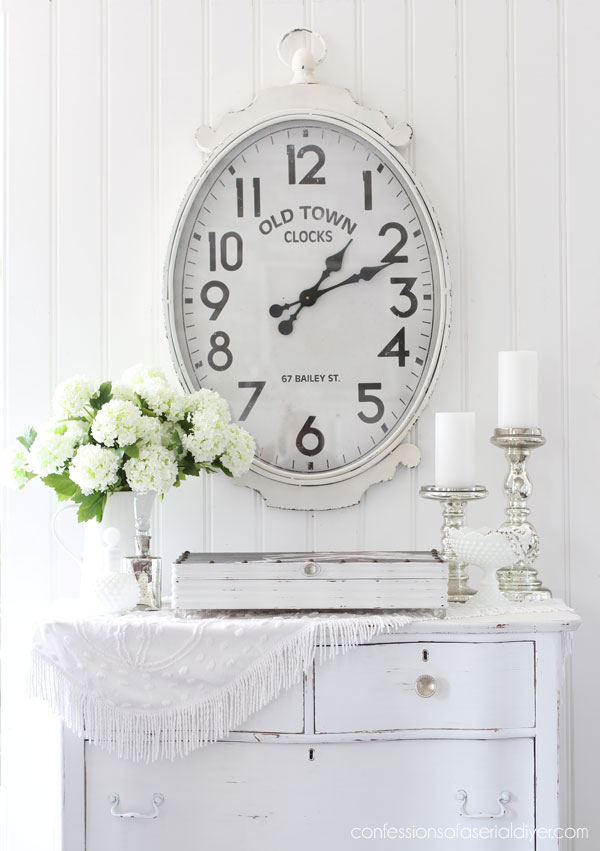
This one had lots of elements, but I’m pleased with how they all came together to make this $1.38 box extra special!

One more done woohoo!
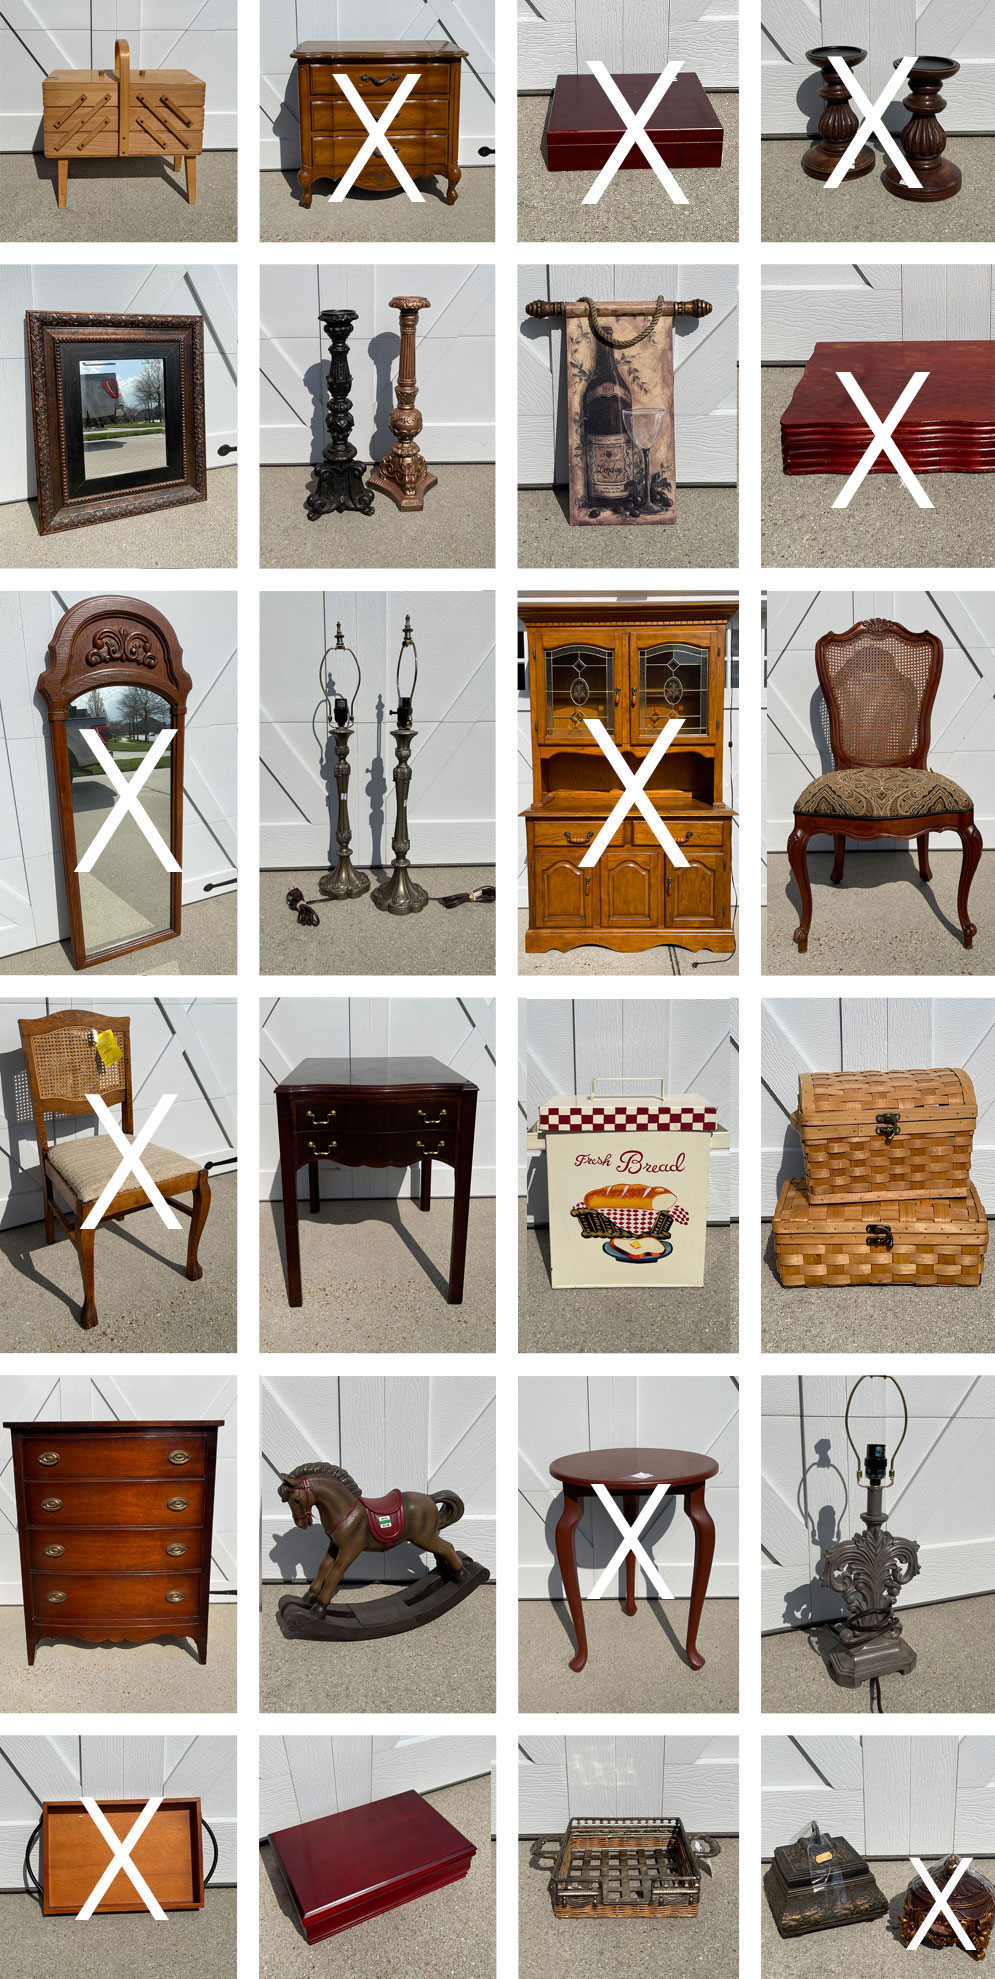
See what I’ve completed so far at the links below:
Petite Side Table Makeover
French Provincial Night Table
Repurposed Cigar Box
Antique Oak Chair Makeover
Painting the Smalls #16 (candlesticks, small box, tray)
Stenciled Mirror Makeover
Hutch Makeover
Shop News
I have some quick shop news for you in the way of NEW ARRIVALS!

Dixie Belle’s newest products include:
- A brand new Voodoo gel stain color called Au Naturel. Just as the name implies, Au Naturel is a very natural color…almost like a bleached wood look that is so in right now!
- Two brand new No Pain Gel Stain Colors: American Honey and Golden Ash.
- Dixie Belle also just released a new foam brush that comes in three sizes ranging from $2.95-$3.95. These Foam N Dandy sponge brushes are very nice quality foam brushes that are perfect for applying glaze, stain, or even sealers, and they don’t have that hard palstic piece in the center of the foam!
Visit my shop HERE for all things DIXIE BELLE! All orders over $50 ship FREE!
I hope y’all have an amazing spring weekend, and I’ll see you back here on Tuesday for a fun thrifted box round up!
UPDATE: It’s ready…go see it HERE now!
XOXO,

Don’t Miss a Thing!
If you like what you see, there are several ways to follow along!
EMAIL * INSTAGRAM * FACEBOOK * PINTEREST


Mary Kaiser says
Oh, she is so beautiful now! What an amazing transformation! I love the glass knob handle and feet mixed with the nail heads that are a little rustic! I would say that you NAILED this one!! LOL! Beautiful!
Christy says
Thank you so much, Mary! Ha ha…I wasn’t sure how everything would come together, but I’m sure glad they did! Have a lovely weekend! XOXO
Denise Cox says
“She’s” lovely! Great job. I love the glass pull accents. The ballerina transfer is so feminine and pretty…
Christy says
Thank you, Denise! I’ve been wanting to use this paper for a while! So glad I was finally able to! XOXO
Janice Holt says
I always love your boxes. You put so much detail into them. Now I watch quite a bit of Youtube and see people that paint things like furniture with the handles left on, etc. and always compare them to what you do. Well there is really no comparison. You never leave anything undone. You are my favorite. Another “best” job.
Christy says
Wow I appreciate that so much, Janice! Thank you! I love redoing boxes since there are so many possibilities! I might cut corners more if these items were for myself, but I think it’s the small details that help things sell sometimes. Have a beautiful day! XOXO
Sandra says
Those feet! They add so much glam. Such a beautiful makeover!
Christy says
Thank you so much, Sandra! XOXO
Cara says
In all my years of shopping antique stores for unique finds, I have never found someone who adds so much attention to detail to their pieces. It’s probably a good thing I do not live close, I’d stalk your booth with all of your new pieces and I’d be broke, but I’d have beautiful pieces in my home. Maybe one of these days I’ll be able to visit and get my fill of your treasures. Lol
Christy says
Aww thank you so much, Cara! I think if I didn’t blog about my items, I might not put as much into them maybe? Who knows lol. That would be awesome if you got the chance to visit! XOXO
Cheryl Atkinson says
Hi Christy! Wow! You really did a great job on this box and you gave some great tips that I will make sure I use. Running the screwdriver around the edges, snipping the tacks and knocking down those pulls. Those will all come in handy. Thank you. If turned out beautiful.
Christy says
Thank you, Cheryl! There were a lot of little details to cover in this one lol…glad it was helpful! XOXO
Sandra says
Christy thank you for your designs, I love your creativity! But today I want to thank you for always giving out product info like new low odor e6000. I had no idea this existed. My hubby hates the smell of the glue and this will allow me to stay in the basement with my projects instead of cold garage!
Christy says
Aww thank you and you are so welcome! I went to reorder some and that popped up…I was so excited! My hubby is the very same. I once used the old stuff on a dresser drawer pull, and no kidding, I had to keep that one drawer in another room when we slept for weeks until the smell finally dissipated! XOXO
Cecilia says
Ooo la la, so pretty! Love all the elements on this box! Just gorgeous!
Christy says
Thank you so much, Cecilia! XOXO
Toby says
This is one of my of all time favorite projects of yours! SO beautiful! I absolutely love it!!! 🙂
Have a great day Christy!!
Christy says
Oh yay! I love that! I’m quite smitten with it myself lol. Thanks, Toby! XOXO
Jewels says
Wow, Christy. This is one of my favorites you have done! So creative.
Christy says
Aww thank you so much, Jewels!! XOXO
Susan M Van Dyke says
I love seeing what you do with these boxes!
Christy says
Thank you, Susan! I really enjoy redoing them! XOXO
LORRI says
This box is lovely. I was looking at that Ballerina decouple paper. It is so beautiful and electoral. I love the way you repurposed these boxes.
Christy says
Thank you, Lorri! I have been wanting to do something with this pretty paper since we got it in, and I was so happy it fit the top of this box perfectly! XOXO
LORRI says
Oh I hate when they change the word.. The word I want to say “eletheral “
Christy says
That darned auto-correct gets us all…I thought you were really smart and just using a word I had never heard of ha ha!
Niki says
I like your flatware boxes a lot. Christy! This one is pretty and feminine; but not overwhelmingly cutesy. I wonder what it would’ve looked like in black with some gold or brass legs.
Christy says
Thank you, Niki! That would be an amazing combination for sure!! XOXO
Carol S says
Really nice job on this one, Christy. I like the nail heads touch and the glass ball feet. The decoupage was perfect for this one with the curvy sides. I love the way you do the insides. I always struggle with the bottom sides when I do my boxes. I forget about just folding over and gluing right to the box instead of making cardboard forms fit. Thank you for the inspiration!
Christy says
Thank you, Carol! This paper worked really nicely on this box for sure. And yep, I only use the foam core for the bottom! 🙂 XOXO
Leslie Delanty says
Christie … your ballerina box is just delightful. Would you be willing to sell it to me and ship to Canada? I will be happy to pay all shipping and duty costs.
I buy fabric from the US quite frequently. (sometimes twice a week) They send it to me via UPS and it works great. I find the USPS and Canada Post don’t always play well with each other. And FedEx can sometimes be a nightmare to deal with on this side of the border.
Thanks so very much.
All my very best …./leslie
Debra Hubbs says
You always add those little extras that make your pieces so pretty! Love this!
Christy says
Aww thank you, Debra! XOXO
Denise - Salvaged Inspirations says
It looks like a vintage piece of art and I love those little feet! Enjoy your day my friend! XOXO
Christy says
Aww thank you, Denise! Have a fantastic weekend, my friend! XOXO
Cyndi says
Another beautiful piece! I love it all, and I LOVE that wallpaper you put on the bottom! Thanks for all your good tips on how to get the best results. I’m taking notes! 🙂
Christy says
Thank you so much, Cyndi! I found several rolls of that paper either at thrift store or an estate sale many years ago and I’m still getting use out of it! XOXO
Sharon L Austin says
That turned out so pretty!!!
Christy says
Thank you, Sharon! XOXO
Phyllis says
This project is absolutely beautiful! Such attention to detail. Wonderful!
Christy says
Aww thank you, Phyllis! I’m so glad you enjoyed it! XOXO
Constance Colvin says
Oh Christy, this box is BEYOND extra special! Your skills are waaaaay superior to the average crafter’s…….just incredible to see in action! And, of course, inspiring 😀 I had a mental chuckle when I read that lining a box “isn’t hard at all”! Hahahahahaha I have one practical question: you paint the bottom of the box and let it dry first, no? Thanks as always (-:
Christy says
Aww thank you so much, Connie!! You are the sweetest! It does seem harder than it is to line these boxes…but when you see how I break it down, it really isn’t bad at all! As for painting the bottom, if you’re referring to the outside of the bottom, I just covered that in wallpaper…no paint. For the inside of the bottom, I did not paint it either since it would be covered with foam core wrapped in fabric. Hope that answered your question! Have a wonderful weekend! XOXO
Marty K says
Just beautiful! Where did you find the ballerina paper?
Christy says
Thank you, Marty! You can find that in my Etsy shop here: https://www.etsy.com/listing/1099356567/floral-ballerina-decoupage-rice-paper-by I try to link directly to the products I use, so if you see blue text in my post, those are clickable and will take you to the products. 🙂 XOXO
Jamie Perez says
This is adorable! Thanks for showing how to shorten the screw on the drawer pull! All the Hobby Lobby ones are so long! Beautiful!
Christy says
Thank you, Jamie! I haven’t tried that method when I just need to remove a small amount from the post, but it worked great here! I usually use a dremel-like tool with a metal cutting wheel, but a small handsaw with really small teeth works as well! XOXO
Mary says
Oooo-la-la! Its a beauty now! And as others have said before me, your attention to detail is amazing. Love how it turned out Christy..I would have not thought of the feet or the nail heads but perfect touches!
Christy says
Thank you, Mary! I appreciate that so much! XOXO
Peggy says
Beautiful and elegant ballerina. LoVe the feet!
Christy says
Thank you so much, Peggy! I’m so glad those knobs worked out as feet! XOXO
Lisa says
Christy,
Your site is my favorite. I love your detailed instructions, the supply list for us to find what u used and the way you stage your finished project. Just beautiful! I have one question. Where did you get the wall clock in the pictures above? Lol. Lisa
Christy says
Aww I appreciate that so much, Lisa, thank you!! I found that clock at HomeGoods when we moved back in 2017. 🙂 XOXO
Michele M. says
Oh my goodness, wow wow wow! That transformation is truly unbelievable. What a gorgeous piece! That’s going to sell FAST, I just know it! Well done, Christy!!
Christy says
Thank you so much, Michele! I sure hope so! XOXO
Susan Renaud says
I have a couple of shallow boxes and lacked the inspiration to do something sweet with them, but I now have gained some oomph to, at least, give it a shot. I really love the fact that you save everything. I too have some of the exact decorative furniture nail heads that were part of an old rocking chair. I also love the handle and feet that you used and thank you for the info on how to apply these items.
Christy says
Oh perfect! I do save it all just in case ha ha! Thank you, Susan! Have fun with your boxes! XOXO
Kathleen says
Hi
I’m new to your site (got the link from the cottage market blog) and to doing decoupage. I have a list started already of potential projects. Finding just the right paper is a challenge in Canada. Where did you source this? It doesn’t look like your typical decoupage paper and your materials differ from traditional so I’m thinking it might be thicker etc. Very interested to learn from you as I enjoy your style.
Christy says
Hi Kathleen! This paper is called Rice Decoupage paper and it is a bit thicker than traditional paper. This particular design is made by Dixie Belle from their Belles and Whistles line. I searched Etsy for a Canadian retailer that has it with no luck as they are in the process of liquidating their current designs to make room for new ones. This retailer on Etsy ships from Canada: https://www.etsy.com/shop/LifesRosie and she has a few other designs plus decoupage papers from Redesign with Prima as well…they have a little Ballerina one you may like. I hope that helps! XOXO