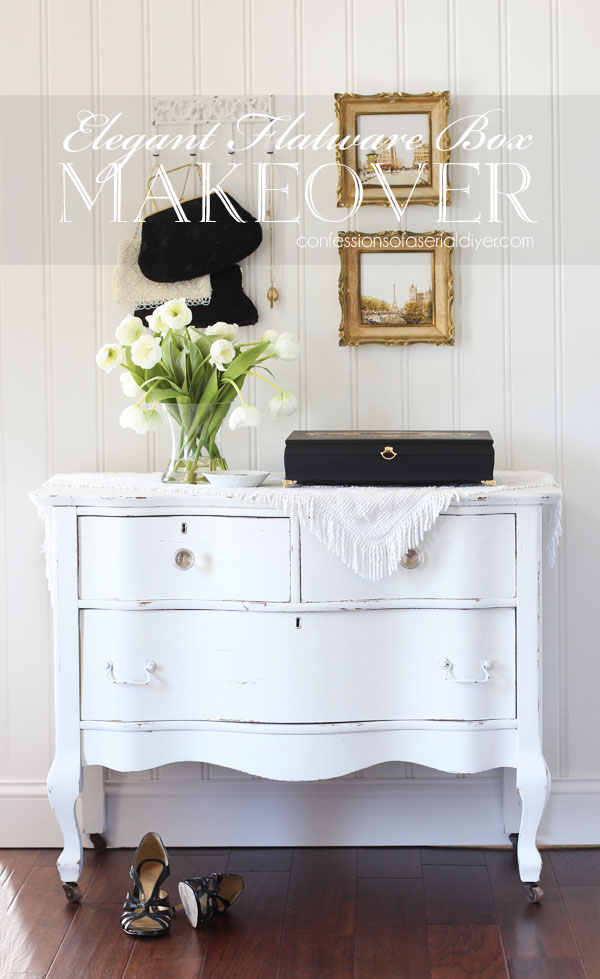
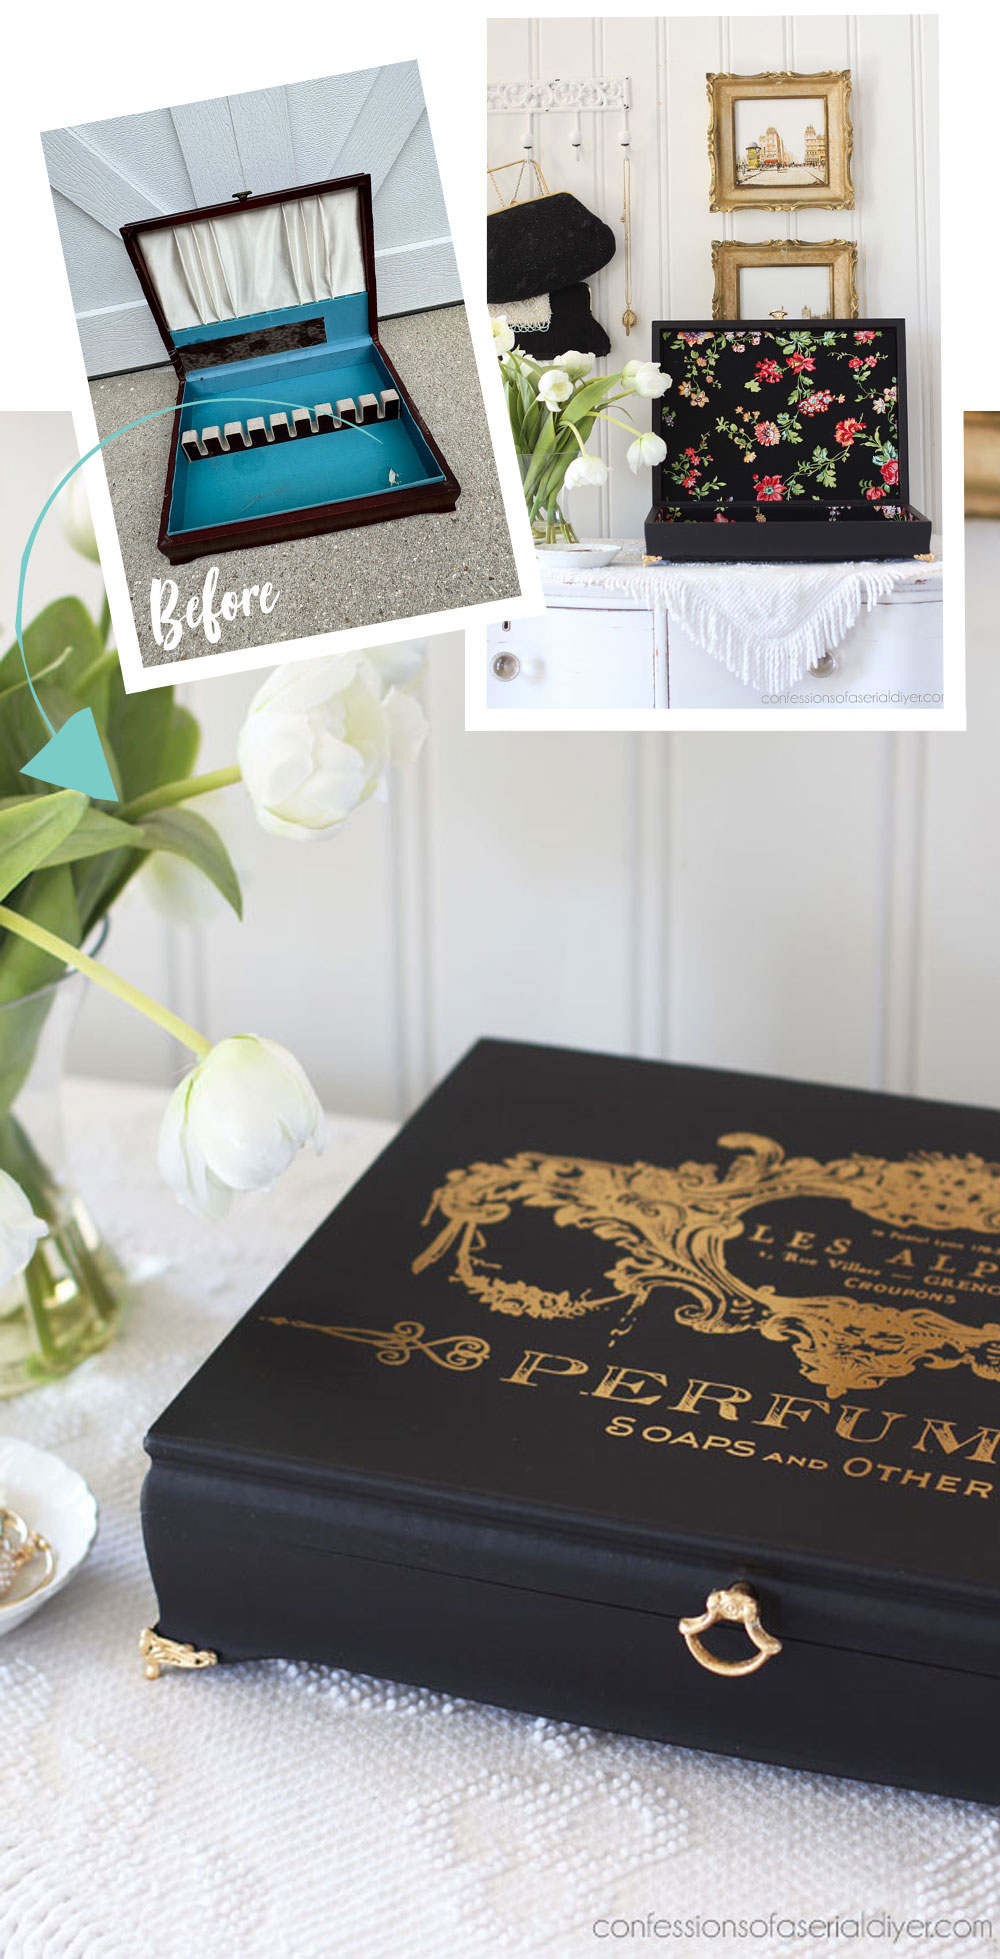
Hello, sweet friends! I’ve got a super elegant flatware box makeover for y’all today! I had originally planned to share a small pedestal table, but I didn’t love what I had done with it, so I’ll be back with that on Thursday instead.
It’s also Trashy Tuesday!! Our group has been at this a long time, and we thought it was time for a new look and a new name…welcome to Trashy Treasures Tuesday!
Be sure to look for my friends’ makeovers at the bottom!
I’ve included a few affiliate links so you can find the products I love.
Here is my project piece for today:
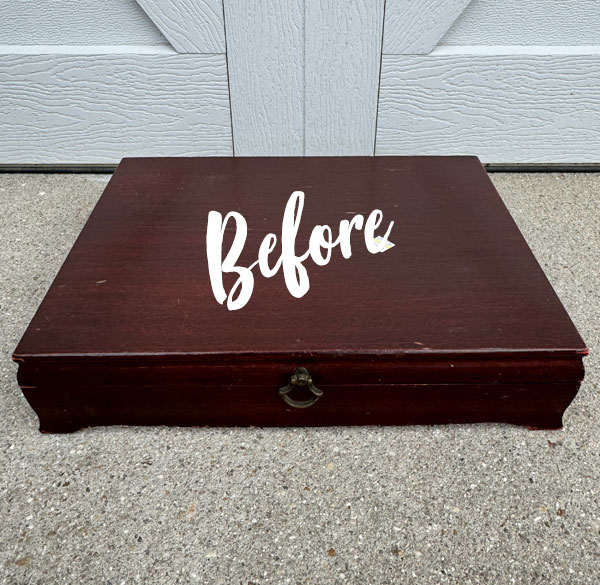
This box was a bargain at only $4.98!
It doesn’t exactly look trashy there, but when you open it up…
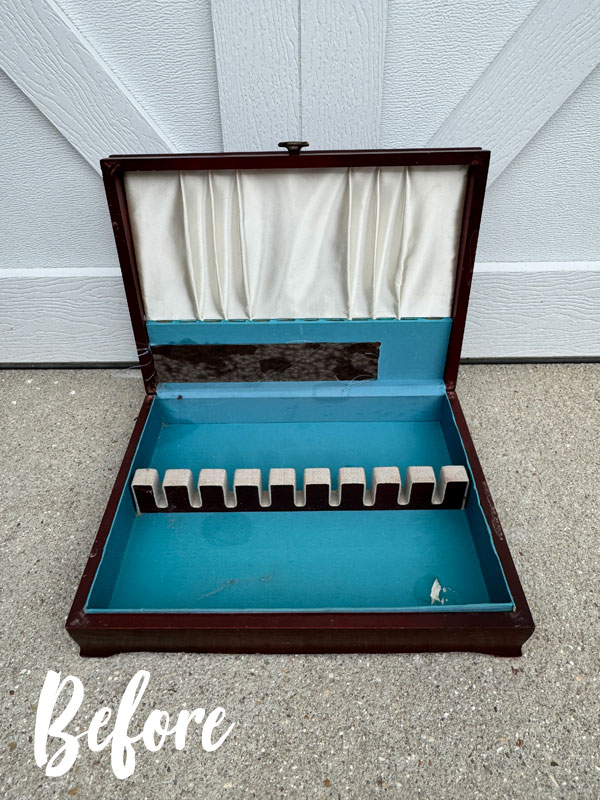
Nice! I’ve actually never seen one with a turquoise lining before. Part of it had been cut away at the back there…maybe it had an engraved plate there or something?
Remove the Lining
The hardest part of these flatware box makeovers is removing the innards.
That center piece can usually be rocked back and forth until it can be pulled out:
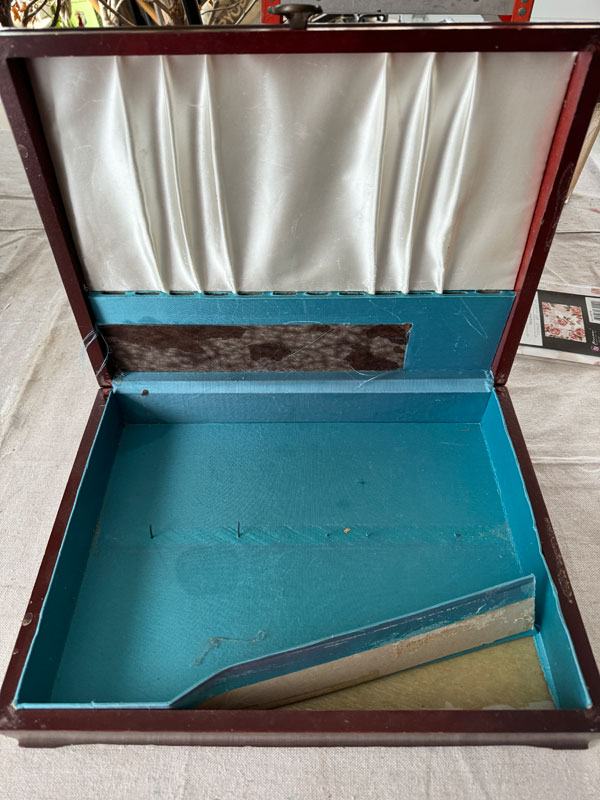
Be careful of any nails sticking up! Then I use needle nose pliers and sheer brute force to pull the rest out:
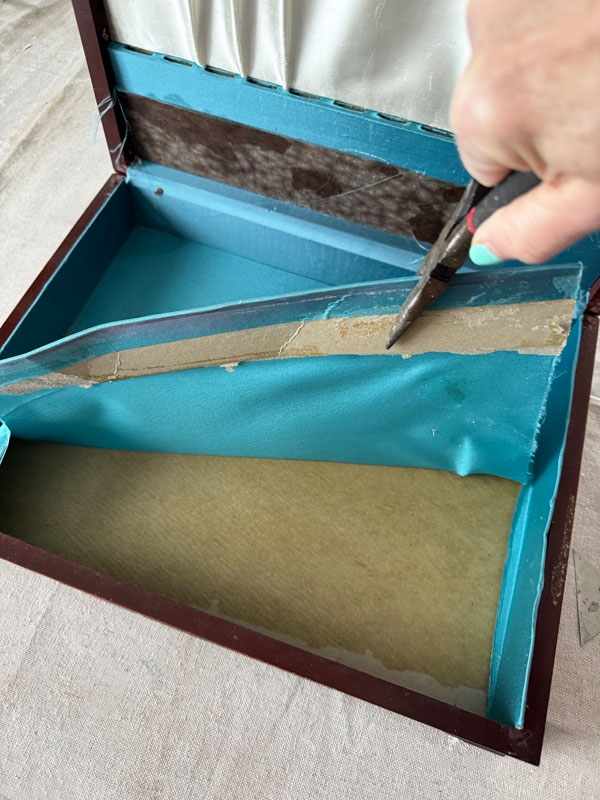
This one luckily was not too bad!
I keep going until all the fabric is gone. It’s okay if there is any glue or remnants of cardboard stuck to the bottom or to the inside, top as those areas will be covered.
Clean
Once I had everything removed, I gave it a good cleaning with White Lightning, inside and out.
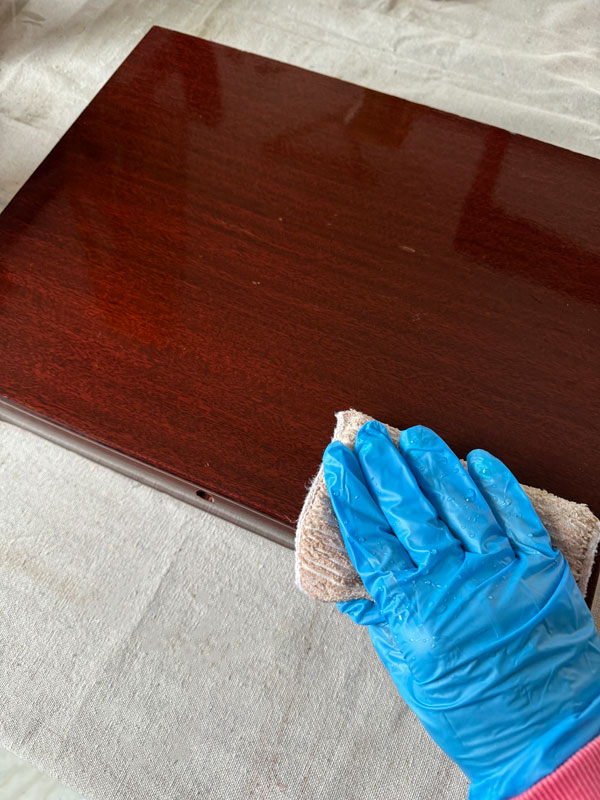
It comes in a powder that I mix into warm water. It is a degreaser and a deglosser, and gloves are recommended. Once I had it clean, I used fresh water to wipe it down once more and this box was ready for paint!
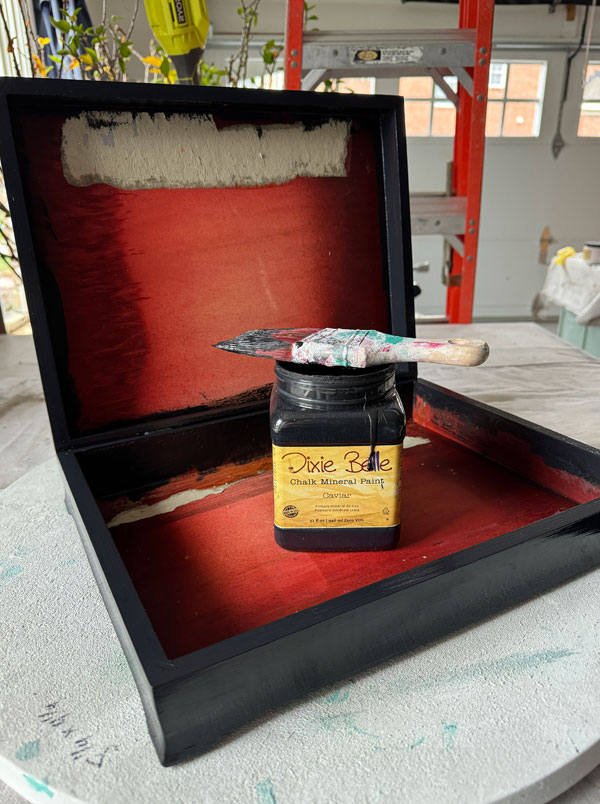
Paint
I haven’t used Caviar in a while, and I thought it would work well with the lines of this box.
I gave it two coats:
Do you ever wonder why there are trees in our garage?
That’s my hubby…he bought tropical trees three years ago, and brings them into the garage in the winter. Pretty soon, they’ll be too big to move them back and forth!
Sand
Lightly sanding chalk paint will make it super smooth. I did not want any distressing on this one, so I used these sanding sponges to smooth out the finish:
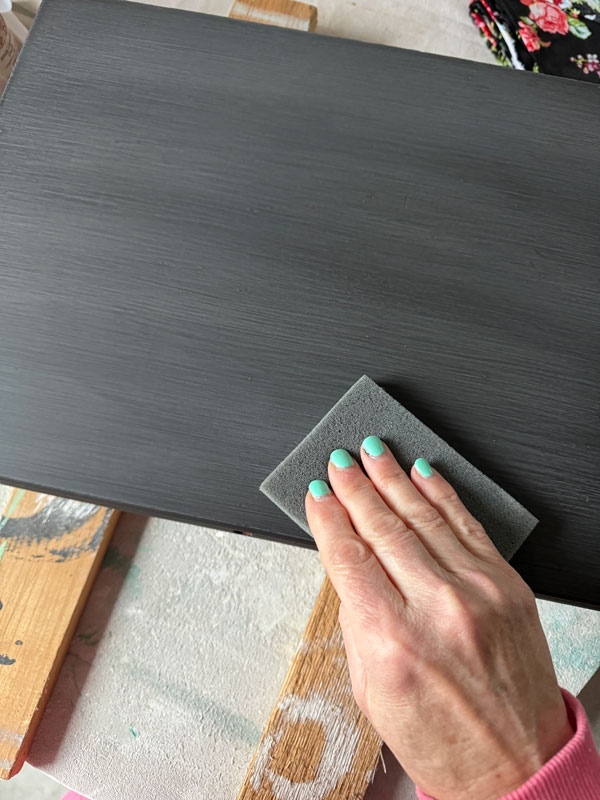
Sanding a dark surface will turn it an ashy color, but sealing it will bring back the deep black color.
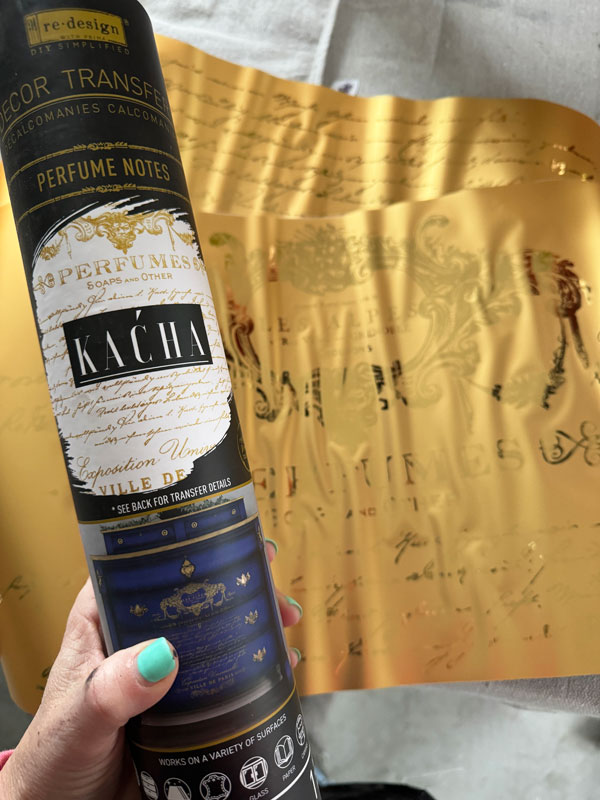
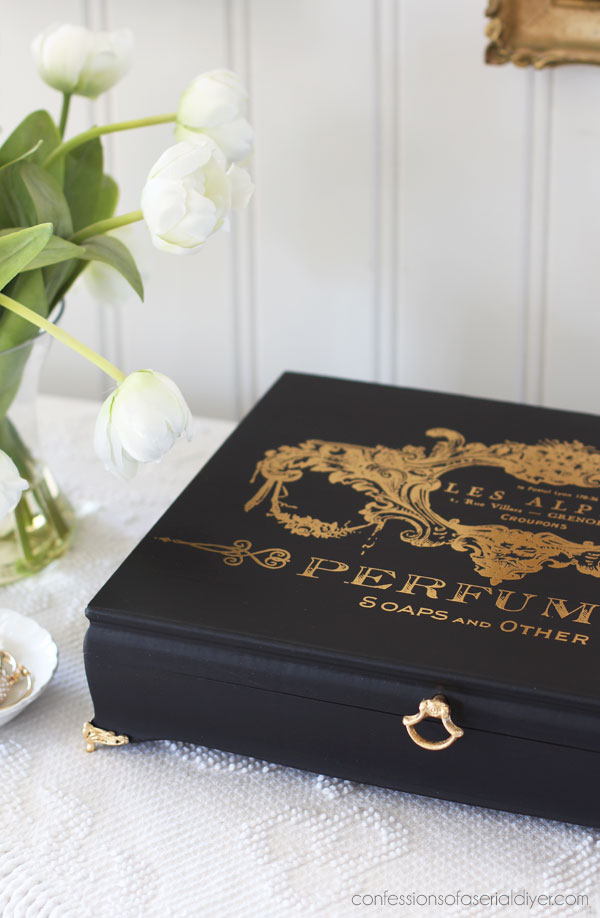
Adding the Perfume Notes Transfer
To embellish the top, I had some of this gorgeous Perfume Notes transfer left from when I used it on this upcycled tea box back in August:
(I made sure to wipe away any dust from sanding before applying. )
I had already used a good portion of the second sheet of this transfer, but this first sheet was still intact and this part was the perfect size for the top!
I used the enclosed tool to burnish it to the surface…
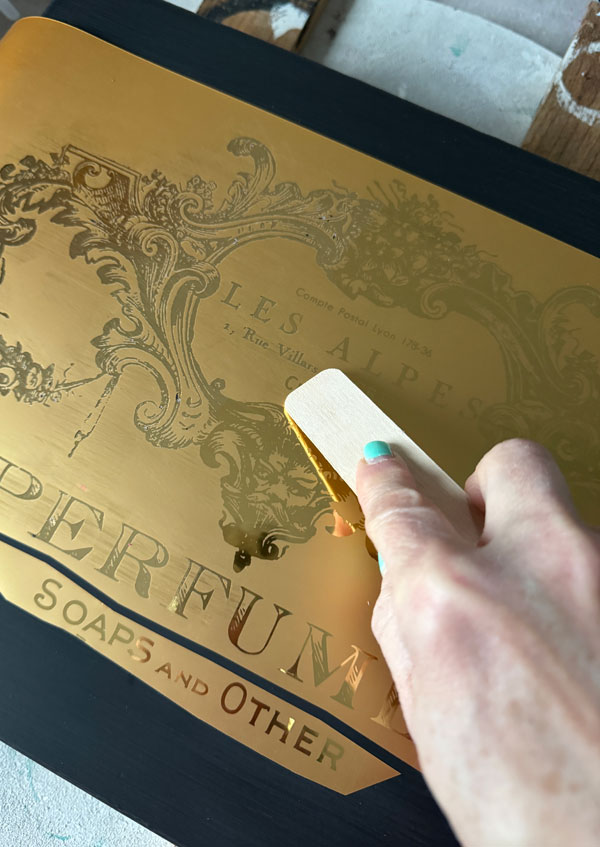
This gold is shiny and blingy and I just love it!
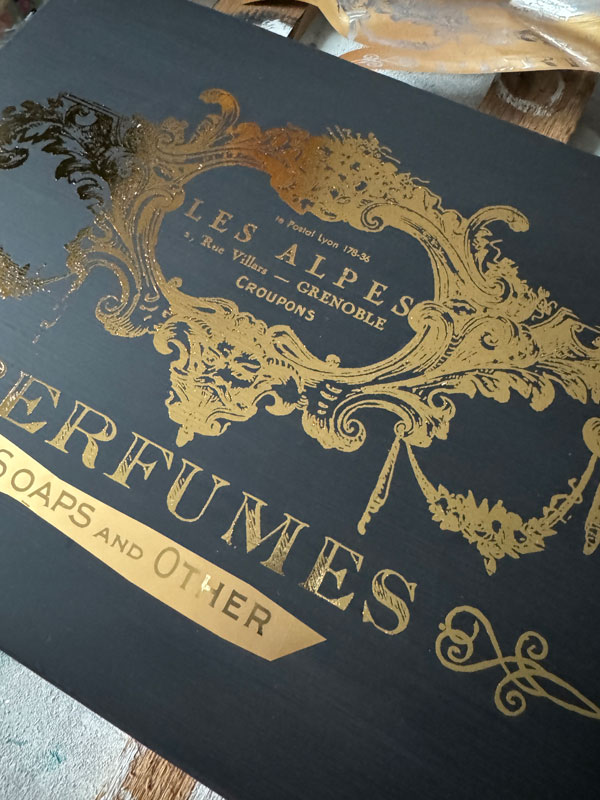
Seal
I sealed all the painted parts with Satin Clear Coat using the blue sponge applicator:
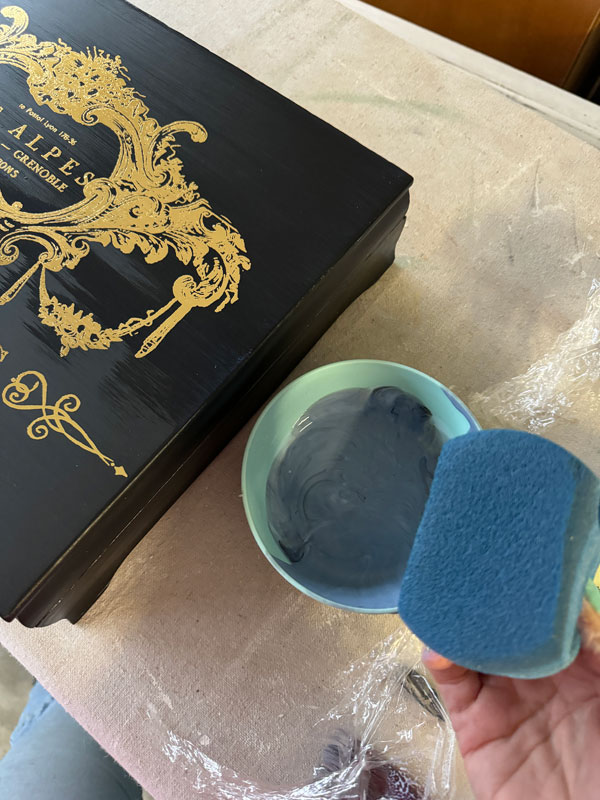
As you can see, I tinted my sealer with a drop of the Caviar. This will help to prevent the “ghosting” you get when you run your finger over a dark painted surface.
(I also like to cut the edges off of my sponges.)
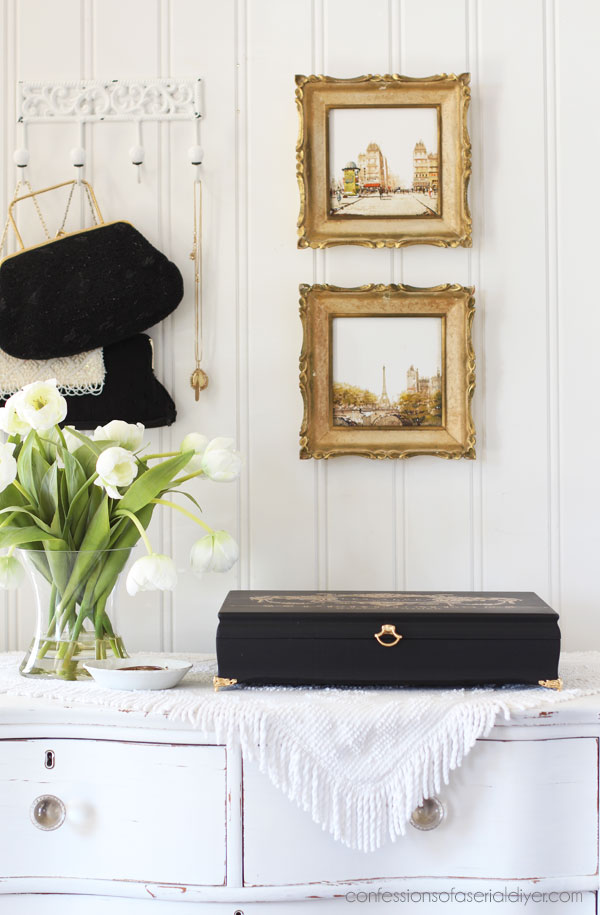
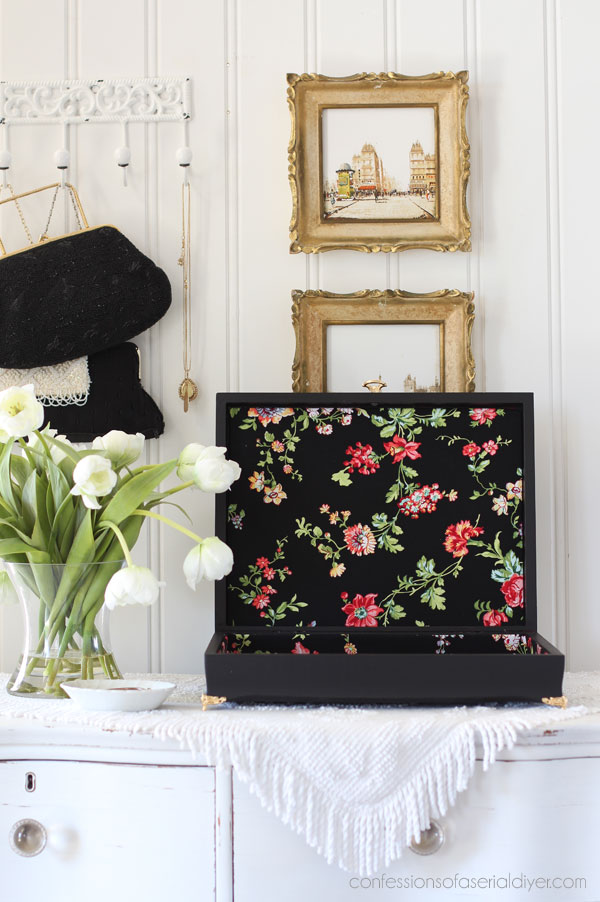
Elegant Flatware Box Makeover Reveal
Here is how this pretty lady looks now!
As you can see, the sealer did bring back that deep, dark, black that I love with Caviar…
And how about those sexy feet??
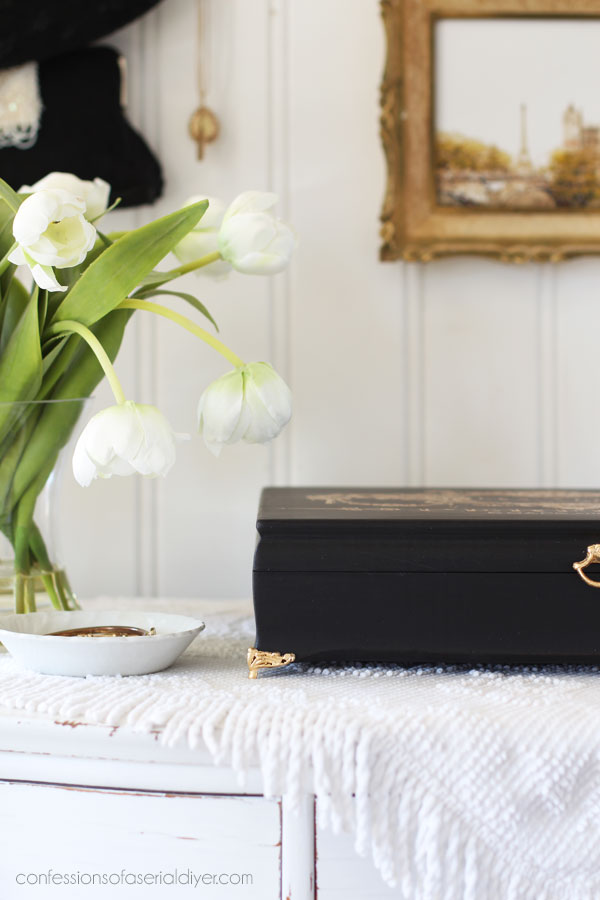
Y’all know I love to add feet to all these ho-hum boxes. They just add so much!
To make them shine like the transfer, I enlisted the help of this Imitation Gold Leaf:

I used Dixie Belle’s Stick with Me glue which worked wonderfully.
Just apply it and wait for it to turn clear, then you can add small pieces of the Gold leaf and pat it down with a small brush:
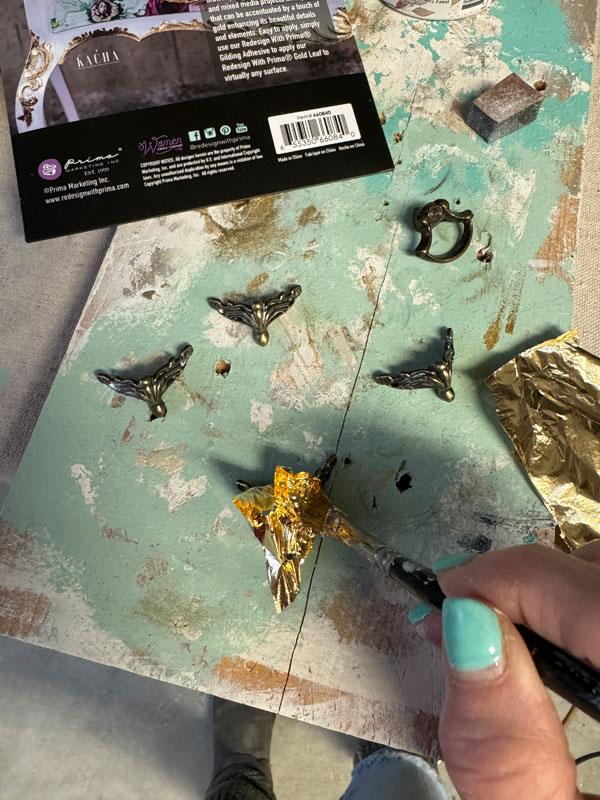
Redesign also has their own glue HERE that you can use to apply it, but I already had the DB glue open.
These little feet are so dainty!
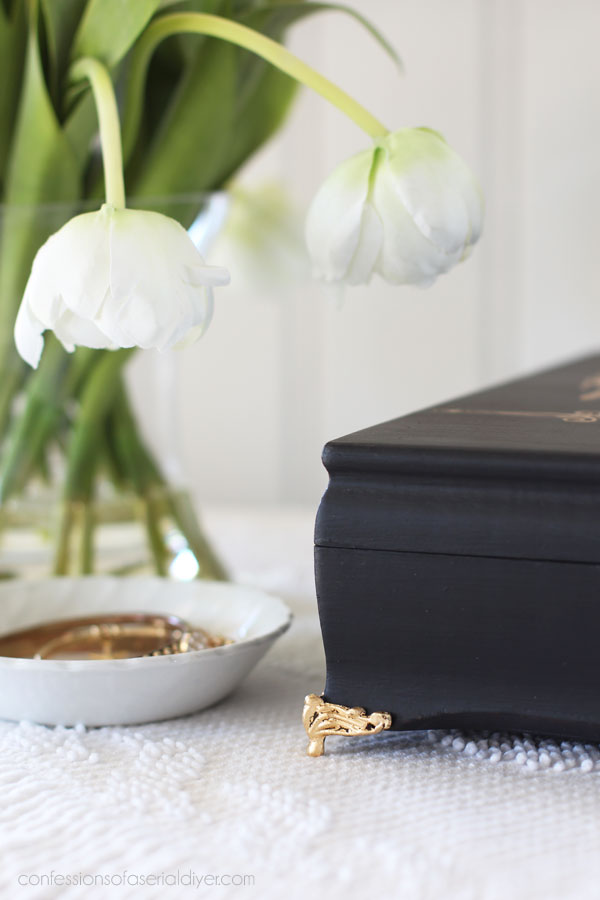
I kept the original pull and added the Imitation Gold Leaf to that as well.
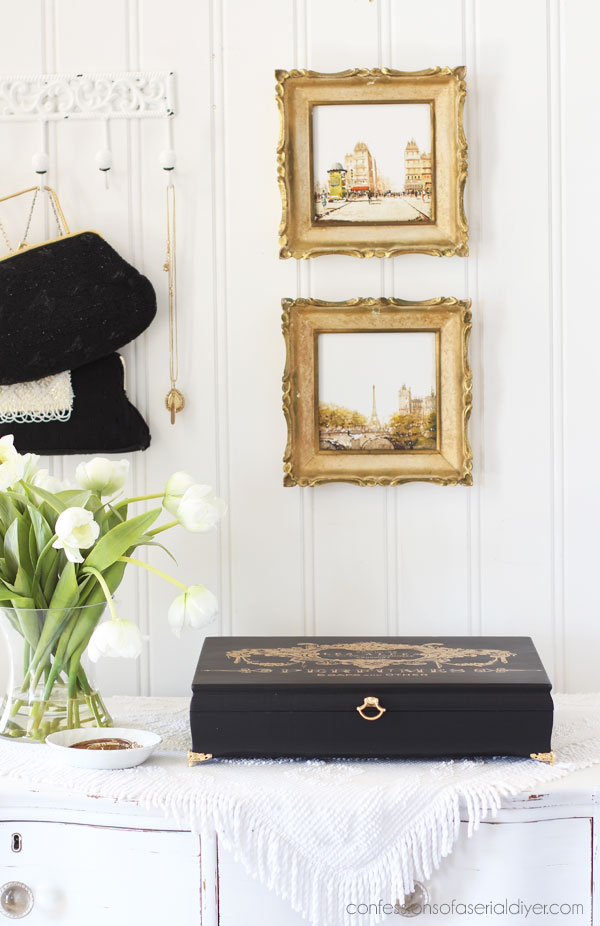
Let’s get a look at that top!
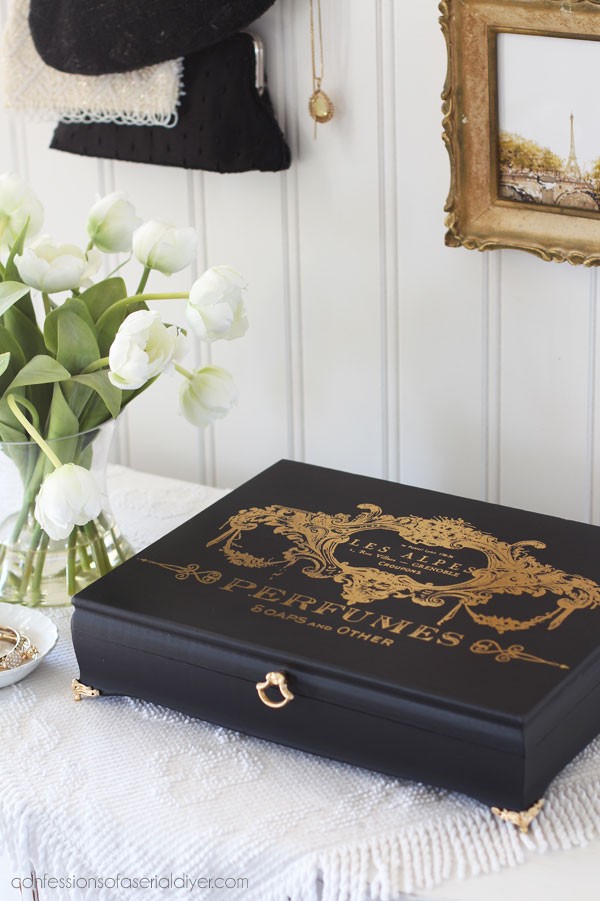
This Perfume Notes transfer was the perfect size for the top of this box!
And the gold feet and pull tie in with it nicely…
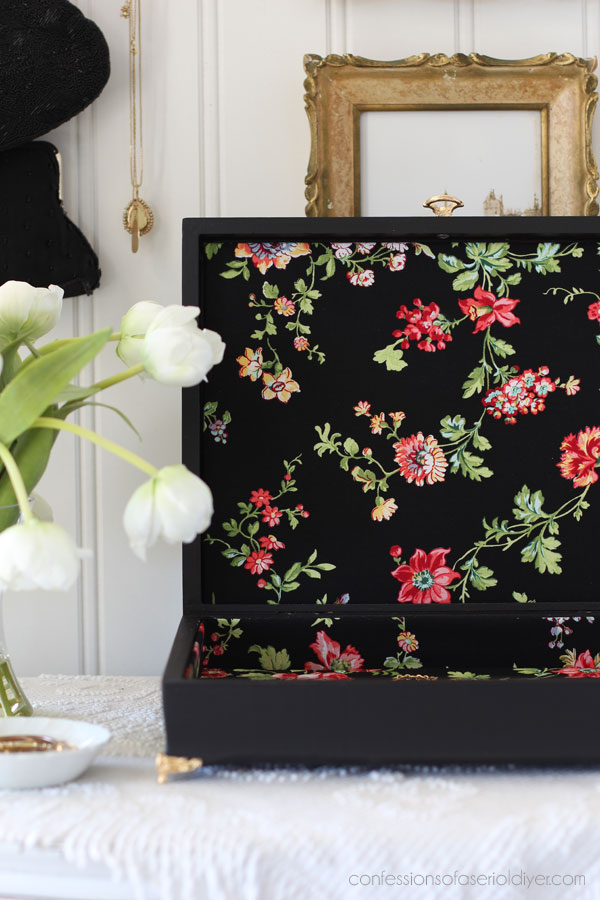
The inside
Here is a reminder of what the inside looked like before:
And here it is now:
I just love this fabric, so I bought a bunch of it and have used it on several projects like HERE, HERE, and HERE.
Lining these boxes isn’t too hard at all!
You just need fabric, hot glue, foam core, and something to cut your fabric. ( I love this rotary cutter and cutting mat set that helps me to easily cut straight lines.)
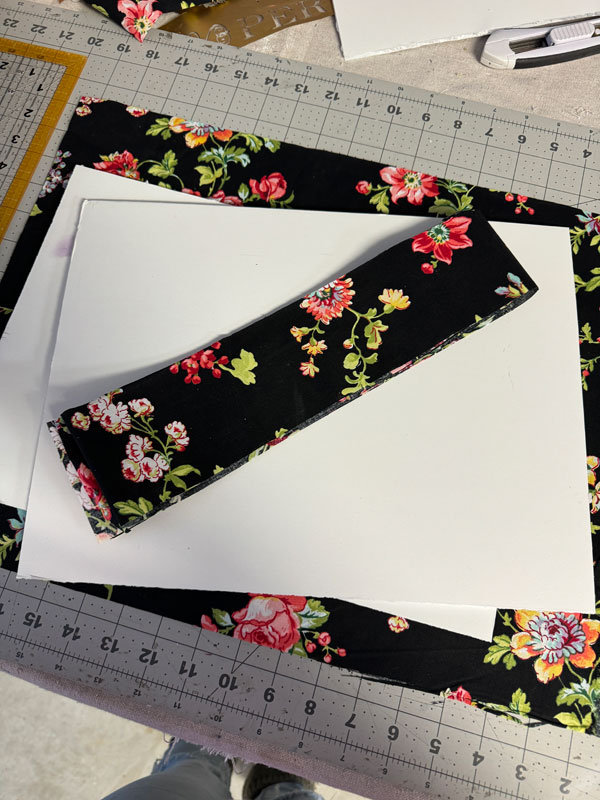
See detailed instructions for how I line a box with fabric HERE.
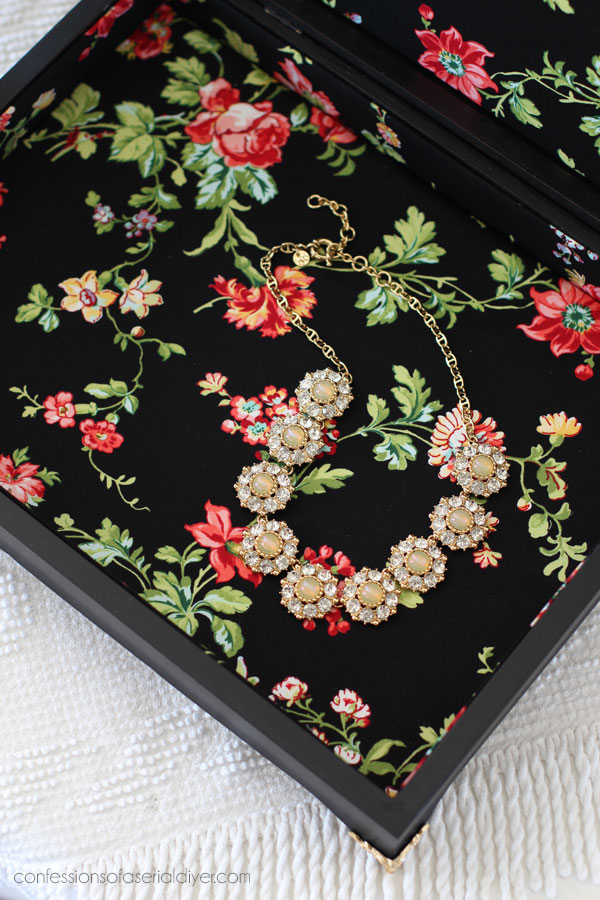
Some bling bling for my bling bling box!
You might even have one of these that you are using to store flatware at the moment.
You can still give it a makeover!
Don’t forget to check out what my friends have for you today!
They’ve been working hard!
And that’s another one done!!
I’ll be back with this little lady on Thursday:
UPDATE: It is fresh and new and finally ready for it’s reveal HERE!
Before I go…just a note to let you know that very soon, I will start sending my posts from Christy@confessionsofaserialdiyer.com, so if it looks a bit different in your inbox, open it and come on over…it’s still me! 🙂
XOXO,

Don’t Miss a Thing!
If you like what you see, there are several ways to follow along!
EMAIL * INSTAGRAM * FACEBOOK * PINTEREST


Lee says
So so beautiful. Love it. May I ask how did you do the frames above the box please?
Christy says
Thank you so much, Lee! Those frames above came in a set of three and I found them at the thrift store for $2.25 a piece if you can believe that. I found them as is. They are actually hand painted tiles! They are one of my absolute favorite thrift store finds! XOXO
Mary Kaiser says
Oooh la la, it is so elegant now! Ok, I love white, but this black mixed with the gold is so elegant! I actually found a silware box, and I ordered some of the feet from Amazon. I can’t wait to find the time to work on it! You have made over so many of these silverware boxes I have loved seeing and getting so much inspiration from yours! You are the Queen!
Christy says
Thank you so much, Mary!! These boxes are so fun to reimagine and I know yours will be gorgeous!! Have fun with it! XOXO
Larissa ~ Prodigal Pieces says
You always rock these boxes, Christy! The outside is gorgeous, but the inside is my fave.
Christy says
Aww thank you so much, my friend! I love that floral fabric! XOXO
TRACY TOTTY says
I wanted to say how much I love your site! The way you explain everything is so great for us diy newbies, lol. I also wondered if you remembered what the name and or brand of fabric you used. I think we all love it!
Christy says
Thank you so much, Tracy! I really appreciate that. I no longer have any identifying information on the fabric, but I do remember that is by Waverly and I found it at Walmart. I hope that helps! XOXO
Janice Redden says
Christy, it’s beautiful and the “bling-y” transfer is perfect, with the addition of the the little feet. I love that you have those times when you aren’t feeling happy with a piece….been there, too. Can’t wait to see what you do with the table.
Christy says
Thank you, Janice! Yes, I just wasn’t feeling that one at all. I love it so much better now, but I’ll show both versions! XOXO
Janice Holt says
You probably already know but these flatware boxes are always my favorite. The gold transfer and feet make this one beautiful.
Christy says
Oh yay! They are so fun to reimagine! Thank you, my friend! XOXO
Teresa says
Hi Christy , the box turned out really pretty ,and I love the little feet and lining . I came across a nice silverware box last week , priced at $20 a bit much if you ask me. You got yours at a good price. Keep up the good work.
Christy says
Thank you, Teresa! Yeah, $20 is too much in my opinion also unless it was really unique and you planned to keep it for yourself. I don’t usually pay more than $5-$10. XOXO
Cyndi says
Wow! This is stunning. It’s like a woman getting dressed up for a special evening…dressed to the nines! 🙂
Christy says
Yes!! In that sexy little black dress ha ha! Thank you, Cyndi! XOXO
Marcie Lovett says
I love what you do with boxes, Christy! I predict this chic stunner is not going to be around long.
Christy says
Thank you so much, Marcie! I always welcome a quick sale lol! XOXO
Nancy @ Artsy Chicks Rule says
I adore the little feet!! They totally give it the perfect touch! xo
Christy says
Thank you, my friend! I cannot believe it is almost identical to yours lol!! Great minds and all…we basically are the same person anyway ha ha! XOXO
Jackie C says
A beauty for sure! You could not have picked a better transfer. This will go quickly I bet.
xoxo
Christy says
Thank you, Jackie!! A quick sale would be awesome! XOXO
Denise Zdziennicki says
ohhh I love the gold and surprise pop of color on the inside. Gorgeous and elegant… just like you my friend. 😉 XOXO
Christy says
Aww you are the sweetest!! Thank you, my friend!! XOXO
Lizzy says
I love this, especially the gold transfer & feet. You are so good!
Christy says
Aww I appreciate that so much, Lizzy, thank you! XOXO
Caye Cooper says
Christy, that box is perfect, and may I say Ooo-la-la! I’m not a fan of black, but when it’s done so well, who am I to object! Great job, as usual.
Christy says
Thank you, Caye! I don’t have a single thing painted black in my home, but I love the sophistication it adds! XOXO
Fran Legler says
Absolutely gorgeous! I seldom leave messages to bloggers I follow, but really wanted you to know you “knocked it out of the park”!!!
Stunning! Dramatic! Elegant!
Christy says
Aww thank you so much, Fran! That means so much to me!! XOXO
Lani says
I love how that turned out. Beautiful!! Love the gold transfer and gold leaf on the feet and handle! Perfection 🙂
Christy says
I’m so glad you like this one, Lani, thank you!! XOXO
Carol Dinsman says
Beautifu, as all of your pieces are! I wish I lived in your area, although it is a good thing I don’t, as I would be at your booth all the time buying everything you redo! I just bought some supplies from you as I am a beginner who hopes one day to be half as good as you! Thank you for all the inspiration!
Christy says
Thank you so much, Carol! Ha ha… I wouldn’t mind that one bit! Happy creating! XOXO
Addie says
I love a black finish with a gold gilded, frenchie writing and scrolls!!! Good job!!! Keep going!!!
Christy says
Thank you, Addie!! Happy Wednesday! XOXO
Cecilia says
Lovely! So much fun to see how you transform these boxes. This one is a winner.
😊Cecilia
Christy says
I’m so glad you like this one, Cecilia, thank you! They are so fun to recreate! XOXO
Debra E Hubbs says
This is so elegant ! That black and gold together! Did not expect the surprise of the inside fabric. Not sure why as you usually do line these with fabric lol. So pretty!!
Christy says
Thank you, Debra! That fabric is an unexpected fun surprise for sure lol! XOXO
p says
Such an elegant transformation. I love the gold leaf feet and pull.
AND THEN….. you opened the box to reveal the interior !! Wow !
Your attention to detail wins again 🙂
Thanks
Christy says
Thank you, P!! As much as I love white, I really love working with black too! Glad you enjoyed this one! XOXO
Cory says
Another absolutely beautiful box! 😍😍😍
I love gold like Kacha loves gold 🤩🤩🤩 Just beautiful!
Christy says
Thanks so much, Cory! And I love Kacha too ha ha! XOXO
Lorri says
Oooh la la..tres chic!! You are so good at redesigning theses flatware boxes. I just love everything about it.. the transfer, coviar colour, the lovely material, those darling feet. ❤️
Christy says
Thank you, Lorri! There are just so many possibilities with these boxes…they are like a blank canvas. I’m so glad you like this one! XOXO
Sharon L Austin says
That looks so rich and exquisite! Love it!
Christy says
Thank you, Sharon! I’m so glad I went with the black and gold on this one! XOXO
May says
To move the potted trees, try looking at the A. M. Leonard website. They have a dolly for moving large pots called potwheelz. Just a helpful hint.
I love how you make each box look different even when they start looking the same. I love your work.
Christy says
Thank you, May! That sounds like a real back saver! And I appreciate that so much…I’m so glad you enjoy what I share! XOXO
Trish says
Christy this box is stunning! Great job as always. When you sealed it with the tinted sealer did you go over the gold transfer or avoid it and only seal the painted areas? Thank you for your beautiful and informative posts. I love what you do.
Christy says
Thank you so much, Trish! I did go right over the transfer and the tint didn’t affect it at all. Thank you for following along with me! XOXO