Amazing friends, welcome to Trash-to-Treasure Tuesday!! Ya’ll know how much I love sharing a good trash to treasure story, but today I get to do it with four of my friends who are also sharing their own trashy makeovers! Be on the lookout for their makeovers at the bottom!
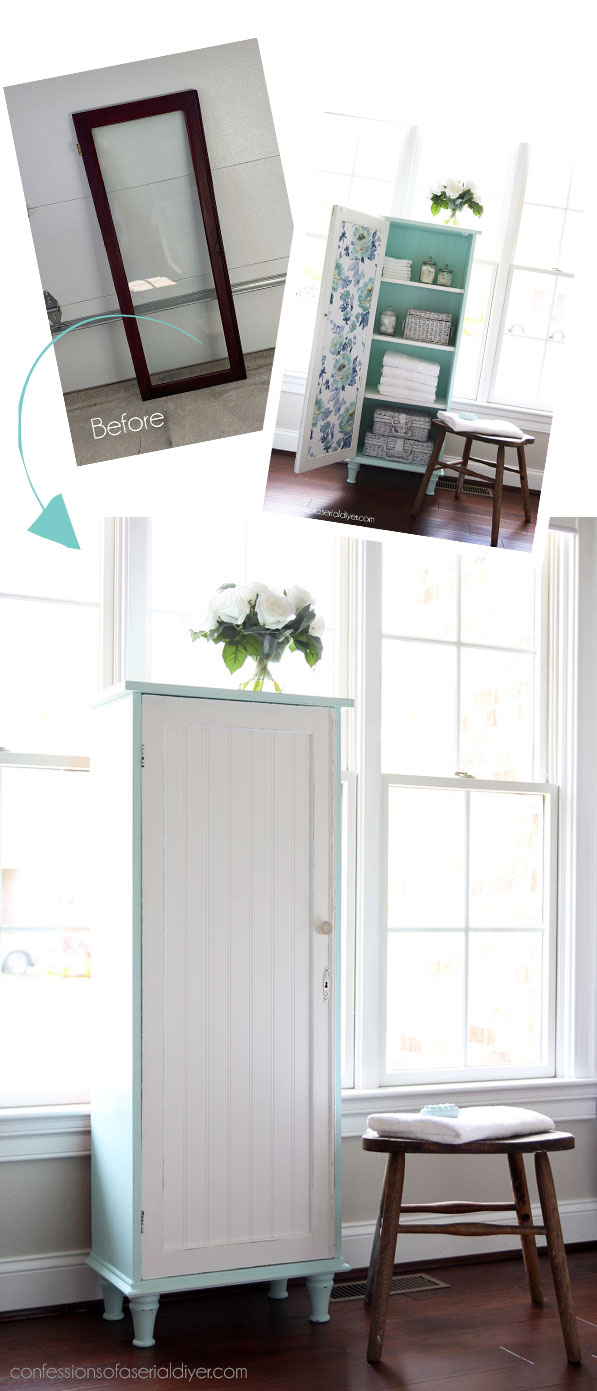
A couple of weeks ago, I shared this bookcase that started out as a cabinet with glass doors:
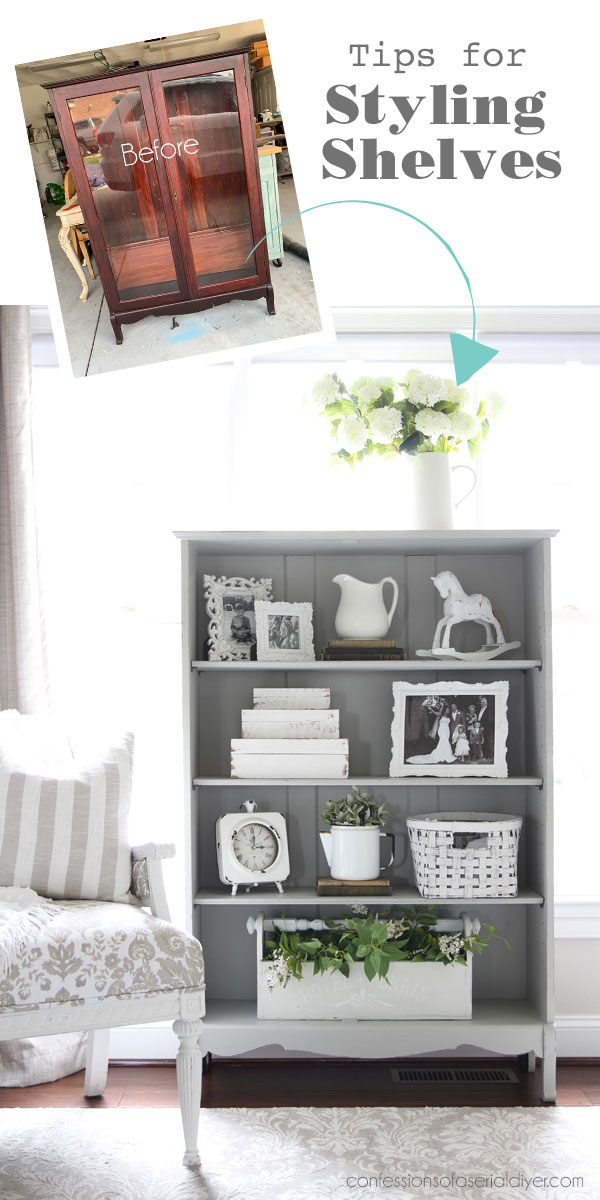
I had plans to use it as a display case for my booth. Once I got it home and unloaded, I noticed that the glass was broken on one of the doors:
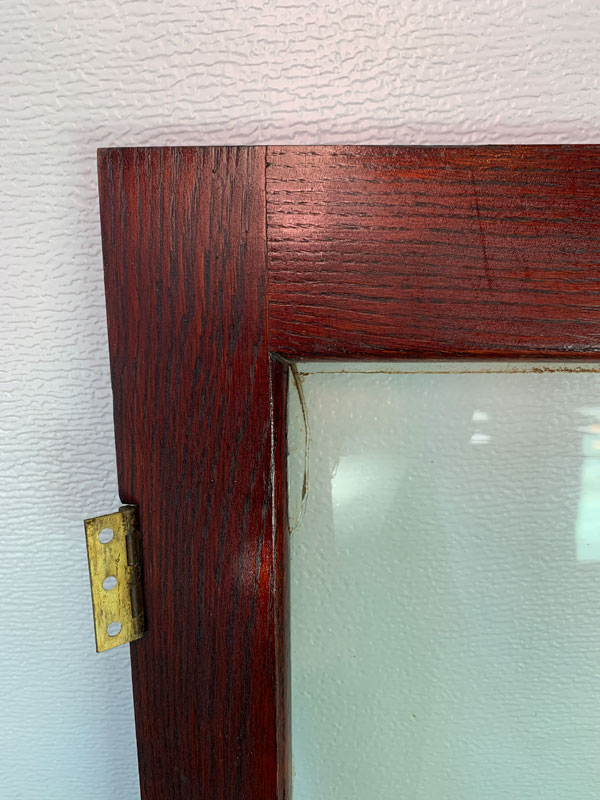
Bummer! I decided that this cabinet would work better as a display piece without the doors anyway and ended up removing them.
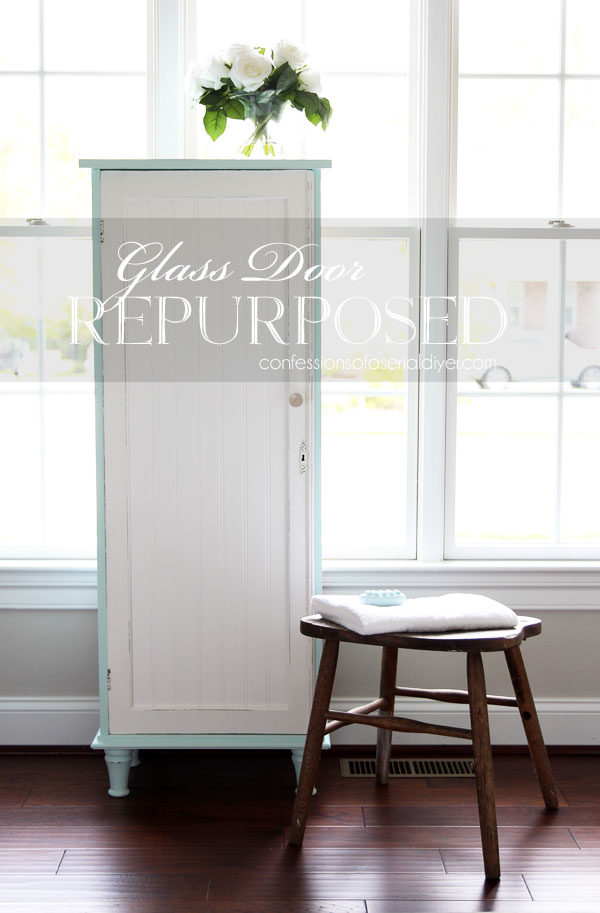
Today I’m sharing how I repurposed the door with the broken glass:

Except, is it really repurposed if I technically used it for the same purpose?
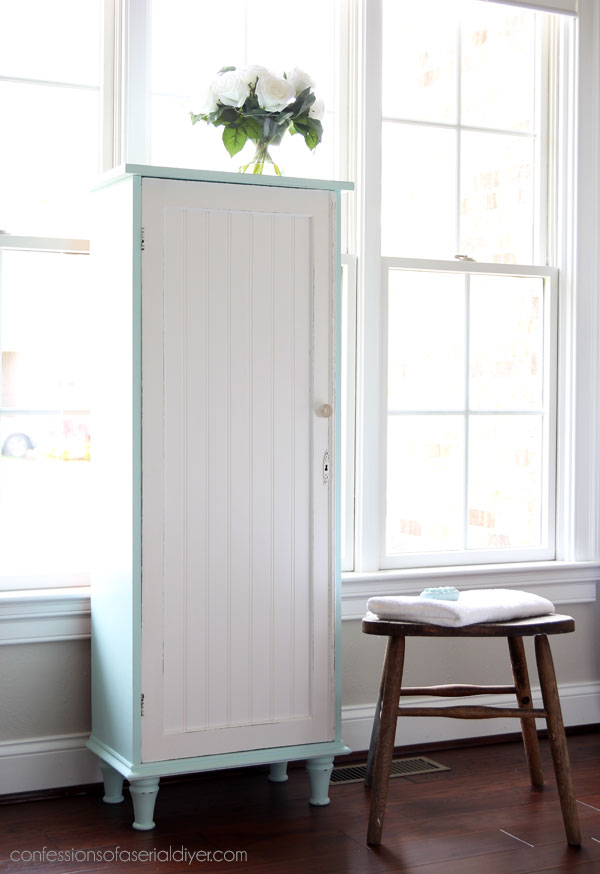
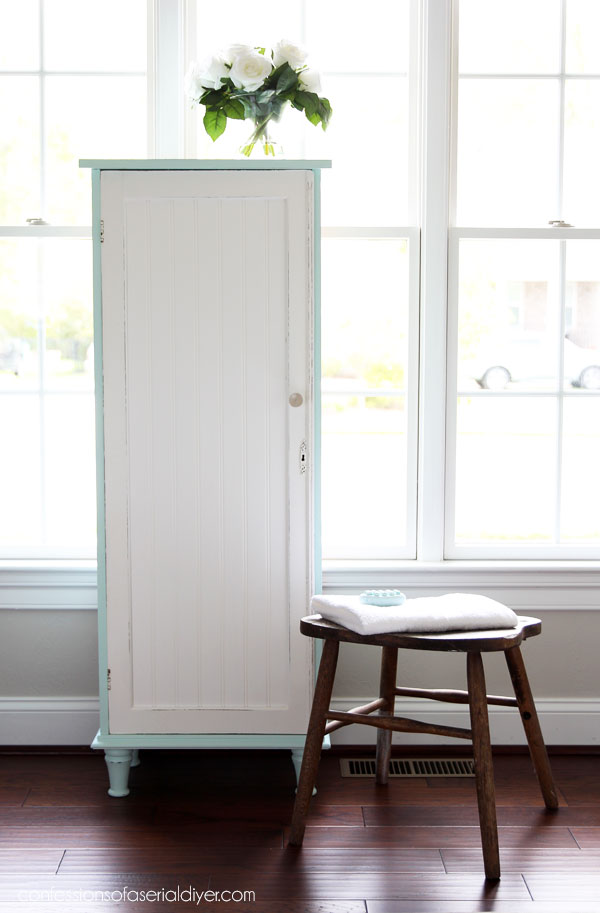
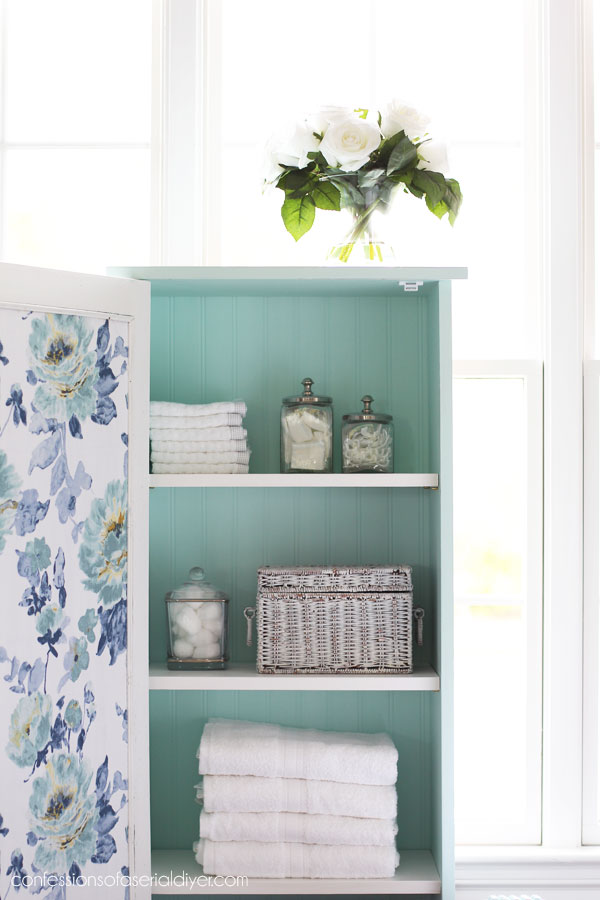
Yep…I kept it as a door and built a cabinet around it!
Cute, eh?
As you can see, I replaced the broken glass with bead board:
I knew I wanted to try to build a cabinet for one of the doors, except building furniture requires wood (and time…who knew??). That meant that I had to put on my mask and brave Home Depot! I did it though, for the sake of Trash-to-Treasure Tuesday!
Have a stray cabinet door of your own that could use a cabinet to go with it? Here’s how I did it!
I’ve included a few affiliate links so you can find the products I love.
Building the Cabinet
I bought two 8ft pieces of common board:
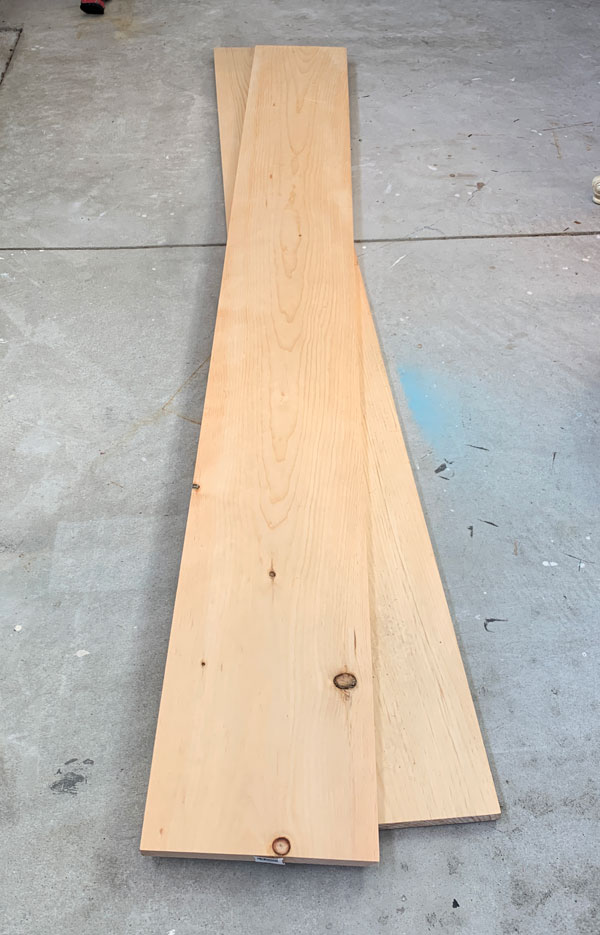
Plus I used a little of another piece that I already had.
All my measurements were base on the size of my door. After deciding what I wanted to do and measuring my door, I measured and cut my pieces using my miter saw.
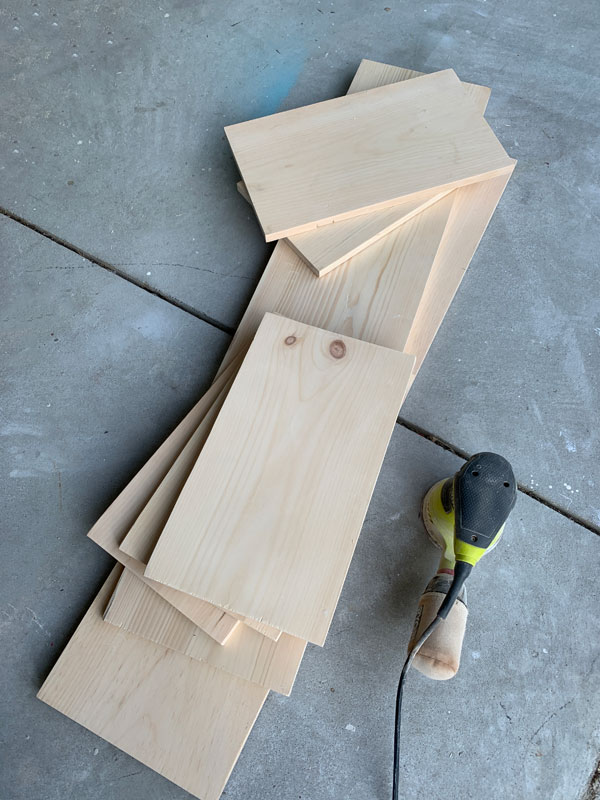
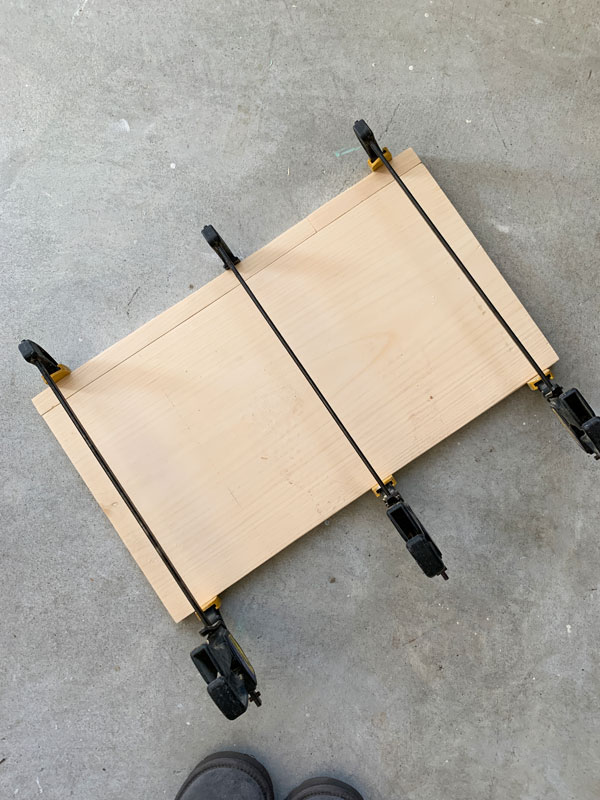
Then I laid the pieces out and dry-fit everything:
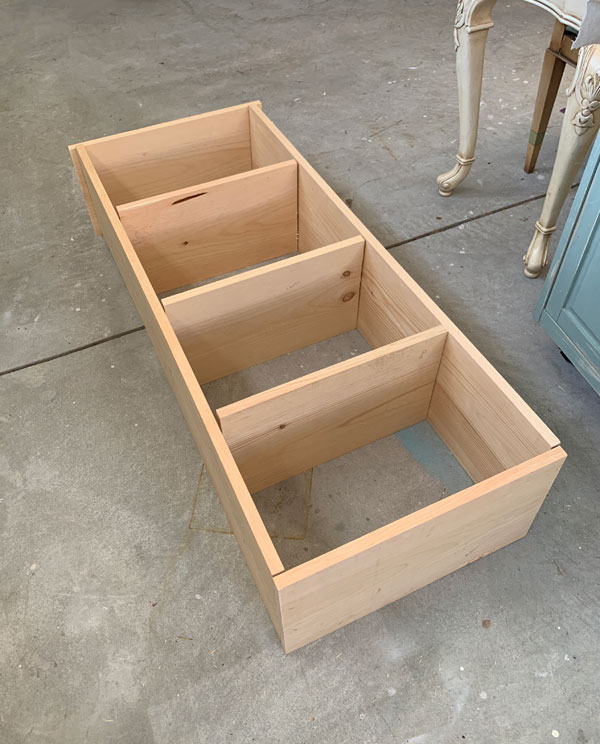
This was when I realized that if the door was going to sit flush with the sides of the cabinet, then I would need to cut the shelves so they sat back about an inch. So, I cut them down with my table saw and sanded everything using 220 grit sandpaper and my orbital sander…
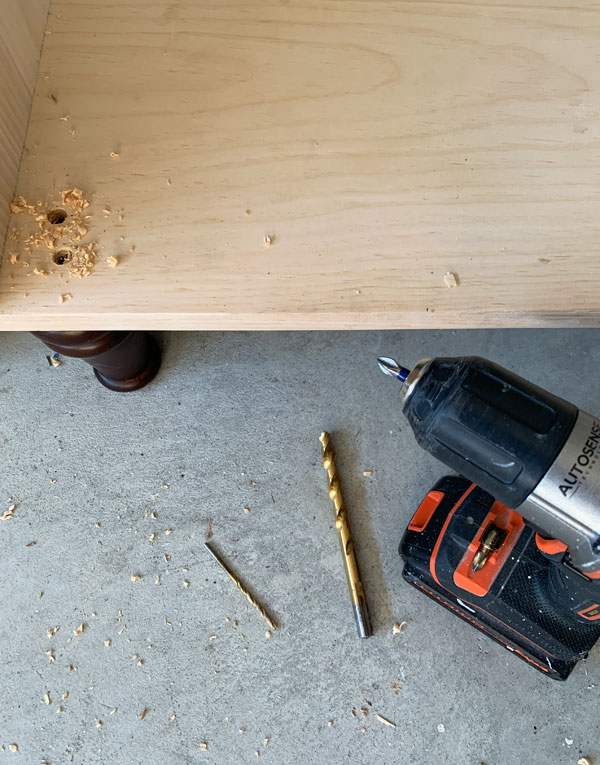
Then I started assembling my cabinet. To do that, I drilled a shallow hole with a drill bit just a bit larger than the head of the screws I was using. Then I drilled a pilot hole in the middle of the shallow hole with a drill bit slightly smaller than the screw, so that it would be easier to drive it in. Then I used my drill to add the screw to each hole:
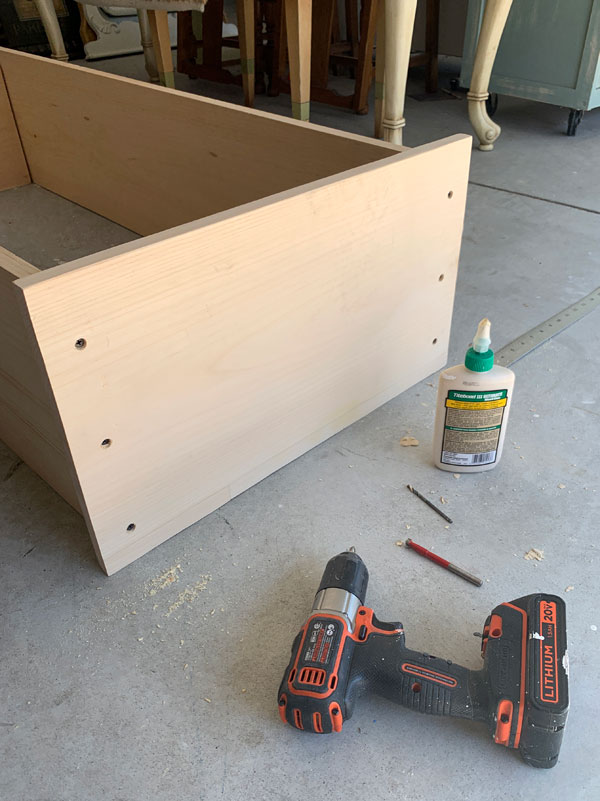
You can barely see in that above photo, but that top piece needed to come out about 3/4″ further in the front. To make that happen, I had to add a strip of wood to the back of it and join it with wood glue:
I used wood filler to fill in the seam and sanded it smooth.
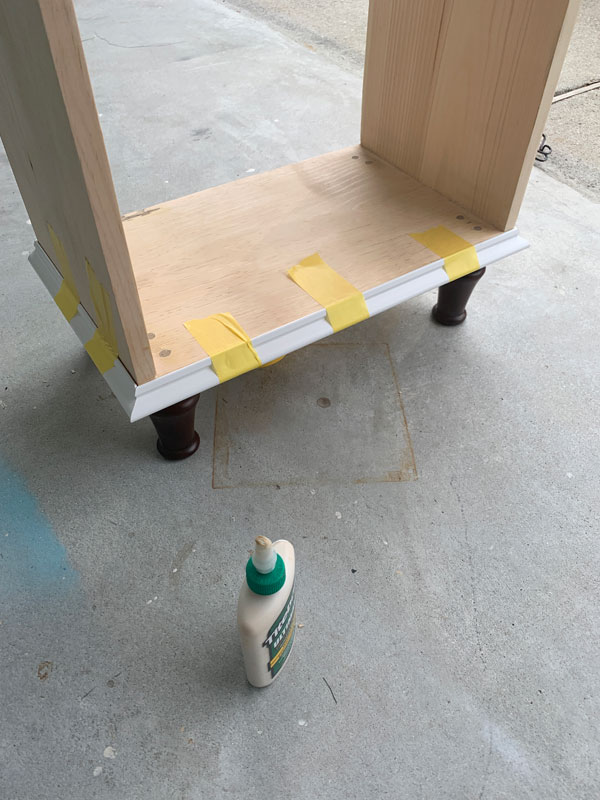
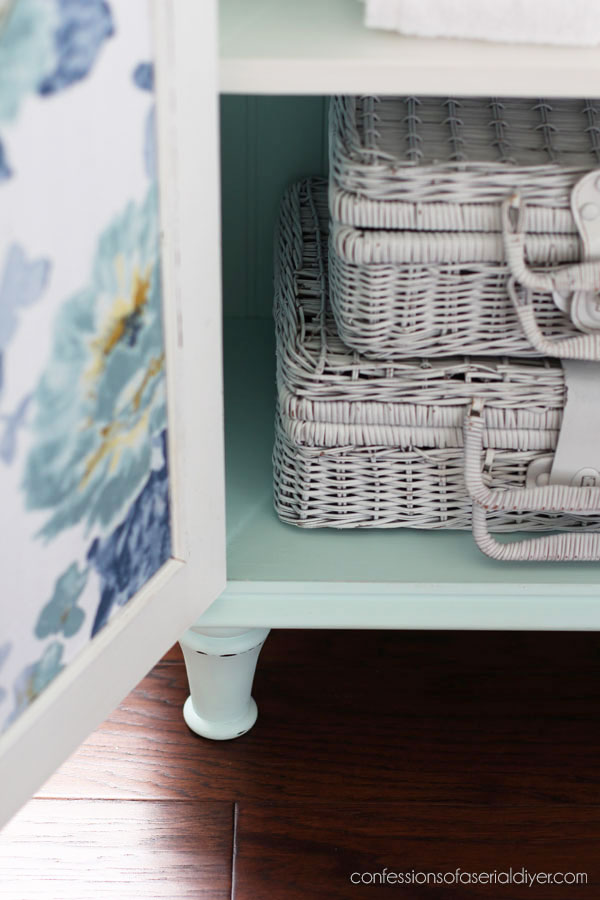
I added the bottom of the cabinet the same way. Then I was ready to add the feet. I bought a set of these feet HERE for another project a while back, but they didn’t work out. They were perfect for this project!
They had threaded bits on the ends that were way too long, so I cut them down using my rotary tool and a cutting wheel:
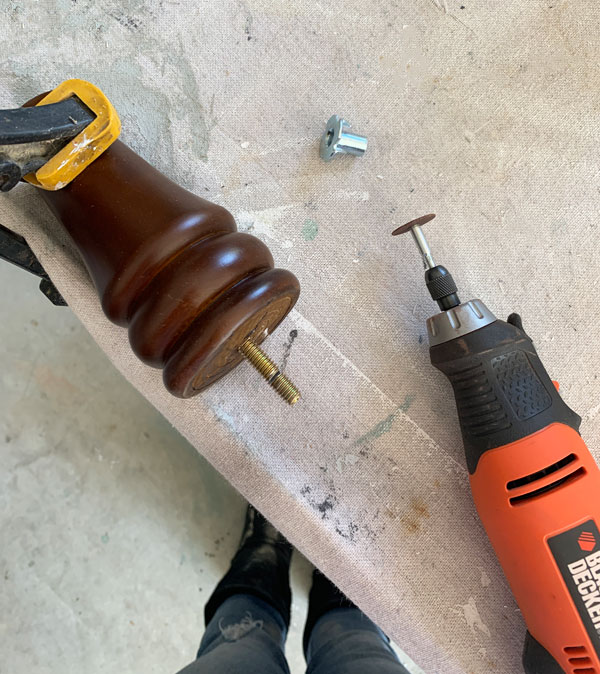
Use this tool with extreme caution. I always clamp what I’m cutting to my table and use both hands to hold it while cutting. (I use the same tool to cut down the threaded bit on knobs and pulls when they are too long.)
I drilled holes and screwed them in place from the bottom, but I wanted to be doubly sure they wouldn’t buckle under the weight of the cabinet if moved, so I drilled screws into the feet from the top using the same method I used to join the top and bottom of the cabinet to the sides.
Then I used Mud by Dixie Belle in brown to fill in all the holes…

I used my orbital sander to sand them smooth once they were dry.
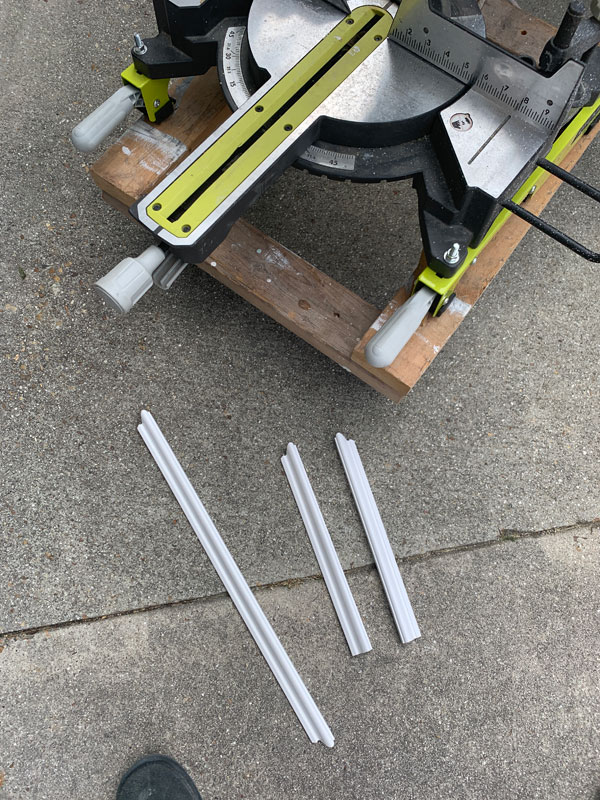
The bottom of the cabinet needed some detail, so I found some decorative molding in our garage to add to the bottom. I had a piece leftover from when we redid our stairs and used my miter saw to cut it:
I added it using wood glue:
Painting the Cabinet
Finally it was time to paint!
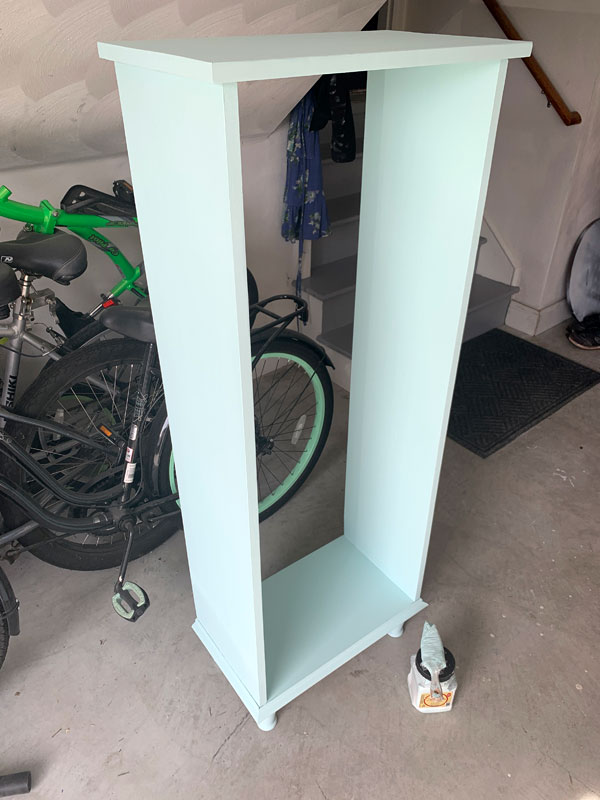
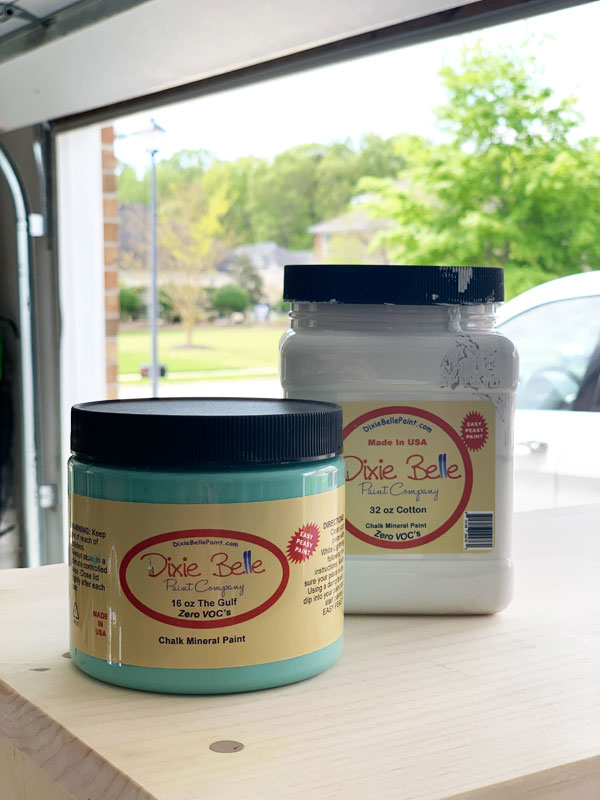
When I was looking back through photos of my older projects for my How to Price Items for Resale post on Thursday, I came across a lot of projects that I painted with one of my favorite Behr colors, Sunken Pool. I used it a lot when I used to make my own DIY chalk paint, and I set out to recreate it with Dixie Belle colors!
I think I came pretty darned close. There was about a cup and a half of Cotton left in the container, and I added about a tablespoon of The Gulf.
I’m almost out of BOSS, but I probably would have painted with that first since the wood really soaks up the paint, but I went straight to painting my custom-mixed color and it only took two coats!
I removed the broken glass from the door and to do that, I used a putty knife and pried up the thin molding up that was holding the glass in place:
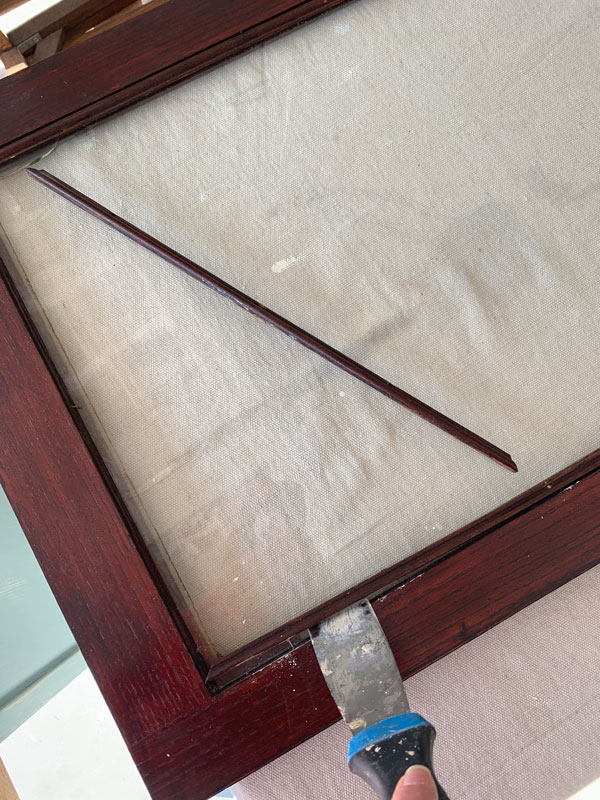
I pulled out any remaining nails with pliers. Then I gave the door a coat of BOSS in White and let it dry overnight. I saw that there were still a couple of spots that were bleeding through the BOSS, so I gave it a second coat and let it sit most of the day. (Ample dry time is key!)
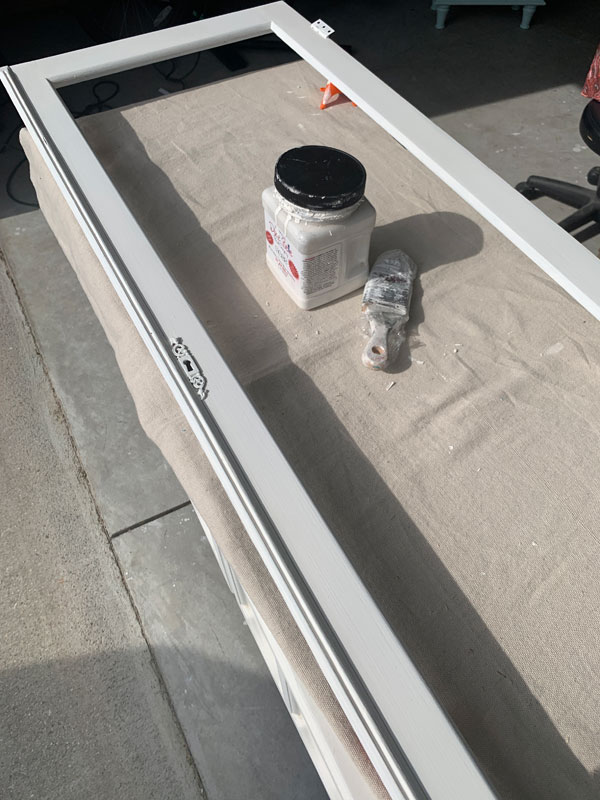
In that photo, you can see I used little tripod risers to hold up the door. That allows me to paint one side and when it is barely dry, I can flip my door over and paint the other side. Those orange ones I used are terrible, but I love these ones.
Then I painted the door in Cotton and no bleed-through!
I cut a piece of bead board out of a large panel I already had for the back of the cabinet and one for the panel in the door. The backing got a couple of coats to match the cabinet, and the door panel got two coats of Cotton, front and back. It was already white to start, but I wanted the whites to match. I painted the back because I planned to add a light fabric to it.
I sanded everything with 220 grit sandpaper and then decided to seal everything with two coats of Dixie Belle’s Clear Coat in Satin using the blue applicator sponge before assembling the rest of the pieces.
The backing got nailed in place with tiny nails.
This would be perfect for extra storage in just about any small space!
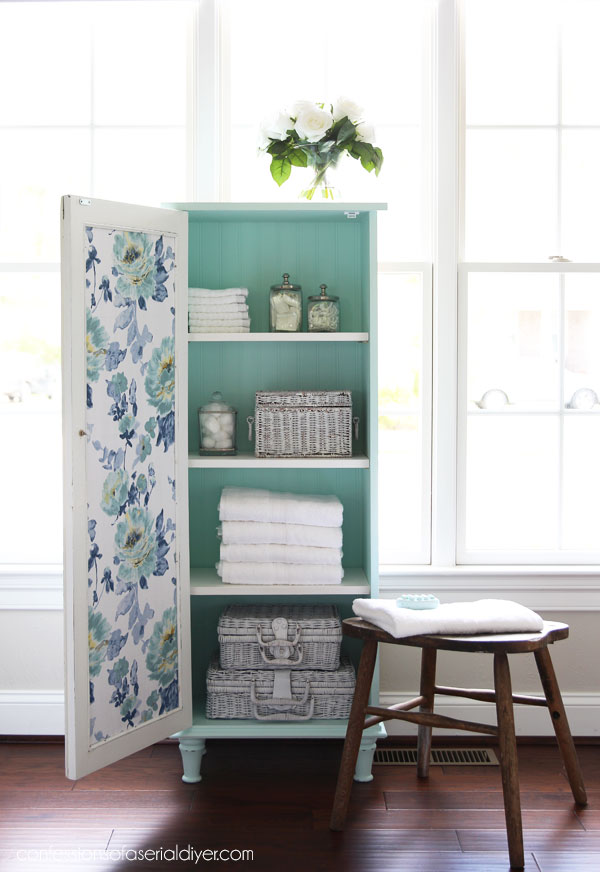
The door panel got a fabric treatment for the back as a fun surprise, applied with matte Mod Podge:
You might remember I used this fabric to line the drawers of a set of these night tables:
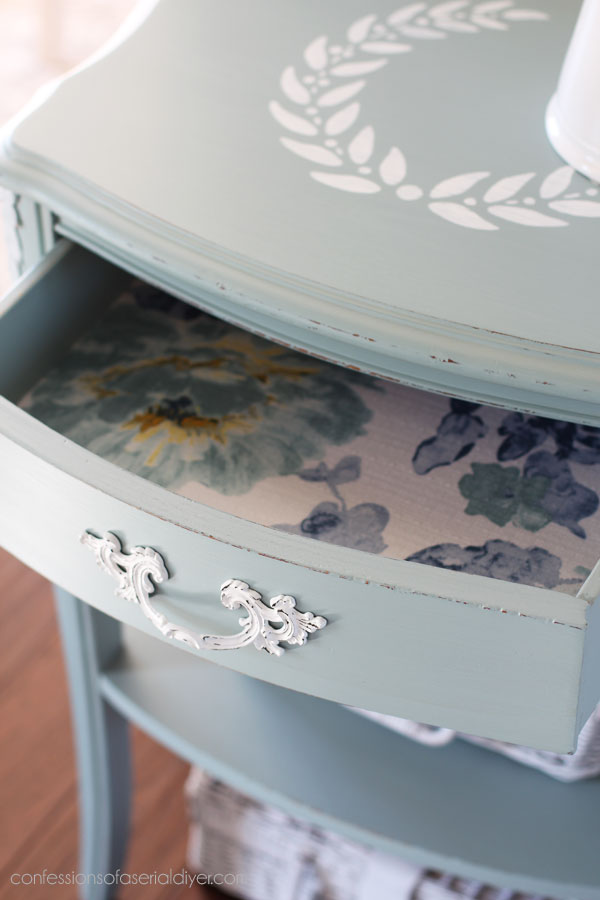
In that post I also shared a video demonstrating How I Paint Furniture with Chalk Paint! The fabric started out as a pair of curtain panels I picked up at HomeGoods. Oh how I long to shop at HomeGoods again!
Here you can see the bead board backing…
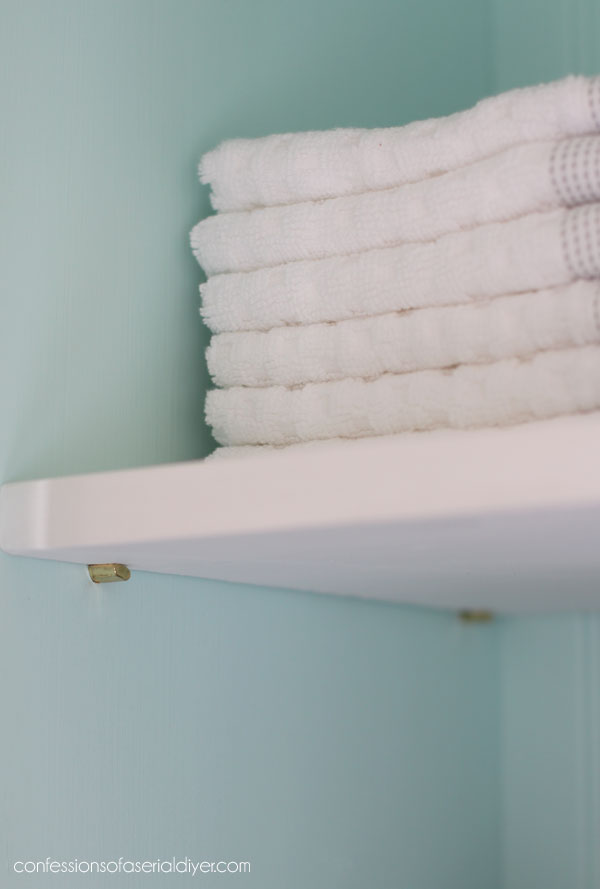
The shelves were all painted in two coats of Cotton also. To install them, I used these thingys that you would use in a bookcase:
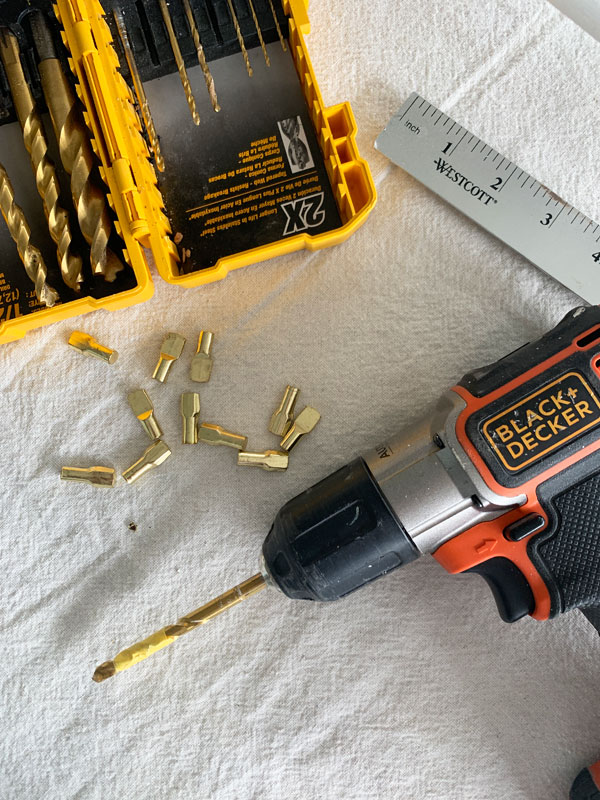
I measured and marked where my shelves would go. Then I drilled a hole the same size and depth as my shelf holder thingys. I used a piece of tape to mark where I needed to stop drilling.
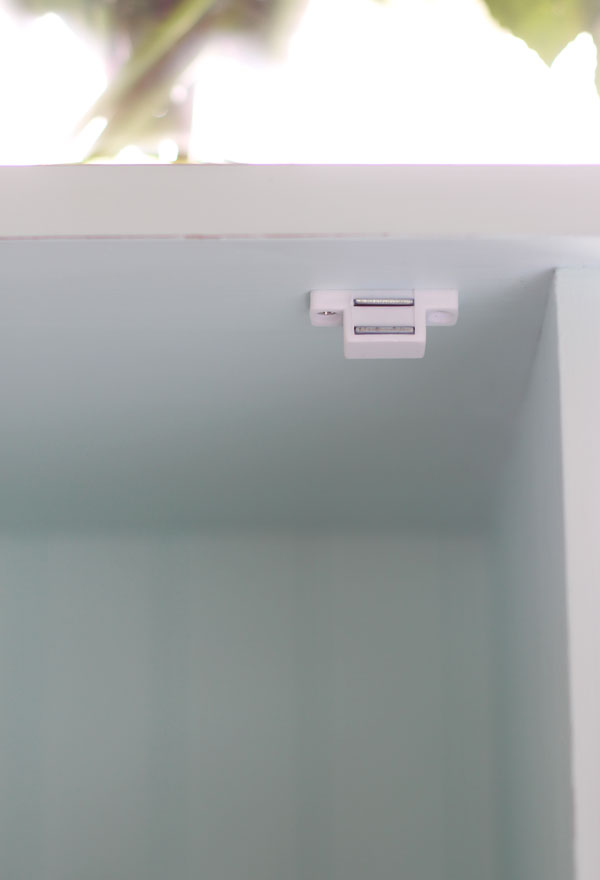
I also installed a simple magnet latch at the top to hold the door closed:
I used the same thin molding and original nails to secure the door panel in place:
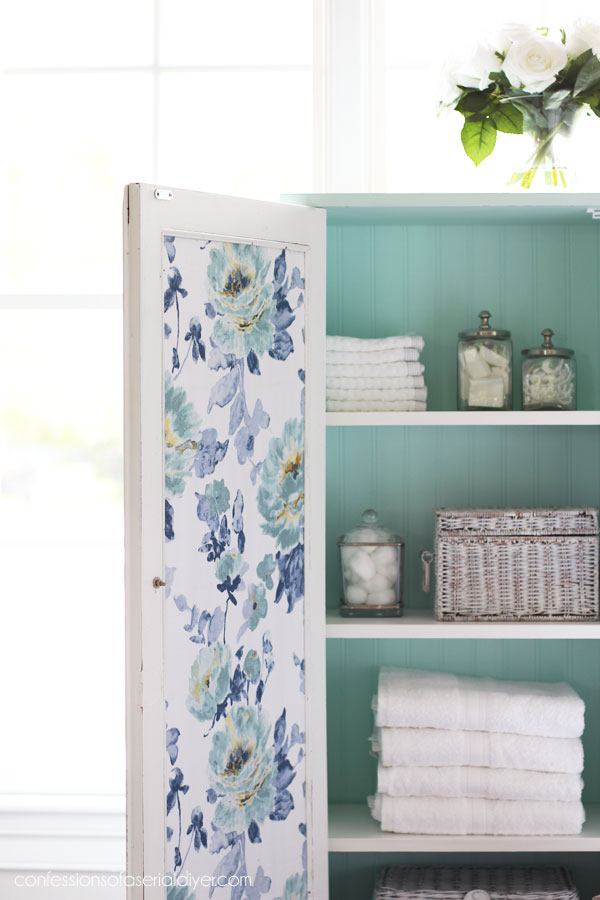
I also added a new glass pull to the door. The keyhole below was operational at one time. I love that antique detail.

And another peek at those perfect feet:
It’s been a while since I’ve gotten to build something!
There are still four more makeovers for you to see!!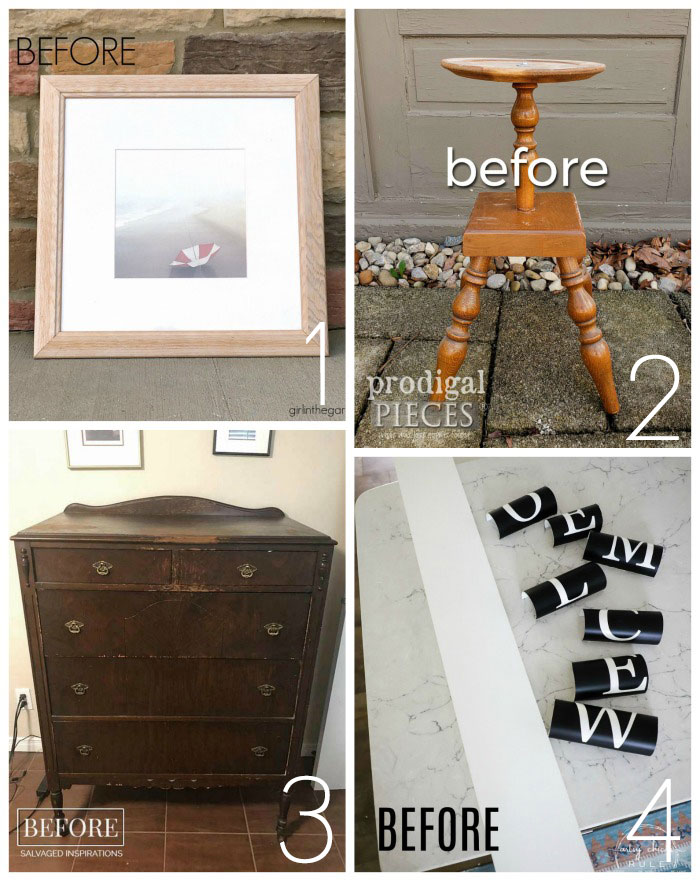
I hope you enjoyed seeing this cabinet door become a cabinet door ha ha!
I’m taking a break now whew, but I will be back on Thursday sharing my next haul woot woot!!
UPDATE: See what I was able to pull from the depths of our garage for my newest haul HERE now!
Take care of yourselves!!
XOXO,
![]()
Don’t Miss a Thing!
If you like what you see, there are several ways to follow along!
Email * Instagram * Facebook * Pinterest * Twitter


ColleenB.-Tx. says
That is Outstanding. A cabinet for many uses.
Like that cute little stool that you have sitting beside your cabinet as well.
Enjoy your day; stay safe & stay healthy
Christy says
Thank you so much, Colleen! The stool was a curbside find from years ago…it was a chair that had lost its back lol. Makes for a great prop! XOXO
Pam Walsh says
So creative !!! It turned out beautifully. Take care.
Christy says
Thank you, Pam!! XOXO
Mary Kaiser says
WOW, you knocked that one totally out of the park!!! How adorable is that! I have the perfect spot in my house to put that!! Now if I only had a cabinet door LOL!! What are you doing with the other door? I thought there were two on your cabinet!! I am so looking forward to seeing your new haul on Thursday. I hope your having fun doing all the make overs, because I sure am enjoying watch you transform all the ugly duckling to beautiful swans!
Your like all the ugly trashes fairy godmother
Christy says
Aww thanks, Mary! I do have one more door…I have a more simple idea for that one! My new haul has a lot of pieces I’ve been hanging onto, so I’m ready to get through that one too lol! Have a great day! XOXO
Robin Stephens says
Do. You. Ever. Sleep!? 😊 Gosh, that is amazingly beautiful….and oh, so functional! Go you!! ❤️ Keep up the good work. I love viewing all you do!
Christy says
Ha ha yes! This one did take up a little more time than most projects do, but it was fun to see it come together! Thank you, my friend! XOXO
Denise says
All I can say is excellent job it’s beautiful even though I’m a mid century gal I never miss your makeovers
Christy says
Aww thank you so much, Denise!! XOXO
Larissa ~ Prodigal Pieces says
You rocked the build, Christy! Love a cupboard like that for any room in the home.
Christy says
Thank you, Larissa!! XOXO
zefi says
I absolutely love this!!! The colour, the style, shape, everything!
Christy says
Thank you, Zefi! XOXO
Maryellen Webber says
Awesome job building the cabinet using the cabinet door! Your mixed color is beautiful! Great job building this cute cabinet!
Christy says
Thanks so much, Maryellen! XOXO
Candy says
Great job!!! Would love to do something like this, thanks for sharing.
Blessings Candy
Christy says
Thank you, Candy! My pleasure! XOXO
Rita says
Whoo hoo you are incredible. Love every bit of it. Color, fabric & your building expertise.
Christy says
Thank you so much, Rita! XOXO
Christina says
Wow, Christy, you have some crazy great skills!!! This is a seriously cute cabinet. Love the colors, size and that fabric is spot on! This would be cute in so many places. 🙂 Thank you for the details and inspiration!!
xo
Christy says
Aww thank you, my friend! It has been a while since I’ve had the chance to build something, so I really enjoyed it! And yes, this could work in just about any space!! XOXO
Janice Holt says
Great job building the cabinet. It turned out so pretty and could be used in so many spaces, especially a small bathroom.
Christy says
Thank you, Janice! It is a great petite size and yes, just perfect for a bathroom! XOXO
Nancy says
Wow! You make everything look so easy. You are amazing. I would have never thought to make a cabinet to fit a door. You are one talented lady. I love your blog.
Christy says
Thank you SO much, Nancy!! You are so sweet!! XOXO
Denise Cox says
Christy, this piece is ABSOLUTELY DARLING! If I lived close, I would buy it in a heart beat. I am constantly impressed with your skills, but especially with this piece. I love the shape, and as usual, the “ocean themed” color. How did you learn your skills with working with tools and the logistics of placing together the “little pieces” (ie., screws)? I wish I had a home with the space where I could ‘You Yube’ myself these skills. Since I’ve stopped working, I’ve had this fantasy of learning to do these types of projects. I truly love all that you do, but for some reason this ‘cupboard’ really strikes a cord within me. How long have you been doing this sort of thing? Did you have a mentor? And, with re., to the ‘Boss’ , it’s purpose is to help with bleedthrough? Anything else?
Thanks so very much for a lovely and informative blog. While I don’t have the tools and skills to replicate your projects, I eagerly look forward to hearing from you every morning… 😉 🌞.
Christy says
Aww thank you, Denise!! My Dad used to build small furniture pieces back in the day and my Mom would paint them, and they would do several craft markets a year. I used to sew dolls and do the shows also. I think I just always though I could figure things out because they did it ha ha. Before blogging, I would do house projects…I built a window seat under our bay window in our kitchen, I laid hardwood floors, etc. That’s where my blog name came from…I was always taking on a project! BOSS is great for bleed-through and it is also an odor blocker, but it can also be used as a primer on bare wood. Enjoy the rest of your day! XOXO
Bev says
I just love this!!
Christy says
Thank you, Bev! XOXO
Marcie Lovett says
I cannot believe you, Christy! I was predicting a chalkboard or bulletin board, not a whole new build. It’s fabulous, inside and out!
Christy says
Ha ha I’m glad I can still surprise you, Marcie!! Thank you! XOXO
Rebecca says
Wow! Built from scratch. Looks great and I know it was a lot of work. Your detailed instructions make me think that I too could build something like this. Thank you!
Christy says
That is such a compliment, Rebecca! Thank you! I want ya’ll to believe you could totally do this!! XOXO
Vicki Lombardi says
Christy,
This cabinet is beautiful! You are amazing. I look so forward on Tuesdays and Thursdays to see what you have cooked up for us. Thank you!
Christy says
Aww thank you, Vicki! I am so thrilled that you look forward to my posts!! XOXO
Gisele Palin says
I love your style! The colors and what you make out of a few pieces of wood are amazing! It’s everything I love too. I plan on doing many, many projects! 🙂
Christy says
Thank you, Gisele! Happy creating! XOXO
Ann Williams says
You are absolutely amazing!! I love the cabinet. Thanks so much for sharing all your ideas.!💕
Christy says
Thanks so much, Ann! It is always a pleasure to share!! XOXO
Toby says
Love this Christy! When I first saw the door…I made a guess of what you might do. I missed it by a landslide! What a beautiful custom piece!!!
Christy says
Thank you, Toby!! What? You never guessed I’d build an entire cabinet around it? I know I’m crazy like that ha ha! XOXO
Phyllis says
I know I say this after each project but I love this. It is even more special by taking something many people would think as useless and making something so stunning.
Christy says
Thank you, Phyllis! Oh absolutely…it is so fun for me to imagine what these pieces could be and then watch them come to life! XOXO
CToth says
Oh, how I love to read your posts. I have never commented, but I am a huge fan. Over the last year you have inspired me to completely decorate our Palm Springs vacation home with free or thrift store furniture finds. Your blog is the only furniture repurpose blog I have ever read because I love your positive, authentic and kind spirit. Everything I have learned about repurposing furniture, I learned from you. We now have a beautifully decorated home that cost me literally pennies.
Thank you for being YOU!!!
Much gratitude and appreciation for sharing your passion and helping others.
Christy says
If I could reach through the screen and hug you, I totally would!! Thank you so much! I’m thrilled that you have found a little inspiration here and put it to work!! XOXO
Kathy says
This is my favorite makeover of all the ones you have done. The look, the functionality, and that paint color is perfect! Bravo!
Christy says
Aww yay!! Thank you, Kathy!! XOXO
sharon austin says
Super cute! You make it all look so easy. It’s really unfair. LOL
Christy says
Aww ha ha…I try to make it look do-able! Sometimes projects don’t seem so daunting when you see them come together step by step! Thank you, Sharon! XOXO
Cate says
Just how adorable is that!! Wow! You did a great job.
Christy says
Thank you so much, Cate! XOXO
gwen says
oh Christy! You gals always bring a bright spot to my Tuesdays and especially in these strange days! This door is perfect as the cabinet door and it looks great with the beadboard and fabric backing. I guess the key is to cut the pieces exact – mine never turn out ‘square’ and that makes it especially difficult when adding a door. This cabinet on those cute feet is PERFECT! Thanks for brightening my Tuesday! And now I want to see what you do with door #2!
Christy says
Aww yay! Thanks, Gwen! We all need a little distraction from what is going on around us for sure and I’m so glad we could do that for you! I have an idea for door #2 for my booth, but still coming up with a plan! XOXO
Denise Zdziennicki says
I wasn’t expecting a full build and what an amazing surprise on the inside! Beautiful! XOXO
Christy says
Well I’m glad I can still surprise you ha ha! Thanks, Denise! XOXO
Debora says
Great job Christy! I love your attention to detail. It really sets you apart from the rest. You really give your customers a “finished” product. I am also that way. Friends have teased me for years about how I paint the bottoms and backs of items, or adding the small touches. I look forward to every post you do!
Christy says
Thank you, Debora! Is this a bad time to admit that I didn’t paint the back of this cabinet lol? I often do though ha ha! XOXO
Carol S says
I am so impressed! A lot of work and a lot of great detail. This cabinet won’t last long in your shop. I love it!
Christy says
Thank you, Carol!! XOXO
Joanne says
OMG! What a great project – you made a magical piece. It is adorable! Love the colors and fabric. Stay Well, Girl.
Christy says
Thank you so much, Joanne! You stay well also!! XOXO
Lani says
Amaze balls!!! Who would know that that cabinet started as a glass door. You are so imaginative and talented! I love the colors and all the details.
Christy says
Ha ha thank you, Lani!! XOXO
Sue Mellette says
Oh My Gosh! I just love seeing your piece of trash in the “before” state and then I go directly to the “after.” But lately on Trash to Treasure Tuesdays, I like to guess what magic you would do before I check out the after. For this piece I envisioned an etching or a transfer on the glass and beautiful finish on the sides. But I never imagine that you would build a cabinet for the door!! I am so impressed!! Your talents are many!! Love what you did, the feet, the shelves, paint color and the pop of color on the door. No detail was left undone. Truly a transformation. Thanks as always for sharing your wonderful gifts with us! Stay well and safe.
Christy says
Oh ha ha…surprise! I’m not sure what I would have done had the glass not been broken, but an etching or transfer would have been lovely! Thank you so much, Sue!! You stay well too! XOXO
Robin says
I love it so much! You have inspired me, definitely going to use a couple of doors I have in the garage rafters, soon. They are not as sweet as your door but they will make nice cabinet doors.
Christy says
Thank you, Robin! I love that you are feeling inspired!! XOXO
Nancy @ Artsy Chicks Rule says
What a creative idea for that old door! Love the cabinet, the feet and the pretty fabric too. xoxo
Christy says
Thanks, Nancy!! Luckily I had everything except the wood! XOXO
Tina Matteson says
This is gorgeous. How is it you keep outdoing yourself…? The surprise of that beautiful fabric on the inside is just stunning! LOVE this.
Christy says
Aww thank you so much, Tina! XOXO
Addie says
Waste not Want not!!! Good one!!! Wish more people would think like you.
XXOO
Christy says
That is right ha ha! Thanks, Addie!! XOXO
Stacey D DeGrace says
wow, I love this one the best so far! Great work. It’s beautiful.
Christy says
Thank you so much, Stacey!! XOXO
Jennifer Lopez-Reis says
Hi there , just want you to know I really enjoy all your makeovers, but was really impressed with the cabinet you made. Bravo, thanks for making me smile. Stay safe 🙂
Christy says
Thank you so much, Jennifer!! You stay safe as well! XOXO
ROSE LEFEBVRE says
Another winner again! I would use it in my home!
Christy says
Thank you, Rose!! XOXO
Robyn Wright says
Totes Gorg!
Christy says
Thanks, Robyn!! XOXO
Terry Moore says
Simply amazing!
Christy says
Thank you, Terry!! XOXO
Cindy says
That is absolutely gorgeous! I love the fabric on the door.
Christy says
Thank you, Cindy! That’s my favorite part! XOXO
islandgal1950@yahoo.com says
I started reading this and then read it again and again! I am just so impressed at your furniture making skills! You have gone from painting and revamping furniture to building furniture!! I jumped to Amazon when you said you hated the orange tripods and bought the yellow ones….hope they are more serviceable! I did hot glue the orange ones to a table I use to paint on and they are somewhat better. I’m putting the desk I painted for my grandson on IG and calling it the Serialdiy inspiration! Love the cabinet! Stay healthy and keep your spirits up!
Christy says
Thank you! It has been a while since I’ve built anything and it felt really good! Yes, the yellow tripods are so much better…they don’t keep falling over. Have fun with your grandson’s desk!! Stay well! XOXO
Mary says
Many years ago I watched a carpenter build a cabinet. He used a long narrow piece of peg board to drill the holes for adjustable shelves. He clamped the peg board to the side of the cabinet., made sure it was level, then chose the holes that fit where he wanted to have pins. He then drilled the holes. This assured the shelves would be level front to back and side to side. Home made jig that is easy to use.
Your cabinet is really nice. I love the bead board.
Christy says
Thanks so much for sharing that, Mary! That is such a smart idea! XOXO
Jen @ Girl in the Garage says
Gorgeous work, Christy! I’m seriously impressed!! xo
Christy says
Aww thanks so much, Jen!! XOXO
Susan says
Wow Christy! You have some mad woodworking skills! I love this cabinet and that door was an amazing repurpose! Stay healthy!
Christy says
Thank you, Susan! This was a fun change of pace! You stay well too, my friend!! XOXO
Cheryl Atkinson says
All i can say is WOW. How do you know how to do all of this? This is awesome and it has all of the extra Christy touches. You create everything so perfect. Love it. I miss shopping so bad. Shopping online for fabric is just not the same. Thank you for sharing this. Those tools look scary to me. Take care!
Christy says
Good morning, Cheryl! Thank you! My parents were pretty crafty, so I picked a bit of it up too lol. About my second year into blogging, I got tired of waiting for my Hubby to cut things with the bigger saws, so I started doing it myself…terrified lol! I have built many smaller things and I have modified several furniture pieces over the years, so this was a fun challenge! I totally agree…shopping online is just not the same! I miss thrifting terribly..it is like therapy! Have a great day! XOXO
Petra says
I would totally love this cupboard in my home – so many uses – and such perfect colours 😀 I’ve always wanted to make furniture (only succeeded once in a basic hall table), so you’ve inspired me to see what I can do xo
Christy says
Thank you, Petra! I think this might be the biggest piece I’ve done…I’ve done lots of smaller things and I’ve modified many furniture pieces over the years so this was a fun challenge for me too! Have fun!XOXO
Marie says
You are so freak’n talented, Christy! This little cabinet is amazing and I knew you’d have your signature surprise waiting for us inside 🙂 Love the colors too. Pinned
Christy says
Aww you are the sweetest, Marie, thank you!! I’m so pleased that what was in my head worked out ha ha! XOXO
Sherry says
What a great idea Christy! Thanks for all your project shares. It keeps me happy during these uncertain times and looking forward to my next project.
Christy says
Thank you, Sherry! You are so welcome! XOXO
Susan R Renaud says
Your repurposed glass door idea is an inspiration. I love to use items that already exist and create something new, beautiful and useful. You are so good at this and it makes me want to go on and do something creative. Thank you for sharing your projects. Susan
Christy says
Oh wow thank you, Susan! I appreciate that so much, and I love that you are feeling inspired to create!! XOXO