Hello lovelies!! It’s the fourth Thursday of the month and that means it’s time for another Furniture Fixer Upper makeover! I thought this louvered door cabinet was the perfect project to share this month! My friends have makeovers to share today as well, so be on the lookout for those at the bottom.
This was such an amazing find for only $9.99 at the thrift store:
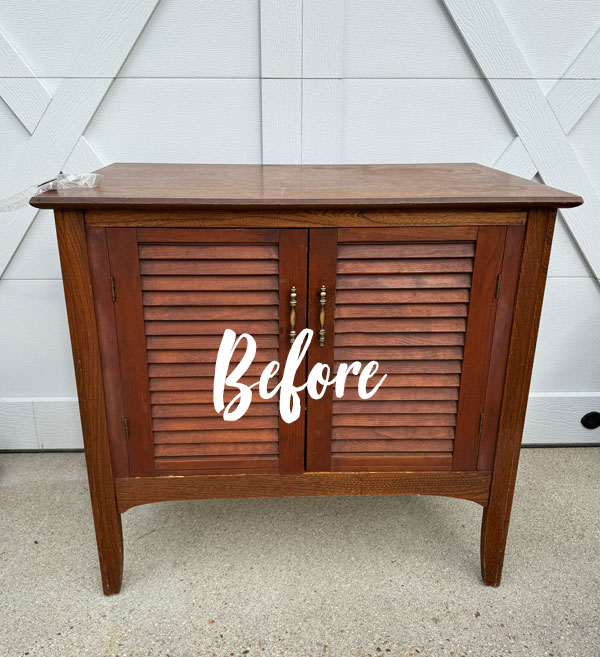
I scooped it right up!
I’ve included a few affiliate links so you can find the products I love.
Don’t forget the most Important Step!
I should have cleaned first with White Lightning, but I was so anxious to get started that I jumped right to filling the hardware holes and filling in lots of little knicks all over with Dixie Mud:
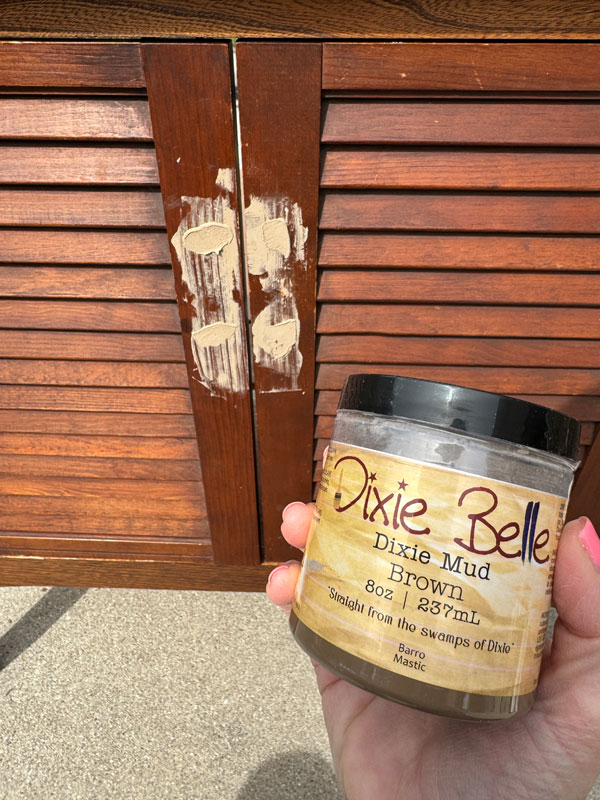
The Mud is water soluble so it is better to fill after cleaning. I had to clean around it best I could after sanding.
Prime
I knew this reddish wood would need to be primed, so it got one coat of Bonding BOSS:
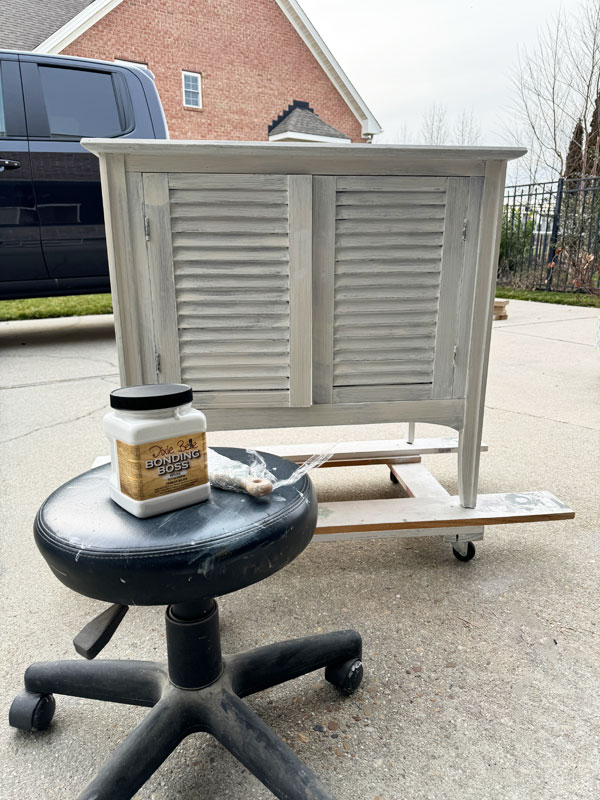
Bonding BOSS suggests applying two coats for most projects, waiting four hours between coats. Then wait 24 hours before applying paint. Of course, I like to push that (I’m all for less work!) and so I started with one coat.
Paint
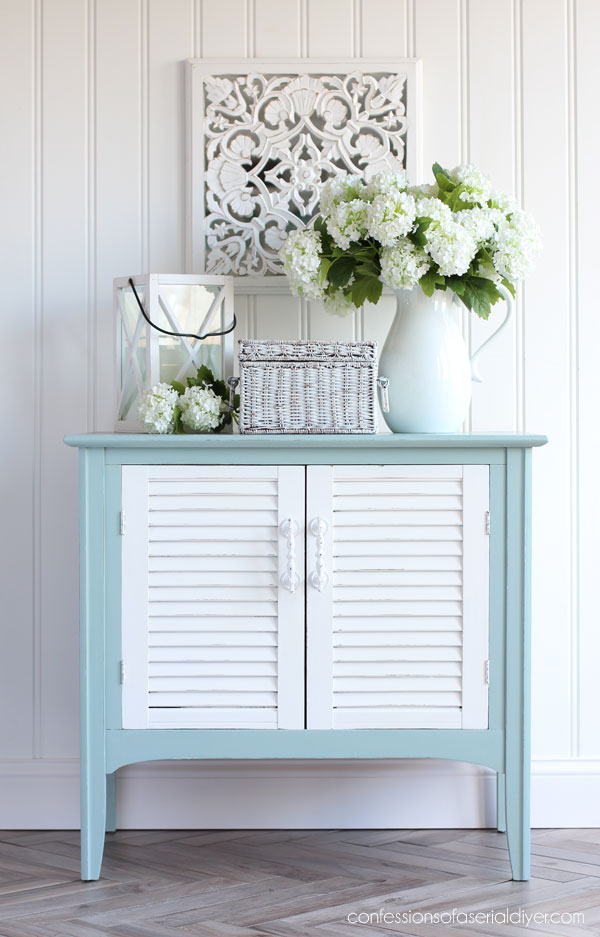
When I saw those louvered doors, I immediately knew I wanted to give this piece a coastal feel.
To do that, I chose Vintage Duck Egg Blue:
UH OH!
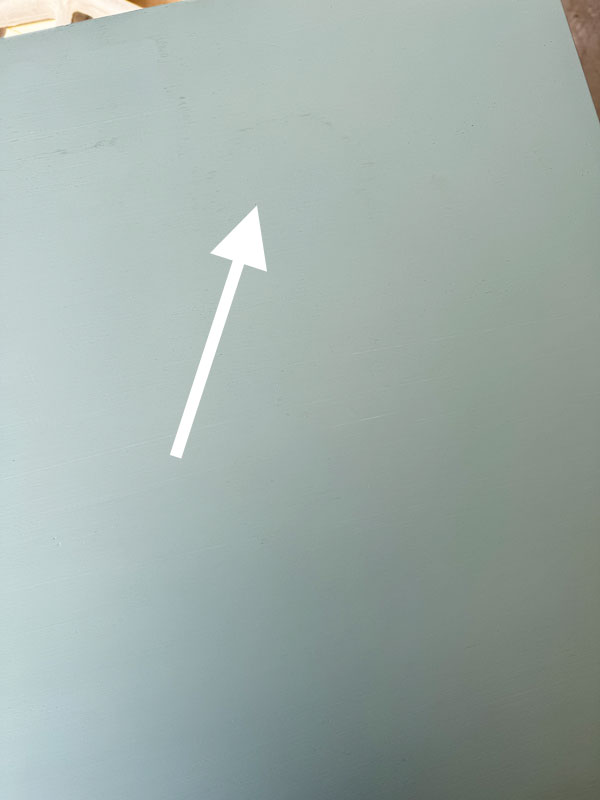
Unfortunately, I did get some water stains bleeding through on the top:
I also got a bit of discoloration coming though the white on the doors where I had sanded the hardware holes I had filled, so I applied another coat of Bonding BOSS and let it sit for about 20 hours before recoating, and it was good to go.
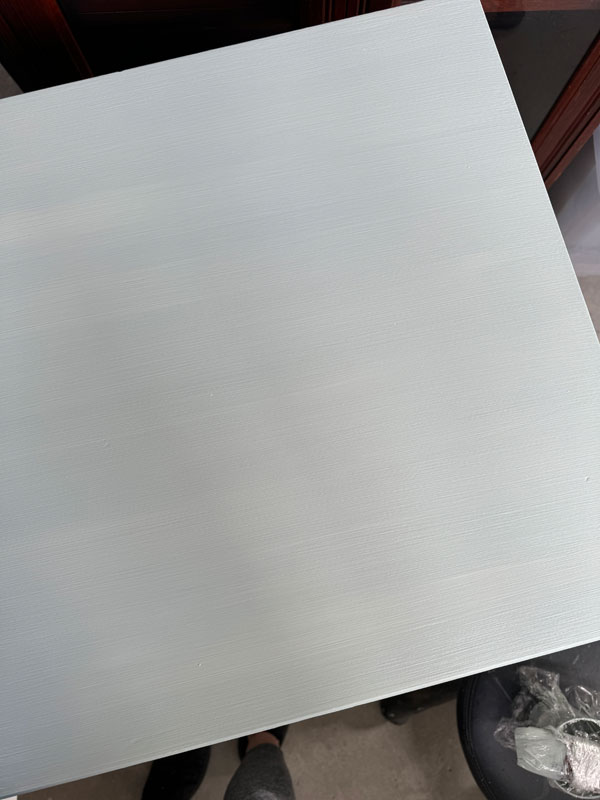
And here’s a peek at the top after the second coat of paint…no more water stains!
This was a really red piece, so I’ll keep trying one coat in the future and report back!
(On white pieces, the work is the same even if you need two coats of Bonding BOSS since you will likely only need one coat of paint. With the regular BOSS, I would do one coat but I would need two coats of paint, so it’s about the same amount of work.)
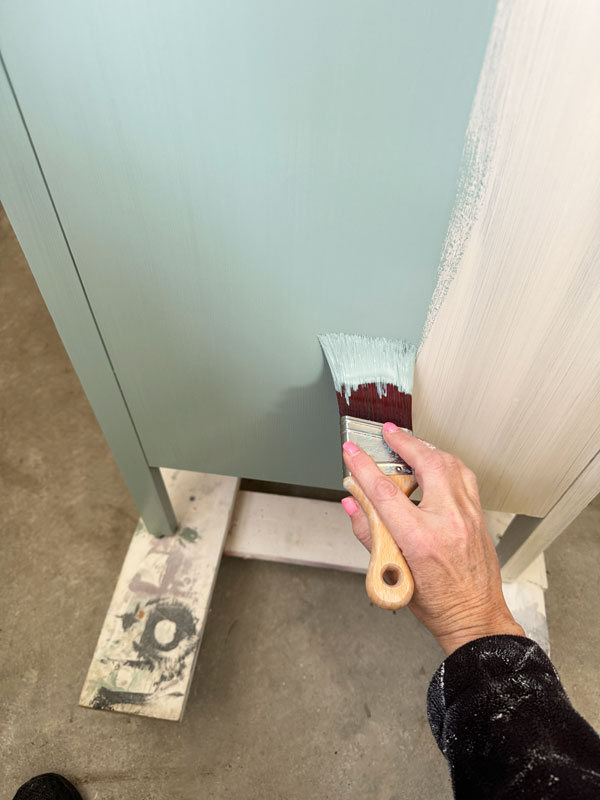
I had used Vintage Duck Egg Blue full strength on my first coat, but I really love it lightened up, so for my second coat, I mixed it 50/50 with Cotton…
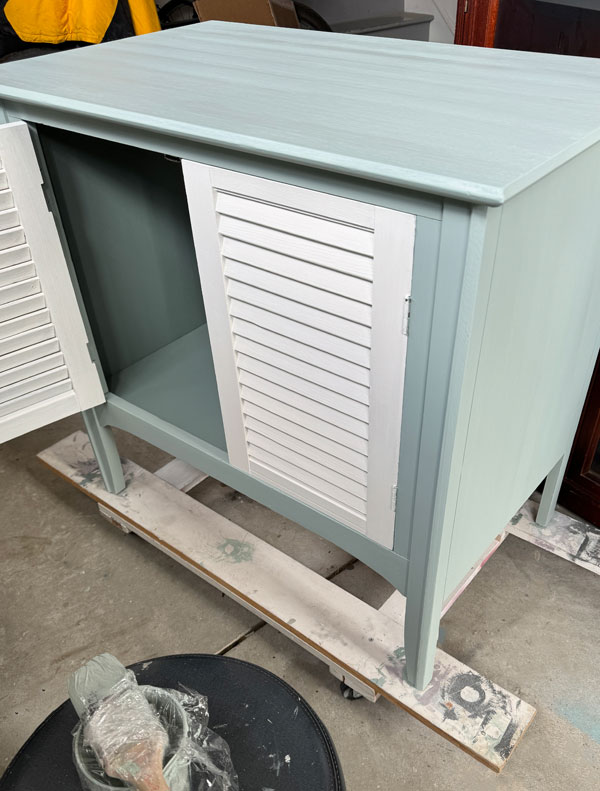
(You can see in that photo the difference of the two colors…the inside is Vintage Duck Egg Blue full strength.)
The Doors were painted in Cotton.
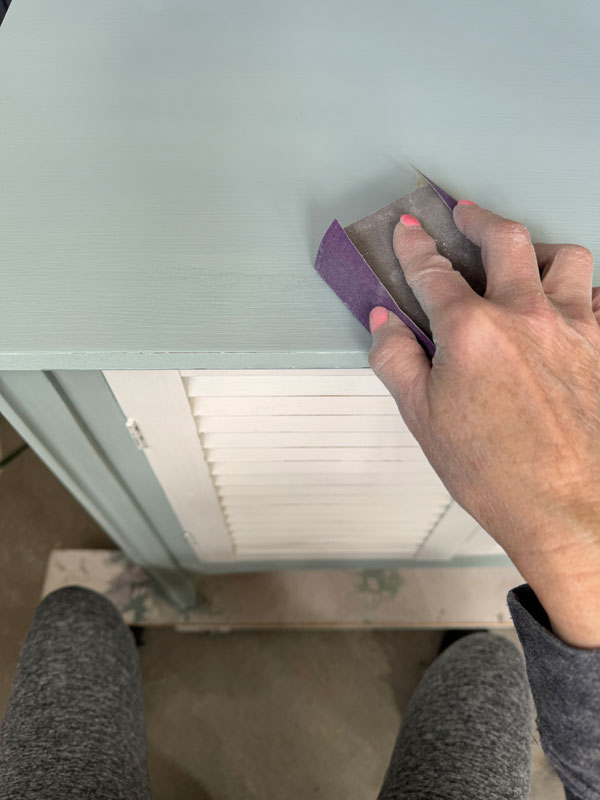
Sand
Once everything was dry, I sanded all over with 220 grit sandpaper to smooth everything out and distress. I wanted more of a distressed look for this piece:
Seal
I sealed with two coats of Clear Coat in Satin using the blue sponge:
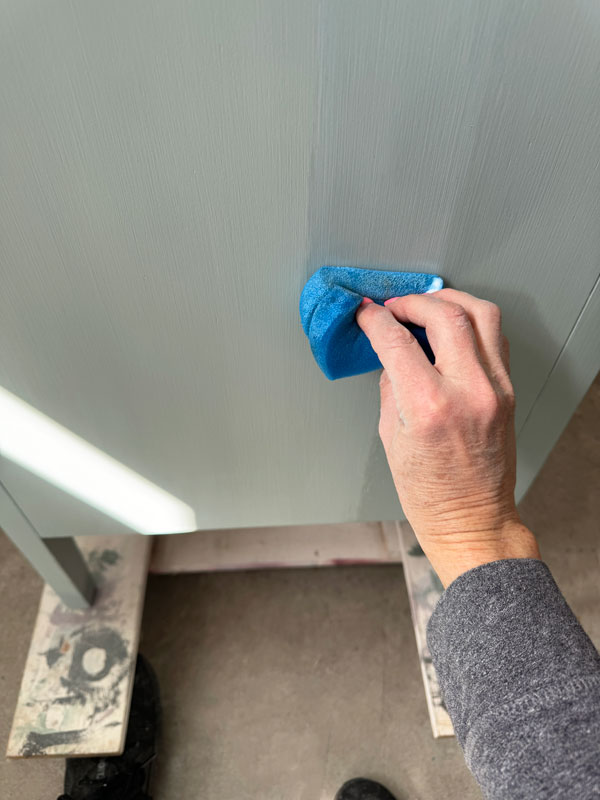
(Cutting one or both of the edges straight across helps to get the blue sponge right up under the lip of the top!)
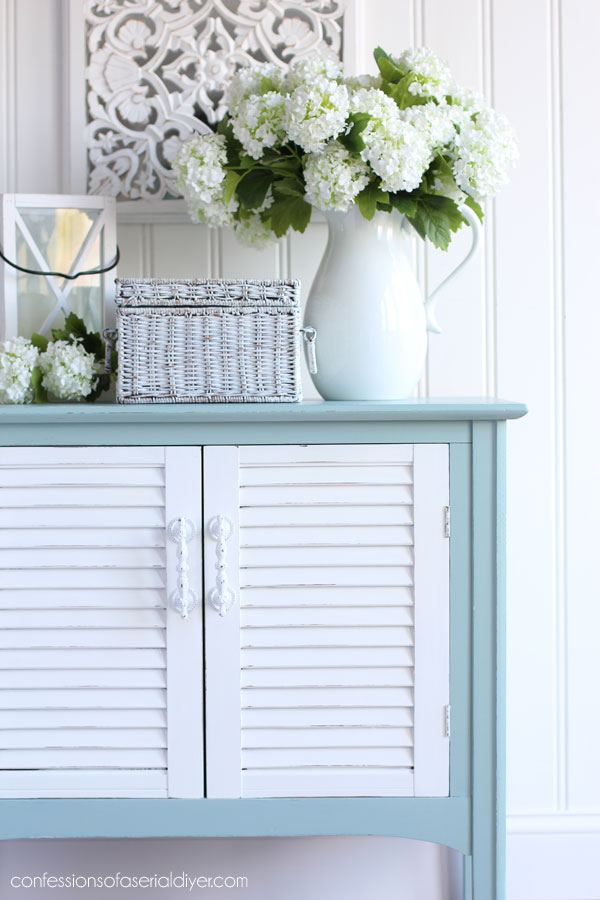
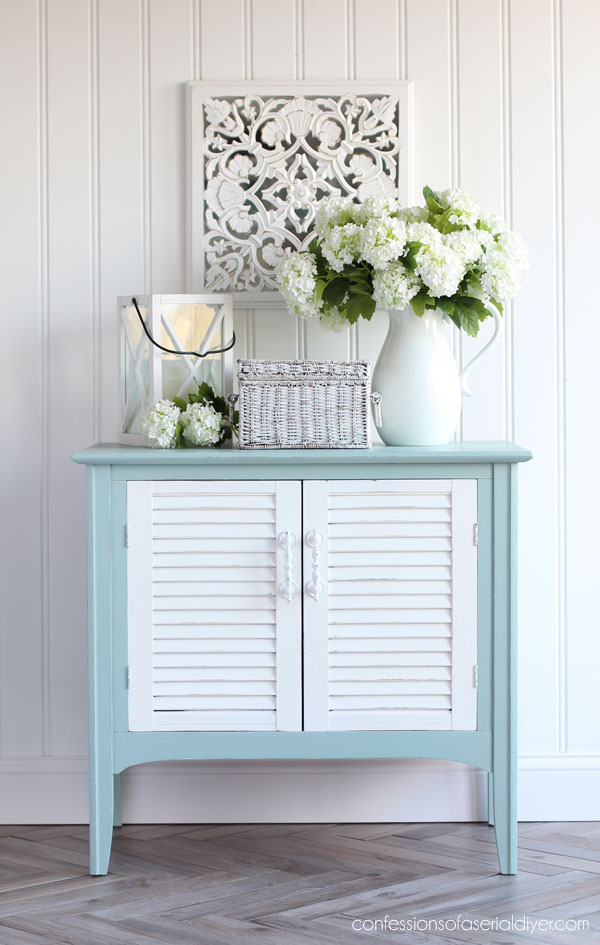
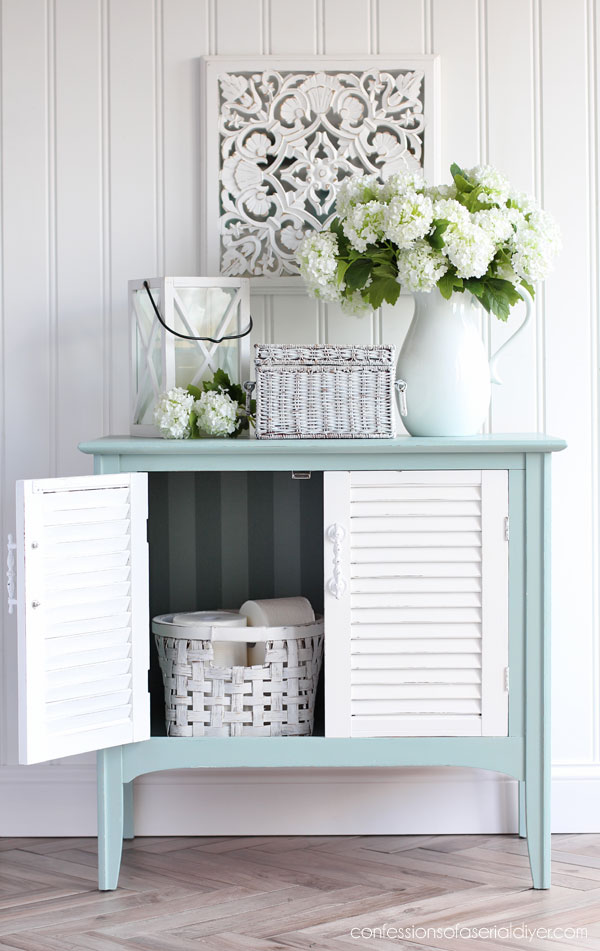
Louvered Door Cabinet: The After
What do you think about it now??
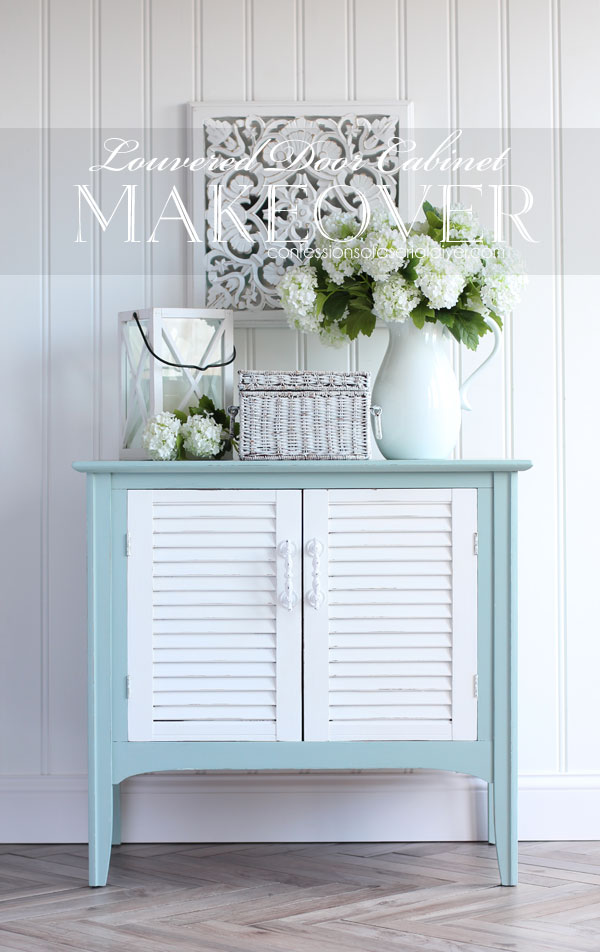
This two-toned look is what I envisioned for this piece as soon as I saw it.
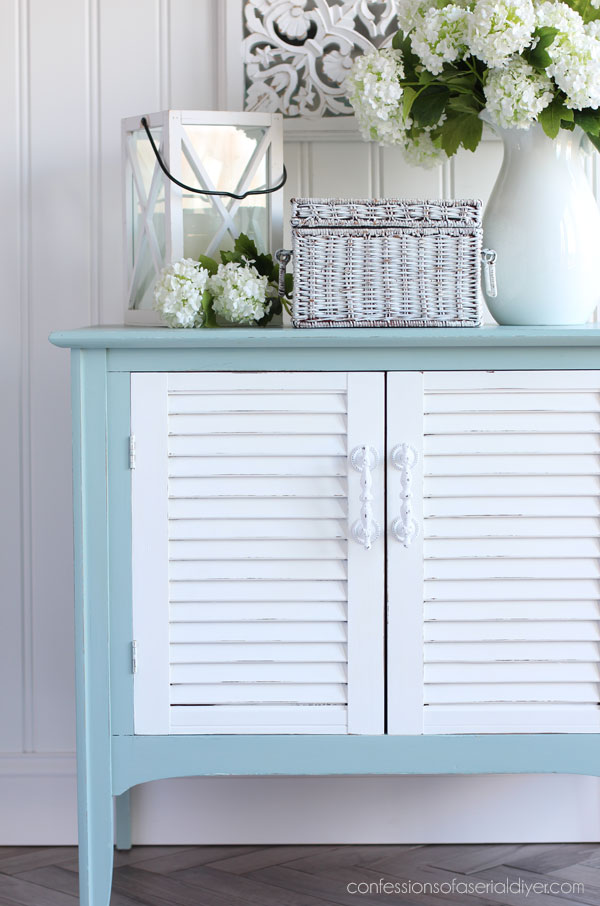
I distressed it, but not in an obnoxious way…
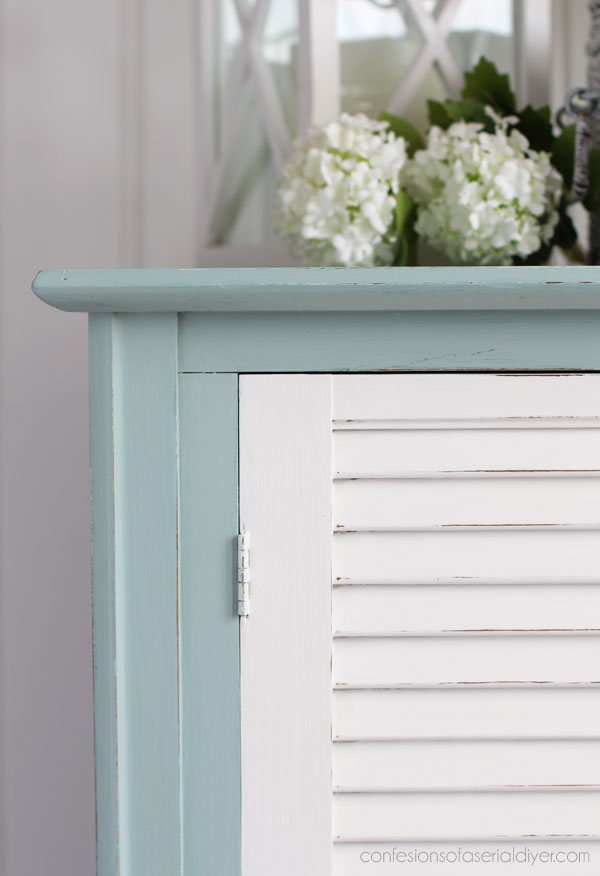
You’ll notice that I did paint the hinges as well, but to avoid every paint layer building up on the hinges, I try to only paint them on the final layer.
The inside
I thought this may have been a radio cabinet originally because of what I found inside:
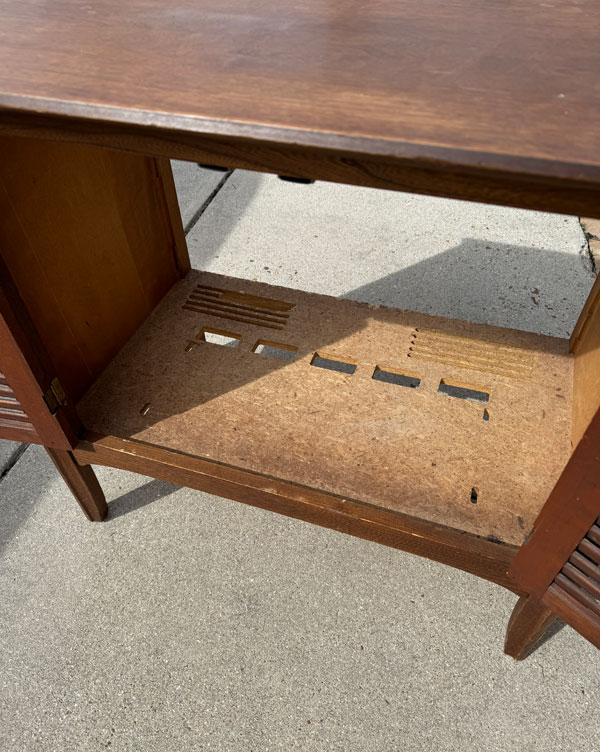
Or maybe a TV cabinet?
Y’all are so good at helping me out with these pieces, so if you know more, please let me know!
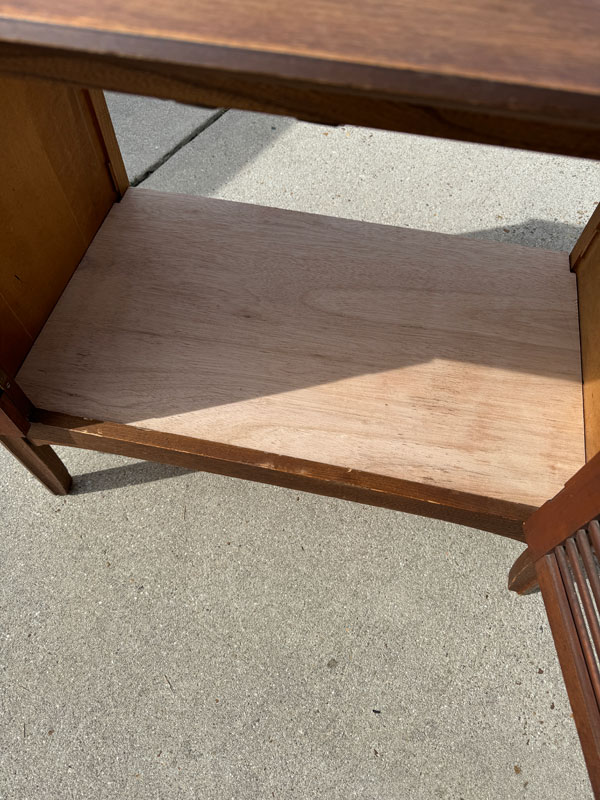
It was also missing the back, so I did have to head to the Home Depot to grab a piece of wood.
Here’s an exciting photo I took for you:
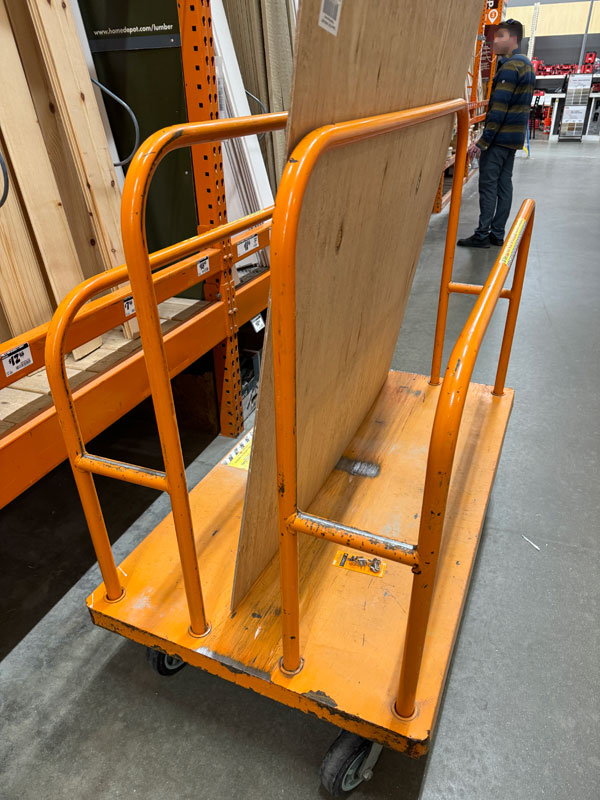
After snapping the photo, I hoped that the lady to my right didn’t think I was trying to take a picture of her man lol.
I used my mini circular saw to cut the pieces I needed for both the bottom and the back:

I’m not fancy, y’all, my wood is propped up on an empty container. That straight edge is a big help though for guiding perfectly straight cuts!
I used Liquid Nails to adhere the new bottom:
I painted the interior in the Vintage Duck Egg Blue, and before I secured the new backing in place, I decided to add a fun touch with my favorite…stripes!
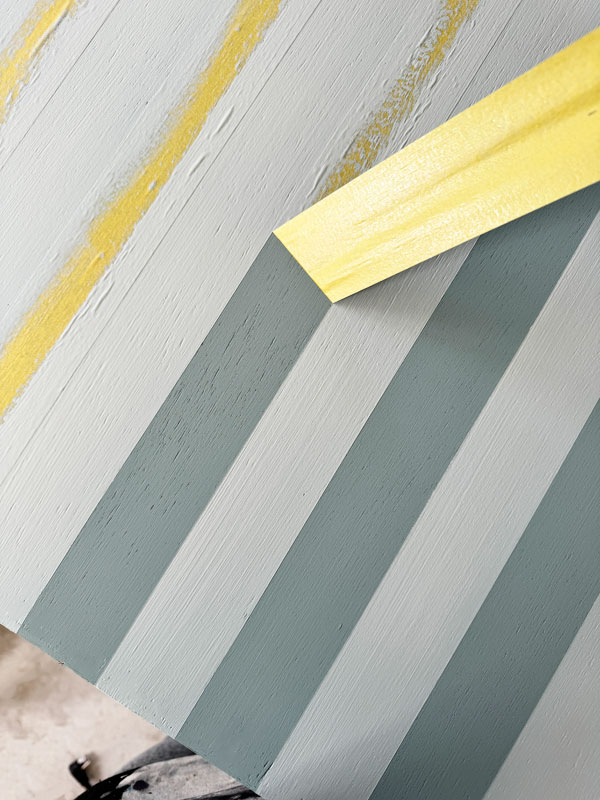
That is Vintage Duck Egg and the 50/50 Duck Egg/Cotton mix, which looks really light since it’s still wet there.
My favorite tape for getting perfectly crisp lines every time is FrogTape for Delicate Surfaces. (This is the 1.88″ width.)
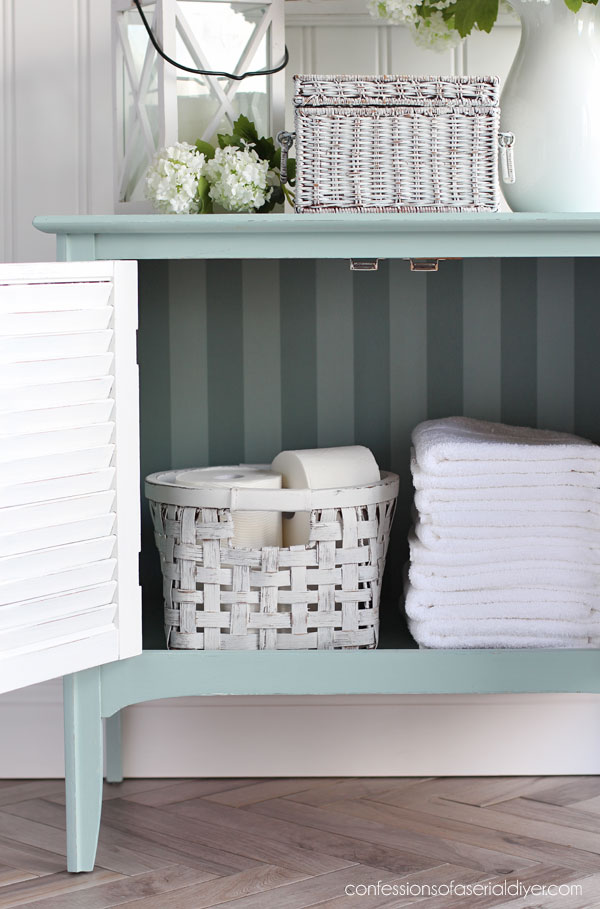
And here it is in my new cabinet:
A fun surprise when you look inside!

It was screwed in place with small screws.
My booth was so full of furniture that I focused on lots of smalls for my new haul, but I sold three large pieces over the weekend, so now I need furniture ASAP! This should help!
I ended up using similar styled pulls to the originals:
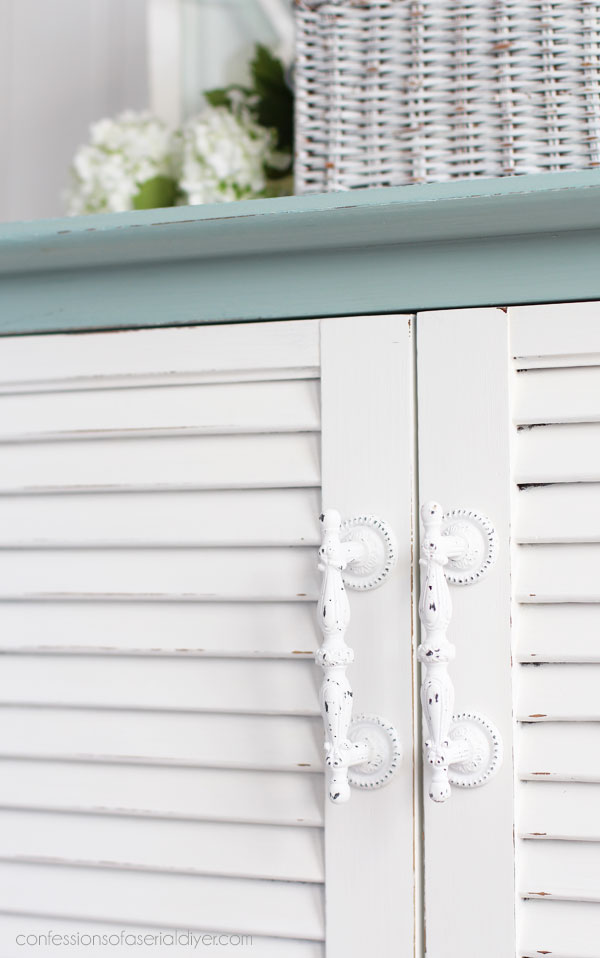
I found these already painted at Hobby Lobby. They are bit longer and are a bit more updated.
I hope I did this vintage piece justice!

My friends have four more makeovers for you today!
That’s one more done!
Here’s what I’ve completed so far from this group:
Painting the Smalls #25 (SIX mini makeovers!)
Shoe Shine Box Makeover
Metallic Vintage End Table Makeover
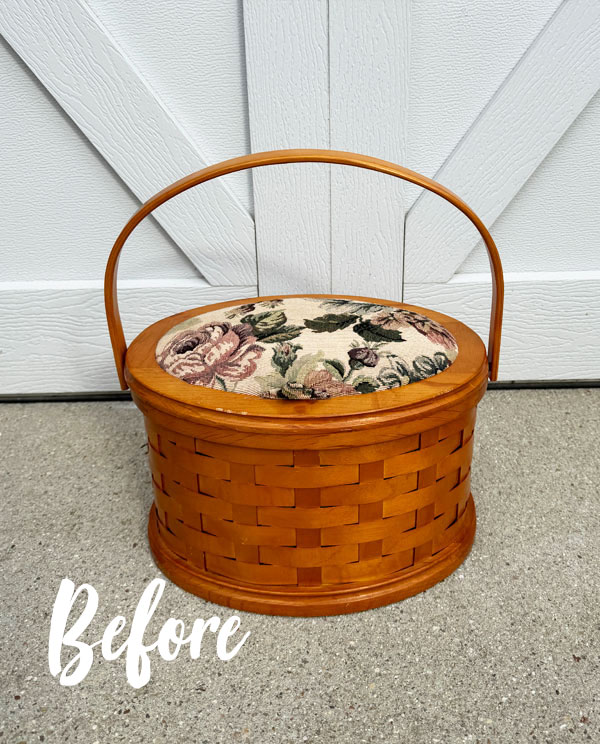
I’ll be back with this sewing basket on Tuesday:
UPDATE!! Wait until you see how pretty this one turned out! Check it out HERE!
Have a beautiful weekend!
XOXO,

Don’t Miss a Thing!
If you like what you see, there are several ways to follow along!
EMAIL * INSTAGRAM * FACEBOOK * PINTEREST


Mary Kaiser says
Oh my it is perfect! Well I hate to tell you this, but that piece will not last long in your booth! If I lived closer it would already be sold! Love how that turned out, and the stripes inside are so fun! It is so happy to be so well loved again!
Christy says
Ha ha thank you, Mary!! A quick sale is always welcome! I hope you have a wonderful weekend, my friend! XOXO
Kathy says
Christy, your storage cabinet looks so good. I love that you painted the doors a contrasting color!! I would have never thought to do that. And, the stripes inside really add a pleasant surprise!! I have gotten away from using stripes (my former addiction, thanks to you) but they are perfect for inside the cabinet. I thought sure you were going to use a transfer inside (my current addiction, thanks to you). Lol. Thank you for your incredible vision when transforming your gems.
Kathy
Christy says
Thank you so much, Kathy! I really have to use restraint these days with transfers lol because they are so fun to play with. Stripes are so easy to add last minute, so I do use them often. I’m so glad you are enjoying creating!! XOXO
Cecilia says
Nice! Love the coastal feel of it and the stripes inside! What a fun surprise. I’d want to keep the doors opened all the time to show them off. I’m resisting the urge to start repainting all my furniture – like I need more projects – but I am so tempted! lol. I will just continue to live vicariously through your blog.
😊Cecilia
Christy says
Thank you, Cecilia! I’m glad I decided to add something to the back. It was easy to do while it wasn’t attached. I understand the urge to paint all the things ha ha! XOXO
Amanda says
I love this makeover!! Great work, Kristi!
Christy says
Thank you so much, Amanda!! XOXO
Jackie C says
What a find!! I LOVE it, although I have no idea what it is. I’m going with your guess of TV stand.
¯\_(ツ)_/¯
Christy says
Thank you, Jackie! That sounds good to me lol! XOXO
Susan says
Yes, pretty sure it was a TV and they probably added the doors on after removing the picture tube and the rest of the guts. It’s actually a good idea! 😂 My dad used to repair TVs, back in the day.
It turned out cute and fresh looking! 🌷
Christy says
Thank you, Susan! I think you may be right! Glad it was saved to be repurposed…it makes a great little storage piece! XOXO
Denise Zdziennicki says
I wouldn’t have thought to paint the louvered doors in a different color but it looks amazing! And the inside striping is the icing on the cake. Pinned!! XOXO
Christy says
Thank you so much, my friend! XOXO
kathy Owen says
Another stunning makeover. It’s always a pain to replace the back on a piece but it makes it much easier to paint, especially stripes!
Christy says
Thanks, Kathy! It really does make it easier to paint the interior too! XOXO
Marcie Lovett says
Well, no wonder the cabinet was such a deal – there was no back and the bottom was odd. But there’s seemingly nothing you can’t improve, Christy! So bright and fresh now, it will fly out of the booth, too, no doubt.
Christy says
Ha ha and I was so surprised it was so cheap lol! Thank you so much, my friend! XOXO
Becky says
That is perfection! SO cute!!!
Christy says
Thank you so much, Becky! XOXO
Liz Shivel says
Hi Christy, this cabinet is lovely. I would bet that this piece, plus a couple of other pieces from your shop space with the same colors, could end up as a whole new bedroom for someone! 😊
Christy says
Thank you, Liz! Ooh yes…I never considered this piece for a bedroom, but the height of it would make it a fantastic bedside table. Lots of storage for books and such! XOXO
Cyndi says
I loooove this! And I am again taking notes…two coats of Bonding BOSS seems to be the way to go. Thanks for the tips! (And I need one of those straight edges. 🙂 )
Christy says
Thank you, Cyndi!! Yes, it looks like two coats will be the way to go…I’ll still be testing that though lol. And that straight edge is awesome! XOXO
Lizzy says
Great work. So sweet & pretty!
Christy says
Thank you so much, Lizzy! XOXO
p says
So fresh ! It’s so cute too.
I always smile to see the details added inside, or on drawer sides.
It adds so much fun.
Christy says
Thank you, P! As I am just about done, I always think, “Now what surprise can I add??” Ha ha! XOXO
Larissa ~ Prodigal Pieces says
What a lovely save, Christy! I always love stripes… and blue.
Christy says
Thank you so much, my sweet friend! I love stripes because they are so easy for a big impact! XOXO
Caye Cooper says
When I first saw the original piece I felt that it would be great to be two-toned. Voila! In an instant I had my wish. LOL It does look great, Christy. Love that you toned down the Duck Egg for the outside and picked it up on the inside. Good choice!
I know what you mean about using transfers. I love them because they are so much easier than decoupage and stenciling for me. However, the price of transfers seems to be climbing and it’s getting harder to work that into the final cost of the piece, so I will have to depend more on the decoupaging.
Thanks again for all your sharing! Have a great weekend. XXOO
Christy says
It sounds like we were on the same page with this one lol. Thanks, Caye! And I totally get it about the bottom line. I find myself using larger transfers a lot, but cutting them apart to get lots of projects from them to make them go further. Enjoy your weekend as well! XOXO
Janice Redden says
The perfect redo – your color combo definitely gives it the coastal vibe you wanted; beautiful as always! I’m curious about what “It was screwed in place with small screws.” refers to – the basket? Or did I miss something…
Christy says
Thank you, Janice! I was referring to the new backing I added to the back. I need to go back and reread it…maybe it didn’t make sense how I wrote it lol. Enjoy your weekend! XOXO
Natalie says
The painted cabinet looks so cute now with the blue and white! Pinned!
Christy says
Thank you so much, Natalie!! XOXO
Michele M. says
WOW!!!!! What a perfect cabinet! Love the coastal vibe and absolutely love love love that blue. Well done, Christy. How on earth did that go for $10!?? That’s NUTS! Glad you found it, what a transformation!!!!
Christy says
Thank you, my friend! This was what I was thinking for it as soon as I spied it, and I’m glad I stuck to it. It was a steal for sure! XOXO
Gail Wilson says
Christy,
Sweet makeover! I really like the colors, but I LOVE the stripes.
Best I can tell, that is a former T.V. cabinet. I’ve had to add underlayment (thin plywood) to the bottom and even the sides on some I’ve done.
Awesome makeover my friend!
Pinned!
gail
Christy says
Thank you, Gail! That makes total sense. Lucky for me, it was already stripped of whatever it was! XOXO
Rose Lefebvre says
You are such a master at this! I love how you finished off the interior, too. Many would not go that extra step! Bravo! The colors are perfect as well.
Christy says
Thank you so much, Rose! If the backing was already attached, I probably would have just painted the inside and been done, but I couldn’t pass up something fun since it wasn’t attached yet! XOXO
Naomi Shelton says
I really do love the way this piece turned out, Christy! Love the colors and the two-toned look plus the new pulls. I would put this in my house without hesitation. Wish I could find one like it to re-do! Thanks for sharing it!
Christy says
That is such a lovely compliment, Naomi, thank you! I’m so glad you like it! XOXO
Debra Hubbs says
This came out so nice! I love the stripes inside and the 50/50 DEB/Cotton. Such a pretty color.
Christy says
Thanks, Debra! I love this mix too! XOXO
Cheryl r Atkinson says
Hi friend! I love it!! Very coastal.
Christy says
Hi there! I’m so glad you like it, thank you! XOXO