Hello, dear friends! Thank you so much for the positive feedback on Tuesday’s post! If you missed it, I shared the before and afters of an entire haul from 2024 AND what each item sold for. I’m so glad y’all enjoyed it, and I’ll definitely do it again in the future! I’m back today with the reshare of a super simple console table makeover.
I loved all the detail of this piece when I spied it at the Habitat Restore for $49:
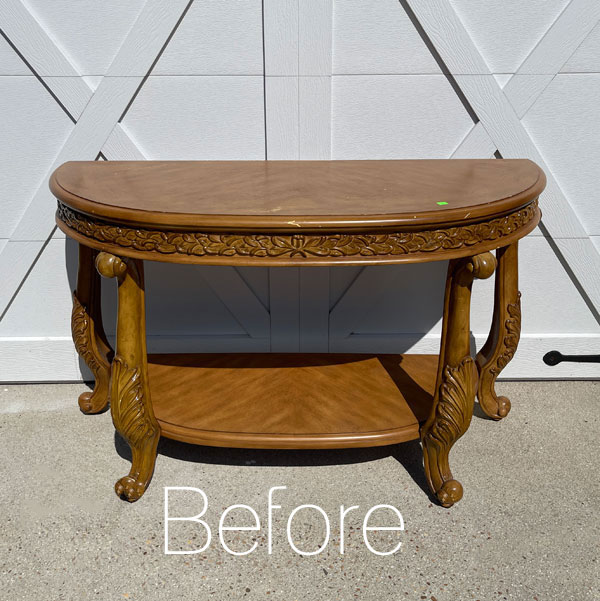
It’s super solid, and I thought it was well worth that price.
Clean
The first thing I did was start with a good cleaning. mixing one TBSP of White Lightning cleaner into a tub filled with a half gallon of warm water.
Then, I cleaned all over using a terry cloth applicator pad:
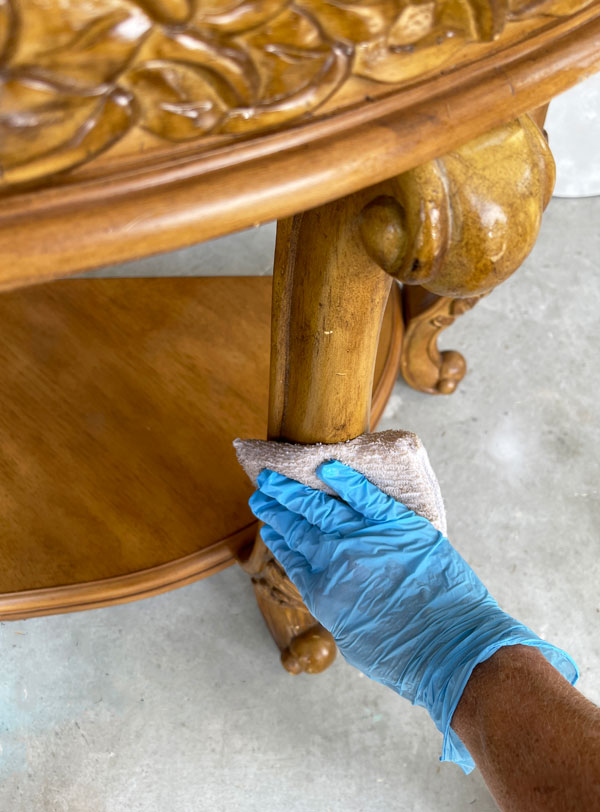
After cleaning, I swapped the water out for clean water and wiped down once more to rinse away any remaining dirt and residue. Gloves are recommended.
Fill in the Imperfections
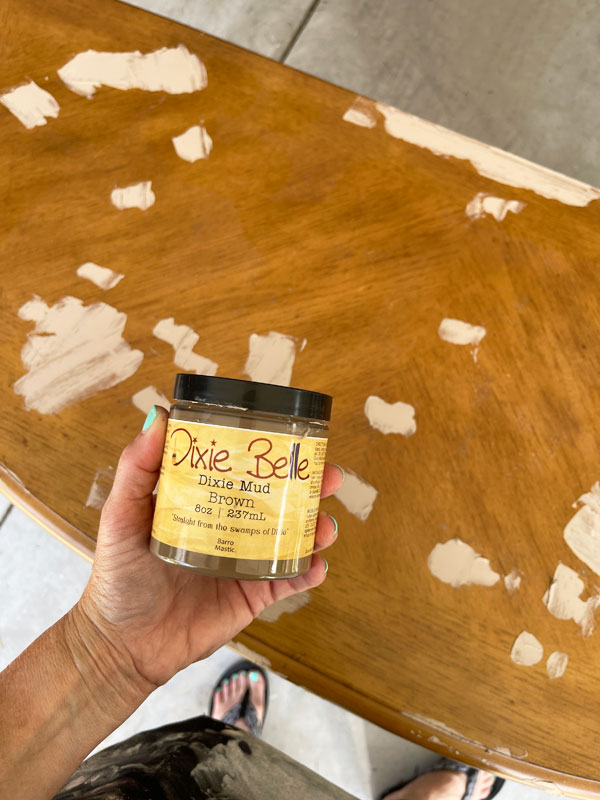
This table was in decent shape aside from several scratches on the top. I will often sand the top to fix that, but I decided to just fill those areas in with Dixie Mud in brown instead this time:
Once it was good and dry, I sanded the filled areas smooth with 220 grit sandpaper:
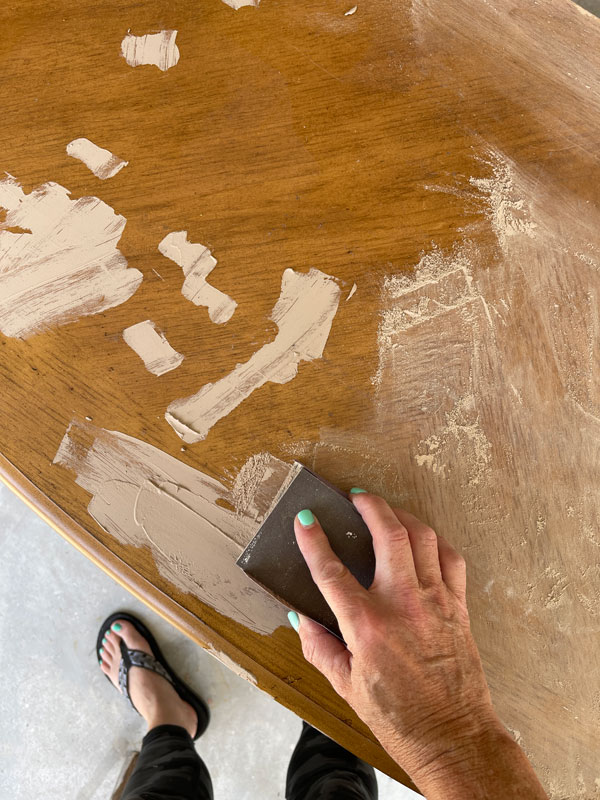
Mud is water soluble until it has fully cured, so I like to clean first before doing any repairs. Then, I use my shop vac to remove any sanding dust, followed by a wipe down with a soft cloth.
Paint
Then it was time for my favorite part, paint!! Amen to finding a piece that does not need to be primed first with Bonding BOSS! This table is not old at all and had no red undertones, so I was able to go right to painting!
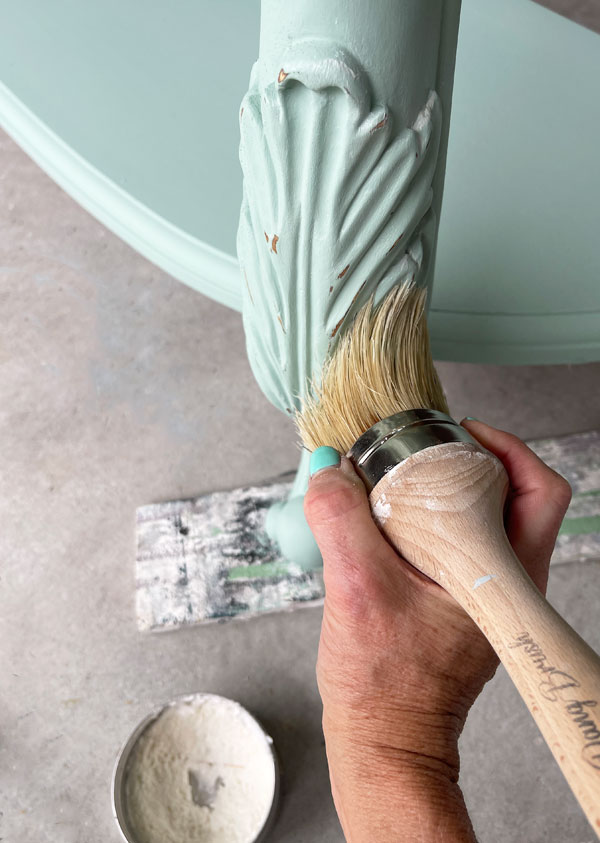
My Belle brush was perfect for easily getting into those details:
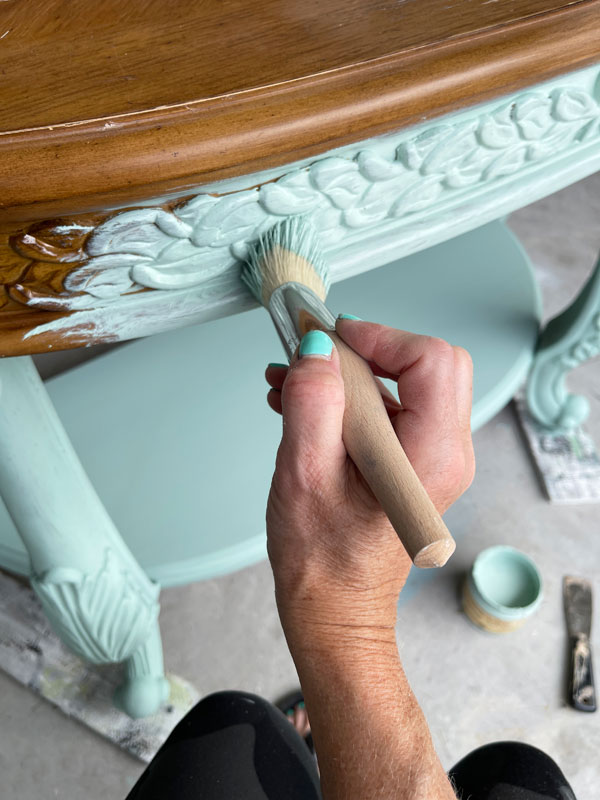
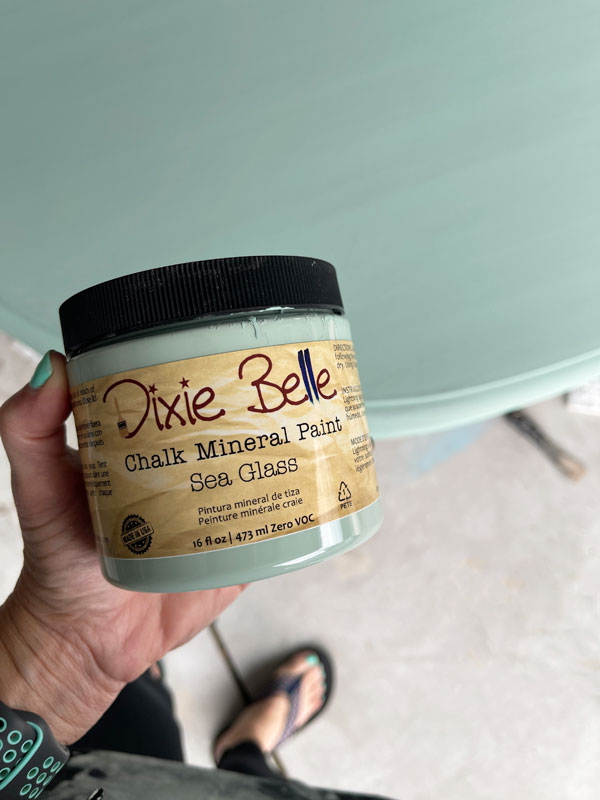
And this gorgeous color is one of my favorites! It’s Sea Glass by Dixie Belle:
Once I had it painted in two coats, I sanded all over with my sanding sponge.
Seal
I was originally planning to add black wax to this piece like I did with this sofa table:
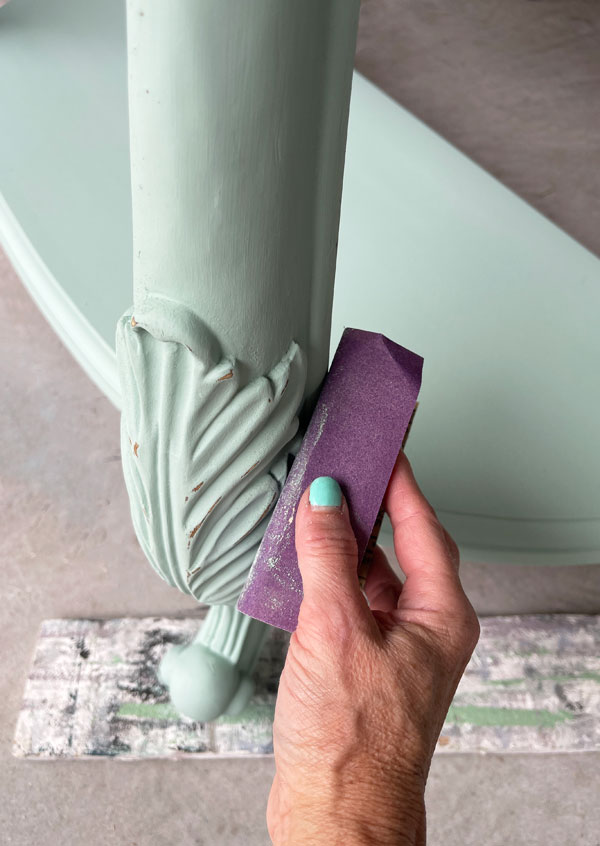
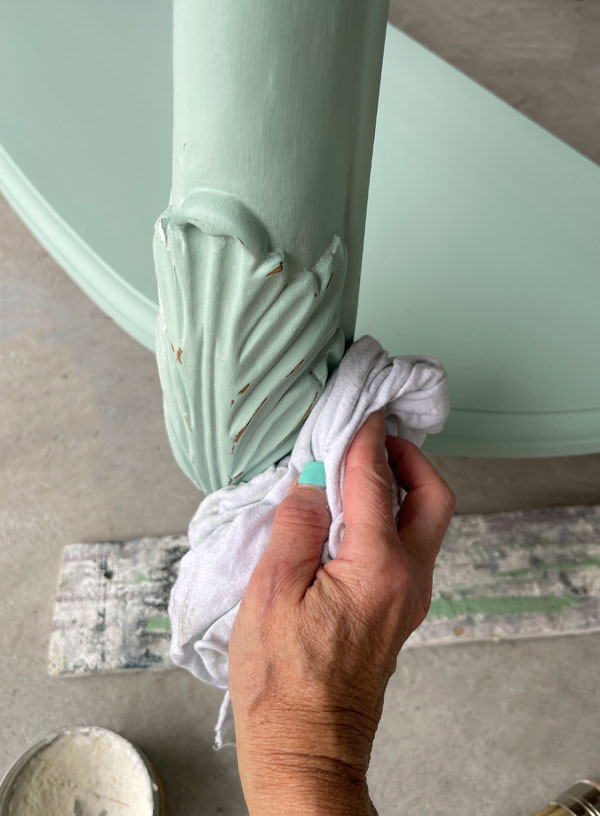
As much as I loved that look, I decided instead to distress the details just a little with 220 grit sandpaper:
SEAL
I seal most furniture pieces with Clear Coat in Satin, which is a great sealer that does not yellow. However, if it pools in those details, it will yellow where it pools. It’s easy to fix just by repainting those spots and sealing again but a pain to keep that from happening on these super detailed pieces.
So, I chose instead to use Clear Wax to seal.
I brushed it on with my Best Dang Brush:
(This brush is fantastic for blending colors also as I did on this French Provincial dresser.)
Then, I used a soft, clean cloth to buff away the excess:
After a few days of sitting, I did go back and add two coats of Clear Coat in Satin to the top and to the shelf on the bottom as I find that easier to keep clean.
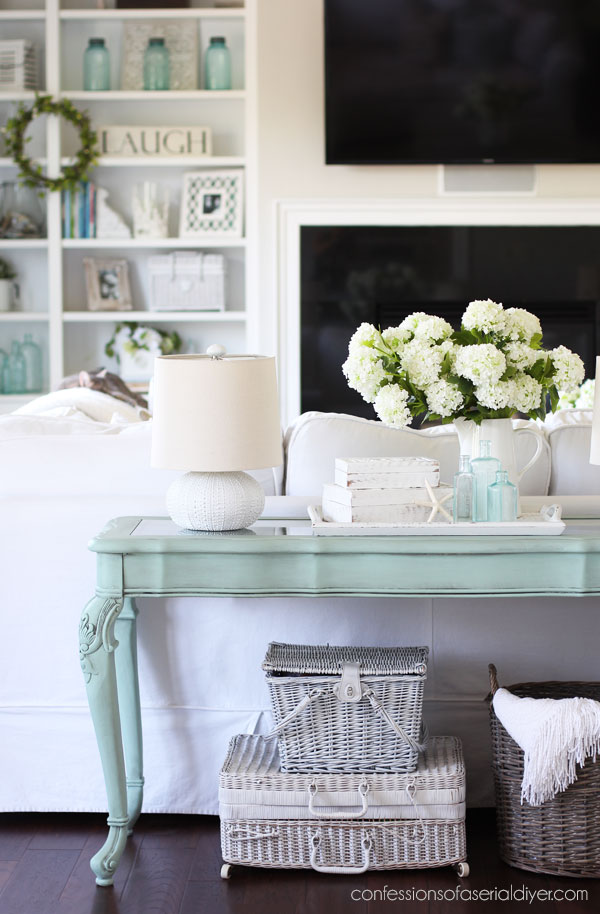
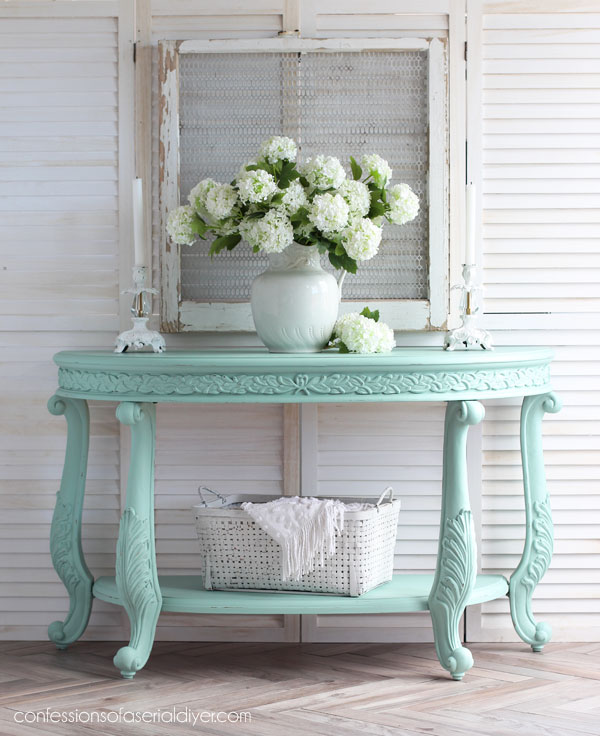
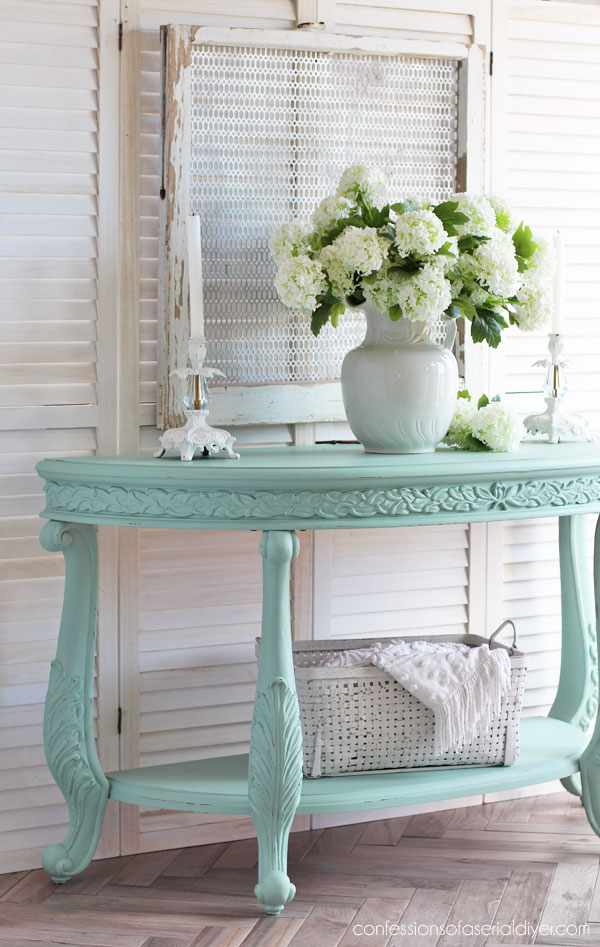
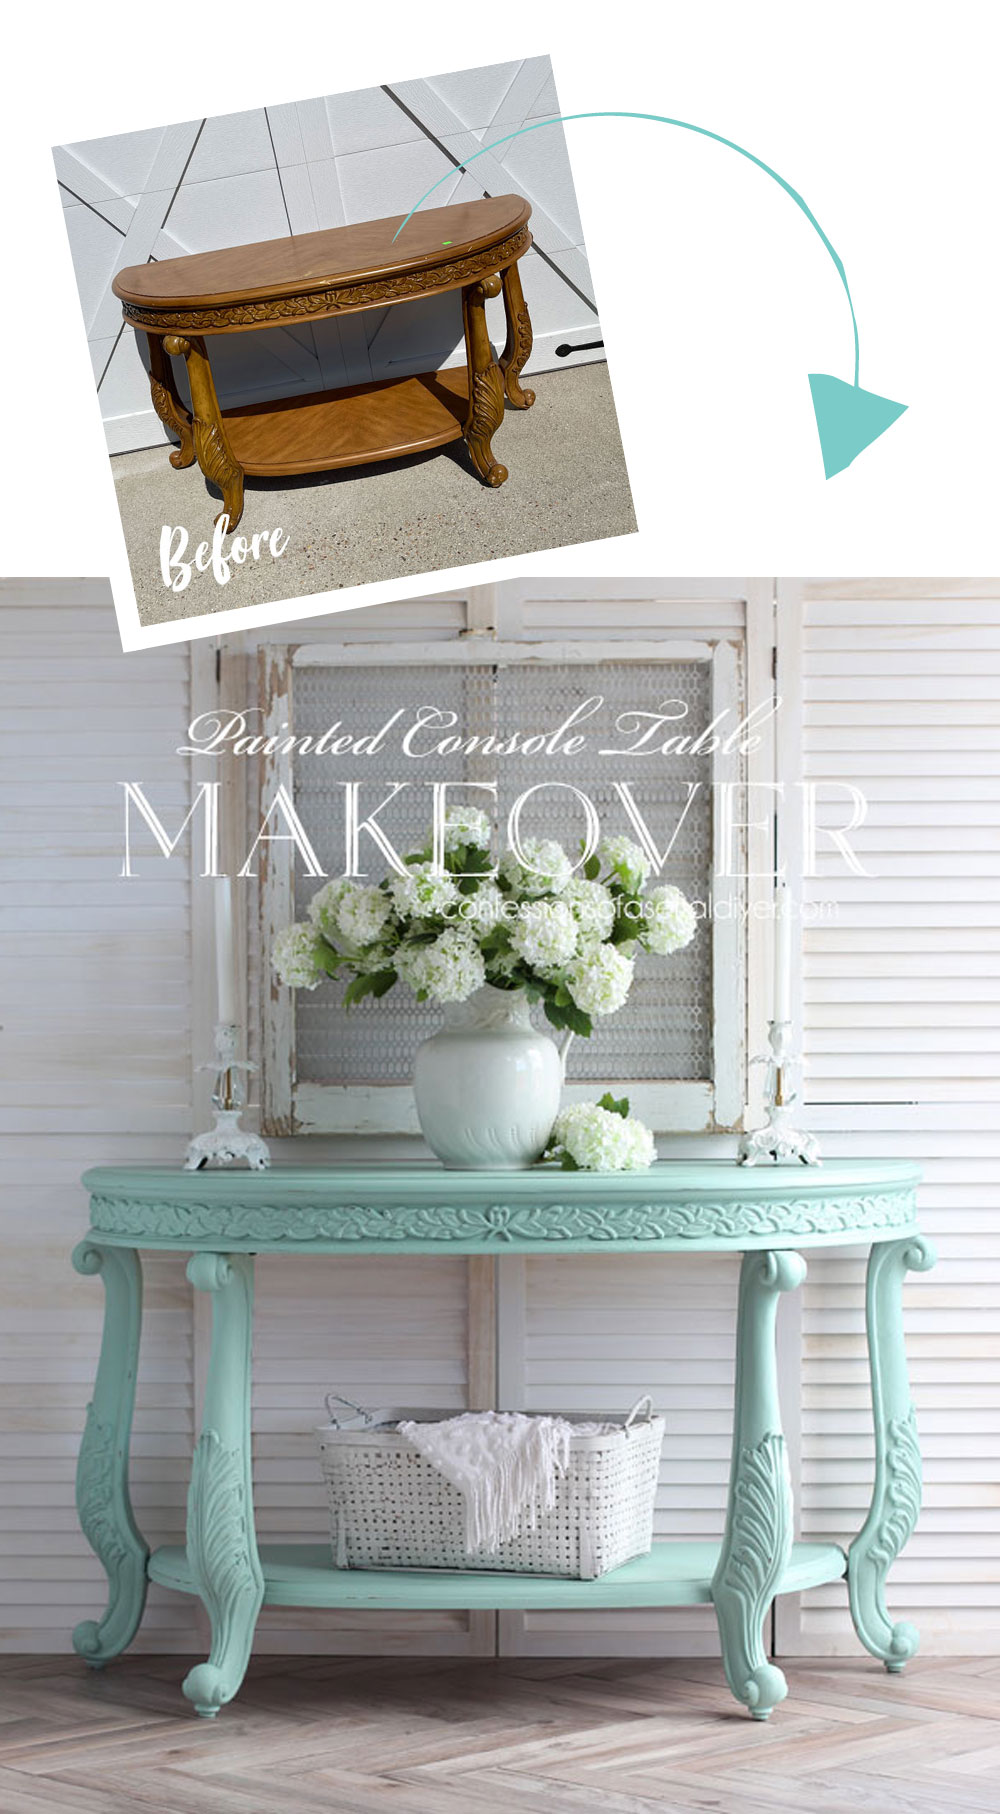
Simple Console Table After
Here is how this $49 Restore Console table looks now!
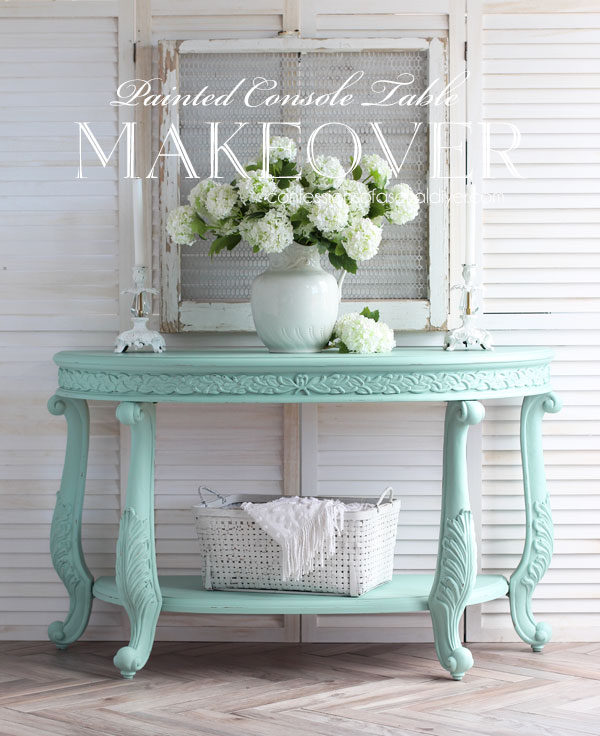
It would add a gorgeous pop of coastal color to an entryway!
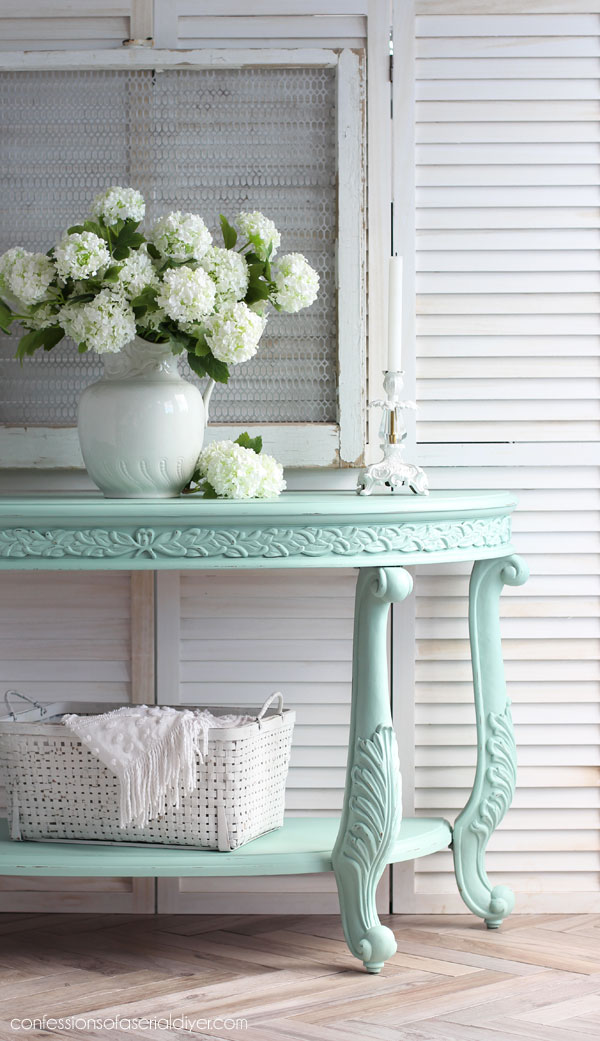
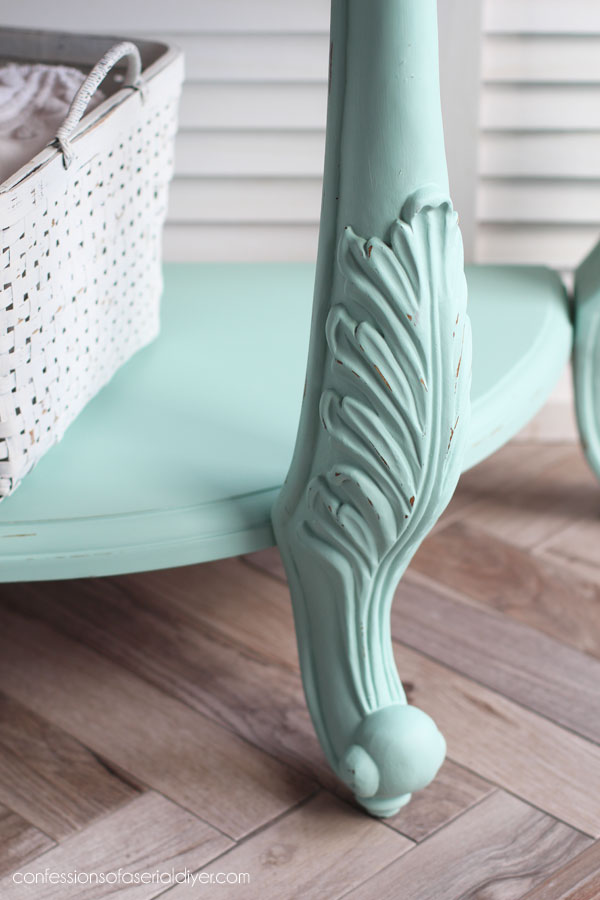
The details are just beautiful!
That band around the top appears to be hand carved, but it is actually a roll of something that has been glued to that area:
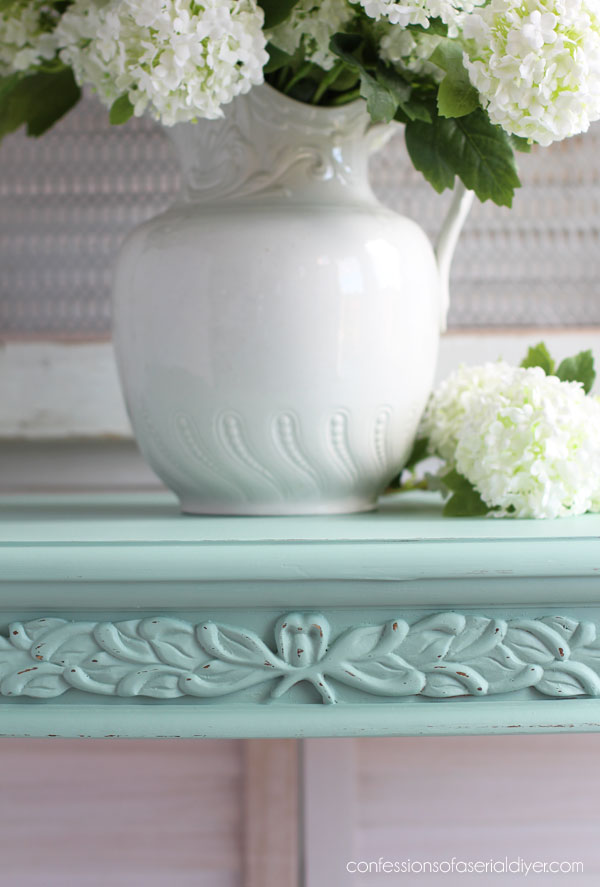
You would never know though!
And I just gave it the tiniest bit of distressing…
This would have been lovely with black wax also. To do that, you would clear wax first, then follow up with black wax.
You can see how I do that on this sofa table HERE.
If the weather cooperates this weekend for photos, I’ll be back with my new haul to share on Tuesday!
Have a fabulous weekend, dear friends!
XOXO,

Don’t Miss a Thing!
If you like what you see, there are several ways to follow along!
EMAIL * INSTAGRAM * FACEBOOK * PINTEREST

Get FREE SHIPPING on all orders over $50 in my Etsy shop. (No code needed at checkout!) Orders under $50 enjoy $8 flat rate shipping!
Most orders ship same or next business day! Visit my shop below!


Leave a Reply