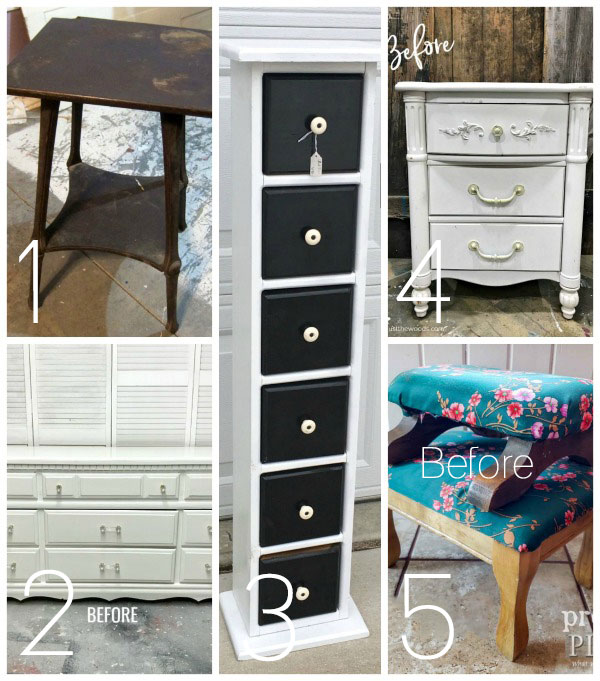
Hello beautiful friends and welcome to Furniture Fixer Upper Day! If you’re new around here, welcome! The fourth Thursday of every month I get together with some very talented ladies to bring you furniture flips, so be sure to look for five more awesome makeovers from my friends at the bottom!
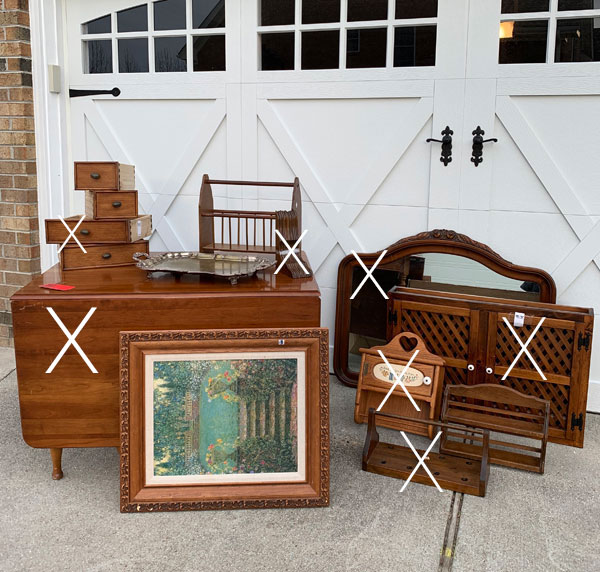
I knew this day was coming, and I also knew that I had very little to work with in terms of furniture in my stash, so I set out a few weeks ago to look for something I could redo for this occasion. That was the day I found all these goodies:
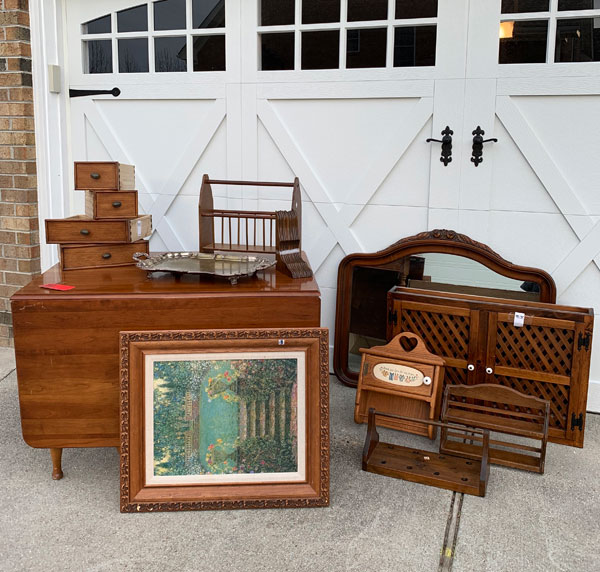
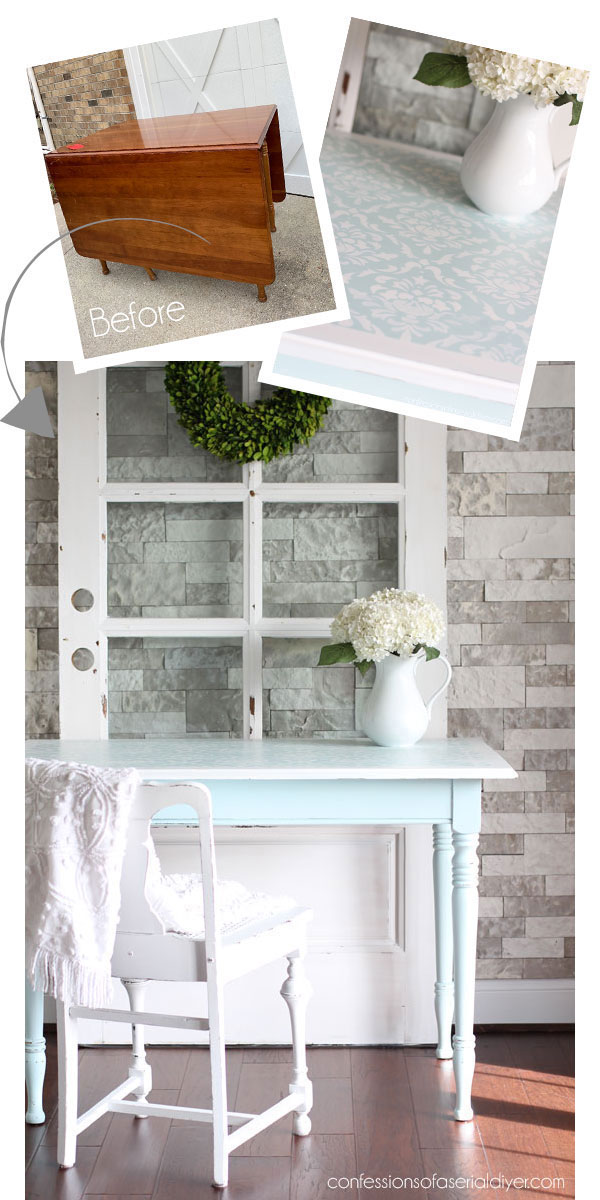
The only piece of furniture I came across out of the five thrift stores I visited that day that was worth anything was this gate leg drop leaf table:

Can you see it has a wonky leg hanging down there? I spied this at the thrift store closest to my house the week before priced at $55. I wasn’t interested in redoing a huge drop leaf table so I passed on it. Then when I returned a week later, it was still there and had been marked 50% off. Now y’all know I love few things better than finding a clearance deal at the thrift store! Of course it was probably because of its bum leg. That’s more my price though! I figured I could repair it and so for $28, I brought it home.
When I got it unloaded and looked further, the leg was cracked worse than I thought, so I decided instead to remove the legs and side pieces altogether:
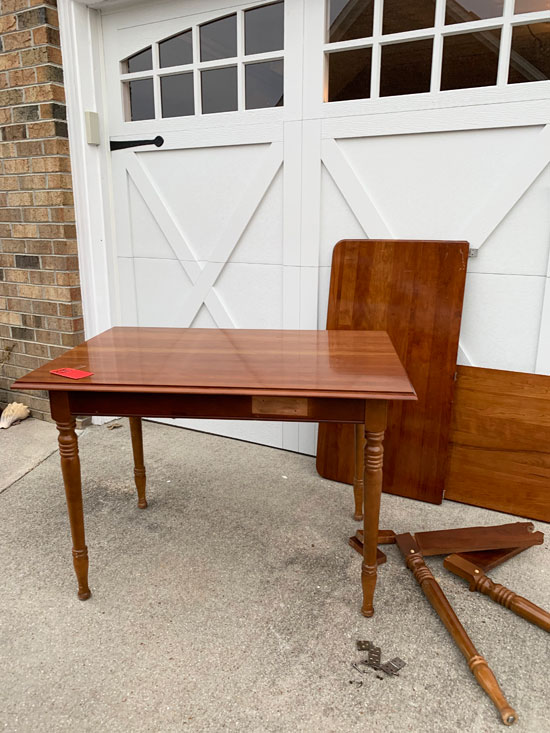
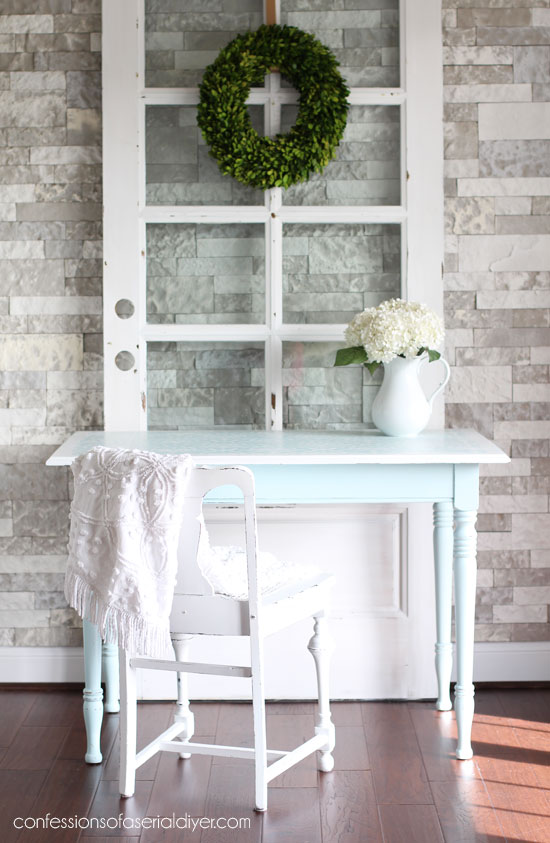
Now I was left with a perfectly good and better-functioning table!
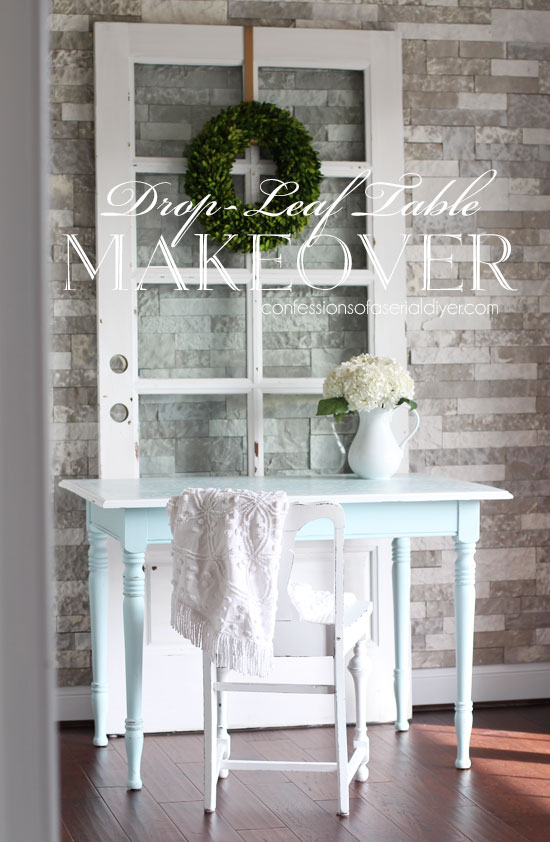
Although the table was much more stately with the leaves intact, there are many more uses for a petite table like this.
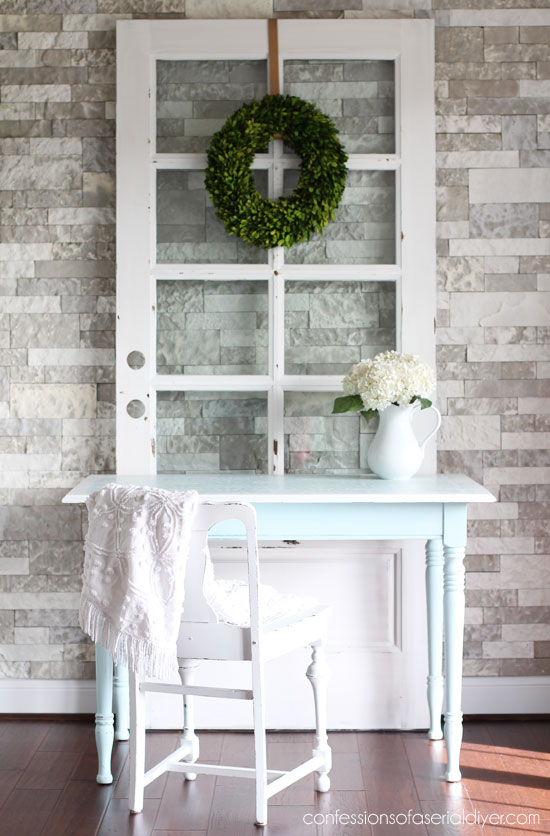
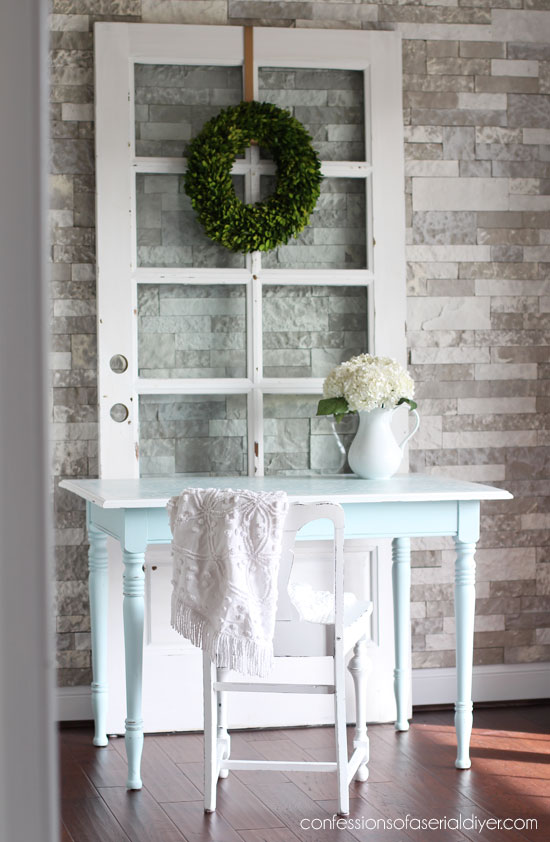
How about as a cute desk:
Luckily this had the same edging all the way around so you can’t even tell it had two leaves attached to it at one time. I’ve included a few affiliate links so you can find the products I love.

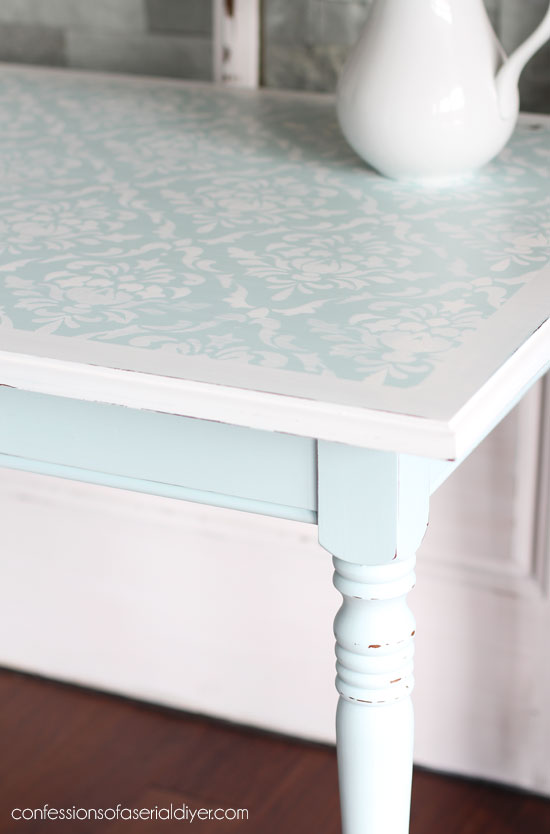
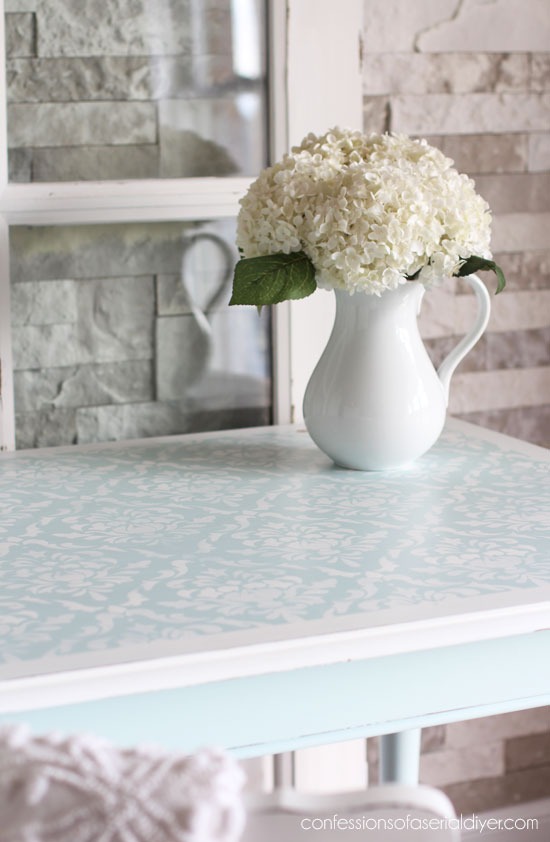
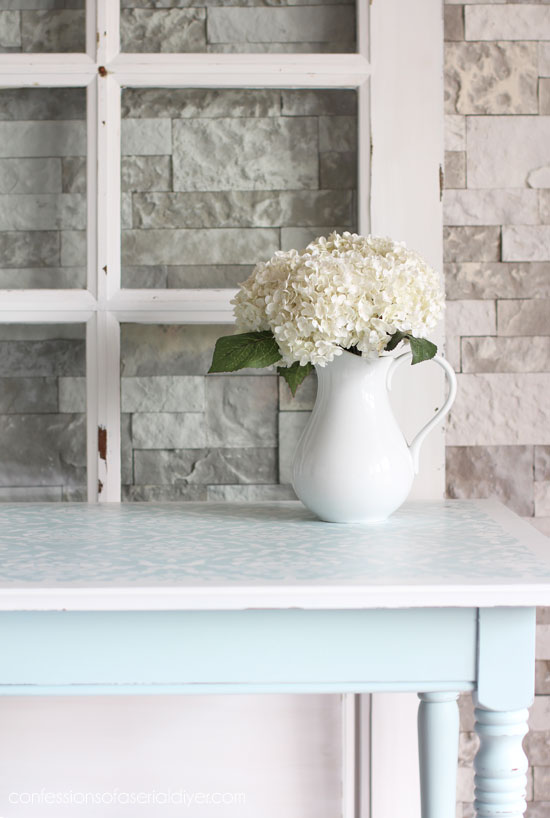
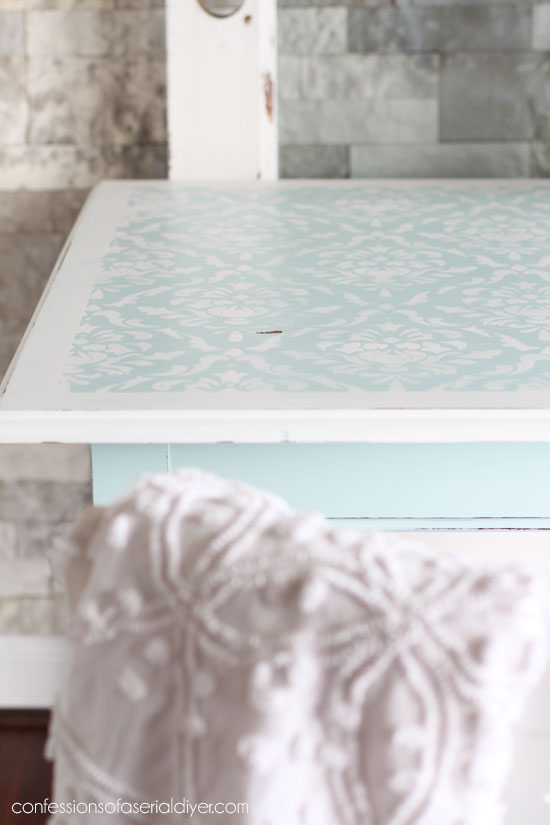
For this table I decided to have a little fun on the top using a stencil:
Isn’t she perty??
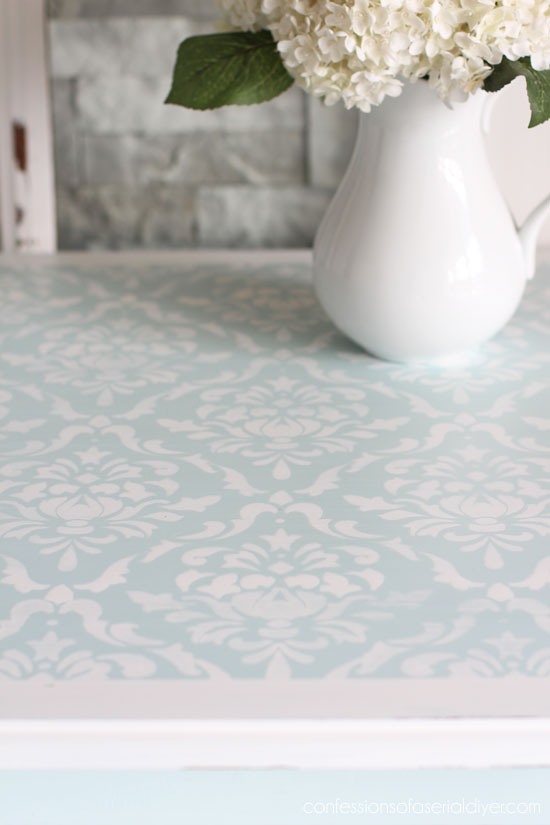
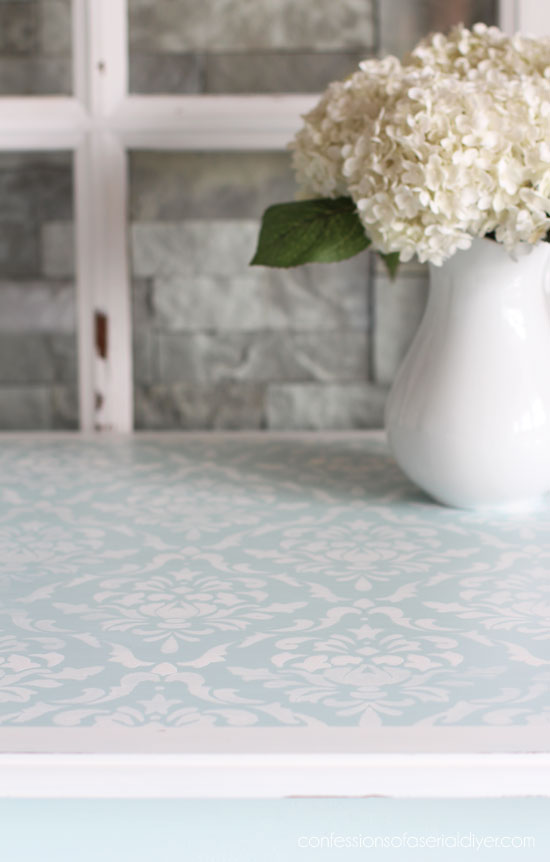
The nice people from Stencil Revolution offered to send me some of their stencils to try out, and one that I chose was this beautiful damask floral stencil. I was thinking it might be a possibility for our master bath walls. We have yet to do anything in there and this sparked a few ideas.
I decided to give it a try on this table first. By the way, I am under no obligation to share my thoughts on their products, but this is a very nice quality stencil.
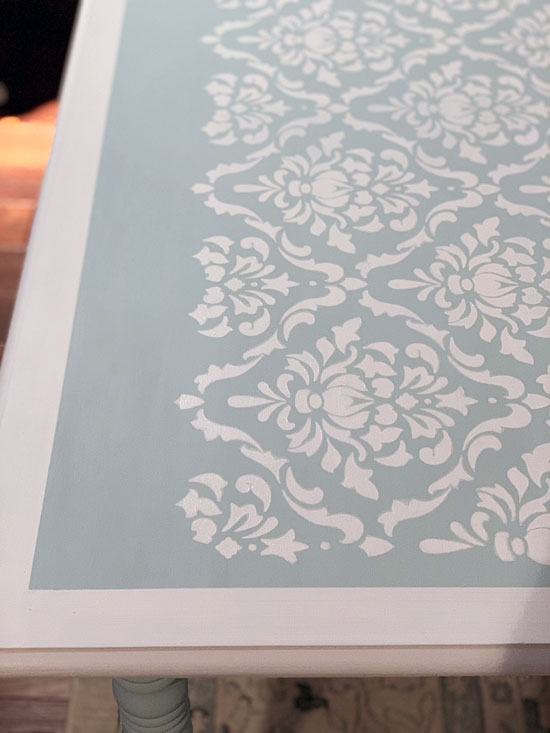
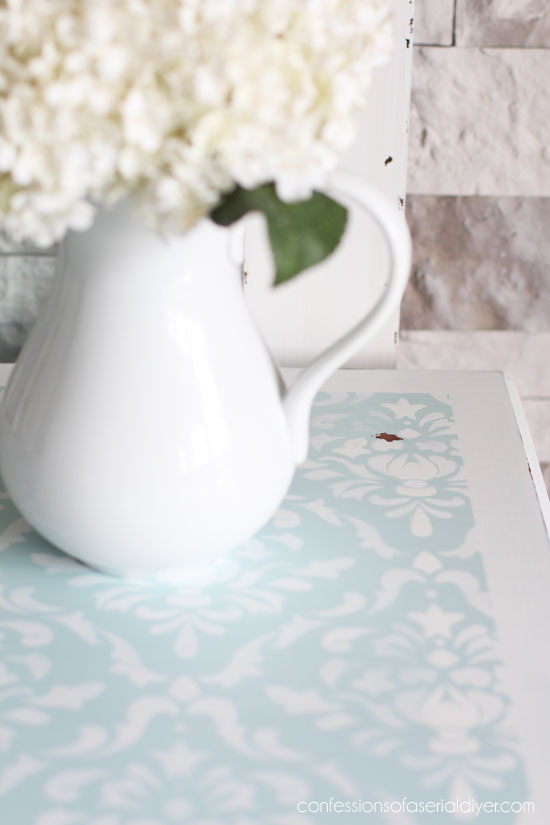
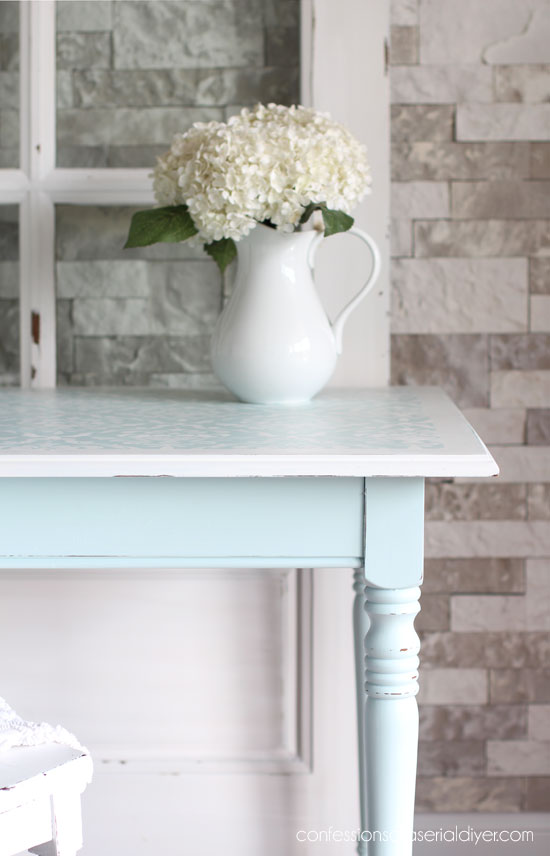
I love the white and blue combination in this print:
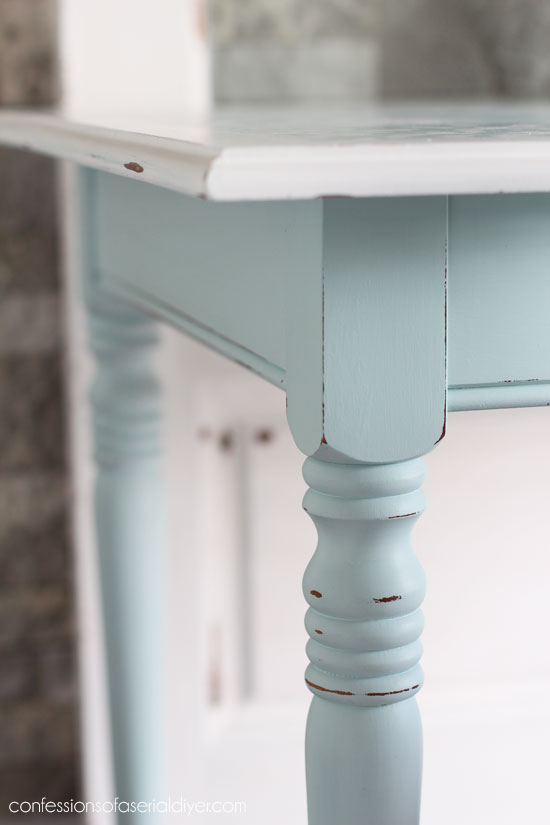
For the base I used my beloved Sunken Pool by Behr made into DIY chalk paint. (Recipe HERE.) I had a few holes to fill from where I removed the extra legs first, and then I gave it two coats of Sunken Pool.
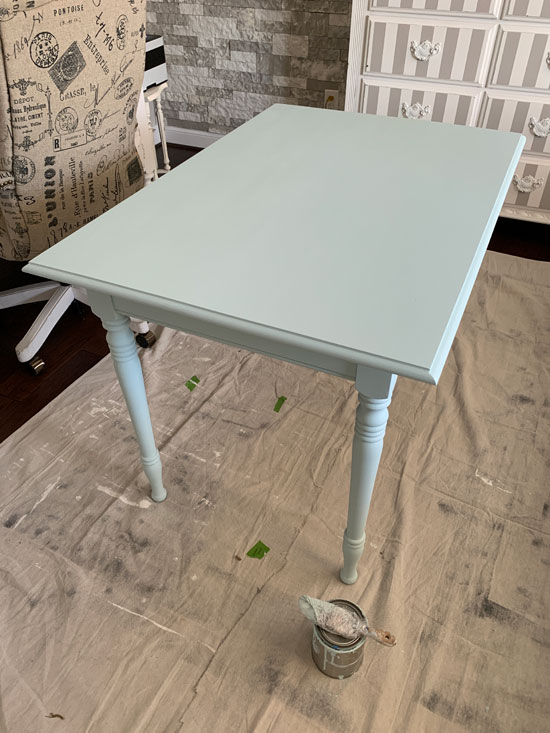
I usually paint in the garage, but with an outside temp of 20º, I decided to move things into my office.
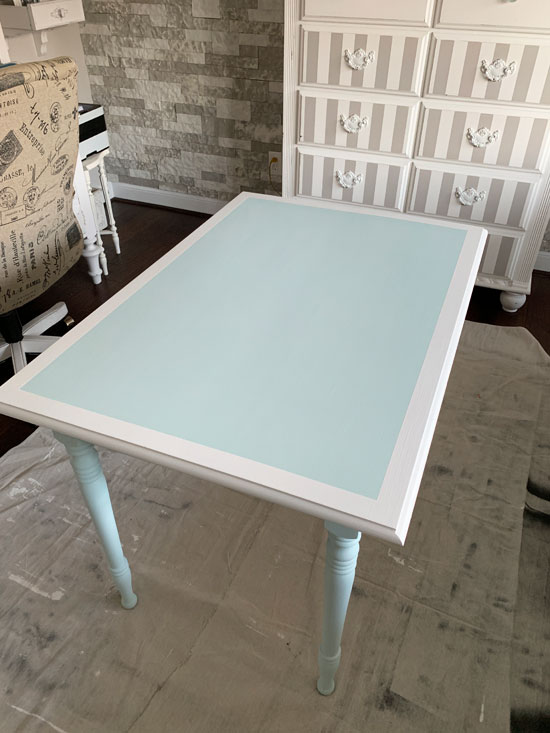
I wanted there to be some separation between the legs and the stencil so I decided to add a white border all the way around the top with the help of my favorite FrogTape:
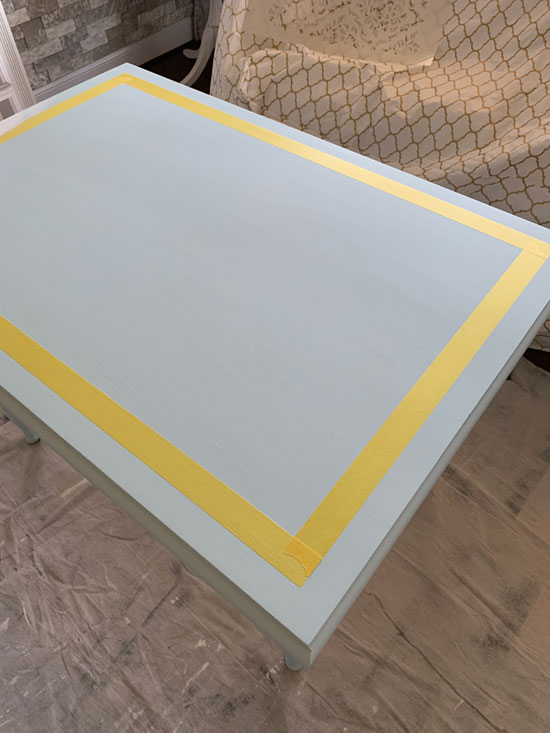
I painted the edges in two coats of Bit of Sugar DIY Chalk paint, also by Behr, then removed the tape while the paint was still wet:
I was so determined to finish this the other night that I stayed up late and worked on the stencil in our living room while I was watching TV. I centered one of the damask patterns and taped the stencil in place with FrogTape.
Then I used a roller made for stenciling to fill in the stencil using my Bit of Sugar chalk paint:
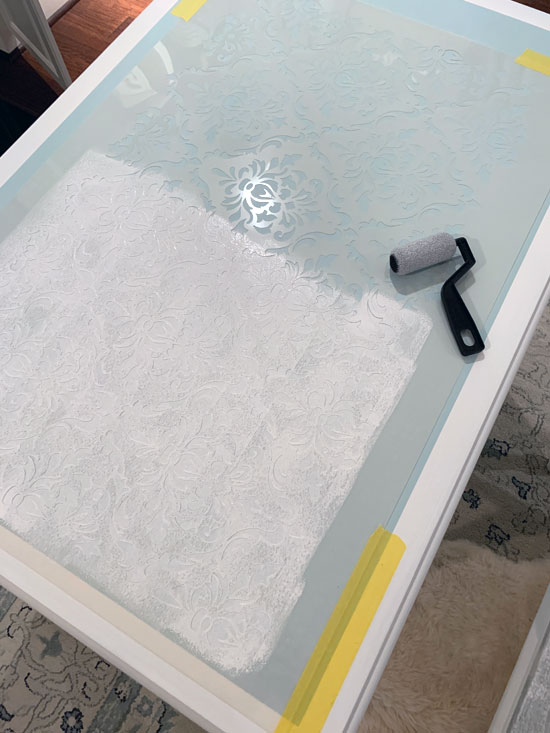
See how big the stencil is? Perfect for creating a fun wallpaper finish in any room.
Here’s what else I used to complete this project… a paper plate with a little paint poured onto it and another plate with a few paper towels on it for blotting the roller:
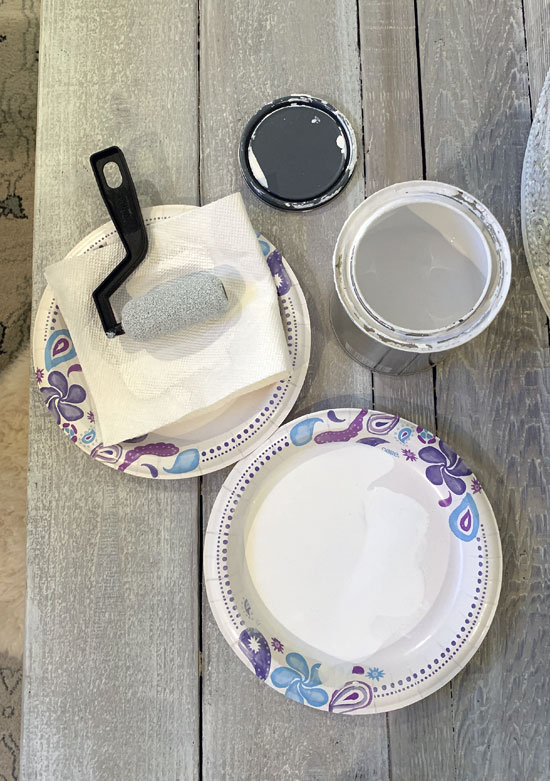
This worked great. I just rolled the roller in the paint and kept rolling on the paper towels until it was just barely damp with paint. Now normally I would use a spray adhesive to hold the stencil in place and then fill them in with a small brush, but this stencil was just too large since it is really meant to be used on a wall. This method worked great too.
I had to wait for the paint to dry before I could match up the stencil and keep going. That was the hardest part. Nothing like watching paint dry!
I had some raised edges as expected, so I took my rotary sander to the top of the table to smooth everything out using 220 grit sandpaper discs:
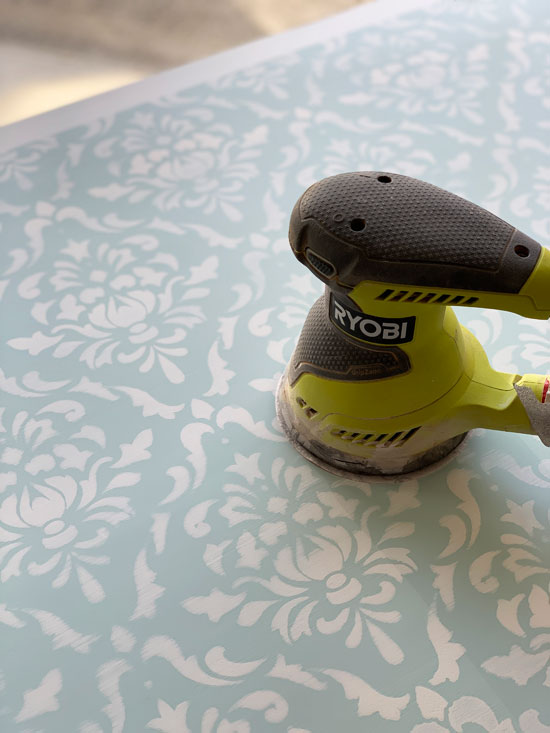
The sander made it look a bit worn in places and I like that look.
I sanded the legs by hand and used Annie Sloan’s clear soft wax to seal them.

Then I used Dixie Belle’s Clear Satin topcoat to seal the table top, using my favorite brush for applying sealers:
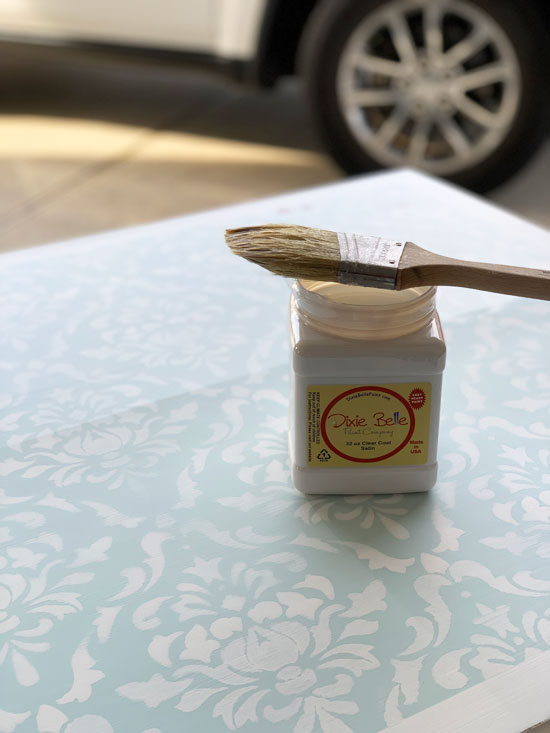
I have had that same brush for easily five years. I wrap it in Saran Wrap in between coats, and then I wash it with warm water and a little dish soap when I’m done with it. That keeps it working like new.
The paint was building up on my sanding disc on my sander and I ended up taking up a couple of tiny patches of paint…
But I decided they looked chippy and intentional and they added a little character, so I left them be.
Now I have some extra pieces to play with too!
There were several of you that mentioned to me on Tuesday that you too have a drop leaf table awaiting a makeover. Maybe this is an option for yours?
Don’t forget my Furniture Fixer Upper friends have furniture flips to share with you today too! Visit the links below the image to see how their projects turned out. I always look forward to seeing them myself!
That’s another project done from this group!
I’ll be back on Tuesday sharing what I did with the Picture!
UPDATE: See what I did with the picture now HERE! 🙂
If you missed any of these makeovers, you can see them here:
$2 Thrift Store Drawer Upcycle
Pretty Thrift Store Mirror Makeover
80’s Towel Bar Shelf Repurposed
XO,
![]()
Don’t Miss a Thing!
If you like what you see, there are several ways to follow along!
Email * Facebook * Pinterest * Twitter *Instagram


Mary Kaiser says
Wow, so cute. I actually like it better without the drop leaves. I LOVE the stencil that you used on the top. The table is so fresh looking now. Amazing.
Christy says
Thank you, Mary! It really is such a versatile little table now without those heavy leaves attached. So glad you like it! Enjoy your weekend! XOXO
Petra says
Well you’re getting through them all 🙂 Love the powder blue, gorgeous and that stencil is HUGE 😮 I need one of those 😉
Christy says
Yeah, girl! It is really nice working through these one by one! And yes that stencil is SO big!! Thanks, Petra…have a great weekend! XOXO
Larissa ~ Prodigal Pieces says
What a fantastic save, Christy. Love the colors and stenciling too. Now, I’m anxious to see what you do with the table leftovers…mwahaha!! ????
Christy says
Thanks, Larissa! You know it will be fun playing with these leftovers!! XOXO
Michelle says
Haha, Larissa, I was thinking the same thing! What to do with the drop leaves and legs??
Christy says
Ha ha already working on that, ladies! 😀
Mariele Storm says
I won’t lie… I loved that shiny, lacquer-look finish it had before! (My inner crow loves all things shiny, and my inner man loves all things wood LOL). But it is a very cute and feminine little desk now. 🙂 That’s one big stencil!
Christy says
Thanks, Mariele! It really was a beauty and in the right home I could see it for sure as it was. Yes that stencil is huge ha ha! XOXO
Christina in SW FL says
Way to think outside the table! lol Love this! You KNOW I would have freaked with the wood showing through at the end. I like the extra bit of character though. 🙂
I love how your pieces have so much style after you complete them. I see so many “makeovers” which, when done, they look like they need a makeover… again!
Love the white and blue. If you put this in your booth, it won’t last long! 🙂
Have a great rest of the week and weekend.
Christy says
Thank you, Christina! I did freak a bit when that patch came off, but then I did it again in the corner and thought oh well…character! Ha ha. I’m so glad you like the finished table! Enjoy your weekend! XOXO
Martha Rekni says
I would have done the same thing by taking those drop leafs off. Besides they look like you could repurpose those and make some nice, big wooden signs. 🙂
Christy says
Yes they made this table so heavy! And absolutely…signs are a great idea! XO
Marcie Lovett says
I do love a drop-leaf table, but this is even better! How serendipitous that you were able to recast this one (and we get to see what you build with the leftovers ????). Smaller dining table, console table, entry table, I can see it used in a lot of places.
That is one big stencil! I vote for using it on the wall. It’s so much faster than wallpaper and when you get tired of it, easy to paint over.
Christy says
Thank you, Marcie! You’re absolutely right; this can be used in so many ways now! And you know I will have fun with the leftovers! I’m thinking this will work great on our bathroom walls…some day! Have a great weekend! XOXO
sharon austin says
OMG, I LOVE IT!!! And I knew when I saw the first pic that stenciling was going to be involved-LOL. I would so buy that for my cabin if we weren’t states apart. Those pieces you removed would make great wall signs; not that you need any suggestions. 🙂
Christy says
Thank you so much, Sharon! I will definitely have fun finding ideas for the leftovers…signs are a great idea! XOXO
Susan says
Great idea for a big drop leaf! I just love the way you put a different little twist on everything you do; in this case, the stencil with the white border. I get so much inspiration from your posts! I have mimicked a lot of your pieces!
Christy says
Thank you, Susan! I appreciate your thoughtful words so much, and I am thrilled that you have found inspiration here!! XOXO
Kim???? says
Awesome, Awesome, Awesome redo!!! You are amazing! ????????????
And yes I am one of those people that have a drop leaf out in the garage! Can’t wait to rip it apart!
The sides are so long and heavy, which I didn’t care for, and the odd extra leg! Can’t wait to see what you can do with the left overs! Lol ????
Good job, A+ Christy ????
Christy says
Aww thank you so much, Kim!! Yes I agree those sides made it look so heavy…it is so much more versatile without them! Can’t wait to play with the leftovers! XOXO
Kristy Yorek says
You now have so much advertising that pops up while browsing that I can’t get through without taking too much time. I will be unsubscribing.
Christy says
I am so sorry to see you go, Kristy, but I understand! XO
Denise says
I was waiting for this drop leaf table makeover and is fabulous! I love the colors and what a perfect stencil design! Beautiful Christy! Pinned! XO
Christy says
Thank you so much, Denise! Now to figure out what to do with the extra pieces! XOXO
Kaycee says
Christy, What a great solution to the wonky table leg! I love the new look and size of this gorgeous beauty now! The wall stencil was ideal for a table top, great idea!
Christy says
Thanks, Kaycee! That stencil did make light work of the top for sure! XOXO
Jody says
Love what you did to the table. I think a beautiful desk in my bedroom. Thank you and blue is my color.
Christy says
Thank you so much, Jody! XO
Karen says
So cute. Love the colors. I have an unrelated questions, I stained some pallet wood 3 weeks ago and it still has a very strong odor. I’ve put it outside in the wind and sun for over a week and it’s still strong. Tried spaying a sealer on it too. Any suggestions?? Thanks.
Christy says
Thanks, Karen! Yes stain odors can last a while, moreso if you used an oil-based stain. They should eventually go away though…it can take several weeks to months for the off-gassing to stop. You can search more about it, but eventually the odors should go away.
Marie Blackburn says
Smart idea to remove the drop leaf. It’s a perfect writing desk now and i love the color and stencil detail. Nice save and very pretty makeover, Christy 🙂
Christy says
Thanks, Marie! It sure was easier than trying to fix the bum leg and now it is much more versatile. Have a great weekend! XOXO
Charleen says
This turned out so beauThe original state looked to be in good shape ,finish wise, .I really love the blue and white treatment. Who doesn’t like a blue and white table? It is a charmer. Fabulous job!!
Christy says
Thank you, Charleen! XO
Margie says
Love the pattern . Can’t wait to see what you do with the leafs ????. The desk won’t last long,bet it sells fast.
Christy says
Thank you, Margie! Playing with the leftovers should be fun! XO
kandice kullmann says
this came out so pretty! I love that you didnt cover the entire top with the stencil, but left a trim around the edge. It gives it such a nice look. LOVE IT
Christy says
Thanks, Kandice! I wanted a bit of separation from the legs so I’m glad that white border accomplished that! Enjoy your weekend!! XOXO
Lizzy Leff says
I absolutely love it! The colors, the stencil, the distressing — SO good!
Christy says
Thanks, Lizzy!! XOXO
Cecilia from Georgia says
Christy, this is so lovely! I love anything close to aqua and that Sunken Pool is my favorite too! The stenciling looks so easy when you do it…. but I always smear some paint when removing the stencil 🙁 I can’t wait to see your bathroom wall when you tackle that project! You have knocked out most of your treasures in the picture—you got it going on!! XOXO
Christy says
Thank you, Cecilia! I am smitten with all things aqua as well, as you know! I found the lighter the paint load on my roller, the less chance there was of smearing the paint. And yes I am almost through this pile of goodies…only a few to go! XOXO
Wendy says
Love the makeover!!! Love your posts! Thank you for the inspiration:)
Christy says
Thank you so much, Wendy!! XOXO
Debra A Wise says
Oh my gosh, Christy! Love love love it! You have definitely given me inspiration for my drop leaf table.
Christy says
Yay! So glad you like it, Debra!! XOXO
kathy says
What a pretty table. I love the bit of distressing. You made a great haul on thrift shopping day!
Christy says
Thank you, Kathy!! I sure did lol! XOXO
Julie Briones says
I was thinking, “Woo hoo, lumber and spindles for other projects!” Looks lovely, Christy, and that stencil is great!
Christy says
Ha ha you know me so well! I was excited about the leftovers too! Thanks, Julie! XOXO
gwen says
i love this table – the colors and the stenciling! it reminds me an enamel farm table! it’s simply gorgeous!
Christy says
I’m so glad you like it, Gwen, thank you!! XOXO
Rose Lefebvre says
I adore this piece! It looks so nice and the perfect colors! I never thought of taking the drop sides off and I once had one just like it!
Christy says
Aww yay…thank you, Rose! I’m not sure I would have thought to remove the sides had it not been for the broken leg! XOXO
Joni says
I knew I would have trouble waking up today so I saved this email to give me incentive. It was hard to wait! Beautiful as always. But I think my favorite part was the tip about the brush lol. I love the nitty gritty tips. Have a great weekend!
Christy says
Aww you are so sweet! Glad I could help motivate you ha ha! Yes love that brush and it has lasted forever! XOXO
Jen @ Girl in the Garage says
This turned out so pretty, Christy! And more “vintage modern” without the leaves. Can’t wait to see what you do with them!
Christy says
Thanks, Jen! XOXO
MLG says
I can’t read the label on the drop leaf table, but I believe it is the design of a Stickley ROSEWOOD drop leaf table. If that is the case there is great value in the rosewood for re purposing and in the table itself because it is a Stickley. What you did was pretty, but I hate to see rare and valuable wood covered up and quality antiques destroyed.
Christy says
There was no label on this table. One of the gate legs was busted where it attached to the table, and that is my guess why it was marked 50% off at the thrift store. Removing the leaves was really my only option, and then the table as it was wasn’t much to look at in the original finish.
Charlene Maximenko says
Christy, I’ve been a fan for quite a while and just adore your projects. I purchased the floral stencil that you used on this drop leaf table for a desk I’m changing into a vanity. I plan to use similar colors, too! Thanks for all your advice!!! You’re awesome!
Charlene
Christy says
Thank you so much, Charlene! I loved this stencil! Have fun creating your new vanity! XO