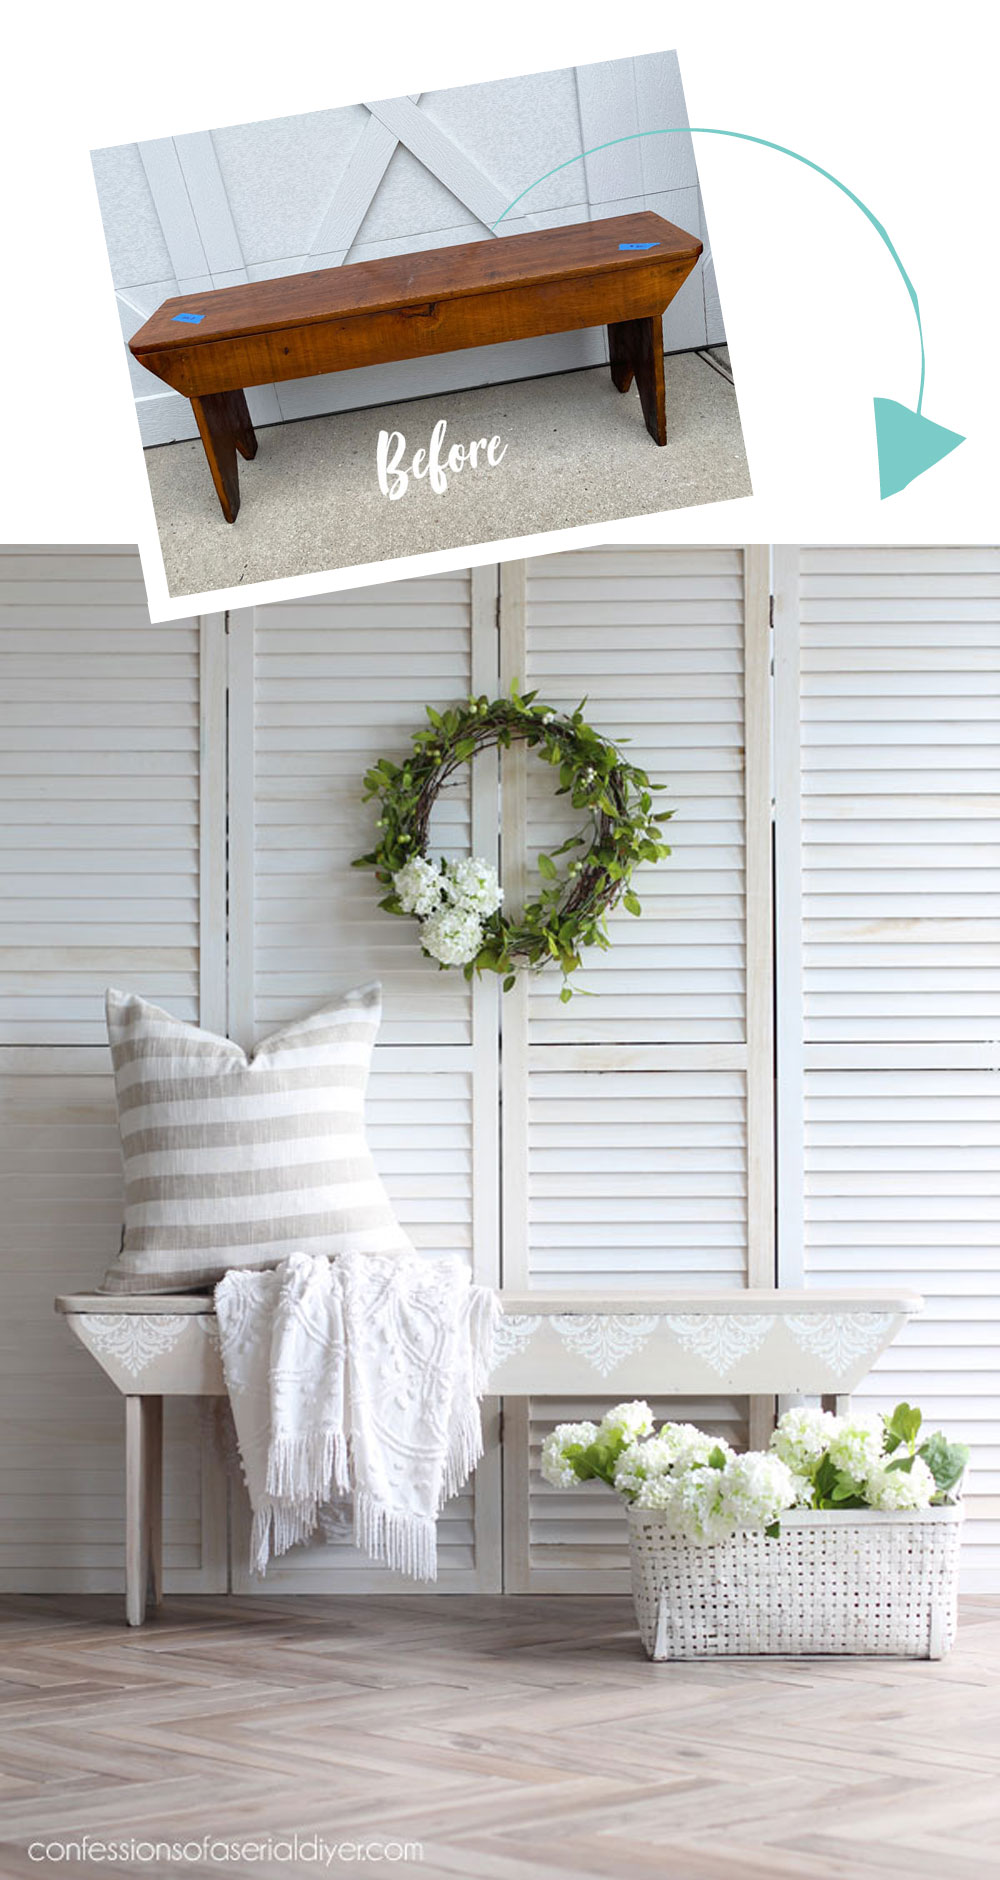
Hello beautiful friends, and welcome back! I always appreciate when you stop by! I’ve got a pretty little makeover to share today, a Voodoo stain and stencil bench makeover on this primitive bench I scored for $20 at a yard sale a few weeks ago:
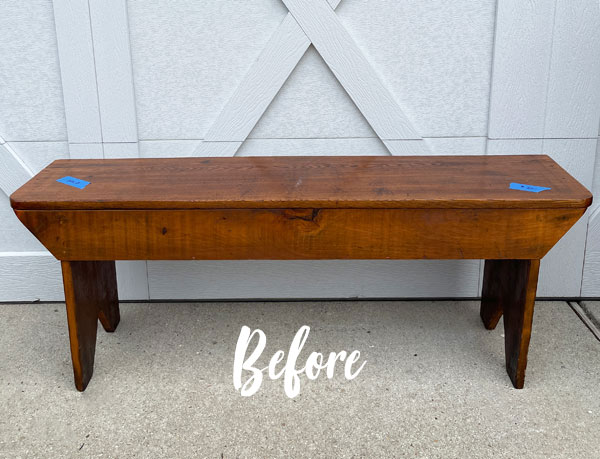
I snatched it right on up! There are so many possibilities for a simple bench like this, but it would look amazing with just a simple paint job as well.
I had a different plan in mind for this one though.
I’ve included a few affiliate links so you can find the products I love.
Sand
This makeover started with a thorough sanding all over using 1oo grit sandpaper with my rotary sander:
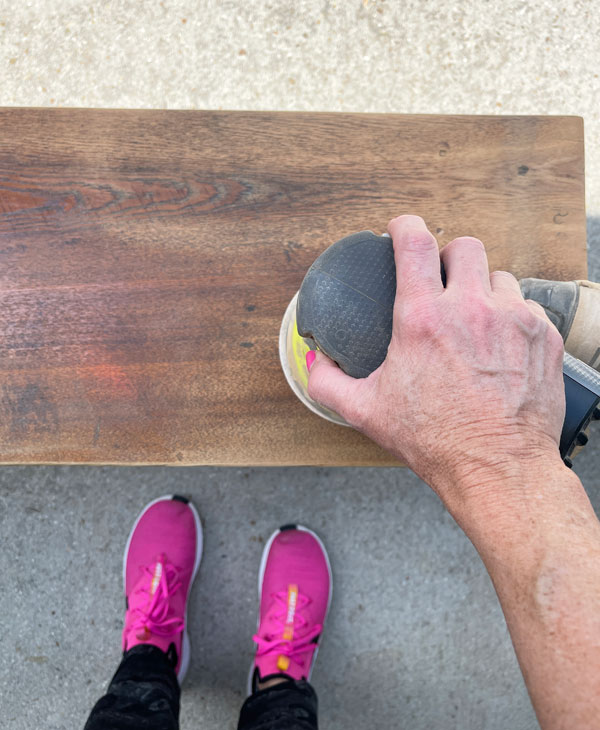
I then swapped my sandpaper for 220 grit to smooth it all out once I had most of the stain removed:

(The lower grit leaves your surface a bit rough, so the higher grit will make is super smooth. Be sure to wear a mask!)
I used my shop vac to remove all the sanding dust and a clean, soft cloth on it after that.
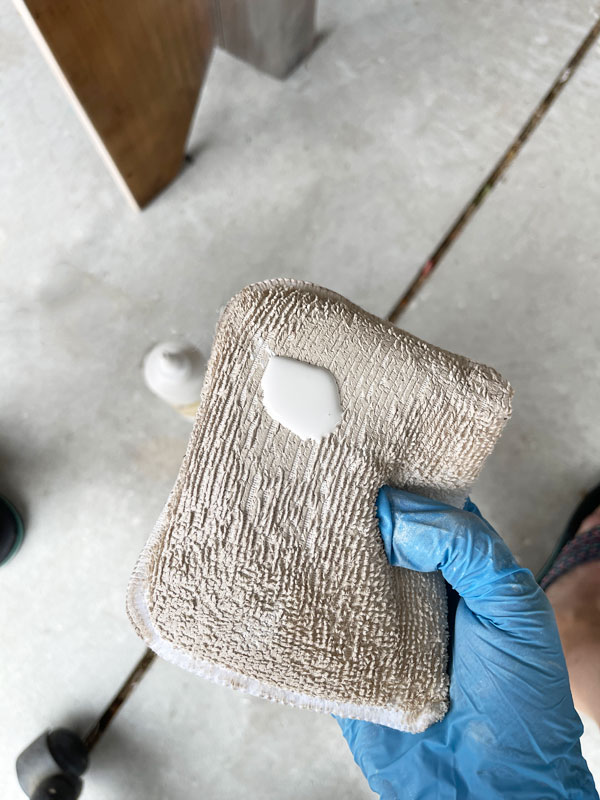
Condition the wood
If you plan to stain, it’s a good idea to condition your wood prior to staining.
I use this pre-stain wood conditioner here, but any water-based wood conditioner will do.
You just wipe it on with a cloth or as I used here, an applicator pad is perfect:
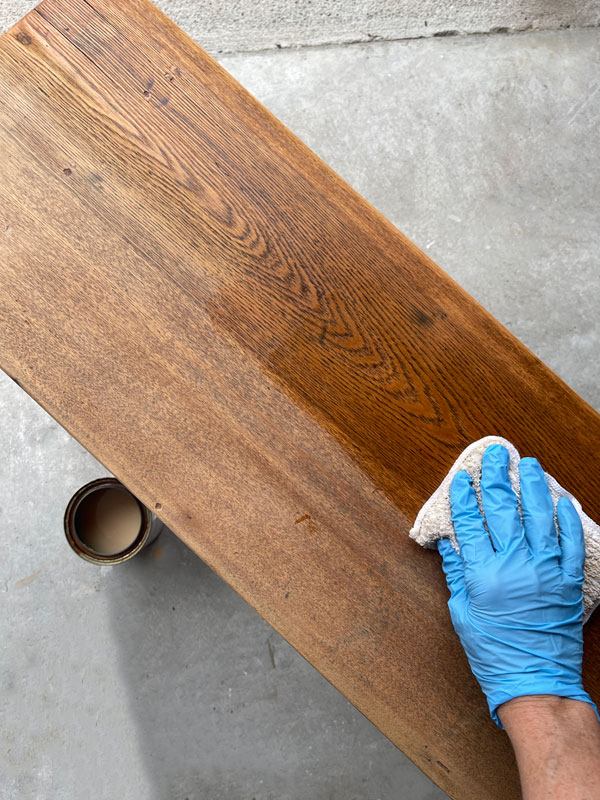
It hydrates the wood and helps it take the stain more evenly. Then, follow up with stain right after.
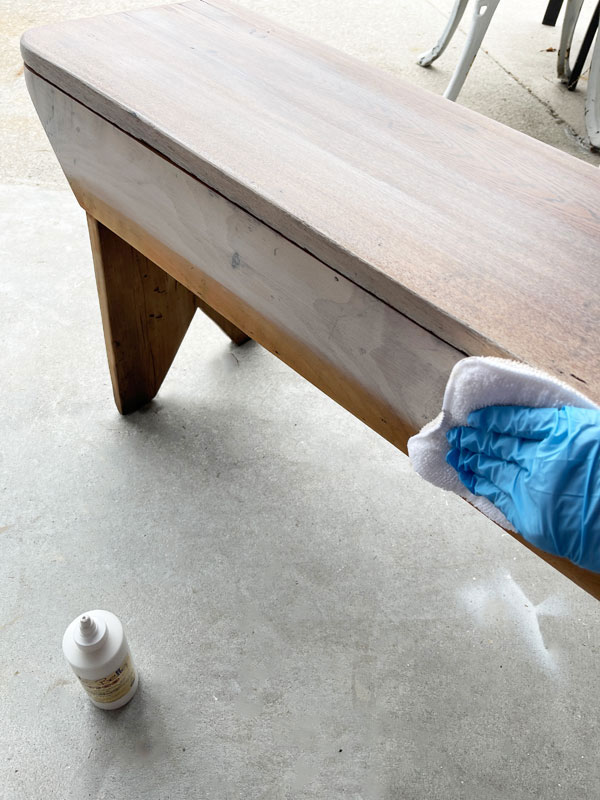
Voodoo Gel Stain
To stain, I reached for Dixie Belle’s Voodoo Gel Stain in White Magic:
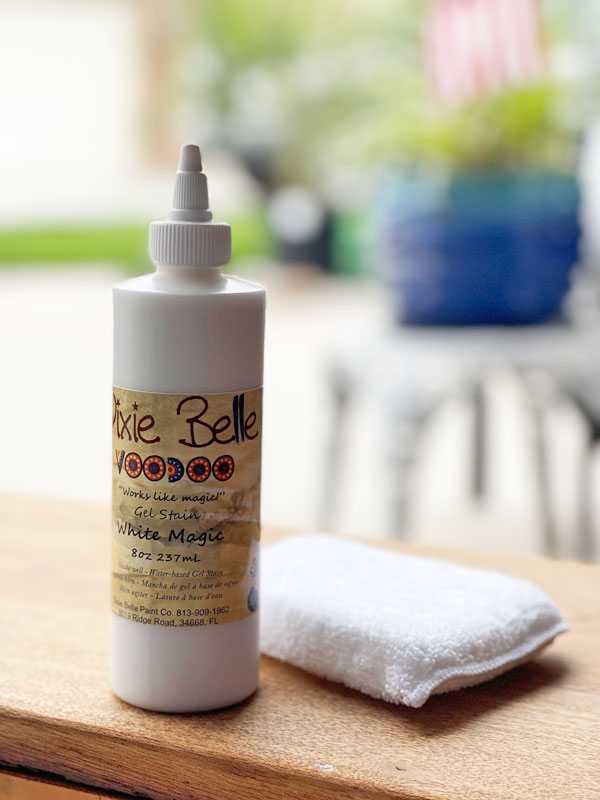
I LOVE this product so much! It is water-based so NO harsh fumes and clean up is a breeze!
If you haven’t seen what we did with my sister’s table and chairs using this stain, it is a must-see! You can find that HERE.
I applied that with an applicator pad as well, but I dampened it first and then squeezed out the excess water before squirting some of the stain onto the pad:
Then I applied it to the surface in long, even strokes:
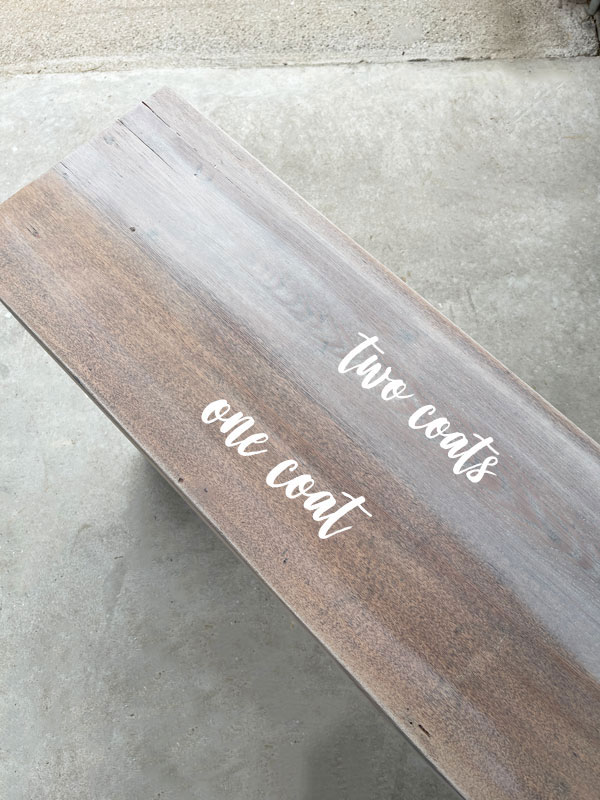
I ended up adding a second coat of stain once the first dried, after about 15 minutes.
You can see the difference here:
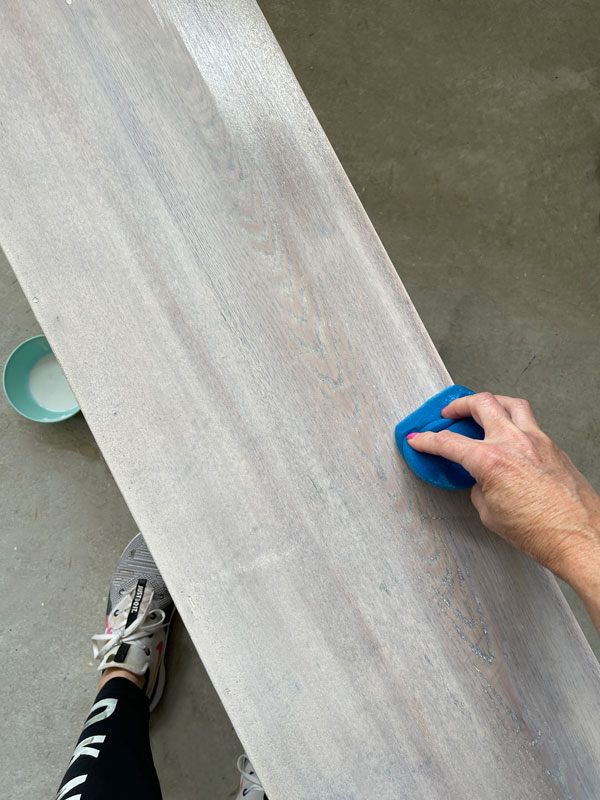
Seal
To seal the surface, I reached for my go-to sealer, Clear Coat in Satin, and applied it with my blue sponge applicator:
I thought I was done here, but nope. I just couldn’t leave well enough alone.
That front panel was begging for something!
Adding a silkscreen stencil
I dug through my stencils and pulled out this Silkscreen stencil that is part of the Belles and Whistles Roses Silkscreen stencil set:
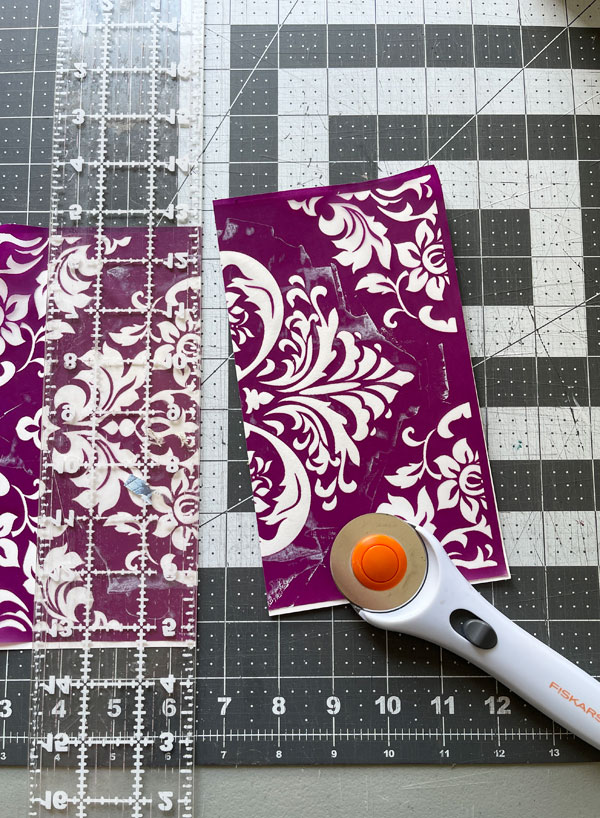
I cut it to work better for my needs for this piece.
Silkscreen stencils are adhesive and can be used up to 8-10 times. They are called silkscreen because they have a tiny mesh screen in the opening.
Silkscreen stencils are actually my favorite to use as I think they give the best results! (They are all on clearance in my shop HERE.)
How to use a silkscreen stencil
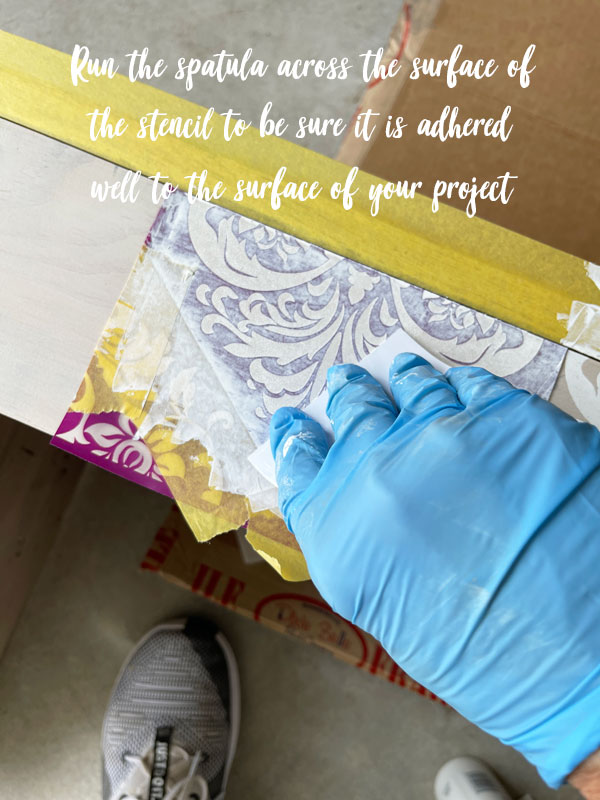
Start by lining up your stencil where you want it to go. (You can see below that I taped off the area across the top and on the stencil where I did not want to the paint to go.)
Then, run the spatula that is included in the package across the surface to be sure it is adhered well to your surface:
Next, scoop up a little paint with your spatula and rub it across the surface, pushing the paint through the screen as you go:
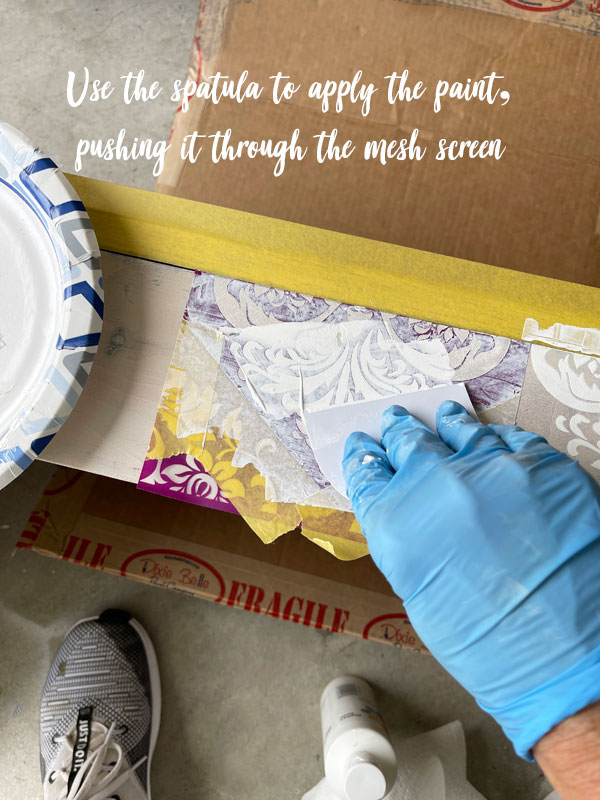
My favorite paint to use for this is acrylic craft paint as it has a longer dry time and doesn’t clog up the tiny mesh screen.
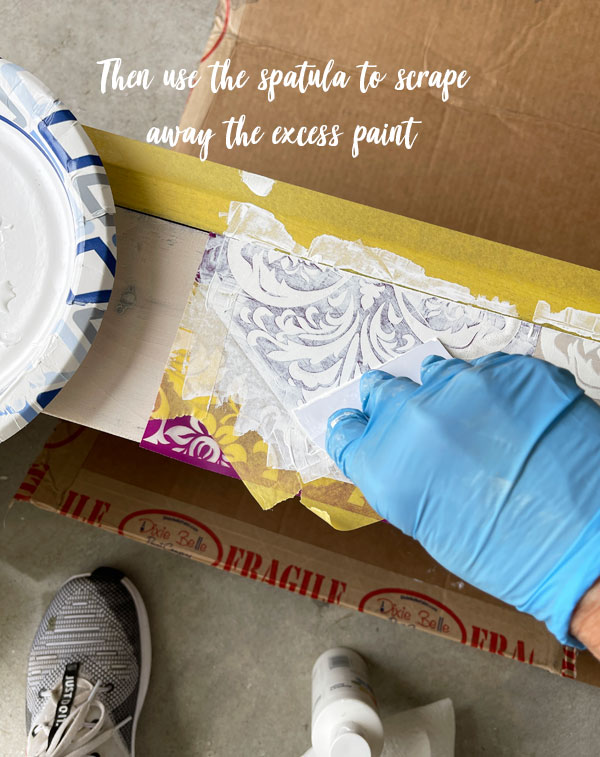
Once the stencil is covered, clean the edge of your spatula with a shop towel and then drag it across the surface to remove the excess paint.
Remove the stencil and any other tape while the paint is still wet:
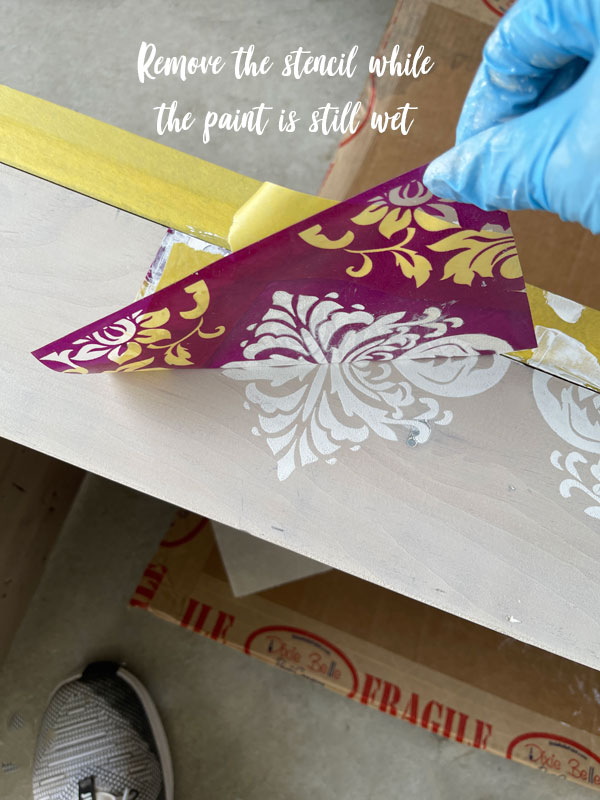
Voila! Perfect results every time!
Because you are removing the excess paint before lifting the stencil, it doesn’t get all gooped up on your stencil and you can keep using it along your surface right away like I did here.
If you are done stenciling, lay it in a shallow tub of water right away, so the paint doesn’t dry in the mesh. Clean it and then dab it with paper towel. You can adhere it back to the original backing to save for your next project.
There was no need to seal over the stencil because acrylic paint is self-sealing, so this project was complete!
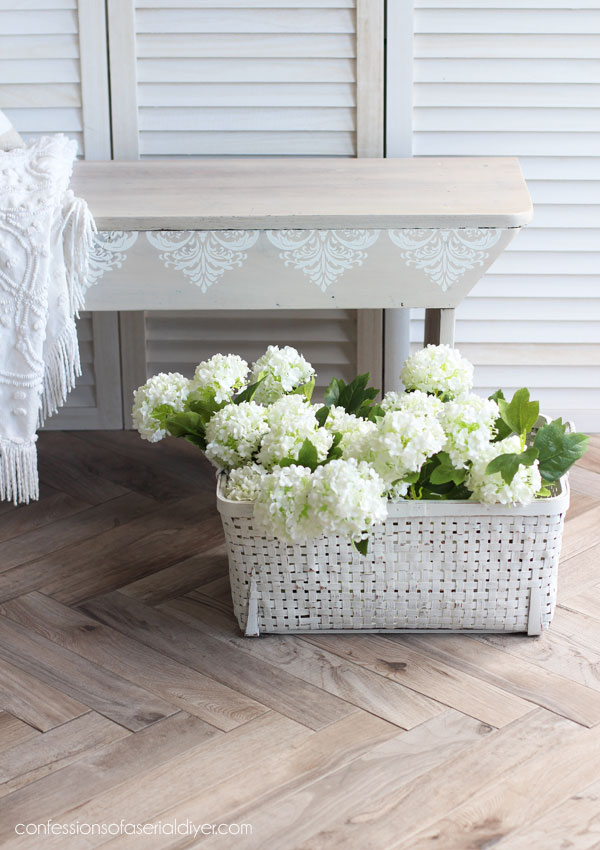
The after
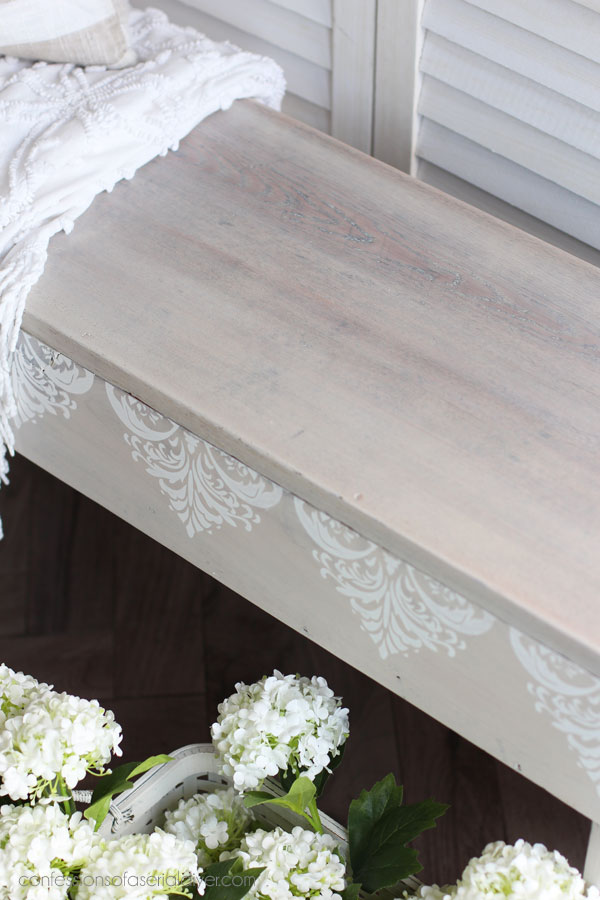
Here is how this primitive bench looks now with a little Voodoo Gel stain and stencil magic!
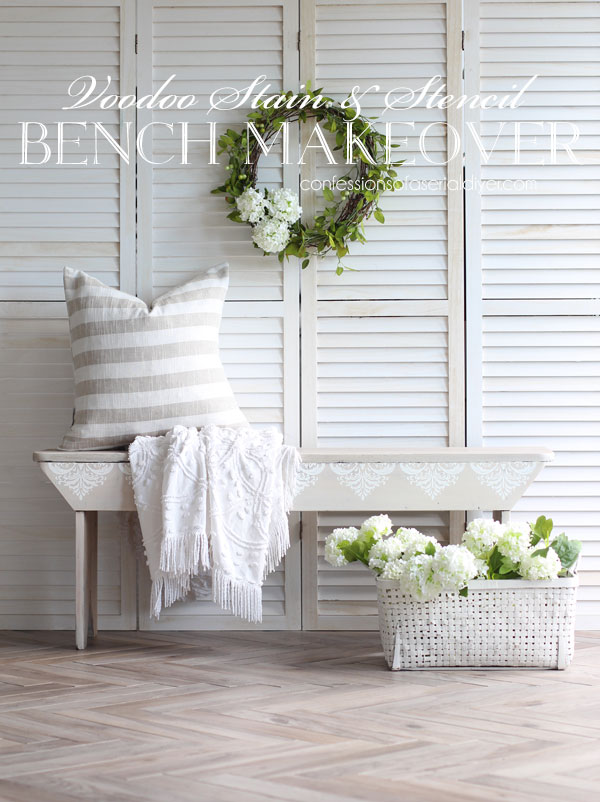
I really liked it before adding the stencil, but the stencil adds some pretty!
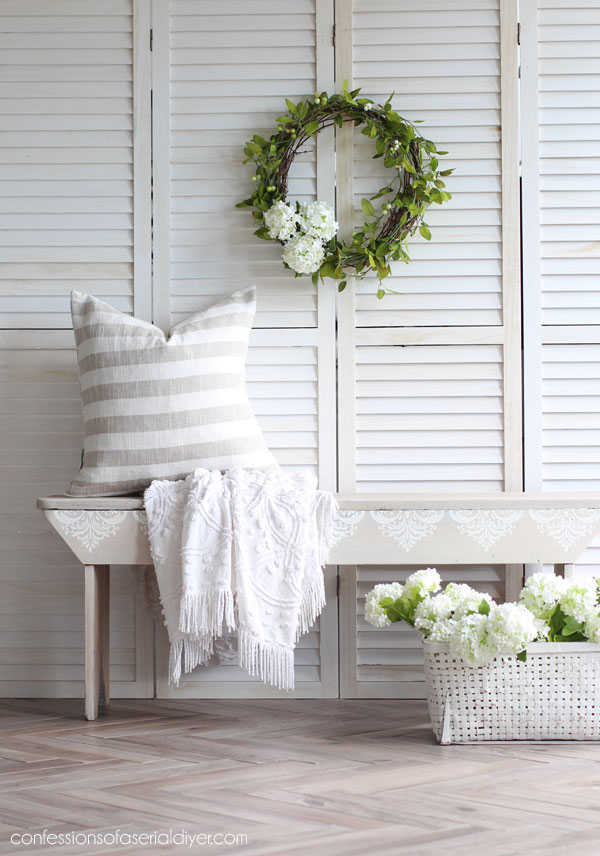
And, I was so lucky that the shape of the stencil lined up so nicely with the edges of the front of the bench!
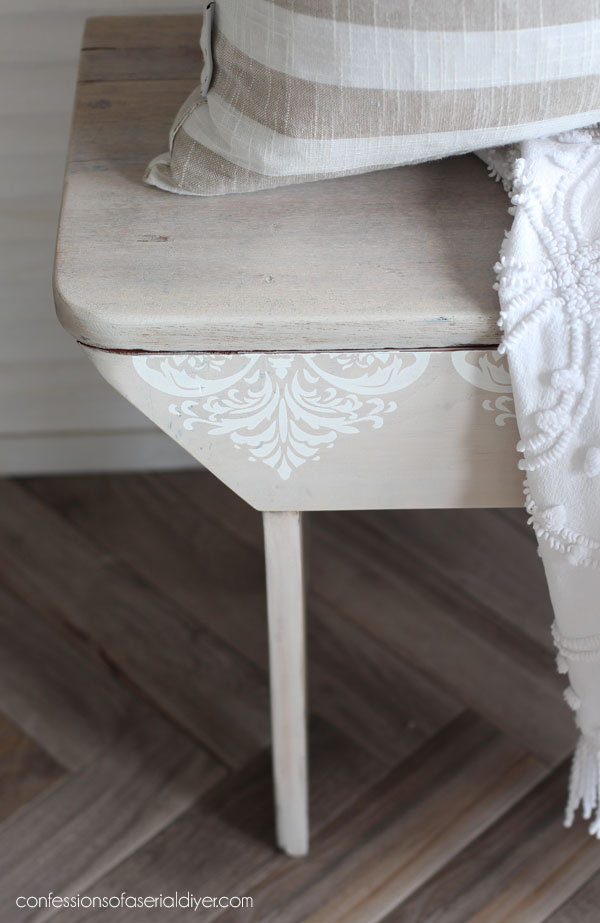

The front was yellow pine, but the top and legs were more interesting and had a cooler look with the stain…
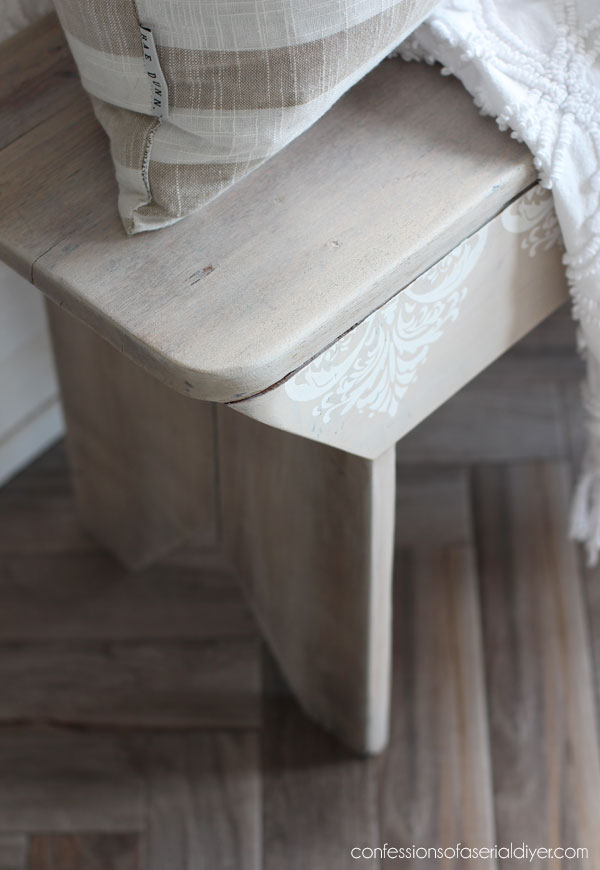
The front apron was pretty plain looking…adding the stencil really made it shine.
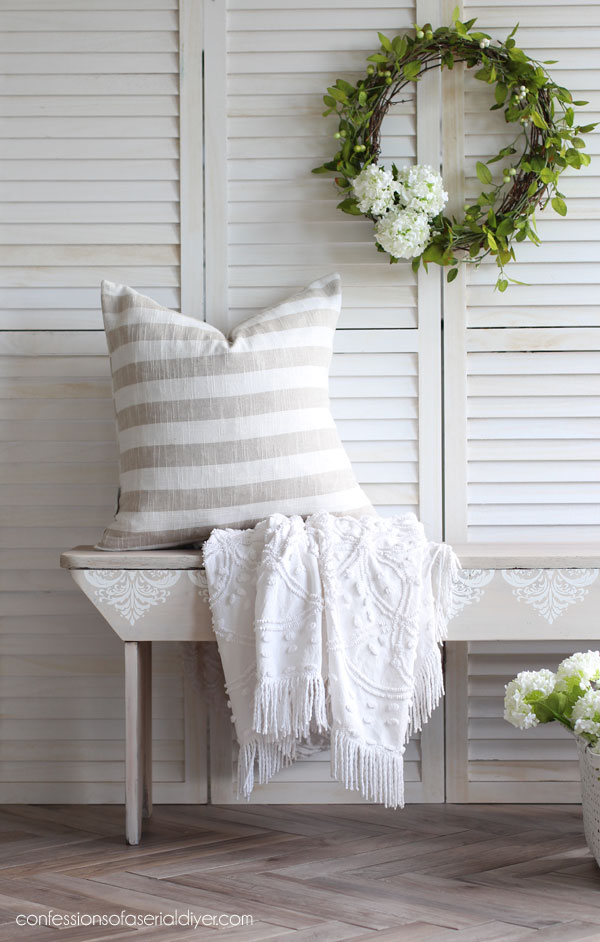
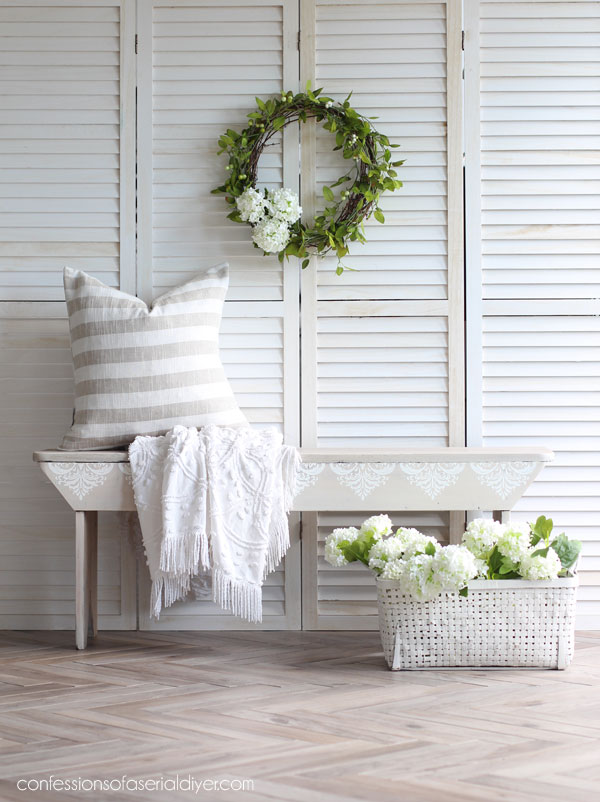
I am so tickled with how this little bench turned out. I hope you like it too!
If you liked this one, you’ll love how I used this stencil on this piece:
See the after HERE!
That’s piece number two done yay!!
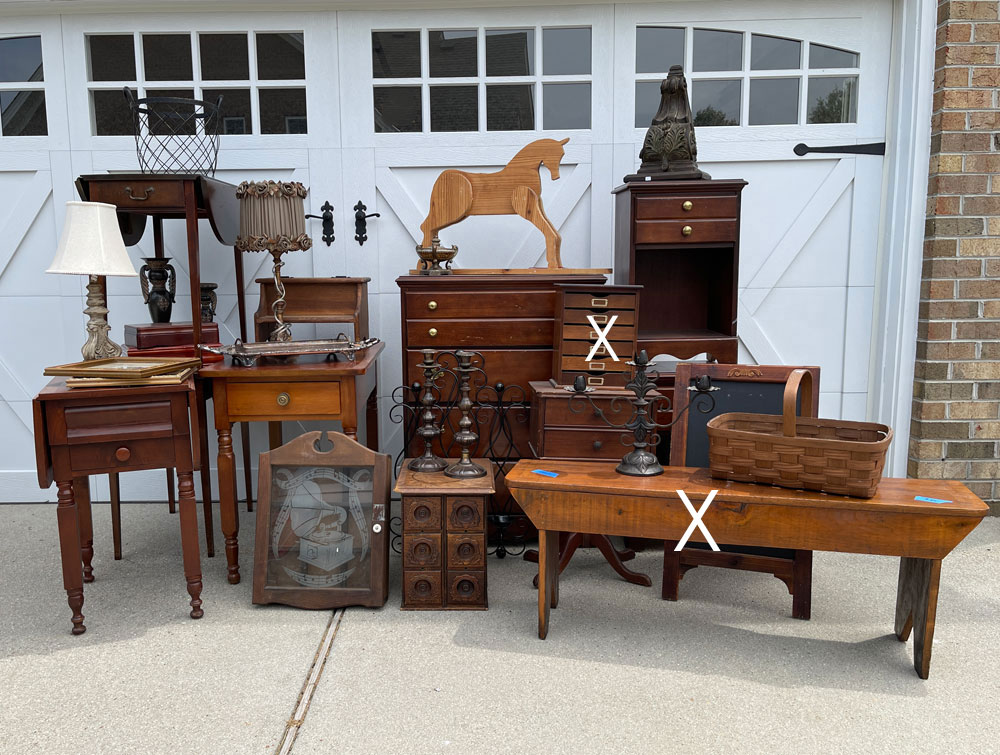
If you missed the first piece of this haul, it was a pretty one! See it HERE!!
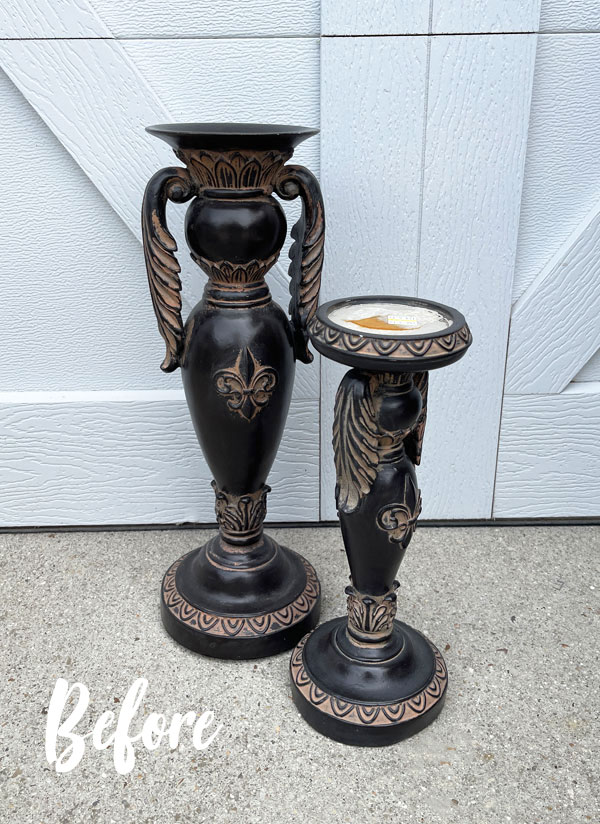
Have a fabulous week! I’ll be back playing with glaze on this set of candleholders on Thursday:
UPDATE: See how this set looks now HERE!
XOXO,

Don’t Miss a Thing!
If you like what you see, there are several ways to follow along!
EMAIL * INSTAGRAM * FACEBOOK * PINTEREST


Get FREE SHIPPING on all orders over $50. No code needed at checkout! Orders under $50 always enjoy $8 flat rate shipping! Most orders ship same or next business day!


Olivia says
I like how the bench turned out. My sister had that same bench many years ago. It was built by a boy in high school taking wood shop. She had a small living room and used it as a coffee table.
Christy says
Thanks, Olivia! I did too! I used it for the very same purpose…great for a small space! XOXO
Denise Cox says
Very pretty!! I REALLY love this bench, though, without the redo. The VOO DOO stain yields great results.
Christy says
I should have taken a better before photo that showed the polyurethane all splotchy and running in several places. That’s the reason I chose to sand in the first place…to smooth it all that out. I love the Voodoo gelt stain! XOXO
Nicole says
Oh my gosh!!! You did an amazing job! That is absolutely beautiful!!! I love to see your work!
Christy says
Aww thank you so much, Nicole! XOXO
Cheryl says
Love, love, love how that turned out!!
Christy says
Thank you so much, Cheryl! XOXO
Janette Deans says
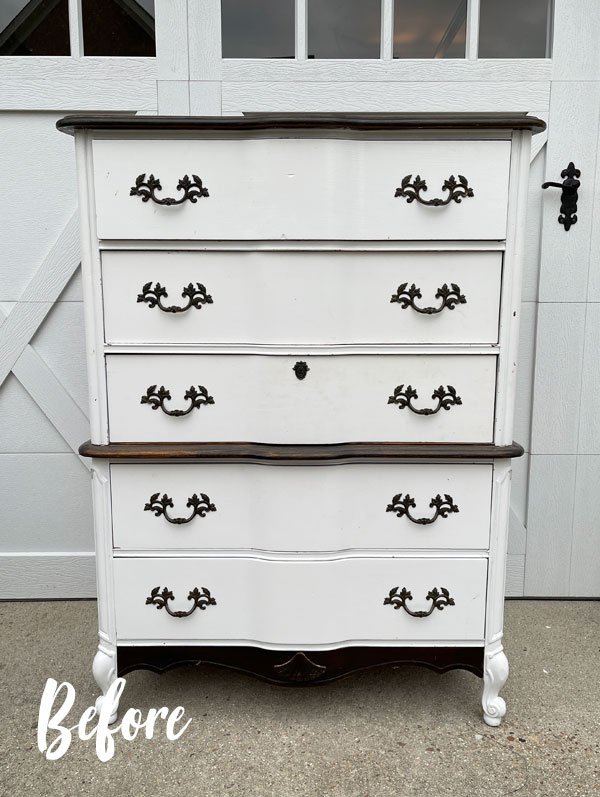
As always you have made this piece look stunning, I did pop over to see that chest you made over and although I had seen it before I was still in love with it, beautiful work.x
Christy says
Thank you so much, Janette! That dresser was a favorite of mine. My niece ended up buying it…she lives in TN and rented a trailer to come pick it up! I was happy it stayed in the family! XOXO
Caroline Acuna says
Omgoodness you are so creative! I love all your projects thanks, Caroline
Christy says
I appreciate that so much, Caroline, thank you! XOXO
Nana Diana says
It turned out great. That particular ‘style’ always takes me back to the 70s/80s when everyone had ‘country blue’ and mauve. I had two of those benches on each side of a scrubbed pine table. I like how you’ve updated its look. Diana
Christy says
Thank you, Diana! Ha ha yes! I had the country blue and then, an Americana theme lol! I had a similar bench I used as a coffee table in our small apartment. XOXO
Peggy says
So fresh and clean! Very pleased with the welcome change. Would make a lovely entry bench, if one doesn’t have an entry table, where one could sit and put on and take off shoes, etc. Christy, you amaze me every time.
Christy says
Aww thank you so much, Peggy! This would be absolutely perfect in an entry way! XOXO
Cheryl r Atkinson says
Hi Christy! The bench looks so good. I love the white magic voodoo gel stain. The stencil just took it up a notch. Great makeover!
Christy says
Thanks so much, Cheryl! I hadn’t used the white stain in a while, mostly because I’m lazy when it comes to sanding lol, but I do love it too! XOXO
Margie says
Beautiful! I need to find a bench lol.
Christy says
Thank you, Margie! Good luck! XOXO
Jane says
Your bench is so beautiful now! I have one that needs a redo and you’ve inspired me to get it done!
Christy says
Oh perfect! Thanks so much, Jane! have fun with yours! XOXO
Cyndi says
That is so pretty! Silk-screen stencils are my favorite too. They’re so easy to use and they always give a great result! (And now I’m going to check your sale on those. 🙂
Christy says
Thank you, Cyndi! They really are the best! XOXO
Niki says
Very boho beachy-cottagecore. I like the driftwood feel of the seat and the overall soft tones. It’s warm and cozy with a summer vibe! Gnarley dude!!
Christy says
You described it perfectly, yes!! Thanks, Niki! XOXO
Denise Zdziennicki says
You make everything pretty my friend… even this tired old bench! Beautiful and thanks for the tutorial. XOXO
Christy says
Aww I appreciate that so much, my friend! Have a fantastic week! XOXO
Kimmylouwho says
Great update on the bench! And I will bookmark this page because I am using Voodoo Gel Stain on a buffet. You give the greatest guidance on projects! Thanks!
Christy says
Thank you, Kimmylouwho! I am so glad you find my posts helpful. Your buffet is going to be gorgeous…good luck with it! XOXO
p says
Verrrry nice 🙂
The white washed wood now looks so fresh. I really like that it can be wiped back to a desired effect. The stencil added a nice touch of pretty for sure. It fits the bench so well.
Your tutorial made the process clear !
Thanks for that.
You have such an interesting haul – so many more fun makeovers to go !!
Christy says
Thank you so much, P! I really love the voodoo stains, especially the white. And yes, I love this haul…so much variety this time! Have a great week! XOXO
MrsSW says
Hi Christy – I’m not usually crazy about stained pieces but I love this finish and the stencil was a brilliant addition. Perfect!
Sheila
Christy says
Thanks so much, Sheila! I’m with you on the stain since I generally prefer a lighter look, but this white stain is fantastic! XOXO
Janice says
Beautiful! Your brain must so full with ideas!
Christy says
Aww thank you, Janice! XOXO
Vicki Bray says
I agree with one of the other comments the stencil took it up a notch! Great makeover!
Christy says
Thanks so much, Vicki! I’m so glad I went back and added that! XOOX
Janice Holt says
Such a pretty bench now. The stencil makes it look like you have a lace doily over it. Great job.
Christy says
Thank you, Janice! It really does look like lace! XOXO
Marcie Lovett says
I couldn’t imagine what you saw in that bench, Christy! But after sanding, it looked 1000 times better and I started to imagine it actually might be worthy of your time 😉 I don’t know why I ever question your judgement because you always manage to take things I think are unsalvageable and create something lovely with them.
Christy says
Thank you so much, Marcie!! I can usually see the potential, but I do question myself sometimes too as I’m working on some things ha ha! XOXO
Michele M. says
Oh wow – that’s so pretty now! I love that color beige/ off white, too – it is such a wonderful neutral. Well done, Christy! I need a bench like that – just less wide – for my small front entrance area. I had a guy make one for me when I first moved here and that bench and that guy was just awful. I ended up not being able to even use it or donate it. I lost my “umph” after getting ripped off. But it LOOKED a little bit like that shape just didn’t last long at all and to be honest I am still salty about it, haha. Love this one!!!
Christy says
Thank you, Michele! That’s a bummer that you had such a lousy experience with your bench. People stink sometimes! There’s a much better bench waiting for you out there! XOXO
Rose Lefebvre says
Love the stencil touches!
Christy says
Thank you, Rose! XOXO
Val says
Christy,
I love this white! I have a 1970’s cedar chest I’d like to try it on, do you think it would show orange through it?
Christy says
Hi Val! I’m so sorry I’m a bit delayed in replying, but it should do just fine! You may need two coats! XOXO