Hello amazing Friends! My boys are starting back to school today in their new schools and it will be mighty quiet around the house, so I am grateful to have this happy place to retreat to!
Today I am revealing the first completed space in our new house! I’ve included a few affiliate links so you can find the products I used.
I shared this sneak peek last week:

It is our downstairs guest bath! (Find that cute “Toilette” sign HERE.)
Our home was in pretty good condition when we moved in. If I had any complaints at all it would have been about this bathroom. I could see that there had been some sort of gate up at the doorway and I am guessing it was to contain a pup or two. The base mouldings were chewed and the grout was almost black.
I knew I wanted to tackle this space as soon as possible, especially since this is the bathroom guests would use.
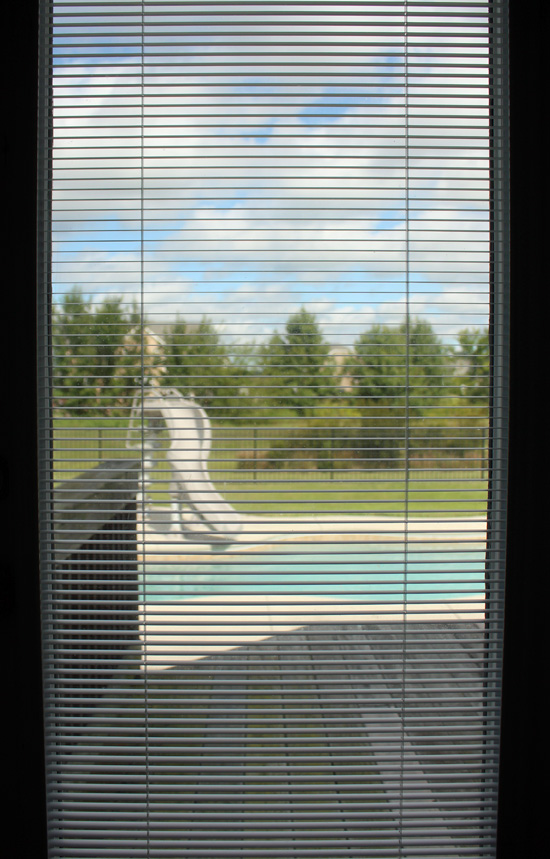
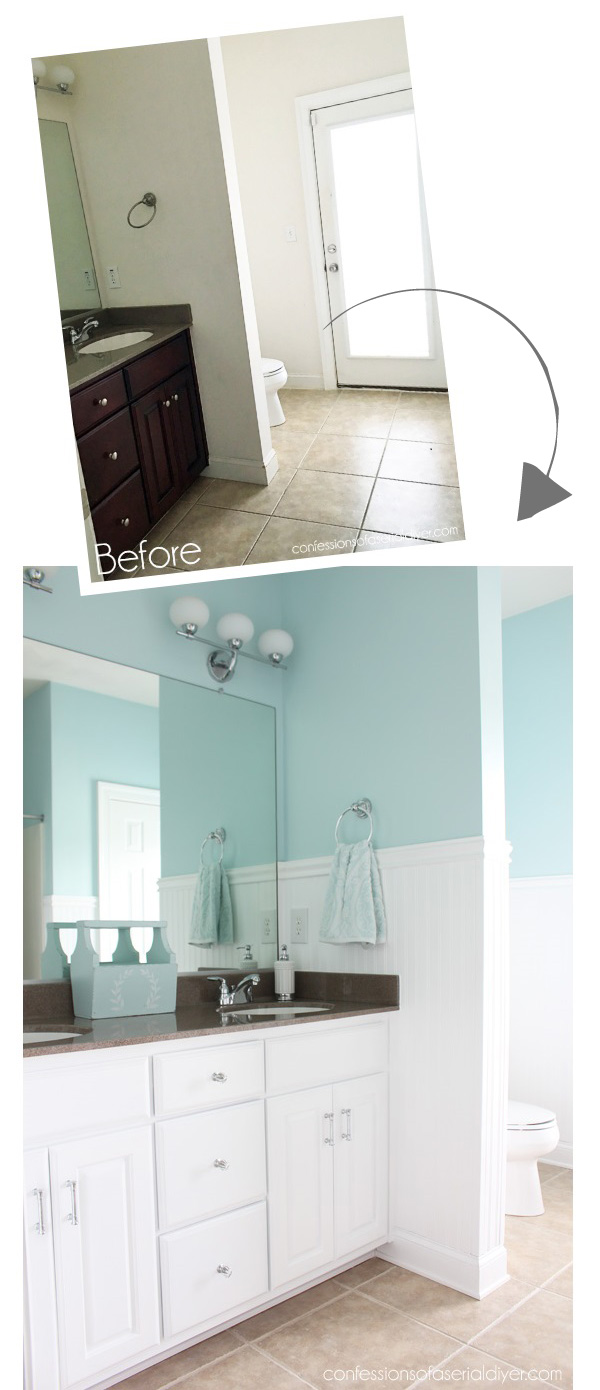
Here is what it looked like when we first looked at the house:
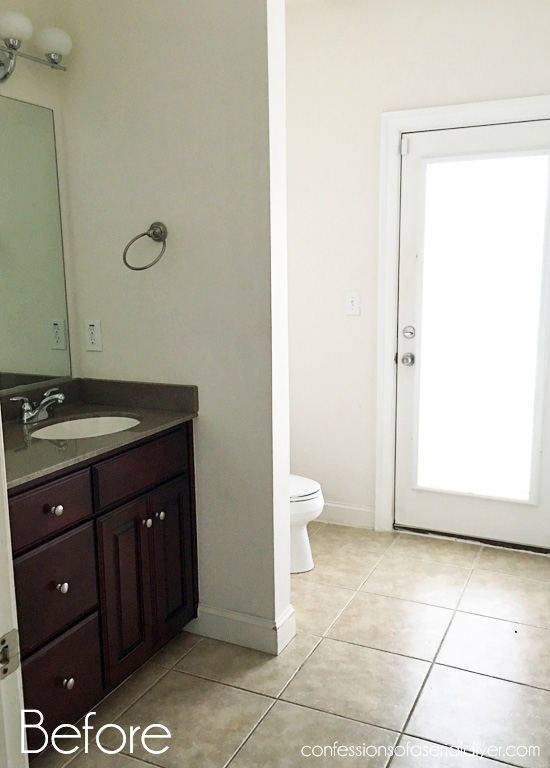
And here is the same view now…

Huge difference, right??
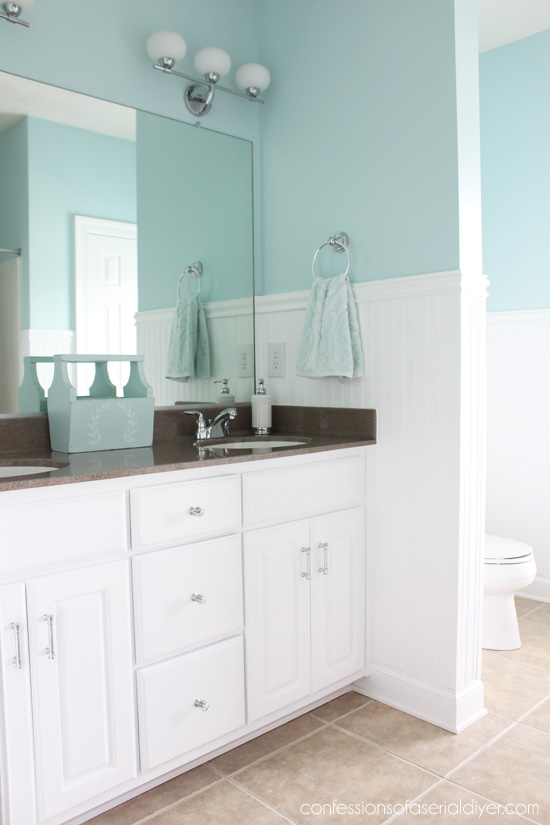
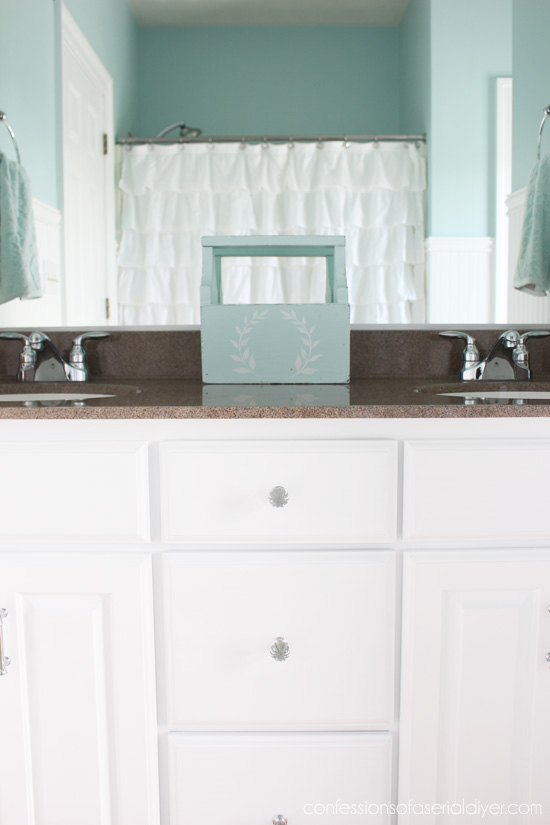
I started by painting the vanity…

I couldn’t wait to say goodbye to the burgundy!
I painted it the exact same way as I did my kitchen cabinets in my last house. (Find that detailed tutorial HERE.)
What a difference that made!
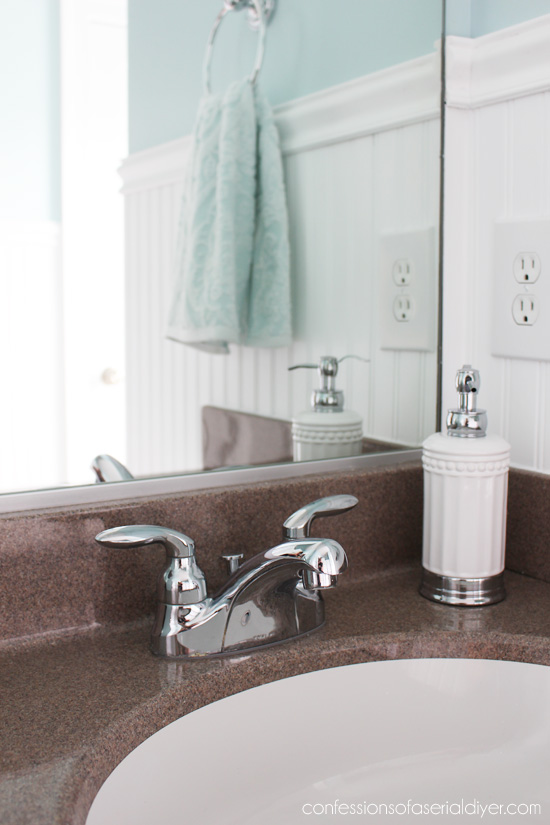
I kept the original faucets since they were still in perfect condition and were nice quality:
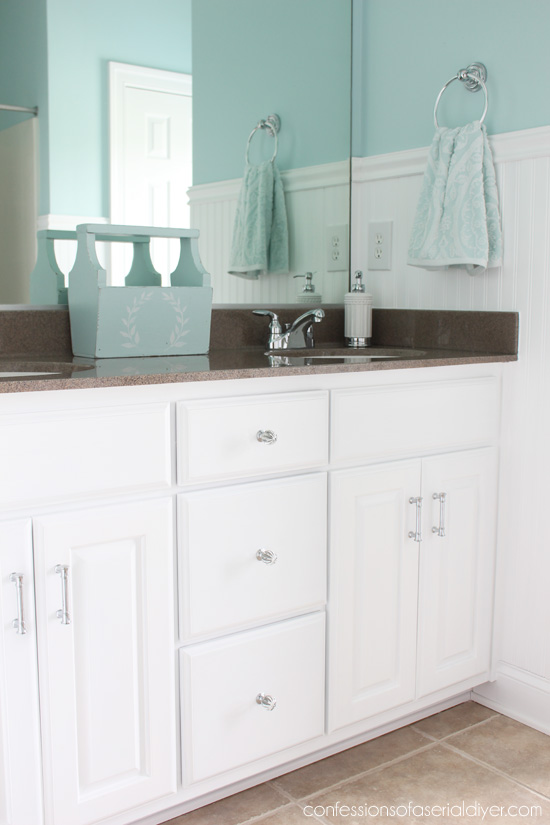
And decided to ditch the simple brushed nickel knobs for prettier, shinier ones to match the faucets:
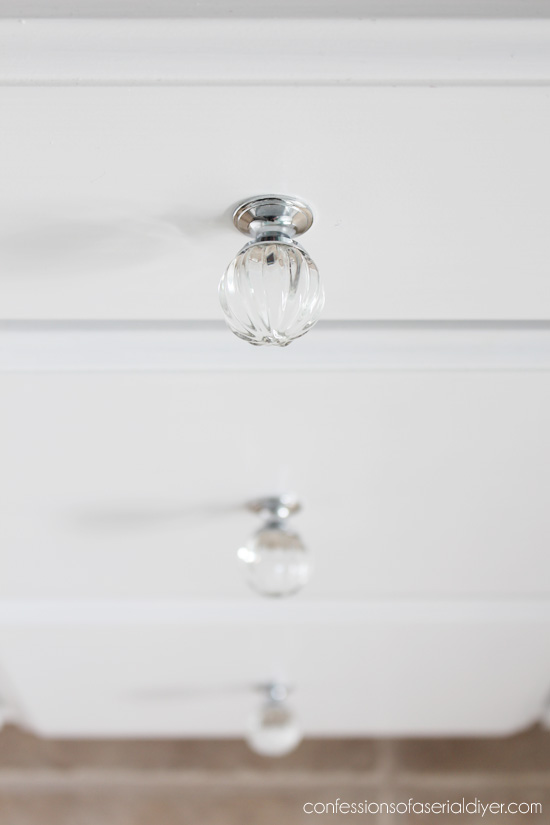
I had originally picked out the same glass pulls for all the drawers and cabinets, but Brennan was with me assisting in the selection, and he insisted we get handles, so we did a little of both:
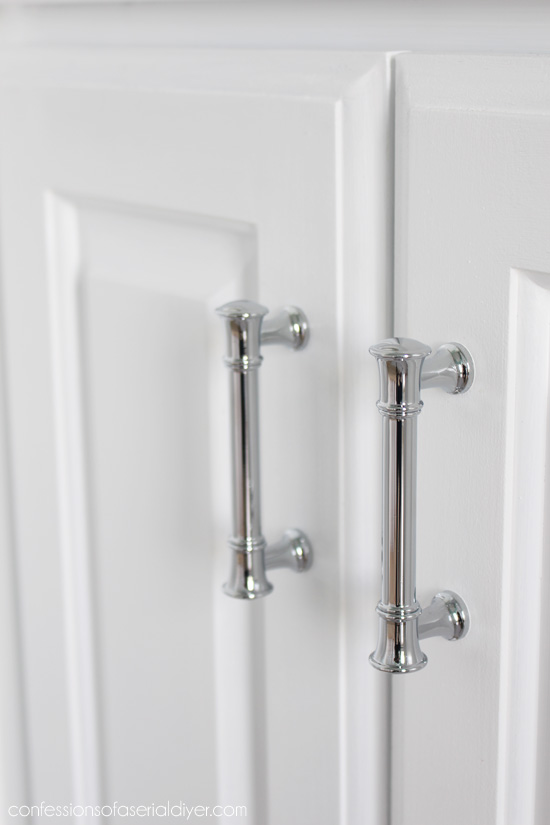
I’m so glad he did, I love the mix!
I kept the décor in here really clean and simple since the walls add a lot of personality already. Remember this little caddy I redid a while back?
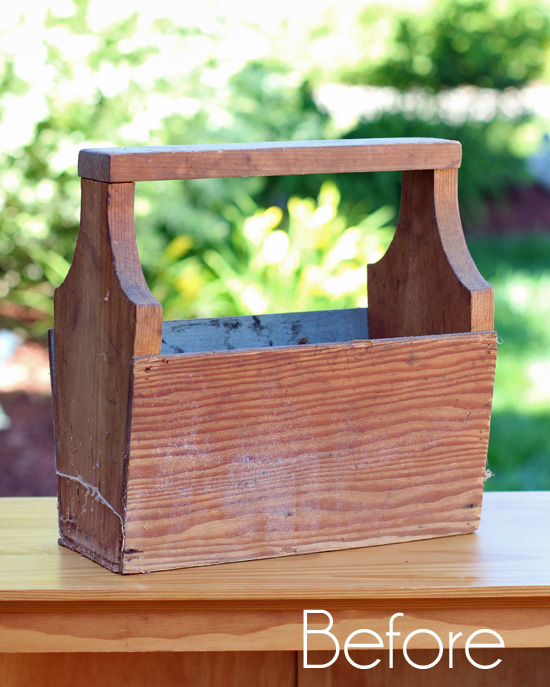
We found it in my Hubby’s Grandma’s shed. I had taken it to my shop and ended up going back and getting it.
I have a few soaps in it for now…
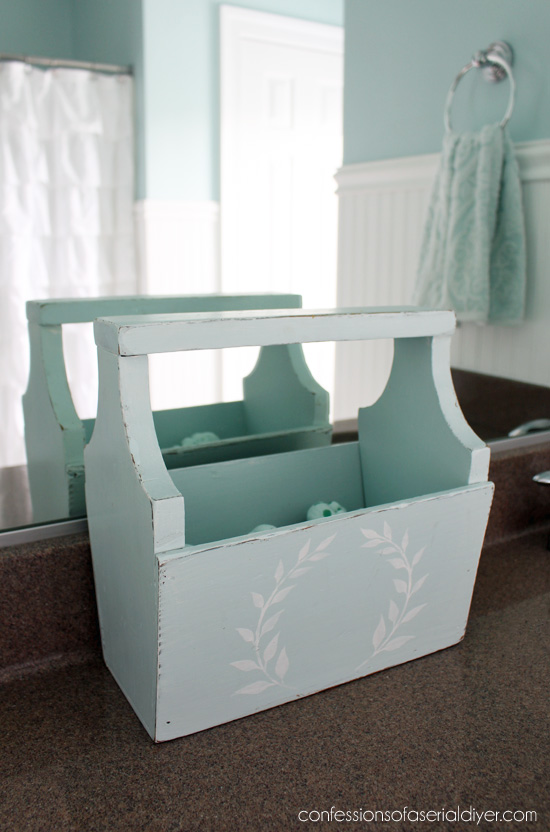
After painting the vanity, it was time to paint the walls. I loved the color of that little caddy so much, and I have painted several other things with the same color so I knew I wanted to use it in this space also. It is Sunken Pool by Behr. It is almost the same color as our pool!
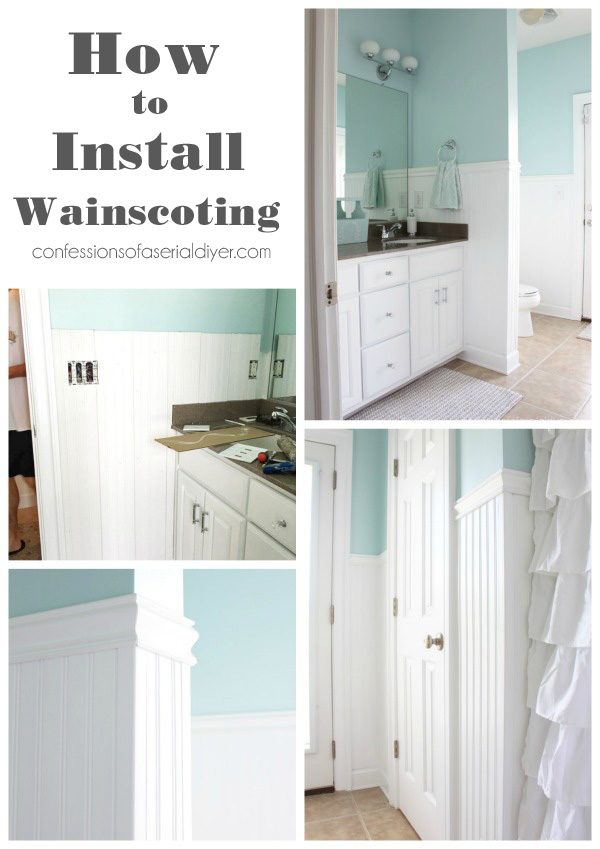
Then I added the wainscoting. I have always been a huge fan of wainscoting. I added it to the bathroom and kitchen in my first house, to my kitchen island in our last house, and knew I wanted to add it here as well. I found this at Home Depot. It comes in 7″ wide, 8′ lengths that I cut in half to make 4′. You can find them HERE. They fit together in a tongue and groove application.

(If anyone is interested, I took pics as I installed it and would be happy to put together a tutorial for it. Just let me know in the comments.)
That door leads to the back deck and pool. It has been great being able to come right into the bath from the pool!
Above the toilet I hung this:
Only it looks more like this now:
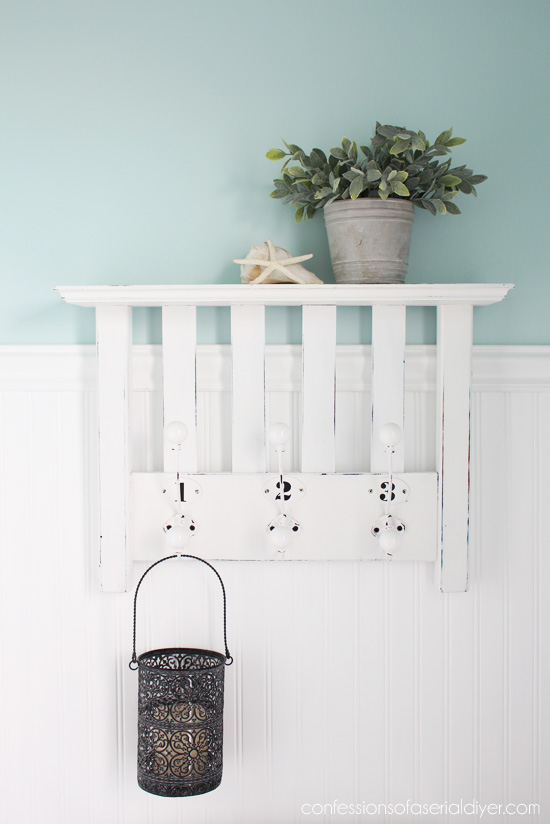
You may remember I rescued that from my neighbor’s trash..no shame. I might need to get to know my new neighbors a little better before I dig things out of their trash in our new neighborhood though ha ha! You can see that transformation HERE. 🙂
I also have this little basket in here that I redid:
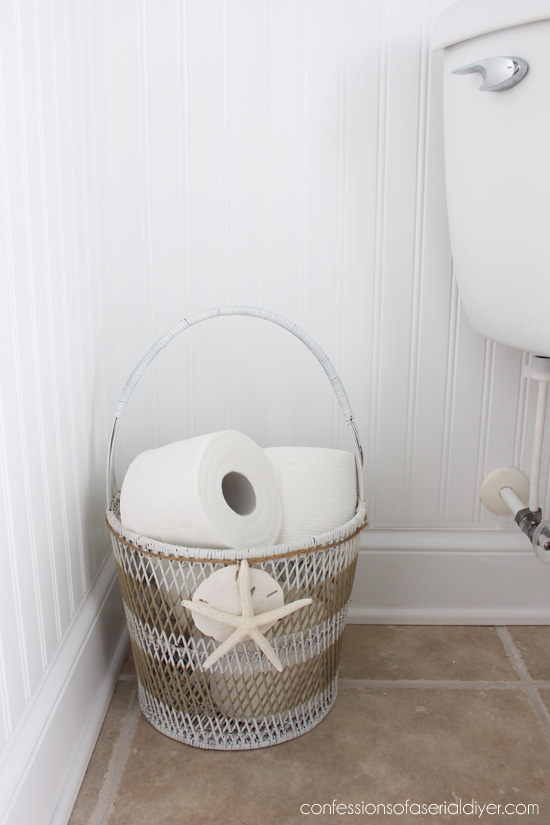
It was a thrift store find before my spray paint and I found it. See more of that makeover HERE.
To the right of the door, there is a nice sized linen closet…

And a shower/tub combo…
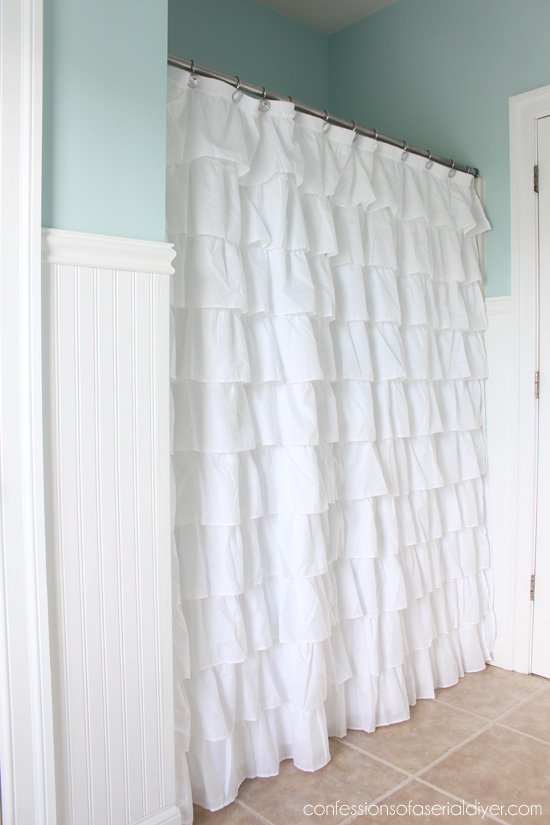
I searched several places for a pretty white shower curtain before I hopped on Amazon and found this one right away. (You can find it HERE.)
Since the boys’ bathroom will be boyish, and our master doesn’t need a shower curtain, I took it upon myself to go all out girly on this one.

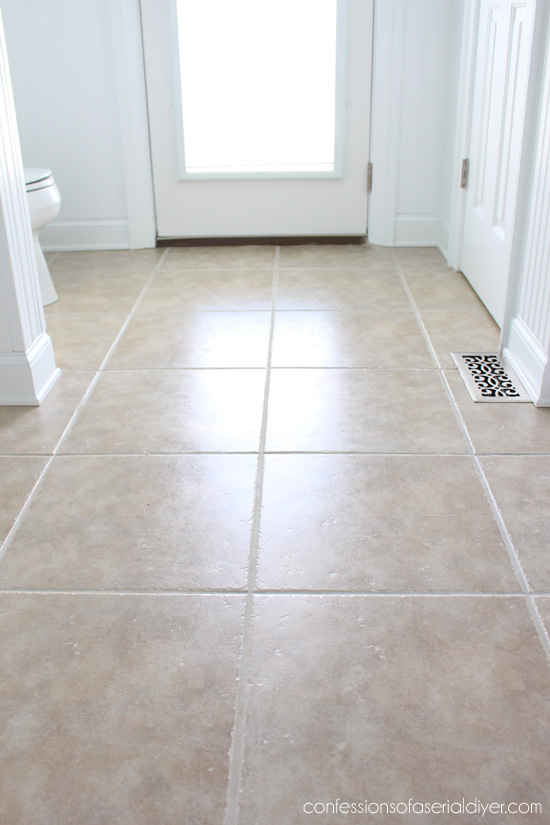
And remember I said the grout was almost black?
I wasn’t even kidding…

I originally bought a grout cleaner at Home Depot but reading the label made me think twice about using it, so I searched online for a less toxic solution and found several recommendations for a mix of hydrogen peroxide and baking soda…winner!!
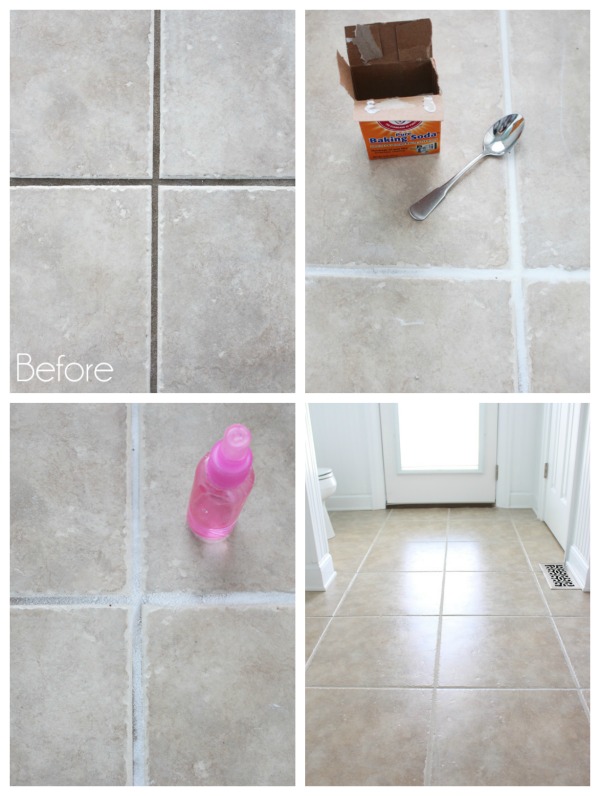
I sprinkled the dry baking soda along my grout lines with a spoon. Then I put hydrogen peroxide in a pump sprayer and sprayed it right on top of the baking soda and let it sit for about 15 minutes. (I worked in about three foot sections at a time.)
Then I came back and scrubbed the grout lines with an old toothbrush, and rinsed them with a sponge and a bucket of warm water:
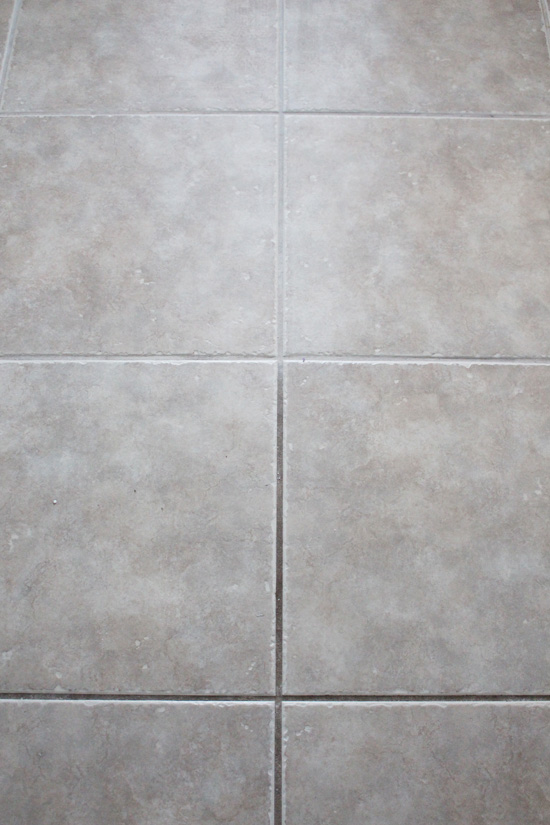
It worked fantastically… without me having to wear a hazmat suit, always a bonus.
I bought some grout sealer but still need to do that.
Overall I am so thrilled with how this bathroom came out!

I love the light airy feel it now has.
So that’s a wrap on my first completed space in our new house!
Before I go, I want to let y’all know about a new Facebook Group made just for thrifty makeover lovers like us! It’s free and it is seriously filled with nothing but thrifty makeovers and goodness. You can even share your own makeovers if you like! Visit it HERE to join. 🙂
If you missed any of my new house adventures so far, you can catch up here:
Ready for Move-in Day: House Progress so far
Pedestal Kitchen Table Makeover
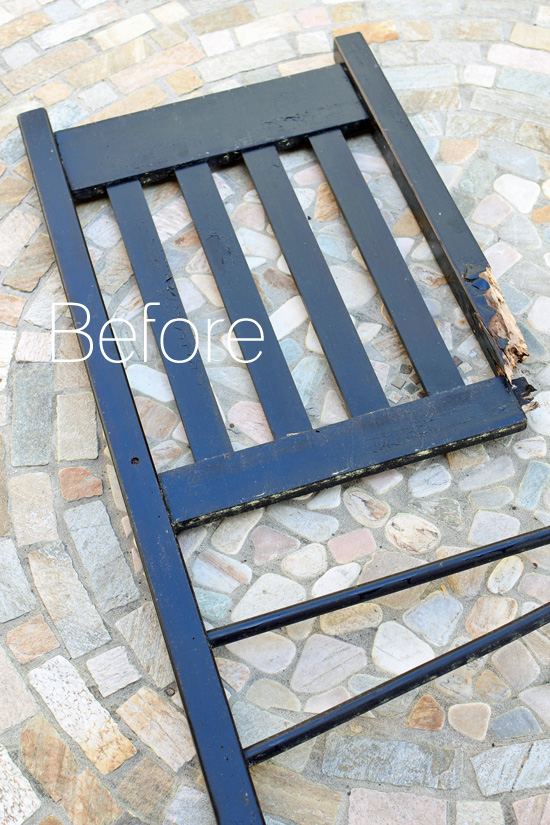
I’ll be back on Thursday sharing how these chairs I bought from HomeGoods look now:
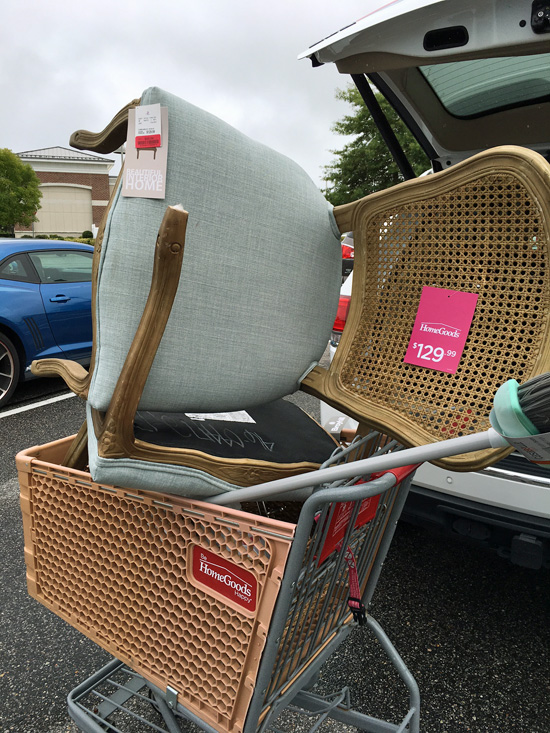
Goodbye gold paint!
UPDATE: See how these chairs turned out HERE now!
BONUS!! I created that wainscoting tutorial:
XOXO,
![]()
Don’t Miss a Thing!
If you like what you see, there are several ways to follow along!


Mary Kaiser says
I Love how your bathroom turned out, it is so bright and beautiful now. How exciting for you to have all new rooms to decorate and to re-do. Your first re-do is beautiful. Can’t wait to see more.
Christy says
Thank you, Mary! I too am so excited to have all these new room to decorate! XOXO
Christina in FL says
Oh Christy, your bathroom is a stellar makeover. Thank you for the truly transformational tip about the grout.
Clearly, you are rocking your new home’s look and feel. I know your new home is really enjoying the love., 🙂
Christy says
Thank you, Christina! This was a fun room to start with, and it makes me so happy when I walk in there! Yes, the grout cleaner works amazing! I’m pretty sure my home is excited we are there too ha ha! XOXO
Janice says
Man you’ve been busy but the end result was so worth it I’m sure. Love the colors and the light and airy look. Fantastic job.
Christy says
Thank you, Janice! You would think a small space would not take that long to do, but it took a little longer than I expected. So happy with the results! Glad you like it too! XOXO
Candy says
Beautiful! Would love to see the tutorial too.
Blessings
Christy says
Thank you, Candy, you got it! XOXO
Sheila DelCharco says
This bathroom is seriously transformed!!! Great job! I love the beadboad ! I have it in my bathroom too! Also made a tray out of the scraps!
Christy says
Thank you, Sheila! I love the look of beadboard for a bathroom! I used just about all that I had, but I do have one small scrap I’m sure I can find a use for! 🙂
Mother Deer says
This is an amazing transformation. Your color and design sense is awesome. I would very much like to see how the wainscoting was installed. Thanks for sharing these improvements to your new home 🙂
Christy says
Thank you so much, Mother Deer! I’m just happy what I had in my head turned out in real life ha ha! Will surely share the wainscoting how-to! XOXO
Sue says
The bathroom looks great!!! Love your new house.
Christy says
Thank you so much, Sue!! XOXO
Anne Sullivan says
How do you install the wainscoting? It really looks great!
Christy says
Thanks, Anne! I will be sharing how I installed the wainscoting soon! XO
Marty K says
Very nice re-do, as always! I am going to have to use your grout cleaning method on my kitchen – huge difference. Wish the grout cleaning fairy would do it for me LOL!
Christy says
Thank you so much, Marty! I’d love to borrow that grout cleaning fairy for my own kitchen ha ha! XOXO
Melinda says
I have no idea where you find time to do all this! Amazing room makeover. I would love for you to come and do over my bath;,when you find the time. haha:) No seriously you are such a motivator for me.
Christy says
Aww thank you, Melinda! I am one of those people that just keeps going till it’s done, and I am so thrilled this space is done! SO happy to hear you are feeling motivated! You can do this! XOXO
Carol says
Yes I would love to see a tutorial on installing the bead board wainscoting, Thanks
Christy says
You got it, Carol…coming soon! XO
Kimberly says
This room looks so fresh! And I am impressed with how fast you are making all these changes. I would still be staring at the vanity, worried that I was going to mess it up! Thanks for the great tip on the grout. I was reading through the first part of the post thinking, “But is she going to tell us how the grout got so clean?” 🙂
Christy says
Thank you, Kimberly! It feels very slow-going from my end ha ha, but thank you! I was very impressed with how well that combination worked on the grout! XOXO
Kelly Howard says
It is like a sunshiny summer breeze just blew in! It is simply lovely!
Christy says
Yes!! Thank you, Kelly! XO
Judy Allen says
I would love to see a tutorial on how you did the wainscoting. It really transformed those blank walls and I’ve got a guest bath in desperate need for that same change. I really get excited to see the things you do! Thank you for sharing!
Christy says
I would be happy to put together a post on how I did the wainscoting, Judy, I’ll share that soon. I agree it makes such a big impact! Thank you so much! XOXO
Sara Miller says
I would love a tutorial on how you did the wainscoting!!
Christy says
You got it, Sara! Will share that next week! 🙂
Mrs Mike says
This is BEAUTIFUL! Amazing what a little paint, elbow grease, and accessory updates can do for a room. And thanks for the tip on the grout. Regular mopping hasn’t helped keep mine clean at all, so I can’t wait to try this.
Christy says
Thank you, Mrs. Mike! You are so right…a little hard work can go a long way! That simple combination worked so well on my grout…need tackle my own kitchen next! XOXO
Anita Ellison says
Really like the guest bath transformation. It is a beauty! I would love to read about the beadboard installation as I have plans to do the same in a 1/2 bath makeover to cover up some dry wall issues where we removed a door and its frame. Thank you!
Christy says
Thank you, Anita! I’ll be sharing that how-to next week! 🙂
Cecilia says
It looks fabulous! We used the beaded board to in our bathroom. I love it and it was easy to put together. Love all your thrifty objects too. They fit right in! Hm, baking soda and peroxide…I need to try that!
Yay for one room finished!
Christy says
Thanks, Cecilia! I love the look of bead board and it really brightened up this space. Yes, try the baking soda and peroxide…it worked fantastically! And YAY is right…feels like a win ha ha! XOXO
Michelle says
Love your new bathroom! Perfect for a poolside bath. Thx for sharing your talents!
Christy says
Thank you, Michelle! 🙂
Karen says
YES! Would love a tutorial on the wainscoating! And your bathroom looks awesome. I want to know how you have time to do this after just moving into a new house!!!! You are amazing!
Christy says
Thank you, Karen! Tutorial coming up next week! I feel like it is slow-going ha ha, but thank you!! XOXO
Larissa says
Yes please do a tutorial on the wainscoting! Did you bother painting the walls all the way to the floor since the wainscotting would be going over top, or did you only do partway? I plan on doing the same in our bathroom.
Christy says
I sure will, Larissa! I did not paint much lower than where the wainscoting starts since I knew it would be covered. 🙂
Susan says
I love your bathroom! So bright and cheery now! Thank you for the tip on the grout.
Christy says
Thank you, Susan! The grout tip worked fantastically! 🙂
Diane says
You are so amazing! I love your creativity and everything you do. You should do workshops! I would really like to know how you do the wainscoting. Can you create a tutorial. If I send you photos of a couple of my “cookie cutter” home would you make suggestions on how to update it….PUHLEASE!!!!!!
Christy says
Aww thank you, Diane! You are so sweet! I will be posting the how-to for the wainscoting next week as it seems many are interested. Glad I took those pictures ha ha! I’d be glad to take a look at some photos of your space…you can email them to me at christykjames@cox.net if you like! 🙂
Donna says
This is a fantastic makeover! Good tip about cleaning the grout…inhaling chemicals is never a good idea.
Christy says
Thank you, Donna! I was very impressed with how well that simple combination cleaned the grout! XO
Marie says
What a difference, Christy! You worked your tail feathers off by the looks of it. It’s so bright and fresh looking, especially with the addition of the white wainscotting paired with the soft pretty wall color. Love the hardware on the vanity too – good choice Brennan! I am so trying the grout cleaner (we used the chemical base one last year and it didn’t work near as well as your natural version seems to have).
Christy says
Thank you, Marie!! It was a labor of love seeing that space come to life, but there might have been a few swear words muttered as well ha ha! Really enjoying the finished space now. And yes, I love that Brennan insisted on handles…I should ask his advice more often. Try that combination on the grout…it worked amazingly well. I think part of the secret is to leave it on for the full 15 minutes! 🙂
Builder says
Christy, I love the choice of light blue. Not only does it match the current header of the blog, but it makes your bathroom look so much cleaner and friendlier. White or beige can really look clinical, but if I was a guest in your home and used this bathroom I would probably be jealous I didn’t have it myself!
Christy says
Thank you! XO
Debbie says
I am LOVING this transformation!! So light and bright! I had to laugh at the part where you pulled the piece above the toilet out of your neighbours trash… My neighbours recently were throwing out a perfectly good stool that just needed a little fabric recovering. As I was leaving my house with my husband I went to go grab it and he freaked out!! Apparently I am not allowed to ruffle through the neighbours garbage. 😛 At least not while he is around. LOL. I was going to grab it when we got back but the garbage had already been taken away! Next time. 🙂
Christy says
Thank you, Debbie!! Your hubby sounds like mine ha ha! I just hate to see something that can be saved being thrown away! XOXO
Linda Dann says
You probably said this a million times in the makeover and I scrolled through several times to find it to no avail. What is the beautiful blue color in the bath? For some reason the scrolling through your posts is really sloooooowwwww and jerky so please save my sanity LOL I have to say my mouth actually waters like when you see an awesome dessert every time I see your posts. Fabric and color does that to me and that’s how I can tell I really love something. Like everything you do.
Christy says
Aww thank you SO much, Linda! That is a color I have used often, it is Sunken Pool by Behr. 😀
Shannon Fox says
It’s so pretty now! You did good 🙂
Love the wall color and all the cute accents.
Christy says
Thank you, Shannon!! So happy to finally have a space done! XOXO
Marcie Lovett says
I laughed when I saw that the bathroom was your first makeover. Not the kitchen. Not your bedroom. Not your office. The guest bathroom. Wowee wow, what a great job! Aside from the fact that it’s huge, it’s simply beautiful now – beachy and bright (and clean ????). Great tip for the grout. I’m aching to paint my kitchen cabinets, but it’s a huge job. I’m going to do the bathroom vanity and see if it turns out as great as yours. Thanks, as always, for the inspiration. Looking forward to seeing more.
Christy says
Ha ha yep! I think I chose that one because it was the most gross, and now it is clean yay! It’s a great idea to start with the vanity and see how it goes. I am not looking forward to tackling the kitchen cabinets either, but I know it’s coming. Thank you for always cheering me on…SO appreciated! XOXO
Christine says
Hello, just wanted to say I was anxious to do my kitchen cabinets and watched Christy’s video on painting kitchen cabinets. I too, was nervous so I did my masterbath vanity first. I followed her directions to the letter and my kitchen cabinets are fabulous. I am so glad I did it myself (with the help of a friend) instead of paying someone or buying already painted cabinets. Saved so much money.
You’ll do a great job. It takes time and it is work; but well worth it in the end.
Good luck to you.
Anita Ellison says
In this guest bath post the cute t.p. basket with the starfish and shell is linked to the instructions for the basket with the roses and chalkboard tag (which is also cute!) I was interested in seeing how you taped off the basket to create the wide stripe. Thanks!
Christy says
Oh no…so sorry! I just fixed it, but here is the link if you still want to check it out: https://www.confessionsofaserialdiyer.com/beachy-basket-makeover/ 🙂
Christy @ Our Southern Home says
Gorgeous! Love that grout tip!!
Christy says
Thanks, Christy!! I was super impressed with how well that combination worked on the grout! XOXO
Linda Bolt says
This was my first post to read of yours, and I was ready to be resistant, because I thought your bathroom looked pretty good in the “Before” photo. After reading your post, and how your painted instead of replaced the vanity, and were not at all extravagant, I totally changed my mind and joined your FB group! And I am very happy for the tip on how to clean grout without harsh chemicals. Thank you for an inspiring post! The bathroom looks wonderful.
Christy says
Oh that is wonderful to hear, Linda! If you learn one thing about me, it is that I am cheap ha ha. If I can make what I have work, I do! Thank you! XOXO
Terri Hughes says
The bathroom looks amazing…..beautiful job. I love wainscoting, also. I would love to use it in my bathroom. Could you please do a tutorial on how you installed the wainscoting? Thanks!
Christy says
Thank you, Terri! The wainscoting just brightened the whole space up! I’ll be sharing the how-to for it next week since several people are interested! XO
Mary Loveland says
You did a great job, it really looks nice. The two kinds of drawer pulls look really good together.
The tile cleaner is a great tip. Thanks
Christy says
Thank you, Mary!! Yes maybe I need to take decorating advice from my seven year-old more often, I never would have mixed up the hardware ha ha. And that grout cleaning combo worked amazingly well! XO
Lisa says
Congratulations on finishing your guest bath- it’s lovely. And thank you for sharing the results of your labor with us. I would love to see the tutorial! Who knows, I might even get up the nerve to attempt another makeover!
Christy says
Thank you, Lisa! I’d be glad to share that how-to…look for it next week. 🙂
Nancy says
One of the best makeovers that meets my needs. I am so excited to learn about the grout cleaner and seal. Whew! Mine need it badly in the kitchen. admire your talents and your step-by-step approach to storytelling. I would really enjoy a tutorial on the wainscoting.
Christy says
Oh great! Yes that grout cleaning combo worked so well…my kitchen needs it also! Thank you so much, Nancy…look for that tutorial next week. XOXO
Larissa ~ Prodigal Pieces says
You said it, fresh new look and beautiful! You have done a fantastic job, Christy.
Christy says
Thanks, Girly! I feel like this was win ha ha…finally having one whole space completed! XOXO
Susan says
Beautiful job! I’m wondering about the wainscotting. How did you get it to fit around your vanity without having to remove the top? Did you also have to put in new baseboards and door trim?
Christy says
Thanks, Susan! I had to cut it to fit, then went back with caulk along the edges. I will be sharing a tutorial for how I did it next Thursday! 🙂
sophia says
A wainscoting tutorial would be lovely. However, I have found here in Oregon, no one wants to work.
Five handymen, my agreeing to their quote and not one ever came back. Six or 7 to make parrot toys and were very excited … until I asked for a simple sample… never heard from them again.
I don’t have the equipment for this, but I would love to know how… just in case I find someone who actually wants to work.
Christy says
Oh no…that stinks! Will be glad to share…coming next week!
Robin says
The bathroom is beautiful, I love it. Have you considered framing the mirror (glued one to my giant bathroom mirror and I loved it)?
Christy says
Thanks, Robin! I have actually…wanted to use a really ornate molding to trim it out, but it wasn’t quite in the budget! May still add it in the future though! 🙂
Amy says
Love your new bathroom – the paint makes it feel so clean! I would love to see your tutorial !
Christy says
Thank you, Amy! It is so nice to walk into a fresh clean space! I’d be glad to share to share the how-to…hoping to on Thursday! 🙂
Julie Briones says
This is PERFECT, Christy! Love the colors and the decor… just ‘right’! Love that pic that you took in the mirror, straight on the ‘tool box’. 🙂 Just love the wainscoting, too! The shower curtain is just enough ‘frill’ for the space, too!
Christy says
Thank you, Julie! I am really enjoying that space!! XOXO
Debra says
The bathroom turned out great! Thank you for the grout tip! I have white tile with white grout in my bathroom and there are areas that I can’t get as clean as I’d like, so I am looking forward to giving this a try! I personally would love to see the step by step wainscoting tutorial! So, please post it when you can!
Christy says
That grout cleaning combo worked so well…now I need to do the tile in my kitchen! Look for that tutorial on Thursday next week! 🙂
MaryJean says
Wow, I can’t believe how that homemade grout cleaner worked! Good to know.
Christy says
Yep…like a charm! I think the secret is to let it sit for 15 minutes! XOXO
Christine says
I would really like to see your pics or video of how you put up wainscoting. Looks fabulous by the way!!
Christy says
Thanks, Christine! I’d be happy to share that tutorial…look for it on Thursday next week! 🙂
Paula says
I love what you did in this space. Your guests are going to feel so loved! With all the other updates, you made the blah beige tile look like sand (now, sparkling sand!) in your beachy room. Really, no other floor would do! (I’m sure you thought of that.) Thank you so much for sharing yourself with us.
Christy says
Thank you, Paula! Honestly I was not a fan of the tile at all when we first moved in, but seeing it all cleaned up makes me love it! And I agree that I don’t think any other floor would work better! Thanks so much for stopping by! XOXO
Robyn Wright says
I just fell in love…with your walls. Did you happen to create that tutorial? I’m definitely interested. WOW!
My bathroom has gold tile in the shower and for a counter top. GOLD…TILE…(cringe).
Christy says
Thank you, Robyn! I will be sharing that tutorial on Thursday! Gold tile, huh? VERY vintage ha ha….tile paint, maybe? XOXO
Robyn Wright says
What made you use tongue in groove planks instead of the large sheets that are available?
Christy says
I have used these before on my kitchen island and like them. I used the sheets in my first house and they worked fine as well. I did like that I was working with 7″ pieces rather than a 4′ sheet at one time, made theme a bit easier to handle and install in a small space.