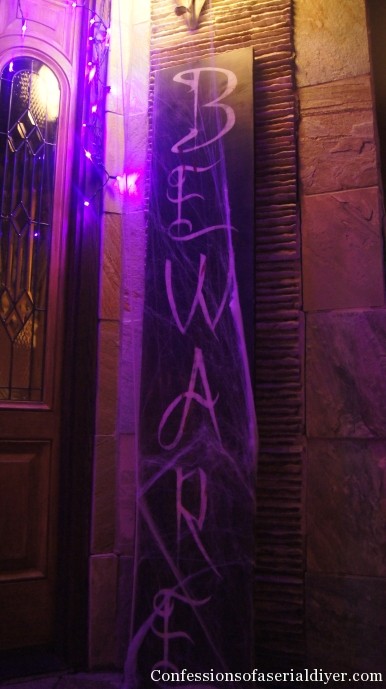
Hi friends! Are your knees still shaking from my Spooky Outdoor Halloween Tour? I’m glad you all are such good sports!
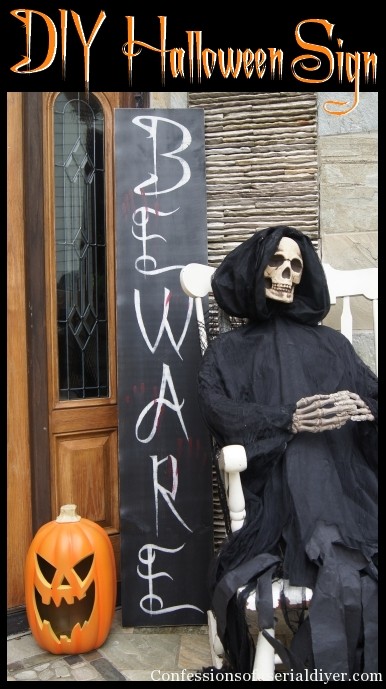
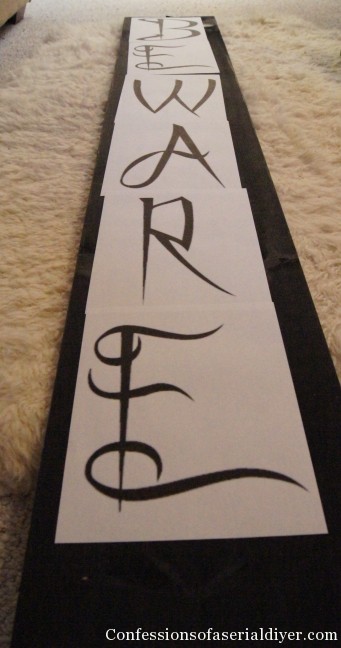
Today I’m going to share with you how I made my Halloween sign that you saw by my front door, with a little help from Paint.NET . You could use this tutorial to make any kind of sign your little DIY heart desires!
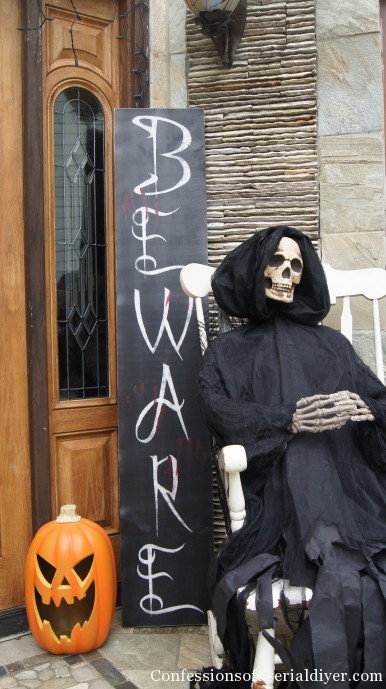
I purchased a piece of 1’x8′ pine unfinished at Home Depot for around $15. I trimmed about a foot off of the bottom so it would fit beneath my porch light and painted it black with acrylic paint.
I really want to share how I enlarge my letters because I had several inquires as to how I had done it for my barn sign that I made out of an old gate.
If you don’t need a letter-enlarging lesson, you can skip to the bottom for the rest of the sign tutorial 🙂
If you’re a regular follower, you know one thing about me. I’m cheap. I use paint.NET to enlarge my letters because it’s free!
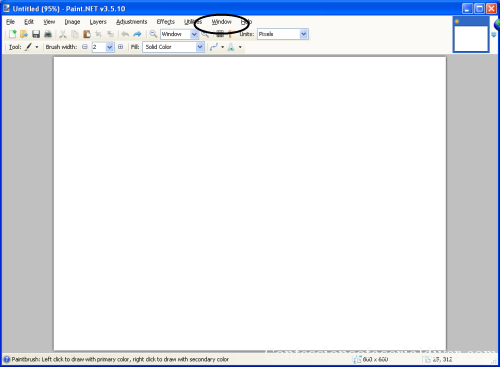
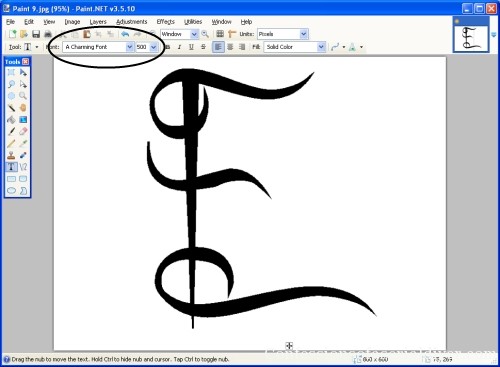
Once you’ve downloaded paint.NET, open it up and your screen should look like what you see below. To start writing, click the window tab at the top and select “Tools”.
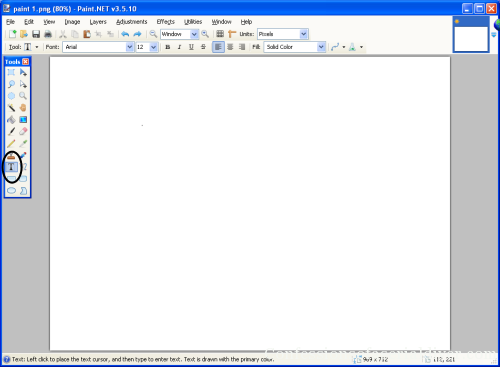
Your “Tools” tab is now to the left of your screen. Click the “T” icon to start writing.
To choose your font, click on the “Font” drop-down box just above your window. A list of fonts should appear for you to choose from. (These are all of the fonts that are currently loaded on your computer.) Then you can select your font size right next to it.
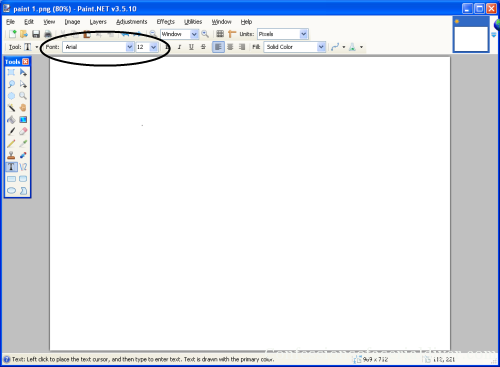
I chose “Charming Font”. The largest font size that shows is 288, but if you click in the font box until the area is hightlighted blue, you can type in whatever size you need. I chose 500. Then I typed the letter “E”.
To Save on Ink:
If you are printing thicker letters and want to save on ink, you can print only the outline by selecting the “Effects” tab at the top. Then choose “Stylize” and select “Outline”. Then it will give you the option to adjust the width of your outline.
That’s it! You’re ready to print!
If you make a mistake, you can undo your last action by clicking CTRL+Z at the same time or by clicking the blue back arrow in the tools across the top.
For this sign, my letters weren’t too thick, so I printed my letters as is.
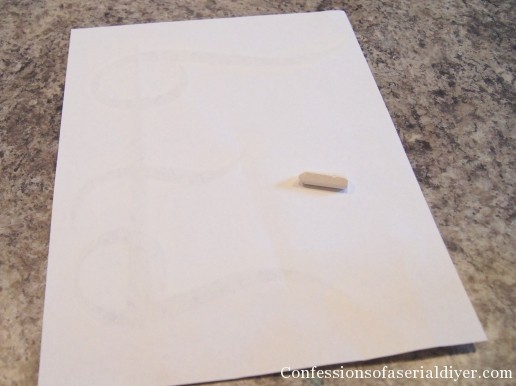
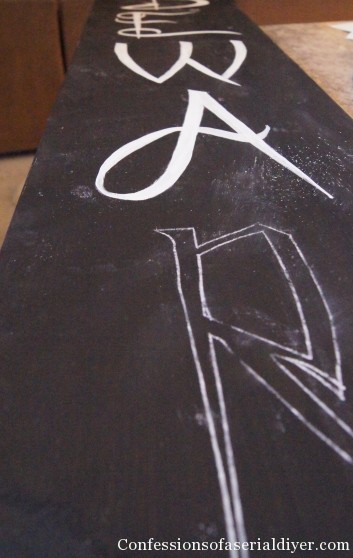
To transfer, I rubbed chalk across the back of my letter. I usually use pencil, but I chose chalk since my background is black.
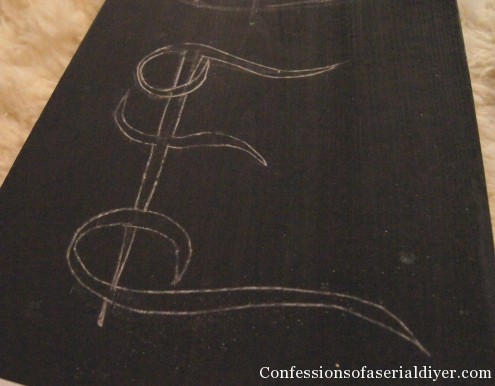
Then I place my chalked-up letter on the sign, chalk side down, and traced the outline of my letter with a pencil.
*You will want to print your letters in the reverse if you have a lighter background. Then place your letters on your project and pencil across the back. The ink from your computer will transfer. See that demonstrated here.
To reverse your letters:
Click the “Image” tab and select “Flip Horizontal”.
Time to paint. I used acrylic paint for my letters.
It’s much easier to hand paint big letters like these! I sanded and then sealed with spray-on matte sealer.
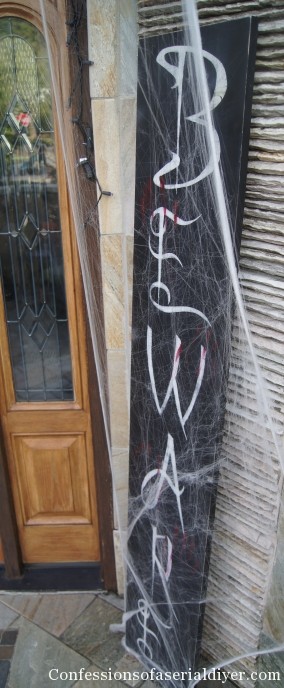
It wouldn’t be scary enough without a little blood…


I hope someone out there finds this helpful. Until I can afford a fancy machine to cut my letters for me, or until I win one of the million give-aways I’ve entered (ok so maybe it was only like three), I’ll be doing my letters old-school style.
What did you think of my sign? Not too spooky and pretty thrifty at $15, eh?
Have a Spooktacular weekend!
XO,
![]()
If you like what you see, there are several ways to follow along! ![]()
Email * Facebook * Pinterest * Hometalk * Twitter * Instagram


")


terri cote says
So easy to follow your instructions. You are Great at everything you do! Thank You
Christy K. James says
Aww…you are very sweet, Terri! I appreciate your kind words. 🙂
Carla S. says
Love your sign ! So cute. Thanks for the great instructions. It sounds complicated but with your detailed tute I think I can do it. Never heard of paint.NET. Thank you for telling us about it. I’m going to give this a try. I usually just do mine free hand, but this is really nice. Have a great week end. Love your site.
Christy K. James says
Thanks, Carla! I dragged out every little step, but it really is super easy! Thanks so much for visiting! 🙂
JoAnn @ SweetPepperRose says
This is exactly how I make my letters 😉 no need to go out and buy stencils, esp when you have an abundance of Fonts at your fingertips.
Christy K. James says
I totally agree, Joanne! I’ve had several inquiries about how I enlarged my letters, so I thought I should just write a post that I can refer people back to. I know when I was a new blogger, I appreciated all the help I could get, so hoping this helps someone out there! Hope you’re enjoying your weekend so far! 🙂 XO
Cindy @ Diy beautify says
Great tips Christy! I think this might be very useful for me 🙂 I currently just use my word processing program, but can’t always get my letters as large as I want. That tip about cropping the paper around the letter and then enlarging the letter makes sense! Can’t wait to try it!!
Cindy @ Diy beautify
Christy K. James says
I’m so glad this is helpful, Cindy! I’m always eager to hear how others do things myself. I’ve even put paper against my screen and traced around them to get my letters as big as I want, but this works much better 🙂
Dee says
Wonderful tutorial, thanks so much! I see another trip to Home Depot. And I will try your tip on stretching the web today. Finding your blog was a great day.
Christy K. James says
Aww thanks, Dee! What a kind thing to say! Good luck with your web 🙂
Emily Maldonado says
I totally needed this tutorial. I use the same transfer process for my chalkboard and have been wishing I knew how to enlarge my letters. Thank you!
Christy K. James says
Awesome Emily! I have played around with it and played around with it and finally found that doing this works great and thought others might want to know too 🙂 Have a great weekend!
Kim says
What am I missing? I don’t understand why I need to print the letters in reverse? Can’t I just put chalk on the back of the letter and then trace the outline of the letter. I am sure I am missing something as everyone else seems to get it.
Thanks for sharing.
Christy K. James says
Lololol…what a great point. I probably didn’t need to reverse the letters for this particular project.This tutorial was intended to be generic to be used for any kind of sign you want to make with large letters. Because the sign is black, you can easily cover the back with chalk and pencil the outline without reversing it. However, for transferring to lighter surfaces, which is more common, printing in the reverse saves the step of rubbing pencil or chalk across the back because the ink from your computer will transfer. Sorry for the confusion! I should probably note that in my post 🙂
Christy K. James says
I made a note in the post. Thanks for keeping me on my toes! 🙂
Cristina@remodelandolacasa says
A girl after my heart, I love cheap 😉 Paint.net is new to me. Great tutorial, now I want to do signs 🙂 Thanks Christy!
Christy K. James says
Yes, I am cheap ha ha! It’s taken me a while to find my way around paint.NET, but I really like it…especially when it’s free! XO
Valerie says
Great tutorial! Thanks!!!
Andi says
Very cool. But then again, you’re very cool. Happy almost Halloween!
-andi
Christy K. James says
Thanks, Andi!! Happy almost Halloween to you too! 🙂
April Hoff says
Beware…I might steal your idea! 🙂
Christy K. James says
I hope you do! That’s why I love to share 🙂
Linda says
I’m pretty sure 288 isn’t the largest option for font size. If you highlight the font size, you should be able to enter a value, via the keyboard, larger than 288. I don’t have paint.net software but it has worked in every graphic program I’ve ever used. For example, Increasing the value to 1296 makes a letter D in Times Roman font a 12″X12″ letter. Some fonts will be larger and some will be smaller. Most programs allow a font size larger than home printers can print on one page. I hope this works for you.
Christy K. James says
You are awesome! It works! I’ve updated my post. Thanks so much for sharing wise friend 🙂
Kimberlee@ The Fancy Shack says
I love your porch setting and sign! Thank you for such a helpful tutorial!
Kimberlee
Christy K. James says
You are so welcome, Kimberlee! Glad you found it helpful 🙂
Marty@A Stroll Thru Life says
Love your sign and super instructions too. Thanks tons for linking to Inspire Me. Hugs, Marty
Cindy says
Absolutely love this post!!!! I have been looking for a program to easily enlarge numbers and letters…and paint.net seems to be a great alternative. I have one question…I’m trying to print large letters in portrait layout but I cannot seem to get the paint window out of landscape layout!! I’am rather new to this but geesh this should be a simple one but evidently NOT for me!!!
Thanks for your time Christy!!
Your new follower
Cindy
Christy K. James says
Hi Cindy,
I’m so glad you found me! If you want to change your window to portrait, open paint.NET and before typing anything, click “Image”, then select “Rotate 90 degrees”. Now type your letter/s. Hope this works for you! Have a great day! 🙂
Mary says
Love this!! Thanks for the info! Is there a way to make the letters print in outline form to save on ink?
Christy K. James says
Yes, if you click on the ‘Effects’ tab at the top and select ‘Stylize’, then ‘Outline’. Then you can make your outline as thin or thick as you want 🙂
NormaJean says
Great instructions! Thanks for sharing your information.
Christy K. James says
Thanks and you are very welcome 🙂
Felecia says
Hi Christy! What a neat sign! And I love the ‘old school’ method! You really don’t need one of those machines when you can do this! I have one and have a hard time trying to figure out the size and everything. And sometimes it doesn’t cut exactly right! What a waste of expensive vinyl! I’m trying this method next! Thanks for sharing! Blessings from Bama!
Christy K. James says
Thanks, Felecia! I haven’t been able to make my self buy one of those machines. I’m so afraid that like so many fancy tools, I would never use it. Maybe one day I’ll change my mind, but for now, this totally works . 🙂
Debbi Dunn says
Thank you so much for the easy to follow tutorial. I just finished mine today. Looks great!
Christy K. James says
Awesome, Debbi! I’m so glad you found this helpful!! XO
Judy Maddox says
Thank you so much for your tutorial. I have always wanted to make signs but didn’t have the machine. I now don’t need one. I am going to get started right away. Thanks again for making it so simple to follow.
Christy K. James says
You are welcome, Judy! Here is another tutorial that is a bit more recent that uses Word. https://www.confessionsofaserialdiyer.com/decorating-with-signs-a-super-easy-sign-anyone-can-make-a-decorating-challenge/ Thought you might find it helpful as well! Have fun! 🙂