Hello lovelies! It’s time for another edition of Furniture Fixer Uppers with my friends. I’ve got a $10 thrift store dresser makeover that ended up costing much more by the time I was done! Be sure to scroll to the bottom to see my friends’ makeovers after checking out mine.
GIVEAWAY ANNOUNCEMENT
Before we get to it, congratulations to Paula B; she was my winner of the $200 Dixie Belle Giveaway! She has been notified and has responded. Thank you to all who played along for a chance to win! I’ll have another Etsy shop giveaway this spring if you did not win this time.
Ok let’s get to it!
I know I’m not supposed to be thrifting while I have so many things left in my haul, but I was on the hunt for a chair to match the desk in this haul when I spied this dresser:
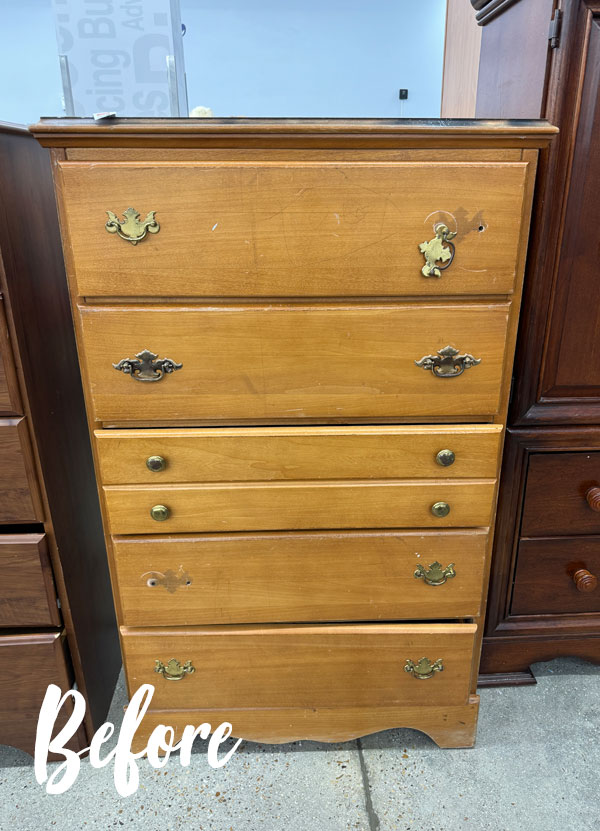
What a project this turned out to be!
It was a perfect candidate for a furniture fixer upper makeover due to this nonsense:
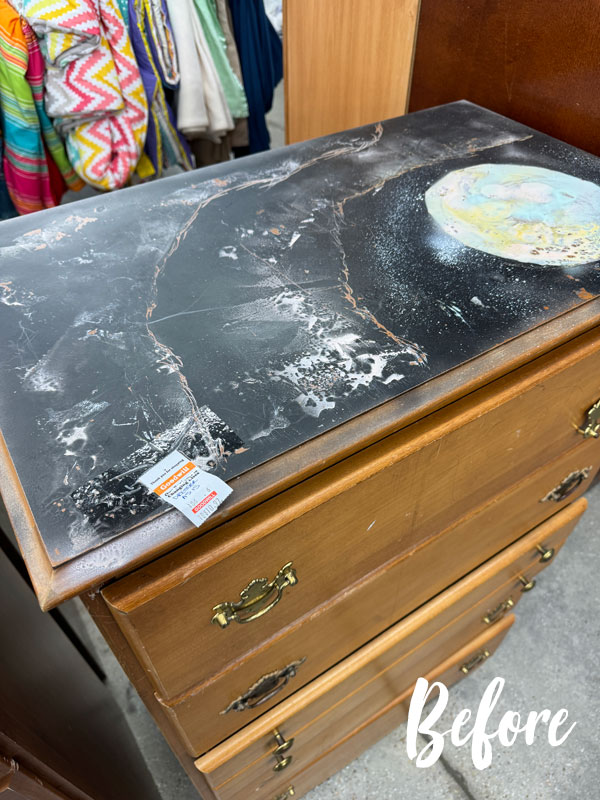
What on earth?? That’s also why I scored it for only $10! I asked myself, “Christy, why are you drawn to all the needy pieces??)
Maybe it is the nurse in me, but honestly, it’s because they are cheap, and so am I! 😂
The drawers weren’t all in the best working order, but they looked and smelled clean, so for $10, this was coming home with me!
I’ve included a few affiliate links so you can find the products I love.
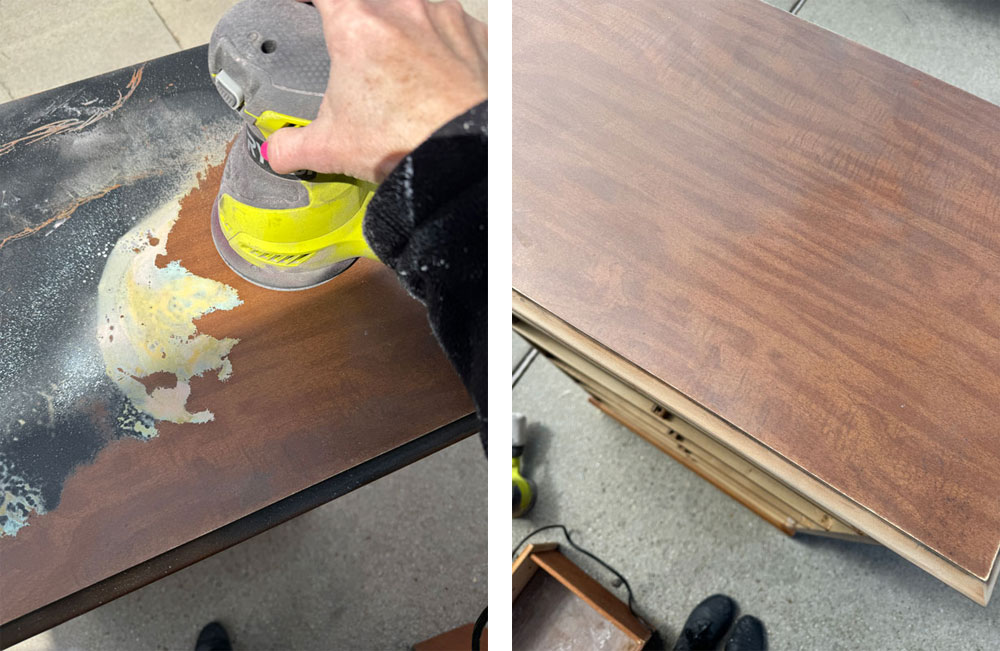
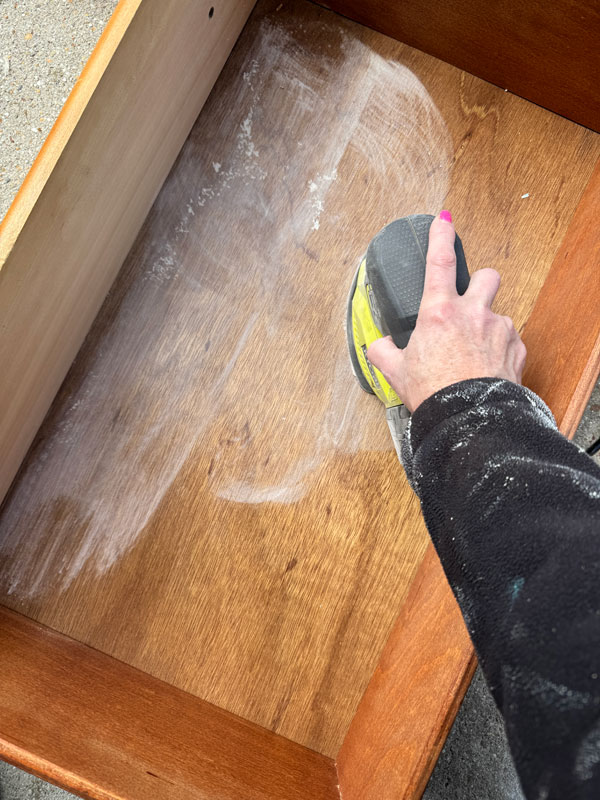
Sand
The first thing I did was sand the top with my Ryobi Orbital Sander. It was laminate, so luckily it sanded up perfectly!
Prep
I gave inside and out a good vacuuming next…

It also had hot glue along the joints that needed to be scraped away…
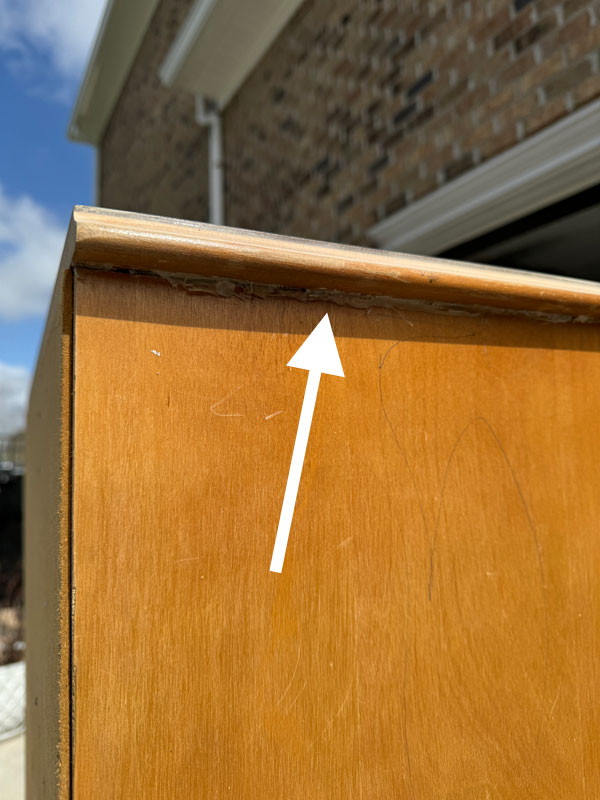
The top didn’t appear to be loose, so I don’t know the reason for that.
The issue with the drawers
I discovered after getting this dresser home that the issue with the two drawers that weren’t working quite right is that they had broken drawer slides! They were metal and needed to be replaced.
Unfortunately, they were $15 per slide. (You can find them HERE.) So, $30 dollars went to parts you won’t even see. My $10 dresser is now $40.
The drawers slides were really easy to replace though:
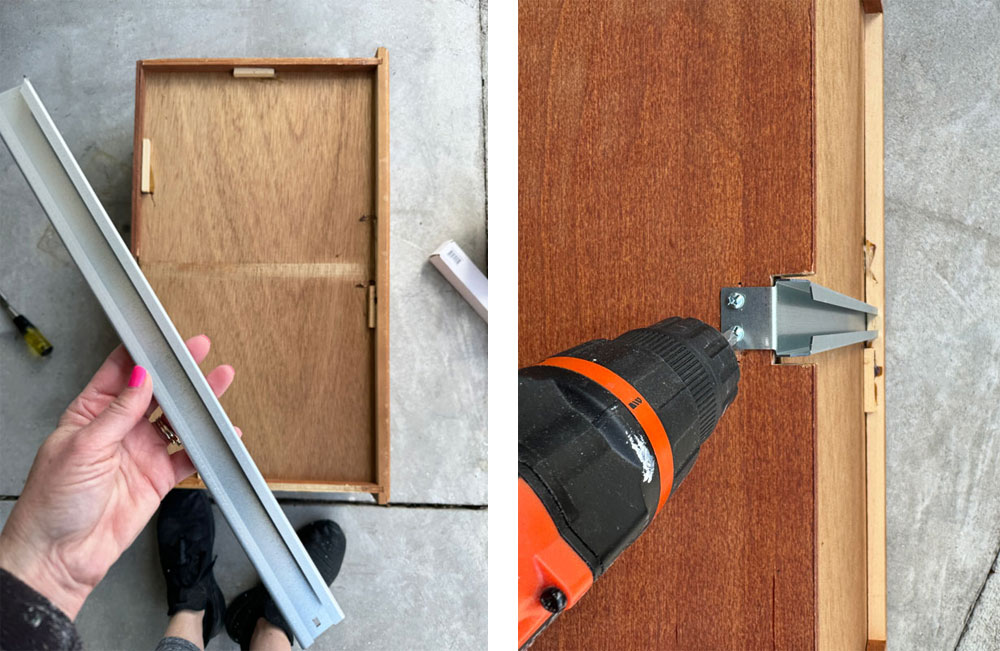
And now they slide beautifully!
Clean
Once I had all the glue scraped away, and the new drawer slides in place, I cleaned with White Lightning, mixing one TBSP into a half gallon of warm water:
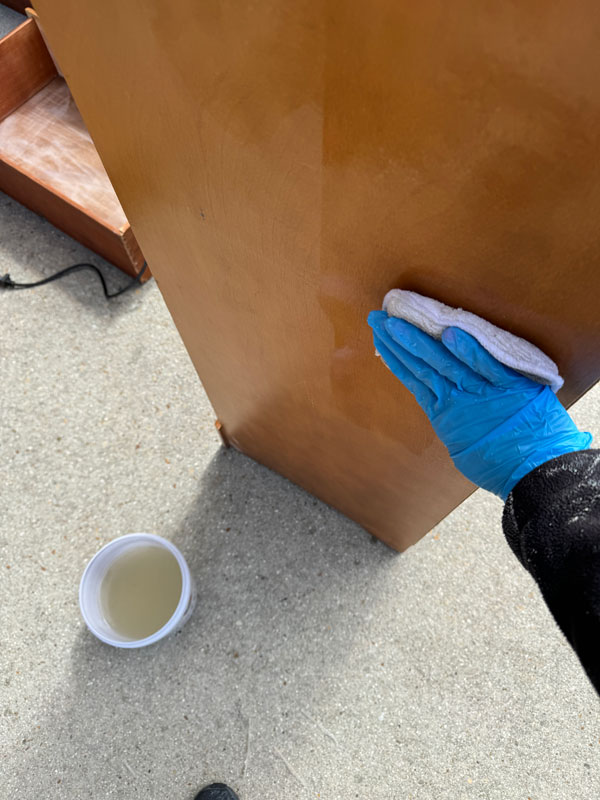
These terry cloth applicator pads are ideal for this purpose. White Lightning is a degreaser and a deglosser, so this is designed for paint prep, so it is not recommended for surfaces you do not intend to paint.
I swapped my water out for clean water and gave everything another wipe down to remove any residue.
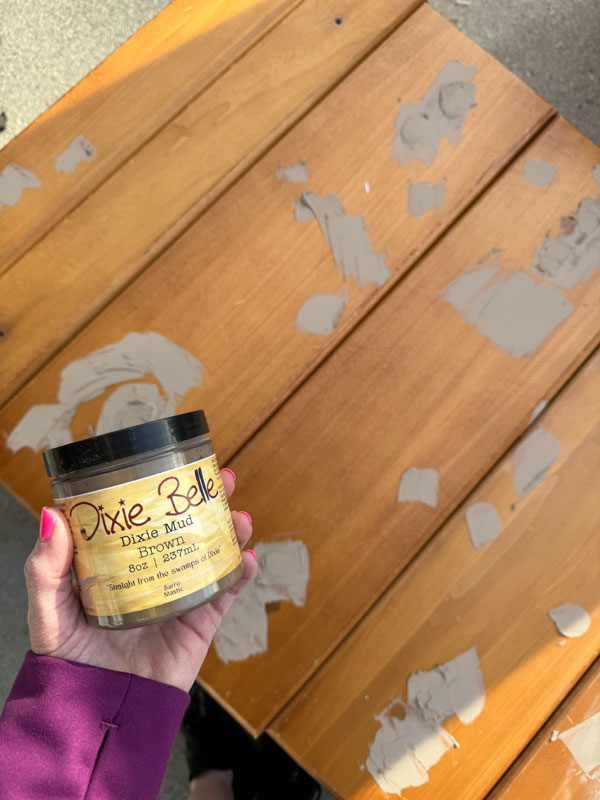
Fill holes and scratches
I had plans to let go of that beautiful hardware, so I needed to fill all the holes. I did that with Dixie Mud.
Many scratches got filled in as well…
Once that was dry, I sanded with my smaller Ryobi Cat sander using 220 grit sandpaper.
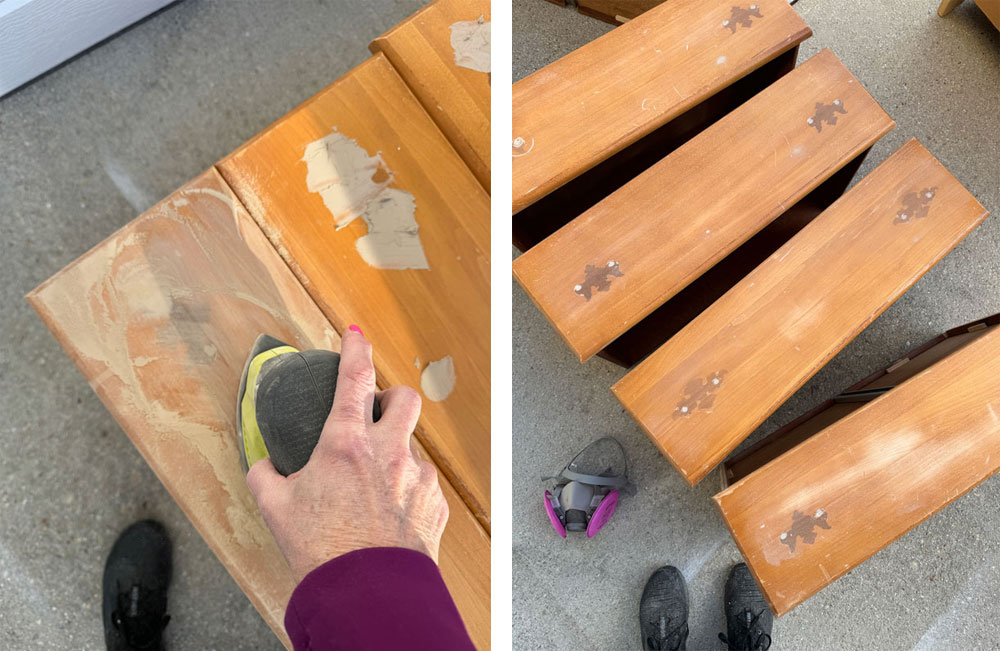
I don’t say it enough, but always be sure you’re wearing a respirator mask when sanding.
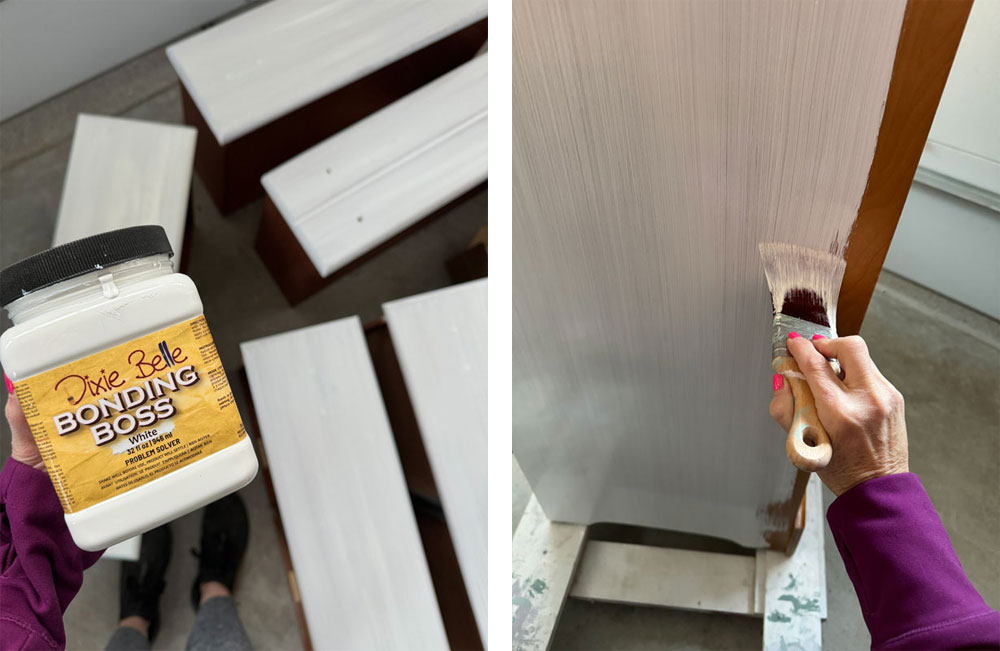
Prime with Bonding BOSS
I needed Bonding BOSS for two reasons.
Firstly, the top was laminate and I needed it to help my paint to adhere.
And secondly, sanding the original finish past the sealer opened up the opportunity for that pesky bleed through to come a callin’.
I gave everything two coats, about three hours apart:
Then I let it dry in the sun so I could start painting before the suggested 24 hour mark. The warm sunshine helps to speed up the dry time.
Paint
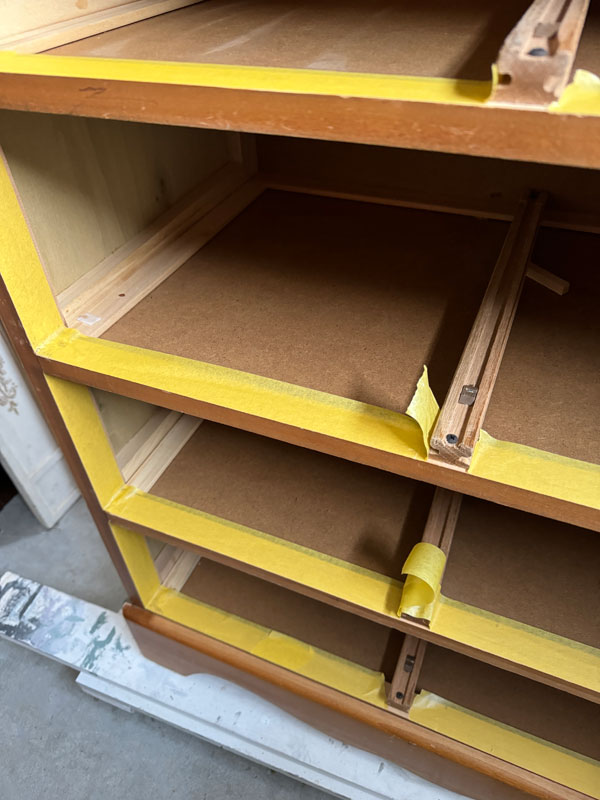
Before I got to painting, I taped off around the opening of the drawers with FrogTape for delicate surfaces to keep everything neat:
The color I chose is Fluff since I had a specific plan in mind for this dresser…
I probably could have gotten away with one coat of Fluff, but I gave it two. Be sure to pull any tape off while the paint is still wet.
Sand
The next step was to sand the surfaces smooth, and because I wanted a bit of a distressed look, I used 220 grit sandpaper wrapped around an old sanding sponge:

Otherwise, I would have opted for these fine grit sanding sponges.
My Plan for this dresser
When I was deciding what I wanted to do with this dresser, it occurred to me that I redid one very similar to this not too long ago that you can see HERE.
It came with two small night stands that I redid to match. The dresser sold pretty quickly, but the two night stands have just been sitting in my booth ever since, so I decided to redo this dresser to match to make them a set again!
Here are the night tables:

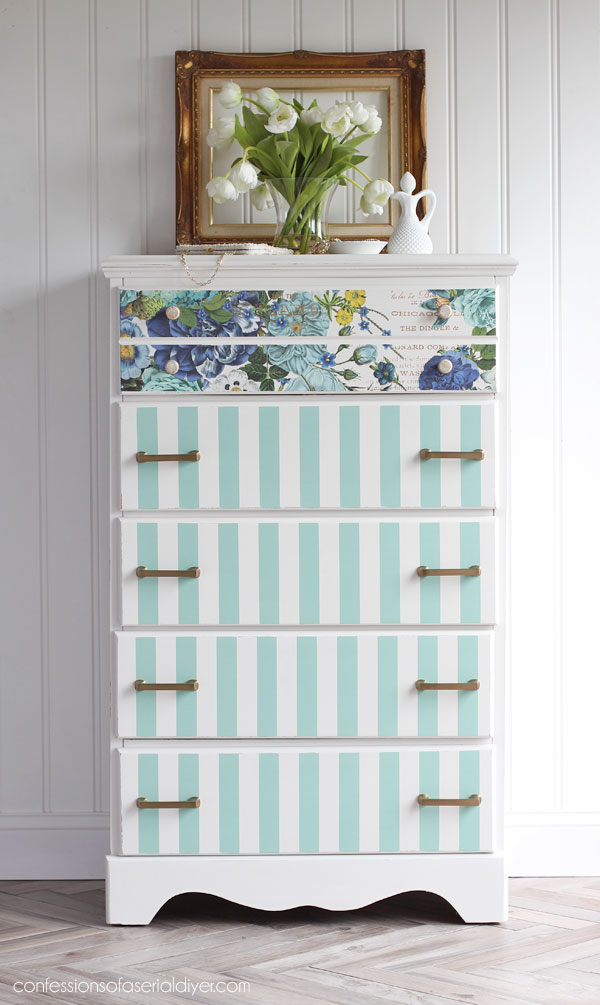
Isn’t the dresser SO pretty??
That is the Cosmic Roses transfer, one of my favorites! I also used it recently on another project HERE.
I did not want to open another set of this transfer to recreate that look this time, so I opted instead to use the couple of pieces I had left on just the top drawer…
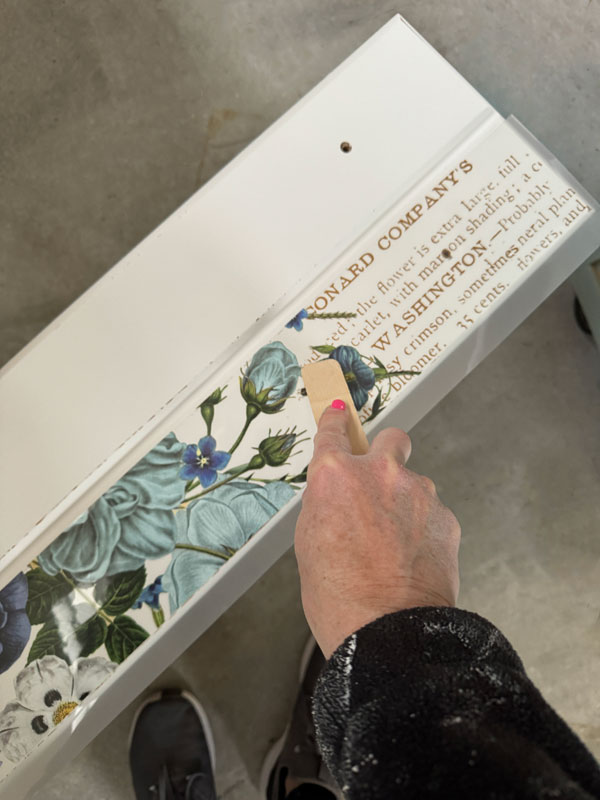
This was to mimic the drawer on the night stands.
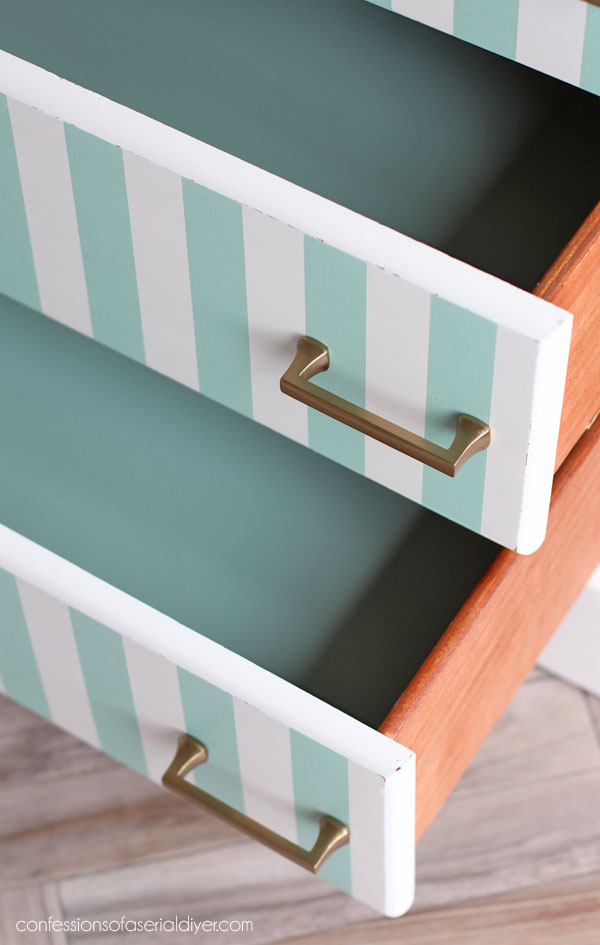
Then, for the rest of the drawers, I added a stripe in Sea Glass:

Seal
After giving those drawers another quick sanding, I sealed everything with two coats of Clear Coat in the satin finish using the blue sponge applicator.
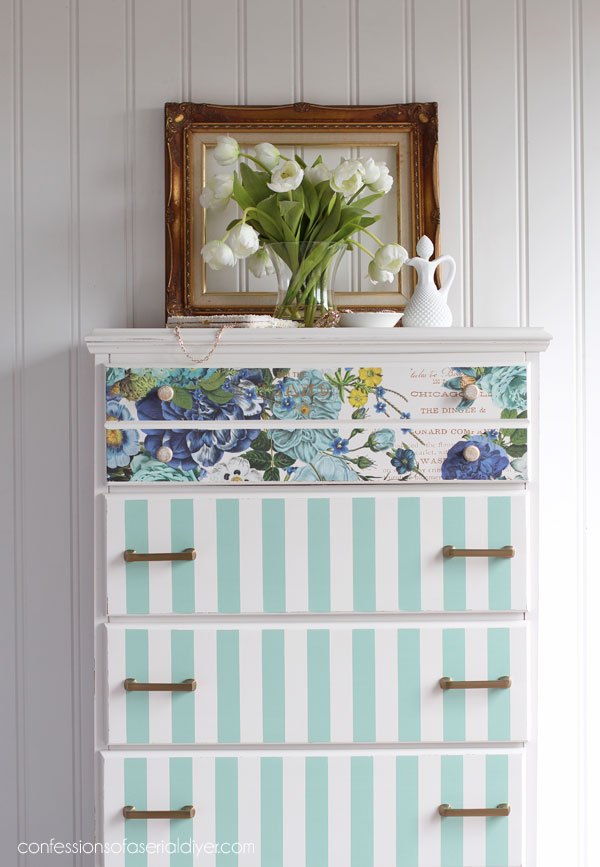
$10 Thrift Store Dresser Reveal
Here is how this $10 thrift store throw away looks now!
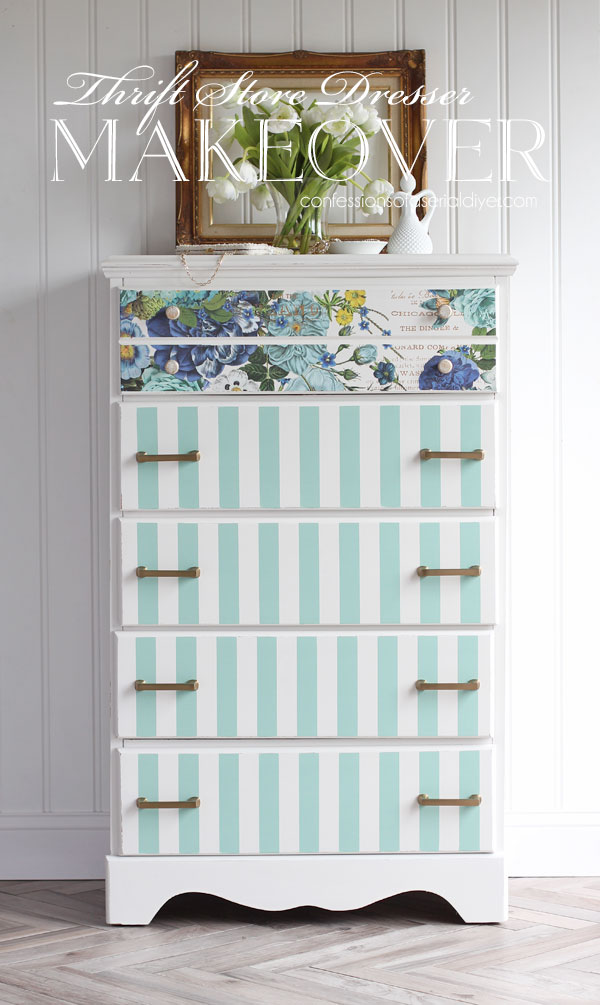
While I really loved the original dresser that I redid with the night stands, this one has a touch of whimsy!
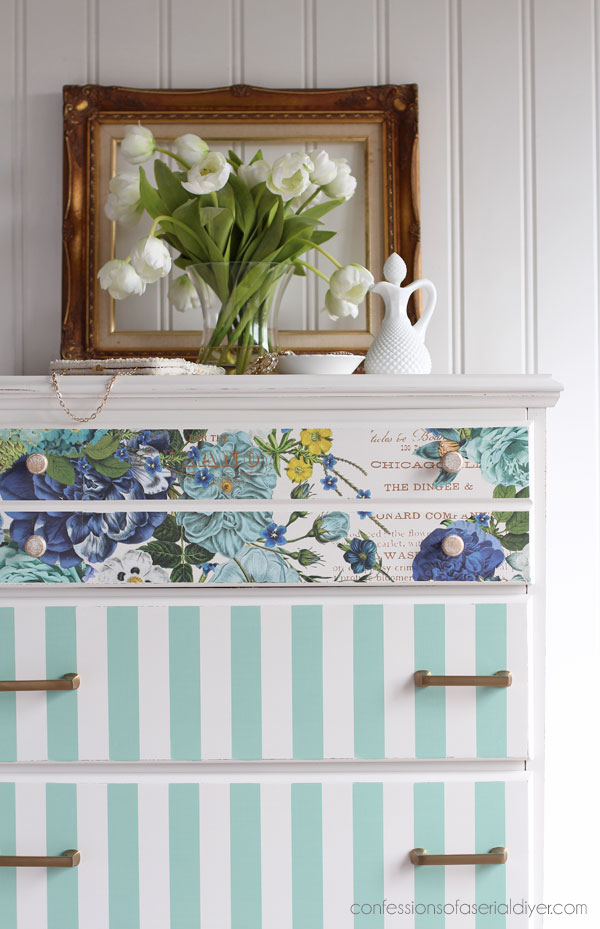
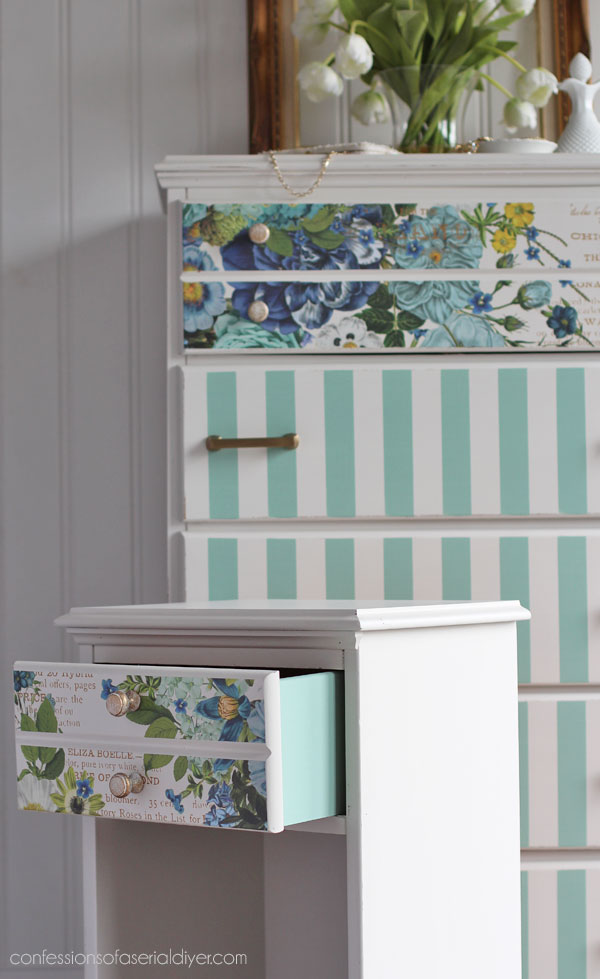
I only had a small amount of this transfer left…
But it was enough to make it coordinate with the night stands!
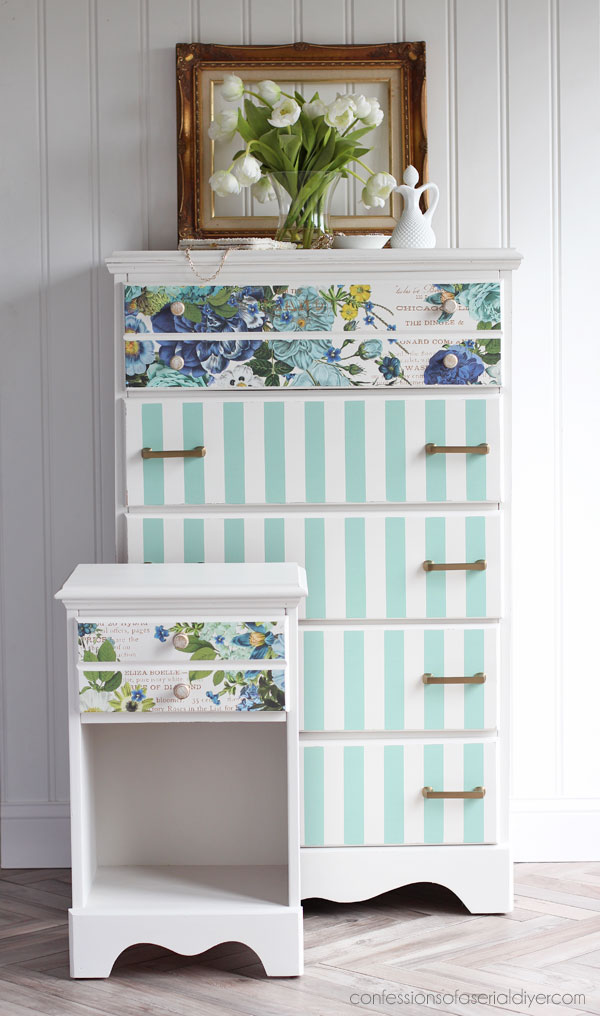
I brought one of them home for the photos.
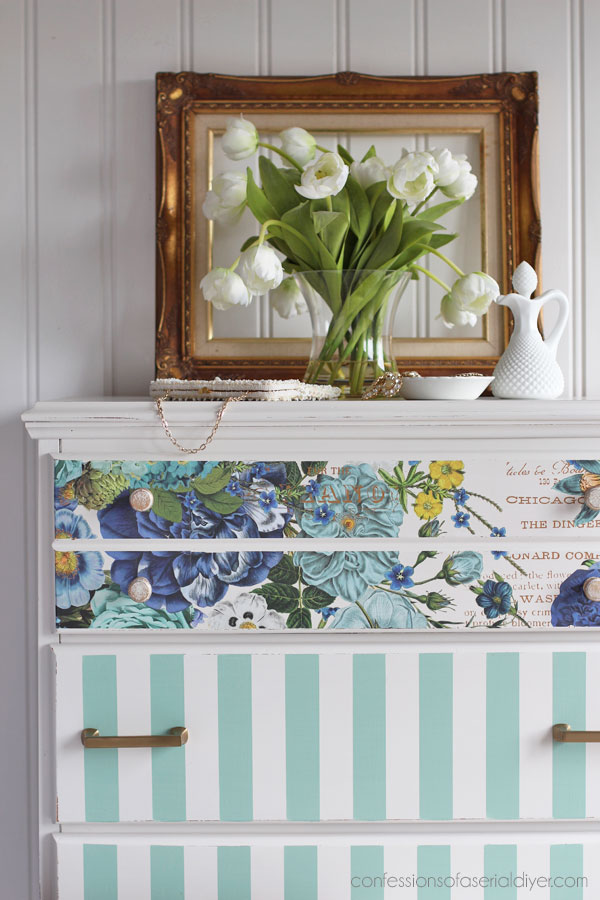
I had intended to use the same hardware that was used on the original. However, Hobby Lobby only had the knobs that were used on the top drawer…
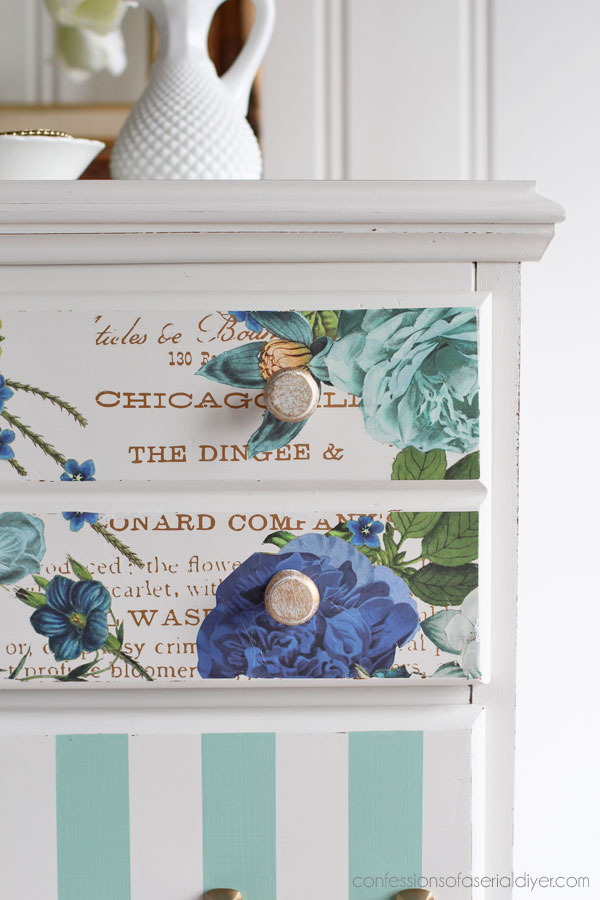
That was fine since those are the same ones used on the night stands, and that would tie them together, but then I had to find a another to coordinate with these.
I ended up finding these simple pulls at the Home Depot:
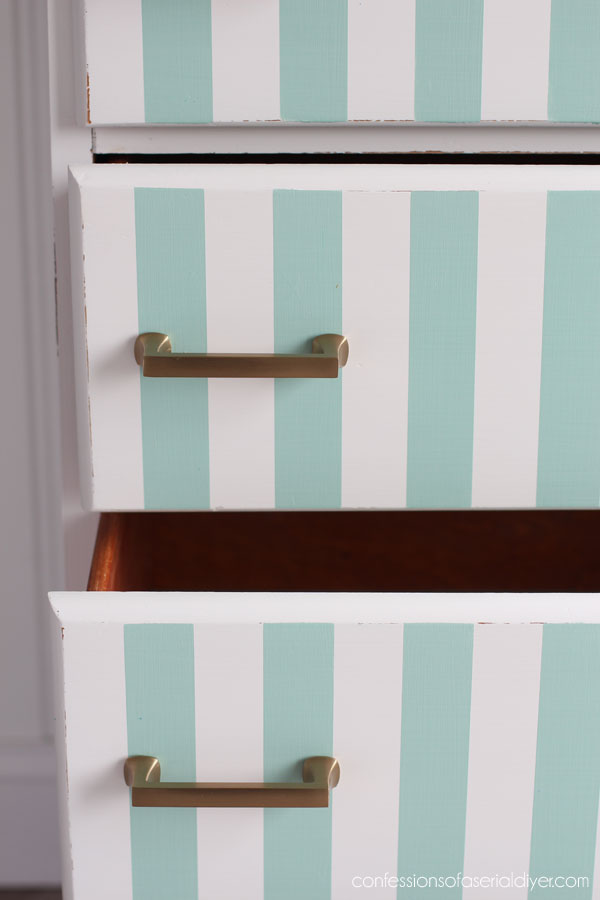
They aren’t the fanciest, but time was running out! All the hardware turned this now $40 dresser into about a $95 dresser.
That’s why I always love when I can reuse the originals!
All the money spent is the main reason I wasn’t tearing into a new transfer lol.
This is kind of fun though, right? I imagine it in a tween’s room.
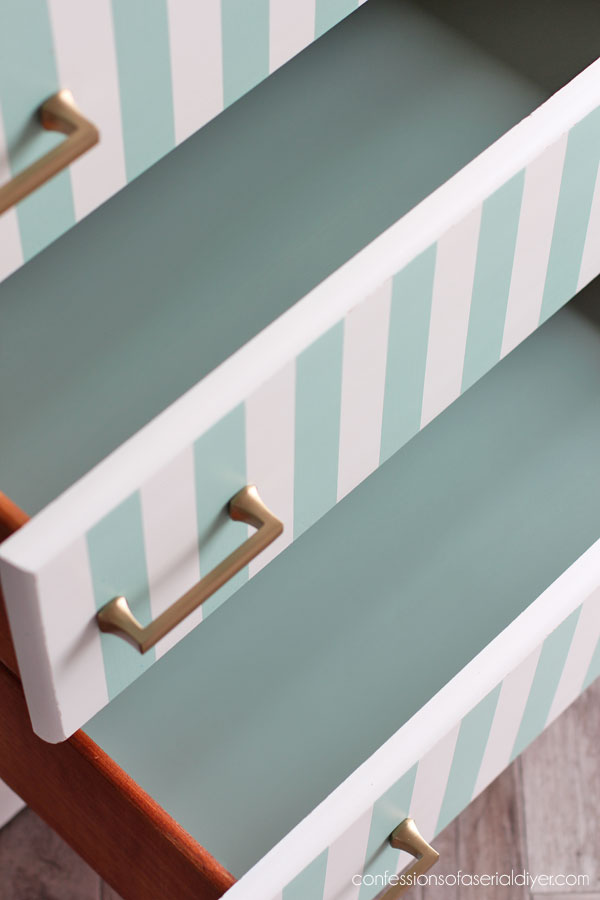
The Drawers
The interior of these drawers were in good condition except for the top drawer. It looked like it may have been used as a junk drawer. Also, the bottoms of the drawers looked like cheap paneling but without the lines…but shiny and fake like that.
I decided paint was the answer!
The drawers in the other dresser and the night stands were painted on the outsides in Tide Pool by Silk:
(Tide Pool is almost an exact match to Sea Glass in the Chalk Mineral Paint line.)
The bottoms of those drawers were immaculate, so I had left them as is.
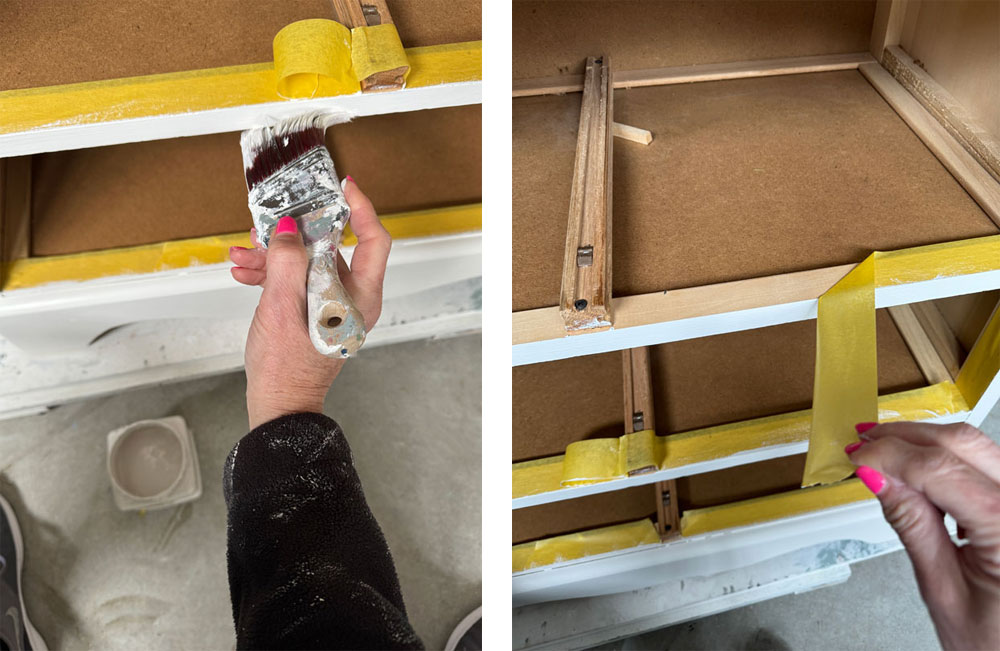
This time I painted just the bottoms. That required a sanding first so the Silk would adhere well since they were shiny on the bottom:
Then, they got two coats of Silk Tide Pool:
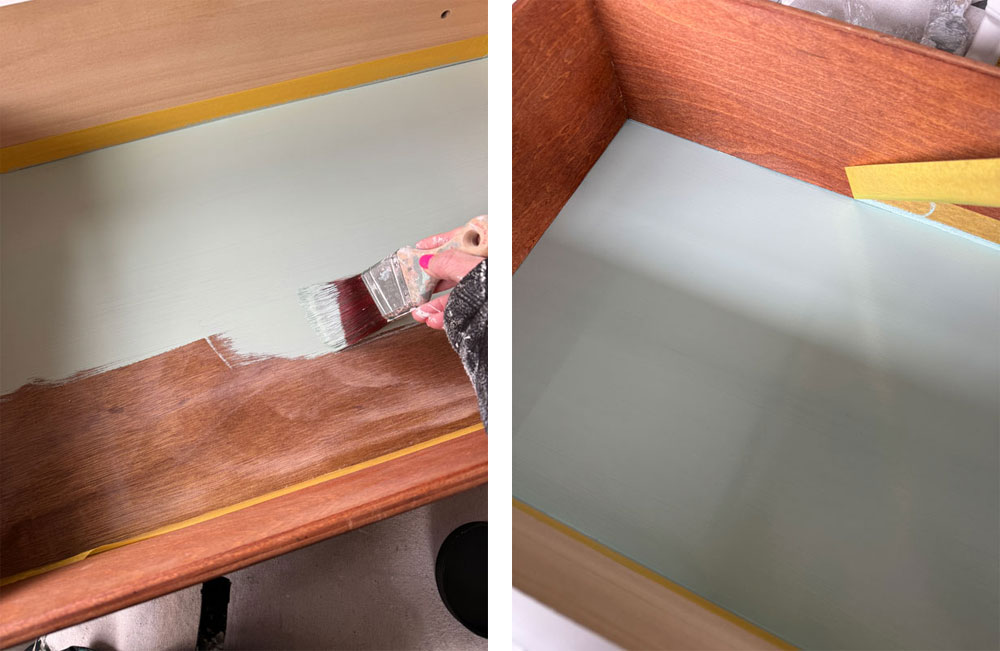
I taped them off so I would have nice, clean lines.
Now I think I need to paint the back of the cubbies of the night stands in stripes too!

Visit my friends’ Furniture Fixer Upper Makeovers below:
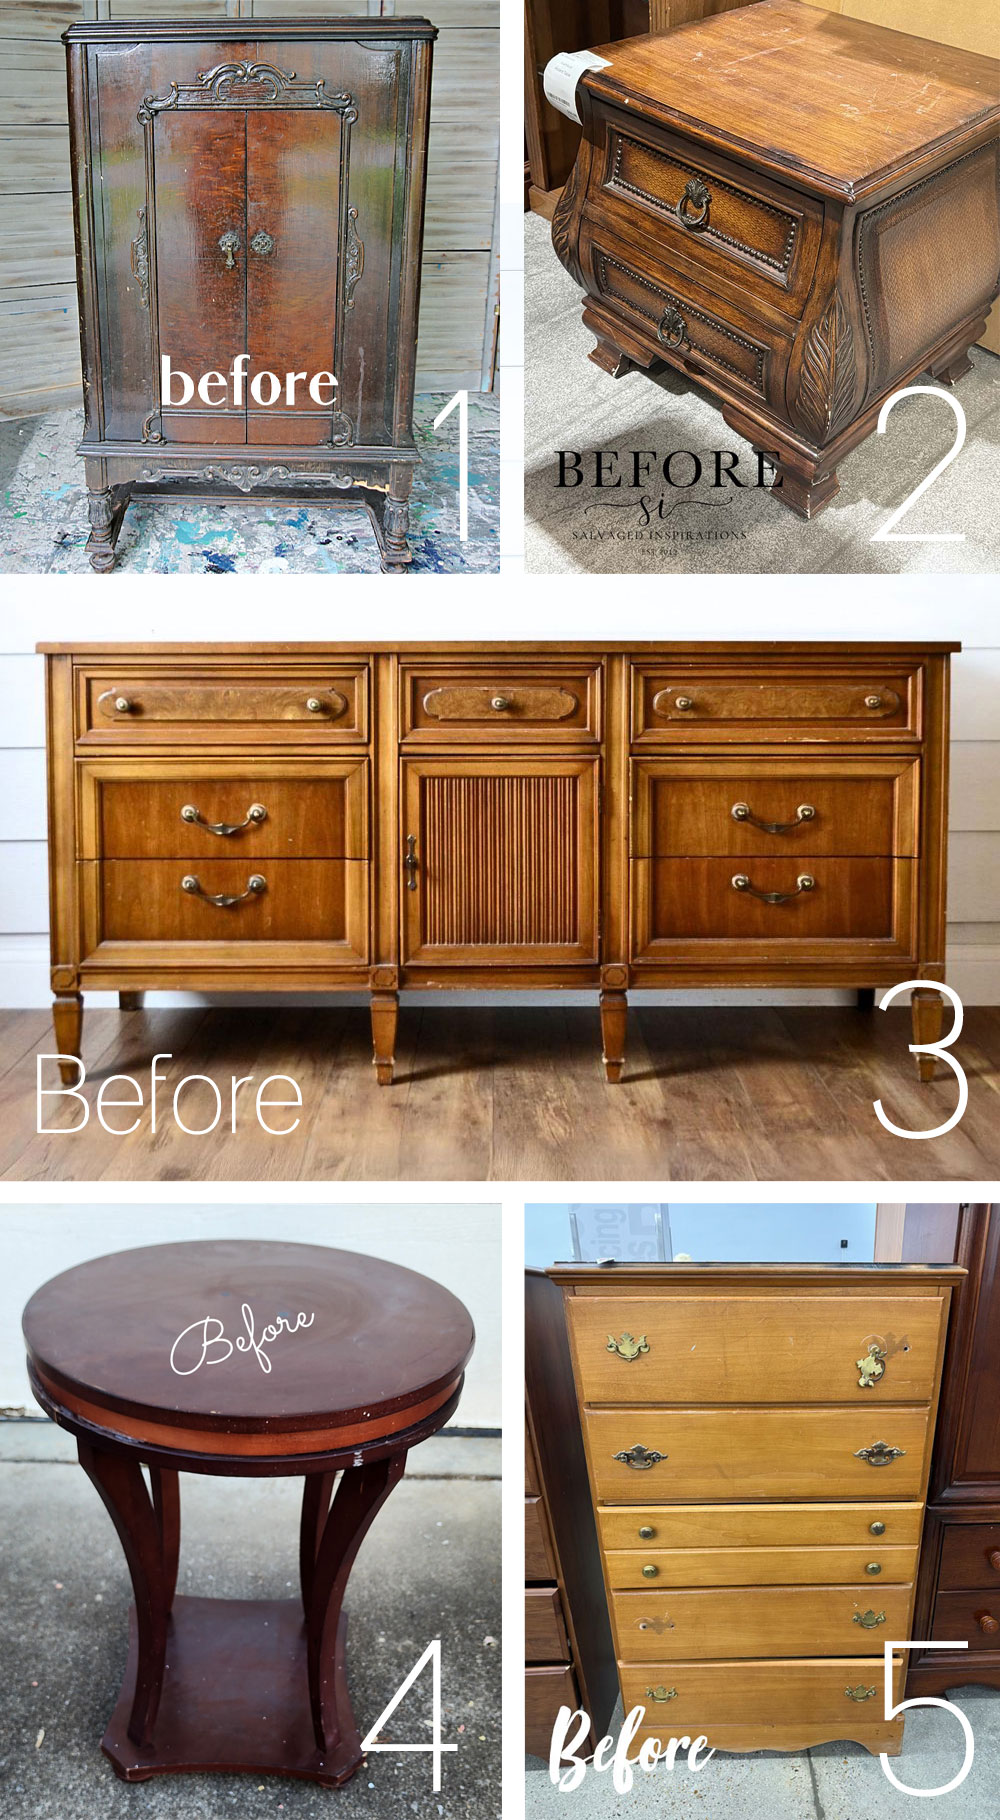
5. You’re here 🙂
I’ll be back to my current haul with a round of smalls next week!
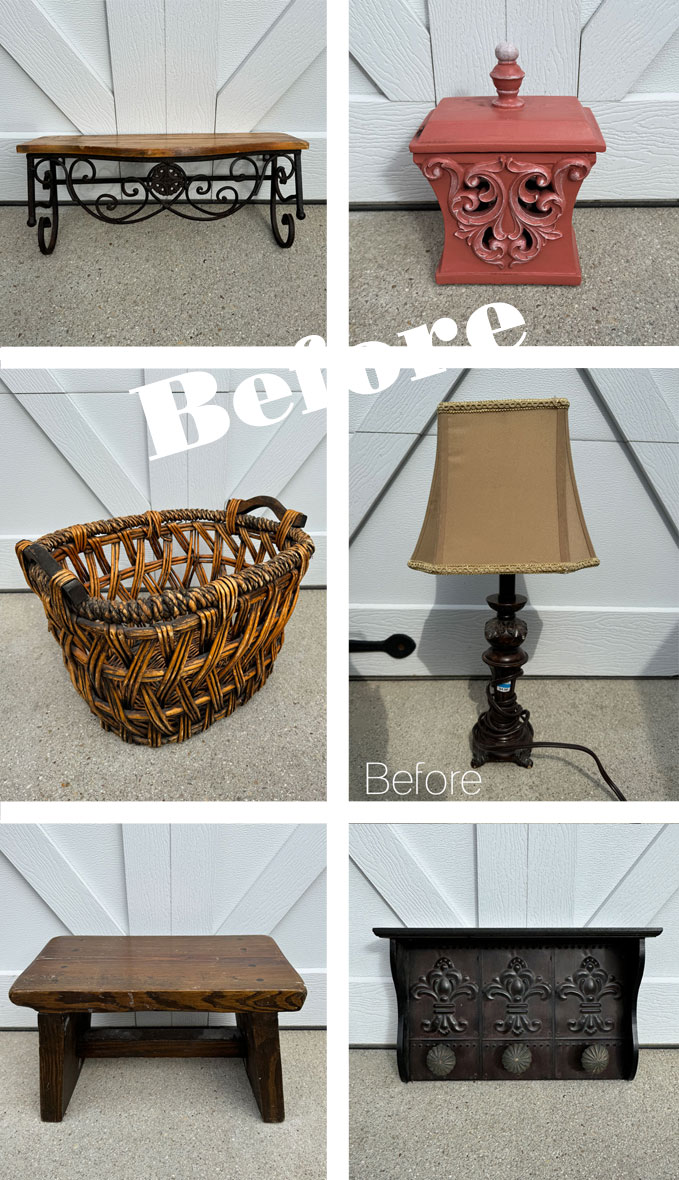
UPDATE: No need to wait! See what became of these SIX treasures HERE now!
XOXO,

Don’t Miss a Thing!
If you like what you see, there are several ways to follow along!
EMAIL * INSTAGRAM * FACEBOOK * PINTEREST


Mary Kaiser says
Oh my girl, you sure do get into it to make something beautiful again! I love how it turned out. I do think you are correct in painting the stripes on the back wall of the nightstands, then maybe they will sell as a set this time. I am sure that dresser feels special with the amount of work and money you spent to make her beautiful again!
Christy says
Thank you, my friend! I agree…I’ll be adding those stripes before taking these back for sure. I should still come out ahead yay! XOXO
Sue says
I love how well the new dresser matched the nightstands! You can never have too many stripes!
Christy says
Thank you, Sue! Stripes are always a go-to for me since they are so easy to add and FREE ha ha! XOXO
Janice Redden says
Christy, when you “imagine the possibilities” you always deliver beautiful surprises! I love the stripes on the lower drawers and the nightstand adds the oerfect balance of floral design.
Happy Easter sweet lady!
BTW, gorgeous nail color!
Christy says
Aww thank you, Janice! Happy Easter to you as well and my nail color doesn’t match this time, but I do love a hot pink! XOXO
Nana Diana says
GREAT makeover! I actually like the stripes and think it is a great match for the side tables. Hope it sells quickly.
Have a wonderful Easter holiday- xo Diana
Christy says
Thank you so much, Diana! Hoping they all sell together this time! Happy Easter! XOXO
Kathy says
Christy, a beautiful transfer and cute stripes…is there anything better than that?? I don’t think so. It’s gorgeous!!
Kathy
Christy says
Aww thank you, Kathy! I don’t think so either ha ha! XOXO
susan says
Really love the floral and stripes on this one!
So pretty!
Christy says
Thanks so much, my friend! XOXO
Cecilia says
I love the stripes! And I was thinking you need to paint stripes in the cubby part of the nightstands. 😊 It really turned out cute!
🥰 Cecilia
Christy says
Thank you, Cecilia! Yes, I will definitely be adding stripes to the cubbies! XOXO
Fran says
So pretty! This ugly duckling sure turned out beautiful and ready for Spring!
Christy says
Thank you, Fran! It is certainly ready for spring! XOXO
Marcie Lovett says
My goodness, Christy, I thought you’d sworn off previously painted furniture! 😁 I can’t believe the top sanded so nicely and that it ended up as charming as it is. What a disappointment to have to sink more money into it, although it does look adorable with the nightstands.
Christy says
Ha ha…me can’t resist cheap dresser lol. Luckily, it did sand super easily! I should still get my money back and I saved its life! 😀 XOXO
Larissa ~ Prodigal Pieces says
Score on the piece and even more so on the finish. Beautiful work, Christy.
Christy says
Thank you, my friend!! Have a blessed Easter! XOXO
Cheryl Atkinson says
Hi Christy! You put a lit of TLC into this dresser and I know those stripes took some time. It is amazing and I hope the set sells because someone will be very lucky to get it.
Christy says
Thank you so much, Cheryl! I think I’ll price everything together this time! XOXO
Tracey A says
Beautiful!
Christy says
Thank you, Tracey! XOXO
Janice Holt says
Turned out so pretty and the stripes just make it that much more beautiful. Yes, put a few stripes on the tables.
Christy says
Thank you, my friend! I’ll definitely be adding stripes to the tables! XOXO
Natalie says
How stinking cute! Love how you painted the Thrifted dresser! But also, thanks for sharing about the replacement drawer slides. Stinks when you have to replace them, but those look nice! Pinned!
Christy says
Thank you, Natalie! My girl name for my youngest was going to be Natalie. I think of that every time I see your name lol…so classic and pretty! Luckily, the drawer slides saved the day! XOXO
Denise Zdziennicki says
What an adorable piece, you fixed her up pretty my friend! I love the stripes and the florals. PINNED! XOXO
Christy says
Thank you, my friend! Gotta love stripes and florals… all I need is some checks and I have the total 90’s trifecta lol! XOXO
Hannah Reyor says
Loved it! The stripes surprised me but work!!!! Hope all 3 pieces sell fast this time. 💕
Christy says
Thank you, Hannah! I wasn’t sure at first either lol, bit it was just so plain without them…glad they worked out. And yes, I will probably price them as a set this time! XOXO
Jan Southern says
The music on your shopping videos is SO loud. If I adjust the sound, I can’t hear the conversation, which is very soft. Please don’t blare the music, the music isn’t the reason we watch the videos.
Christy says
Thank you for the feedback, Jan. So sorry about that. XO
p says
Yes. Nice update 😉 I do love me some stripes. It looks like a set again – after adding the cubby stripes of course.
Painting the drawer bottoms make it look sooo fresh.
Amazing how much cost the hardware adds – but… it is the jewelry.
Happy Easter.
Christy says
Thank you, P! I loves stripes too! It was just so plain without something on those bottom drawers. I will definitely be adding stripes to the cubby on the tables and will probably price them all together this time. And yes, hardware can really add up! Happy Easter!! XOXO
Michele M. says
Oh my word, Christy! WOW!!!!
Very well done – and a great smart thought-out plan for this makeover.
What a neat set now! Someone will be ecstatic to have that.
Christy says
Thank you, Michele! Hoping it all sells together this time. I may just price it as a set! Happy Easter weekend! XOXO
Carroll Xavier says
Totally love this transformation, especially the sea glass stripes (my fave colour!) and really like the new hardware! I agree with adding the stripes to the small tables, would really tie the set together. I know it’s a lot of work, but you make it look so easy 🙂
Christy says
Aww thank you so much, Carroll! I love Sea Glass too. And yes, I will definitely be adding stripes to the back of those cubbies! XOXO
Leticia Beam says
Simply lovely! you do amazing work!
Christy says
Thank you so much, Leticia! XOXO
Susan Pease says
Love the stripes and agree the cubbies need some stripes! Also love the inside drawers that you paint make it special! Well done👍❤️
Christy says
Thank you, Susan! Adding the stripes will definitely be on the to-do list for those cubbies. I might have left the drawers as is since they were all in good condition except for the top drawer, but the paint does add a little something extra! XOXO
Cyndi says
Christy, you are soooo much braver than me! This piece would have scared me off cuz it was uuug-ly. Ha ha! But you did such a good job on it. It’s beautiful, and it looks perfect with the nightstands.
Christy says
Ha ha! Thank you, Cyndi! Sometimes those cheap price tags can be very convincing lol! XOXO
JANET SCHEN says
Oh My Goodness! It is fabulous! Love the colors! I love everything about this! Great job!
Christy says
Aww thank you so much, Janet! XOXO
Robin says
Nice work, Christy (even if it was an added expense). So funny that I was thinking as I saw the night stands “she needs to paint stripes on them” & later on there you go speaking out loud my exact thought! LOL. Seems like, though, people don’t buy coordinating bedroom furniture as much these days. I can tell you that in our new place (June) the 2nd bedroom only has room for a queen bed & night stands. No chest of drawers…nada. Luckily my mom’s solid walnut bedroom set was split up…night stands to me, highboy to daughter, & not yet sure what to do with the dresser. Headboard was changed out decades ago by Mom.
Christy says
Thank you, Robin! Yes, stripes in those cubbies are definitely on the agenda. You may be right about that, but I am going to hold out hope that they sell together lol! XOXO
Kelly Schulte says
Beautiful work as always, Christy!
I can’t believe those nightstands haven’t sold. They’re beautiful! Glad you were able to create another set. Yeah, stripes in the cubbies of the nightstands would look great! Wonderful tips. Thank you for sharing!
Christy says
Thank you so mcuh, Kelly! I will definitely be adding stripes to the night stands and will likely price them as a set this time. Hopefully, they sell quickly! XOXO