Hello, amazing friends! I have a hot mess serpentine dresser makeover to share with y’all today! This is a favorite from 2022. My sister and I went out of town this weekend, so I did not get a thing done!
She lives here, and our older sister who lives in Wisconsin, was helping to move her daughter and son-in-law into their new apartment on the outskirts of Baltimore this weekend. Her husband reached out last week and suggested we come up and surprise her since they would be just a few hours away, and so we did! She was so surprised and we had so much fun!
Giveaway update
My friends and I will be drawing the winners of the $200 Dixie Belle Giveaway sponsored by Dixie Belle today, so keep an eye on your inbox!
The Hot Mess Serpentine Dresser
Today’s dresser makeover was originally shared for Furniture Fixer Upper day a couple of years ago. It took a lot to get it to the finish line, so I thought it would be a fun one to revisit.
I’ve included a few affiliate links so you can find the products I love.
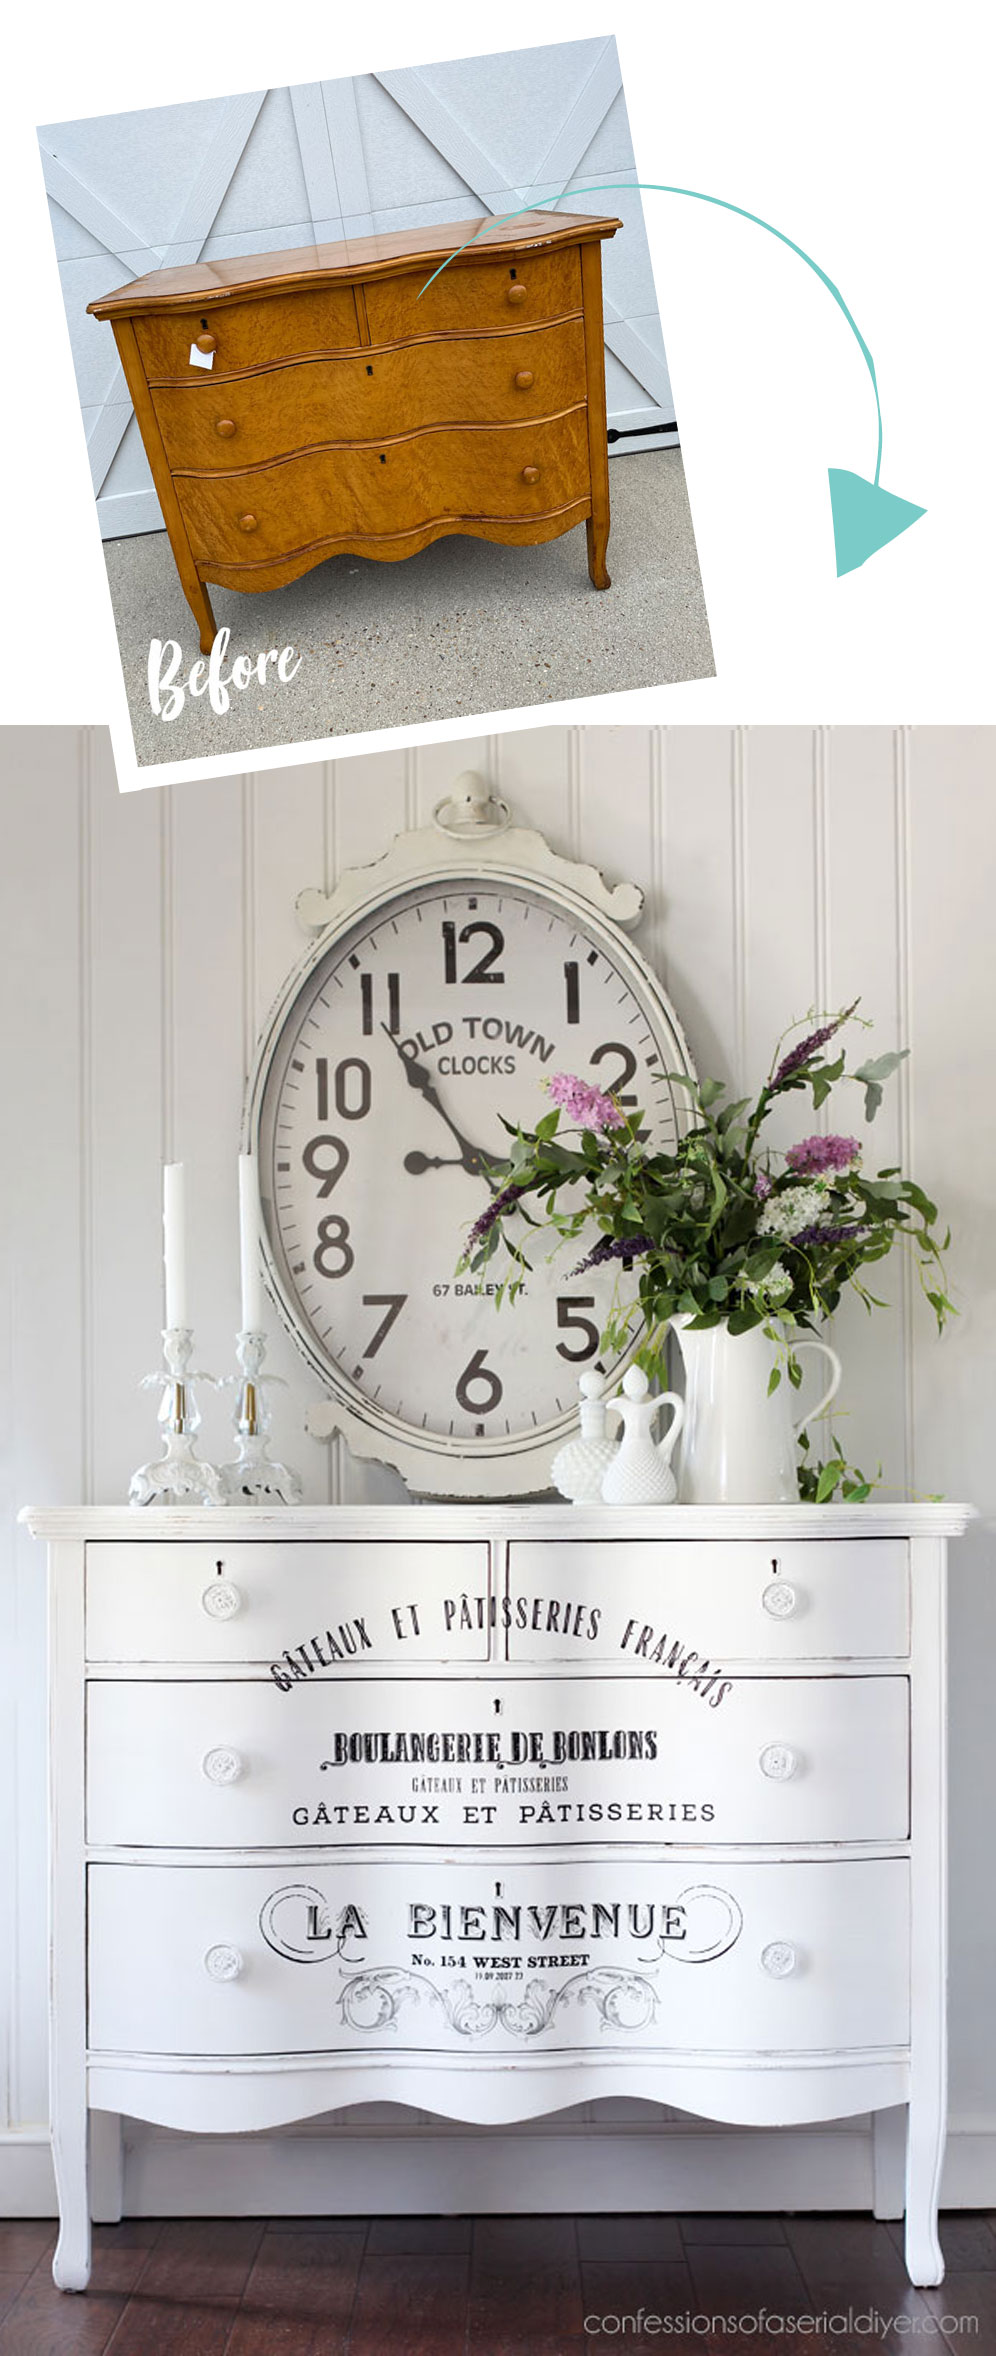
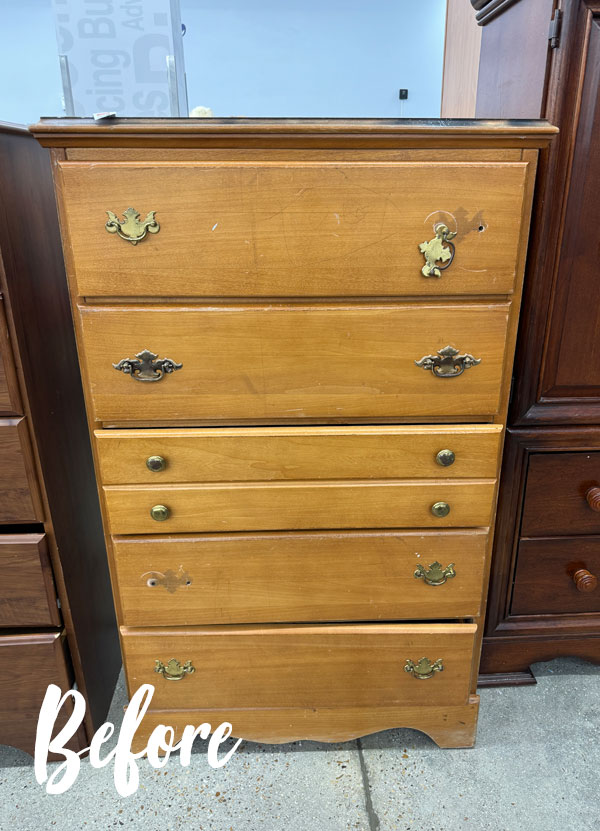
Here is how this classic serpentine beauty started:
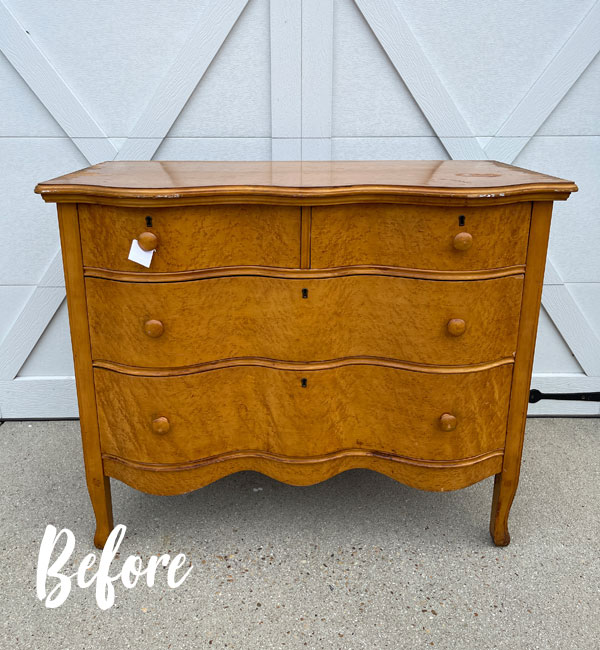
Nice, right? Not so fast!
Looks can be deceiving!
The good thing is it was a real steal at only $34.95. And, it had zero stink yay!
However, it needed some major TLC.
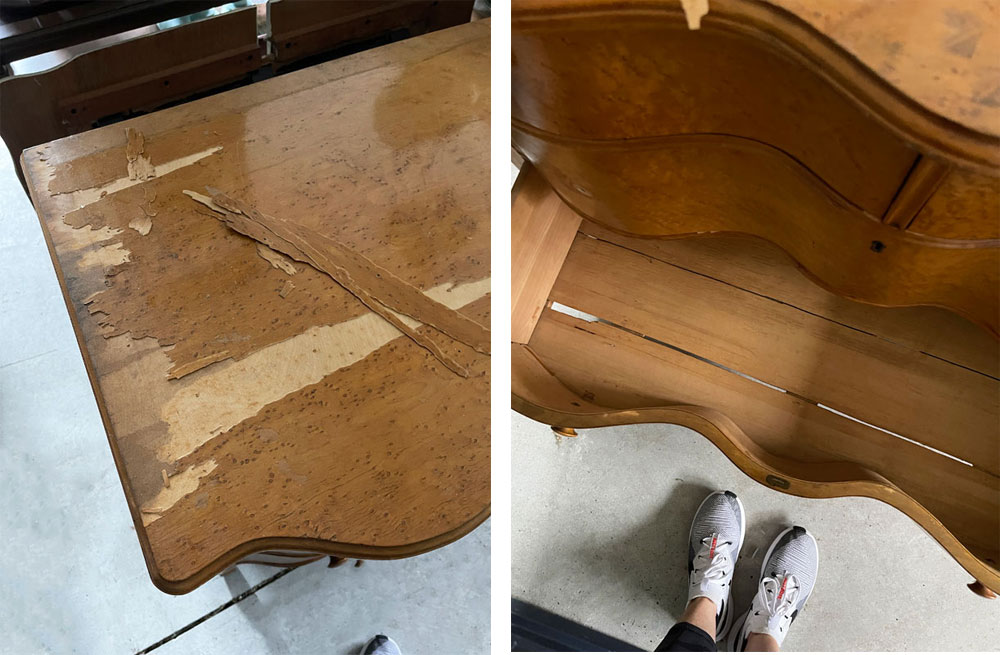
The top had missing and chipped veneer, and one of the drawers needed an entirely new bottom:
Removing Veneer
I was able to remove a good portion of the veneer pretty easily with a putty knife:
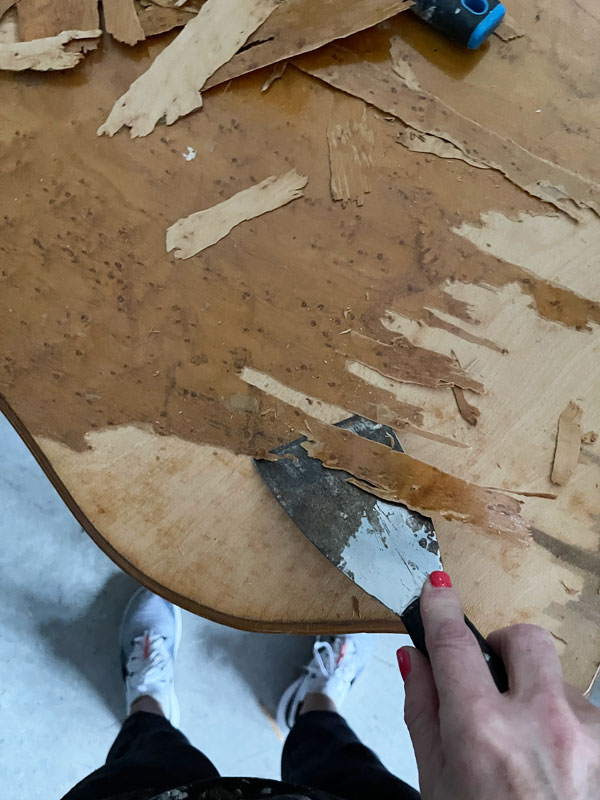
The rest of it was not so easy…it was stuck on there good!
To remove it, I applied soaking wet towels to those areas and let it sit overnight and part of the next day:
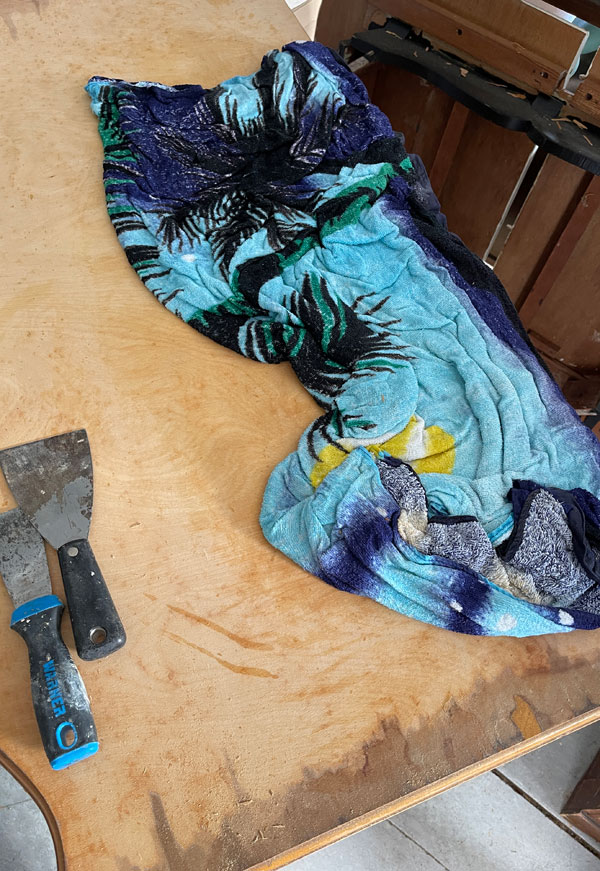
That softened the glue enough to be able to remove the rest pretty easily.
Sand
Once I scraped away the rest of the veneer, I gave the top a good sanding using my rotary sander:
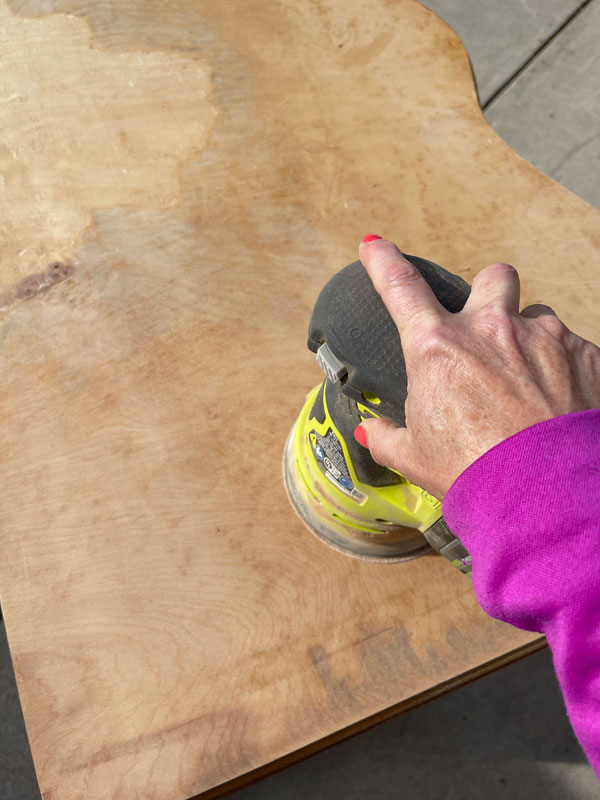
This sander is great and comes in a corded and cordless version. I started with 120 grit sandpaper and finished with 220 grit.
Replacing the drawer bottom
Once the top was taken care of, I moved on to the drawer bottom that needed replacing.
Someone had tried to hold it together with a piece of an old crate at one time:
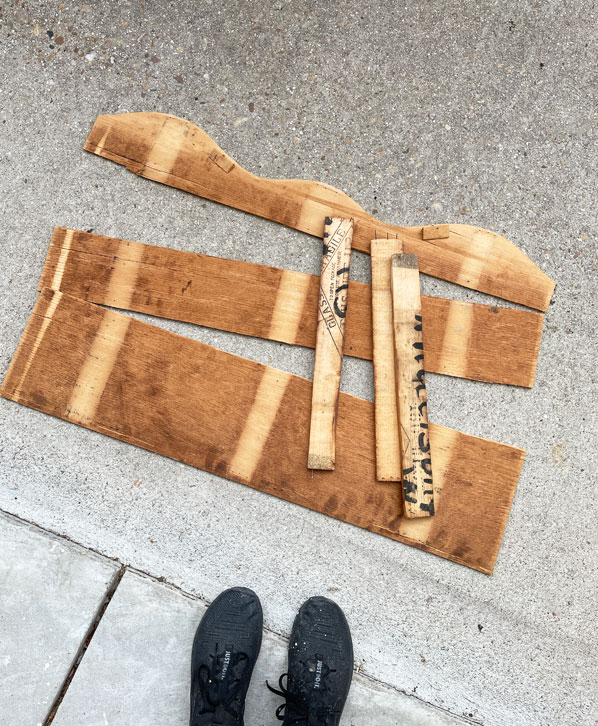
But it really needed to be replaced. I traced the bottom pieces onto a fresh piece of thin plywood and then cut it with my Ryobi jigsaw
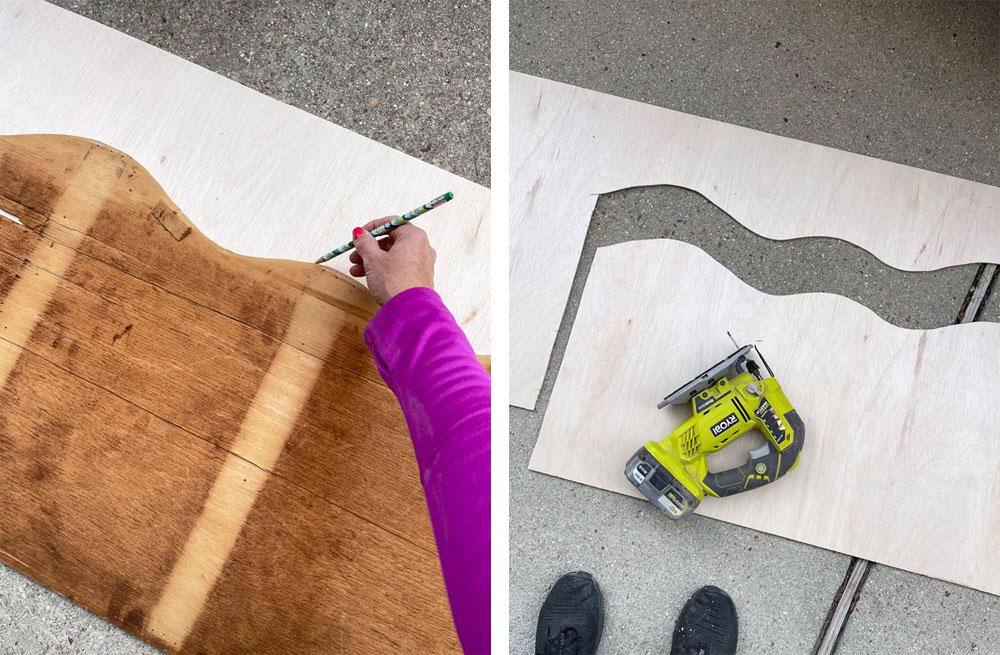
This is a great saw to use on those rounded edges, especially if you swap out the original blade for a smaller scroll saw blade (made for the jig saw).
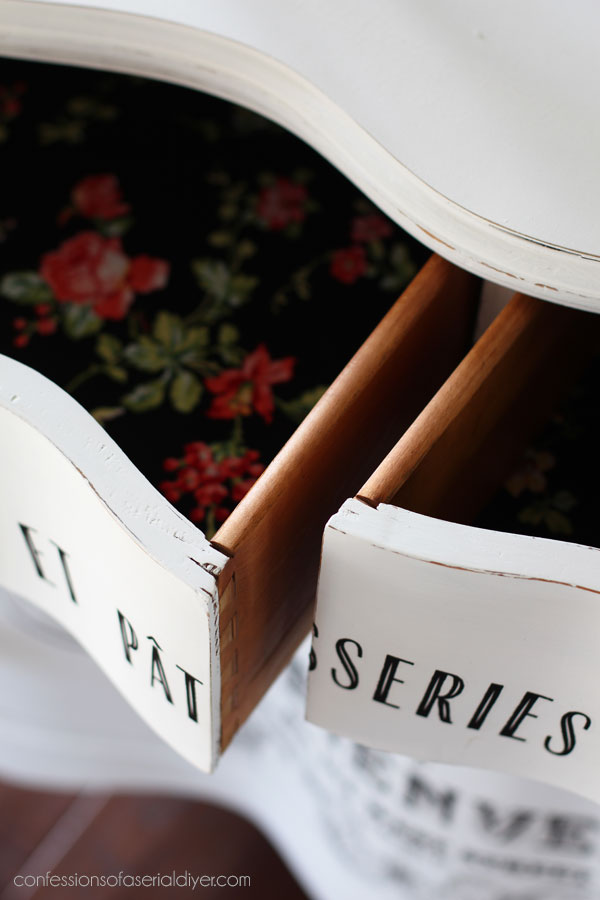
Fix Broken Drawer Joints
Most of the dovetail joints were loose and coming apart as well.
I used wood glue to glue them all back together.
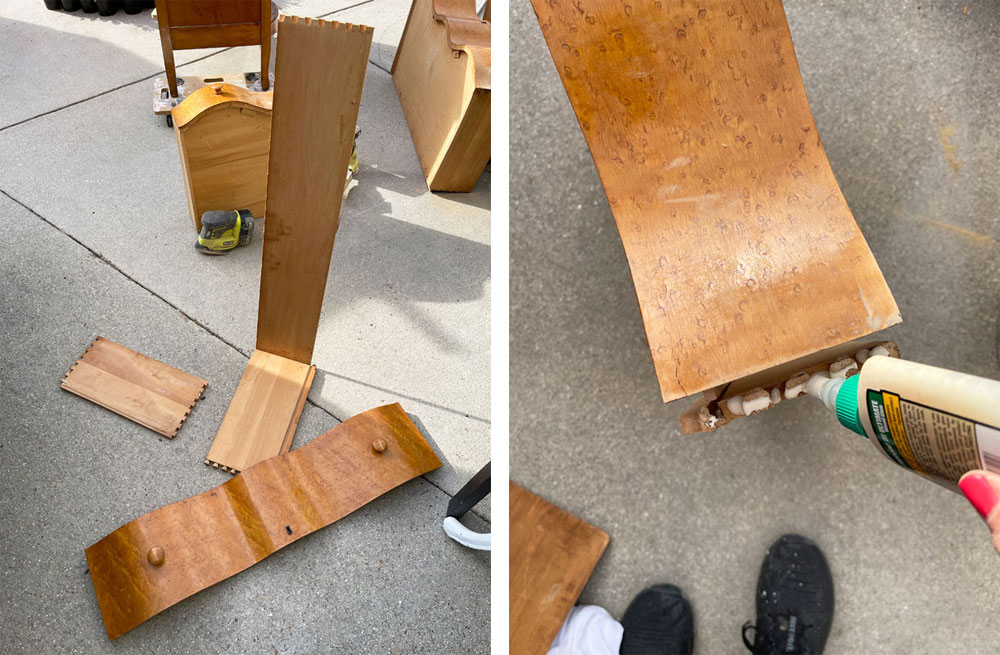
Once the drawers were all repaired, I sanded all the sides to make them fresh and new looking again using my Corner Cat Ryobi Sander:

Finally, I was getting closer to the good part!
Clean
Once I had everything repaired, I gave all the pieces a good vacuum with my shop vac followed by a thorough cleaning with White Lightning:
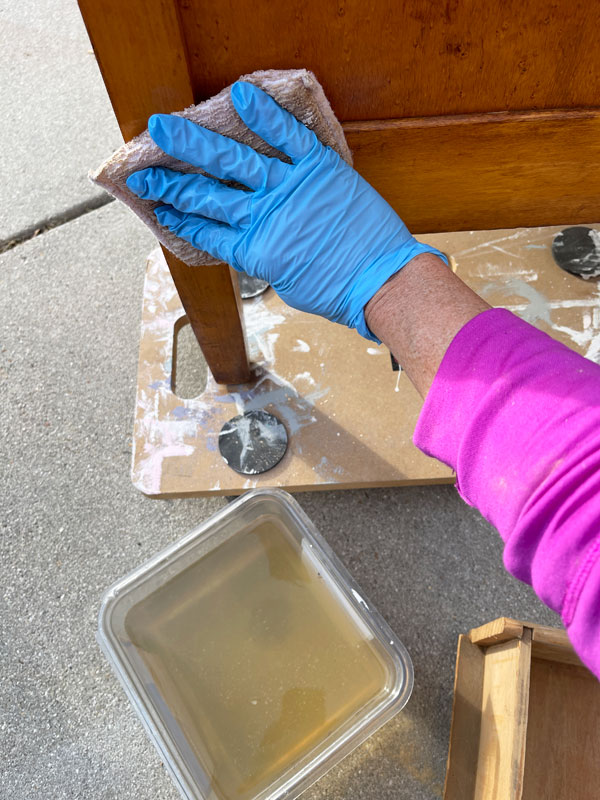
I swapped my water for clean water to rinse away any residue, and I was ready for paint!
Or so I thought.
This dresser threw me another curve ball.
As I started to apply the paint, I immediately got bleed through:
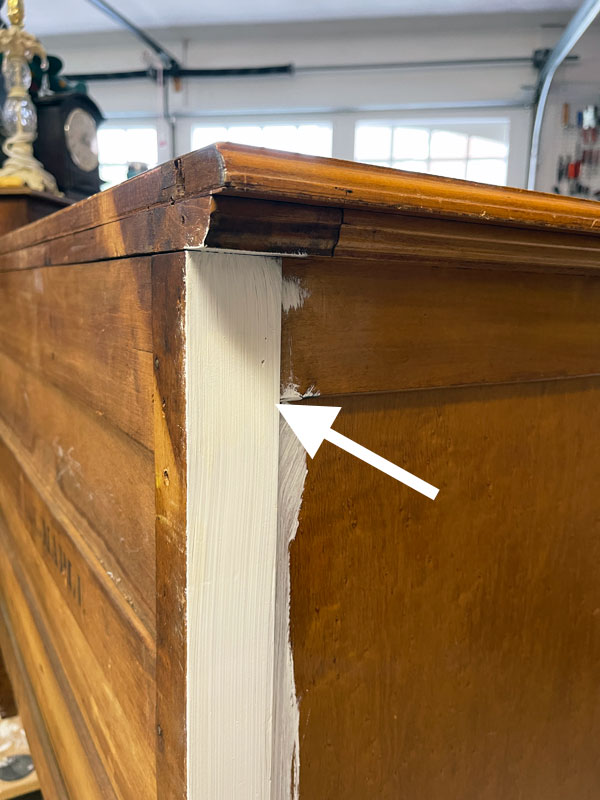
It may be difficult to see it in that photo, but that was an open invitation for my go-to stain blocker, BOSS:
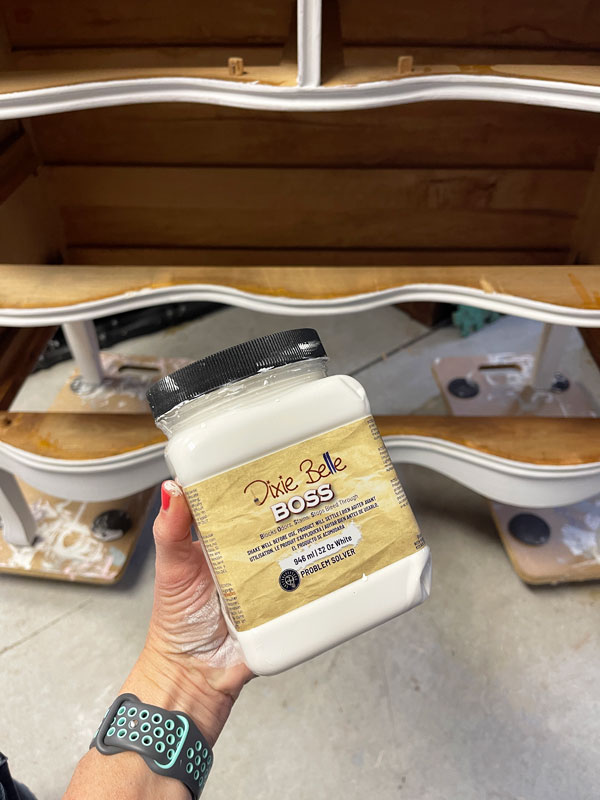
I chose white, but it also comes in a clear formula and a gray formula as well.
This white BOSS will both block the bleed, and save me a coat of white paint.
**I still have some BOSS available, but it has since been replaced by Bonding BOSS, still available in all three colors!**
I let that dry overnight to be sure it was good and dry. (Proper dry time is the key with BOSS!)
Paint
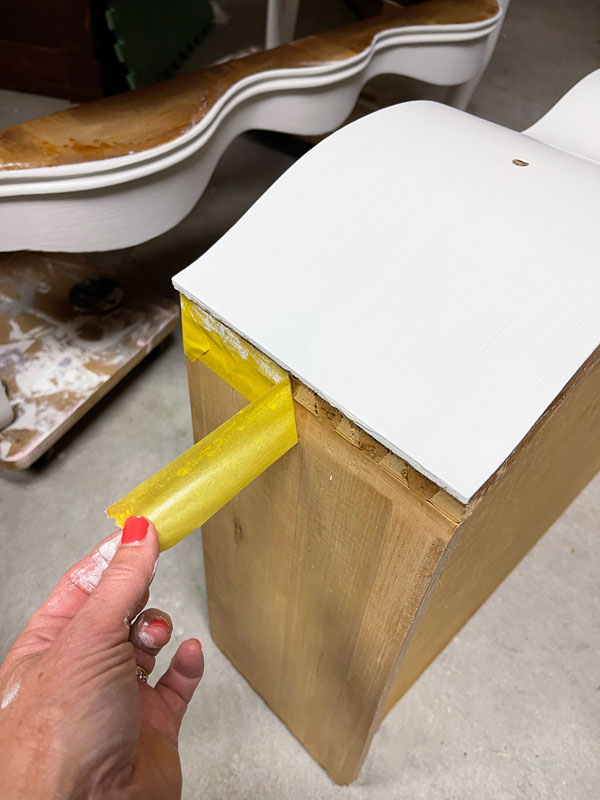
Then I was ready for paint!
I applied two coats of Cotton white over the White BOSS:

This was the first coat and you can see how yellow the BOSS was underneath in that photo.
I taped off all my drawers with FrogTape before painting to get a nice clean edge and removed it as soon as I applied my final coat of paint.
Sand
All the painted areas got a good sanding with 220 grit sandpaper to make all surfaces as smooth as possible, hitting the edges a bit more to distress.

I vacuumed any sanding dust with my shop vac.
See my complete tutorial for The Best Way to Paint Furniture White HERE.
Transfer time
Of course I reached for another gorgeous Redesign with Prima Transfer, the French Specialties transfer:

The fantastic thing about these transfers is that you can use them as is, or you can cut them up and use them any way you like!
That’s what I had to do here since the original design didn’t fit my dresser.
I first laid this dresser on its back and then decided on the pieces I wanted to use.
Once I was settled on a design I liked, I used the included tool to burnish it to the surface:
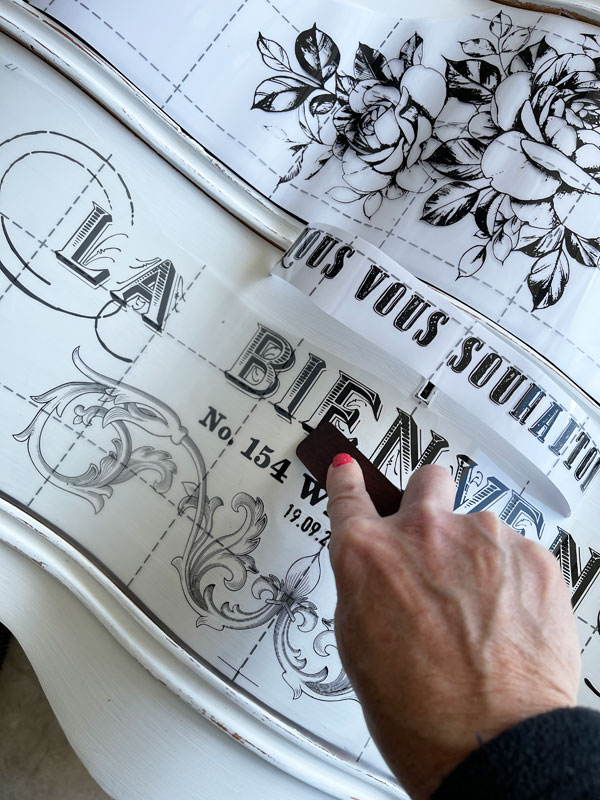
I kept adding my design until it was complete!
Seal
This piece had yet to be sealed in these photos because I noticed some blemishes on the top that I hadn’t noticed until I pulled it out into the light of day. I fixed them with Dixie Mud and then sealed with Clear Coat in Satin using the blue sponge.
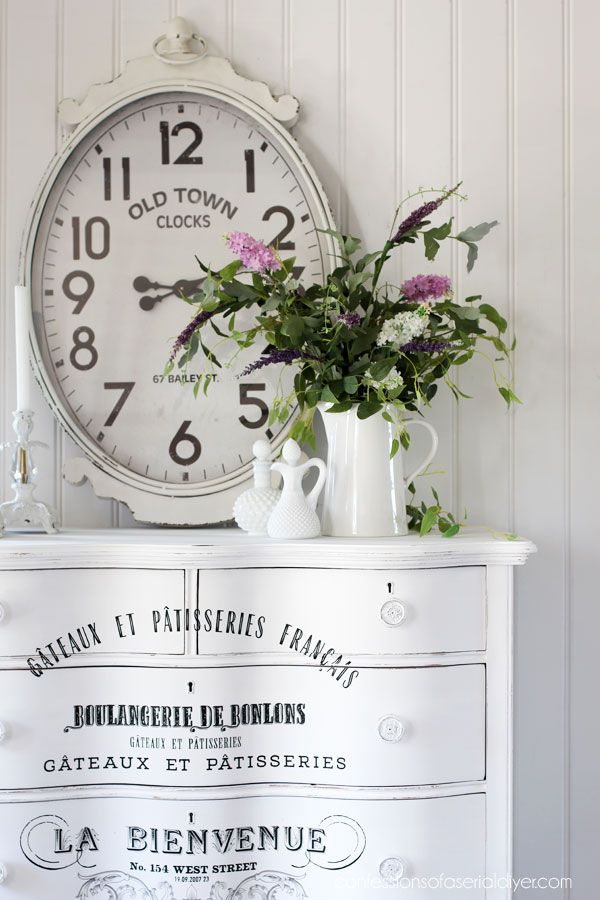
This Hot Mess Serpentine Dresser Makeover is now complete!
Here is how this classic beauty looks now!
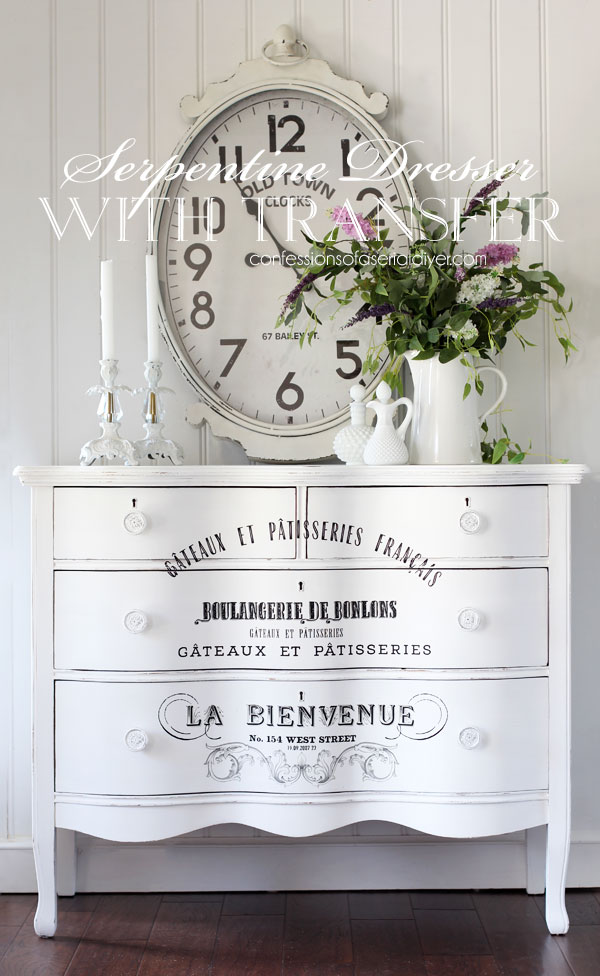
I love a classic black and white makeover!
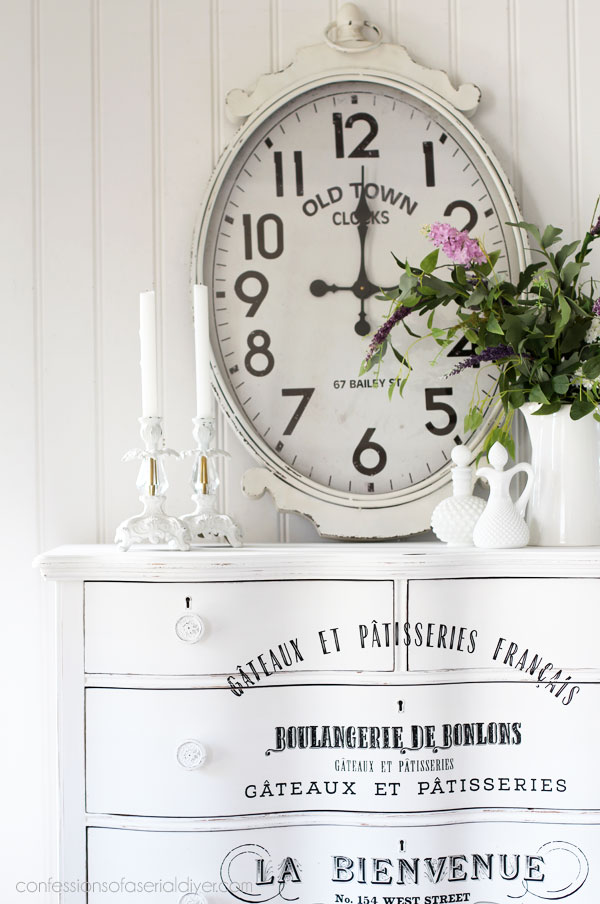
I always get questions about the clock when I share it in posts…it came from HomeGoods several years ago.

I swapped out the plain wooden knobs for these pretty metal ones from Hobby Lobby…
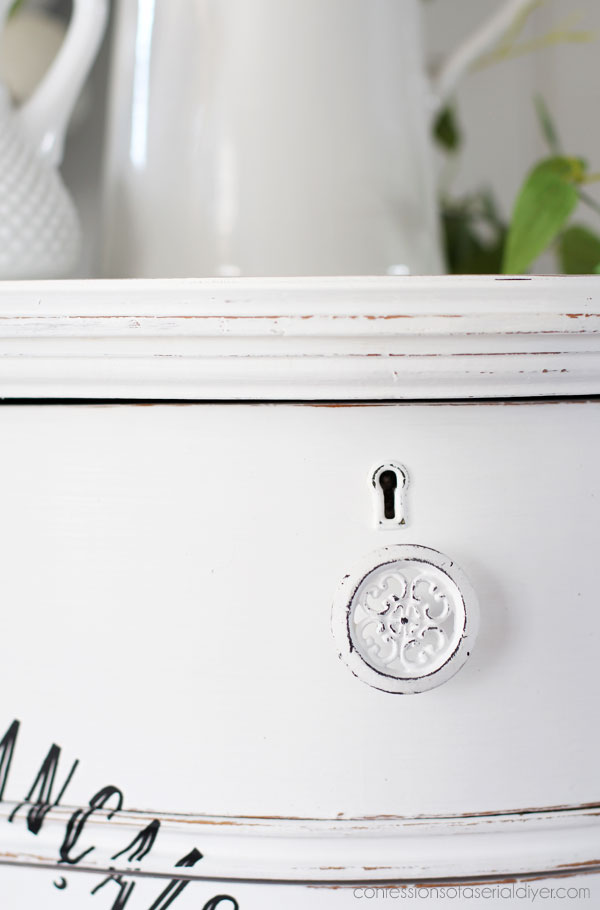
They came already painted and were just perfect for this dresser!

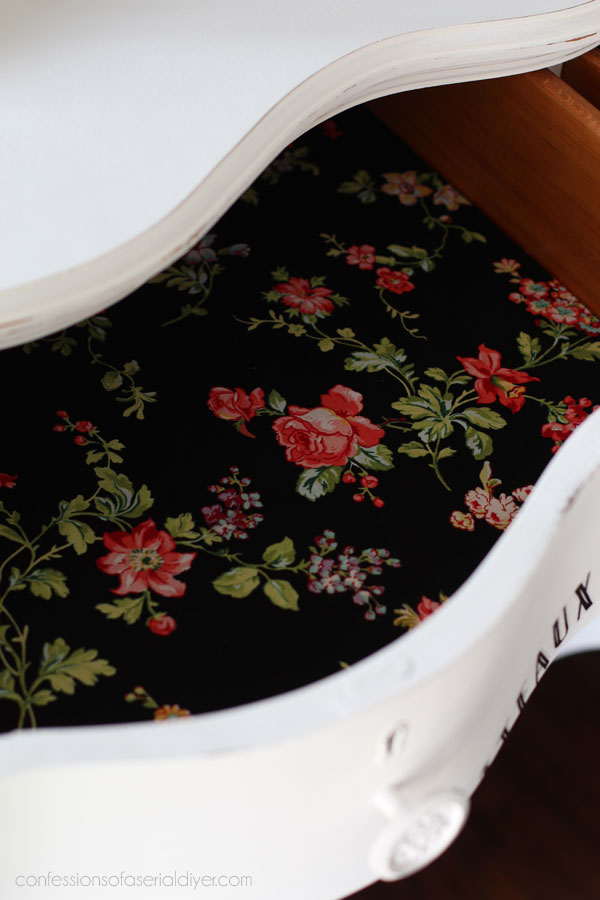
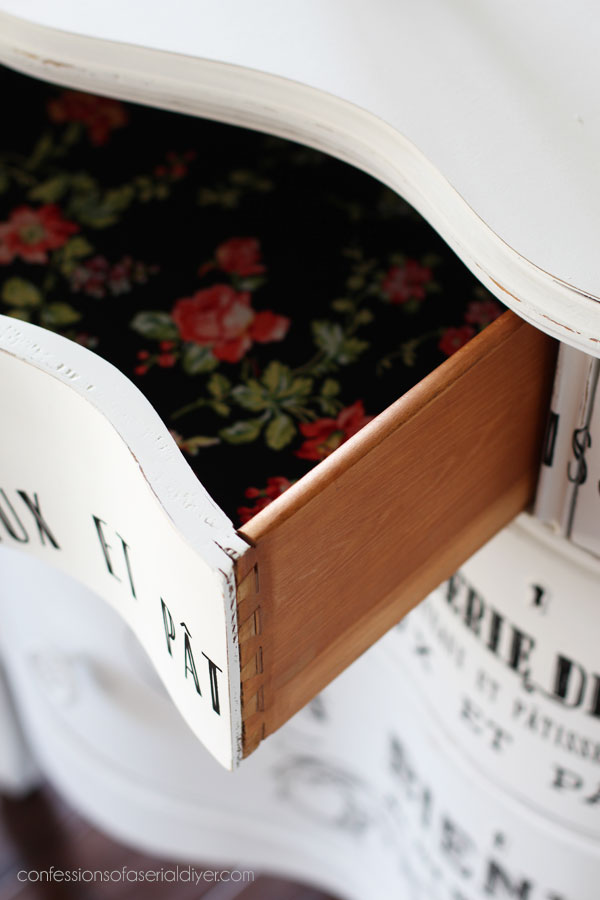
The drawers
Of course I had to give the drawers some love!
I use this gorgeous floral print often like HERE, HERE, HERE, and most recently HERE!
For these drawers, I made a pattern first and used my rotary cutter set to cut the fabric:
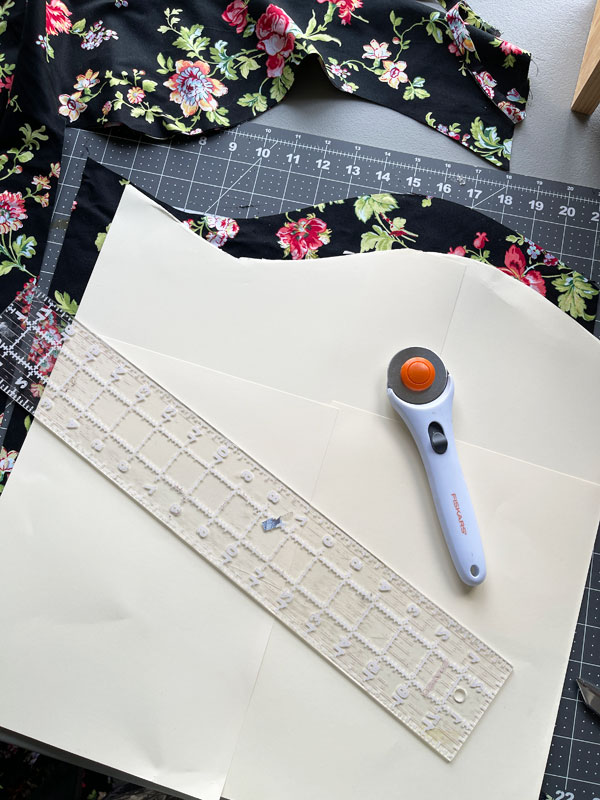
Here’s a video on how I line drawers with fabric:
If you have trouble viewing, find it on YouTube HERE.
I applied the fabric with matte Mod Podge.
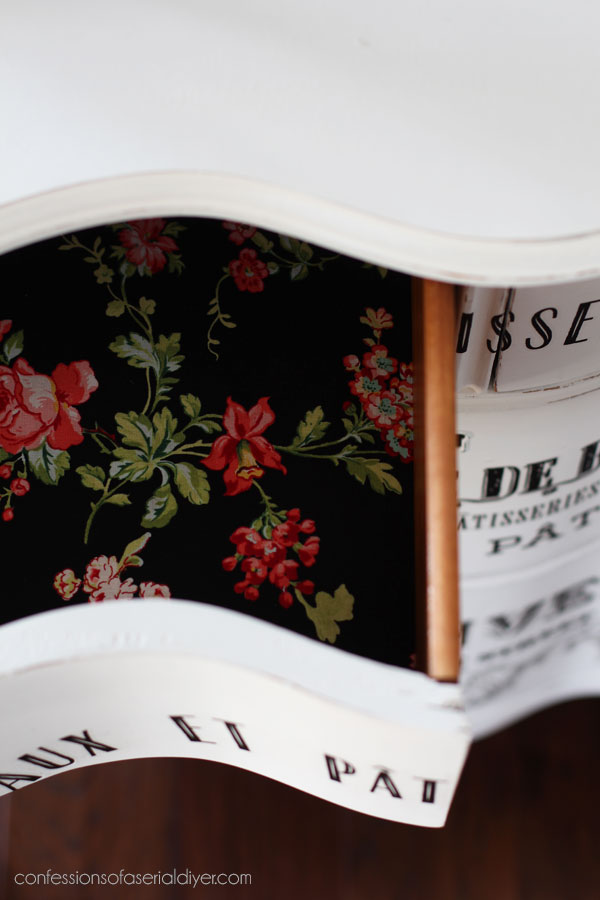
And how pretty are the rest of the drawers now?
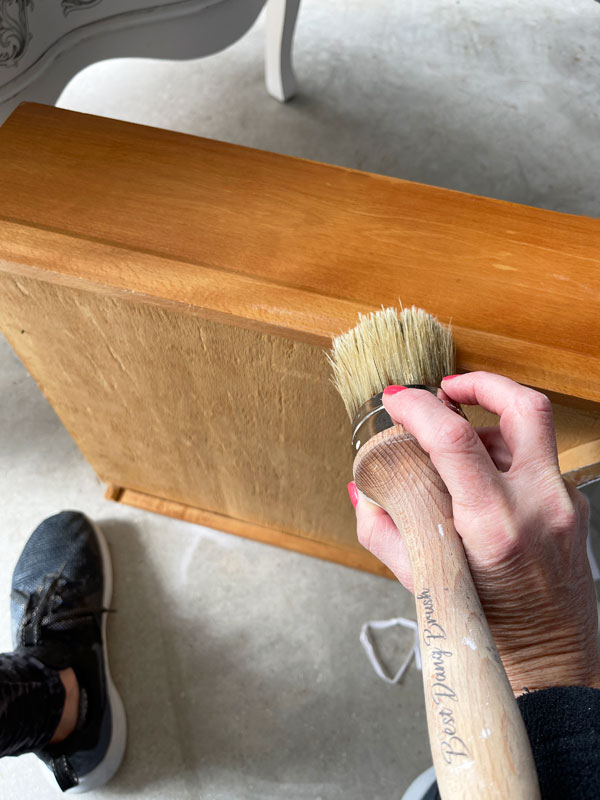
After sanding the wooden sides to clean them up, I rehydrated them with Big Mama’s Butta in Orange Grove scent. It smells so good and makes the drawers look amazing!
I used my Best Dang Brush to apply it and a clean, soft cloth to remove the excess:
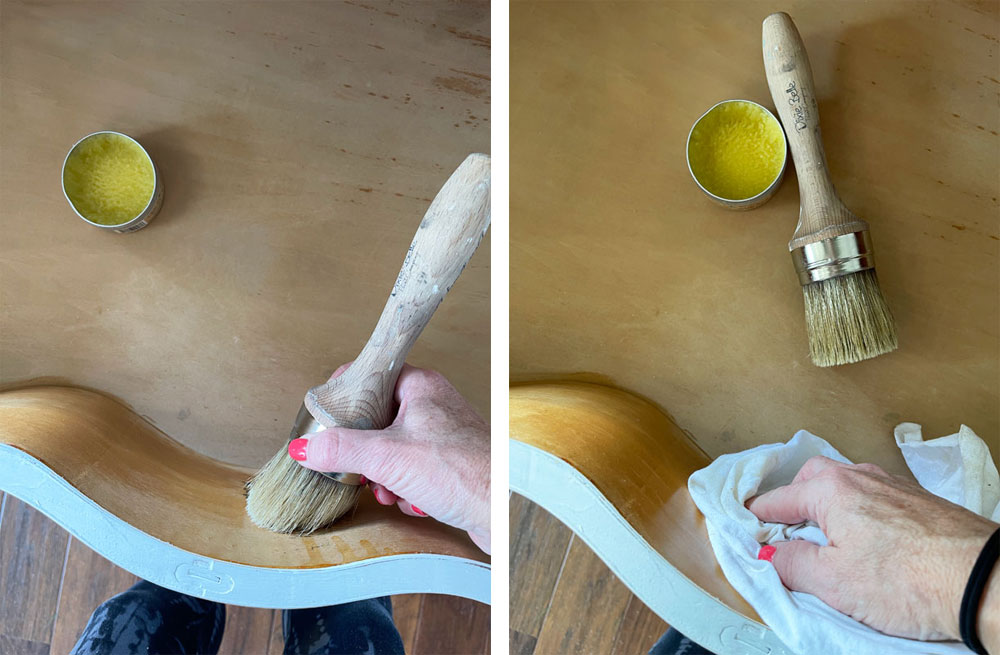
Look at the sheen after buffing!
I also added it to the bottoms of the drawers where they slide, and they slide like a dream!
They look SO good now!
I loved watching this dresser come back to life with each step!
And I still have a few pieces of this transfer left that I can use on another project:
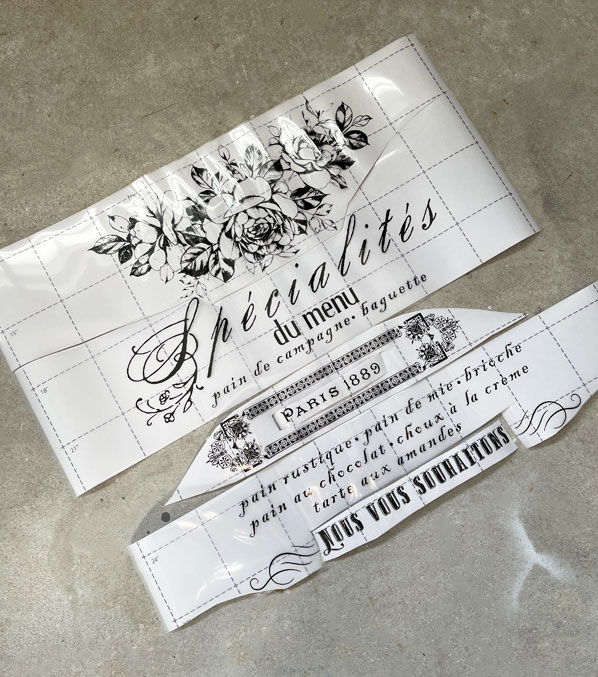
This transfer was just what it needed to finish it off!

This transfer had sold out, but Redesign released a few more they found in their warehouse, so you can find this one and over 200 more transfers in my Etsy shop!
I’ll be back with a new makeover on another hot mess dresser on Thursday with my Furniture Fixer Upper crew:
I hope to see you then!
UPDATE: It’s done and ready for its big reveal HERE!
XOXO,

Don’t Miss a Thing!
If you like what you see, there are several ways to follow along!
EMAIL * INSTAGRAM * FACEBOOK * PINTEREST


Get FREE SHIPPING on all orders over $50. No code needed at checkout! Orders under $50 always enjoy $8 flat rate shipping! Most orders ship same or next business day!


Mary Kasier says
How fun that you were able to surprise your sister and have a great weekend away! I remember this beautiful dresser makeover, and it turned out amazing. I love the black and white, and that fabric inside the drawers went beautifully with that dresser!
Christy says
I know…it was so nice to have that sister time! I thought this dresser would be a fun one to reshare since it had all the issues lol. Have a great week, my friend! XOXO
Janice Redden says
Christy, maybe an oldie but a goodie. Loved the lookback; it’s a beautiful, fresh look for spring!
Sister time is the best; how wonderful that the three of you had a great weekend…sorry our Maryland weather on Saturday wasn’t great. I hope your niece and her husband settle in nicely.
Today, my prayers are with the citizens and families in Baltimore who may be affected by the tragic bridge collapse over the Harbor.
Christy says
Thank you, Janice! The weather was a wash for sure, but it was where I live too so oh well! We ended up spending the day at the mall to avoid the rain. And yes! I could not believe the tragic news of the bridge collapse when I awoke this morning. Absolutely devastating for sure. My heart goes out to all affected. XOXO
Tracey A says
Your things always turn out so beautiful.
Christy says
I appreciate that so much, Tracey, thank you! XOXO
Patricia says
You do such beautiful work. I love your vision on the use of transfers and color.
Patricia
Christy says
Thank you, Patricia! I’m so glad you enjoyed this one! XOXO
Caye Cooper says
Wow! I have to try using my jigsaw at some point. I’ve never had to use one so it will be a virgin trip. You made it look easy! How did you get the keyhole in? I would have chickened out and just closed all of them in and pretended they were never there. 🙂
Of course, it all looks great as usual, Christy. Thank you for sharing all your wonderful ideas with us. OOX
Christy says
Thank you so much, Caye! I didn’t do anything with the keyholes, but I may be misunderstanding your questions. I just painted right over them. The jigsaw isn’t too bad at all…just remember to wear safety glasses, and be mindful of where the blade is at all times lol. XOXO
Caye Cooper says
Hi again Christy: Not to belabor the point, but when I see your finished piece I see an escutcheon. I thought you made a whole new front for one of the drawers. Each finished drawer has an escutcheon hole, so if you made a new front I wondered how you put in the escutcheon. Maybe I’m confused, lol.
Christy says
Oh gotcha! I did not make a whole new front. The drawers were coming apart at the dovetail joints, so I just glued those areas back together. I did cut a new bottom for the drawers though. I hope that clears up any confusion! 🙂
Caye Cooper says
LOL!! Thanks for clearing that up for me. It’s wonderful and you did such a fabulous job.
Christy says
No worries, thank you, my friend! XOXO
Janina says
I love how this turned out. The simplicity of black and white is so beautiful. I know this is an oldie, but I think this style of makeover is a winner! And after watching all your transformations for years, and especially rewatching this one, I think you should be called The Furniture Doctor! You sure heal a lot of wounds – and perform a lot of transplants! 😉
I’m fairly psychic but as I opened this post I felt there was going to be some connection to Baltimore…so bizarre when I read it! I was horrified to hear about the tragedy with the ship and bridge. I worked in Washington, DC a lifetime ago, and lived in Baltimore briefly. That’s a tough thing for a community. Hope your family will be okay.
Big hugs from 🇨🇦
Christy says
Aww thank you so much, Janina! I sure am drawn to these needy pieces lol! And yes…what a heartbreaking tragedy that is. My niece is on the outskirts of the city, so they won’t be affected much, but my heart breaks for those affected. XOXO
Susan Duffy says
WOW!
Christy says
Thank you, Susan! XOXO
Michele M. says
I love that you did that for your sister. What a fun get-away!
GREAT job on this dresser. You made her so pretty. Great tutorial.
I got an old surpentine dresser for $15 and the bottom drawer was broken like that. I cleaned it and oiled it but haven’t painted it. Keep thinking I will but I haven’t yet. It’s my husband’s bedside table and he likes it like it is – it is a bit scratched I could hide with oil pretty much – but no missing veneer or damage.
Christy says
It was SO nice to have that sister time together! Thank you, my friend! What a great deal you got. I love the idea to use it as a beside table! XOXO
Hannah Reyor says
I’ve been quiet the past month or so, due to surgery, but I’m still reading your posts every time! I loved this dresser and appreciate all the work you did. Hope it sells quickly so you have room for more big pieces! Love you always,
Hannah
Christy says
Aww thank you, Hannah! You know I appreciate that so much. I wish you a quick recovery, my friend! XOXO
Cheryl r Atkinson says
Hi. Christy!! I loved this makeover. I think you forgot to send me the email stating I won 🤣🤣
Christy says
Hi Cheryl!! Ha ha! My winner has not responded yet, so there still may be a chance lol! Thank you, my friend! XOXO
Chris says
Do you ever feel even just a smidge of being overwhelmed when you realize that you have to repair something like replacing a new drawer bottom? You make it all seem so simple and quick. I took apart our dining room chairs to re-glue the joints to make them stronger and they’re still a bit wobbly. It was such a huge job and I can’t imagine doing it again. Love your projects.
Christy says
Hi Chris! In the beginning, something like that would have been definitely more intimidating. With practice, it has gotten much less so though. Thank you so much! XOXO