Hello, lovelies!! I’m back today sharing how to turn an old sign into an amazing new shelf! Signs have been a huge part of our decor over the last decade or so, but eventually, you move on. Whether you tire of the saying, just don’t need another quirky sign, or maybe it is just no longer applicable like today’s thrift store find might be.
The sign I’m upcycling today started out like this:
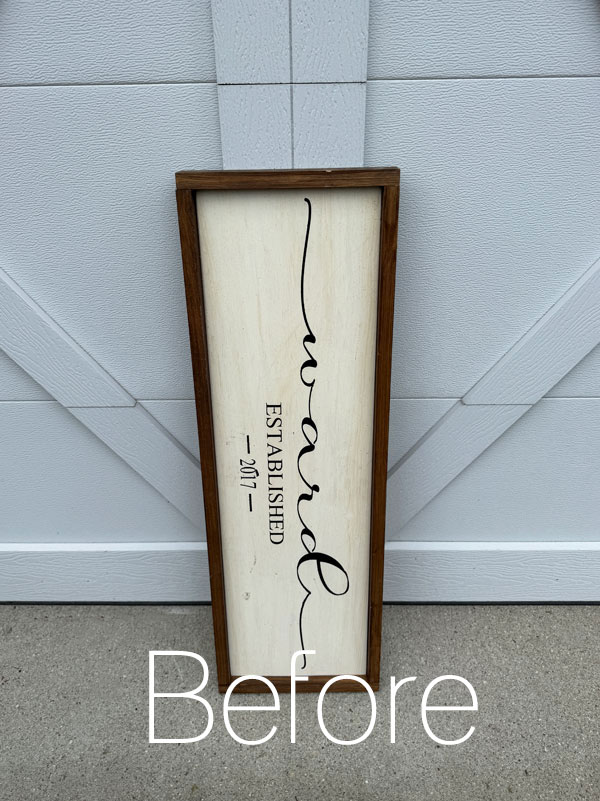
It was a $3.99 thrift store find. I hate to think it was donated because a marriage didn’t last, but that might just be the case. Let’s hope they just tired of the sign!
Either way, lumber is so pricey these days that I definitely wasn’t leaving it behind!
I’ve included a few affiliate links so you can find the products I love.
Clean
I started with a good cleaning first using White Lightning, mixing one TBSP into a half gallon of warm water:
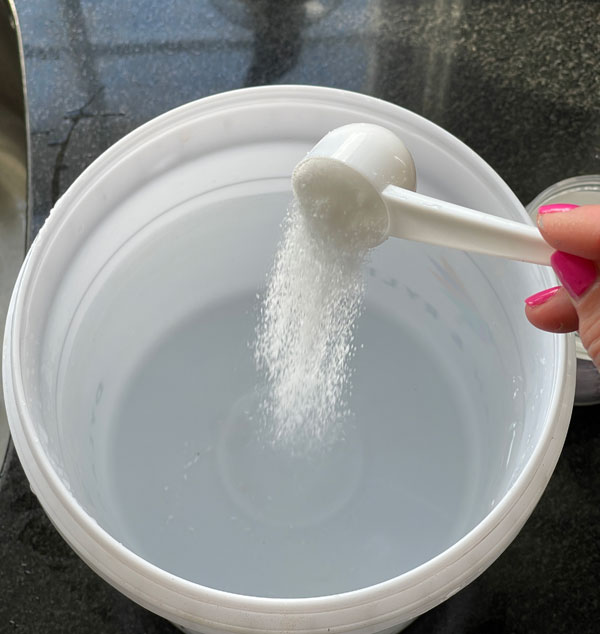
I then rinsed with clean water. Gloves are recommended.
Sand
The lettering on the sign was raised, so I knew that would need to be sanded down to smooth it out, so that was next. I used 220 grit sandpaper wrapped around an old sanding sponge for this step:
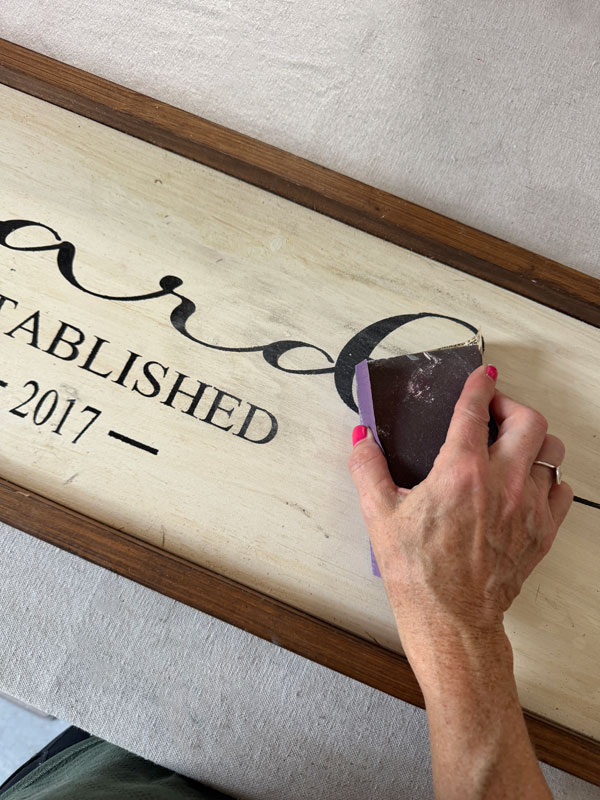
It may sound counterproductive to sand after cleaning, but there was some sticky residue on the surface that I knew needed to be cleaned off. Otherwise, it would be smeared into the surface. It’s never a bad idea to clean first.
Prime with Bonding BOSS
It appeared that the sealer on the surface up close was yellowed. This indicated that the wood beneath was likely a bleeder. To prevent any bleeding through my paint, I opted to prime with Bonding BOSS first:
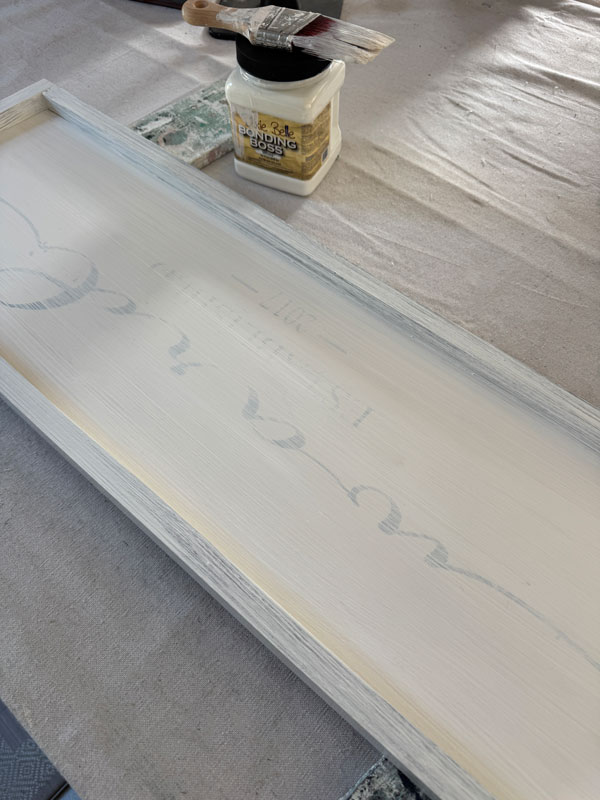
I let that sit for 24 hours to do its thing. Proper dry time is the key here!
How to turn an old sign into an amazing new shelf
To turn this old sign into a shelf, I had to make a Home Depot run for a piece of primed lumber (I think this is a 1X6).
$15 later, I was back home cutting my new shelf using my miter saw:
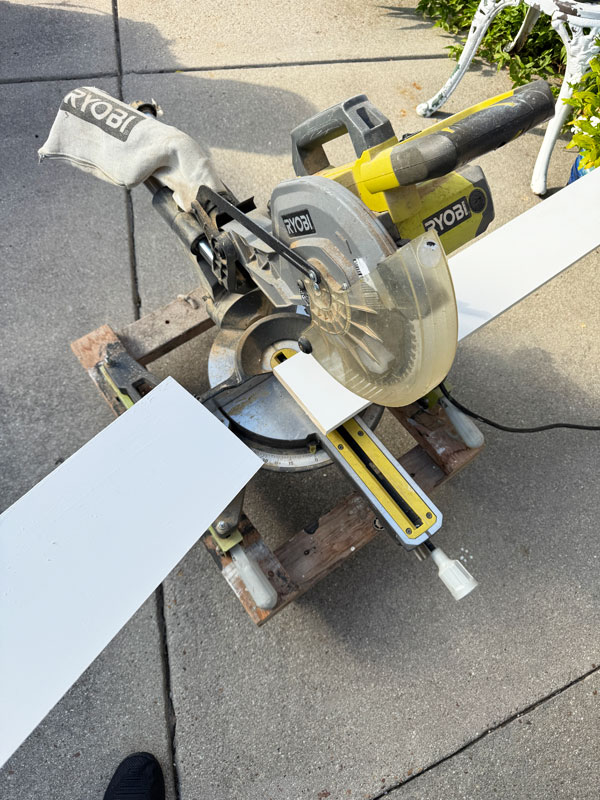
(Ryobi no longer makes this 12″ sliding miter saw, but if you are in the market for a miter saw, a sliding one allows you to cut deeper cuts than a traditional non-sliding miter saw since the blade slides forward.)
Attaching the shelf
To attach my new shelf without using brackets, I used my drill and a couple of drill bits.
- The first drill bit was slighting larger than the screw head, and I barely sunk it into the surface:
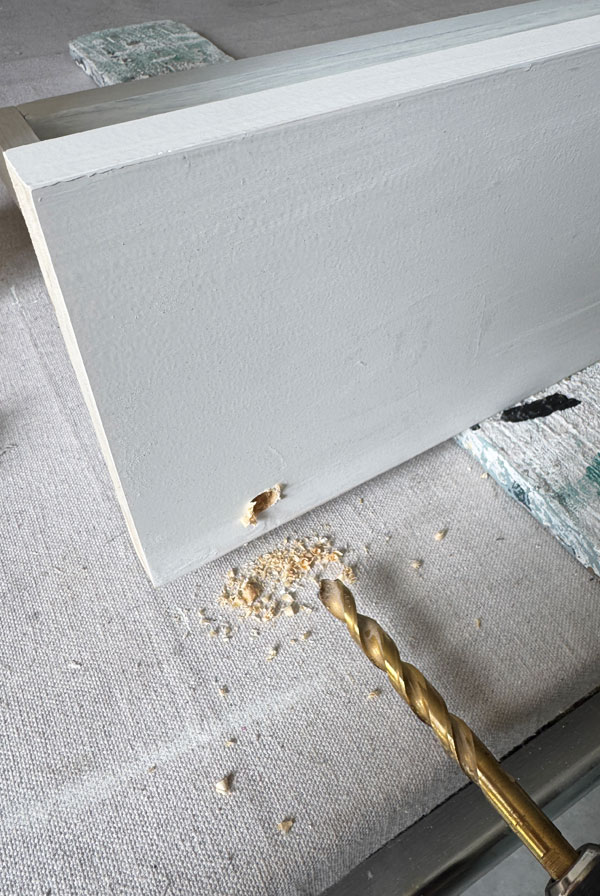
This was just to conceal the screw head.
- Next, I drilled a pilot hole in the center of that for my screw:
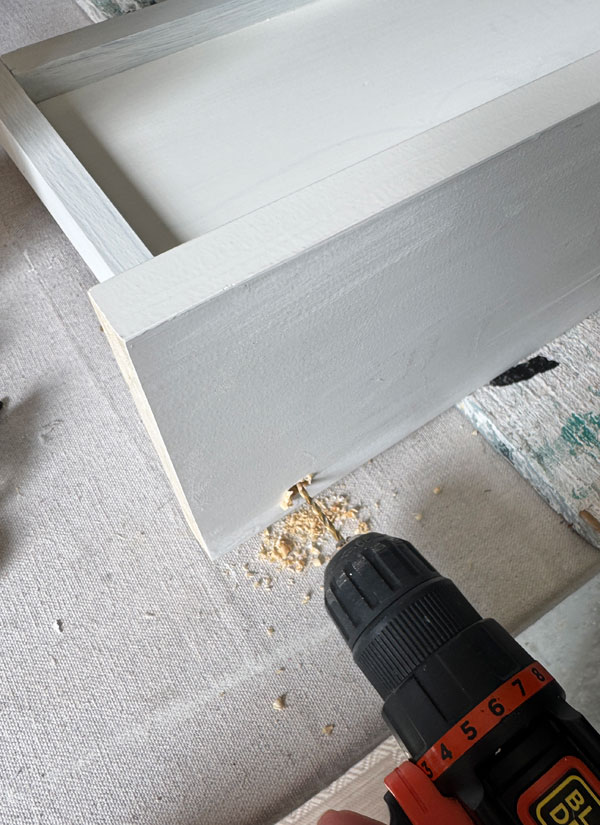
This will stop the wood from splitting.
- And finally, I drilled in the screw to hold it together:
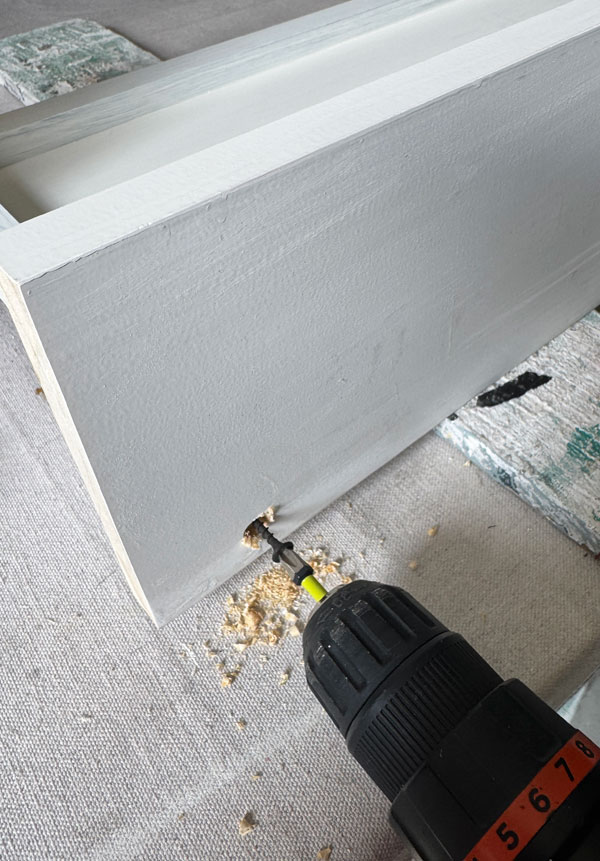
Once I had that drilled in all the way, I filled the shallow hole with Dixie Mud:
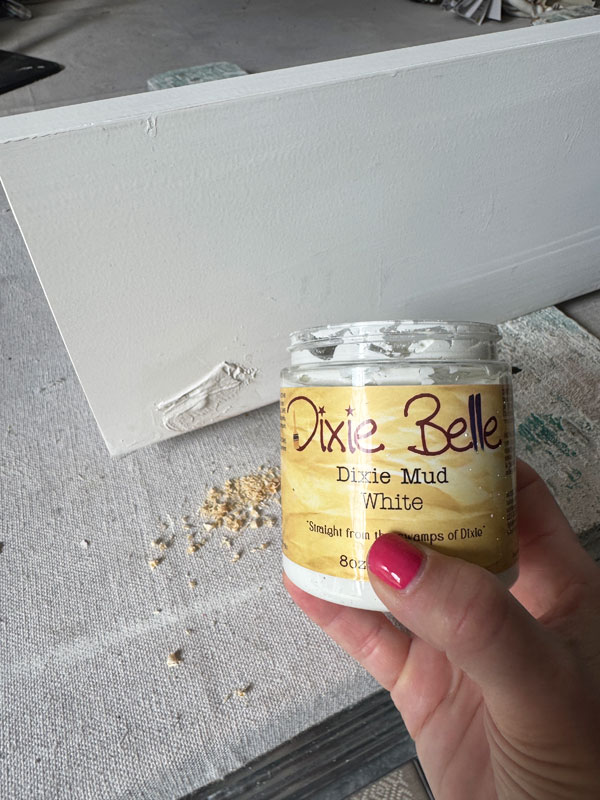
I let that dry for a couple of hours and then sanded that smooth using 220 grit sandpaper.
(Note: I usually add a bead of wood glue as well when attaching two pieces of wood, but I forgot…oopsie.)
And that is it! now I have a new shelf! Time to design it!
I wanted to use this beautiful Silver Wings transfer that was just released last quarter. It coordinated perfectly with one of my favorite Silk Mineral Paint colors, Oxford Fog.
This is after two coats:
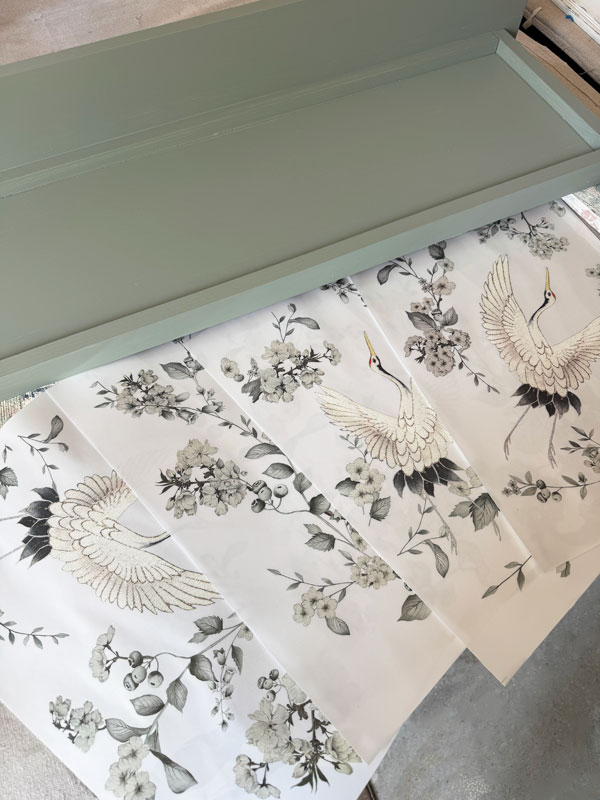
I love how this color pairs with this design!
I used this color on this vintage side table HERE and we couldn’t decide if it was a gray blue or a green. It appears to take on either in different lights.
(Silk Mineral Paint goes on silky smooth, so there is no need to sand to smooth after. See more on using Silk paint on this dresser redo HERE.)
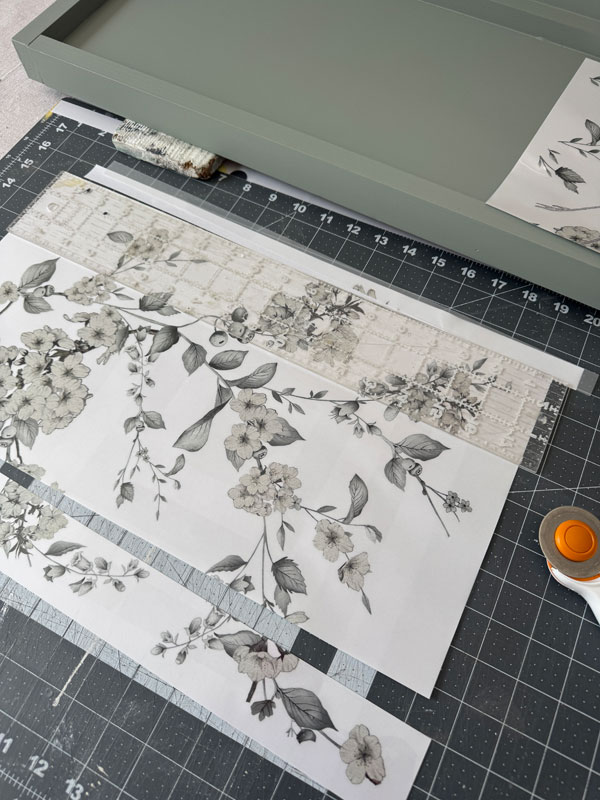
Next, I used my rotary cutter, a straight edge, and cutting mat to get nice, straight cuts when cutting this transfer to fit the space:
HOW TO APPLY A TRANSFER:
- Remove the white backing
- Position the transfer where you want it
- Use the burnishing tool included to burnish (rub with pressure) the transfer to your surface
- It’s best to start in one corner and pull the clear plastic layer on top away from the transfer as you go as I did here:
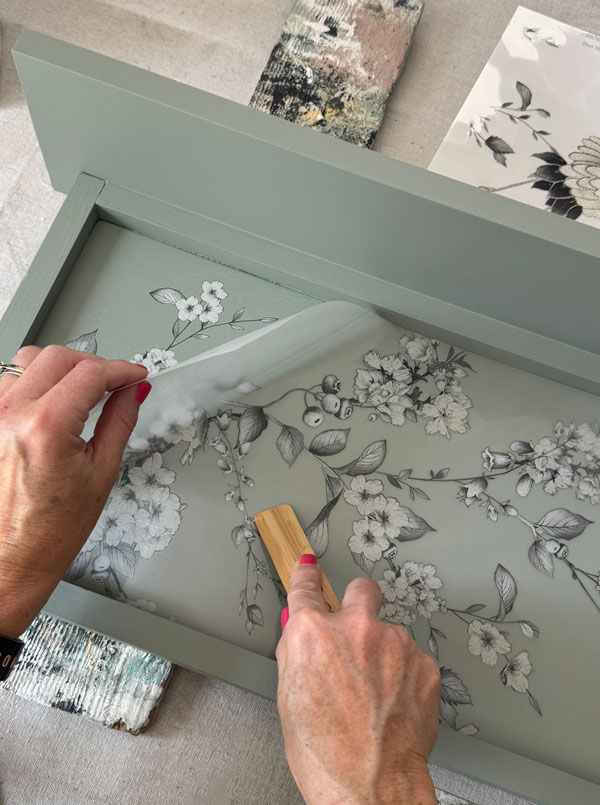
- If you get any pieces that stick to the clear plastic layer on top, lay it back down and burnish some more
You may need to cut your transfer into smaller pieces and match it up to make it easier to apply if you have mouldings or trim you are trying to work around.
A flat surface like this makes it much easier!
Seal
Silk Mineral Paint has a built-in eggshell sheen topcoat, so if I hadn’t added a transfer, I could be done here.
However, to seal and protect the transfer, I applied two coats of Clear Coat in Satin, applying it with the blue sponge applicator:
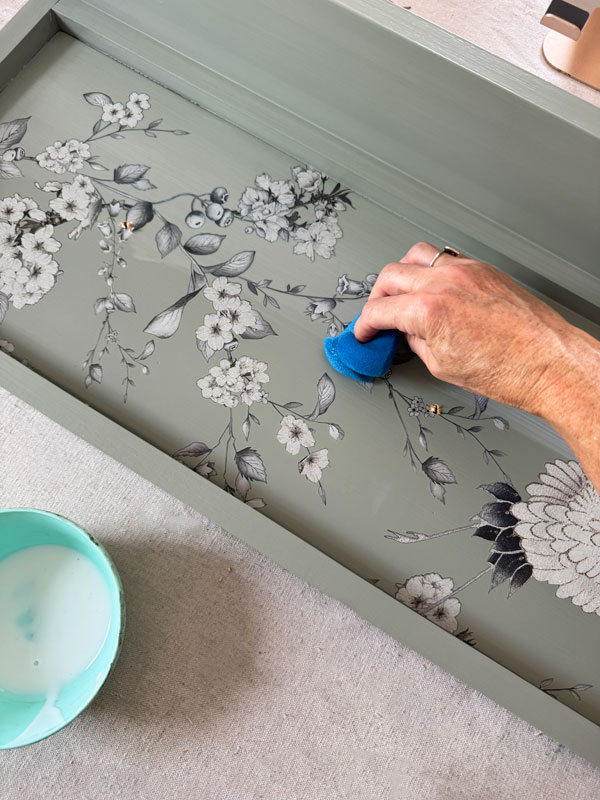
I went ahead and sealed the whole shelf so it would all be the same satin sheen.
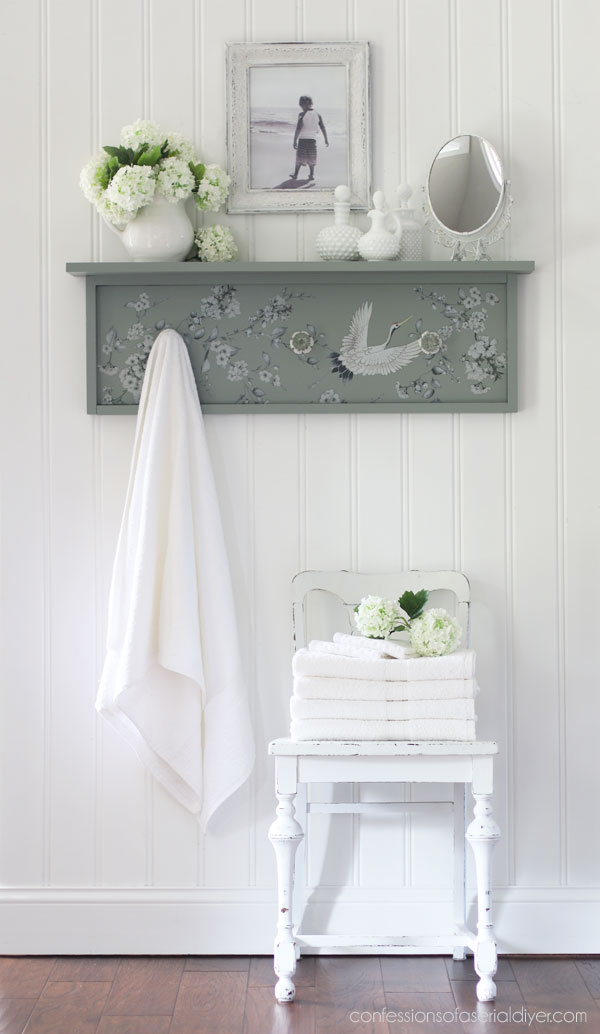
Let’s jump to the after and see how this shelf looks now!
Turn an Old Sign into an amazing New shelf, the Reveal
Here ya go!
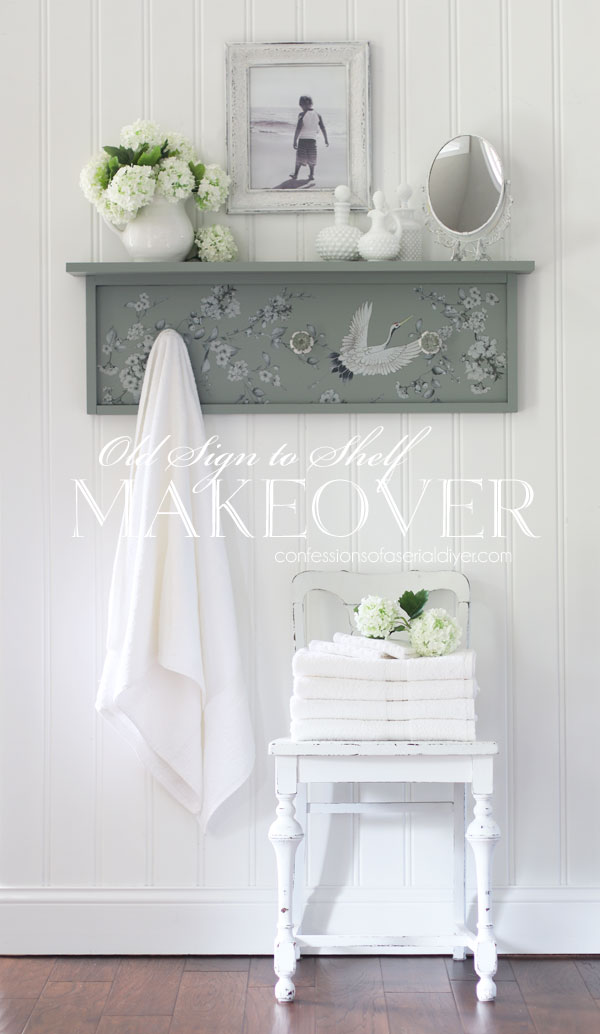
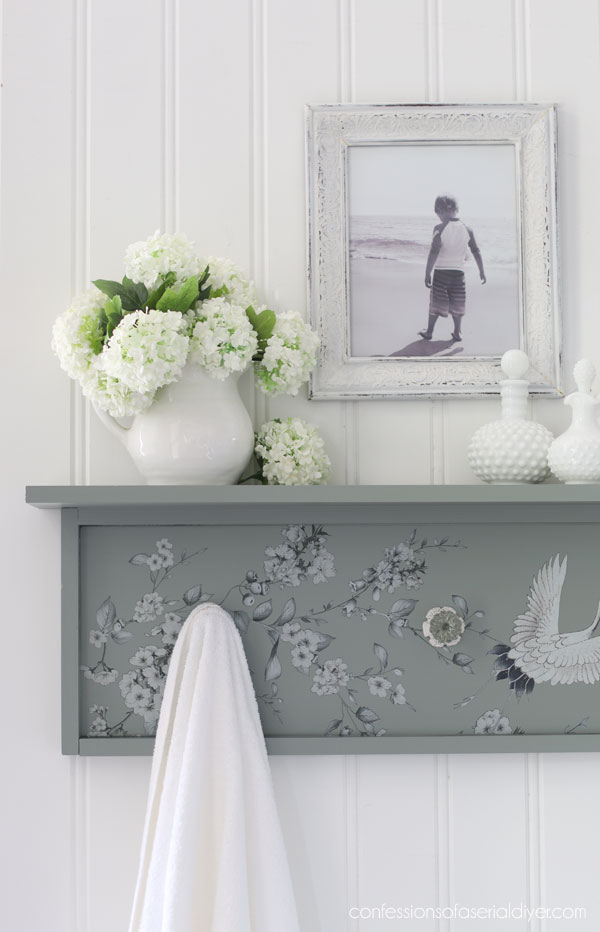
Would you ever know that it started out as someone else’s donated sign??
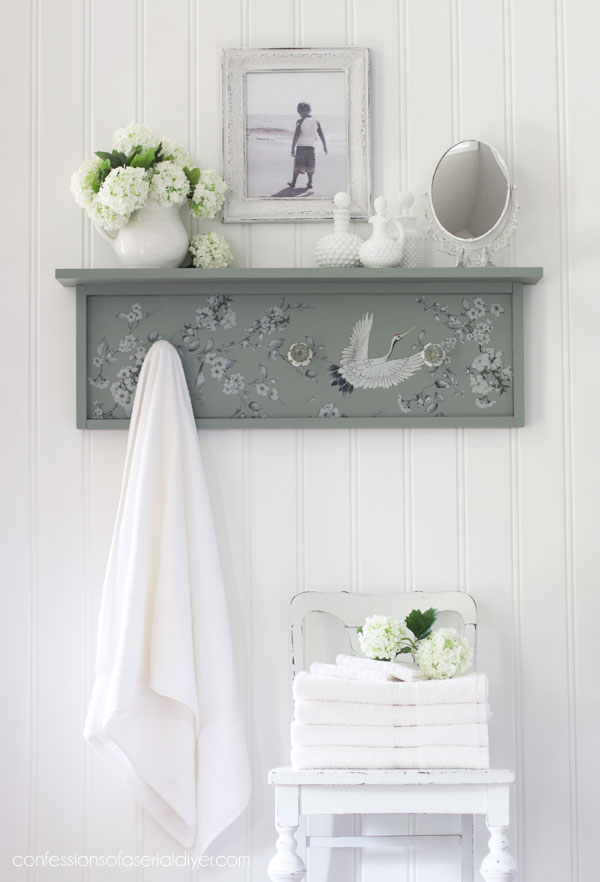
I just love this transfer design!
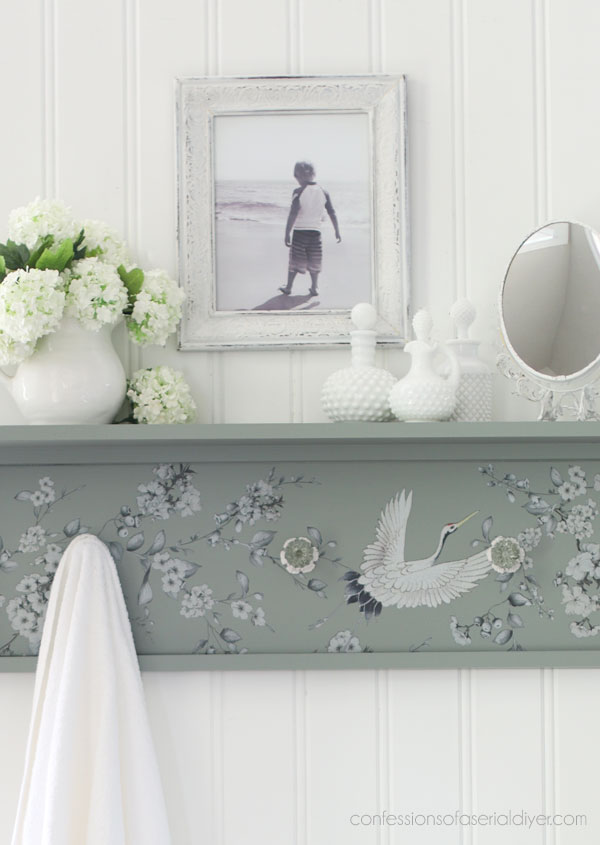
And of course, I had to add more function with knobs!
I didn’t have enough hooks in my stash that I liked enough for this piece, so I chose these glass knobs from Hobby Lobby instead:
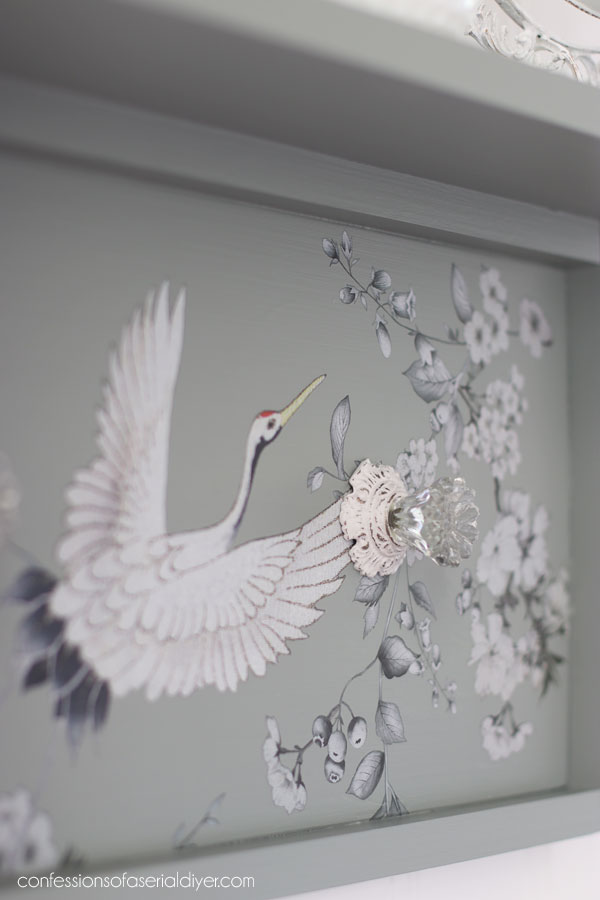
But don’t they stick out at the back??
Hobby Lobby hardware is famous for being extra long. I first cut the posts to a length that wouldn’t stick out the back using this dremel-like tool:
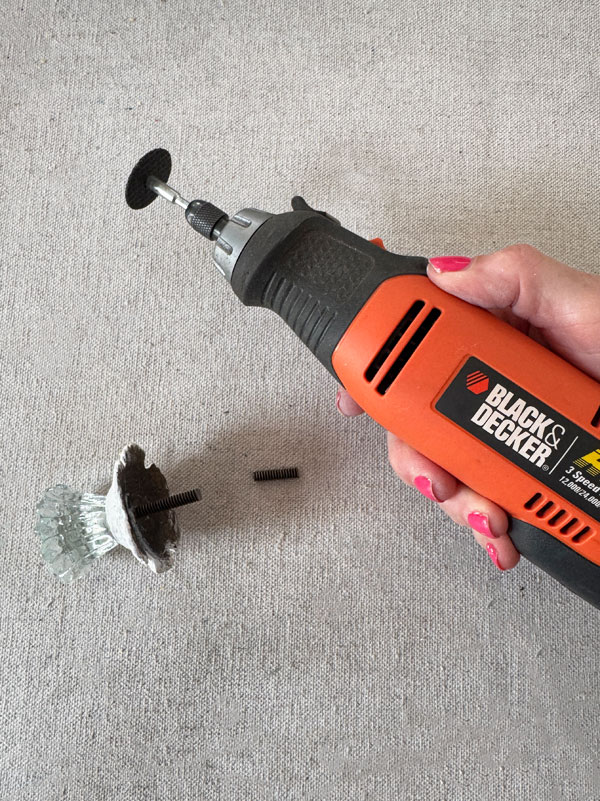
(Use with extreme caution including eye protection as this is basically a mini saw, and sparks will fly!) And that is a cutting wheel for metal that I purchased separately at Home Depot.
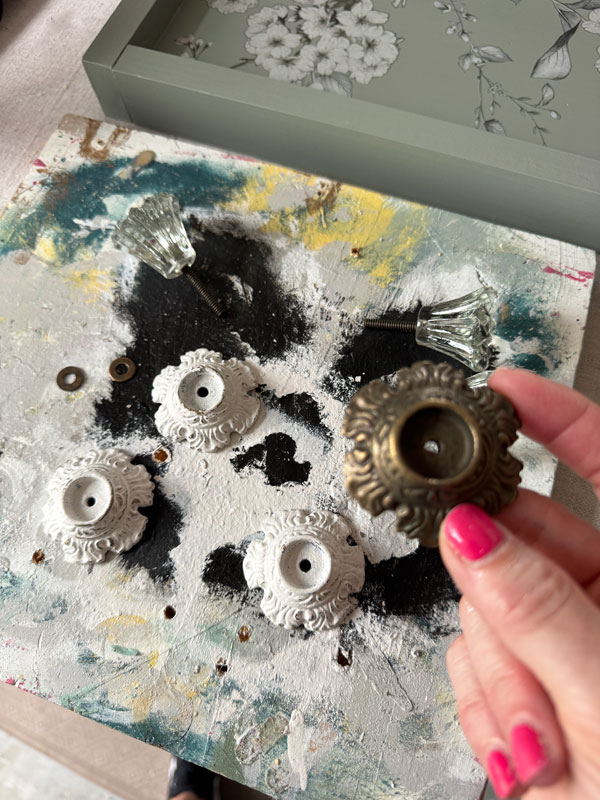
Once I had my hardware cut, I painted the bases that started out like this blurry one:
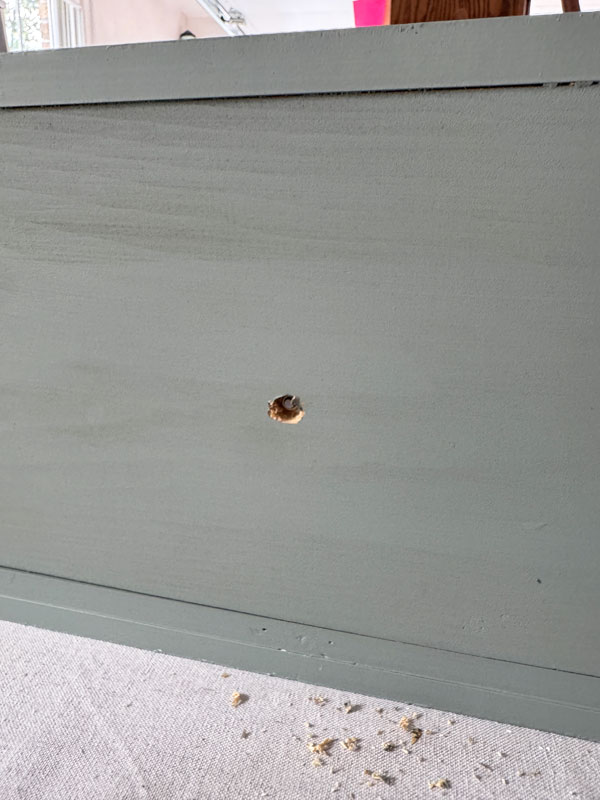
While those dried, I used my drill once again to drill out a wide enough space for the nut that goes on the back of the knob to fit inside the hole:
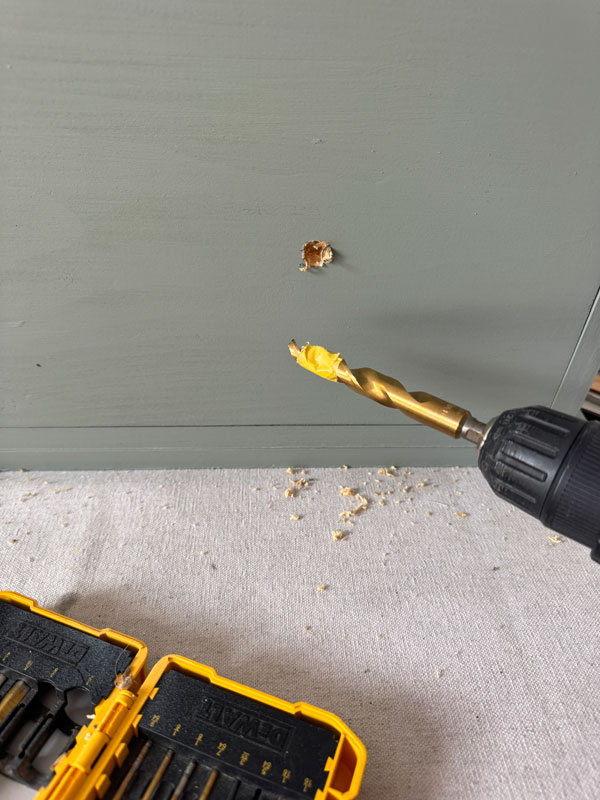
(Using the tape as a guide on the drill bit stopped me from drilling too deep and coming through the other side.)
Then I added my knobs, and you can see the nut on the back is nestled in there…
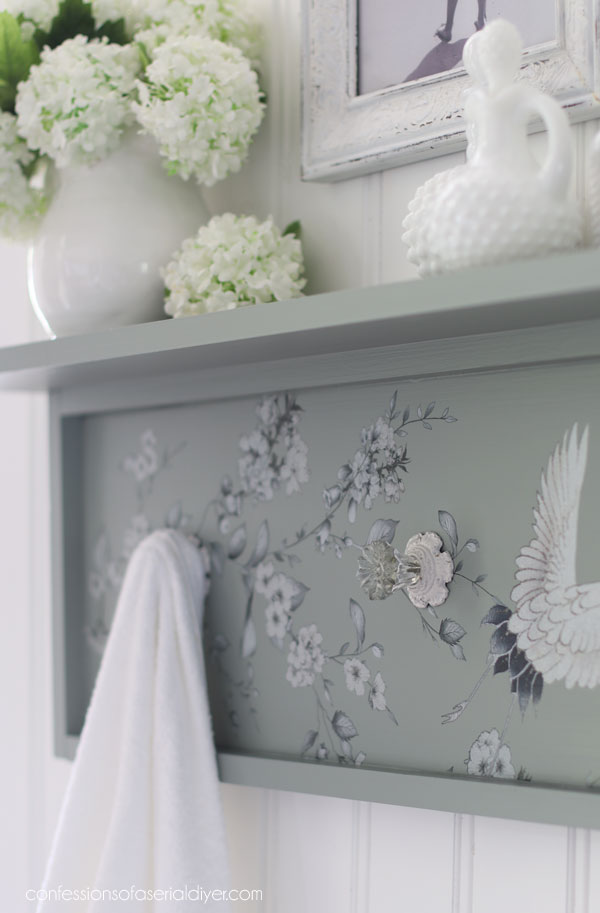
I thought the glass was a fitting match for this delicate design…
And here’s a peek at the hanging hardware I used. This shelf has some weight to it, so I like to use larger D-ring hardware:
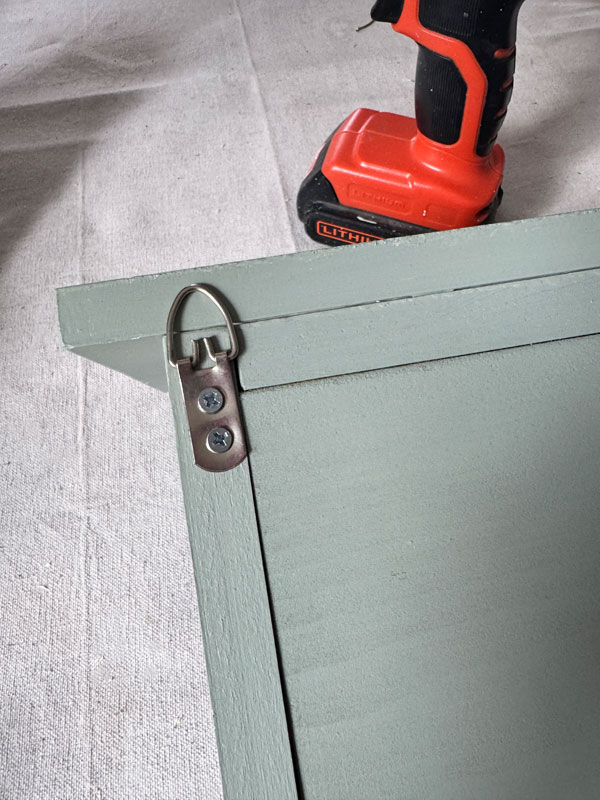
(I actually reused these from a picture, but I normally use the ones I linked to above that are similar.)
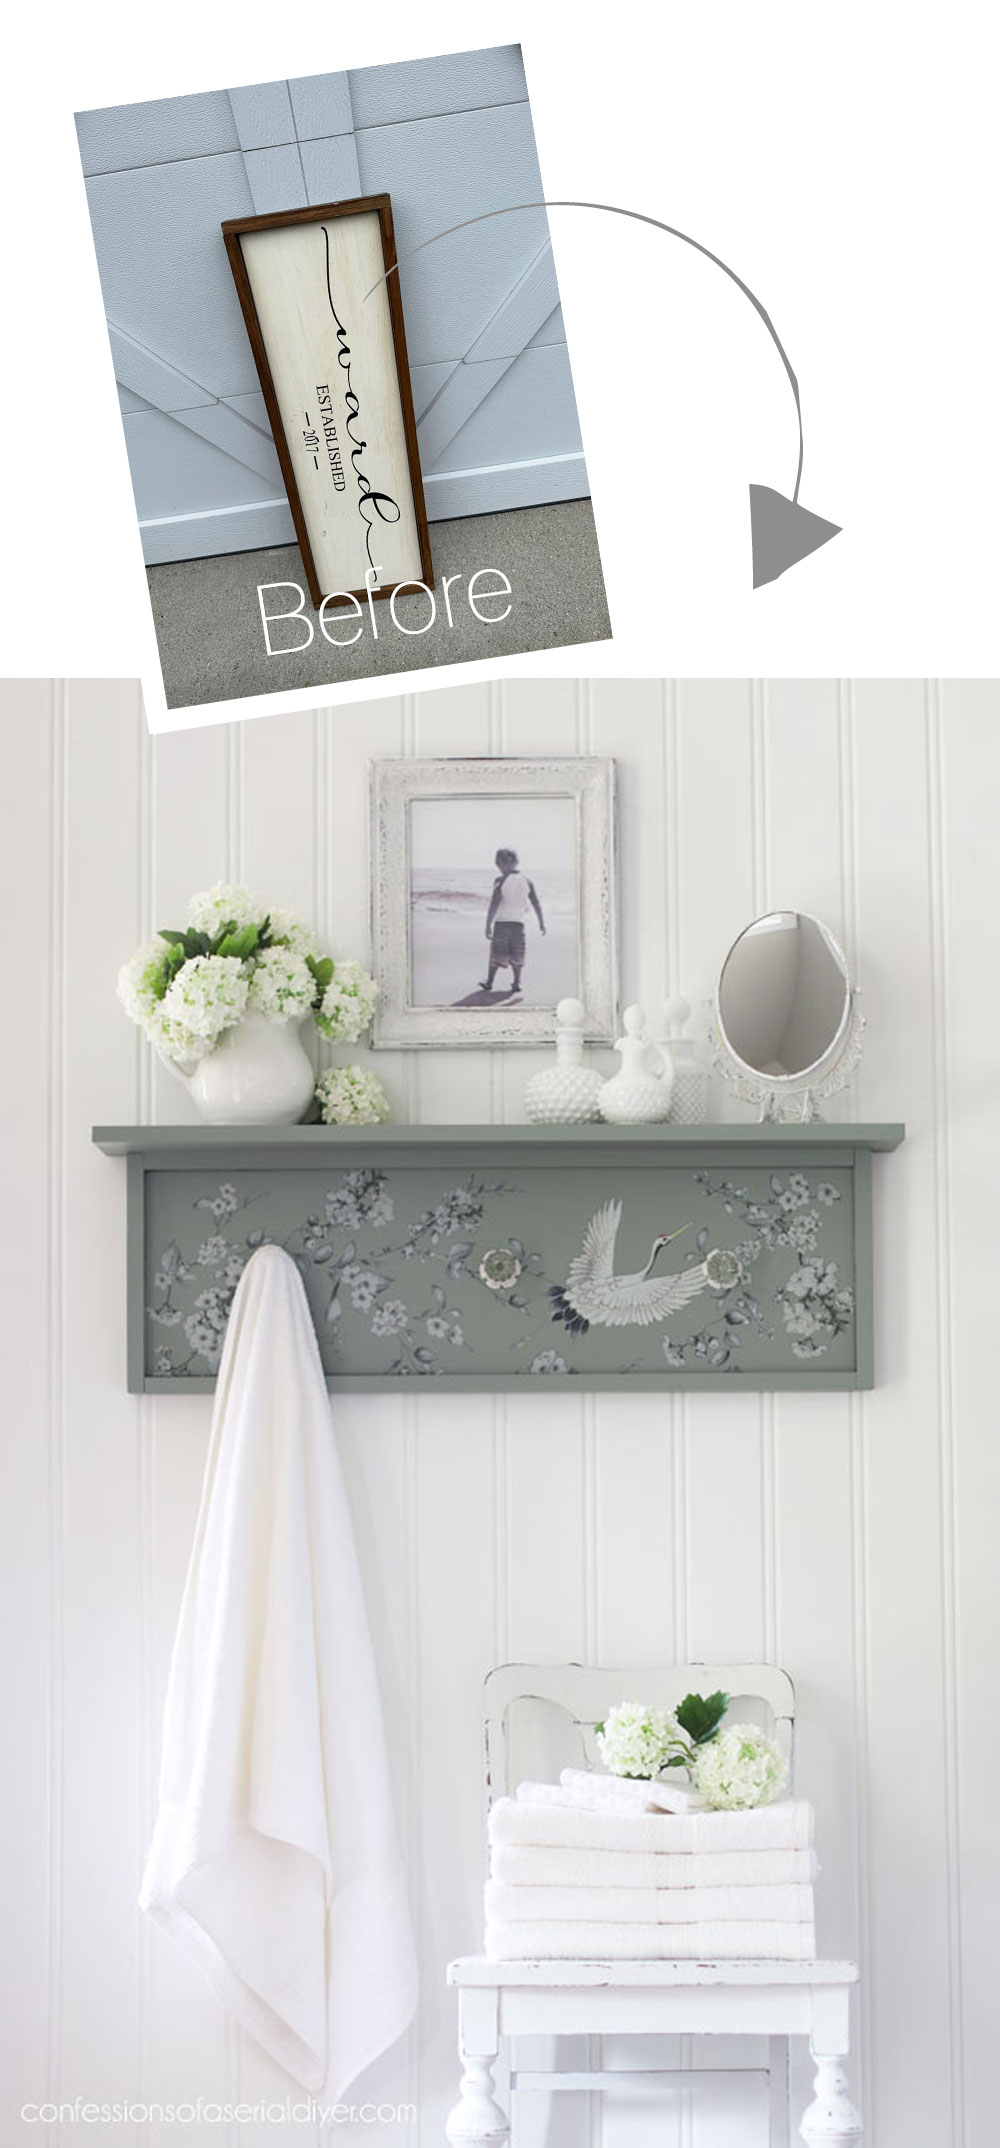
Think twice before ditching that sign you’re no longer loving!
And that’s another one done!
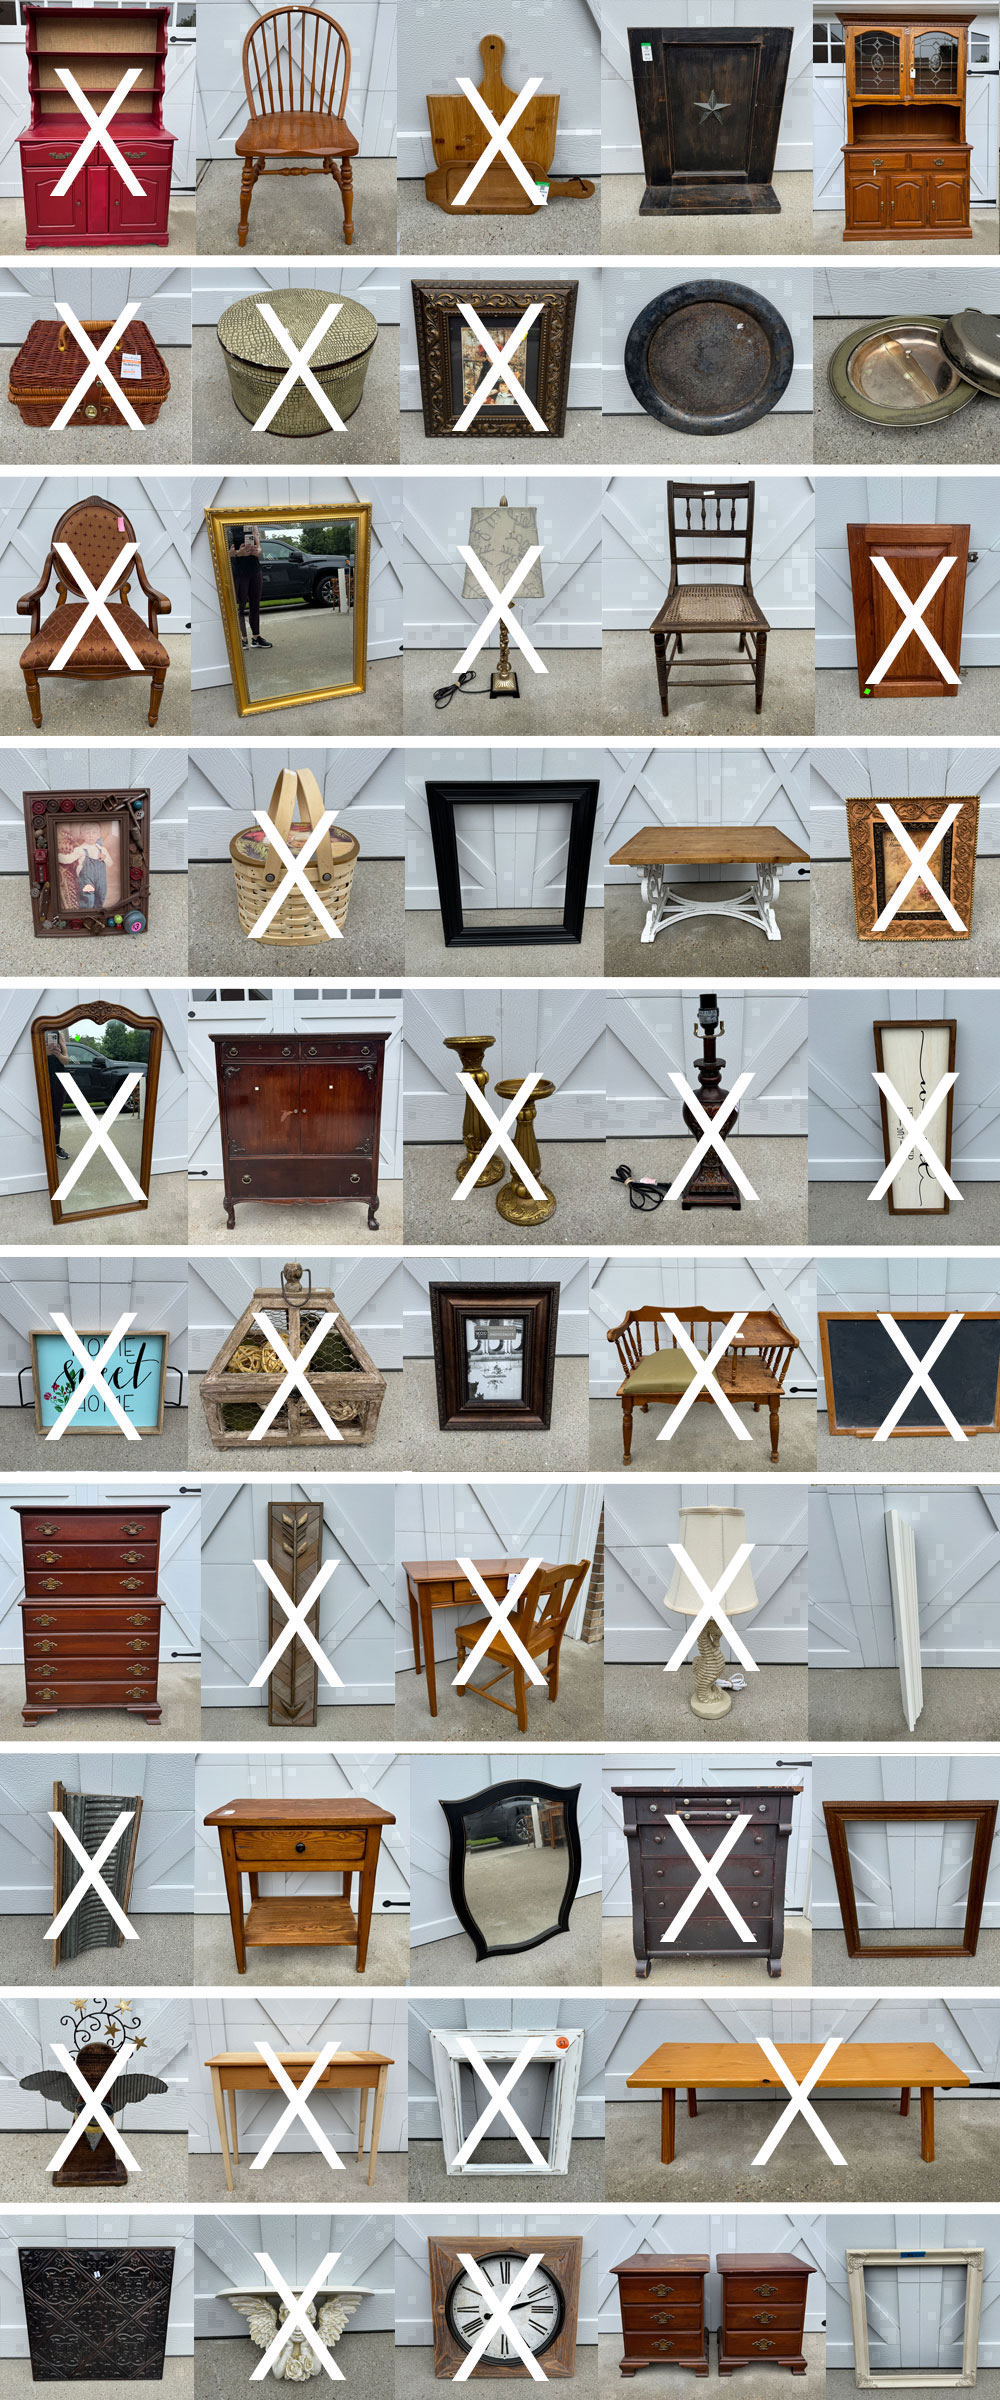
Meet me back here on Thursday where I’ll be joined by my Furniture Fixer Upper ladies and sharing this beauty:
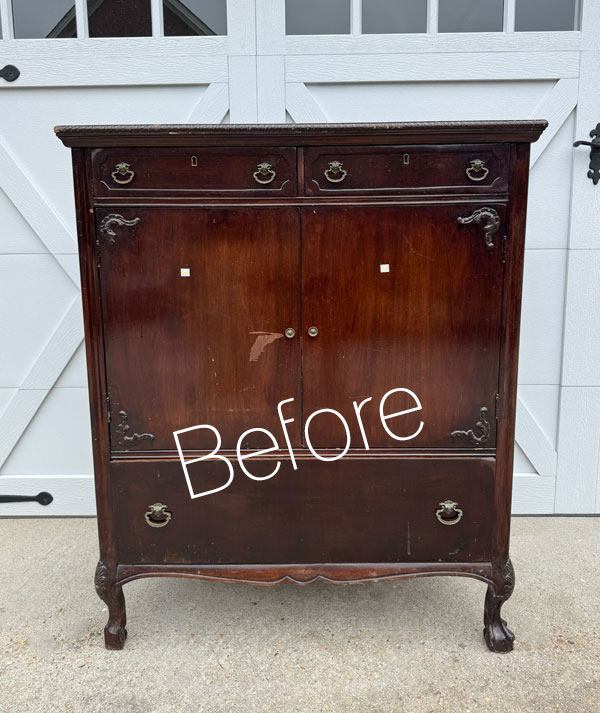
I’ve usually got my Thursday project completed and photographed by now, but I’m still working on this pretty lady…hoping to finish her up today!
UPDATE: She’s done and she’s a beauty, but this thing was a HOT MESS!! See it now HERE!
XOXO,

Don’t Miss a Thing!
If you like what you see, there are several ways to follow along!
EMAIL * INSTAGRAM * FACEBOOK * PINTEREST

Get FREE SHIPPING on all orders over $50 in my Etsy shop.
(No code needed at checkout!) Orders under $50 enjoy $8 flat rate shipping!
Most orders ship same or next business day!
Visit my shop HERE or click the image below!






Mary Kaiser says
Oh so beautiful! I love the color and the transfer with that color! It would be so sweet in a babies room, or any where! It would be so sweet in my house if I lived closer! That is the best way to re purpose an old sign!
Christy says
Thank you, Mary! I never thought about it for a little one’s room, but you are so right! The tranquil colors would be perfect! XOXO
Abbe K says
That was a small labor of love and yes, yes on that transfer. I can see the crane practically lifting off the shelf in flight.
You have such tenacity, Christy!
Now to see that lovely armoire.
Christy says
Aww I appreciate that so much, Abbe, thank you!! See ya on Thursday! XOXO
Robin says
Do you ever sleep? 🥴 Wow….what a creative flip…and, so gorgeous! That won’t last long in your shop. At all! ❤️
Christy says
Ha ha yes! But I do work a lot…except it doesn’t feel like work! Thank you so much, my friend! XOXO
Cecilia says
It turned out beautifully! Love the color – it’s a perfect match for the transfer – and of course, the knobs are the finishing touch! I love repurposing signs. Why not find another use for them? 😊
Christy says
Thank you so much, my friend! Right? I knew I could reuse the wood on this one on something, but I’m so glad I was able to reuse it just the way it was! XOXO
Karen says
I just love everything you do( redo).!!!
Christy says
Aww thank you so much, Karen! I’m so happy to hear that! XOXO
Janice Redden says
Christy, love the color choice and transfer! Beautiful redo; the thrift stores are full of these old signs, while Hobby Lobby displays new trendy ones that will be in the thrift store/yard sales in a year our two..LOL.
BTW, what size staples are you using in your Ryobi cordless staple gun, and are you pleased with its function? My Arrow just conked out…
Christy says
Thank you, Janice! Yes, I see signs like this all the time at thrift stores. I do love my new Ryobi staple gun. It’s a bit heavy because it uses the Ryobi battery, but it works great! I use these staples in it: https://amzn.to/3Sr3XlI XOXO
Sharon L Austin says
WOW, great idea on this one! Looks great
Christy says
Thanks so much, Sharon! XOXO
Cyndi says
Another beautiful piece! There’s nothing wrong with a simple sign, but I love that you added to it to make it really useful. A+!
Christy says
Thank you, Cyndi! Yes, a simple shelf added just a little more function! XOXO
Laura J. says
I agree with Robin… do you ever sleep Christy?!!! You truly are a one-woman show! Thrifting, yard sailing, loading/unloading, cleaning, sanding, painting, stenciling, transferring, imagining, creating, repurposing, staging, selling, packaging, sending, posting, replying to everyone’s comments…. and I’m sure I left out so much more!!! You are incredible, and it shows how much you love your work! The sign turned shelf is beautiful! Hope you keep doing what you’re doing for many, many more years. I just love it!❤️❤️❤️
Christy says
Aww you are the sweetest, Laura, thank you so much!! I do work a lot doing ALL the things that need to be done, but I truly feel blessed that I get to do this. I hope I can continue for many years to come as well! Thank you for following along and cheering me on!! XOXO
Marcie says
The color and the transfer are beautiful choices, Christy, but the idea to create a shelf out of the sign is ingenious. Just putting hooks on it would have been enough for me, adding the shelf obviously extends its usefulness! I love when you use the different products you carry, to see what they can really look like.
Christy says
Thank you, Marcie! I love that I could add a little more function with shelf. Being solid wood made it a great candidate since I could just screw the shelf right onto the top! And it’s definitely awesome to have lots of things to create with! XOXO
Josee says
Really elegant. Great job … again.
Christy says
Thank you, Josee! XOXO
Marlene Stephenson says
Clever lady, love what you did. I have a sign simular to that and now I can fix it to use, thanks so much.
Christy says
Thank you, Marlene! Have fun with yours! XOXO
Kathy from Jax says
What a wondrrful idea. Other than you, who would have thought to make it a shelf. I love the glass knobs. The transfer and color are perfect. You’re so clever.
Christy says
Aww thank you, my friend! I’ve been trying to keep my eyes out for possible shelf options as they sell well for me, but I honestly bought this one for the lumber lol! XOXO
Kim says
Would never have thought to put that transfer on that painted surface. Absolutely gorgeous!
Christy says
Thanks so much, Kim! I’m so glad they worked so nicely together! XOXO
Molly Donohue says
Hello and thank you for sharing this inspiring and stunning piece. Just curious, since there seems to be at least $25-$30 cost to this particular piece, what you priced it for if you don’t mind me asking…
Molly
Christy says
Hi Molly! I’m so glad you like it! Typically, I would have used a piece of scrap lumber I salvaged from something else that would have kept the costs down, but that wood did add to my bottom line. I still have a decent chunk of it left for another project though. And the transfer I only used half of, and then the knobs were half off at HL, so I figure I have about $22 or so in it if you don’t count the paint, etc I already had opened. I will probably price it in the upper $40’s to $50’s. XOXO
Leslie L Mack says
I’ll never look at a framed sign the same way again. What a creative way to use something like this that many wouldn’t think of. The color and the transfer are perfect. As usual you picked a perfect knob.
Christy says
Ha ha thank you, Leslie! I bought this for the wood, but it ended up working out great as a shelf! XOXO
Michele M. says
BRAVO!!!!! It is absolutely fabulous. And on a sadder note – many couples didn’t last after the Covid lockdown and remaining tough years full of fear and death and closeness. I live at the end of a short cul-de-sac with only 7 houses on my street. Only 3 couples marriages lasted – an elderly couple, a young 40s couple and us. SO sad. But you breathed beautiful new happy karma into that piece for sure. ♥
Christy says
Thank you so much, Michele! And oh no…how sad. I’m glad you and your hubby survived the ultimate test. Those were trying times for sure! XOXO