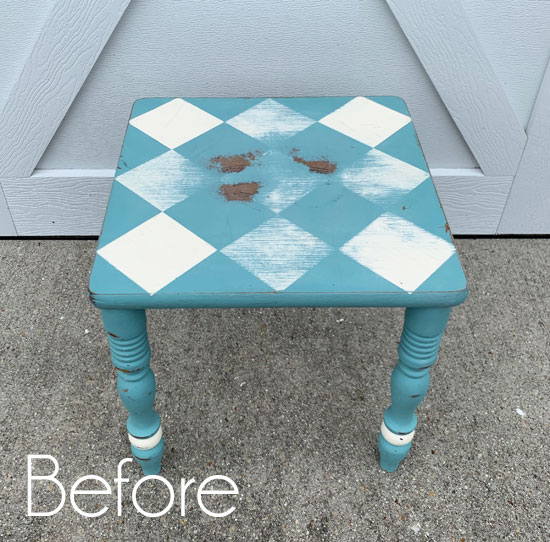
Hello dear friends, and welcome back! Today, I’m sharing how to add a tufted seat…my subject for today is this sad little table/bench that I originally redid way back in 2013:
I know you were expecting the mirror frame I previewed on Thursday, but we got snow and quite a bit of it for our area:

So instead of working, we played in the snow! And, that project will require my saw which I wasn’t really able to drag out into the snow. I hope to be back with that piece soon though!
I hope you don’t mind this redo that I shared a couple of years ago. It is one I really liked and actually kept!
It’s was a little bold for my current taste, so I decided to give it a redo, but I got as far as sanding the words off, and then it was pushed aside for more fun projects. I eventually added it to one of my hauls to get it done. I’ve included a few affiliate links so you can find the products I love.
Getting started
I started by covering up the blue paint with Rustoleum satin Espresso spray paint:
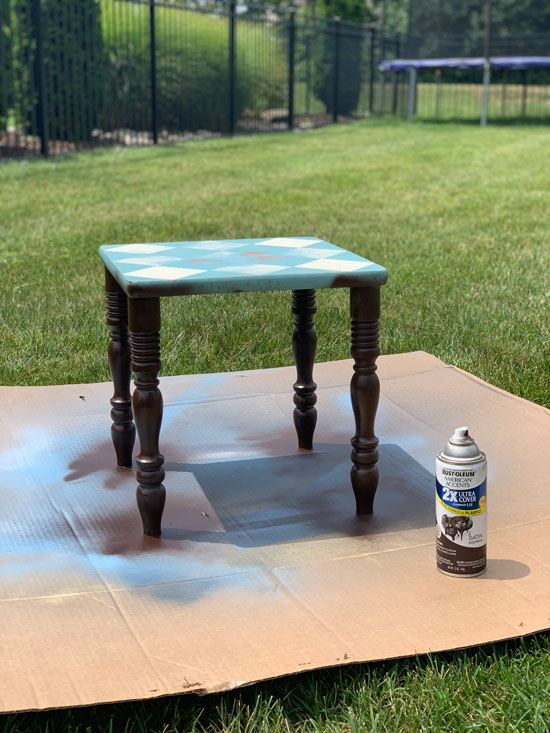
I didn’t want the blue to show through when I sanded, and this was before I rediscovered the cheat method using a distressing block. (So much easier!)
Then I painted the legs in two coats of Dixie Belle’s Cotton…
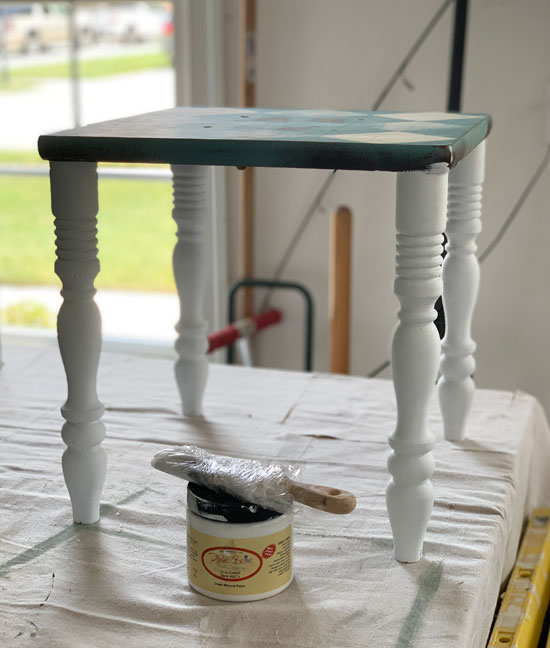
When the legs were dry, I lightly sanded them with 220 grit sandpaper and sealed with Dixie Belle’s Best Dang Wax.
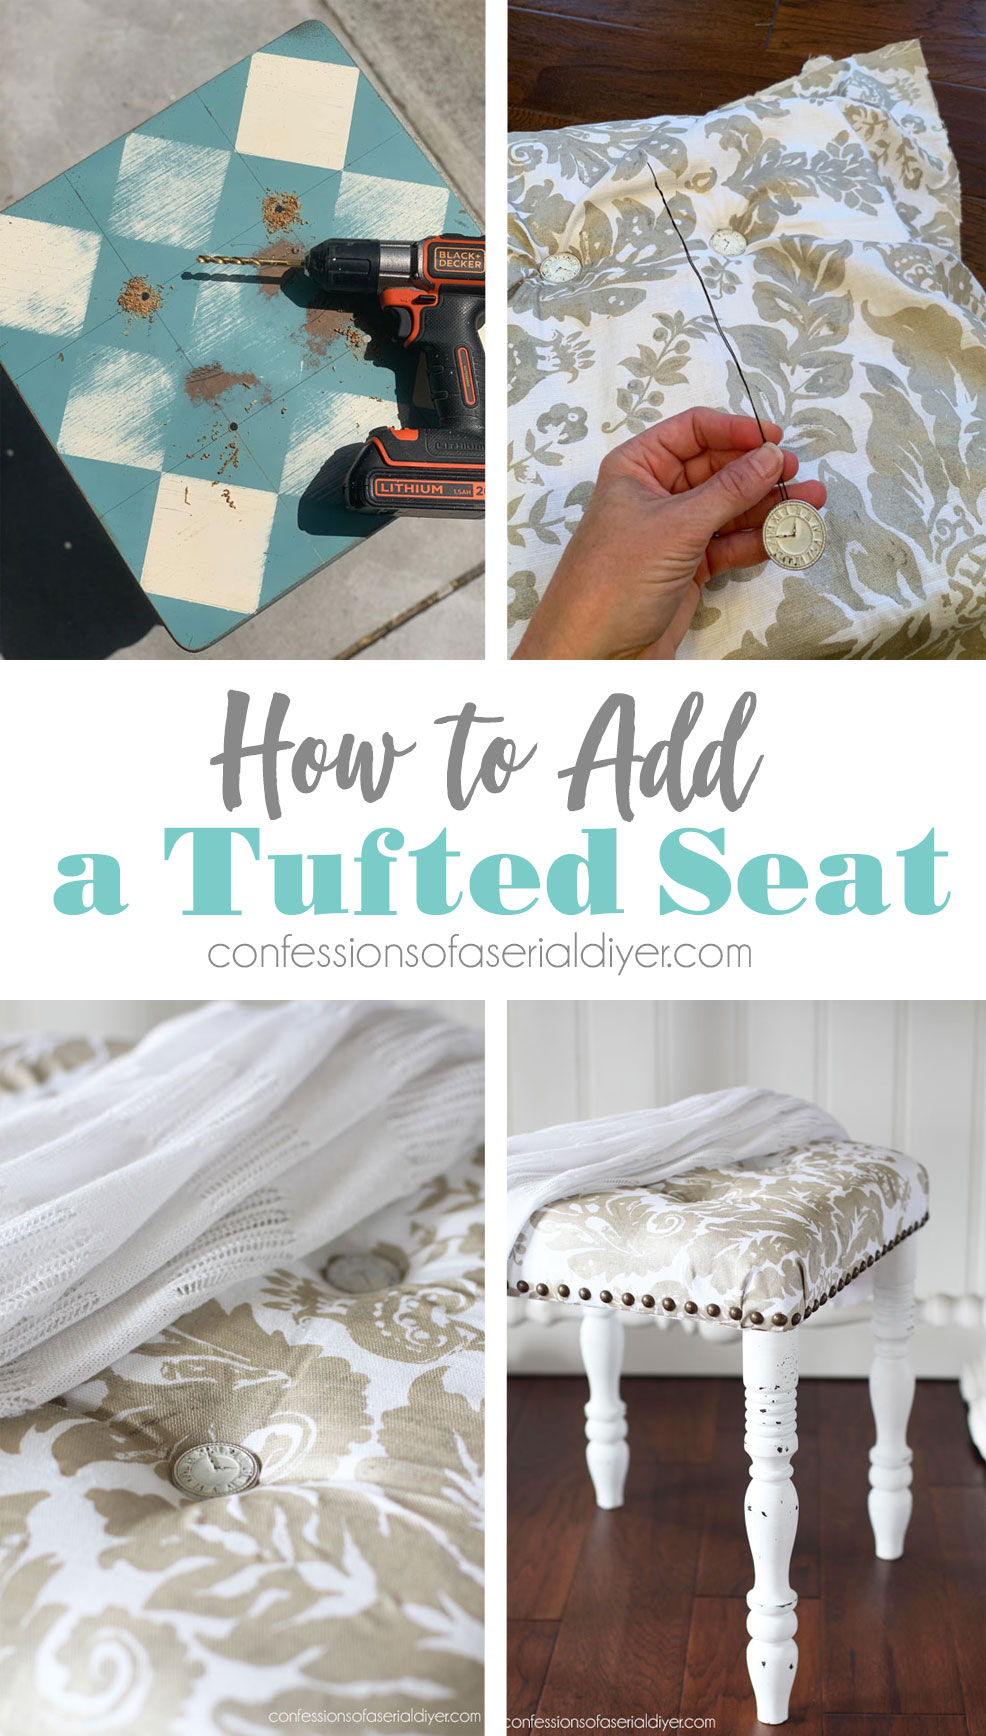
How to add a Tufted seat
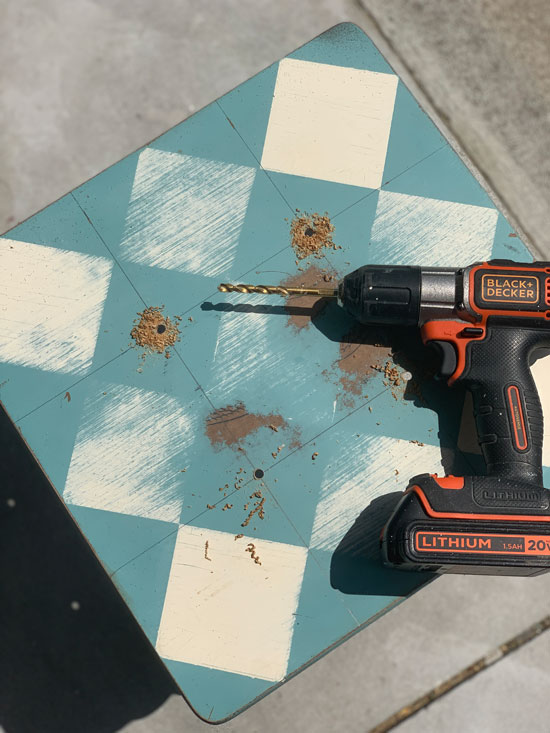
I knew I wanted to add a tufted seat to this piece, so to get started, I measured out where I wanted the tufts in my seat to be.
Then I drilled holes with my drill:
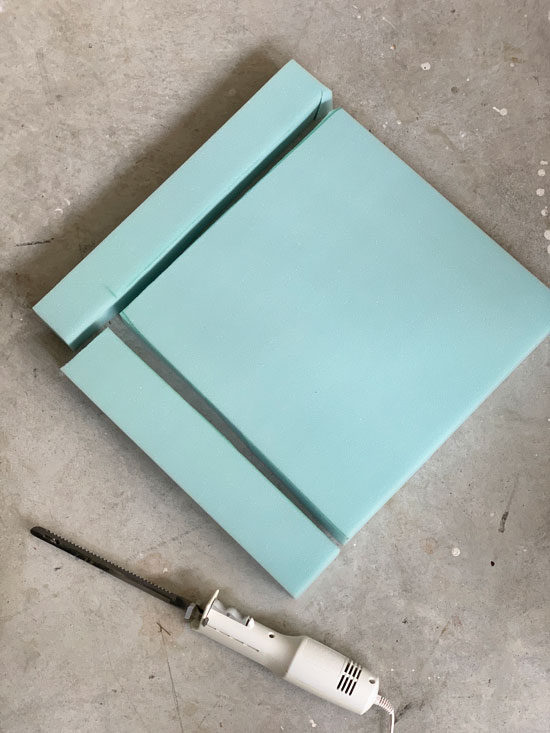
I found this foam at Walmart. It’s an 18 X 18 X 2″ sized foam cushion that I cut to fit using my electric knife:
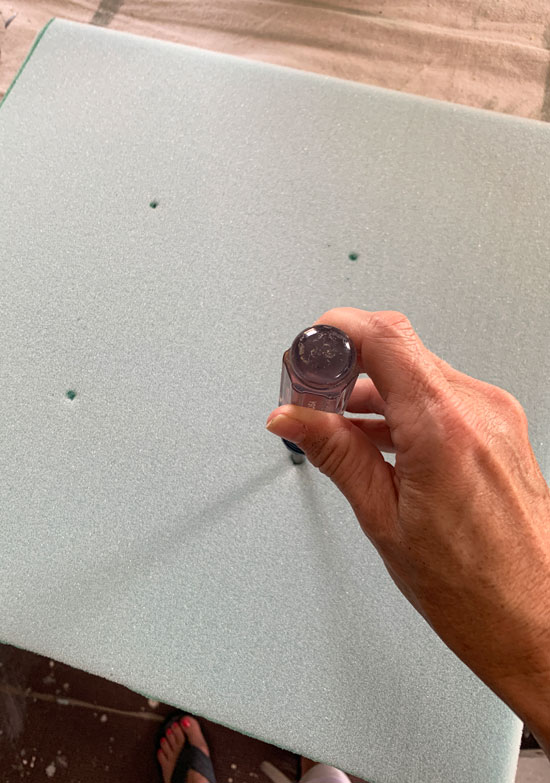
Then I marked my holes on the foam as well and used a screwdriver to puncture the holes:
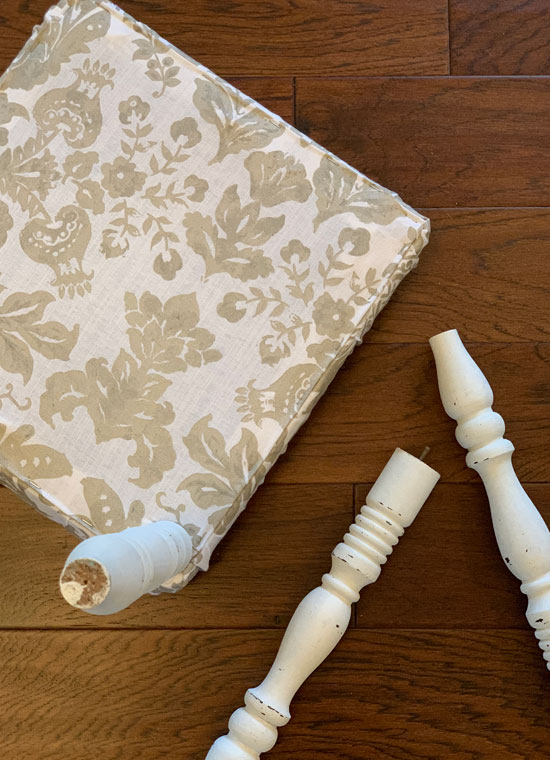
Next, I cut my fabric, including a thin white layer to cover the green foam since my fabric has a white background:

This fabric was originally a pair of curtains I found at HomeGoods for another project. The thin white layer was the liner that came with them. I love hitting up the curtain aisle for decor fabrics! You can see also that my legs unscrewed from the bottom which was super helpful!
For the tufts, I found these clock buttons at Walmart that I painted with a coat of Cotton first…
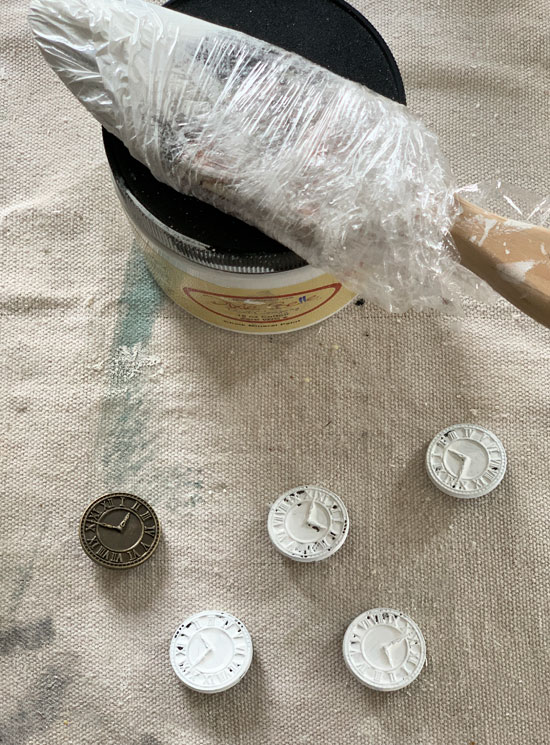
I usually cover my buttons with fabric and you can see what I use to do that in this post, but I decided to go a different route this time. I lightly sanded these and gave them a coat of spray sealer when they were dry. (You can also hit up the thrift store and look for garments with unique buttons you can use.)
Creating the Tufts
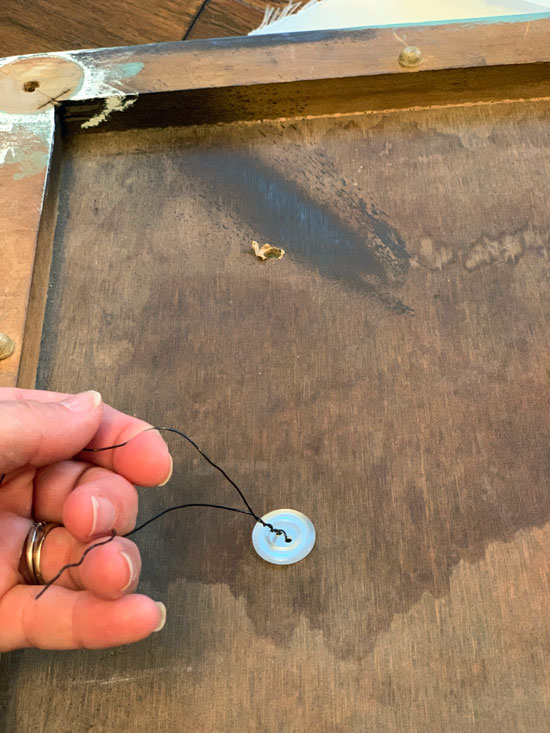
Then, I grabbed some wire and my wire cutters.
I threaded the wire through the loop at the back of the button and then pulled the ends straight, slightly twisting the ends together like so:
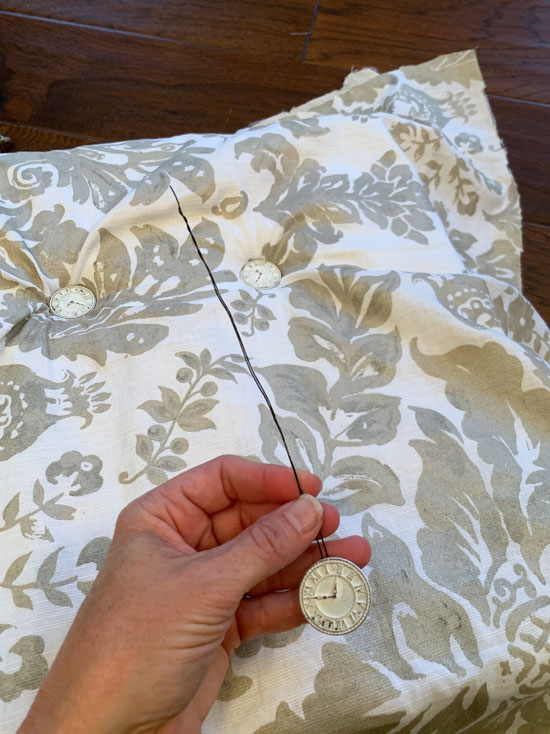
I was able to feel my way to the holes I had created in the foam and poked the wire down through the holes in the fabric, the foam, and then the bench top:
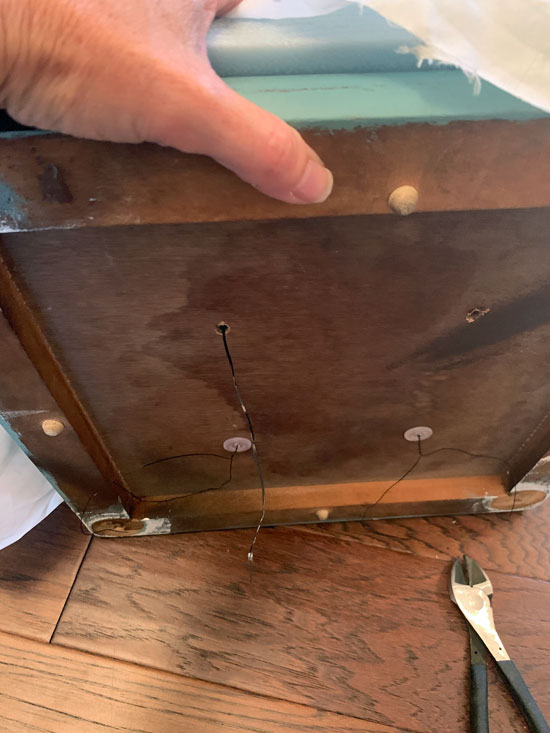
Then I used some buttons I already had to help secure them on the underside of the seat…
I just put my knee on the back and pushed the cushion into the floor a bit while I inserted the wire through the buttons. Then I twisted the wire to secure it.
Applying pressure to the back made it easier to “sink” the button to create the tuft.

When I had all my tufts complete, I used my el cheapo staple gun to secure the fabric to the back:

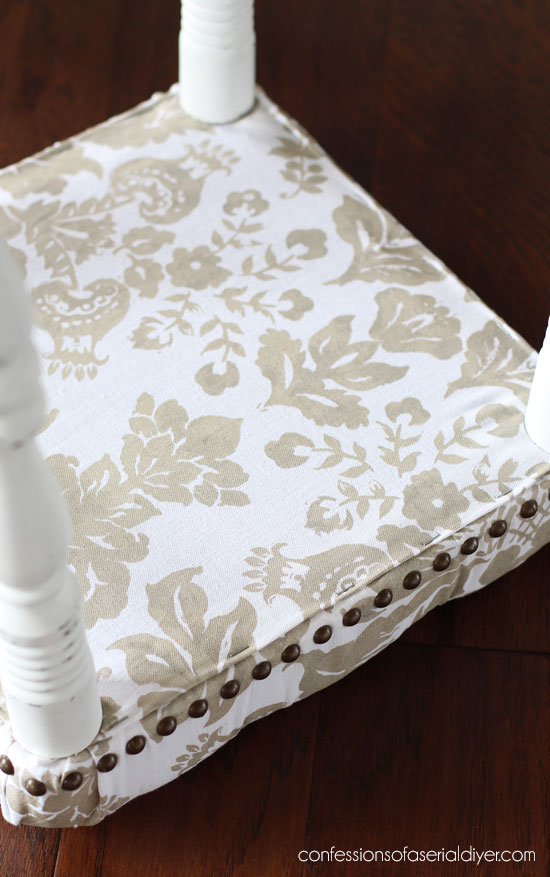
The bottom was really gross, so I covered that with fabric also. You can see how I cut out some of the bulk off the corners before securing:

Then I cut a small slit in the fabric where the legs screwed in…
THe After
It looks so much different now!
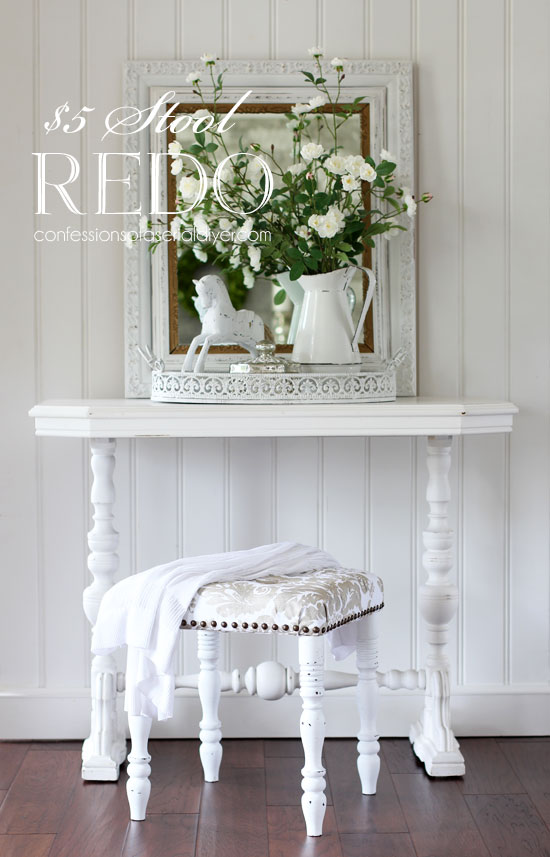
Right??
When it was put back together, it felt like it needed something more.
I found a stash of old nailheads I had removed from these chairs when I redid them, and they were exactly what this little bench needed!
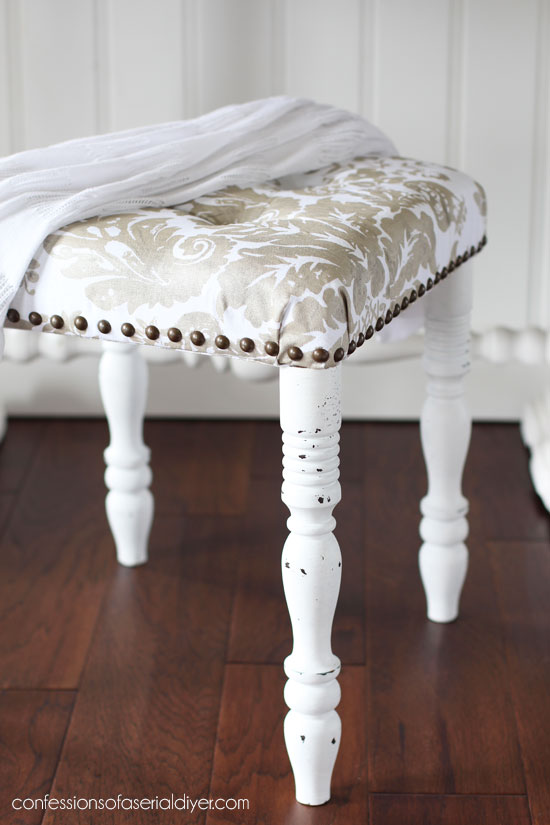
I used needle-nosed pliers to hold them in place while I tapped them in with a hammer.
And I love how the tufts turned out with those cute buttons!
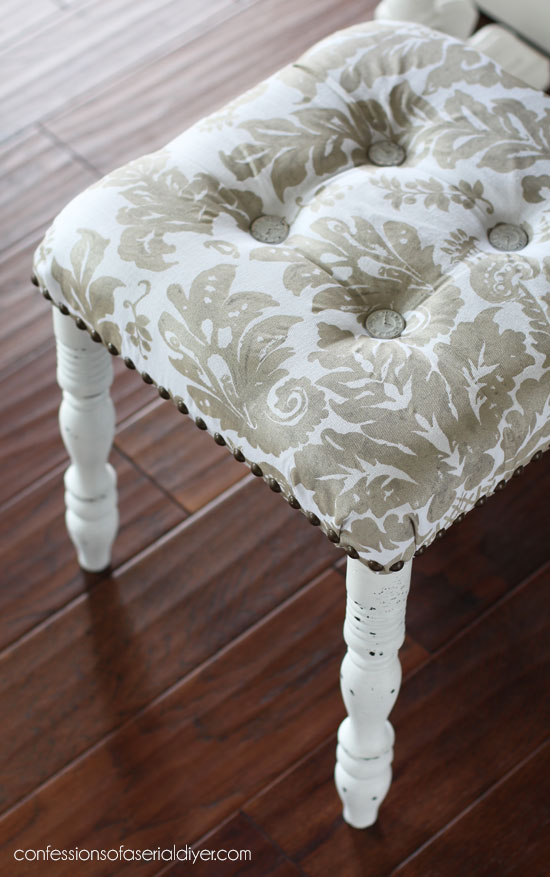
This is just a small project, but you could use this method for adding a tufted seat to a larger project as well!
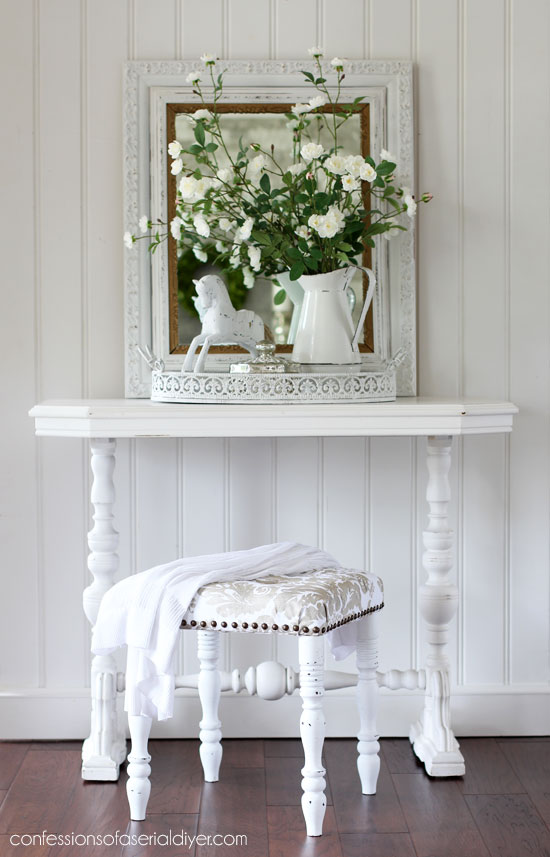
Remember this mirror? I used three pieces to create one chunkier frame:
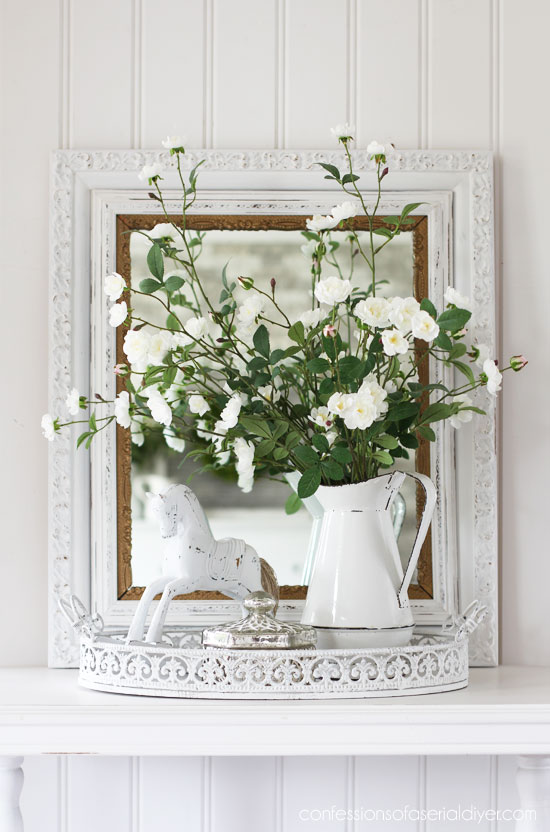
You can see that makeover HERE.
And here’s a peek at the finished underside…
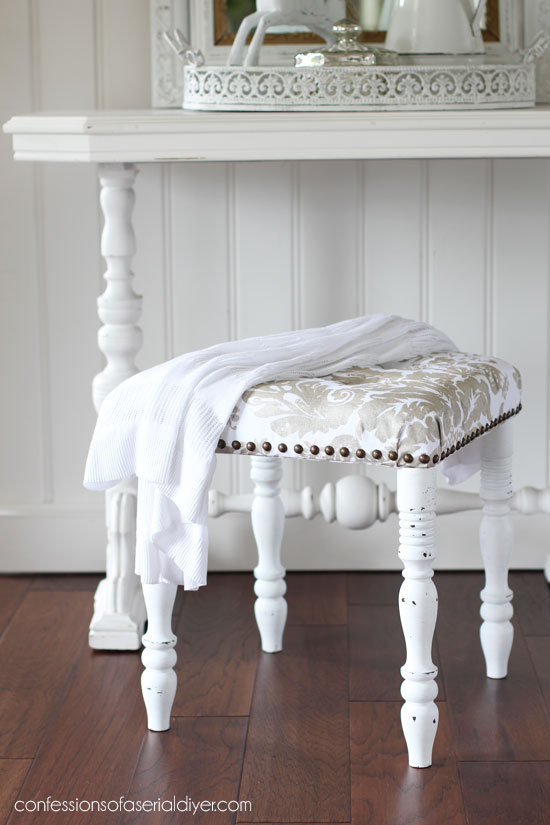
I just love how this little stool turned out, and I actually use it nightly as a footstool!
If you liked how this little bench turned out, you might like this makeover too:

See how this chair turned out HERE!
And here’s our snowman we made…we thought we’d be smart and use this tree topper head for our snowman:

Brennan was super proud, but it looks like a pea on a mountain ha ha! It wouldn’t stay on anyway, so a little later in the day we fixed it, adding a more proportional head:

This head fell off some time in the night, so it’s just a headless snowman. 😀
Thursday is Furniture Fixer Upper Day, so I’ll be back with my creative friends who will also be sharing furniture makeovers!
I’ll be sharing this pretty piece that a sweet neighbor from our old neighborhood passed along to me:
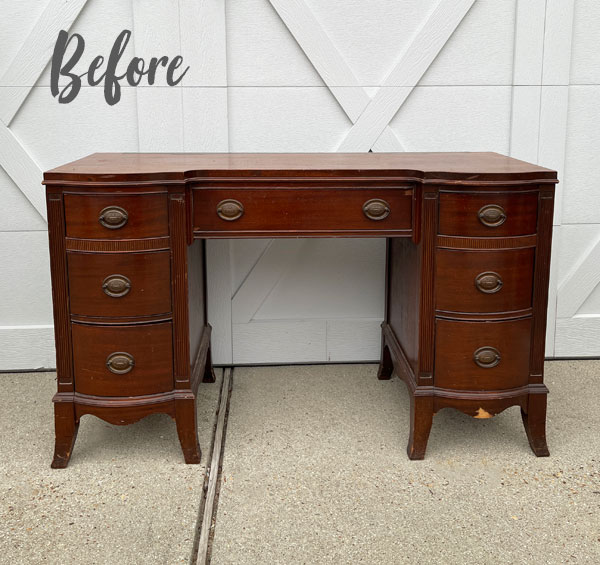
Then hopefully, I’ll get the mirror frame completed over the weekend to share next week!
UPDATE! See how this sweet piece turned out HERE now!
Hope to see y’all Thursday!
XOXO,

Don’t Miss a Thing!
If you like what you see, there are several ways to follow along!
EMAIL * INSTAGRAM * FACEBOOK * PINTEREST


Mary Kaiser says
I remember both of those makeovers of that sweet little stool! I loved both makeovers but the last one turned out so beautiful with that lovely fabric. I love your snow man, even if he is headless!!!
Christy says
Thank you, Mary! I don’t feel so bad because I ran to the grocery store this morning, and passing by all the snowmen that were built this weekend, most had lost their heads ha ha! I guess we just don’t get enough practice. 😀 XOXO
Kim Smith says
Magic!!
Christy says
Thank you, Kim!! XOXO
LORRI says
Christy… I know sometimes Florida gets cold but where you live I didn’t think you got actual snow.. wow.. We get snow sometimes here in Windsor On we are right across the Detroit River ….usually just cold around here in the winter. I like how you explained about how you did your tufted chair seat. It turned out lovely.
Christy says
Thank you, Lorri! We are lucky if we get one snowfall each year and it rarely accumulates much. Every few years we get a “coastal storm” that really delivers! XOXO
Christina says
I love this little stool makeover Christy!! The tufts are ingenious and I love how you covered the bottom. The nail heads are an elegant touch. It really is beautiful.
Fun with the snowman!!
Stay warm and enjoy your week!!!
Christy says
Thank you, Christina! This poor thing was really in need of a redo lol. Enjoy your week too! XOXO
Elizabeth Pusateri says
Adorable! What a great update.
Christy says
Thank you so much, Elizabeth! XOXO
Sheila Pack says
LOVE the little tufted stool! What a transformation.
Christy says
Thank you so much, Sheila! XOXO
Denise says
You know I’m a huge fan of your upholstery projects my friend and this did not disappoint! So gorgeous! Have fun in the snow.🤗
Christy says
Aww I appreciate that, my sweet friend! Thank you!! XOXO
Cheryl Ware says
Love seeing the “oldies” and the stool is so sweet! Thanks for sharing the snow pics too. What a “handsome” snowman (before he lost his head)!
Christy says
Thank you, Cheryl! I’m so glad you enjoyed this one again! Our poor snowman ha ha! XOXO
Denise Cox says
It’s gorgeous!! I’m confused about one thing, though. Why bother to “cheat” distress the edge (or did you do the legs as well?) when your goal is to pad the top anyway? Guess I missed something?
Christy says
Thank you, Denise! That was just for the legs! 🙂 XOXOX
Barbara says
Thanks for the tutorial Christy! I have a small mahogany piano bench (a $5 thrift store find) that I use at my craft table. It could definitely benefit from an update, especially a more comfortable top! Now I’ll feel more confident tackling it.
Christy says
My pleasure, Barbara! I’m glad it was helpful! Have fun with your bench! XOXO
Vicki says
This is so sweet! I love the tufting and nail heads, two of my favorite details. I have a couple of little second hand footstools in my stash and you’ve inspired me! Thanks for sharing how you did the tufting, it really elevates it.
Christy says
Thank you so much, Vicki! Nail heads and tufts can fix anything, right?? XOXO
Amanda says
This is beautiful and you make it look easy enough for me to attempt! Thanks!
Christy says
Thank you, Amanda! I’m so glad you found it helpful! XOXO
Niki says
This little stool is so pretty! I really like that damask print-and I’ve probably said that before too. All you furniture bloggers inspire me- I wish I had the energy y’all have.
Brennan did a great job on his snowman too!
Have a great day Christy!
Christy says
Thank you so much, Niki! He had a ball in the snow! Enjoy the rest of your day too! XOXO
Cindy D says
Holy shnitzel lol. What a genius idea to do to a simple old ugly stool. Thank you, pinned for later.
Christy says
Ha ha! Thank you, Cindy! XOXO
Sue Mellette says
Thanks for the review of your cute little stool. I love how you added the clock buttons and even finished the underneath of the stool! I agree the nail heads complete the makeover. Love the pictures of Brennen and his snow man. Glad ya’ll had fun in the snow!. Enjoy your week.
Christy says
Glad you enjoyed it, Sue! Thank you! Enjoy your week too! XOXO
Rebecca Payne says
I love this stool makeover. Gorgous!
Christy says
Thanks so much, Rebecca! XOXO
Victoria says
I just love your blog. I learn so much. Your chair remake is incredible! I have some bar stool cushions to recover so I am going to try using curtains or drapes for the fabric. Thanks for all the great ideas!
Victoria
Christy says
Aww I love that…thank you so much, Victoria! Yes! The drapery aisle is an amazing fabric resource! XOXO
p says
Now that’s so cute !
I would not have thought to do tufting like that. Thanks for sharing !
p
Christy says
Thanks so much, P! XOXO
Brenda says
Such a great redo!
Christy says
Thank you, Brenda! XOXO
Cecilia says
I don’t blame you for taking time to play in the snow! Looks like y’all had fun. 😊
Love the stool.
-Cecilia
Christy says
Thank you, Cecilia! We had a ball! XOXO
Lizzy says
Great tutorial. It’s super cute!
Christy says
Thank you, Lizzy! XOXO
Constance Colvin says
That is awesome and adorable Christy!
Christy says
Thanks so much, Connie! XOXO
Sharon L Austin says
That turned out super duper cute! Quick unrelated question: what product do you use for stripping stained furniture?
Christy says
Thank you, Sharon! I usually bust out the sander since it is the quickest way, but I have used a product called Antique Furniture Refinisher in the past. I did a post about it way back in 2014 that you can see here: https://www.confessionsofaserialdiyer.com/how-to-remove-stain-without-sanding/ XOXO
Bonnie says
I am so proud of you. I don’t think there is nothing you can’t do once you get those wheels turning.
I meant to mention before I was so happy you two got to put out the Christmas set together. Have a great week my friend.
Christy says
Aww you are so kind, Bonnie, thank you!! And yes, it warms my mama hear that Jack still wants to build the village with me!! Enjoy your week too! XOXO
Mary says
Isn’t that amazing that sometimes things we keep pushing off turn out so wonderful? Oh my Christy…what a great purpose for this little table/stool. I have nothing more to add to what has already been said…just love how this turned out! I love all things tufted too, but would not have thought of drilling holes and using buttons and all that you did plus finishing off the underside so beautifully…really a work of art! Thank you for inspiring once again!
Christy says
Yes! I love when that happens! Thank you so much, Mary! I’m tickled every time I pull out this little seat to prop up my feet…so glad I kept it! XOXO
Petra says
I’m in love with this ottoman 🙂 Little cushioned stools like that are so versatile. And those buttons are adorable! xo
Christy says
Thank you so much, Petra! I’m so glad I kept this one! XOXO
Cyndi says
This is soooo cute! I love nailheads, but putting them on would scare me. Do you have a tutorial on getting them in with equal spacing and in a straight line???
Christy says
Thank you, Cyndi! I use needle nosed pliers to hold them, but there actually is a tool that can help with spacing if you are using newer nail heads here: https://amzn.to/3G1KFHn 🙂 XOXO
Cyndi says
Oh, yeah, I definitely need one of those. TY! 🙂
Christy says
You’re welcome! 🙂
Patty says
New life! I love everything about it! I like your corners which I often struggle with.
Another makeover of yours bookmarked! Thanks!
Christy says
Thank you so much, Patty! Those corners can be tough! XOXO