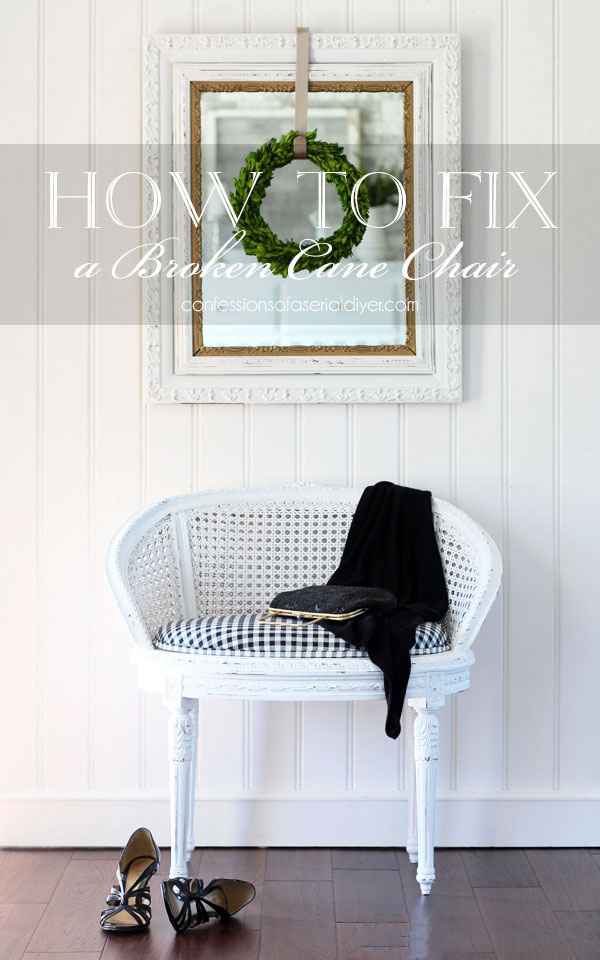
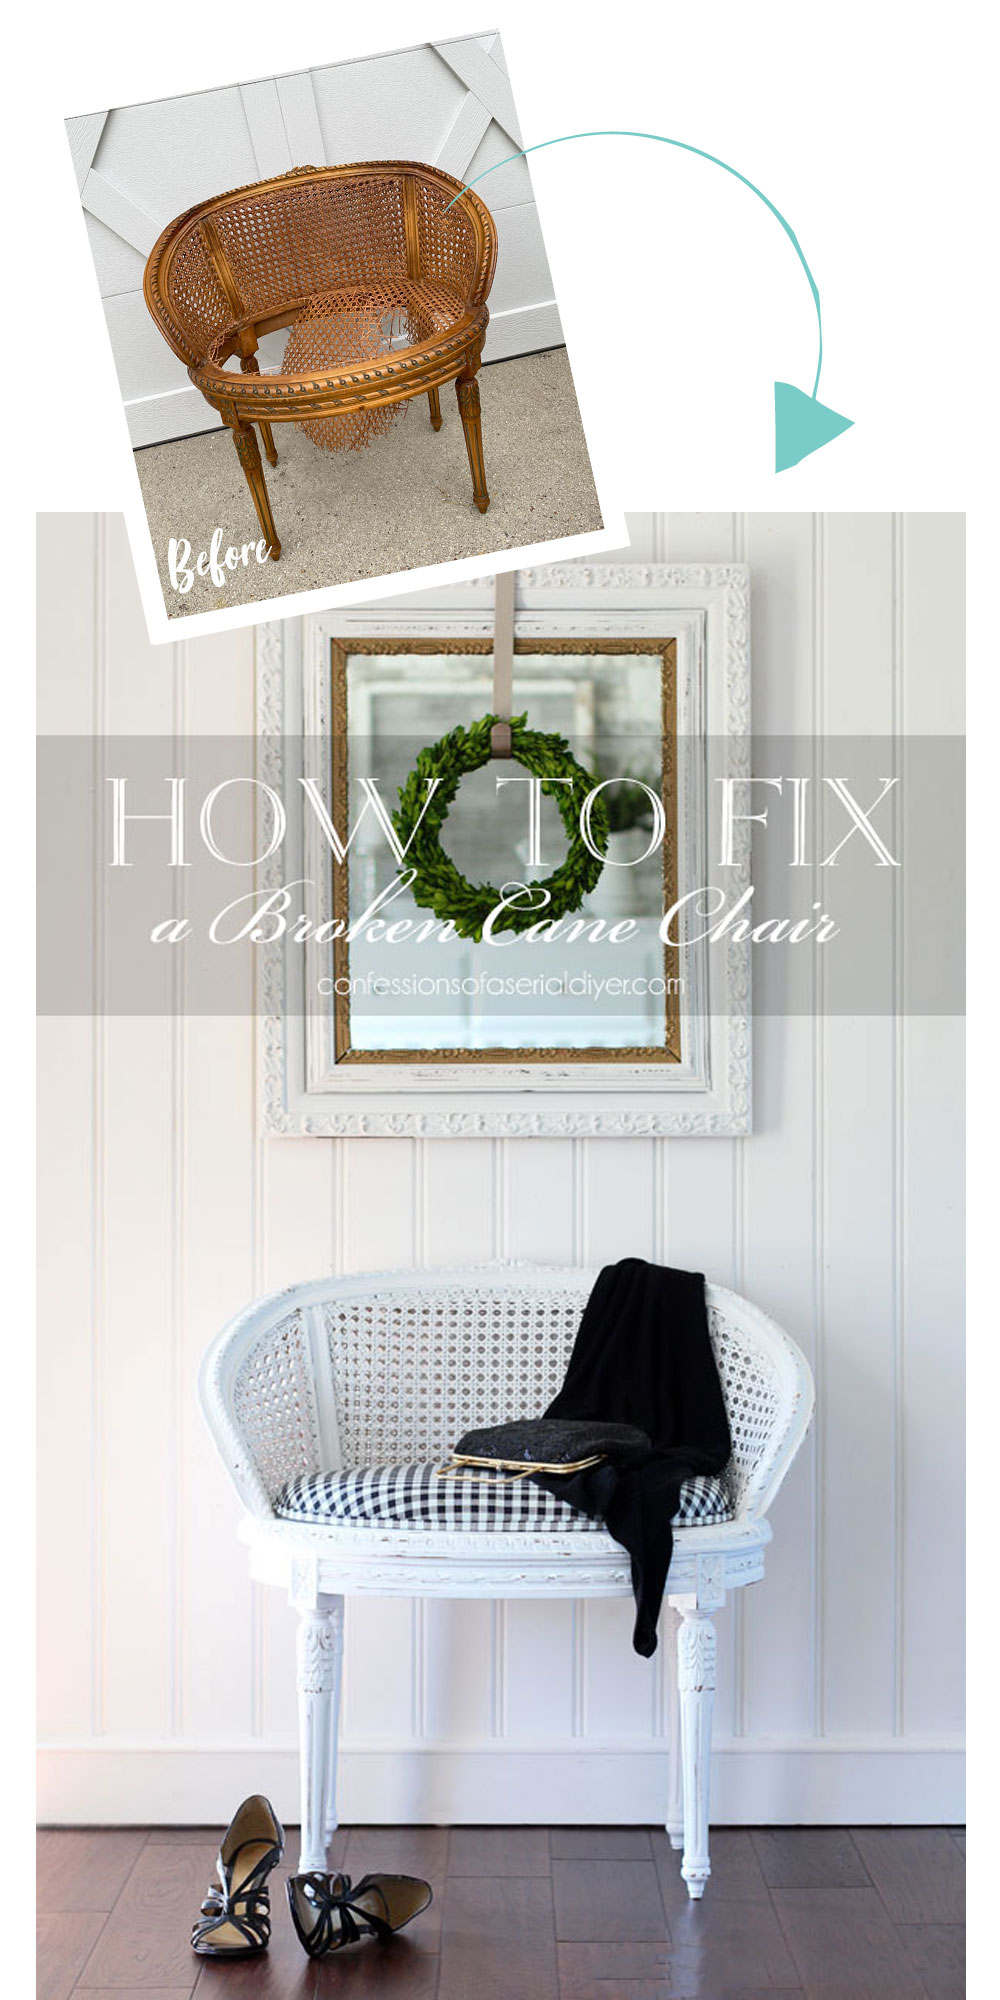
Hello dear friends and welcome to Trash-to-Treasure Tuesday! Today, I’m sharing how to fix a broken cane chair! Now, I’m not talking about recaning…no, thank you! I’m sharing another solution for that broken cane!
Here is my project piece, badly in need of repair:
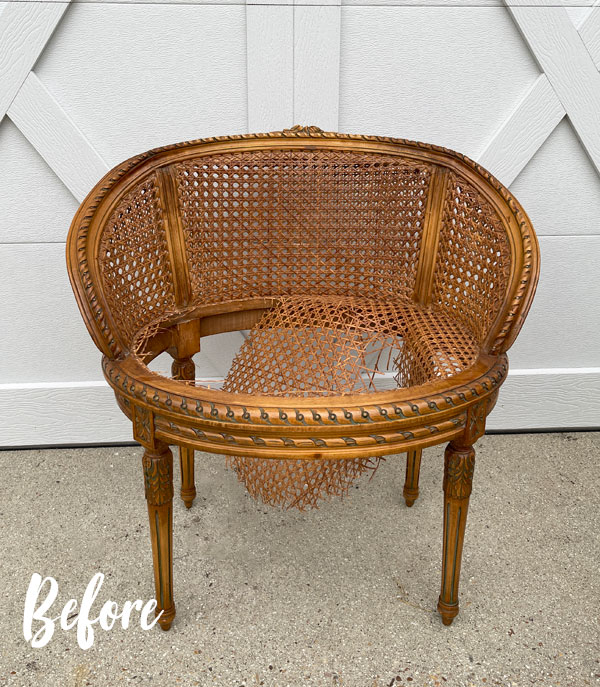
Aside from the broken cane seat, it’s a gorgeous chair! I’ve included a few affiliate links so you can find the products I love.
My sweet mother-in-law offered it to me after her hubby put his foot right through it while trying to stand on it. My own hubby did the very same thing with this chair a few years ago.
How to fix a broken cane chair
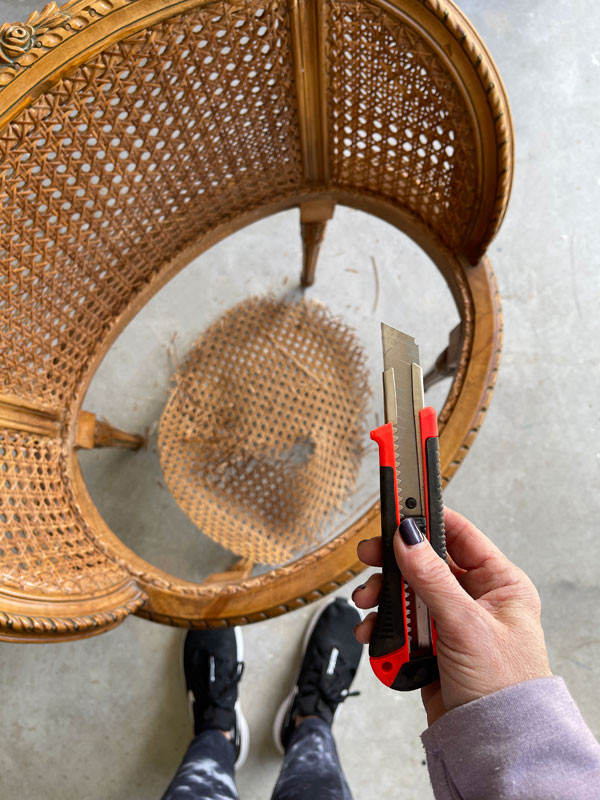
The first thing I did was remove the broken cane seat with a razor knife:
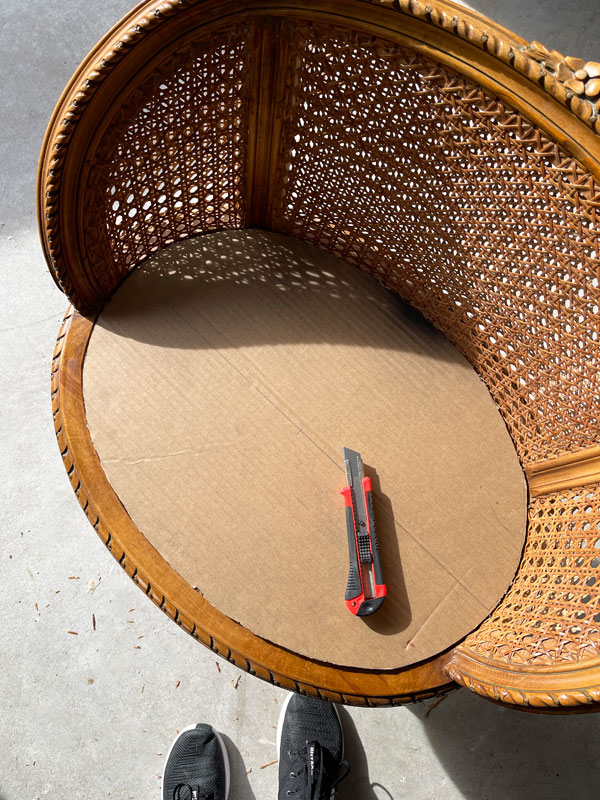
Create a New Seat
Then, I cut a pattern for the new seat with a piece of cardboard:
I traced the pattern onto some thin plywood and cut the new seat using my jigsaw:
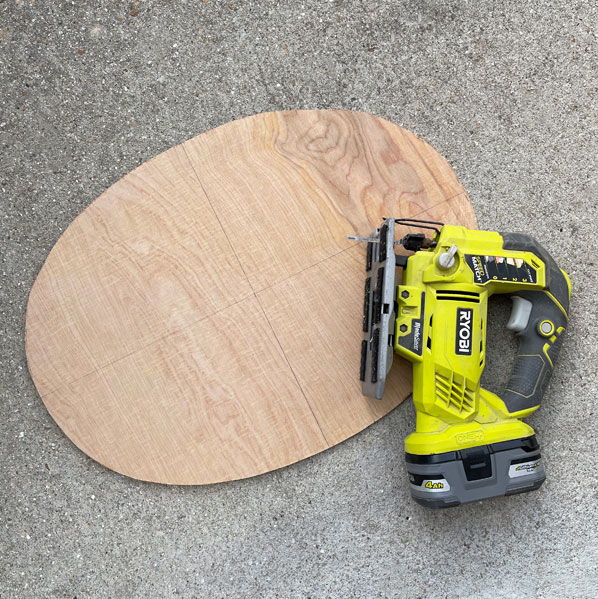
This is a great saw to use on those rounded edges, especially if you swap out the original blade for a smaller scroll saw blade (made for the jig saw). I found mine in a multi pack at the Home Depot.
I then cut my foam that I picked up at Walmart, using an electric knife:
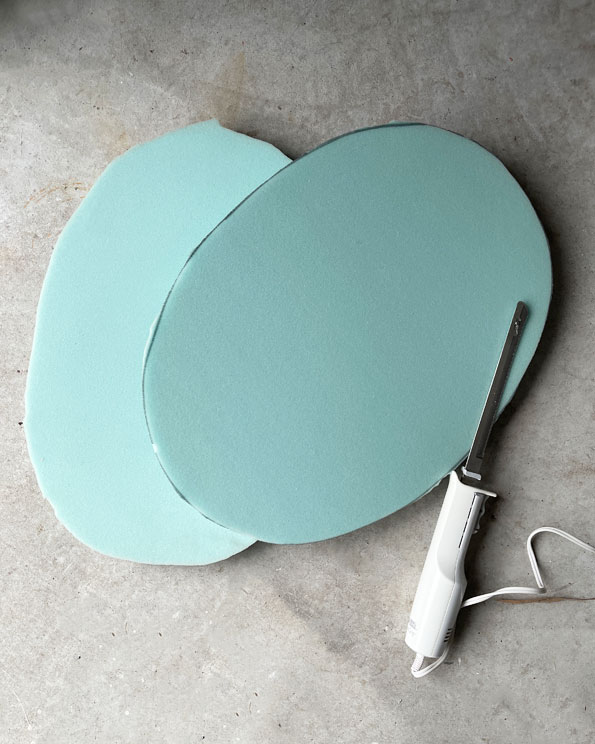
The only foam available at Walmart was much thicker than I wanted, so once I had it cut to size, I then sliced it in half widthwise.
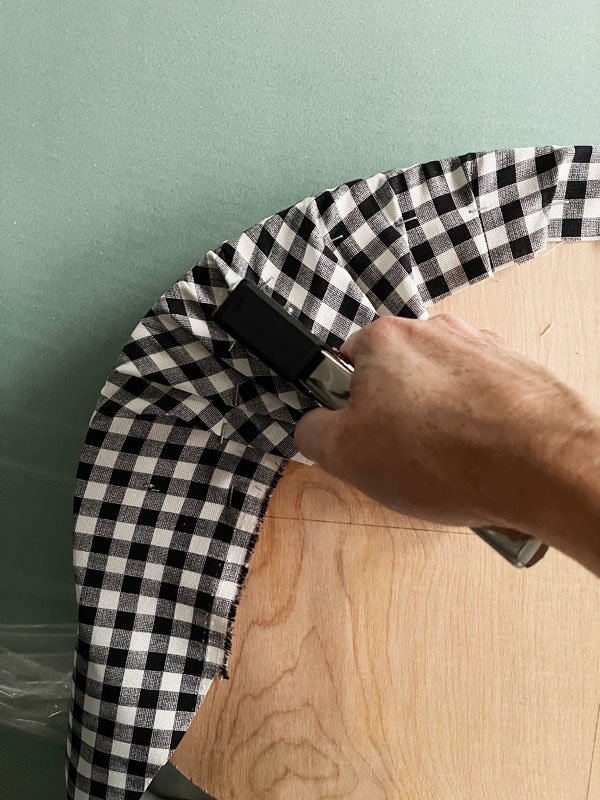
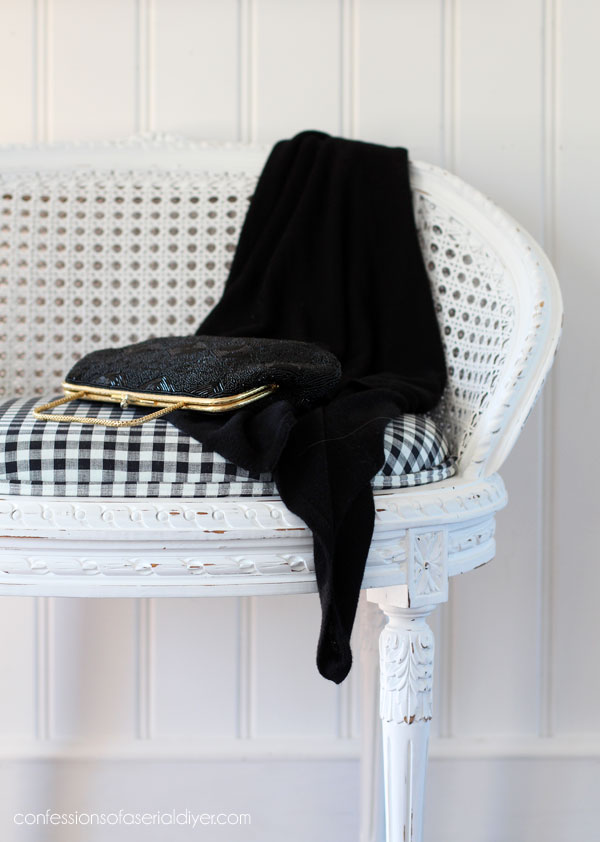
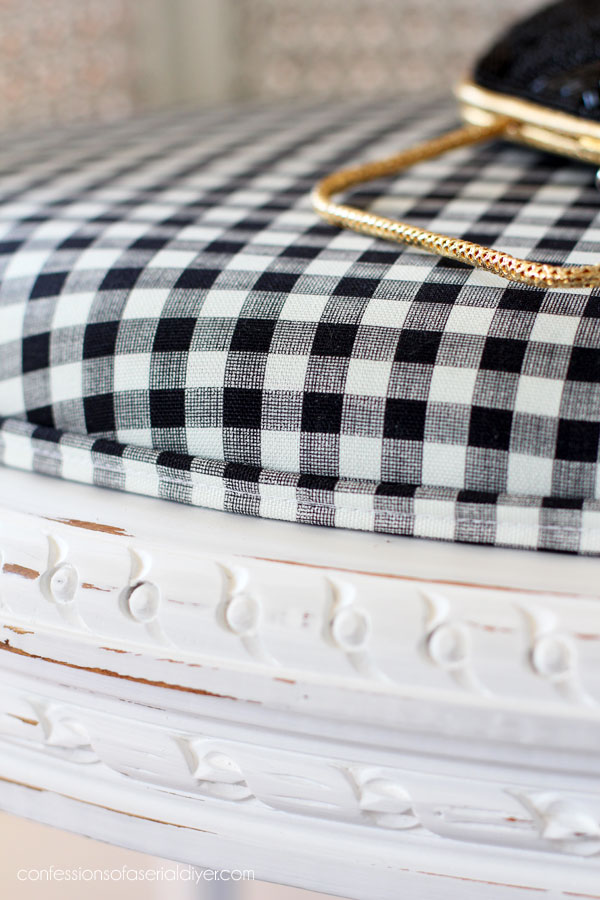
I had a couple of fancier, more formal fabrics that I thought would be perfect on this chair, but I just wasn’t loving them. To me, cane is more casual and once I laid this black and white gingham check over the seat, I loved it.
I attached the fabric using my cheap light duty staple gun…
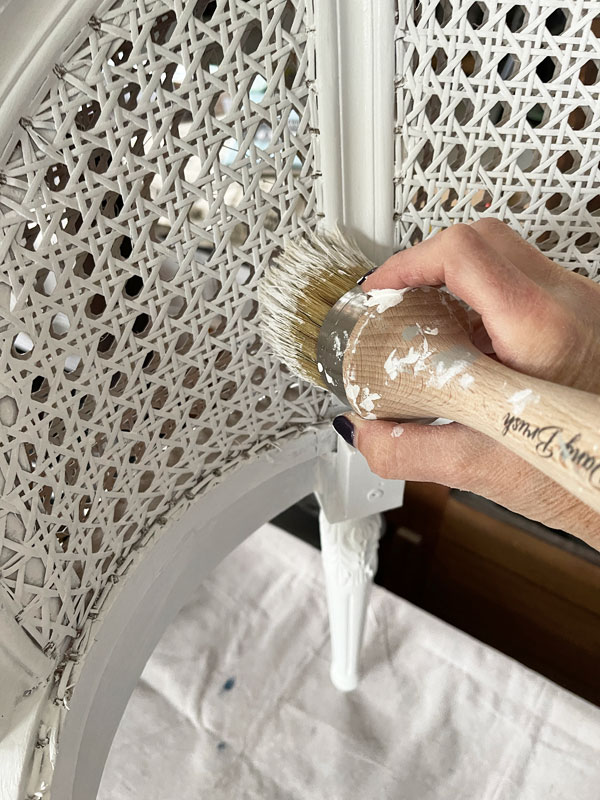
Paint
To prep for paint, I gave the main parts of this chair a quick cleaning with White Lightning and used my shop vac on the cane parts.
Before painting cane, you will want to prime it or the paint can flake off over time, so I went ahead and hit everything with Rustoleum spray primer:
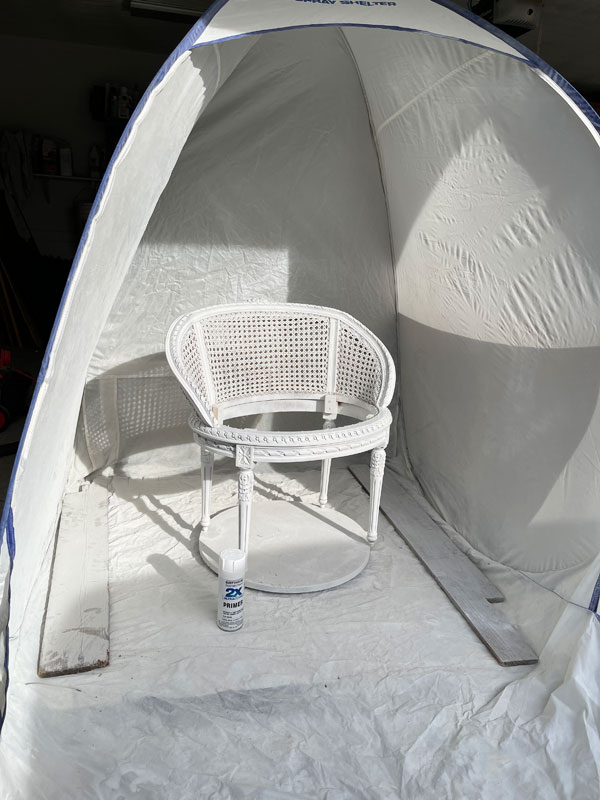
This is my medium spray tent and it is awesome! (It is by Wagner now, but it is the same one I have.) On windy days, I can sit it just inside my garage and spray away!
Then, I followed up with one coat of Dixie Belle’s Cotton using my Best Dang Brush:
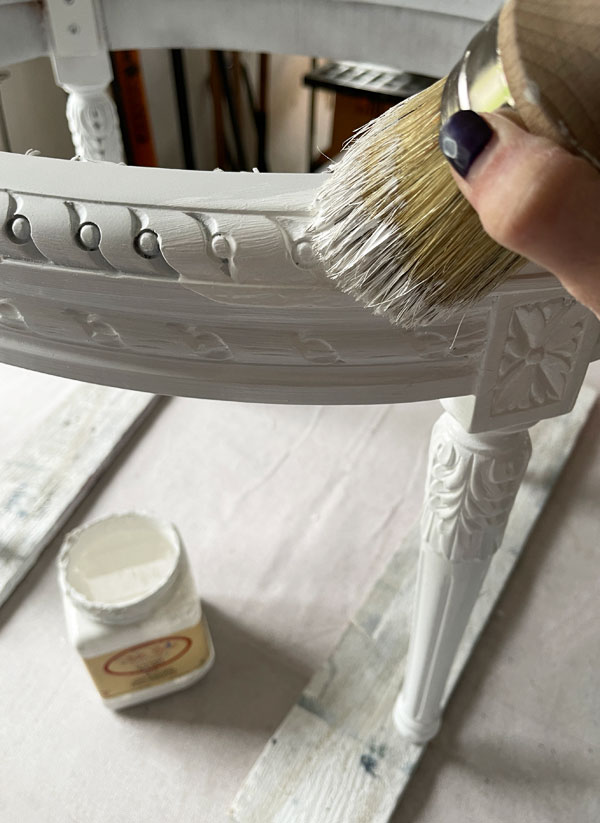
This brush is considered more of a wax brush, but I love it for highly detailed pieces like this one and it works so well on baskets and on this cane:
Once the paint was dry, I sanded all over with 220 grit sandpaper wrapped around an old foam sanding sponge…
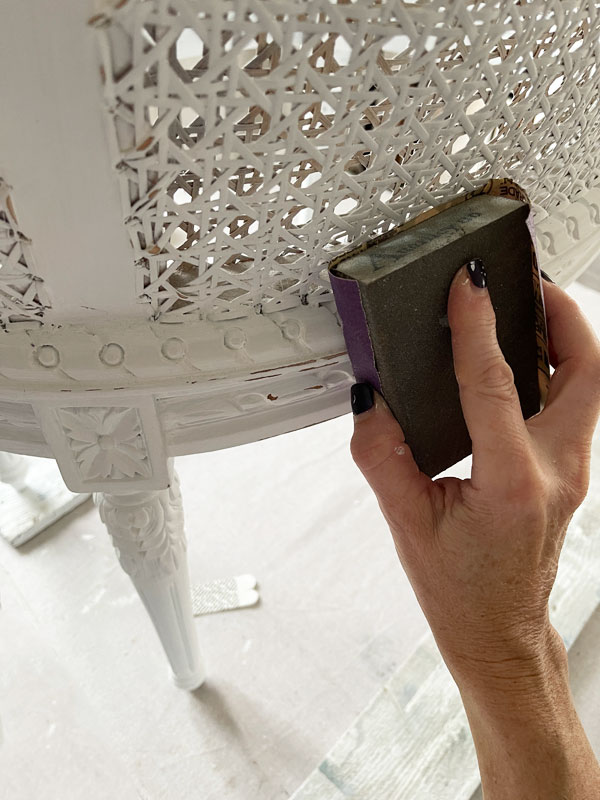
I left the cane parts unsealed and sealed the rest of the chair with clear Best Dang Wax.
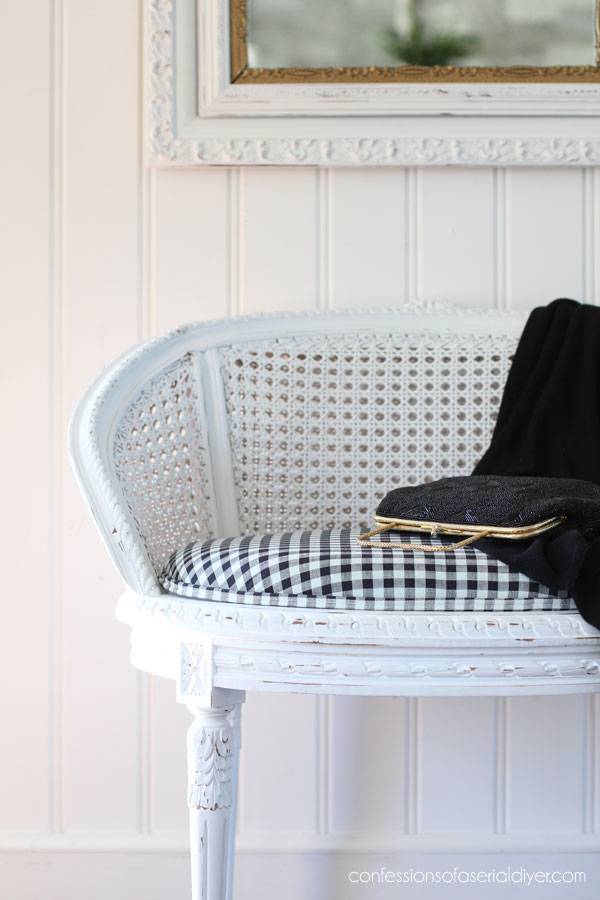
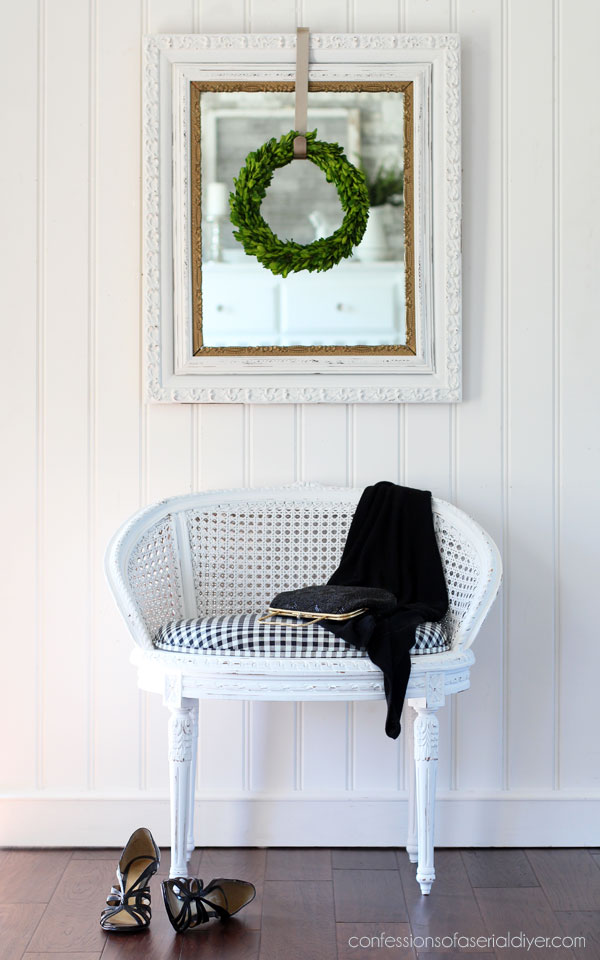
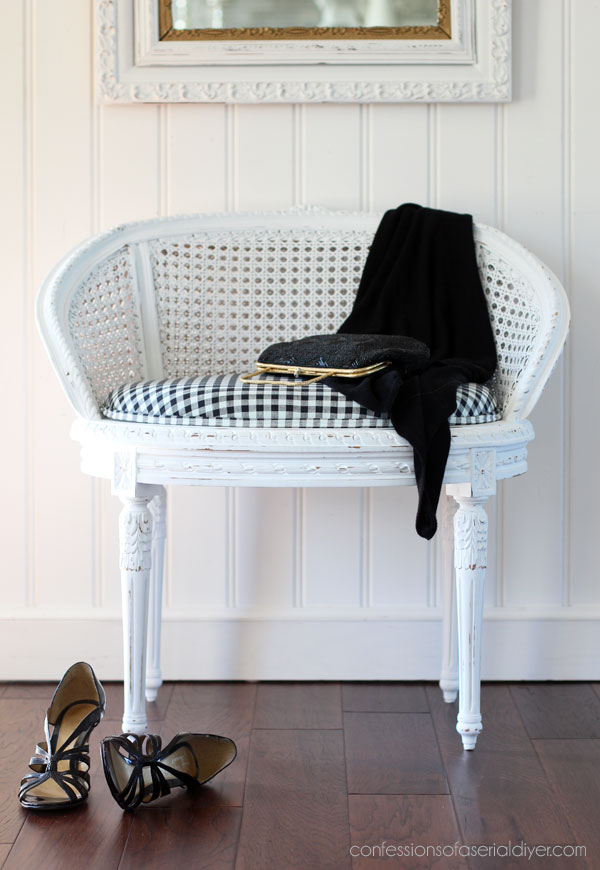
The after
This would have been a fantastic piece to highlight with colored wax, but I went for a simple, cottage-inspired shabby look for this one!
This was such a beautiful piece already, but the paint and fabric add a little more charm…
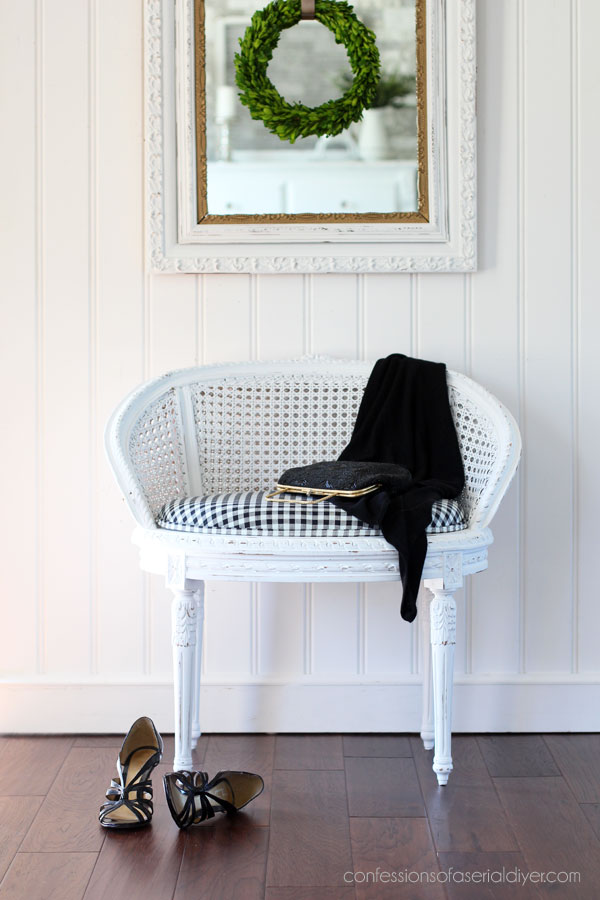
Those details are just gorgeous!
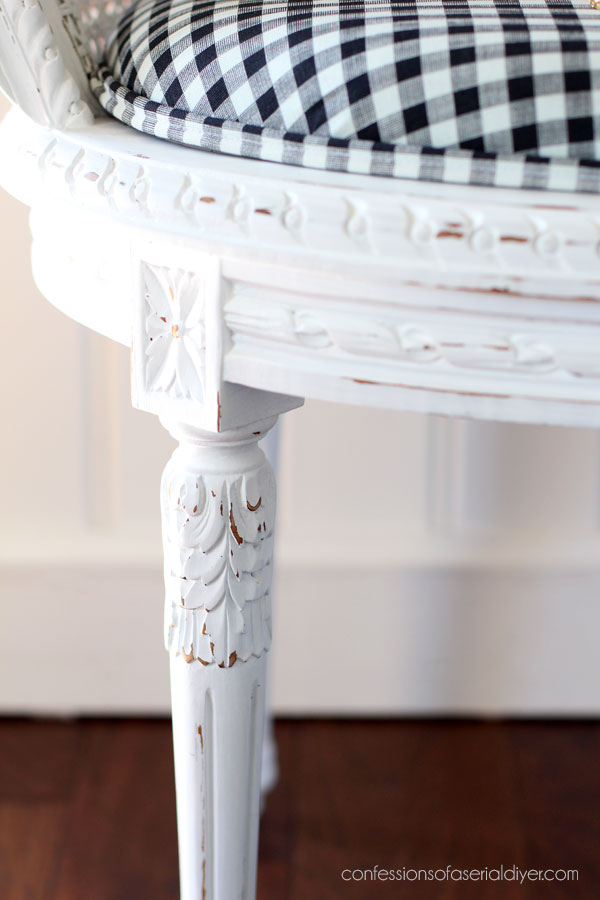
I knew I wanted to trim out the front edge of the seat, so I made double welt trim to match:
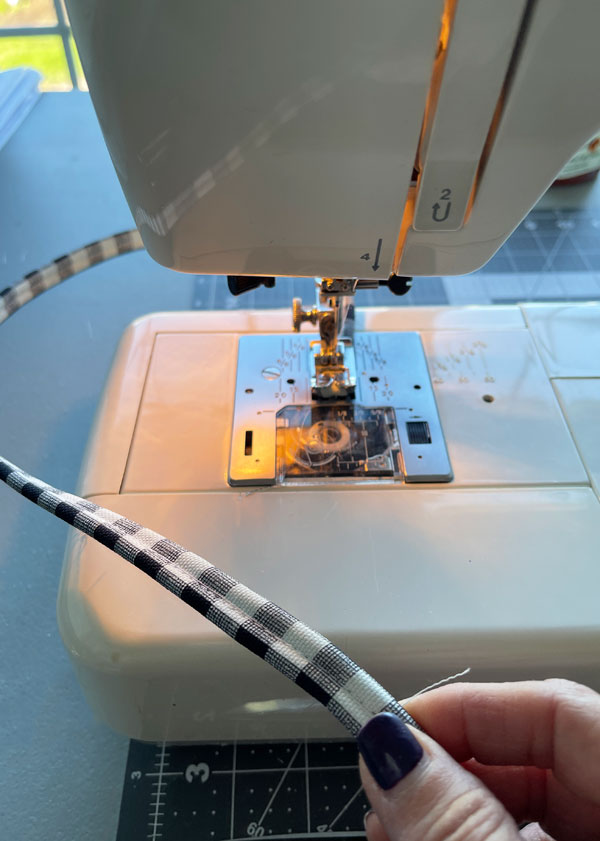
If you can sew a straight line, you can totally make this! See my how-to HERE!
If you don’t sew, you can also use gimp trim like I did HERE.
It just gives the front edge a more professional and more finished look:
I attached it with hot glue along the bottom edge of the cushion.
And I stopped it where the arms start.
The seat rests on the small lip around the back side and across the front, but I secured it in place to the legs with these L brackets.
And that’s how to fix a broken cane chair!
This is an excellent alternative to replacing the cane seat!
And it’s probably a lot more comfy too!
Don’t forget my friends have trashy makeovers of their own to share with you today!
I hope y’all enjoyed this makeover!
If so, you might like this one too:
See how I “fixed” this one HERE!
And for even more Trash-to-Treasure inspiration, see all of my Trash-to-Treasure Tuesday makeovers HERE!
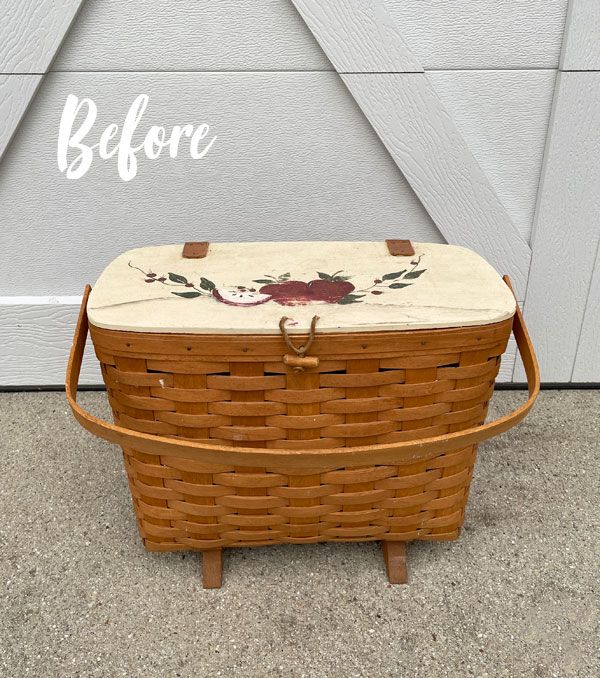
And that is project #1 from my new FREE haul complete!
I’ll be back on Thursday with this basket that belongs to my pretty mama!
See ya then!
UPDATE! See how this basket turned out HERE now!
XOXO,
![]()
Don’t Miss a Thing!
If you like what you see, there are several ways to follow along!
Email * Instagram * Facebook * Pinterest * Twitter


Mary Kaiser says
Oh wow, it turned out beautiful. Love the fabric and cottage look it has now! I knew what ever you did to it that it would be beautiful, every thing you touch turns into beauty.
Christy says
Thank you, Mary!! You are the sweetest!! XOXO
Bridget says
Beautiful work👍🏾
Christy says
Thank you, Bridget! XOXO
Larissa ~ Prodigal Pieces says
Bravo! Wonderful save and love all your tips. 🖤
Christy says
Thank so much, my friend! XOXO
Cheryl Atkinson says
This chair is so pretty. I will never pass a chair with broken cane again. Great choice of fabric.
Christy says
Thank you, Cheryl! Yes…definitely grab the next busted cane chair you find lol! XOXO
Rose Lefebvre says
Job well done! It looks great.
Christy says
Thank you so much, Rose! XOXO
Denise - Salvaged Inspirations says
Gorgeous Christy! And this is an amazing alternative to replacing the cane seat – which I wouldn’t have a clue how to do…lol. Pinned XOXO
Christy says
Thank you, my sweet friend!! I would not have any idea how to repair the original cane seat either, and I don’t want to know lol! XOXO
Christina k Wilson says
Brilliant makeover! I bet this little chair is singing!! Love the padded seat. Love the soft colors and the gingham seat is perfect. Way to go!!
Christy says
Thank you so much, Christina! It is definitely happier!! XOXO
Janice Holt says
Now I kinda hate to say it but glad the cane tore up because it is so much prettier now. You lined the trim up so well with the seat; it looks professional. Love the fabric with the white. Another great job.
Christy says
Thank you so much, my friend! I agree…I think the fabric helps break up all that cane. And would you believe I was not trying to line up the fabric?? It just happened to work out that way lol! XOXO
Denise Cox says
It’s lovely!!
Christy says
Thank you, Denise! XOXO
Toby says
This is absolutely fabulous!!!! I can’t imagine it will stick around long at all in your booth! I just love it!!
Christy says
Thank you so much, Toby! I don’t think it will last either!! XOXO
Susan says
I love this! I have a cane rocker that needs the seat replaced, and I planned on doing an upholstered seat also instead of replacing the cane. It’s just pressed cane which would be a fairly easy fix, but I think the upholstered look updates it more. I was wondering if the seat should be braced in the middle for extra support.
Christy says
Thank you, Susan! If the seat has a larger opening, you can always use a little thicker/stronger plywood. Good luck! XOXO
Peggy says
Christy! You FIXED the UNFIXABLE. I wondered all week WHAT could be done with the disastrous cane chair. You OUT-DID yourself this time, girl~!
Christy says
Aww thank you so much, Peggy!! I’m so glad you liked the outcome!! XOXO
Ashley Walter says
The chair is beautiful! You are so talented.
Christy says
Aww I appreciate that, Ashley! Thank you! XOXO
yamandu says
quedo hermosa todo nueva
Christy says
Gracias! XOXO
Hannah Reyor says
Hey Christy – love the cane chair. Can you explain a bit more about the L bracket placement on the front you placed? How you did it and why they were needed?
Thanks! Loved the outcome.
Christy says
Thank you Hannah! I’m going to take a photo of it tomorrow to add to the post as I got a couple of questions about it. XOXO
Dana L Smith says
You did a great job on this chair! I love it so much!! Thanks for sharing a wonderful project with us.
Christy says
Thank you so much, Dana!! XOXO
Cindy Olaya says
So pretty! The gingham was a good choie!
Christy says
Thank you, Cindy! I’m glad I went with that fabric! XOXO
Debra Hubbs says
What a great little cane chair, love the shape of it and how you fixed it. Came out beautiful.
Christy says
Thank you, Debra! It was such a beautiful chair to work with! XOXO
Lisa says
love love your cane chair makeovers!
Christy says
Thank you, Lisa! XOXO
Cindy W. says
Thank you for posting this re-do! I have a couple of cane projects and was thinking of gutting out the broken seats. Now I have a good idea how they’ll turn out! I have a few questions: Do you still get overspray from the open end of the tent settling on other things inside your garage? How do you spray projects when weather gets too cold? How do you decide to use a paint gun vs. just the rattle can paint? Thanks for the answers!
Christy says
You’re welcome, Cindy! Glad this was helpful! As for the tent, I have it sitting at the front of the garage, so there is usually no overspray onto anything in the garage. It is awesome at containing the paint. We don’t get much colder than the 30’s here in the winter, and I have still been out there spraying in the 40’s. I hardly ever use my paint sprayer although it would be much quicker. It seems like too much work to clean it all after and it uses a lot more paint. Plus, I enjoy the quiet work of painting with a brush. I mostly only use the spray primer in the cans to prime things or to get a quick first coat on the smaller things. I hope this helps! XOXO
Jen says
She’s adorable!
Christy says
Thank you, Jen!! XOXO
Angela says
The cane chair turned out so beautiful. Prettier than the original. I love it ! You are so very talented. Thank you for sharing your talent.
Christy says
I appreciate that so much, Angela! Thank you!! XOXO
Jen @ Girl in the Garage says
Christy, you completely transformed the style of this chair – it looks perfect for a cottage now! Great save! xo
Christy says
Thank you so much, my sweet friend! I’m so glad my MIL saved it for me! XOXO
Nadine Garwitz says
Christy,
You did a wonderful job on this cane chair. When I saw it in your ‘before collection’ I was wondering how in the world could that cane bottom be replaced with new cane…..but I see that you have great insight. Way to go.
Nadine
Christy says
Thank you so much, Nadine! I’ve met a couple of broken cane chairs before ha ha! XOXO
Char says
Great job Christy! It’s a great little curvy piece.
BTW, do you have a pneumatic upholstery stapler that you’d recommend? I’m in the market for one and want to make a good choice for a DIYer.
Christy says
Thank you, Char! It was such a great piece to begin with! And I use a light duty cheap Stanley staple gun believe or not. It has always worked great so I’ve never felt the need to upgrade. We use two chairs I reupholstered with it daily at our kitchen table and it has held up perfeclty! XOXO
Marcie Lovett says
Oh, my gosh, Christy! So simple, so grand. I think the gingham makes it less Frenchy, more casual, fancy-ish but not too fancy. I see it flying out of the booth 😁
Christy says
Thank you, Marcie! You described it perfectly ha ha! XOXO
Addie says
Sooooo you are saying, stepping in cane chairs is a heredity trait in your family??? ….haha!
The double welt really makes the finish on the chair….good job.
Christy says
Ha ha must be!! Those silly boys! And thank you!! XOXO
Nancy @ Artsy Chicks Rule says
I love it! You made a treasure out of that “trash” for sure! xo
Christy says
Thank you, my friend!! I’m so glad my MIL saved it for me!! XOXO
Denise says
Wow — Magic! I would never have imagined it could ever have turned out so beautiful, but you did it again — gorgeous!
Christy says
Thank you so much, Denise! XOXO
Jackie C says
I love it. You’ve taught me well. I immediately knew how you would repair the seat. Several years ago I would have had no clue. I’ve learned a lot from you. Thank you! One quick question. Was there a particular reason you didn’t seal the paint on the cane? xoxo
Christy says
Thank you, Jackie! Yes, you know me well lol! And I love hearing that so much! As for sealing the cane parts, chalk paint doesn’t really need to be sealed. If you let it cure for 30 days, it will cure to a strong finish. However, it has such a flat look to it that it looks so much prettier when sealed, and of course the sealer offers additional protection. On the cane, the flat finish is fine and it doesn’t really need any extra protection. I hope that makes sense! XOXO
Gloria says
Wow, Christy,
You outdid yourself on the cane chair. Love the check fabric, but then I’m a lover of checks anyway. The white paint looked great and paired with the checked seat, it came out wonderful. But then, I knew it would be a great piece once you finished it. Yay!!
Christy says
Thank you so much, Gloria! I’m a sucker for checks too!! XOXO
Cecilia from Georgia says
I’m just catching up on emails and so glad I didn’t miss this chair! I love it and the seat replacement is genius! Black and white is timeless and can be used in most home decor styles. You got it going, girfriend!!
Christy says
Thank you, Cecilia! I’m glad you didn’t miss it either!! XOXO
Michele M. says
That looks FABULOUS, Christy!!!! You sure gave it a lovely second life!
I think I like TTTTs the most – because you literally SAVE things from the landfill. It’s such a treat to see how beautifully you save them, too!
Christy says
Thank you, my friend! It is the best feeling to take something that is destined for the trash and give it new life…might be my favorite thing ever! XOXO
Jeanne Barrett says
It’s such a cute chair. I wondered how the new seat would hold and then you mention the L brackets. LOL! You’re good, Christy. Do you get sick of hearing it? 🙂
Christy says
Aww thank you, Jeanne!! I so appreaciate that! I don’t mind hearing it ha ha! XOXO
Cory B says
That is absolutely adorable, and you are a genius with mad fix-it skills. Thank you for teaching us so much!!
Christy says
Thank you so much, Cory! It is always a pleasure to share!! XOXO