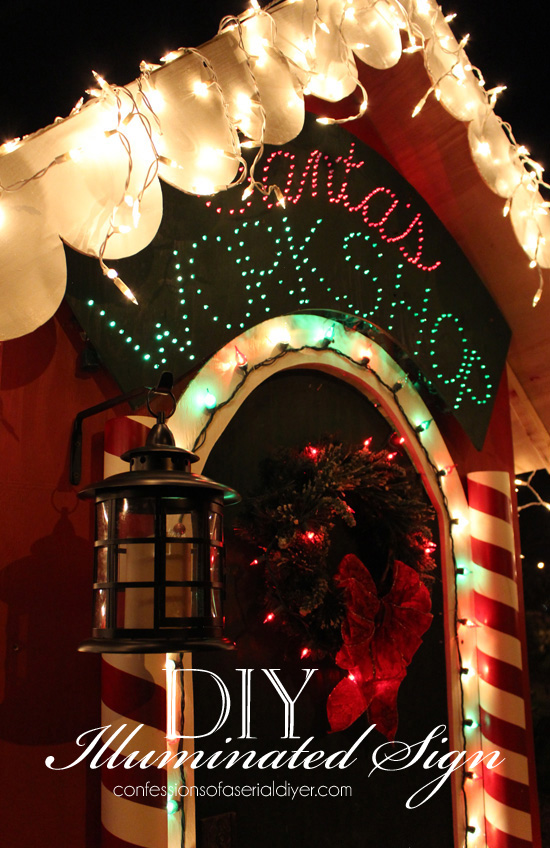
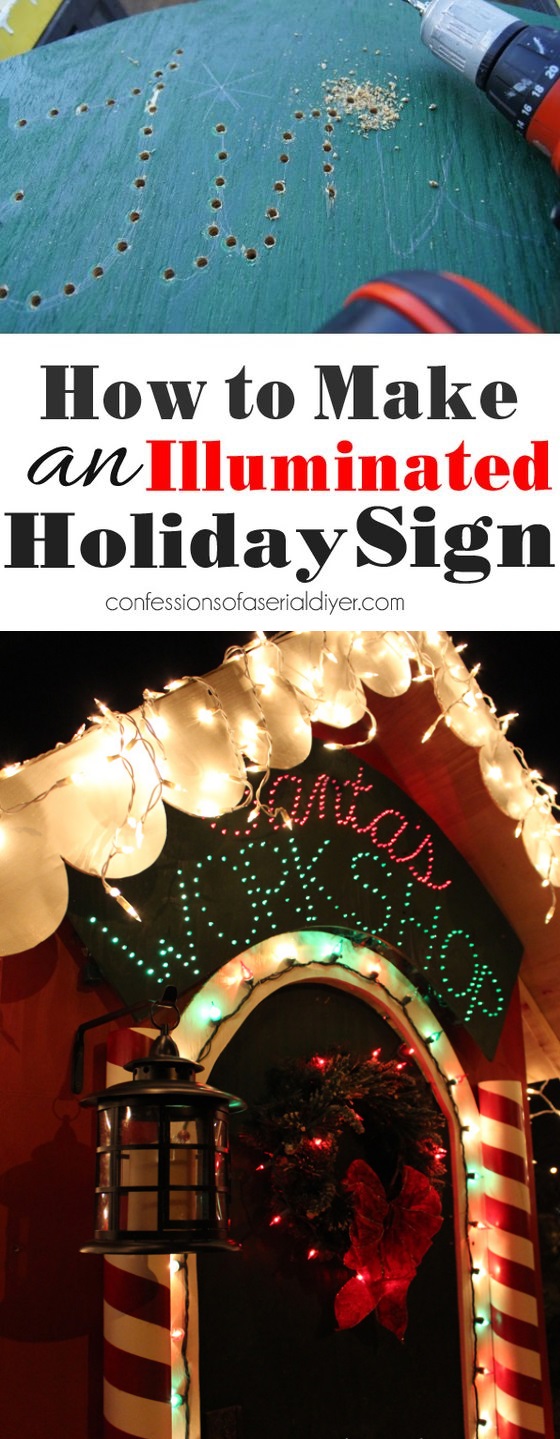
The most important component of our Santa’s Workshop is the sign that let’s everyone know what it is. Making the sign was pretty easy and would be a fun addition to any outdoor holiday display so I thought I’d share how I made it! It’s not too late to make one for this year. After all, most of us keep our Holiday lights up until at least New Years, right?
What you’ll need:
- 3/8″ ply wood (thick enough to be sturdy but not so thick that the lights won’t show through the other side)
- pencil
- newspaper for making a template
- spray paint
- jig saw
- Drill and 13/64 drill bit (sounds like an odd size but that’s what worked best)
- staple gun/ staples
- mini light sets ( The number of sets will depend on how big your sign is and how many letters it has. For this sign, I used three 70 count red light sets and one 100 count green light set.)
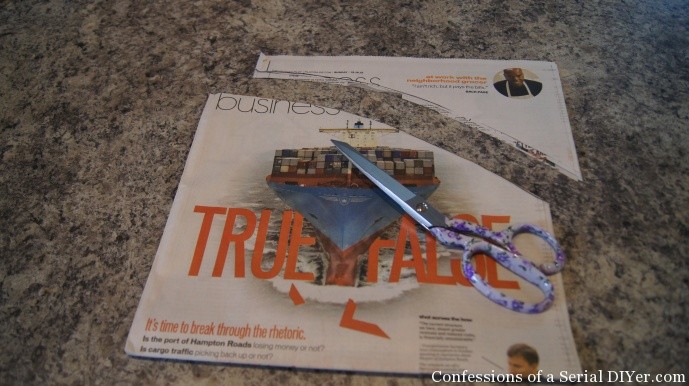
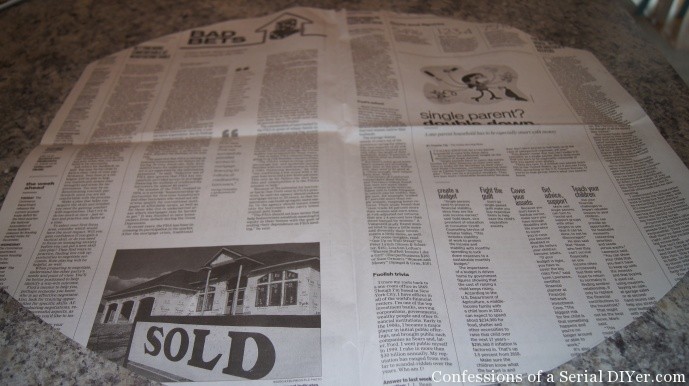
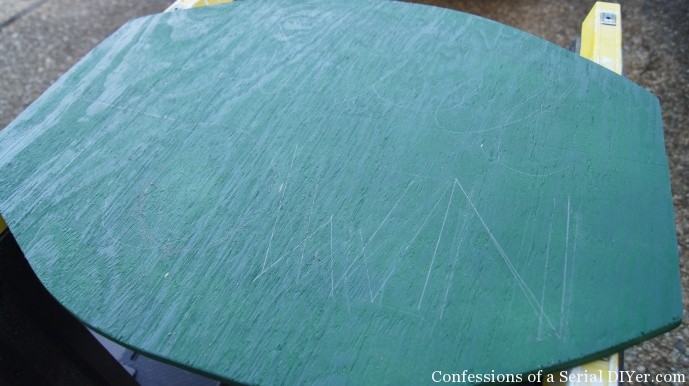
First, decide the shape of sign you want to create. You can freehand your outline or as I did for this sign, use newspaper to create a pattern. I folded the newspaper in four and drew my outline. Then I cut it to create a shape that was equal on both sides and top to bottom.
I tested a few cuts. This is the one I settled on.
Next, I traced my pattern.
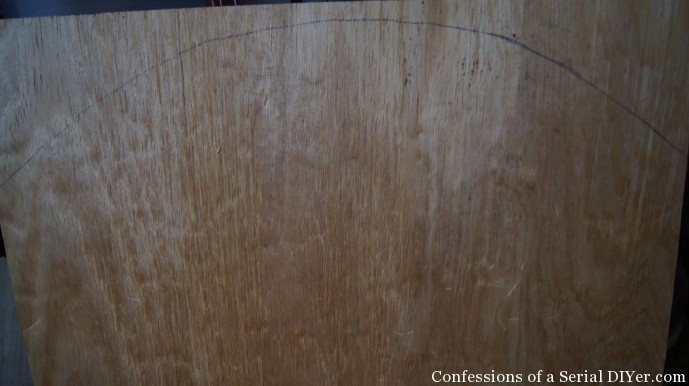
I cut my sign using a jig saw. Then it got a coat of spray paint. You could wait to paint after you drill your holes, it’s up to you.
After painting, I sketched out my words. I am fortunate that I was blessed with decent penmanship so I just went for it. There are all kinds of fancy machines out there to help you out in this department if needed. You can also enlarge and print the letters on your computer then transfer to your surface using good old fashioned carbon paper.
You can see I made a couple of attempts to get my letters spaced properly.
Nice penmanship? Check.
Ability to space correctly freehand? Not so much.
Then I drilled my holes.
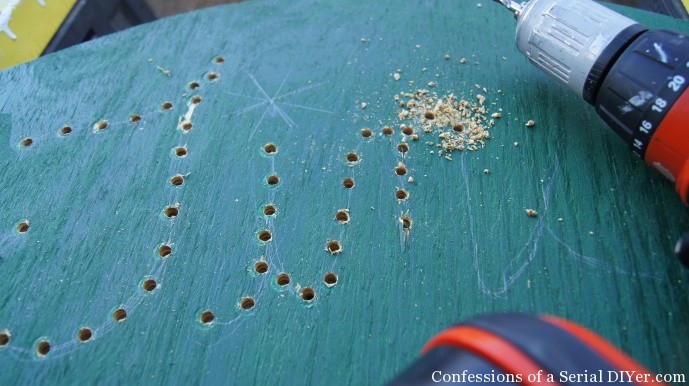
See the cute asterisk I penciled in for the ‘I’?
There ended up not being enough space in that area to pull it off.
Boo hoo.
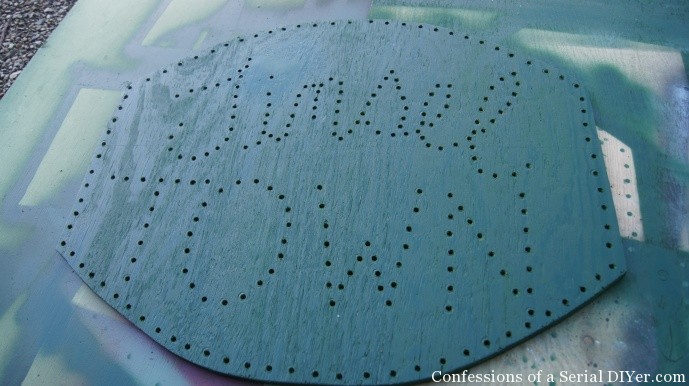
When all my holes were drilled, I gave it another light coat of spray paint. If you decided to wait until this point to paint, go right ahead.
Now it’s time for lights! Start plugging them in.
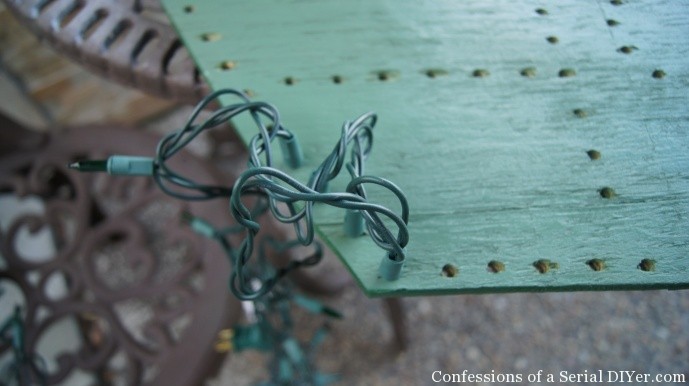
You will need to secure the light strings every so often with the staple gun. For some reason, some lights didn’t want to stay in there and others needed a bit of coaxing. But overall, most of the lights went in easily and held well.
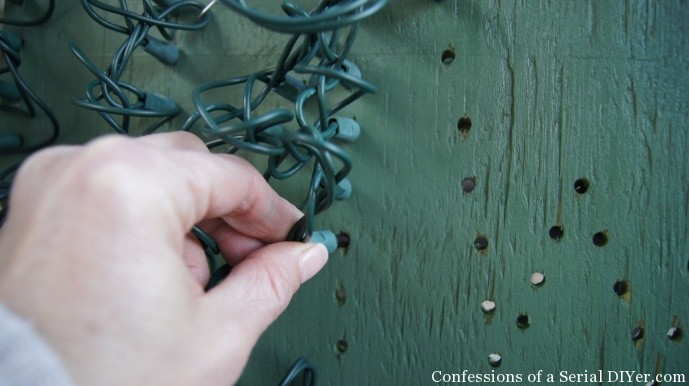
“Get in there, little buddy!”
When you are finished, you will most likely have extra lights dangling. Just secure them to back with a staple gun. They will not be seen when illuminated at night.
Here is the finished sign:
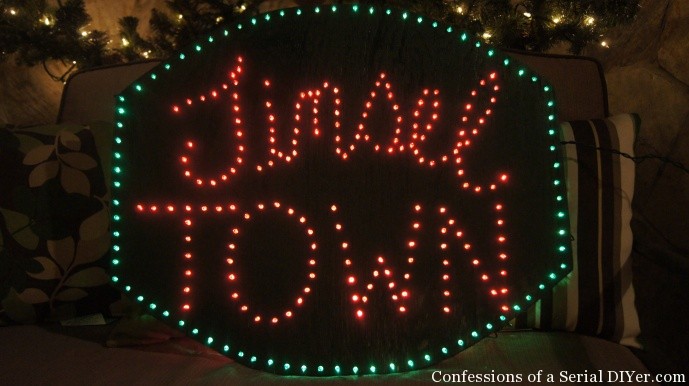
So fun…and pretty easy!
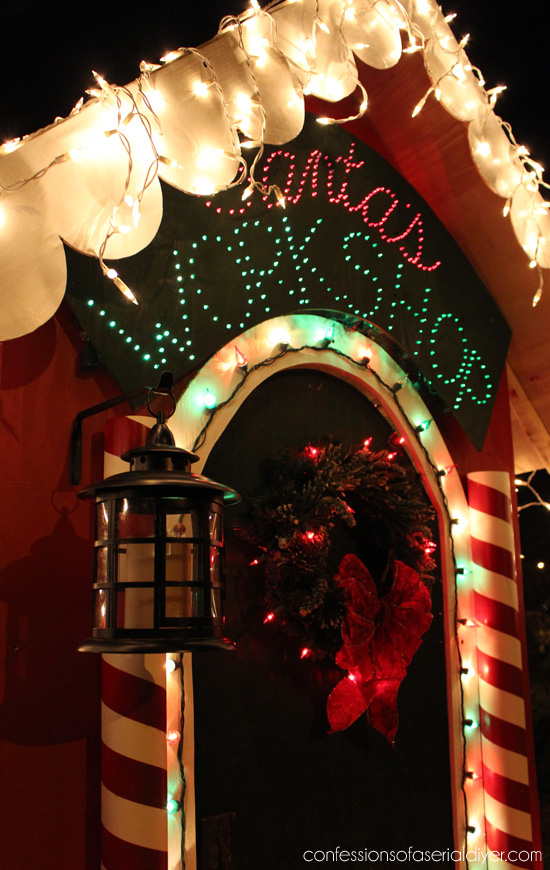
And here is my Santa’s workshop sign made the same way:
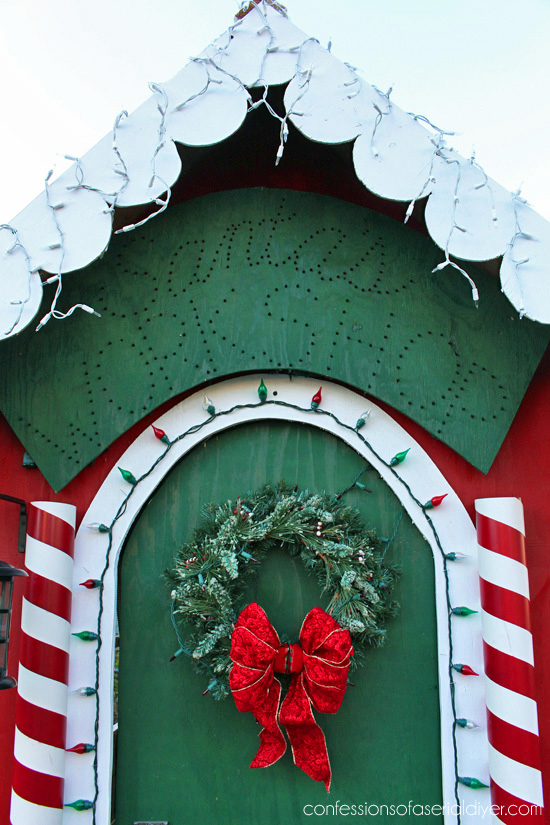
Here the flash makes it easier to make out the shape of it:
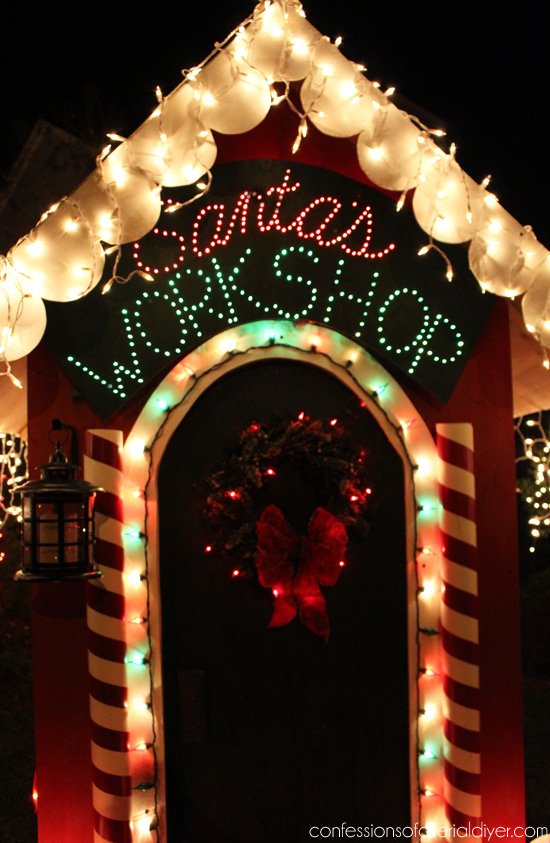
This was mounted by adding a square of 4X4 to the back on either side and then screwing it to the workshop so it sat away from the wall enough to make room for the lights. You could also drill holes on either side at the top and hang it with rope. The “Tinsel Town ” sign will sit on the lawn so I will probably make a kickstand of sorts for that.
I love how they turned out! How about you?
This would be pretty using all white lights to say “Merry Christmas” or “Joy to the World” or whatever you can imagine.
Not too hard, right? You can do this!
XO,
![]()
Don’t Miss a Thing!
If you like what you see, there are several ways to follow along!
Email * Facebook * Pinterest * Twitter * Instagram


")

Julie @ follow your heart woodworking says
No comments? This is fabulous, I want to try it! Thanks for sharing your ideas and techniques.
Christy K. James says
Thanks, Julie! No comments I know because it was one of my first posts when I was just working on adding content. I never linked it up anywhere…I’ll definitely repost it this Christmas:). This was a fun project, it was actually a gift for my BIL for his Christmas display:)
Yana says
Wonderful! When I saw the picture, I couldn´t imagine how you pulled it off, and it is so easy!
Christy K. James says
It iseasy, right? Looks a lot more complicated. If your lights ever go out, you can just replace them! Thanks for visiting and taking the time to peek around! XO
Charlcye says
I followed your tutorial to make a sign for my boyfriend’s business (because really big lit signage is typically crazy expensive), and it looks great! Finished it for under $100. We’re going to paint it before we hang it up, but check it out. Thanks so much for your guidance. https://www.pinterest.com/pin/225461525071502857/
Christy K. James says
That seriously looks SO great!! I’m glad my tutorial was helpful, and thanks for sharing with me!!
Charlcye says
I scored 24 strands of lights on Craigslist, but by then end 2 had become “donor strands” for fuses and extra bulbs. I learned the hard way not to string more than 2 or 3 strands together (or your fuse will blow!) There are 2200 lights on the board, and 2 surge protector strips in the back to accommodate all of them.
Christy K. James says
I am so impressed. It looks amazing!