Amazing friends welcome back! I am so excited to share today’s project with you! It’s a perty one! It’s also Furniture Fixer Upper Day, so there are five more fabulous furniture makeovers for you to see at the bottom!
Okay here is today’s project piece before:
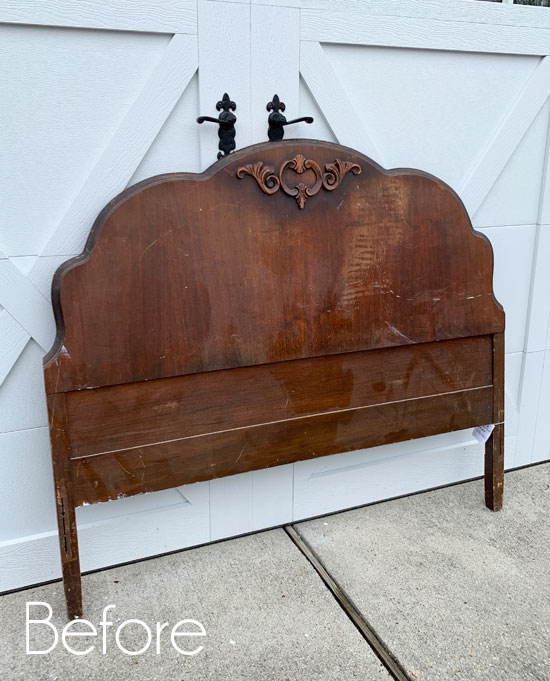
You would not believe what I paid for this gorgeous antique headboard…ready for it…$7!!! Can you believe that? I found it when I was thrifting with Nancy last year… you can actually see me finding it in this Thriftshop Shakedown video:
If you look closely, you’ll see a sign as we entered that read something like, “50% off all furniture if you take it home today.”
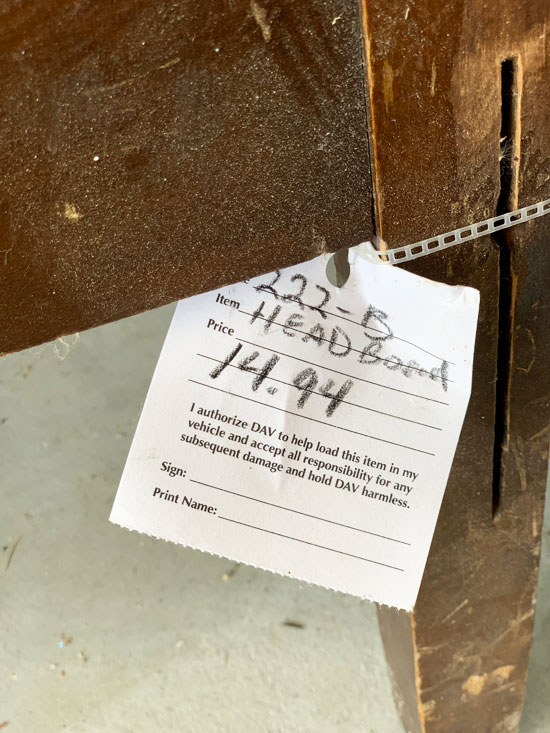
Here’s the tag:
Deal of the century! Of course, I’ll be taking that sweet thang home today! Then I let it sit…for a year and a half! The shame!
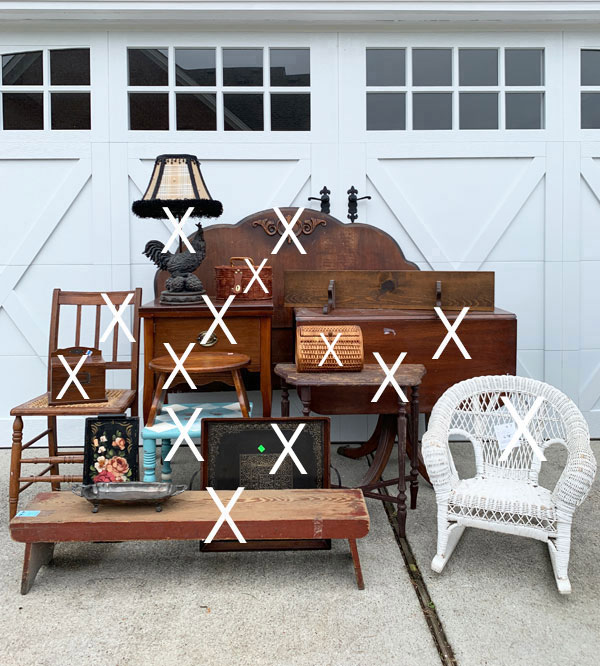
I knew that if I added it to this pile of treasures that I would HAVE to do something with it, and I finally did!

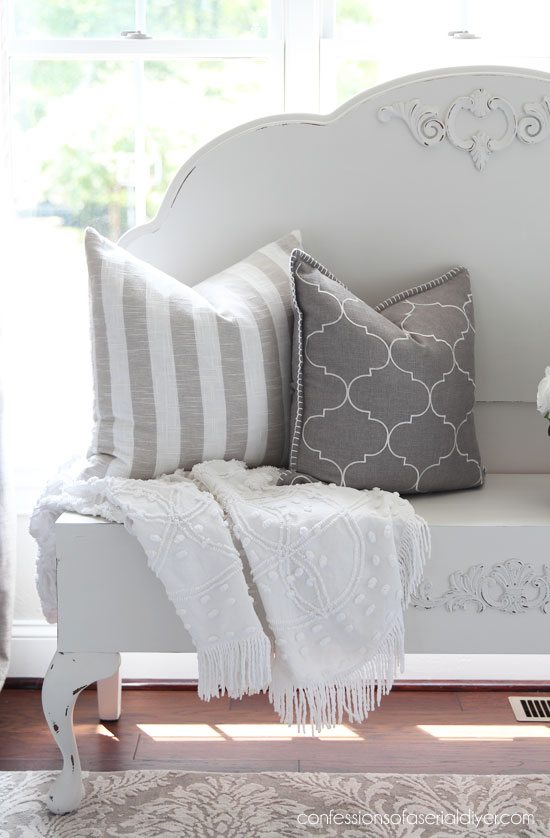
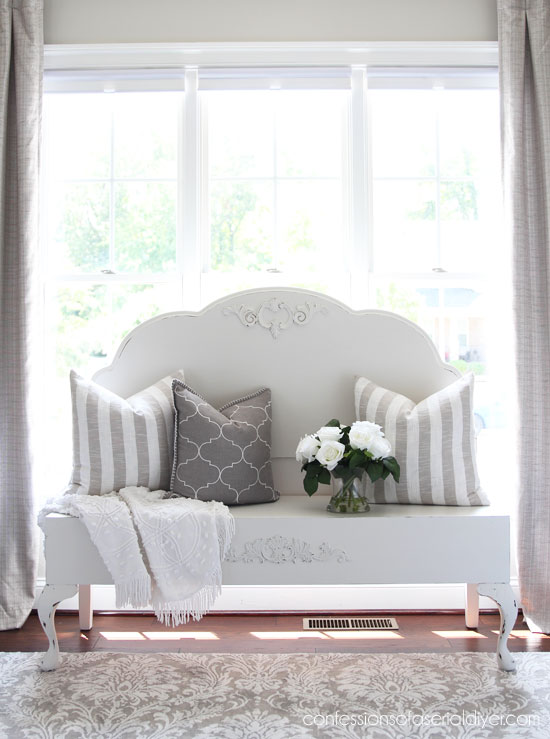
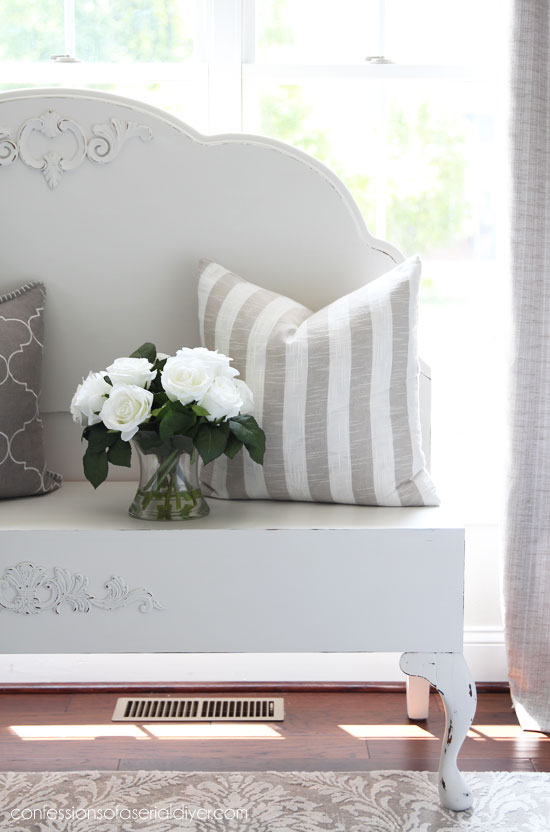
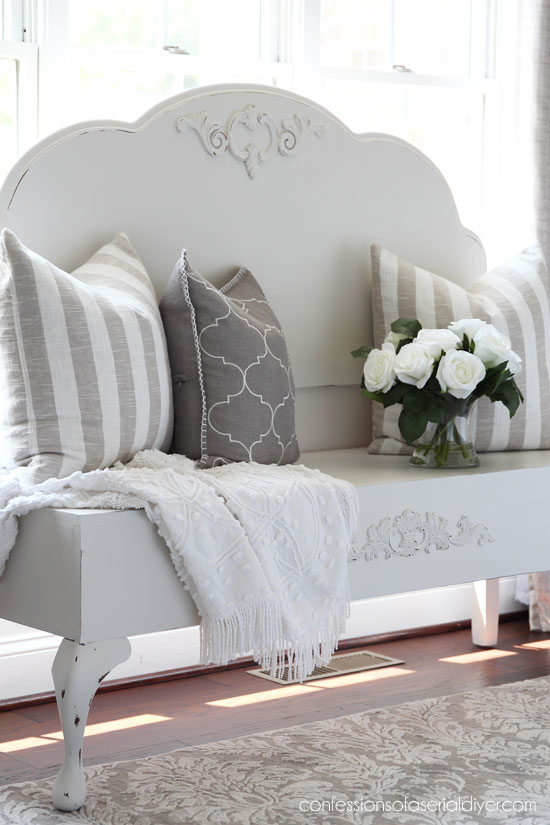
I’m sure you already guessed I would make a bench with it, right?
I have a thing for headboard benches and have done several in the past. However, this one was without a footboard. I have never attempted to build a headboard bench without the matching footboard before, and that right there is probably why it took me so dang long to make this one! I’ve included a few affiliate links so you can find the products I love.
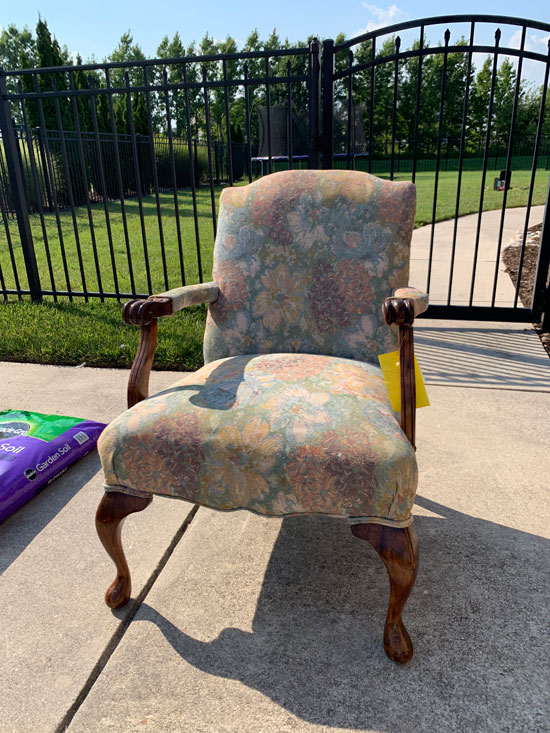
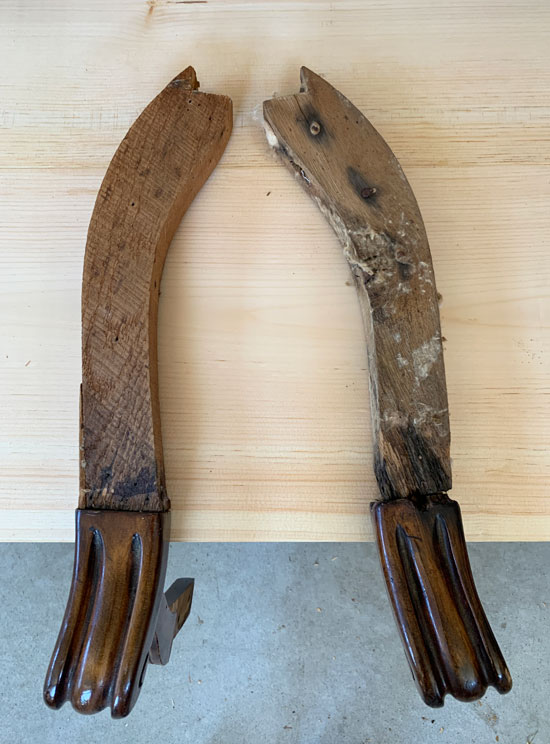
First, I knew I needed to find some legs, so I headed to my favorite thrift store to see if I could find a chair or table that I could steal parts from.
I got lucky with this chair I found for $14.96:
The legs were perfect! I was able to wrangle them out of there with the help of a sledgehammer:

One of them looked like the top of it had been exposed to water or something, but I cut those parts off anyway using my miter saw so I would have a flat edge across the top:

I was excited when I first saw it because I thought I might be able to use the arms as well. As you already know, that didn’t work out. That pretty wood on the arms stopped where the fabric started:
Um…no. Boo! I half considered trying to wood-fill/sand, etc, but it was 100 degrees outside that day and I had already spent about 30 minutes removing all the fabric and nails.
At least the legs worked. Next, I needed to build the seat. This is what I used:
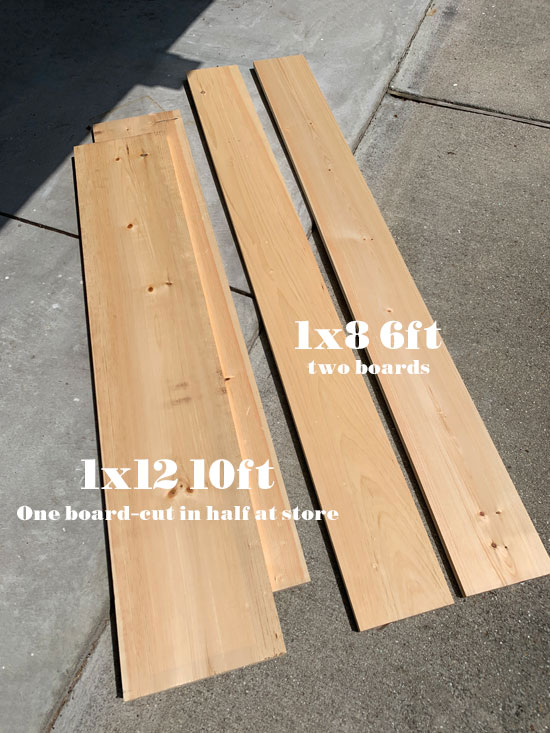
I started with the sides of the seat, cutting one of the 1×8 pieces into two 17″ pieces with my sliding miter saw:
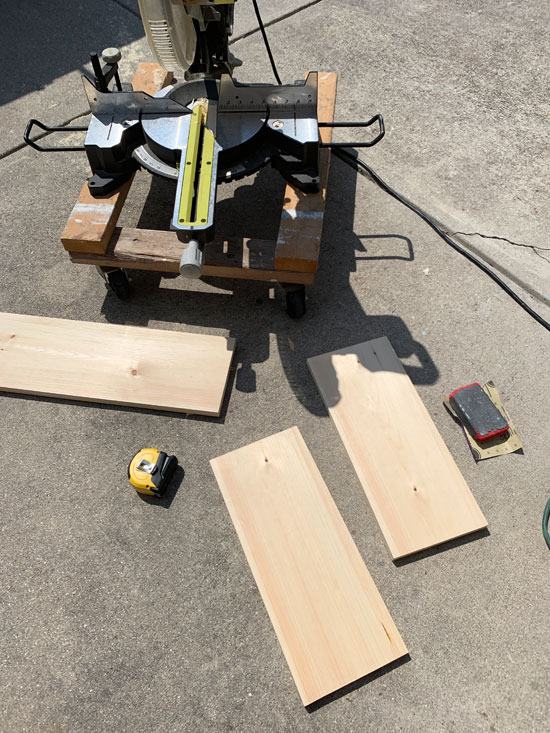
After every cut, I sanded the edges smooth with 220 grit sandpaper.
Then I used my Kreg Jig Pocket Hole Kit to create pocket holes so that I could attach them to the headboard and to the front of the seat to create my frame:
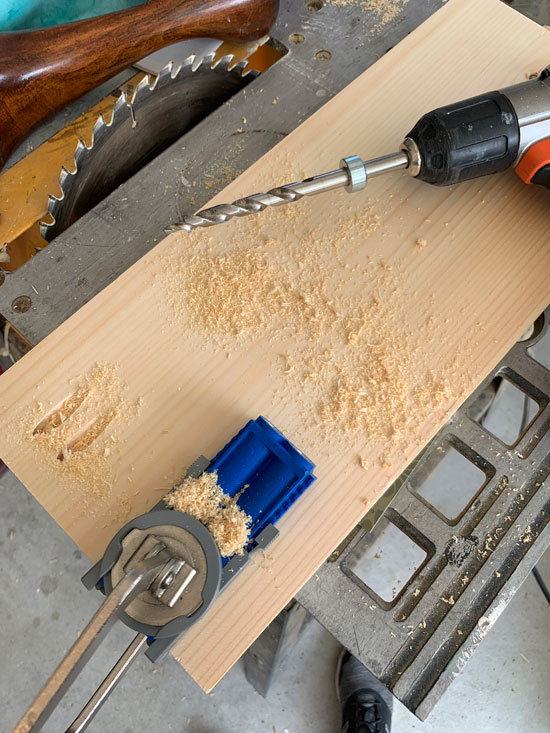
Don’t let this scare you! If you have a drill, you can totally do this! All you need is the Kreg Jig kit. (The one I linked to includes the clamp as well.)
(Ya’ll I had NO clue how this bench would turn out…I was seriously making it up as I went and hoping for the best…seeing these photos reminded me of that lol!)
Next, I cut the front of the seat panel to the width of my headboard. Then I attached the feet. I added pocket holes to either side where the feet would attach, added some wood glue, and screwed those to the bottom of either front corner of my bench seat:
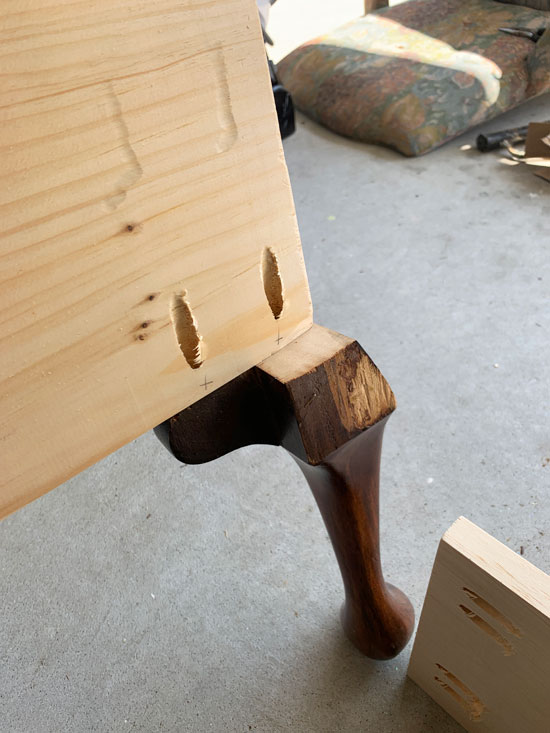
Here’s what they looked like from the front:
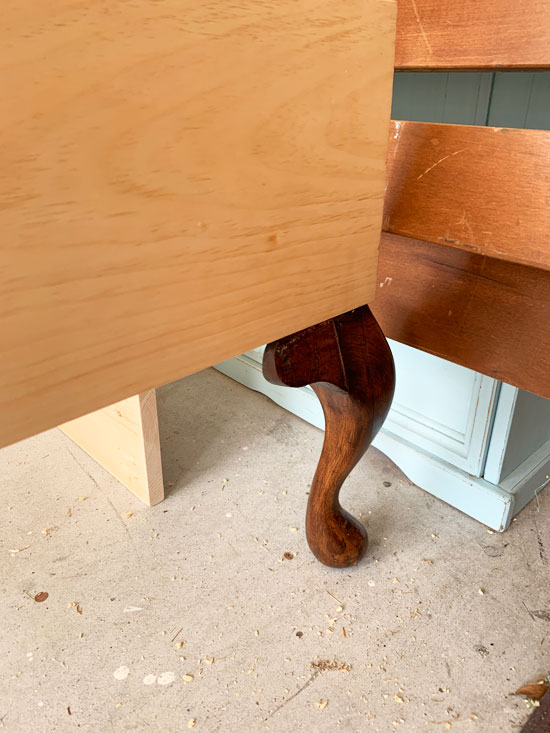
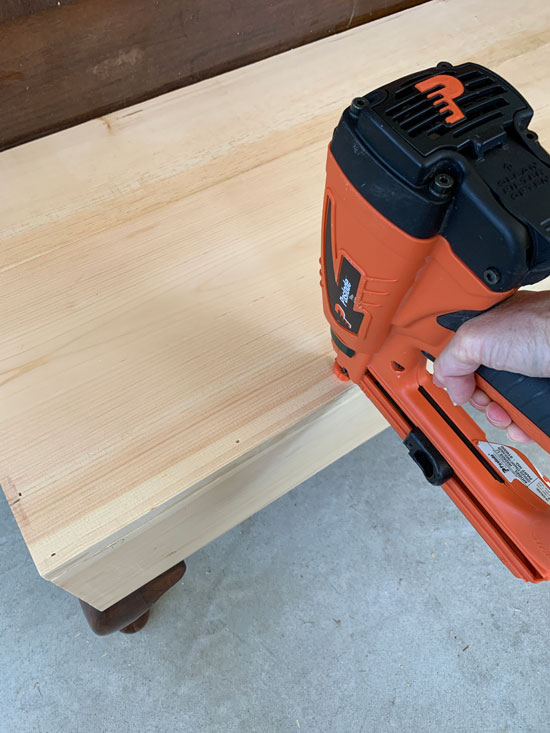
I ended up adding a few nails from the side with my nail gun as well.
Always be sure to use wood glue in addition for added strength:
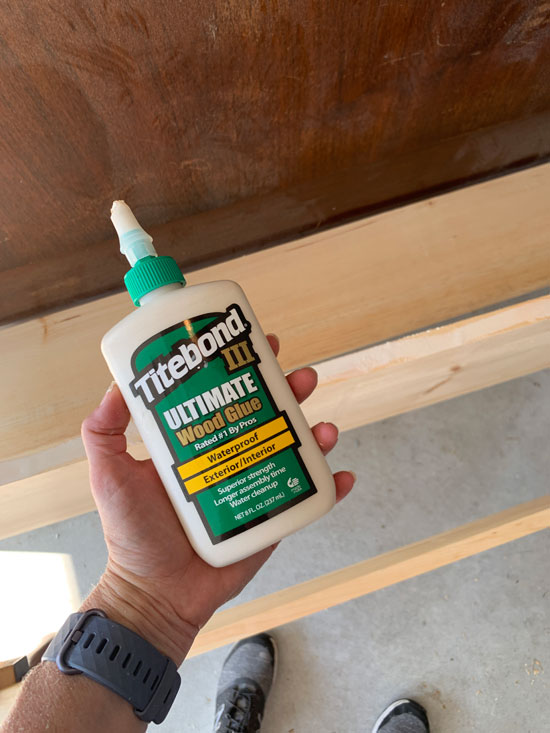
I added wood glue to the end of each side piece before screwing them into the front panel through my new pocket holes. I also added it the other of both sides before screwing them into the headboard.
Be sure to grab a level and make sure your seat is level before attaching.
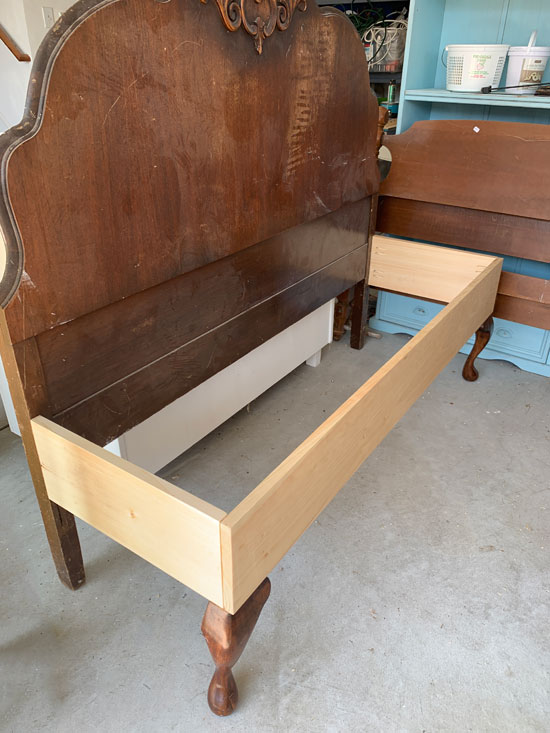
Hey, it’s starting to look like a bench:
At this point, I thought about creating storage inside the seat. That would have meant another trip to Home Depot for wood though and like I mentioned before, it was 100 degrees outside on the day I was building this, so I really just wanted to see it done.
To make the top of the seat, I cut my 1×12 boards to length using my sliding miter saw. Then I ripped one of them down with my table saw to make it fit the top. I used wood glue and clamps to hold the boards together while the glue dried. I wanted the seat top to look like one solid piece:
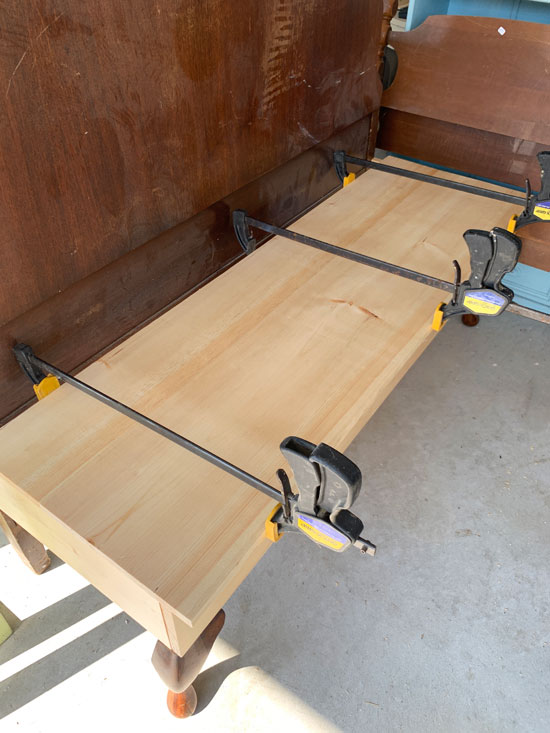
When the glue was dry, I used wood glue and my nailgun to attach it to the frame:
I added wood filler to the holes and all the seams to get a nice smooth look. When it was dry, I sanded everything smooth with my rotary sander and 220 grit sandpaper and that was that!

Find those furniture wheels HERE. They are a lifesaver when you have to move pieces around while working!
The next step was to stain the seat. I did that using Minwax staining cloths in Dark Mahogany since they dry super fast. (That is so that when I sand the painted surface, stained wood will show through the edges and not raw wood.)

Pretty ugly at this point and it was about to get even uglier!
I primed the whole thing with Dixie Belle’s BOSS in white to prevent bleed-through…
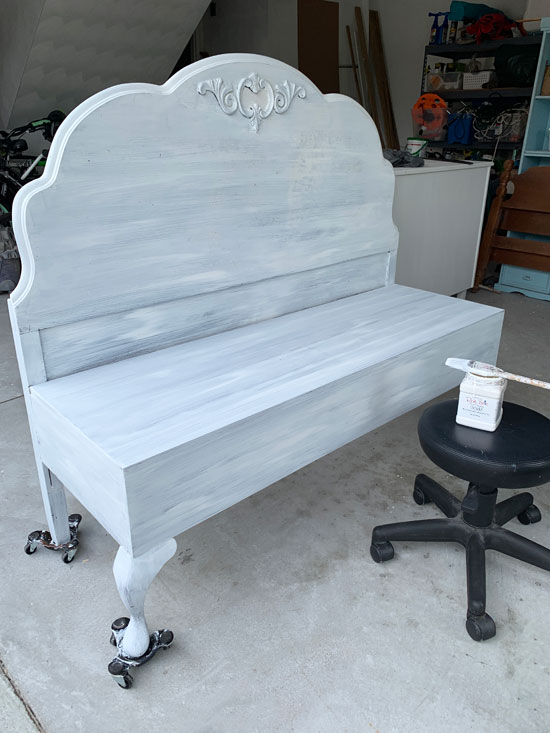
I ended up giving just the original headboard two coats. This stuff WORKS, y’all! Be patient though…let each coat dry for a couple of hours at least in between.
Then I gave it two coats of Dixie Belle’s Fluff:

NO bleed-through!! TIP: Dipping your paintbrush in water before dipping it into your paint every once in a while will help your paint to glide on super smoothly.
I used my rotary sander this time to sand it smooth all over and give it a bit of distressing.

I sealed with Dixie Belle’s Clear Coat in satin using their blue sponge applicator. SO easy! You can see how I do that in the video below:
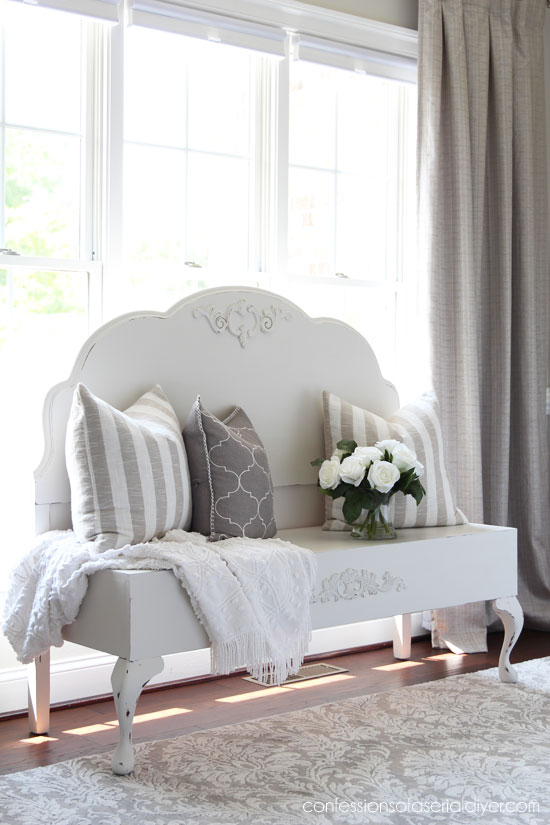
I considered adding stripes to the seat all the way around or some kind of saying or stencil to the back, but in the end, it needed to be simple to allow the accessories to play it up.
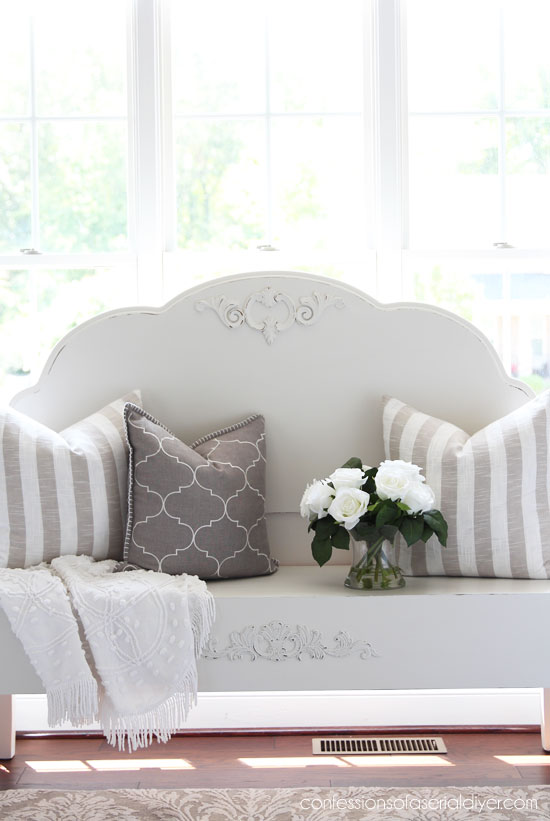
I did add the scrolly piece across the front of the seat:
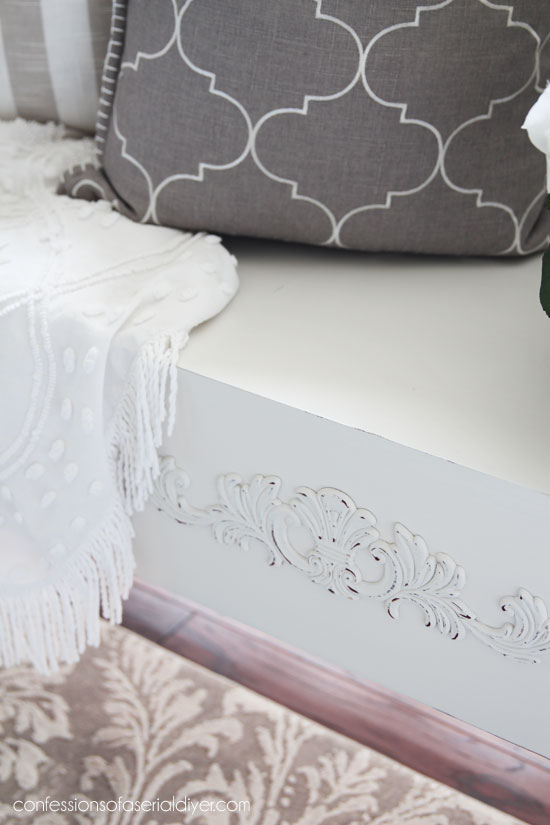
I found that at Home Depot. I stained it first as well before painting it in Fluff. I added it with wood glue after sealing the bench.
I wish I had a place for this in our own home! I realized after building it that it won’t fit in my SUV lol. I’m hoping it fits in my hubby’s truck or I might have to find a place for it here ha ha!
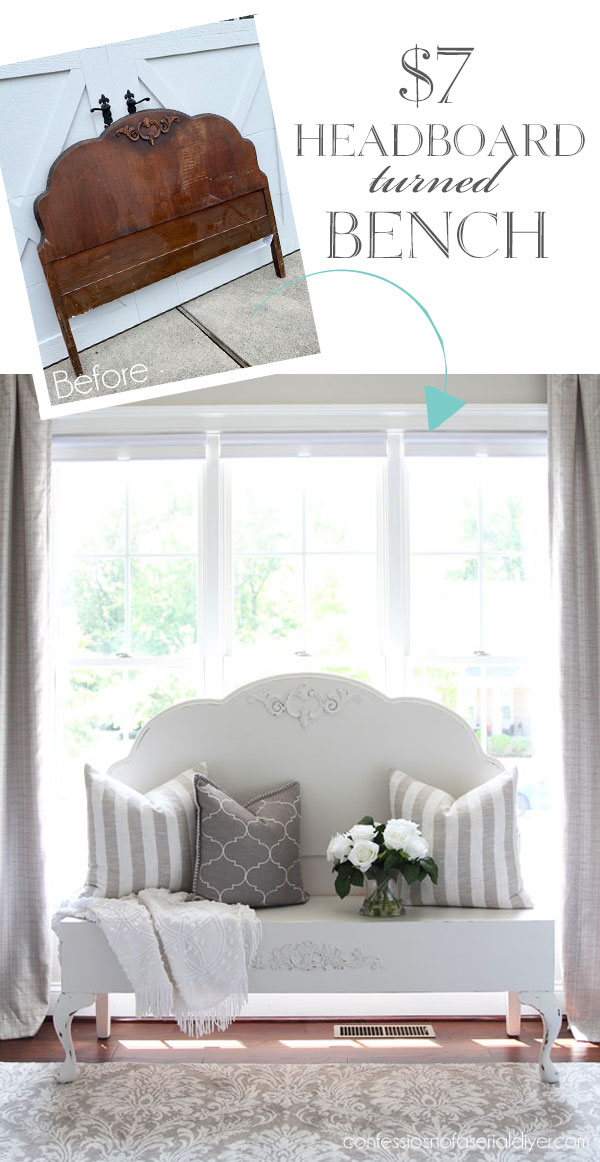
The total cost for this project, including the headboard, thrift store chair, wood, and wood applique was around $85. Not too shabby!
Don’t forget my friends have more awesome furniture makeovers to share with you today!

I only have three items left from my Haul of Shame!!
If you missed any, you can see them all at the links below:
$6 Thrift Store Bench Makeover
Drop Leaf Table Makeover & How to Apply Sealer with a Sponge
Thrift Store Step Stool Makeover ( & How to Whitewash!)
The next project on the list is this tray I picked up for $3:
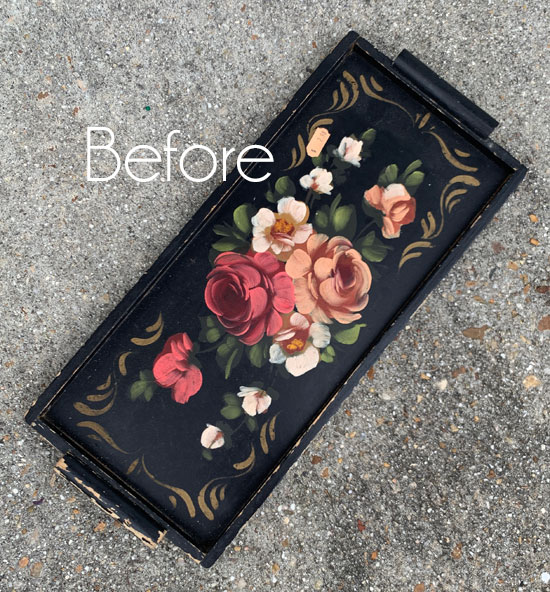
I think you might be surprised to see how I repurposed it!
UPDATE: See what it’s being used for HERE now!
XO,
![]()
Don’t Miss a Thing!
If you like what you see, there are several ways to follow along!
Email * Facebook * Pinterest * Twitter *Instagram

