Welcome back, my beautiful friends! With my previous makeover taking more time than usual (totally my fault lol!), and with Brennan still running a fever from the Flu, I’m resharing one from the archives today! I’ve got a simple metallic piano bench makeover for you.
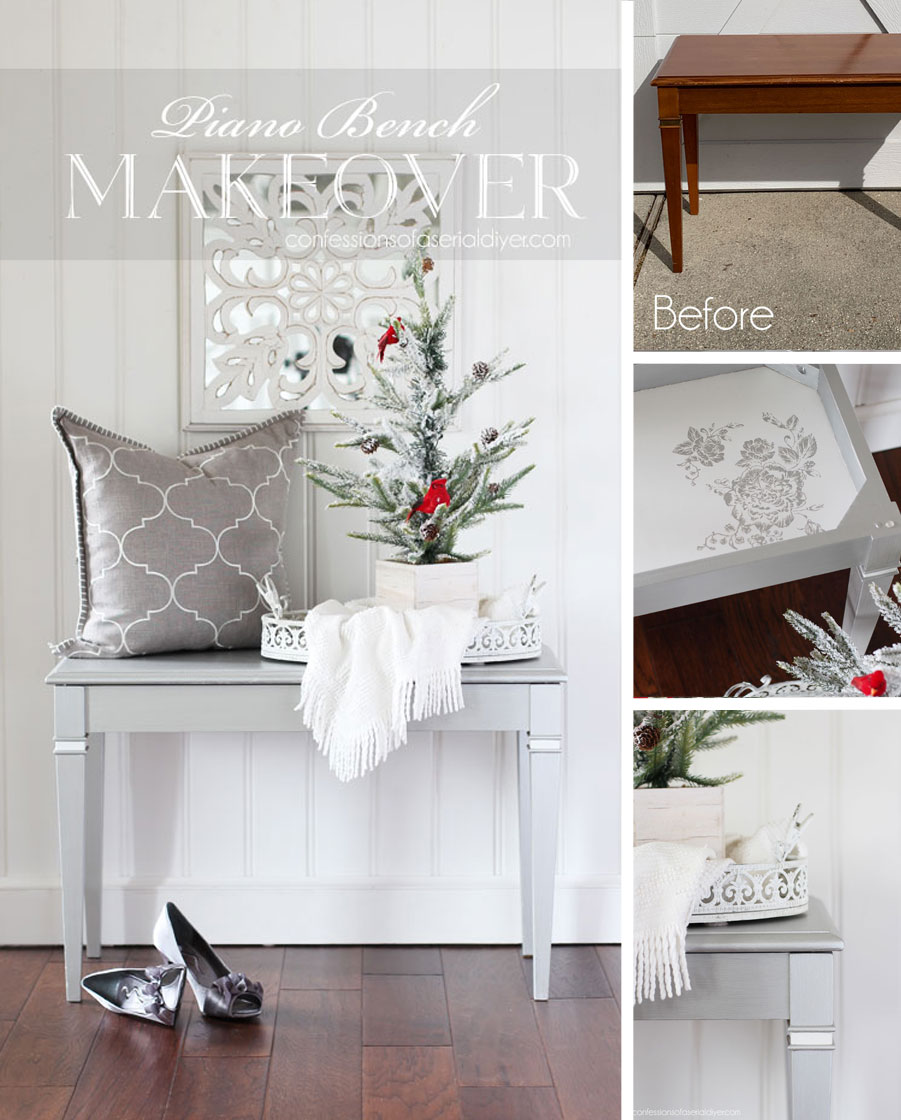
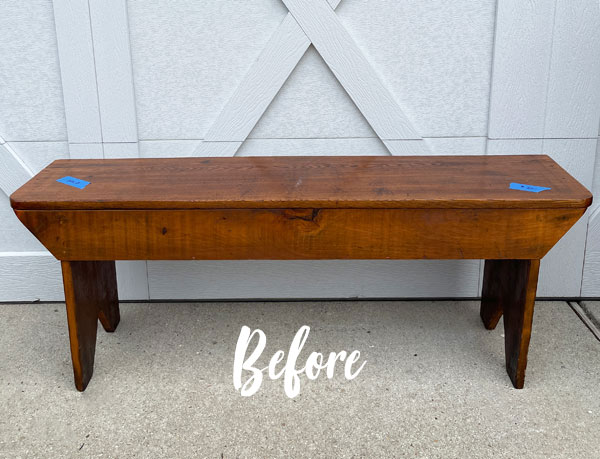
I found this piano bench at the thrift store for $12:

For some reason, I love piano benches! Luckily, I had a full punch card that earned me an additional 20% off.
I’ve included a few affiliate links so you can find the products I love.
Clean
All furnture makeovers start with the proper prep…a good cleaning with White Lightning, mixing one TBSP into a half gallon of warm water:
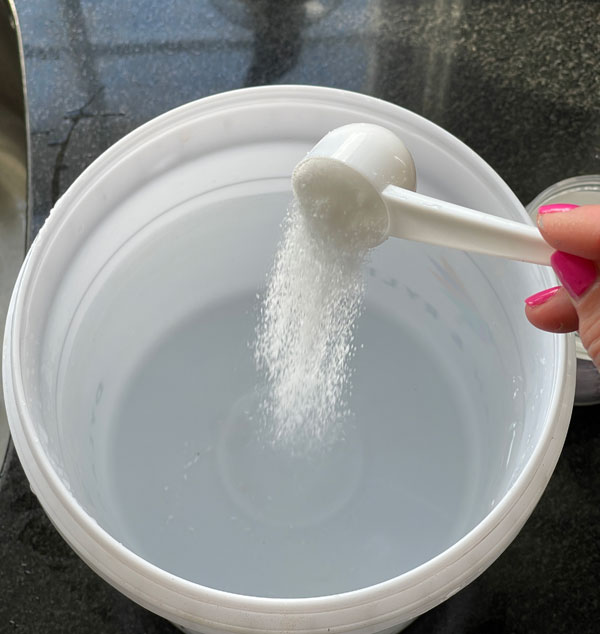
Once your piece is clean, be sure to swap out your water for clean water and give it another once over to remove any remaining residue.
Paint
I knew I wanted to give this one a metallic makeover using one of the Moonshine Metallics.
They go on a bit sheer, so they work best with a similar shade of regular chalk paint as a base coat.
Beacuse I chose Silver Bullet, I would have chosen Manatee as my base had I not already had this custom mix on hand:

This is one part Hurricane Gray and two parts Cotton that I mixed up for this flatware box makeover. I don’t normally paint inside the house, but with temps in the upper twenties when I was painting this, I decided to bring this one inside.
I followed up with two coats of Silver Bullet:

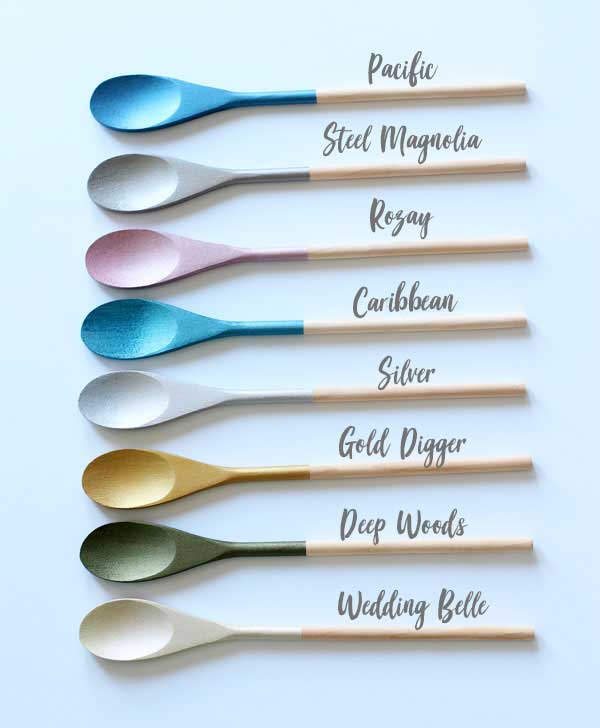
I love the Moonshine Metallics!
There are eight shimmery colors in all to choose from:
To get a smooth finish, it’s important to use a quality brush like a Mini or Mini Angle brush, and paint in long even strokes, going from edge to edge and with the grain.
Seal
There is no need to sand or seal the Moonshine Metallics as they are self-sealing! Woohoo!
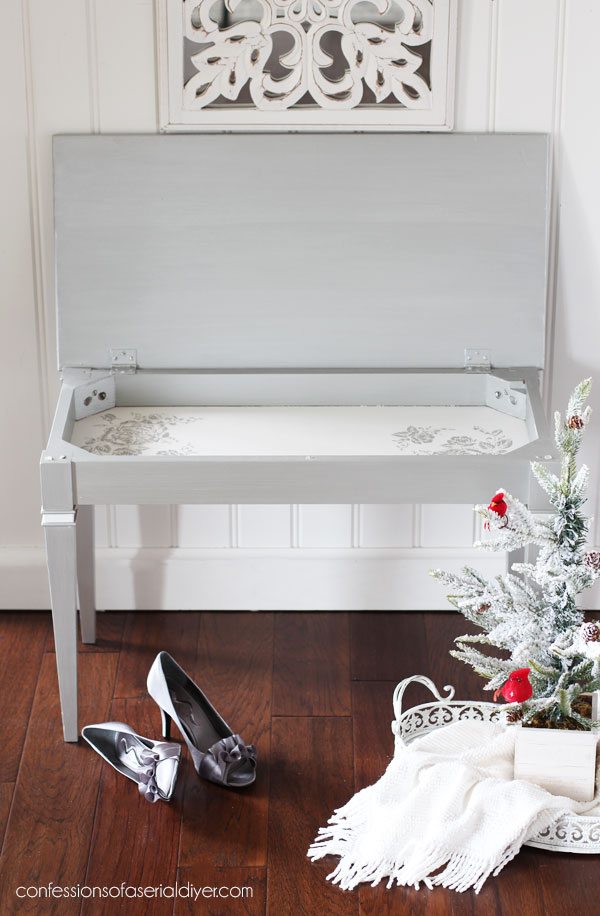
Ready to see the after??

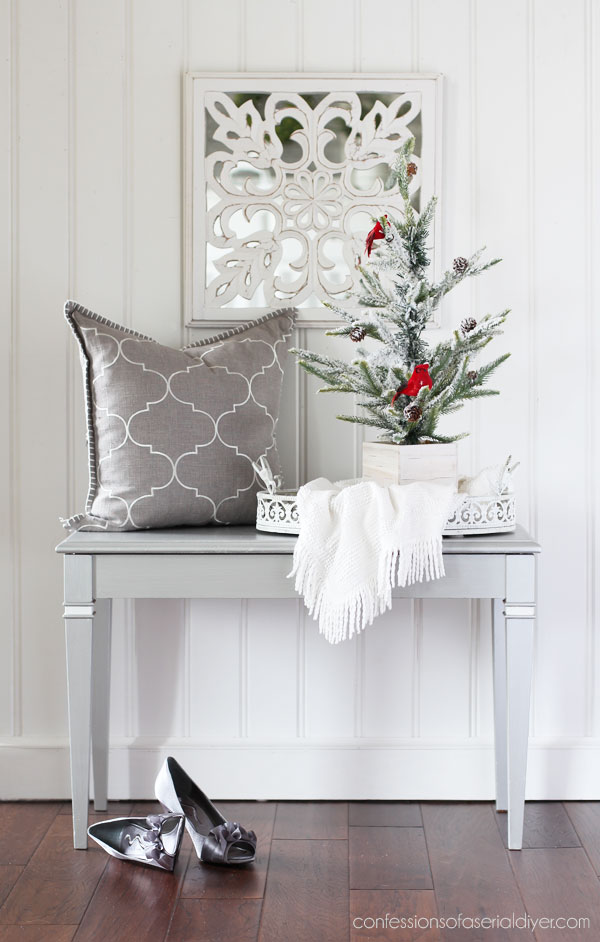
This pretty metallic took a dated piano bench and gave it an air of sophistication!
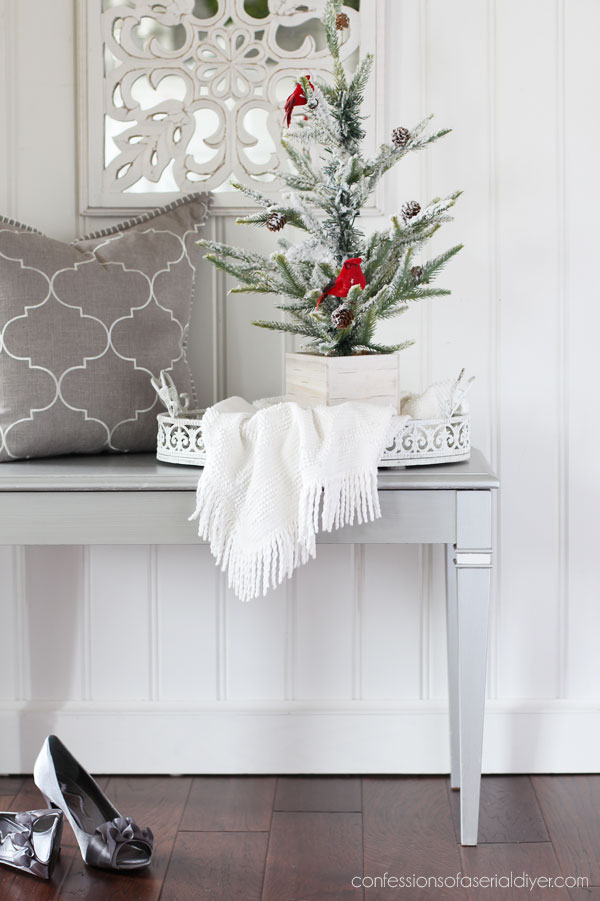
How sweet is this flocked tree?
I had it on this tray on my dresser for the holidays and never packed it away…
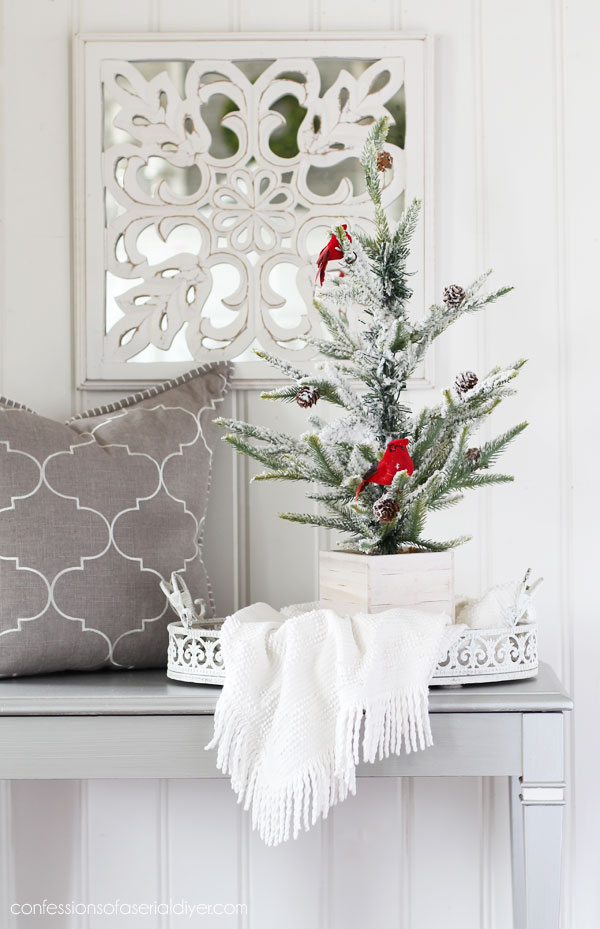
I just love the cardinals in it.
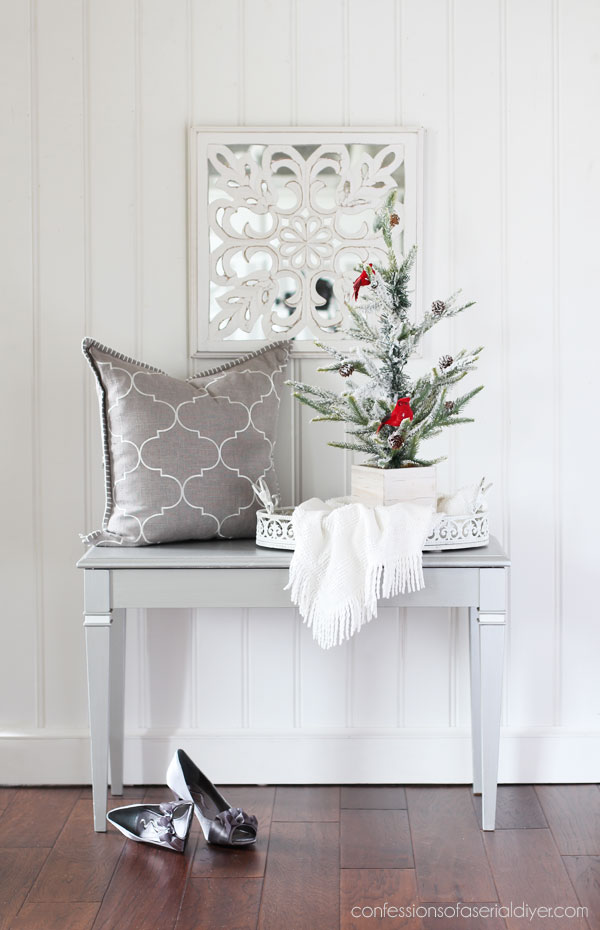
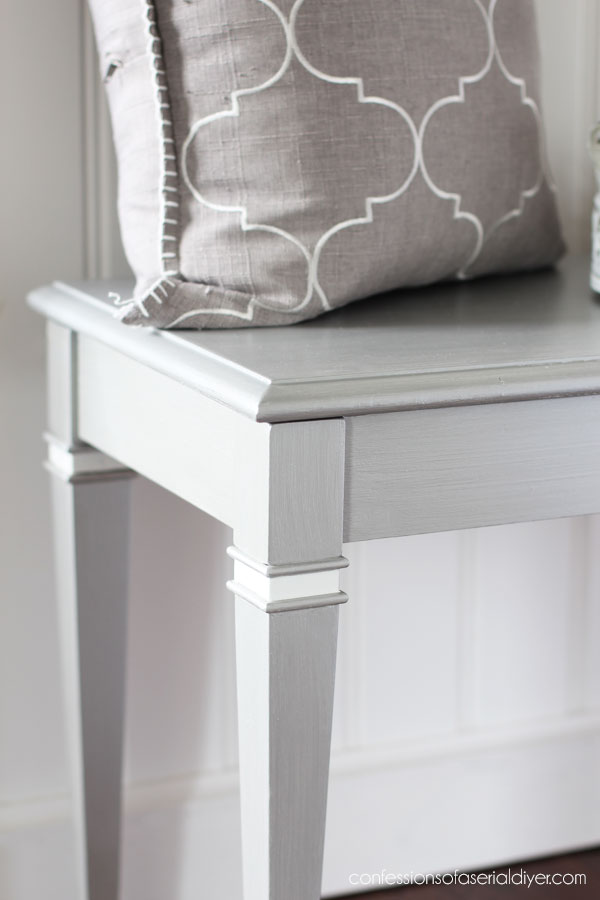
Painting that area on the leg in Cotton added a nice detail…
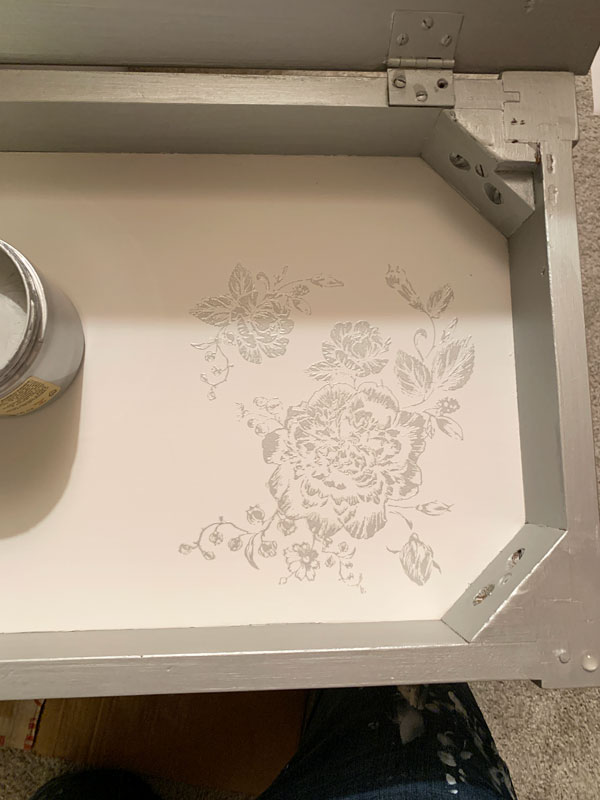
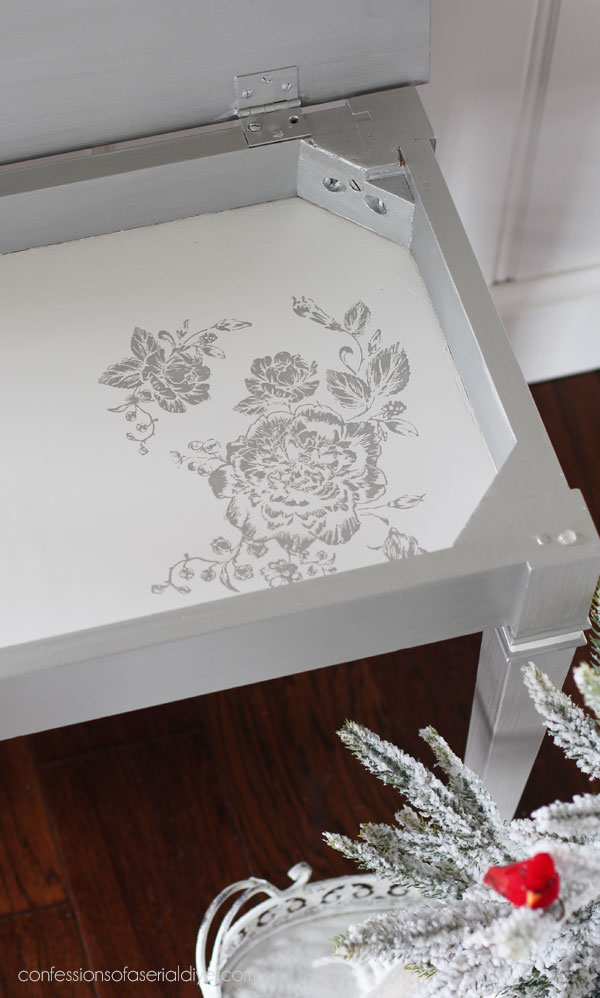
How about the inside?
I had another idea for the inside.
To prep it, I started by taping off the perimeter with FrogTape and painting two coats of Cotton:
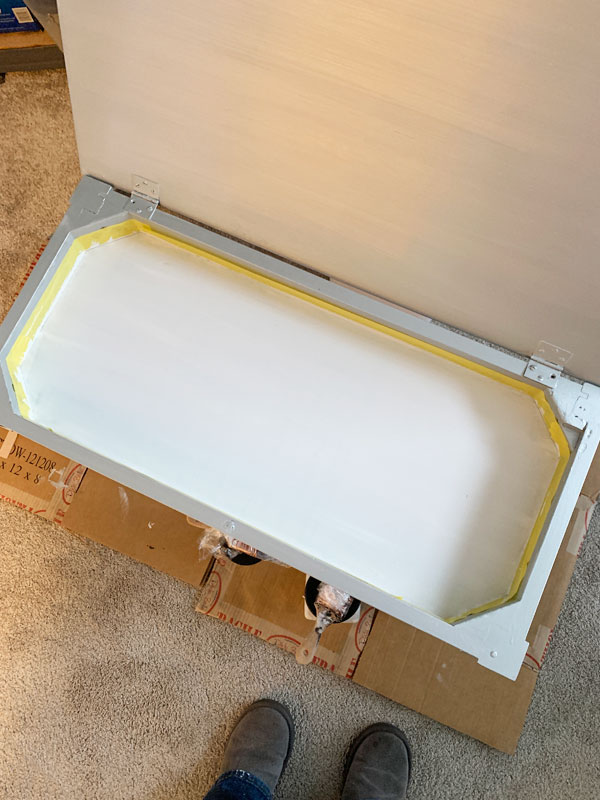
I removed the tape as soon as I applied the second coat.
Using Silkscreen Stencils
Then I reached for one of Dixie Belle’s silkscreen stencils:

This is the Floral Silkscreen Stencil.
Silkscreen stencils have an adhesive backing, so there is no need to use spray adhesive as I normally do with stencils. I love that!
- Place the stencil where you want it to go and rub gently across the surface to be sure it is firmly in place, so no paint will seep under anywhere.
- Then, using the included spatula, load up a small amount of paint:
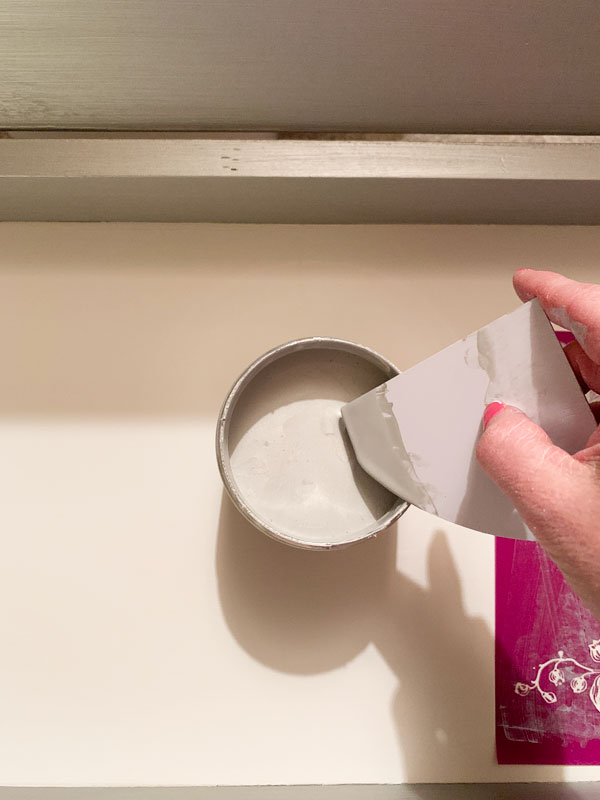
I used the Silver Bullet here.
- Next, spread the paint across the surface of the stencil. There is a super tiny mesh screen in the open areas of the stencil and this will aid in pushing the paint through the screen:
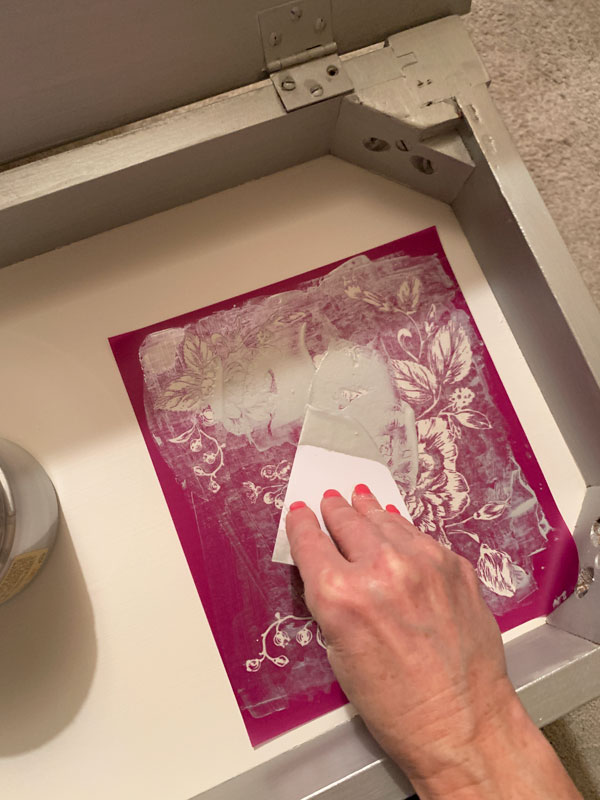
- Once you have it covered, go back over and remove any excess paint:
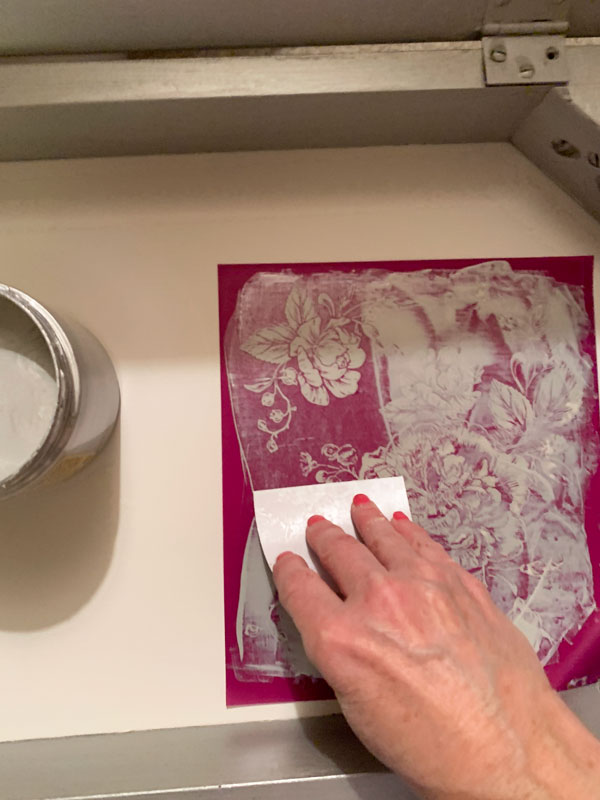
- Remove stencil while it’s still wet:
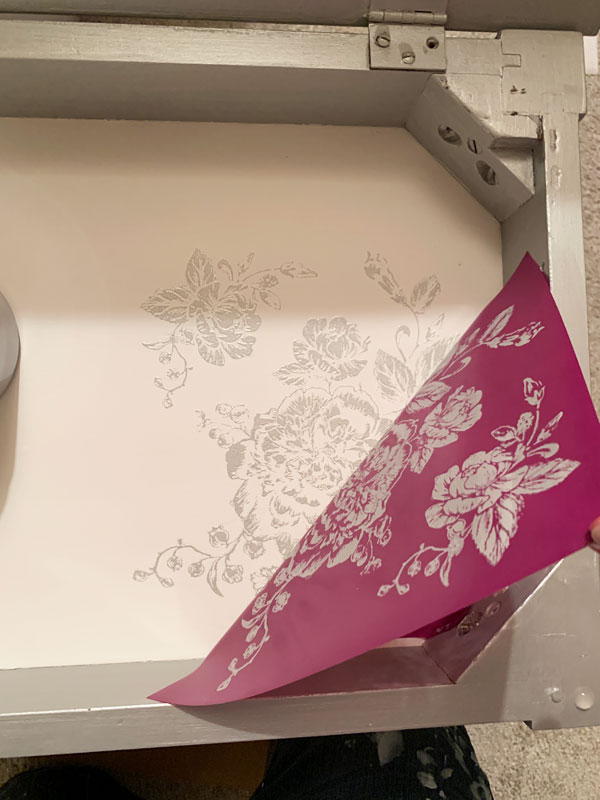
- Voila! These stencils give incredibly detailed results:
- Place the stencil in a tray of water to clean immediately after use:

I did use mine two times; I added the same floral to the left side first and then immediately used it again on the right side, before washing.
I wouldn’t recommend regular chalk paint on these stencils as the dry time is too quick, and the stencil would have to be rinsed often to prevent that.
The Moonshine Metallics are thinner and have a longer dry time than the chalk paint and work great. You can also use Silk paint or acrylic craft paint as both work well.
- Allow it to dry tacky side up and then reattach it to the original backing:

You should be able to get about 10 uses out of one stencil like I did on this dresser. I used the Roses stencil on that piece.
I have several silkscreens in my my Etsy Shop to choose from, and each one comes with three sheets of designs.
The fine detail you get with these stencils is really detailed and beautiful!
This little bench would be perfect at the foot of a bed!
I hope you enjoyed revisiting this simple makeover today!
Here’s another project I redid using silkscreen stencils:
See how this yard sale bench turned out HERE!
I’m excited to get back to my haul on Tuesday! I’ll have this huge, awesome toolbox to share:

And then, I’ll be back on Thursday with my Furniture Fixer Upper crew!
UPDATE: No need to wait…see how HUGE this piece really is and what I did with HERE!
I hope you all have a wonderful weekend!
XOXO,

Don’t Miss a Thing!
If you like what you see, there are several ways to follow along!
EMAIL * INSTAGRAM * FACEBOOK * PINTEREST


Get FREE SHIPPING on all orders over $50. No code needed at checkout! Orders under $50 always enjoy $8 flat rate shipping! Most orders ship same or next business day!


Mary Kaiser says
Oh that one turned out so pretty! I am so happy that Brennan is on the mend! It is still fun to look back on your old makeovers though! Looking forward to seeing what you do with that toolbox!
Christy says
Thank you, Mary! Yes, Brennan went back to school today, thank goodness. Have a wonderful weekend! XOXO
Kathy W says
Hello Super-Cal Gal ???? –
Christy, I love the bench!!! I am so happy you brought it back to share because I am excited about the Moonshine Metallics and the Silkscreen Stencils!!! Two amazing products I look forward to using. I will visit your Etsy shop and add them to my cart. You’re correct about the added detail on the legs!! Such a difference the small addition on the leg makes!!!!! I never would have thought to do that.
Thank you, again, for bringing it back!!
Kathy W
oxox
Christy says
Ha ha thank you, Kathy! It’s always nice to reshare older projects. And those silkscreen stencils are fabulous to work with! XOXO
Janice Redden says
L overly! And you are right, that little touch of white adds to its sophistication! Feel better, Brennan!
Christy says
Thank you, Janice! Brennan finally went back to school today, so he is doing much better! XOXO
Anne says
Your piano bench makeover turned out really cute! I particularly liked the detail of the white cotton. I was also enamored with the flock tree, housing the little cardinals. My entire family is obsessed with cardinals. I know it’s a longshot, but can you tell me where you found the tree… Hobby lobby perhaps? I’d like to keep my eye out for something similar in the future. Thanks so much.
P. S. I always enjoy your makeovers. You do a phenomenal job. I still obsess over the large serpentine dresser you did a couple of years ago with the white background and pink florals. I live in the midwest, but would have bought it in a heartbeat if you shipped your refurbished items. Happy New Year.
Anne
Christy says
Thank you so much, Anne! I found that little tree at a local shop here in Virginia Beach when it was on clearance after the holidays a couple of years ago. I did a quick search and found what looks very similar here: https://www.batteryoperatedcandles.net/flocked-tree-with-cardinals.html I appreciate you following along with me! XOXO
Cecilia says
Oh poor Brennan! I hope he starts to feel better soon! Having the flu is just miserable.
Love the bench. Very elegant looking with its metallic coat. The stencil detail is amazing. I’m looking forward to what you do with the toolbox. I have a gigantic one I need inspiration for!
????Cecilia
Christy says
Thank you, Cecilia! Brennan is doing much better. In fact, he went back to school today. The Flu really knocked him out! Have a great weekend! XOXO
Christine says
Love it, the legs make those benches! Hope your son feels better soon!
Christy says
Thank you, Christine! XOXO
gwen says
Love the white strip on the legs!
Christy says
Thank you, Gwen! XOXO
Jackie C says
I like it! I love piano benches too. I bought one for three dollars at a garage sale this summer. I wish I could add a picture here. I would love for you to see it. I painted a floor jewelry cabinet in Moonshine a few years ago. It has worn incredibly well. Its hard to capture how pretty it is on camera.
Christy says
It’s funny you say that about capturing how pretty the metallics are on camera. I feel the same way when I am photographing them. I feel like they are so much prettier in person. They do wear very well too! XOXO
Cyndi says
Gorgeous! And those silk-screen stencils are my favorite kind. They’re so much easier to use than regular stencils and they give so much detail. I hope your son is feeling much better now and that the rest of your family stays healthy!
Christy says
Thank you, Cyndi! I agree…love the silkscreen stencils! Brennan went back to school today, finally, so he is doing much better, thank you! XOXO
Catherine says
I want to do a dark purple (Amethyst) toy box but want it to be metallic looking. Do you recommend one of these over the purple to get the metallic look?
Christy says
Because the metallics go on a bit sheer, you will see the purple underneath, but it would likely end up a silvery purple rather than a dark purple.
p says
Sooo pretty. A little bling is a good thing.
So many pretty colors to pick. The Deep Woods green looks fun.
Great choice. I love the interior stencil too.
You always hide a special detail 🙂
Christy says
Thank you, P! Would you believe the Deep Woods is one of my best sellers? It’s so pretty! And you know I love a hidden surprise! XOXO
p says
You’re welcome.
Have you used Deep Wood – not sure I remember one.
I may have a piece and place to use it.
Your attention to detail makes your work special. 🙂
It is appreciated. Who doesn’t like a surprise ?
Christy says
I haven’t used it on a project as green doesn’t typically do well for me in this coastal market, but I got to see it up close when I was painting the spoons for display. It is really pretty! Thank you so much! XO
Michele M. says
It’s really gorgeous, Christy. I am not one for anything shiny but that really went from drab to FAB!
Christy says
Thank you, Michele! I love how the metallics at a touch of fancy! XOXO
Cheryl Atkinson says
So pretty! You know I have never used the metallic? I need to
Christy says
Thank you, Cheryl! These are great because they are self sealing, so no need to add a sealer! XOXO
Nancy says
Oh the piano benches I have sat on! I started piano lessons at age 5. I became a choir accompanist at age 15. I taught piano for 12 years. But yours is the prettiest!❤️ One of the old pianos I practiced on in early years had a stool that you could raise and lower. I think it would be fun to find one now.
Christy says
Thank you! Oh what fun information about you, Nancy! I never learned how to play, but would love to! That and the violin…maybe some day. I bet you play so beautifully. I’ve never seen a bench that raises and lowers! XOXO