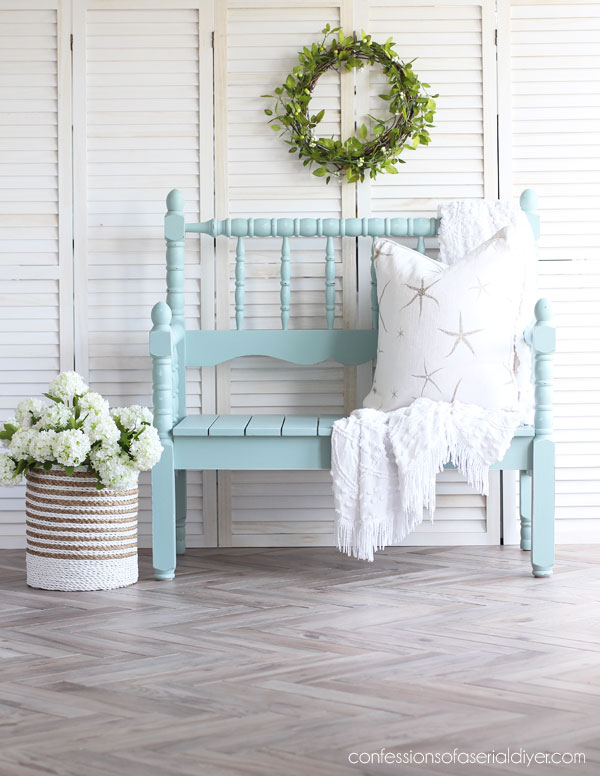
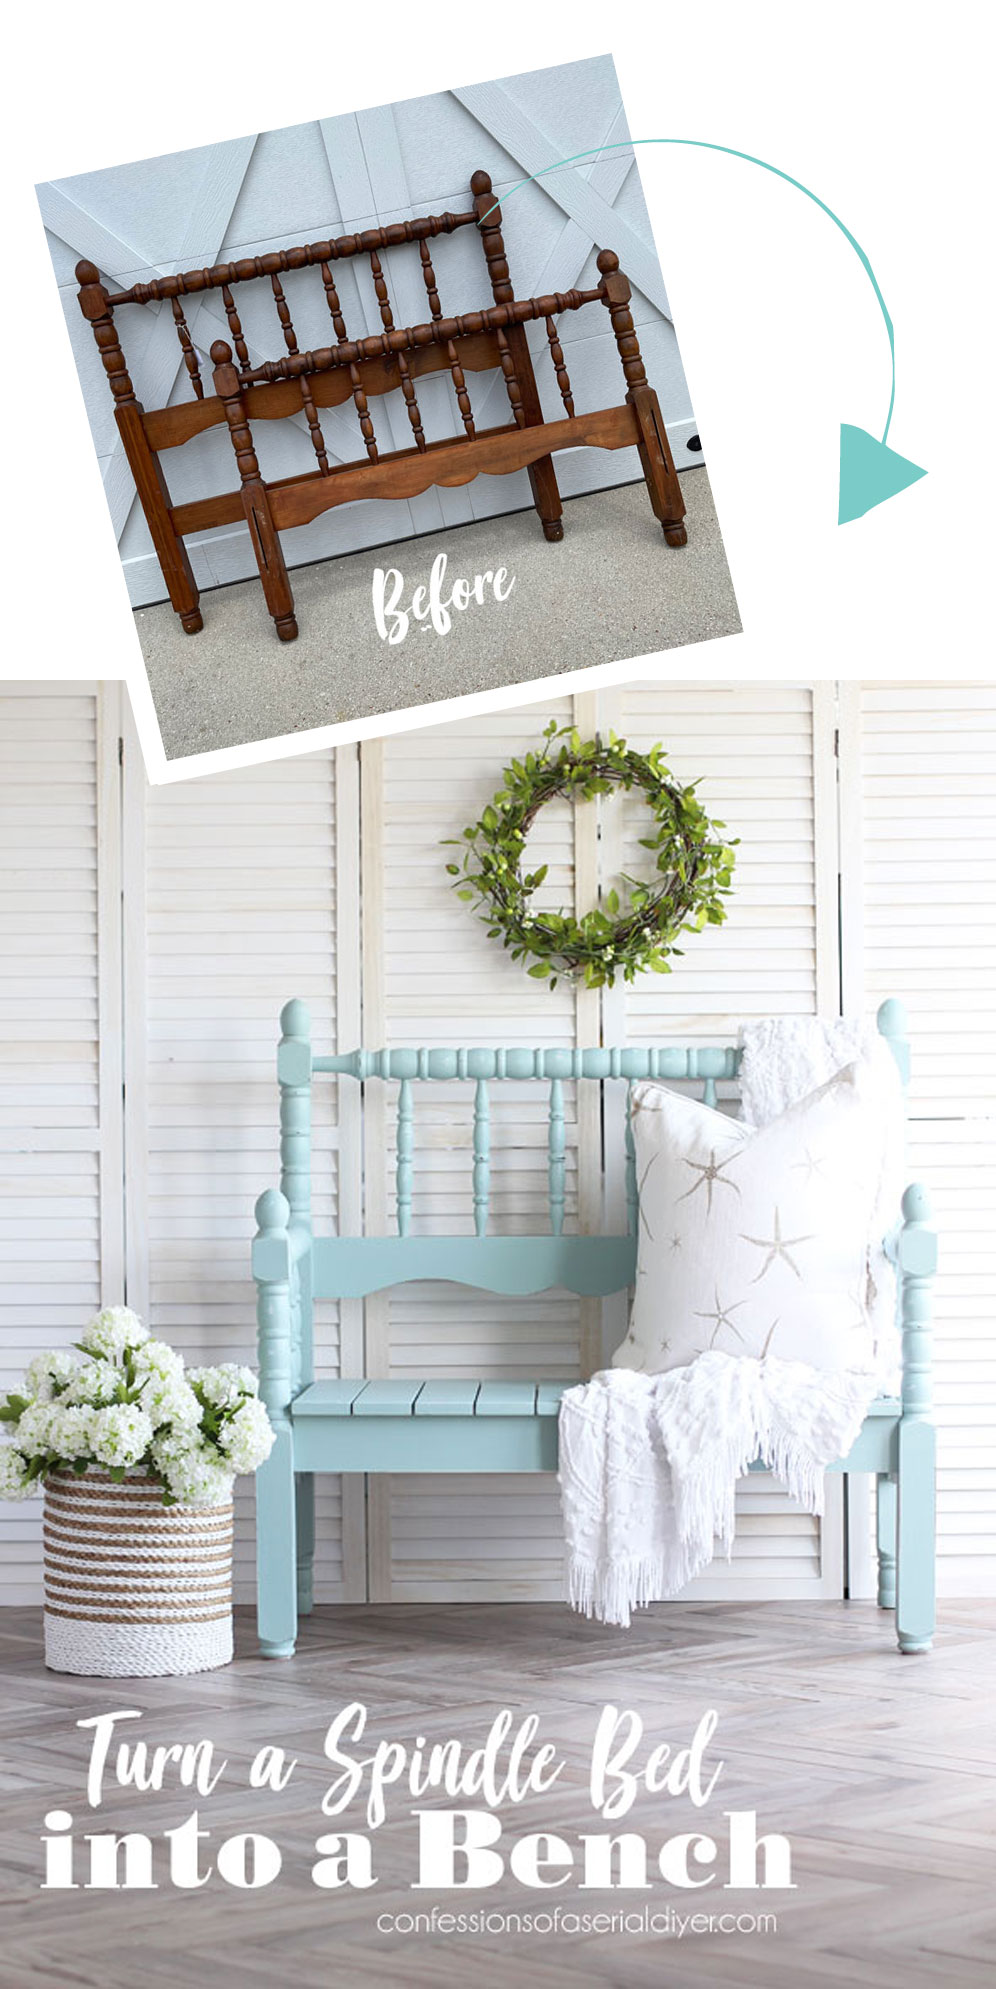
Hello, beautiful friends!! With graduation weekend for Jack keeping us quite busy, I did not get a chance to make something new to share, so I’ve pulled out one of my favorite makeovers from a couple of years ago, a spindle headboard bench!
Twin beds are great for turning into benches, and this one was only $20 at one of my favorite thrift stores:
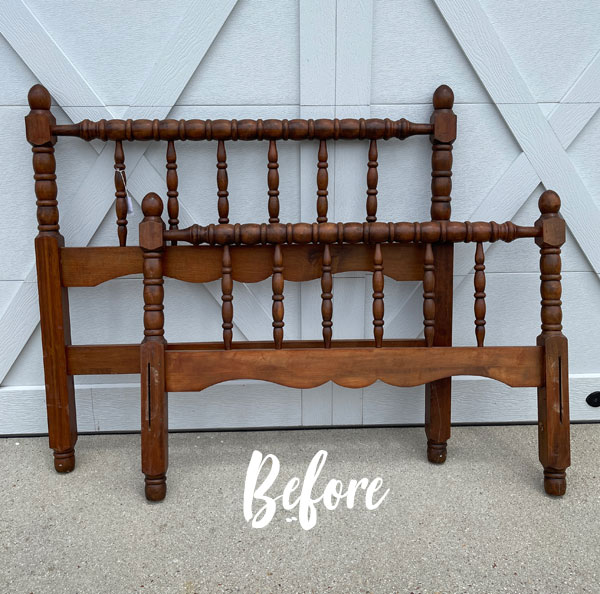
I’ve created many headboard benches over the years like HERE, HERE, and HERE, so I’m sure it’s no surprise that I would do the same with this set.
I just love the charm of them, especially when they have all these spindles!
However, creating one from a spindle bed is a bit trickier than with with a bed that has all straight lines, so I’m going to break it down step by step!
I’ve included a few affiliate links so you can find the products I love.
How to Turn a Spindle Bed into a Bench
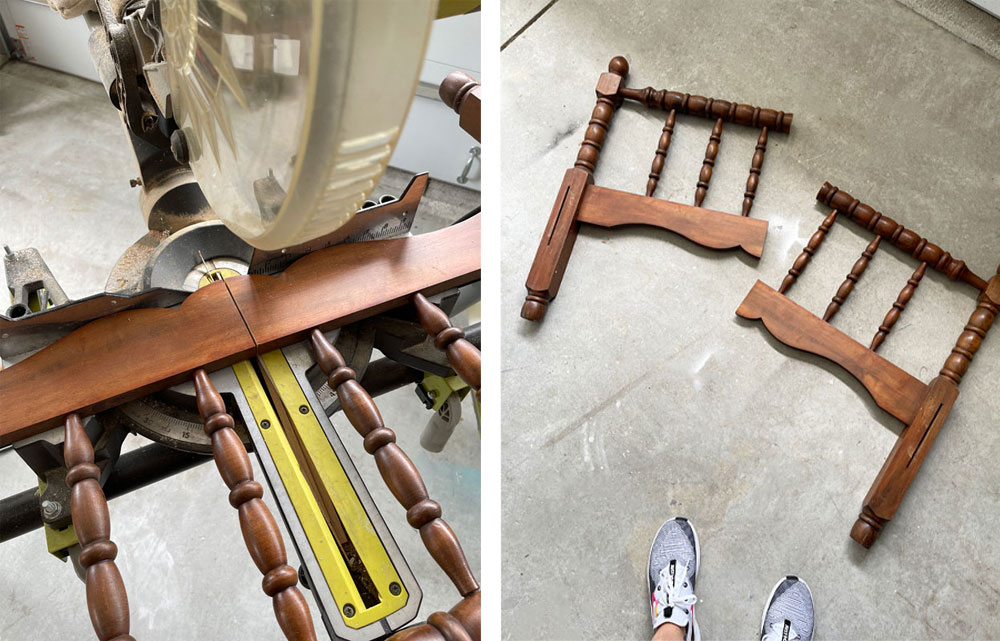
The first step is to cut the foot board in half. Those pieces will become the sides of your new bench.
I did that with my miter saw:
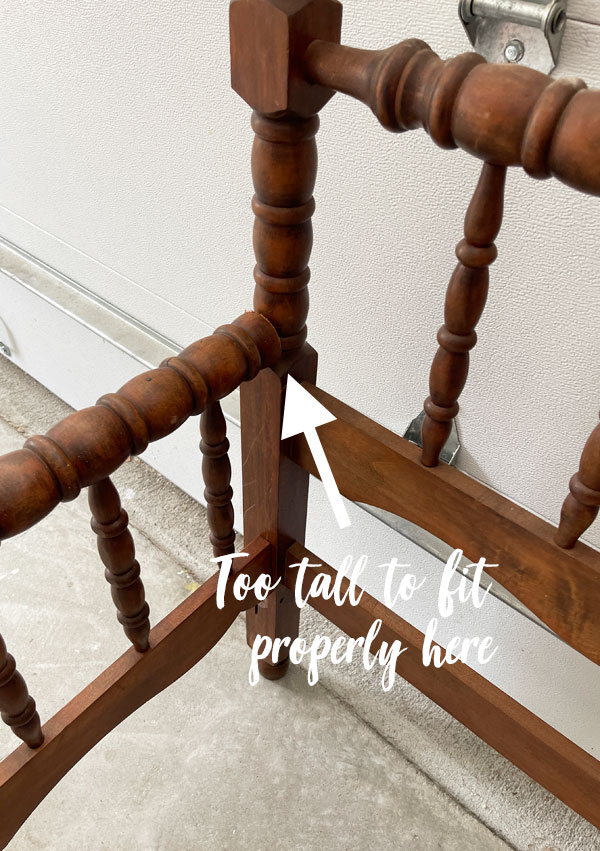
The tricky part about spindle beds
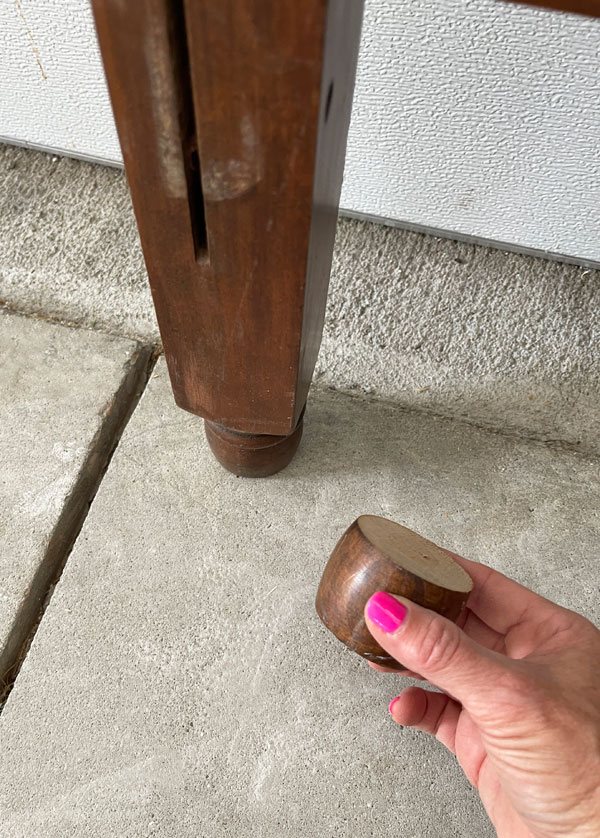
Now here’s the tricky part about spindle beds. Often, the foot board is too tall to hit the headboard in the right place where they will be joined together:
To remedy that, you can remove some of the height from the bottom as I did here with my miter saw:
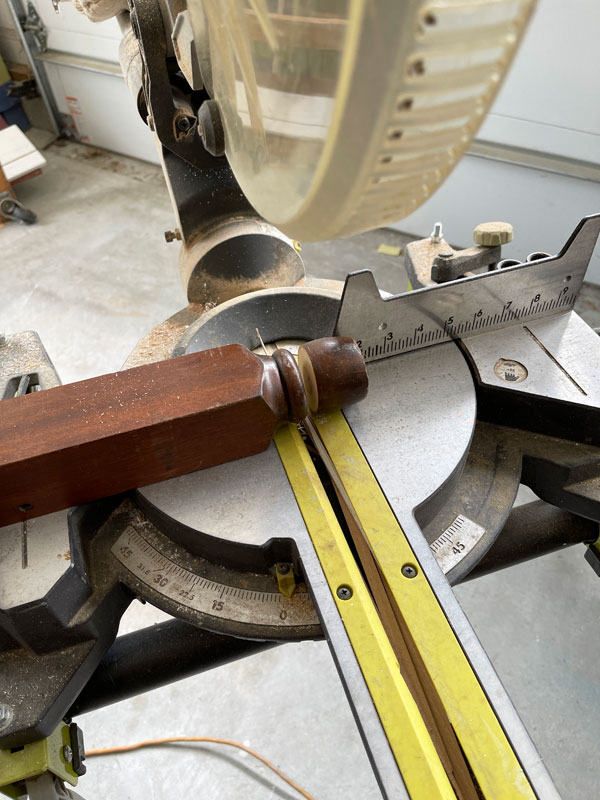
This will usually fix the issue, and you can proceed like normal. However, this one was being extra sassy and was still too tall.
So, I decided to add the piece I had removed from the foot board, to the feet of the headboard!
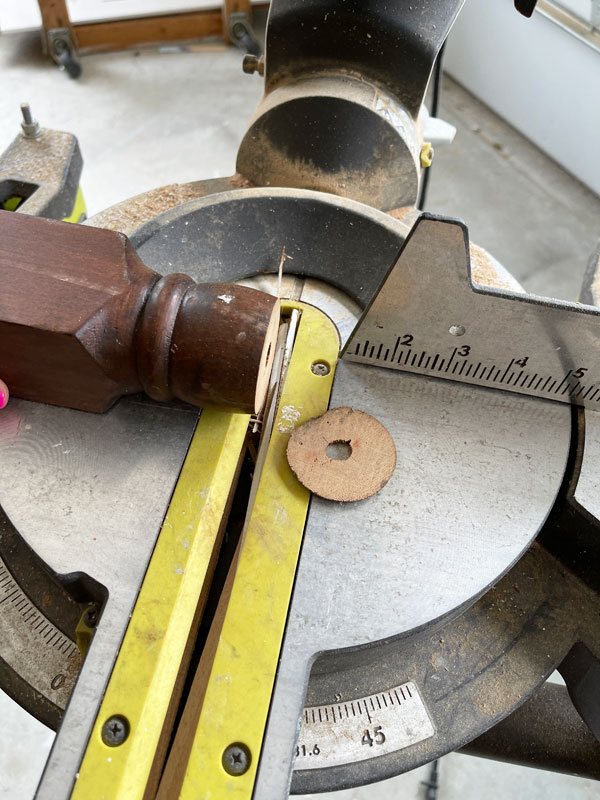
To do that, I first smoothed out the bottom of the headboard feet by barely trimming it, so the two pieces would attach nice and flush:
Next, I added a ring of wood glue to the bottom and then attached them together…
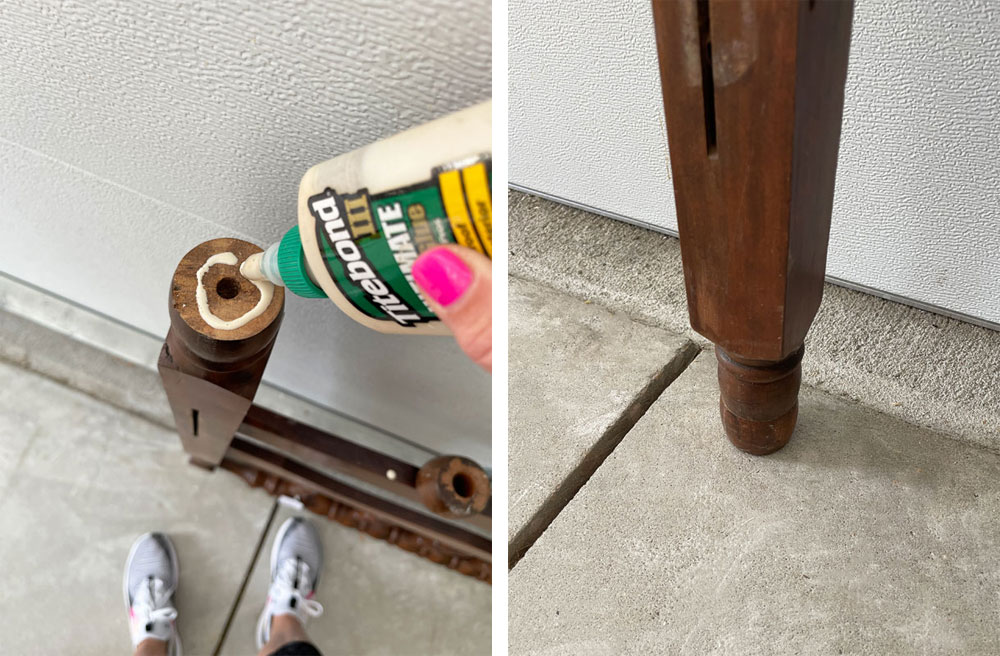
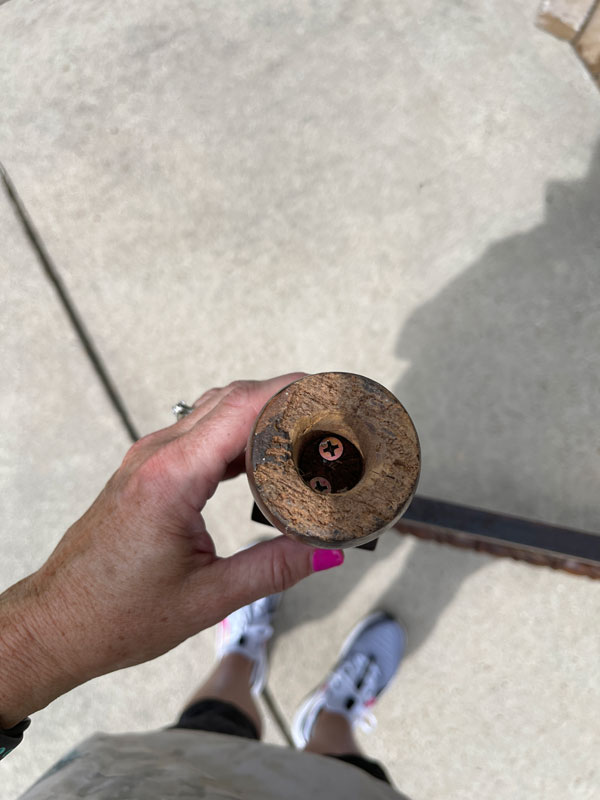
I secured them further with screws once the glue was dry. There was a hole up the middle of these legs since they were once part of a bunk bed set that stacked above one another, so I added two screws, aiming them both towards the outside of the hole:
Okay now that the height issue has been resolved, it’s time to build this bench!
Attach the new bench arms to the headboard
Now you can line up the headboard and new arm pieces made from the foot board and do a dry fit to make sure everything lines up properly. Also make sure everything is level at this point.
Next, wood glue the new arms to the headboard at the top and bottom and use clamps to hold everything in place:
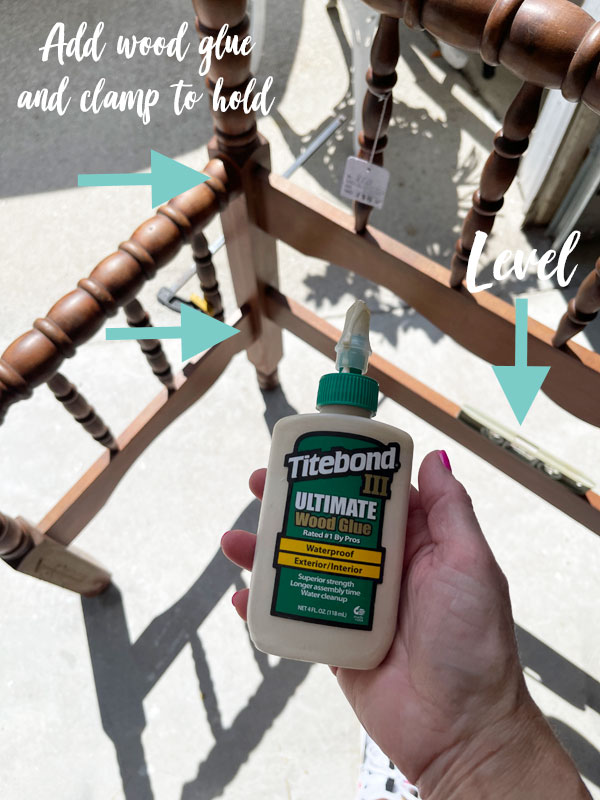
Once the glue is dry, attach the arms more permanently with screws.
To do that, use your drill to drill a pilot hole with a bit just a tad smaller than the screw:
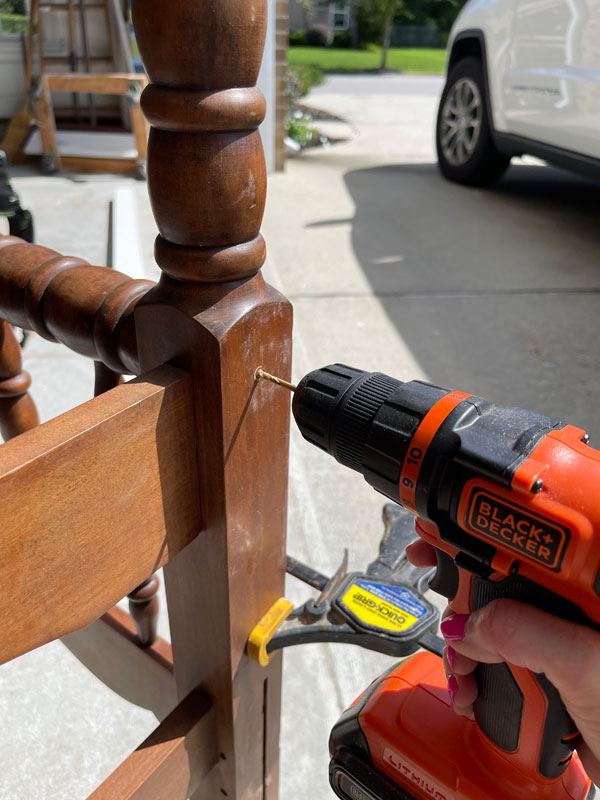
Here I drilled it as deep as it would go.
Then, use a drill bit just a bit larger than the screw head and drill deep enough so that the screw will go all the way into the new arm pieces about an inch when screwed in place.
I added a piece of tape to my bit as a guide for how deep to drill:
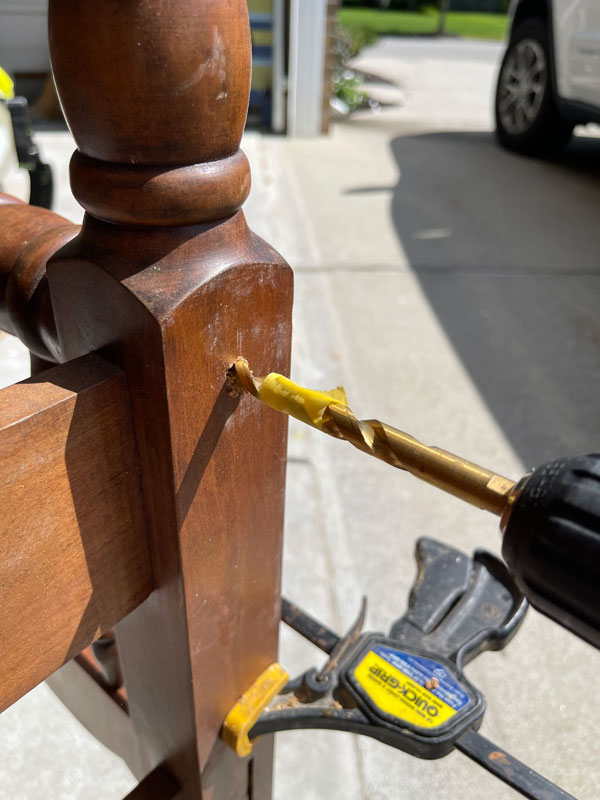
Screw the screws in place.
I added one on the top where the spindle was…

I usually use my Kreg Jig Jr to attach the bottom part since it has a right angle where it connects to the headboard, but I went ahead and used the same method on the bottom this time.
I added two screws on the bottom part. The screw will be countersunk, or below the surface, and you can fill the hole with filler to hide it.
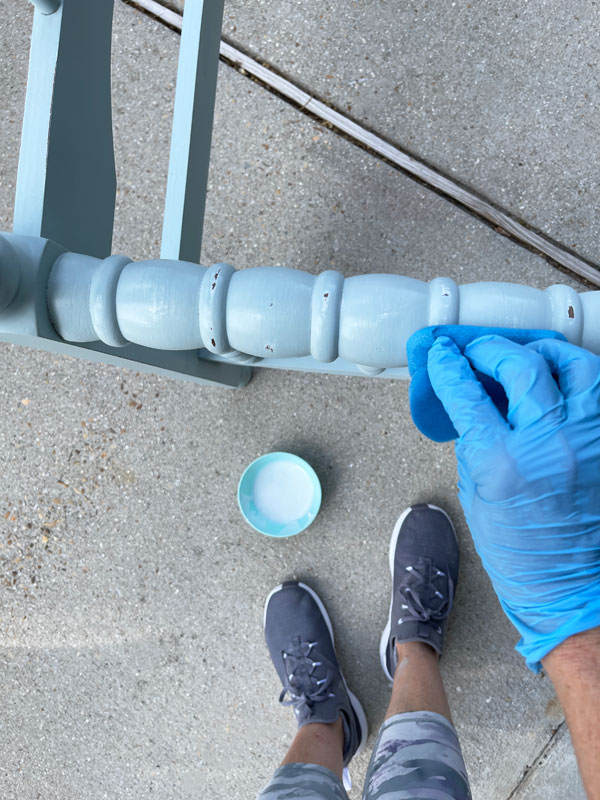
Clean
Before getting to the filler part, I cleaned everything with White Lightning. (Dixie Mud is water soluble, so you want to clean before filling the holes with Mud.)
I added one TBSP of White Lightning to my tub with a half gallon of warm water…
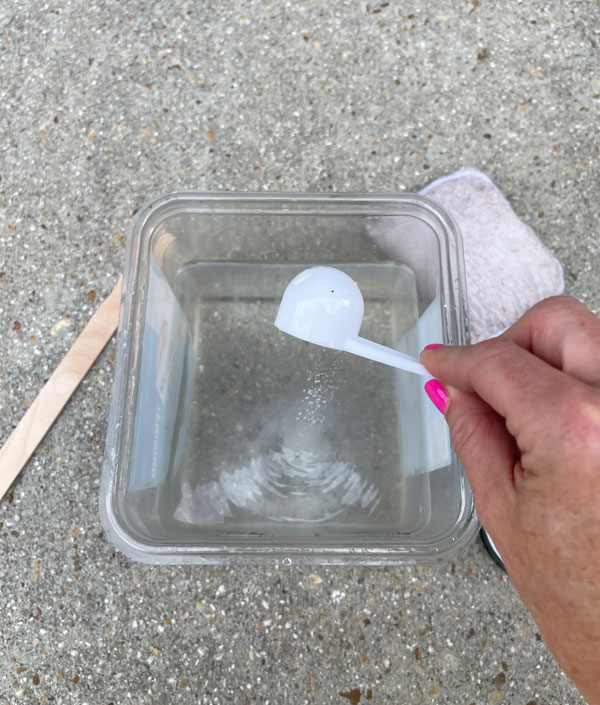
I used a terrycloth applicator pad for this step. Then, I swapped out the water for clean water and wiped everything down once more.
Fill the Holes
Once my bench was dry, I used Dixie Mud to fill the holes as well as the parts where the bed rails attach:
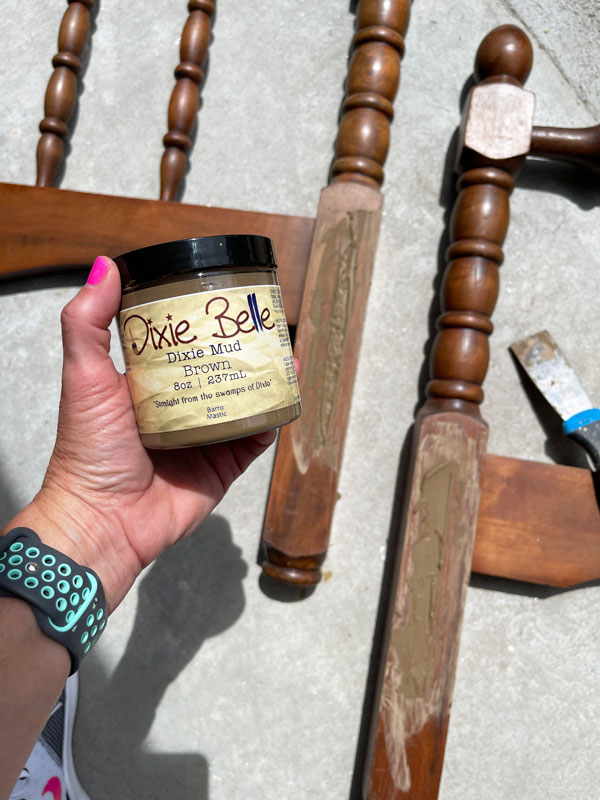
Those areas may take a bit longer to dry since they go deep. Once mine had dried, it had sunk a bit, so I went over it with a second application.
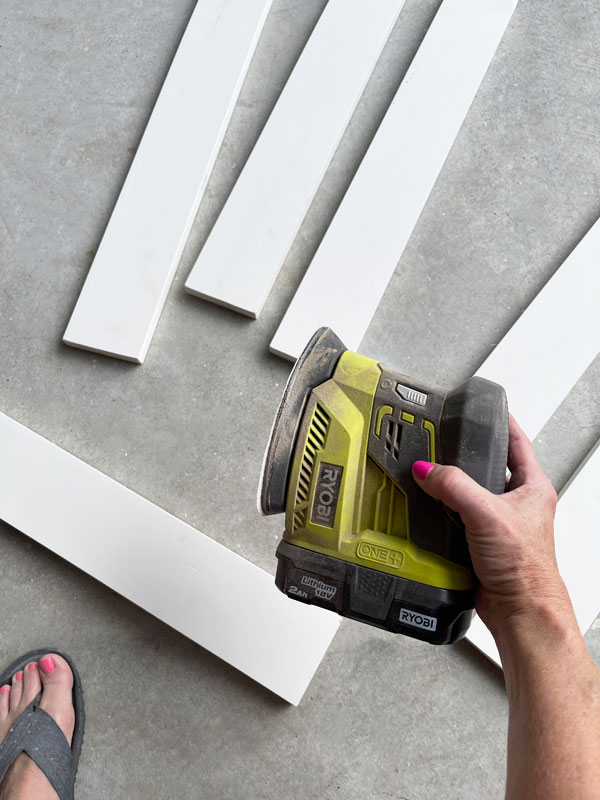
Once the Mud is completely dry, sand to smooth:
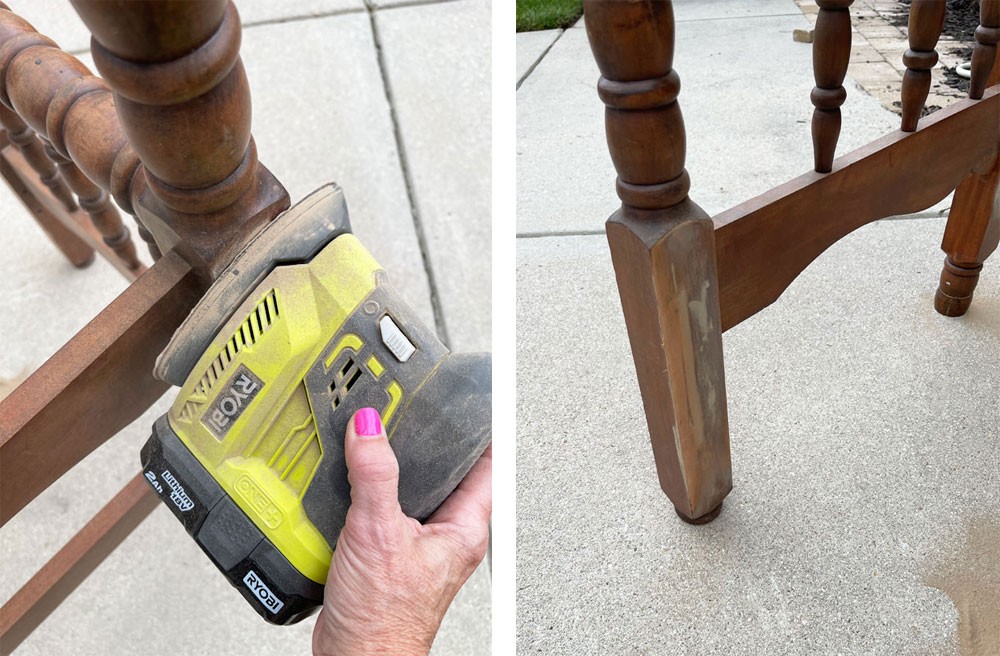
This cordless Ryobi Cat sander is great for smaller projects like this!
I used a soft cloth to wipe away any dust from sanding.
Attach the new front support
I tried really hard to pull enough scraps from my stash to complete this build, but I just couldn’t gather enough.
So, I stopped by the Home Depot and picked up three of these primed 1X4s for $10.88 each:
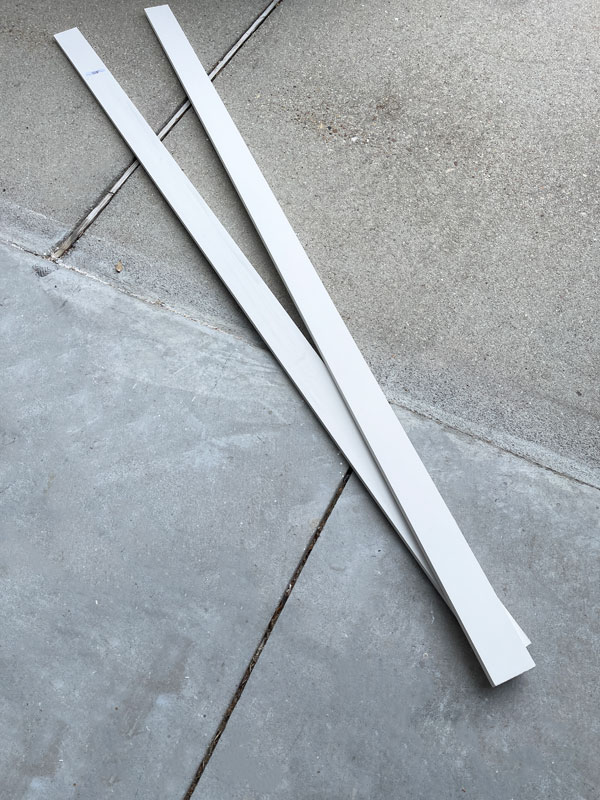
I used them to make the support piece across the front and the seat slats.
I did use my Kreg Jig Jr to attach this front support piece. The kit has easy to follow instructions, and you can use it with your drill to create pocket holes that allow you to easily connect pieces at right angles.
Screws go right into those pockets…
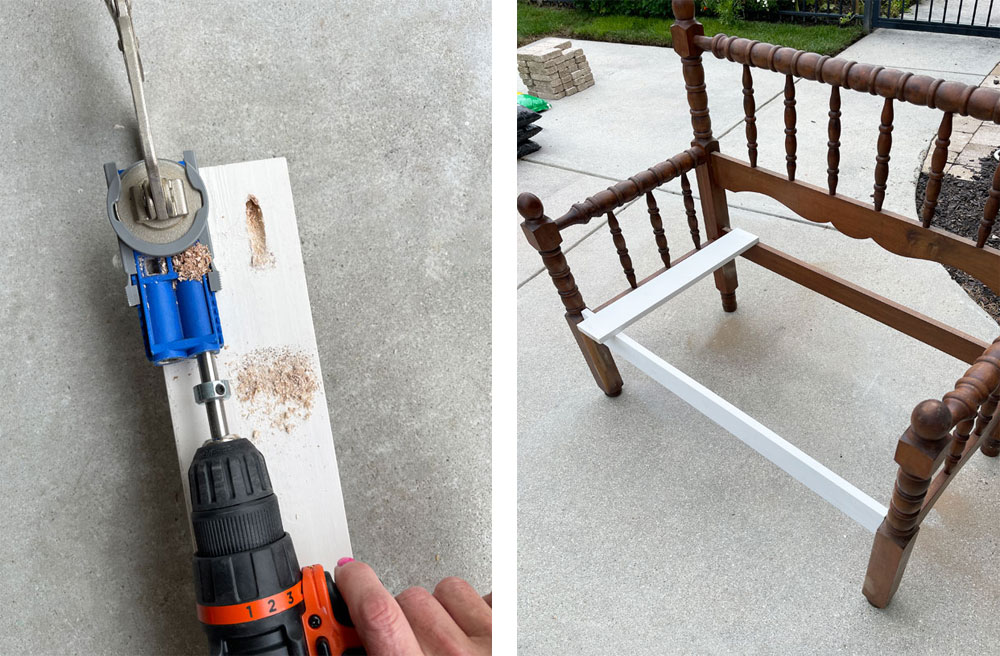
The new front support needs to be level with the back support to hold the seat slats in place. I cut those out of the primed pieces next.
Once I had them cut, I sanded the edges smooth with my Ryobi Cat sander:
Time to Paint!
I chose to paint and seal before attaching the new seat slats to make it easier.
I wasn’t planning to paint this piece white, but I wanted some white to show through when I sanded. To get a quick coat of white on, I gave this bench a coat of Rustoleum’s white spray primer:
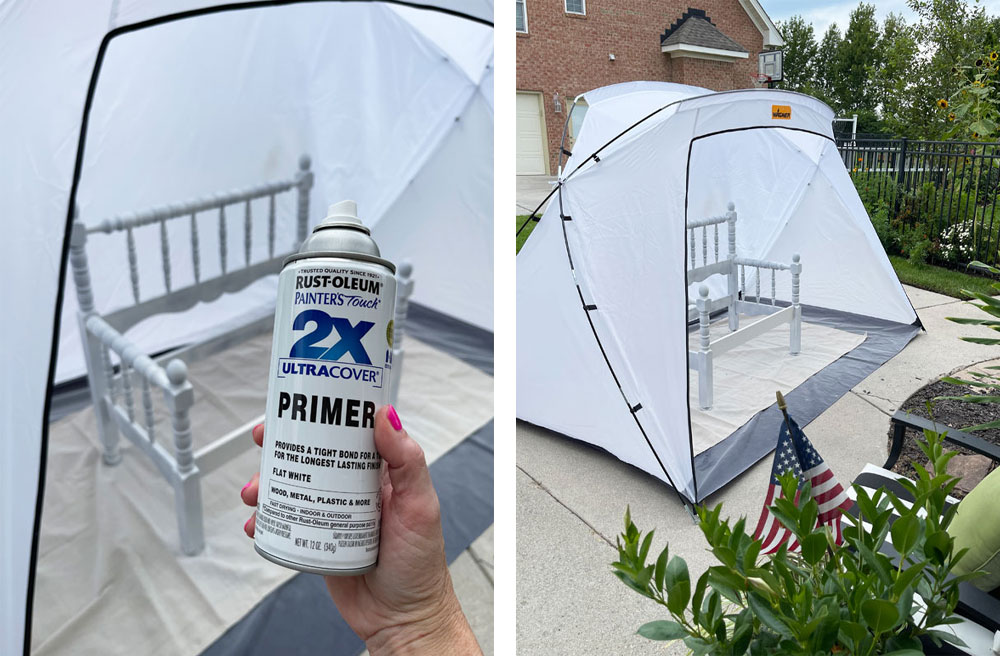
I bought a new large spray tent since my old one had become super crusty, but it’s just been sitting in my garage for at least a year. I needed it for this project since it was threatening rain. It’s pretty big and does a fantastic job at containing the spray!
I followed that up with one coat of Vintage Duck Egg Blue mixed 50/50 with Cotton:
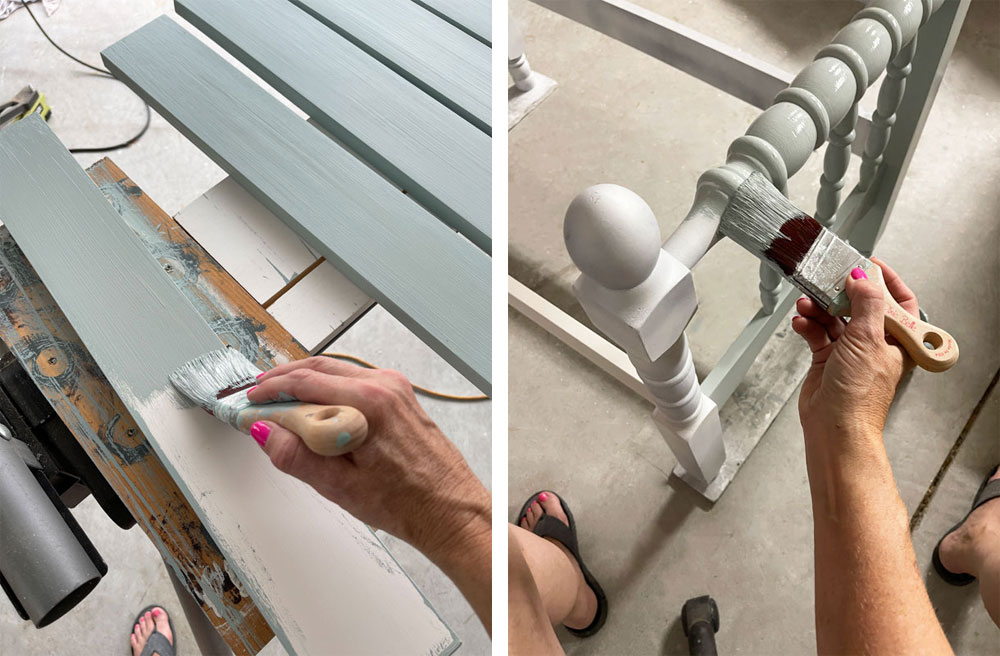
I love Vintage Duck Egg Blue, but I love it even more lightened up! (In the second photo, I was painting at night, so it looks a bit different.)
Sand
I sanded all over with 220 grit sandpaper wrapped around an old sanding sponge to smooth and distress a bit:
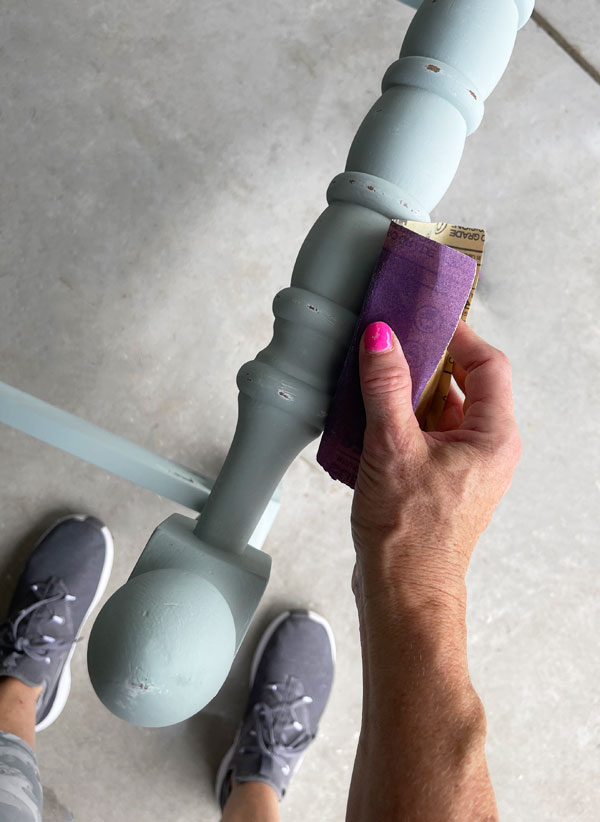
I hoped I would see more white come though, but you can still see it a little.
Seal
To seal my new spindle bench, I used Clear Coat in satin and applied it using the blue sponge applicator…super easy!
The satin dries to a lovely subtle sheen.
How many coats do you need of Clear Coat??
Technically, Dixie Belle chalk mineral paint does not require a topcoat. Once it has cured (about 21 days), it is good to go and super durable, but it is very flat and not as nice a finish as it is when sealed. So, keeping that in mind, if you just want to change the sheen and add a little additional protection with the Clear Coat, one coat is fine.
However, on more flat surfaces, two coats covers the surface best and yields nicer results. So on the spindle parts, I did one coat, and on the flat parts, I did two!
I attached the seat slats using my nail gun and this transformation was complete!
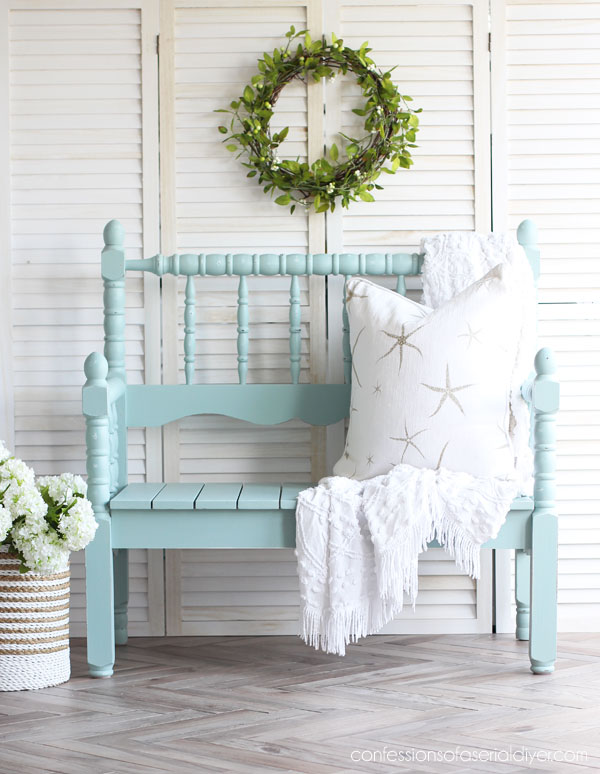
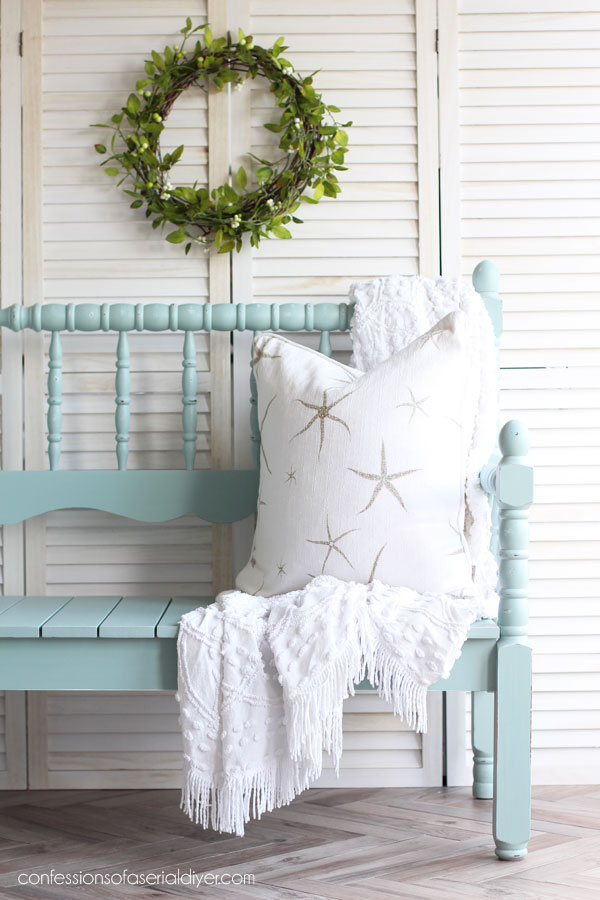
The After
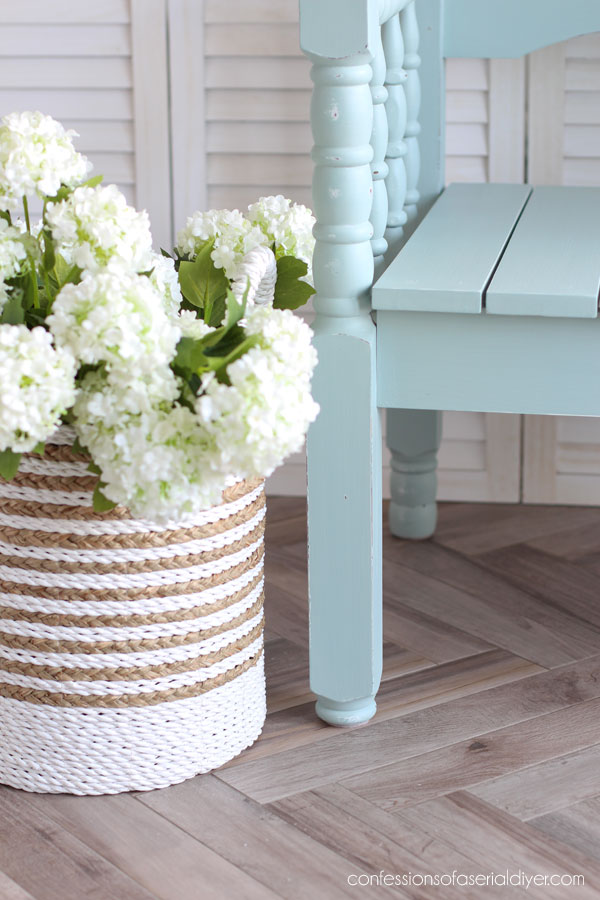
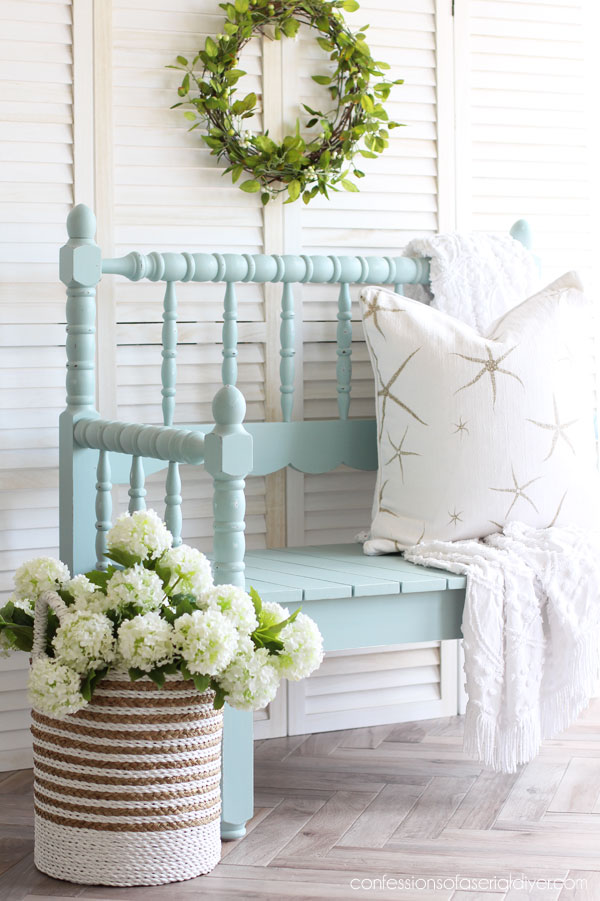
There’s just something so charming about those spindles!
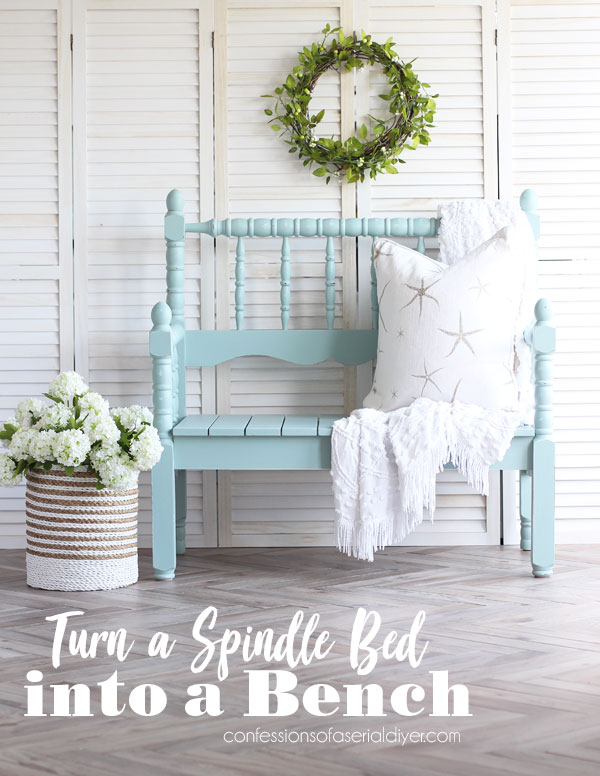
And this color? LOVE!
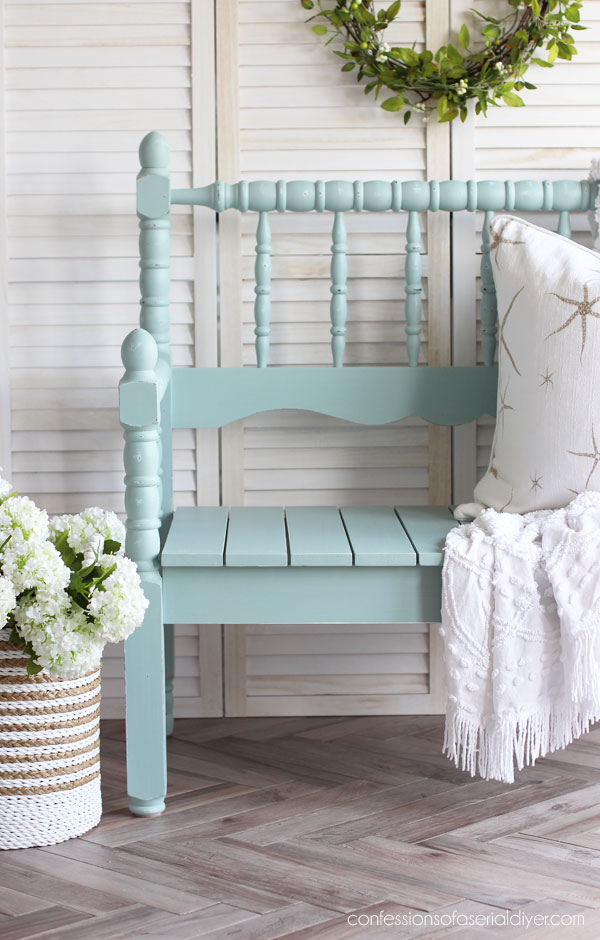
Again, it is a 50/50 mix of Vintage Duck Egg Blue and Cotton.
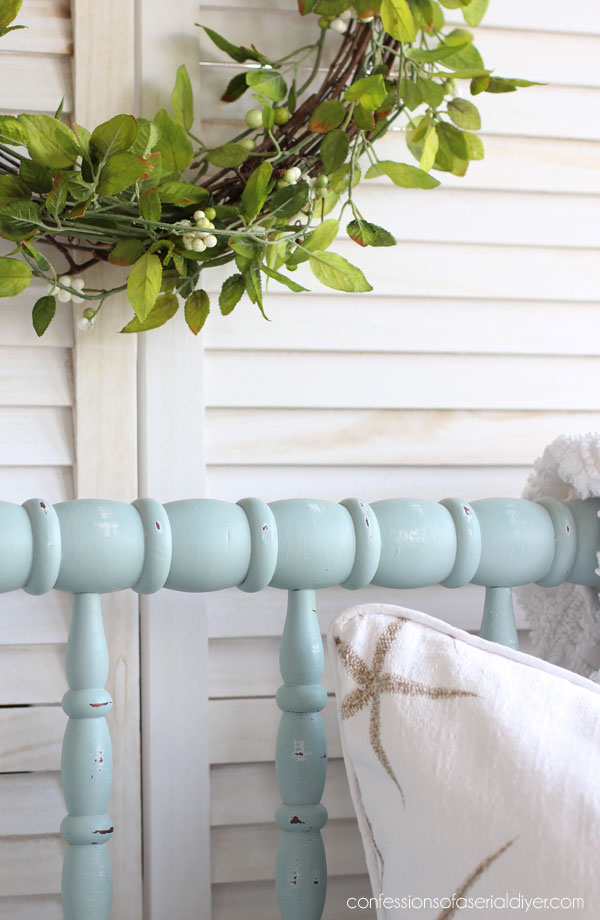
Here you can see both the front and back feet that I had to alter to make this bench work…
Look who else showed up! Lyla jumped up on here the minute I started setting it up, but then the doorbell rang.
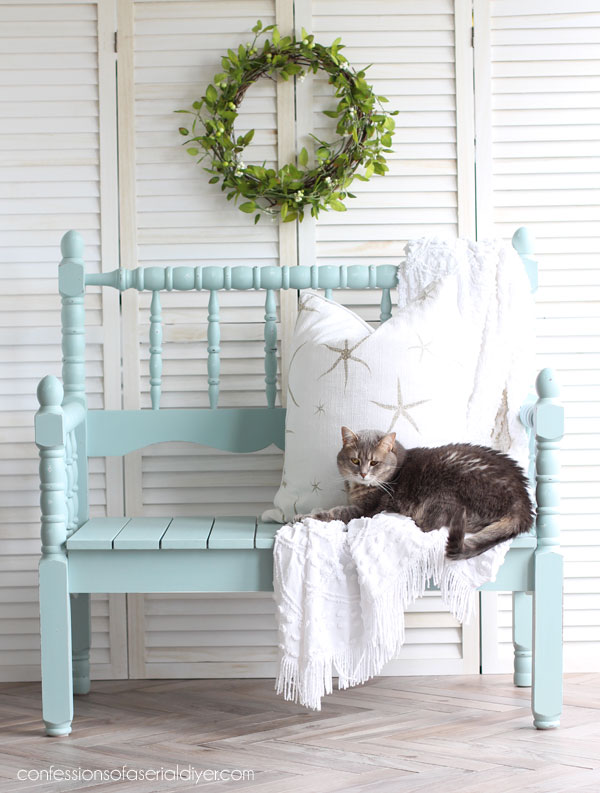
She’s like a dog that way…always has to run to the door when people show up, but instead of barking, she meows until you answer the door!

If you want to see a headboard and foot board that were repurposed into something other than a bench, check out this one:

See what I did with it HERE!
I couldn’t sign off without a proud picture of me and my graduate!

It rained on us, but we didn’t let it cloud our celebration!
See y’all on Thursday with my Furniture Fixer Upper crew and this dresser my neighbor gave me for FREE:

UPDATE: See what became of this dresser HERE now!
XOXO,

Don’t Miss a Thing!
If you like what you see, there are several ways to follow along!
EMAIL * INSTAGRAM * FACEBOOK * PINTEREST


Mary Kaiser says
Oh what a great picture of you and Jack the graduate!!! I love the picture! I remember when you did the bench and it turned out so cute!!
Christy says
Thank you, Mary! We were a bit soggy at that point, but oh well ha ha! Thank you! XOXO
ELIZABETH MAPLESON says
You look like a beautiful proud sister, not old enough to be his mother.
Well done for all your pretty ideas as well.
Christy says
Aww you are the sweetest, Elizabeth, thank you!! XOXO
Janice Redden says
Christy, the bench is beautiful….no apologies needed for a “look back”. We all know how busy graduation time can be! That you took the time to post something for today is just one more thing that we all love about you; you never disappoint and your “followers” appreciate your dedication. Seeing your “prettys” – current or past – is always a bright spot in my day!
Congratulations to Jack and best wishes for a bright future ahead. You have an amazing mom and I’m sure she is so proud of you!
Christy says
Aww thank you, Janice! You are the best, and I appreciate you so much! We are excited for Jack to move onto the next chapter! XOXO
[email protected] says
I totally agree with all you put. We are lucky to have her. I told her we are all Jack’s Aunties lol
Cecilia says
Love it! And love the picture of you and your son. Special times!
Christy says
Thank you so much, Cecilia! XOXO
Teresa Brown says
Love the bench Christy and the kitty cat . Also a big congrats to your son .
Christy says
Thank you, Teresa! XOXO
Nana Diana says
Okay-This project is absolutely adorable! I love it!!!! Great job of reconstructing it and I love the paint color, too. xo Diana
Christy says
Thank you, Diana! This is one of those pieces that I wish I had a spot for! XOXO
Sue says
Congrats to your son on his accomplishments in graduating! I love this sweet duck egg blue bench! You are such a great design visionary!
Christy says
Aww thank you, Sue!! We are excited for Jack to start the next chapter! XOXO
Susan erbaan says
Good morning!
I really enjoy your posts. You are so clever
and knowledgeable. Your projects are
fabulous. Thanks for sharing your talents.
Sue
Christy says
I appreciate that so much, Susan! Thank you! XOXO
Cyndi says
It was good to see this post again! Pretty little bench, and you did a great job getting the two pieces to the right height! 🙂
Congratulations to Jack–and you, as it usually takes the whole family to get through!
Christy says
I’m so glad you enjoyed the replay! Thank you! And I know Jack appreciates all the kudos…and no truer words could be said…it does take us all ha ha! XOXO
Penny says
One proud momma! Congratulations to you and Jack.
Bench looks great.
Christy says
I am for sure! Thank you so much, Penny! XOXO
Michele M. says
WOW!!! That bench is absolutely amazing. I love the color, the design – the awesome tutorial. You are a super power, Christy!
GREAT pic of you and your son. You look like a sister more than a mom!
Wishing him all the best that life has to offer. ♥♥
Christy says
Thank you, Michele! This is one of those projects I wish I had a spot for! And you are too kind…that is my baby right there, all grown up and ready to take on the world! Thanks, my friend! XOXO
Nancy Sharp says
Congratulations to your son on his graduation!
Christy says
Thank you so much, Nancy! XOXO
Hannah Reyor says
Congratulations Mom!
We head to a graduation for our granddaughter in. June. Exciting times.
Enjoy!
Hannah
Christy says
Oh yay! Yes…they are our future…you enjoy also! XOXO
Connie Douglas says
Thank you so much for that bench tutorial!!! And Congratulations to your handsome graduate!!! All the best to him♥️. It’s raining and nasty here in oak Harbor, Whidbey Island Washington today.
Christy says
It is my pleasure, Connie! Thank you so much! I’m sure you see lots of that kind of weather there! XOXO
Rose Lefebvre says
I LOVE what you did with this! And the color you chose is perfect.
Christy says
Thank you so much, Rose! XOXO
Barri Simpson says
Wow! I love these type of benches made from beds, you did a fantastic job! It is gorgeous! Congratulations on your grad too! Best of luck to him!
Christy says
I’m so glad you like it, Barri, thank you! And thank you for the congrats! XOXO
Cyndel says
Congrats to Jack on his achievement and to you and the family for your encouragement and support. Hope his next adventure doesn’t take him too far away.
Christy says
Thank you so much, Cyndel! Yes, it took us all to get him there ha ha! He plans to stay close to home, so we’ll see! XOXO
Bonnie says
Well you know how I feel about you and your projects and this is no different. I have always loved this one because I am a sucker for spindles. You definitely need to frame that picture of you and Jack. I don’t think that Momma smile can get any bigger.
Hugs, Bonnie
Christy says
Me too!! I love ALL the spindly things! Thank you, my sweet friend! I have to agree…I was bursting with joy lol!! XOXO
Catherine says
That was quite the project but it turned out beautiful!
Congrats to Jack!
Christy says
Thank you so much, Catherine! And we appreciate the congrats for Jack…on to the next chapter! XOXO
Cheryl Atkinson says
Love your spindle benches. Perfect coastal color. I can’t believe that is Jack and he is graduating. I have been following you for 6 years so wow. He is all grown up ????
Christy says
Thank you, Cheryl! And I know…how is time passing so fast? Jack has turned into such a kind young man! XOXO