Hello, amazing friends!! After Tuesday’s Trashy makeover that had me putting in serious overtime, I decided to pull out a lovely set I redid a couple of years ago to share today. It’s a painted dressing table and stool that I originally shared as two separate posts.
Piece #1:
It all started with this dressing table one of my awesome neighbors from our previous neighborhood offered to me for FREE:

Yes, please!! I headed right over to pick it up! Thank you for thinking of me, Tracey!!
Although it is missing the mirror, I’m still calling it a dressing table. She did later offer the mirror to me, but the dressing table had already sold and so it is still hanging out in our garage!
I’ve included a few affiliate links so you can find the products I love.
Clean
The prep is always the most important step of any painting project! Don’t skimp here!
I started this makeover by giving it a good cleaning using White Lightning and an applicator pad:
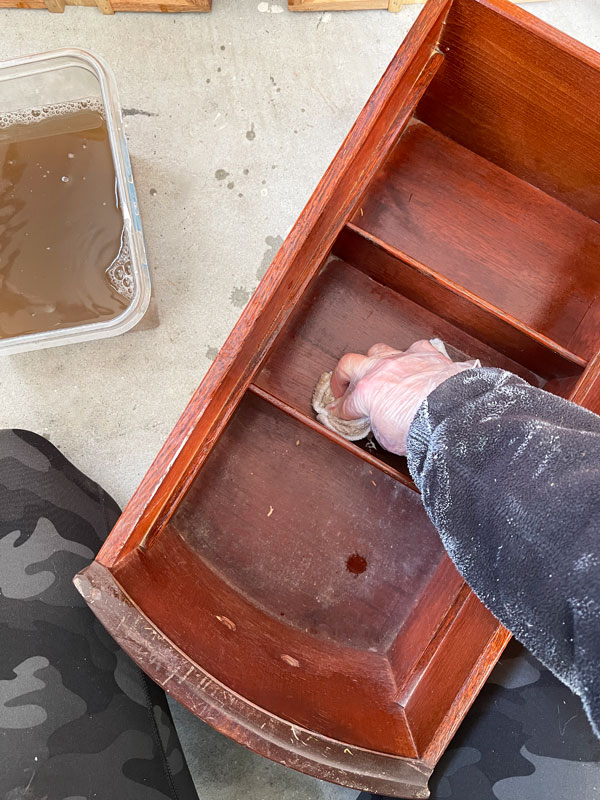
The applicator pads are covered in terry cloth and are perfect for this step!
Be sure to wear gloves and then do a final wipe-down with clean water after to remove any residue.
I had a couple of areas where the veneer was missing, so next, I filled those areas with Dixie Mud:
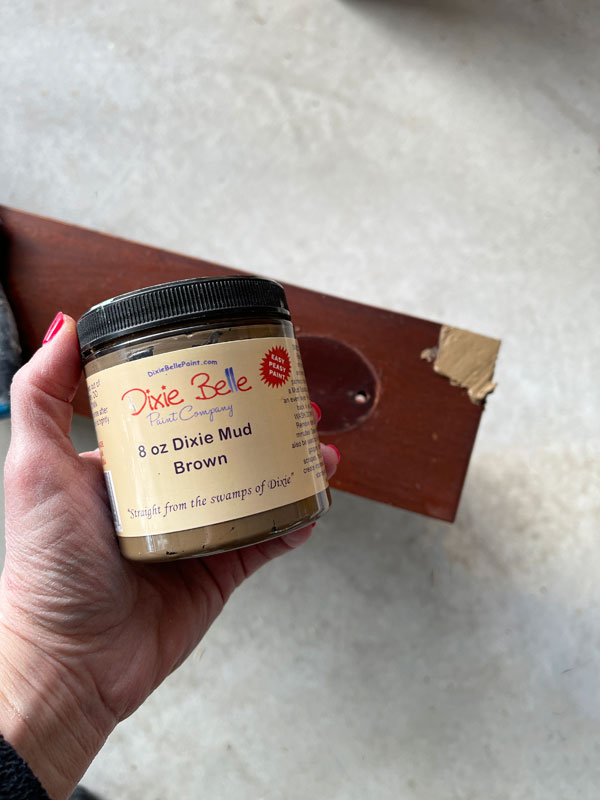
I allowed that to dry completely and then lightly sanded the filled areas with 220 grit sandpaper to smooth them out.
BOSS for bleed through
The next step in our prep was to BOSS this piece as it definitely had potential to be a bleeder with that red wood!
I gave all the areas to be painted one coat of BOSS in white (That has since been replaced by Bonding BOSS which is a bonding primer and stain blocker in one.) and let it sit overnight to thoroughly dry…
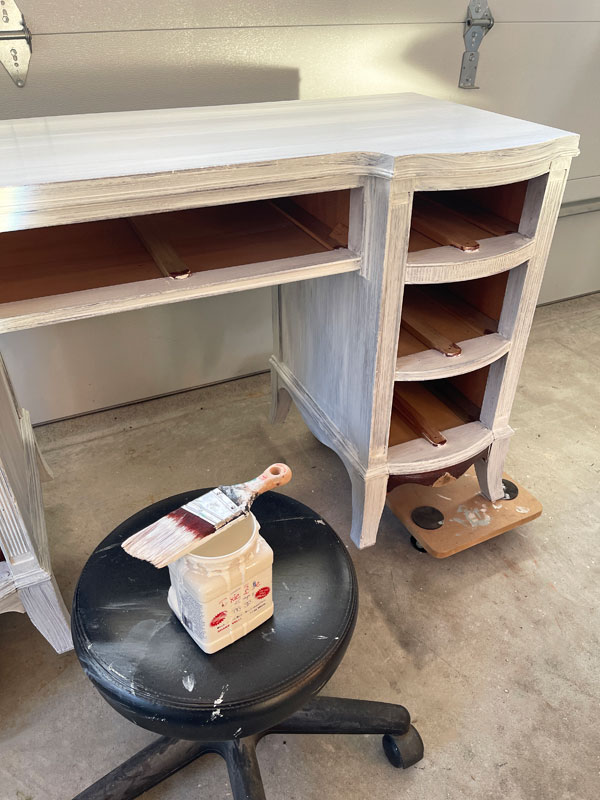
(Bonding BOSS requires 24 hours of dry time.)
Paint
Finally, I could start painting!
For this piece, I chose Pink Champagne:
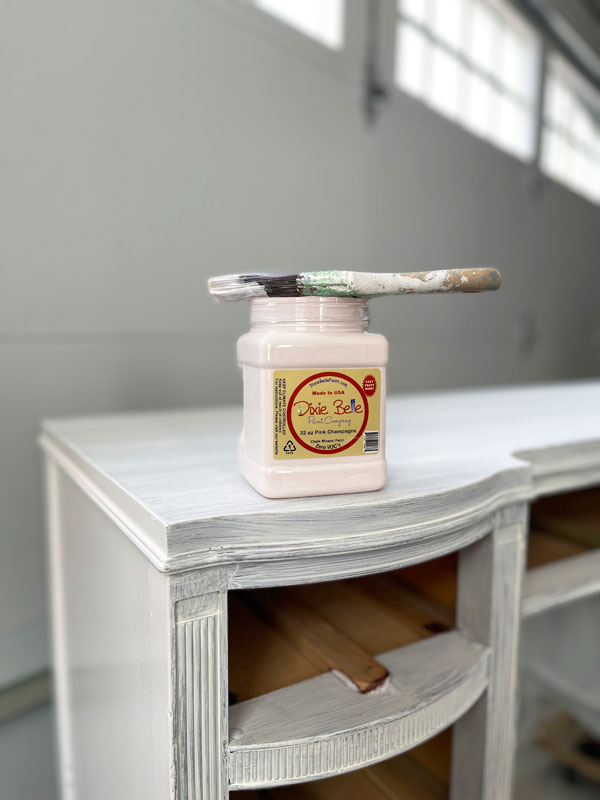
It is a very soft, subtle pink color.

I decided to use my favorite tape for painting, FrogTape for delicate surfaces to add a broad stripe to the fronts of six of the drawers. I removed the tape as soon as I added my second coat of Cotton:
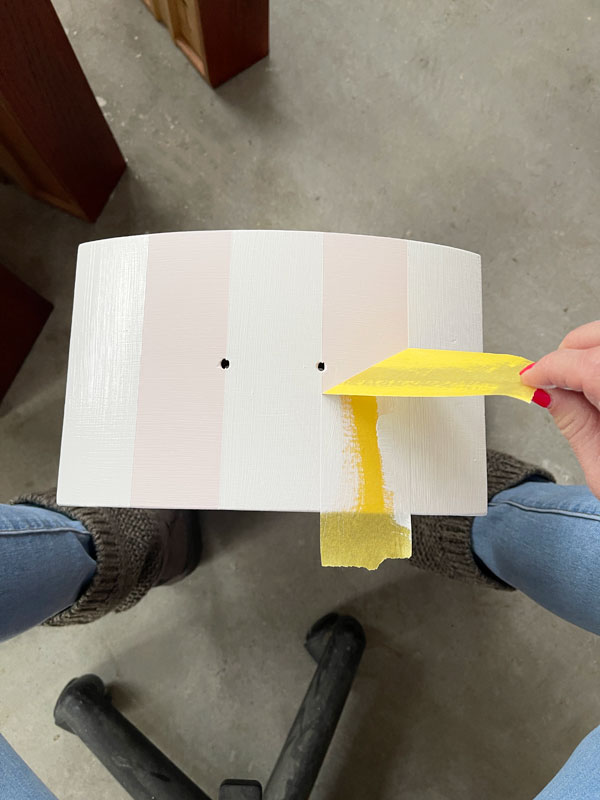
See how I measure out perfect stripes every time HERE.
Once everything was dry, I lightly sanded all over using 220 grit sandpaper wrapped around an old sanding sponge:
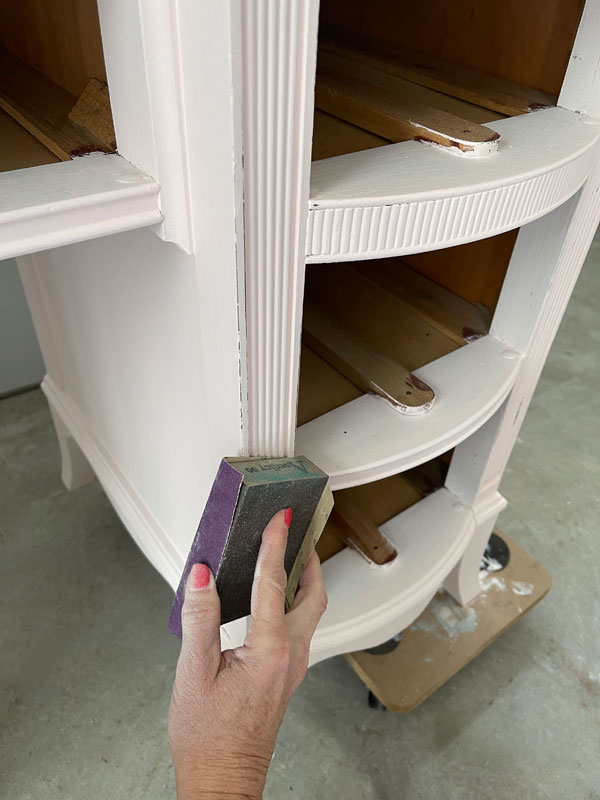
I hit the edges a bit harder to distress this one a bit.
If you prefer no distressing, use these sanding sponges instead to smooth out your finish.
Adding a Transfer
I was excited when we first got this Flower Child Transfer in:
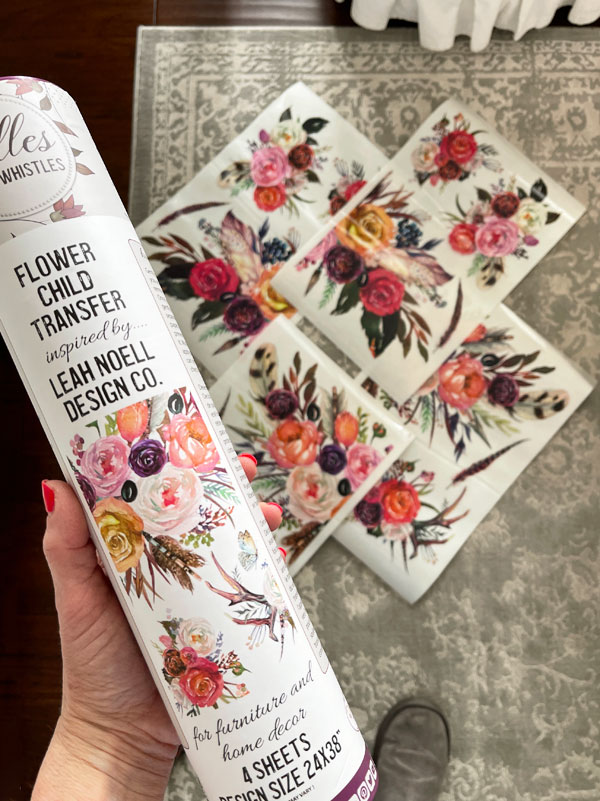
It had a fun Boho vibe that I thought would bring new life to this desk. It has since been discontinued, but I still have a few left HERE.
See all the transfers I have in stock HERE.
I started at the bottom, cutting the transfer with a razor blade so that I could start with just the parts that would be on the drawer front:
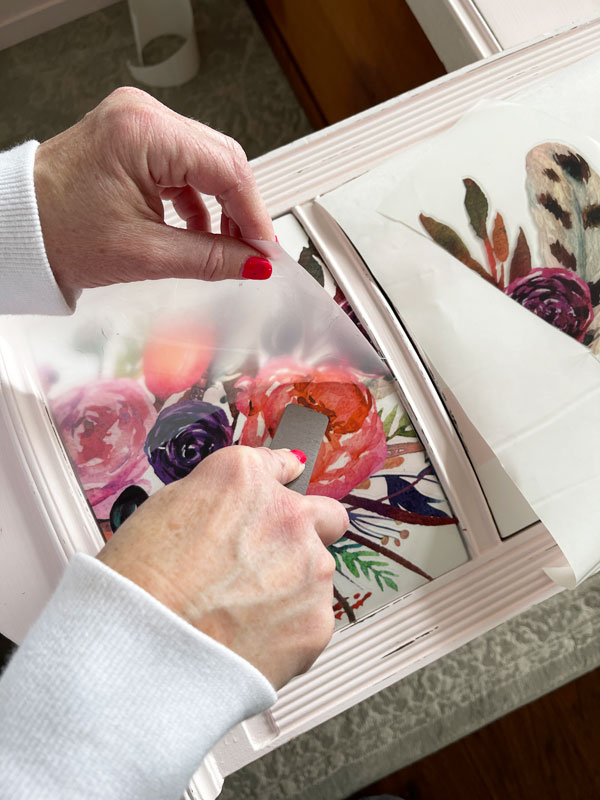
This is the easiest way to apply a transfer…by holding one edge and pulling up as you burnish the transfer to the surface. If any of the transfer sticks to the top clear sheet, just lay it back down and burnish some more.
Then I worked on the rest of this design, working it over the bumps.
It’s easy for it to have a few boo boo areas over these parts:

That actually happened when I ran my razor blade in the crack there…it pulled off some of the transfer. It’s an easy fix if you have scraps.
How to fix the transfer boo boos
To fix that, I took a piece of the transfer that I didn’t plan to use on this piece and cut a few small pieces to match up what was missing along that seam. I just burnished them right over those areas.
Here it is after:

What boo boos?
Finally, once the transfer was in place, I used a finishing pad to make sure the transfer was adhered well all over:
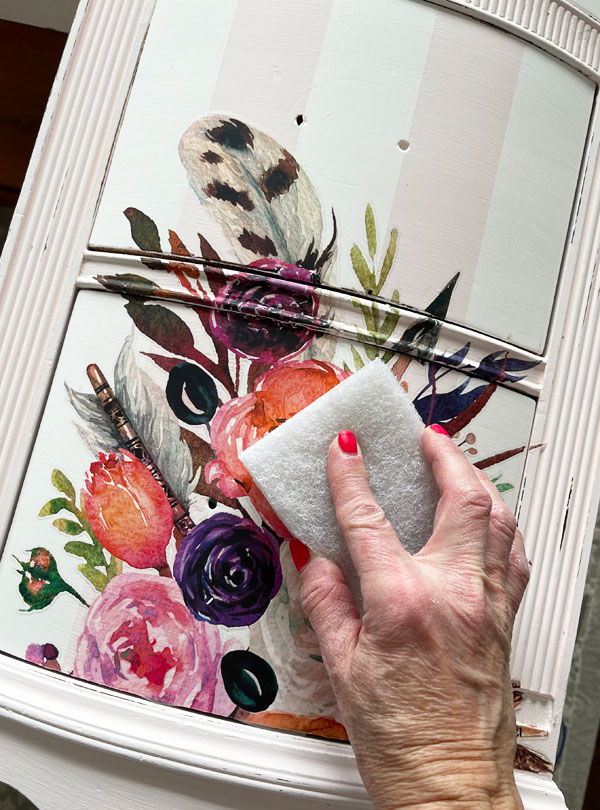
The pads I have in my Etsy shop are large at 4X6 each. I cut them in two and it gives me two pads. You can run a soft cloth over them as well. You just want to make sure they’re well-adhered all over.
Seal
The final step is to seal to protect your piece.
I used Clear Coat in Satin, applied with the blue sponge applicator:
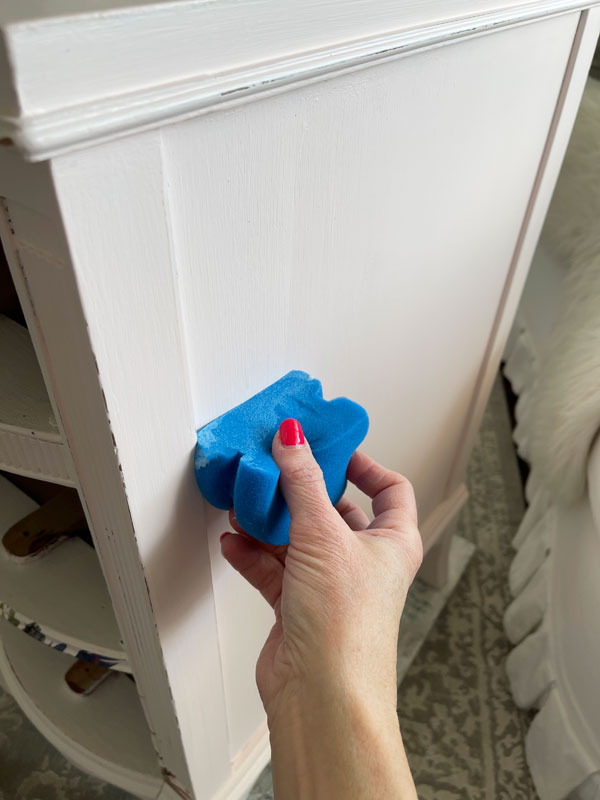
I cut my sponges just enough to give them a flat edge so I can get it flush with the lip of the top of the dresser. It works so well!
Everything got two coats.
You can see how I apply sealer with a sponge in this video:
If you have trouble viewing, find it on YouTube HERE.
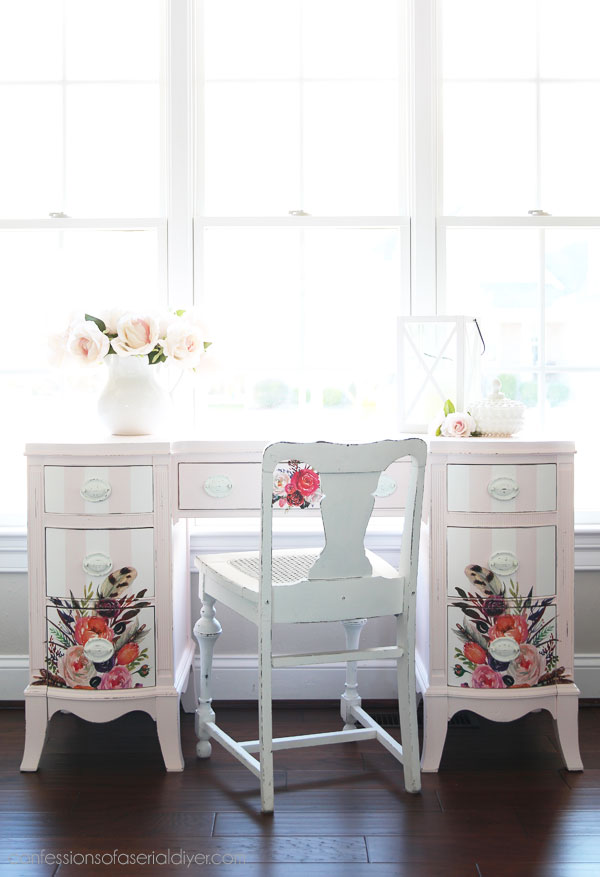
The After
Here is how this little lady turned out!

I chose this soft Pink Champagne color because the floral transfer I chose had a large pale pink flower in it, but it was really hard to settle on a base color!
But wait…what about a chair?
I shared this on my blog with this white chair I redid and kept for staging:
But guess what I found at the thrift store the very same day I shared this makeover?
I found piece #2
Piece number two and what would become a super cute match to this dressing table, is this bench I picked up for $6.98:

Honestly, I feel like they had a lot of nerve asking that for this piece, but I like to sell dressing tables in sets and I knew this would be a great match!
Let’s jump to the after, shall we?
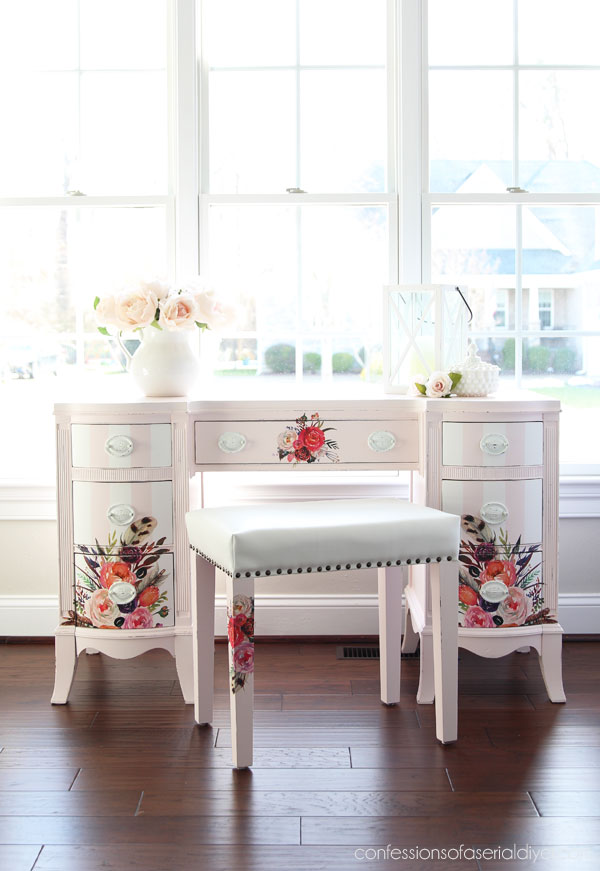
Painted Dressing Table and Stool Makeover Reveal
Here they are together:

How cute is that stool with this dressing table??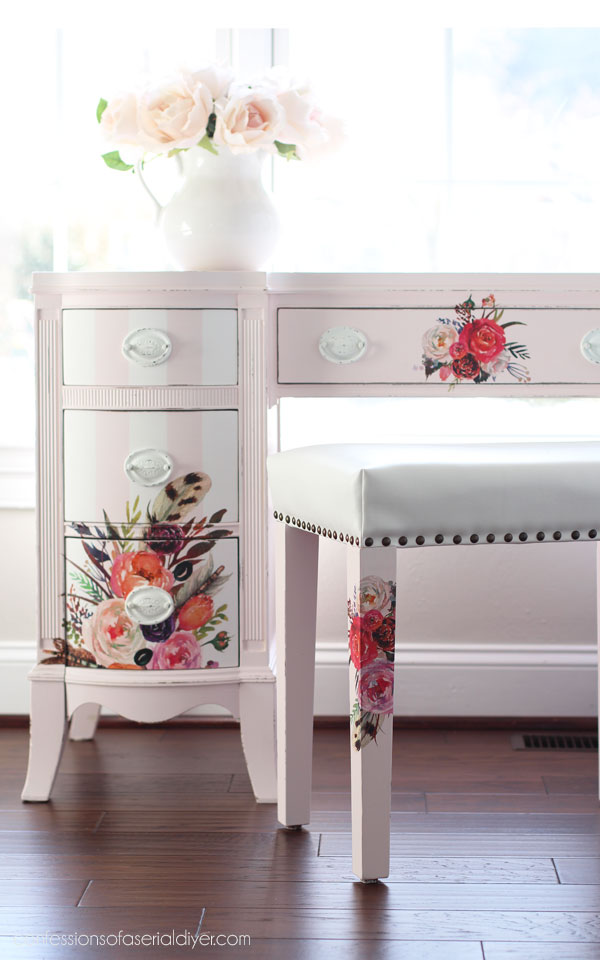
I’m not going to share the whole how-I-did-it for the stool because this post would be way too long, but…
You can see how I redid this stool step-by-step here!
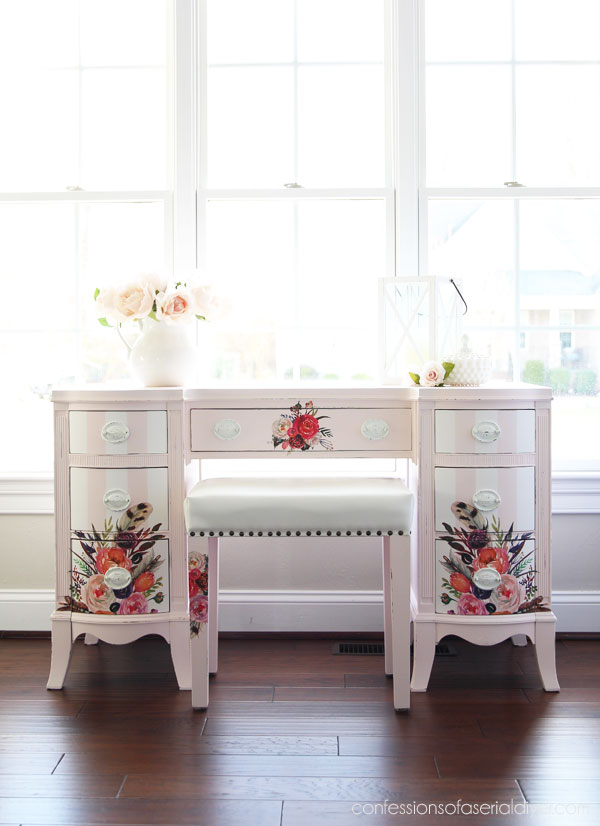
This set has so much personality now!

I really wanted to keep going and adding more transfers, but I had to stop myself…
The drawers
I like to give the insides of the drawers some love too.
I chose to paint the smaller drawers on either side in the pink:
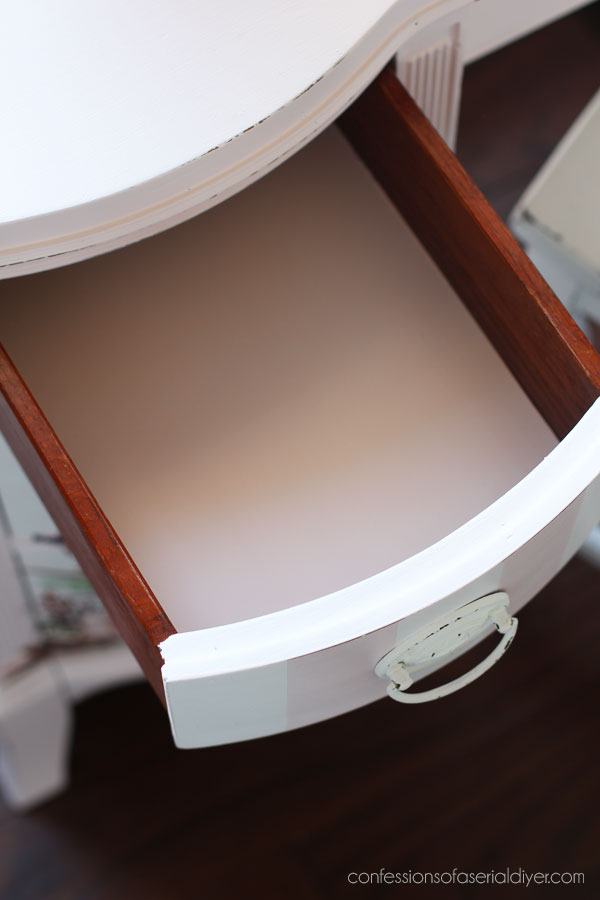
I taped them off all around the edge with FrogTape to get a nice, crisp line.
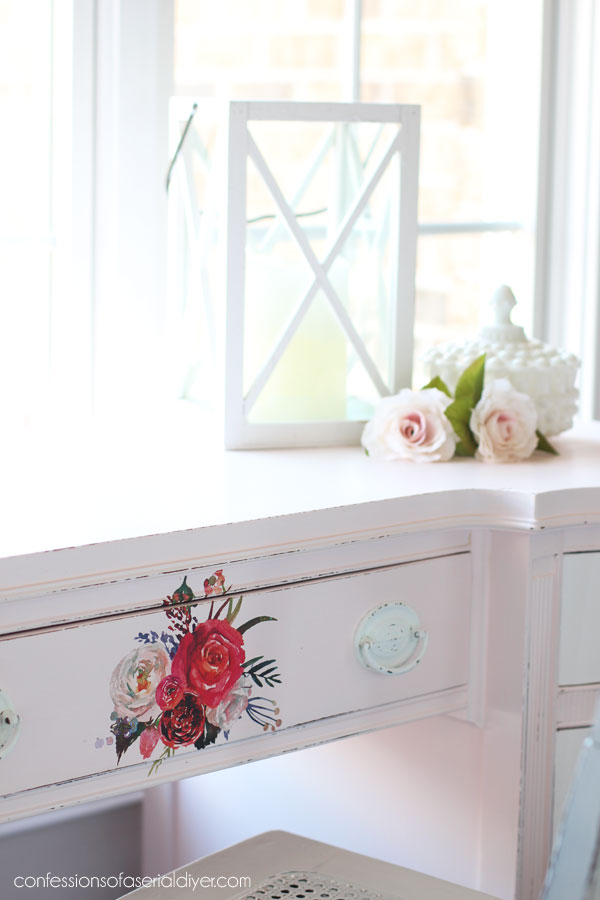
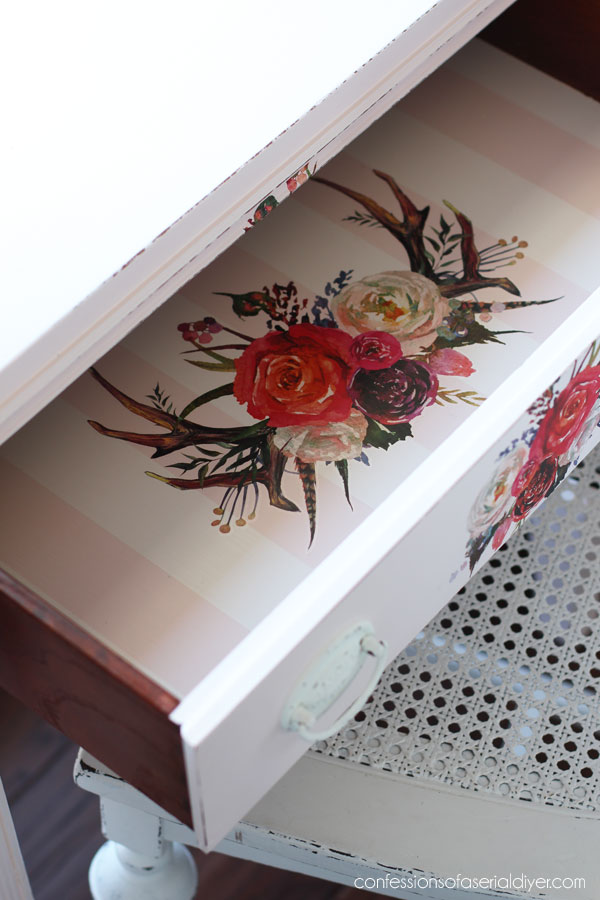
The drawer front in the center I kept solid on the outside instead of adding stripes, but I chose instead to add them to the inside!
I then added another piece of transfer!
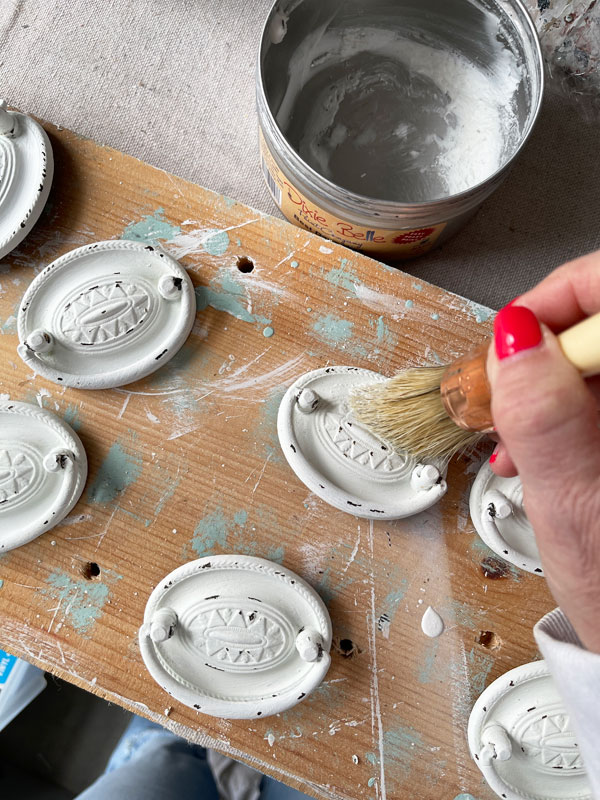
The Hardware
I love when I can reuse the original hardware. I chose to keep these pulls as I really like this style.
They got a couple of coats of Cotton white paint using my French Tip brush to get into all the details more easily:
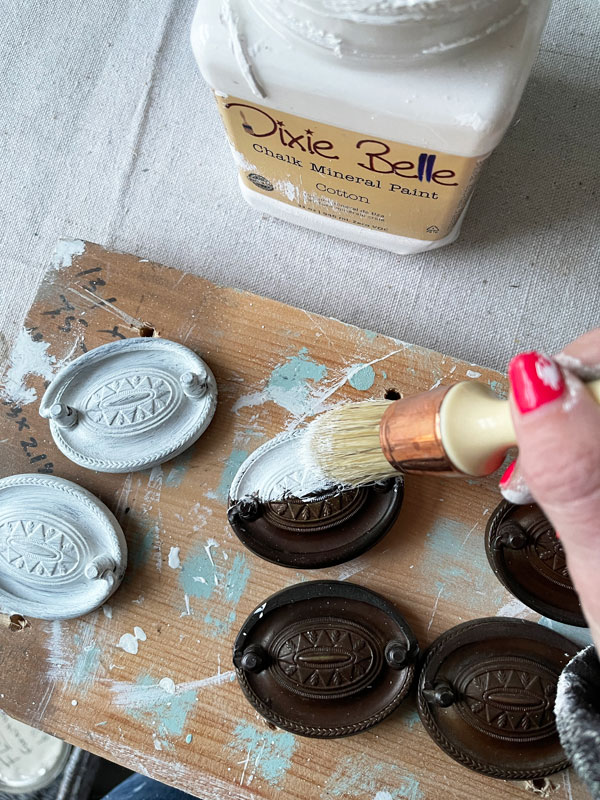
Then I used my nail to remove some of the paint here and there and shabby them up just a bit.
I sealed with Best Dang Wax in Clear using my French Tip brush once again to apply the wax.
Any excess wax was buffed away with a soft cloth.

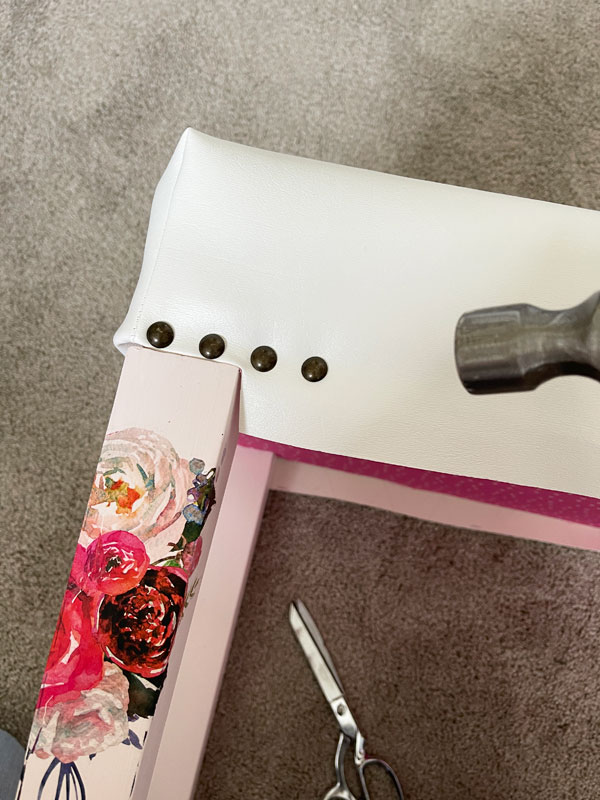
The stool
The fabric on the stool was removed and replaced with white vinyl:
Again, you can see this whole stool makeover HERE if you like.
The transfer on just one leg was a fun addition to tie it to the dressing table:
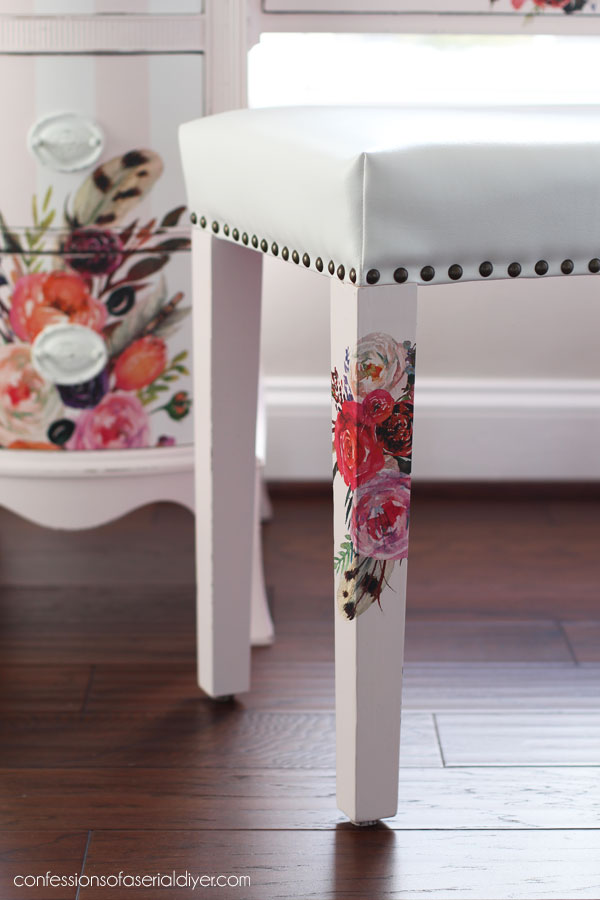
This was such a fun set to work on!

Here’s another very similar dressing table you might enjoy too:

See how I redid this one HERE.
I’m hoping to be back with this desk from my yard sale haul on Tuesday:

UPDATE: You won’t believe how this desk turned out! See it HERE now!!
Have a fantastic weekend!!
XOXO,

Don’t Miss a Thing!
If you like what you see, there are several ways to follow along!
EMAIL * INSTAGRAM * FACEBOOK * PINTEREST


Mary Kasier says
Oh I remember how sweet that desk and stool turned out! The handles on the desk your doing on Tuesday look like the same ones as that desk. I love that style of handles on desk and dressers, especially when you paint them.
Christy says
Yes! I love that style of handle also and almost always keep them! I hope you have a wonderful weekend, my friend! XOXO
Gail L Martin says
I do not think this is a dressing table unless the middle top lifts up. My grandmother had a desk just like this. She did all her correspondence here(letter writing), paid bills, etc. She had this for years. You have taken this to the next level. Great job!
Christy says
Thank you, Gail! It did have a mirror attached that the previous owner was going to keep but later passed along to me. It would work nicely for either purpose though! XOXO
Joanne says
OH MY Gosh! That is SO adorable! Wish I could buy both, even tho I have no place to put them! Just love both pieces!
Christy says
Thank you so much, Joanne! It is such a fun set! They ended up selling to a sweet young lady! XOXO
Connie says
Well darling girl you’ve done it again! Maybe the most beautiful desk you have ever done just glorious♥️. Sending love from Whidbey Island Washington
Christy says
Aww thank you, Connie! This one was so fun to work on! Enjoy those Whidbey Island breezes! XOXO
Fran says
While pink is not my favorite color, you really made me like it with this dressing table. I am a fan of this era style desk and the kidney shaped ones. The bench is a bonus! This won’t be in your shop for long!
Christy says
Oh good, Fran, I’m so glad you like the pink on this one! I love this style too! Thank you! XOXO
Rebecca says
GORGEOUS
Christy says
Thank you, Rebecca! XOXO
rachel says
Wow! Both pieces turned out lovely! I literally just got home from a furniture haul. We ended up getting an antique desk with amazing detail pieces and gorgeous hardware in excellent shape at Habitat. They are having a sale so got it for $113. We also picked up an antique dress with amazing detail pieces, a small Eastlake rocking chair and a nightstand all for $130. Not too shabby!
Christy says
Thank you, Rachel! Wow, it sounds like you scored big time!! I haven’t been to habitat in a while… I need to go! Enjoy!! XOXO
Ava says
Hi, I follow your makeovers regularly and enjoy seeing the transformations.
I’m curious on the cleaning instructions for pieces after your changes. What is the best way to clean these furniture pieces with paint and transfers? Just a damp cloth or sponge?
Christy says
Hi Ava! Thank you! A damp cloth every once in a while and just a swiffer duster in between works great, although, you could probably use just about any cleaner once the paint and sealer have fully cured, after about a month. XOXO
Michele M. says
Oh, Christy! It is absolutely gorgeous!!!!!
Christy says
Thank you so much, Michele! XOXO
Petra says
Such lovely details on the dressing table before and after your painting. Very cute and methinks an heirloom piece for a little girl ????
Christy says
Thank you, Petra! This was a lovely piece even before…and yes!! XOXO
Cheryl B Acampora says
Girl, You are gonna make me sell my house and buy a bigger one! I just love everything you do…….but u probably already know that! It’s just turned out so beautiful!!
Christy says
Aww you are so funny! Thank you so much, my friend!! XOXO
Diane says
You always do such good work. I’m just not a fan of this particular rub-on, as I think it is too bright and strong for the pale color/stripes. Something more delicate and pastel would be more to my taste.
Christy says
Thank you so much, Diane! This design is one I would not normally be drawn to either, so I get it, but it did sell pretty quickly! XOXO
Sherry Pelle says
Hi Christy! My name is Sherry and I‘ve been following you for sometime now and I really like the work that you do on here. I’ve been wanting to paint three pieces of furniture for sometime now but I’m not familiar enough with the products you use to decide on what I need to paint and finish the furniture. Could you please email me that information? Thank you so much!
Christy says
Hi Sherry! Thank you! Here is a post you should find helpful: https://www.confessionsofaserialdiyer.com/the-best-way-to-paint-furniture-white/ It is my tutorial for painting furniture white, but it can be used for any color of furniture and links to all the steps and products I use, plus has two helpful videos. XOXO