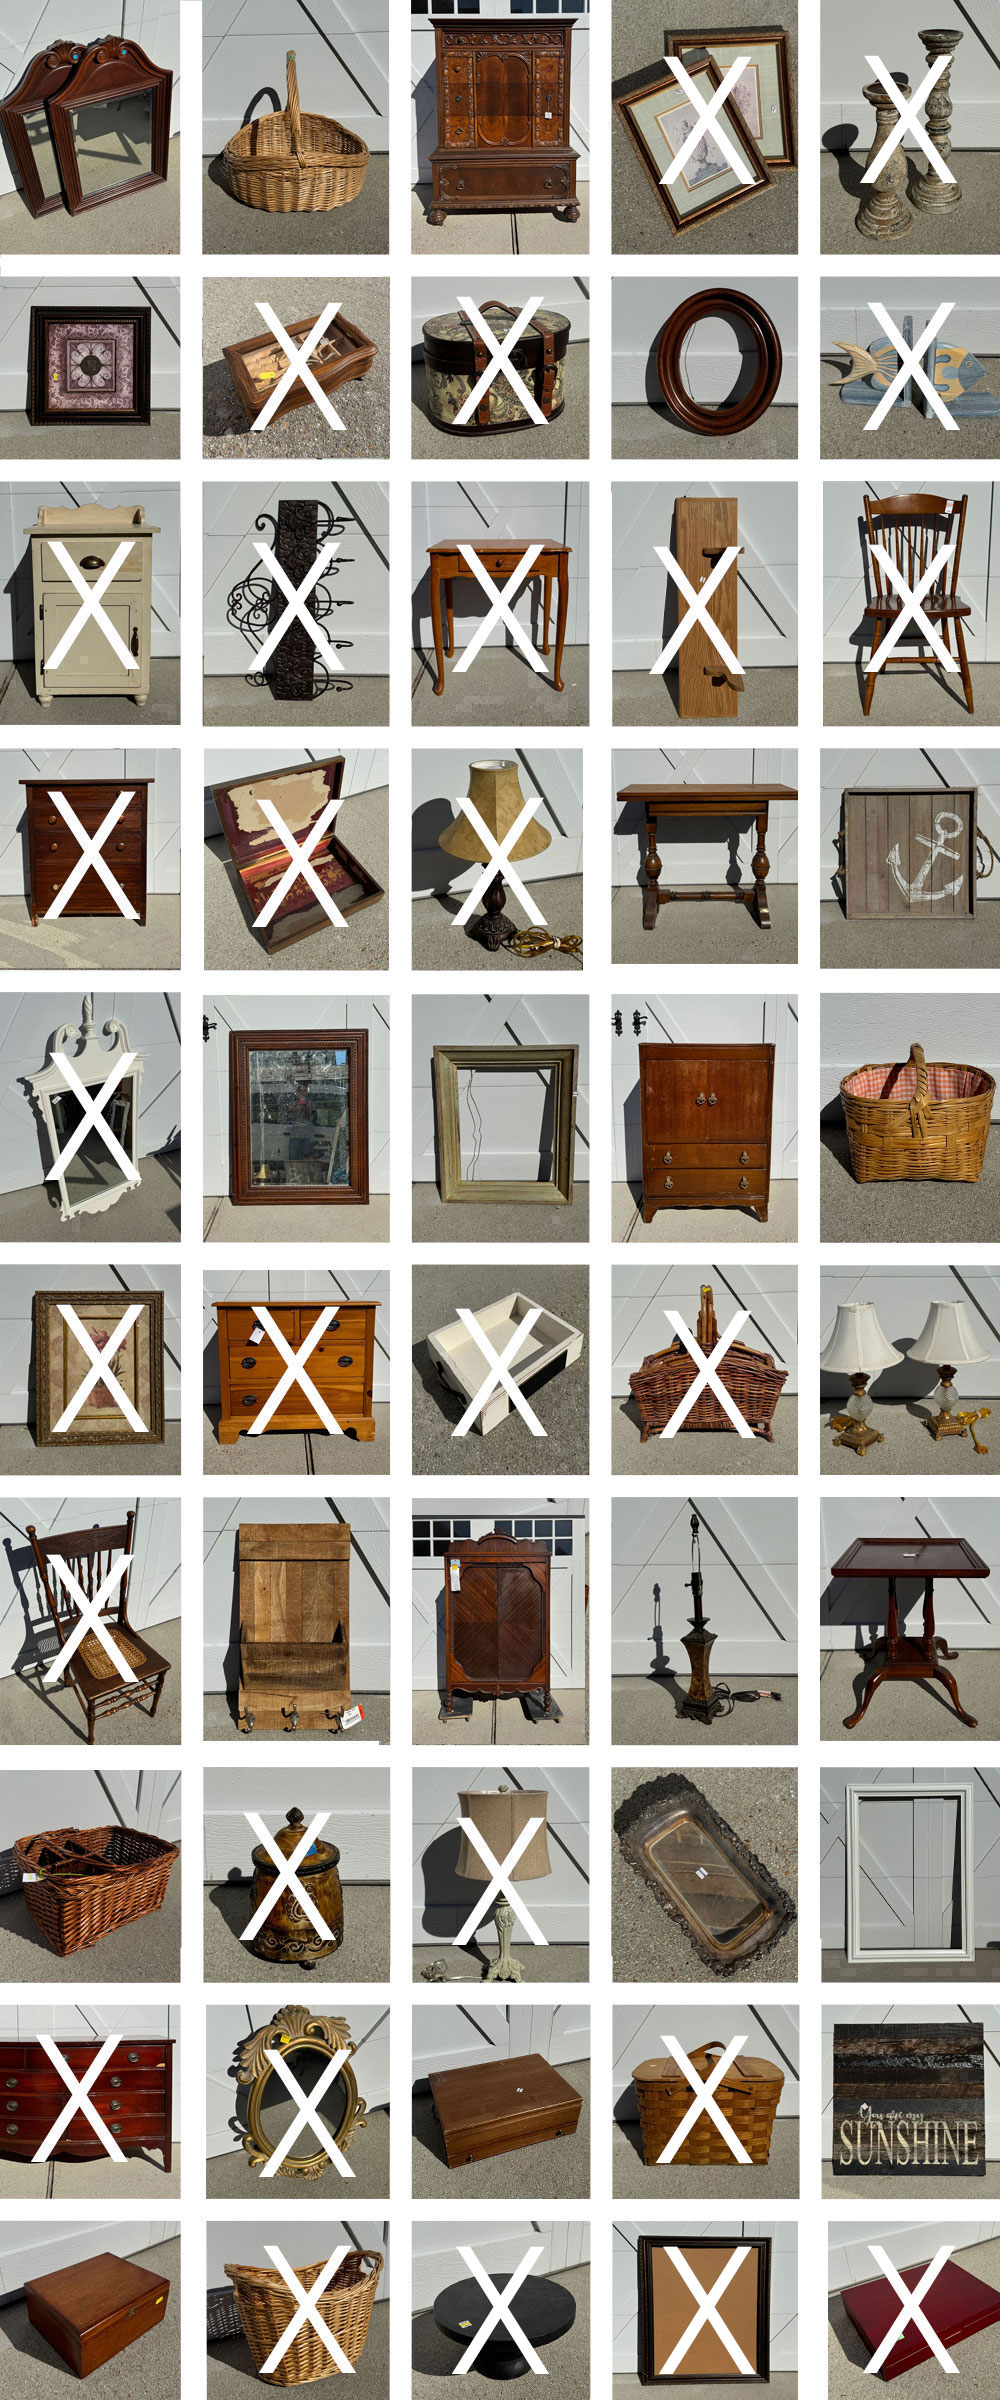
Hello, sweet friends! Can you believe this is my 40th Painting the Smalls post?? That’s 240 smalls!! Today, I have what’s left of this grouping:
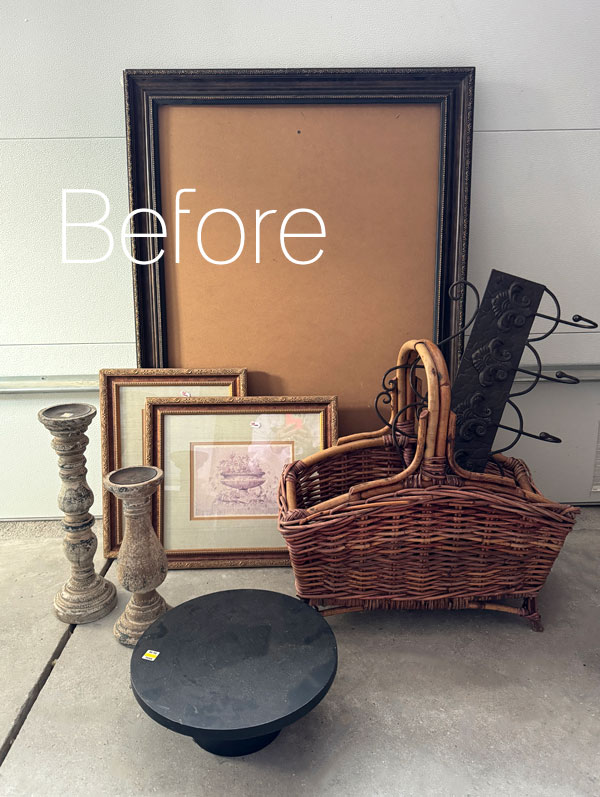
I already shared the frames redone HERE if you missed them!
The weather when I took those photos was so gloomy and my photos were so dark that I just did not want to take all the photos that day. Luckily, my photos actually looked pretty decent after editing, but the rest of this group got a bright and sunny day, and they look so much better that way!
I’ve included a few affiliate links so you can find the products I love.
Let’s get to it shall we??
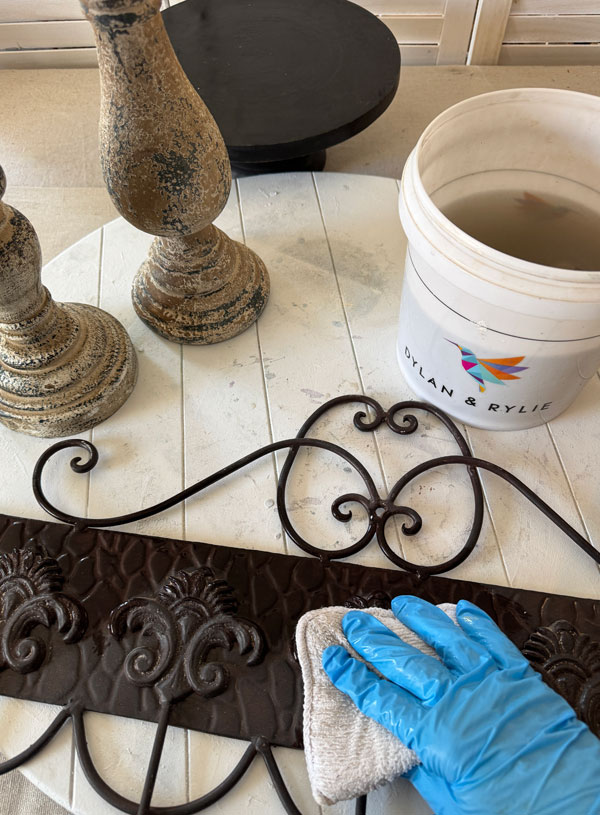
Clean
Aside from the basket, everything else got cleaned with White Lightning using one of these terrycloth applicator pads which are perfect for this step!
Mini Makeover #1
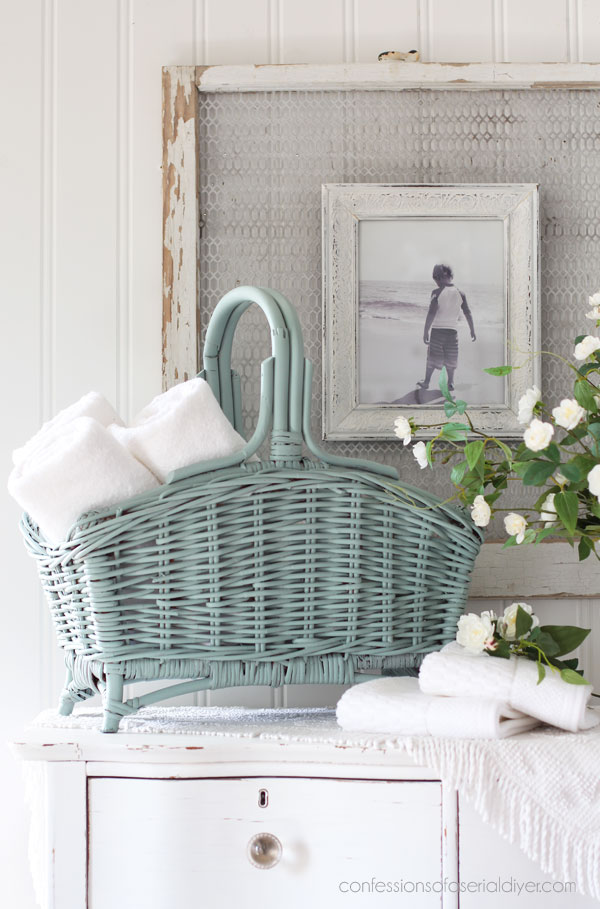
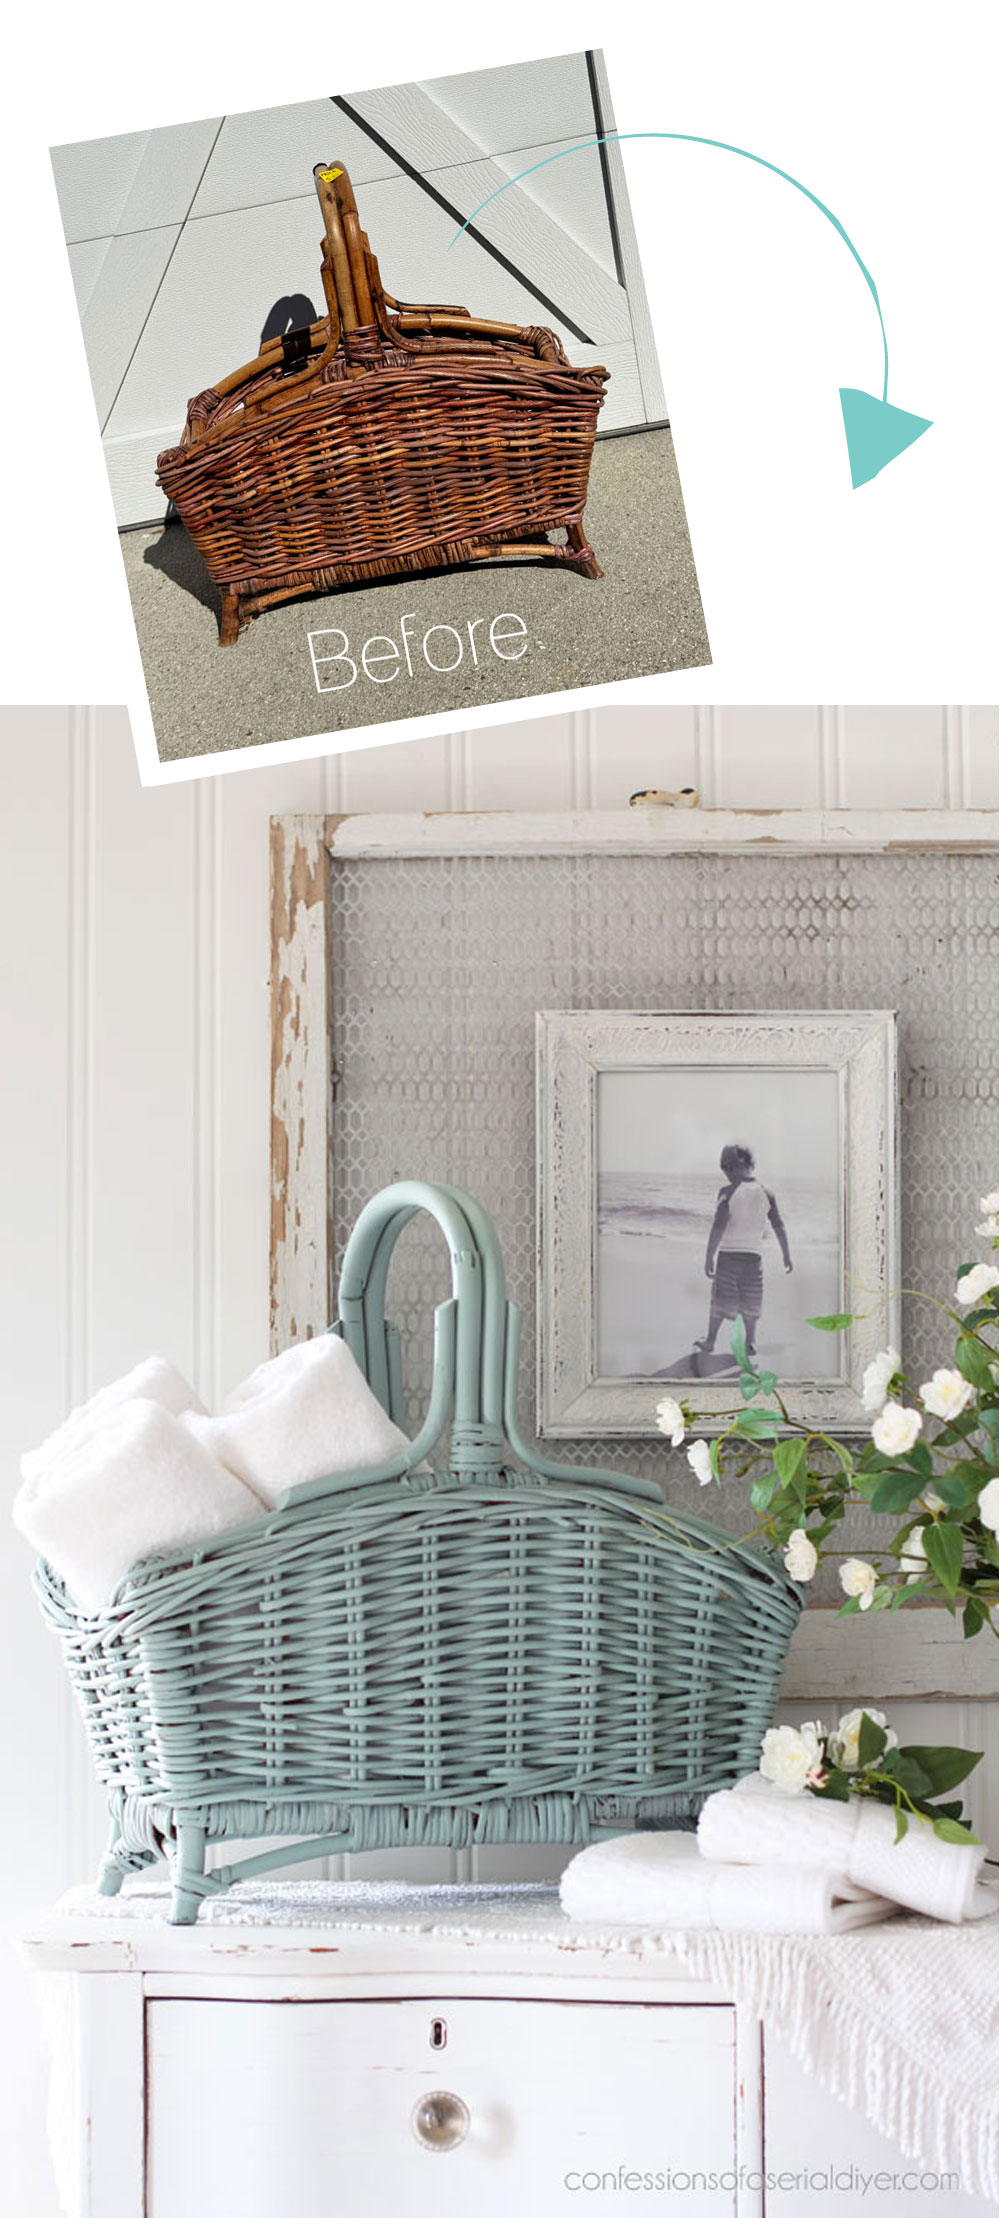
Up first is this large basket I picked up at a yard sale for $10:
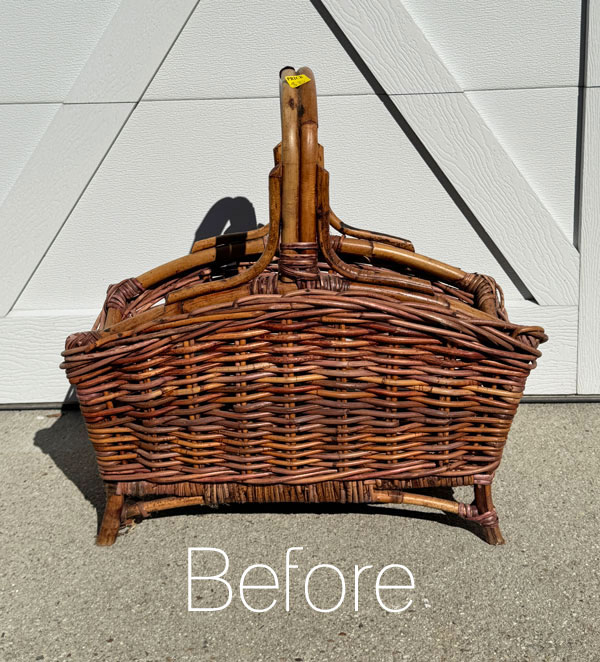
That was a bit more than I wanted to spend, but it was a solid basket, and I loved the large size of it.
To clean baskets, I usually just give them a good vacuum with my shop vac and get right to painting!
Paint
I’ve painted several large baskets for my booth, and whenever I paint them in a shade of blue, even if they start out ugly, they sell almost right away like this one HERE and HERE and also HERE!
I feel like I had to paint this one blue too, and that is what I did:
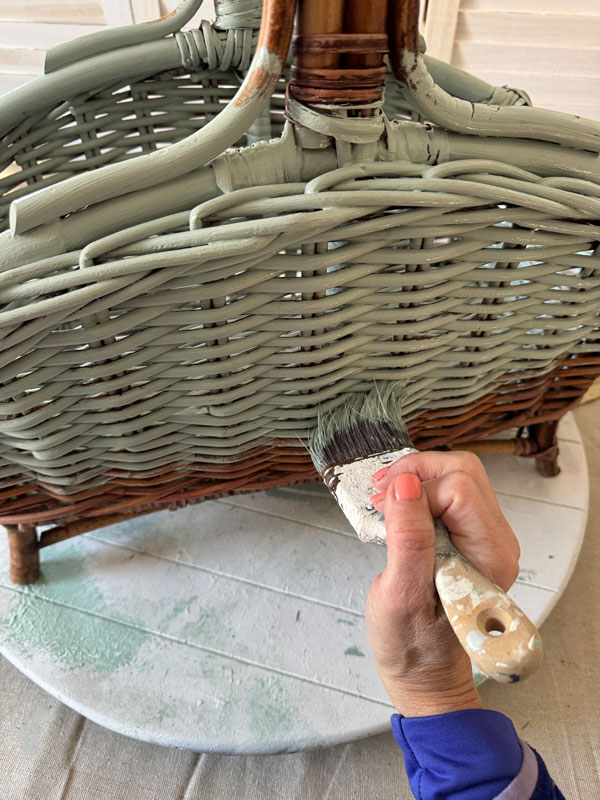
This is a mix of equal parts of Vintage Duck Egg Blue, Sea Glass, and Cotton to get the perfect beachy blue! I used it on this chair recently too!
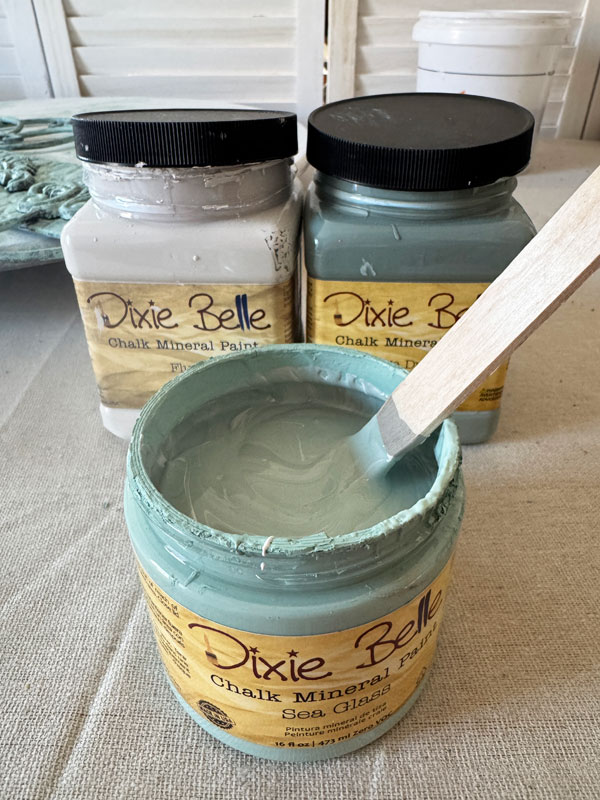
I usually use my Best Dang Brush to paint baskets, but the deeper grooves on this one needed a thinner brush to get to all the parts!
After a light sanding all over, to seal, I gave it a good spray of Rustoleum Clear Satin spray and this makeover was complete!

Mini Makeover #1 After
Much better!
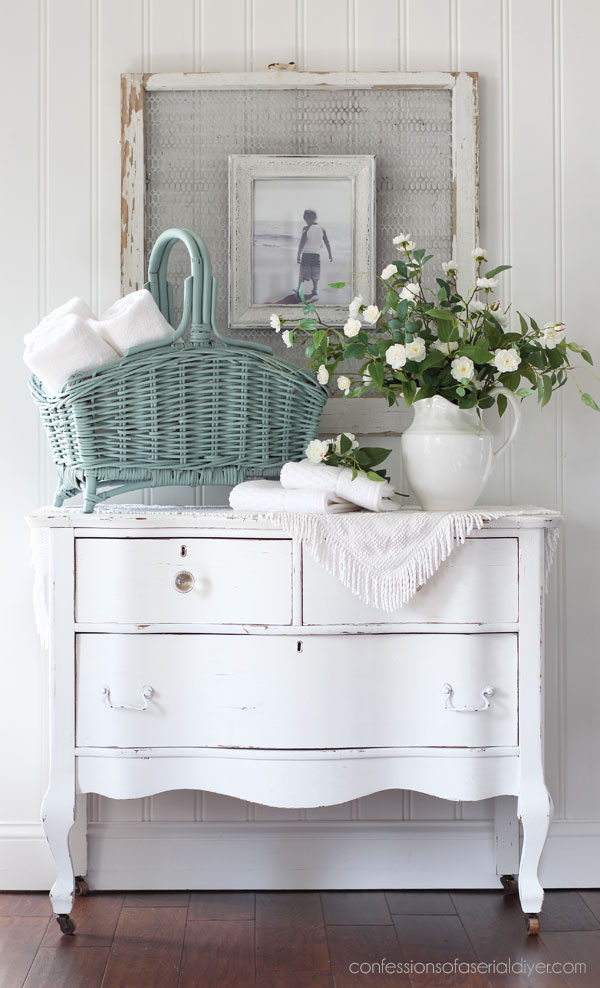
I love this basket! I don’t have a need for one anywhere in my home, but I wish I did!
I pounced my brush into the deeper spots to get good coverage…
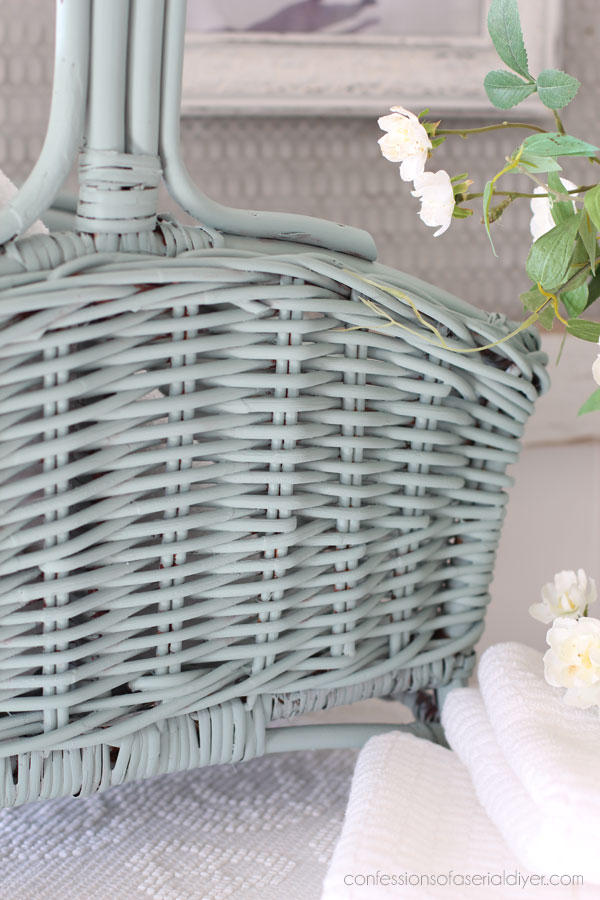
I used an older brush for that.
It’s definitely worth the $10 I paid for it now!
Mini Makeover #2
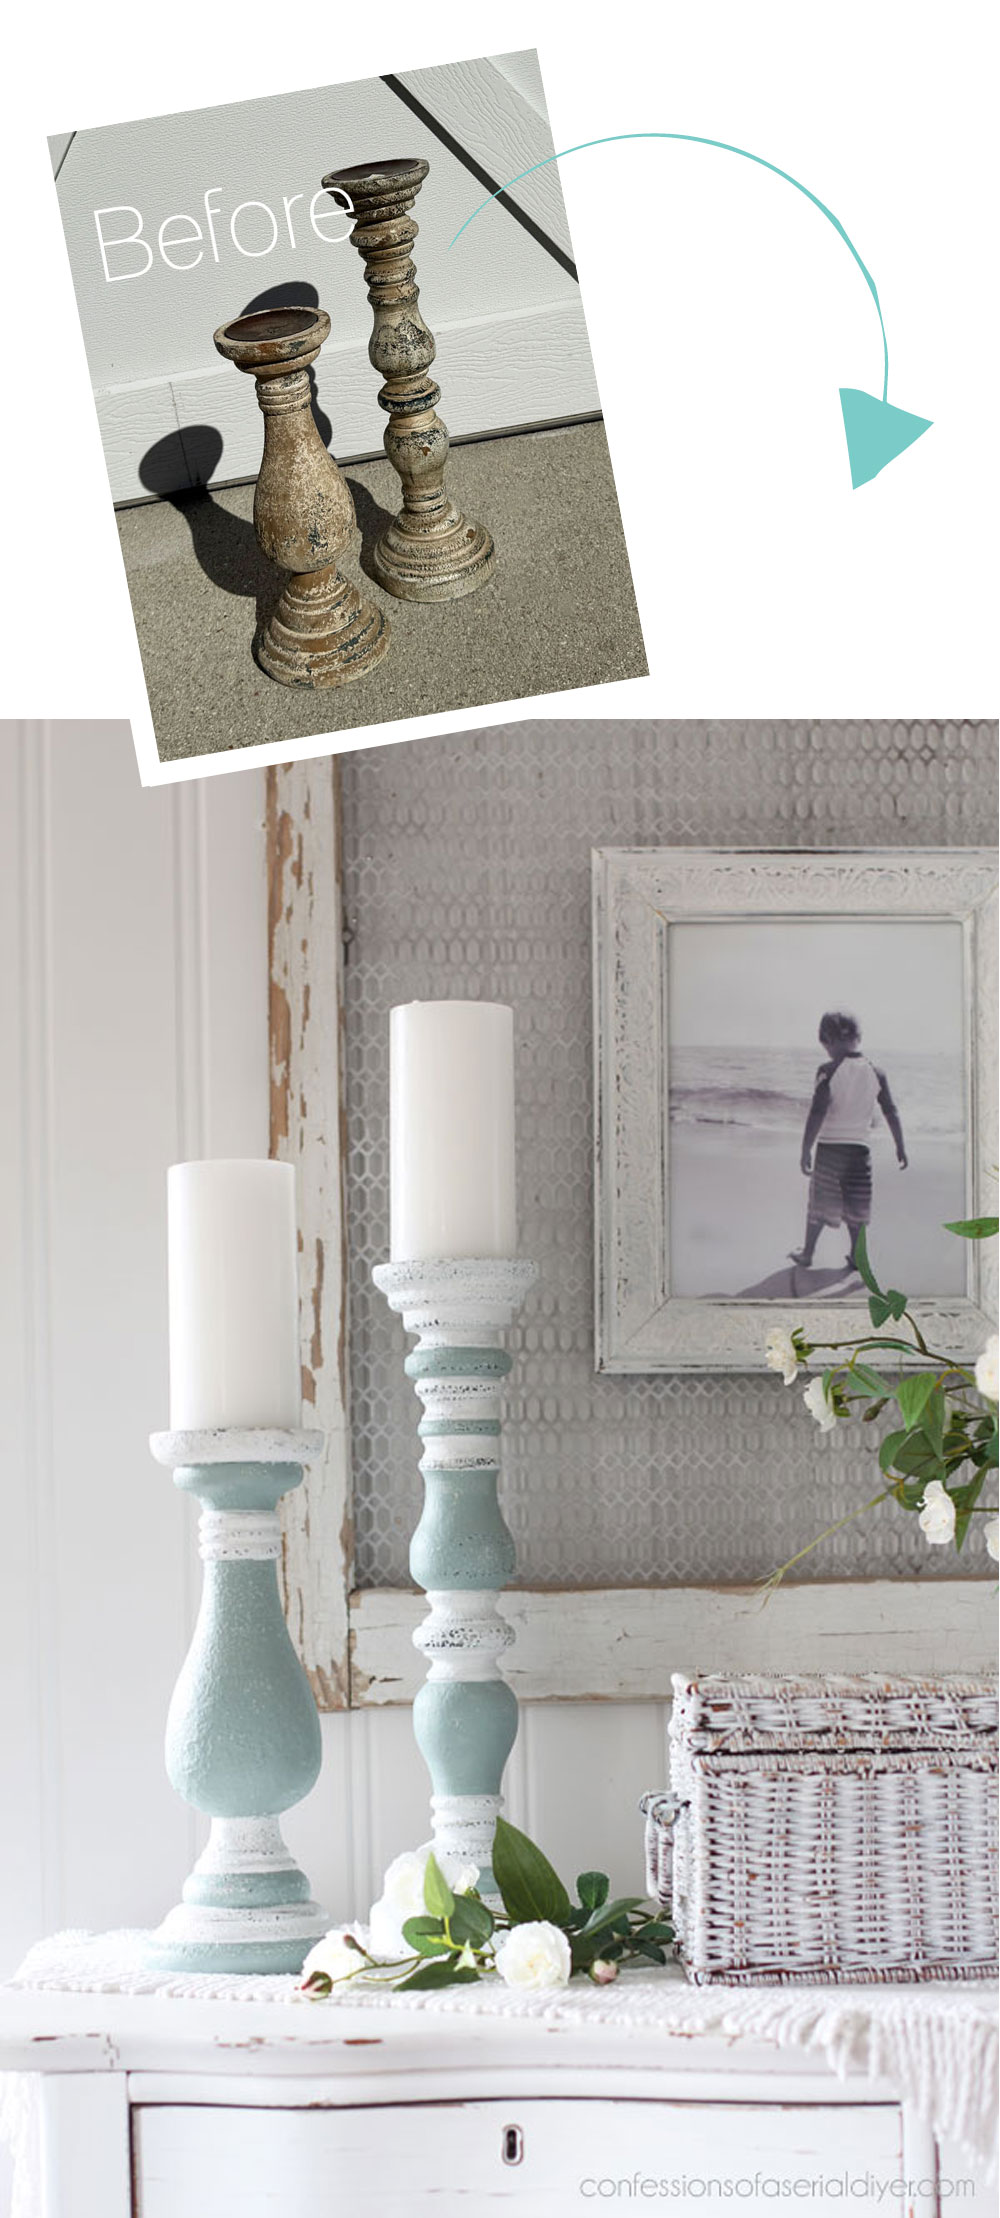
Up next is this set of candle holders I found for $8.99 for the set:
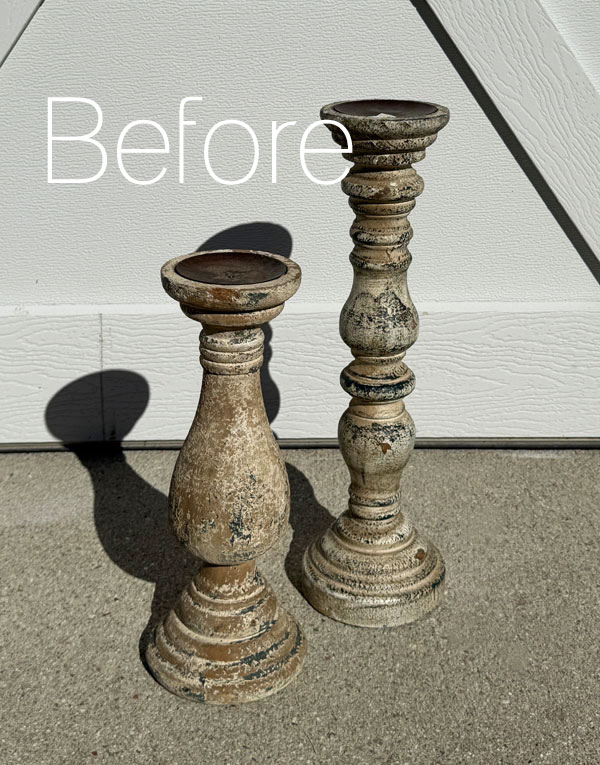
A bit steep and they were very rustic…a bit too rustic for my taste, but nothing a little paint couldn’t fix!
Paint
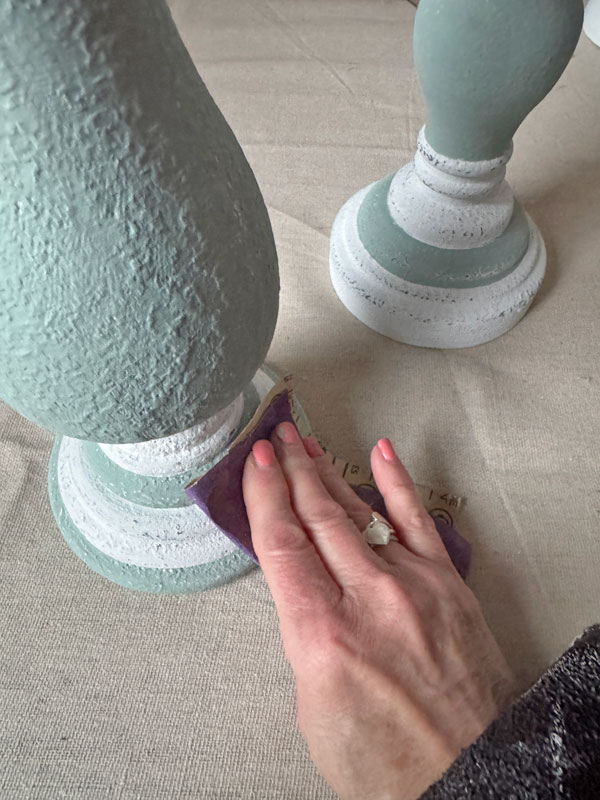
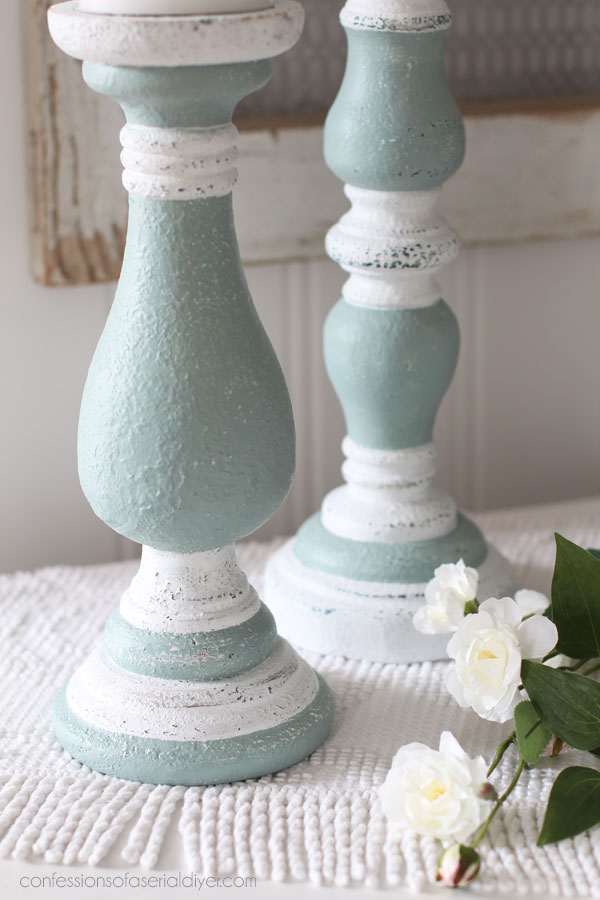
I painted them first in two coats of Cotton and then came in with my new beachy blue custom mix:

I then sanded to bring some of that texture back…
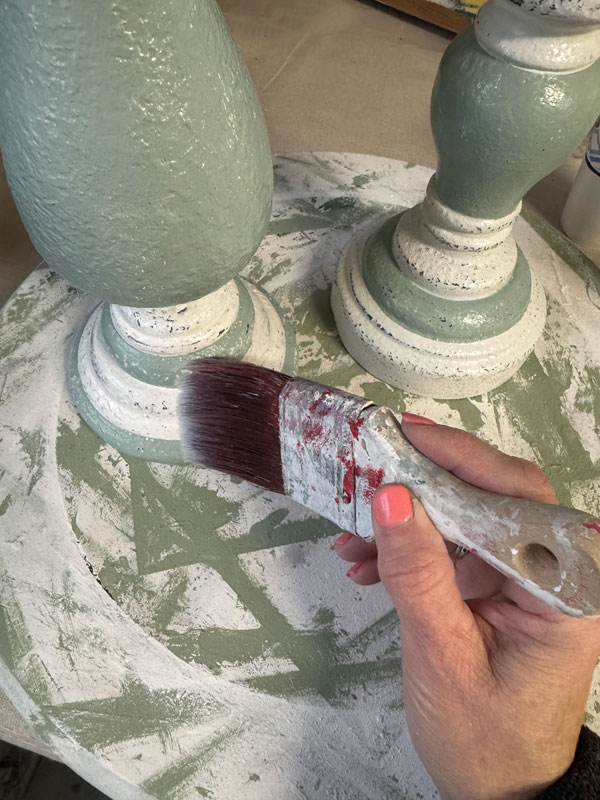
And sealed with Clear Coat in satin uisng a brush since they were so textured:
Mini Makeover #2 After
Here is how they look now:

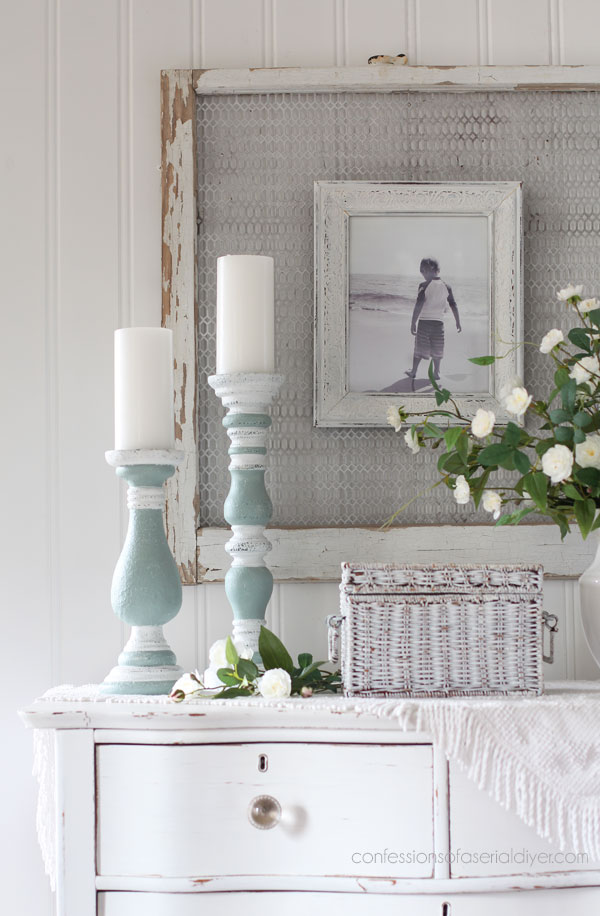
Y’all know I love a coastal look, but they really do look so much better!
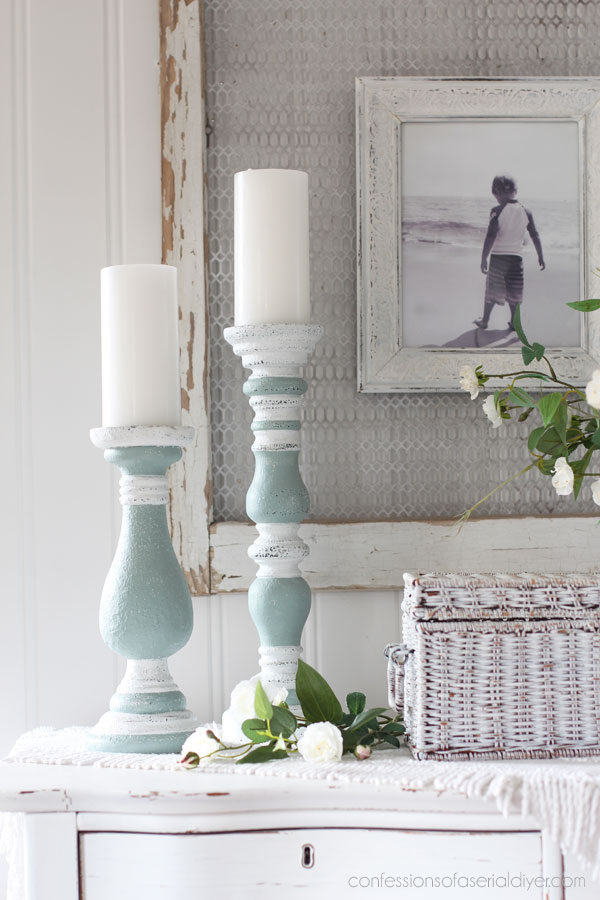
And I love the texture after sanding:
And again, $8.99 wasn’t bad at all for these now!
Mini Makeover #3
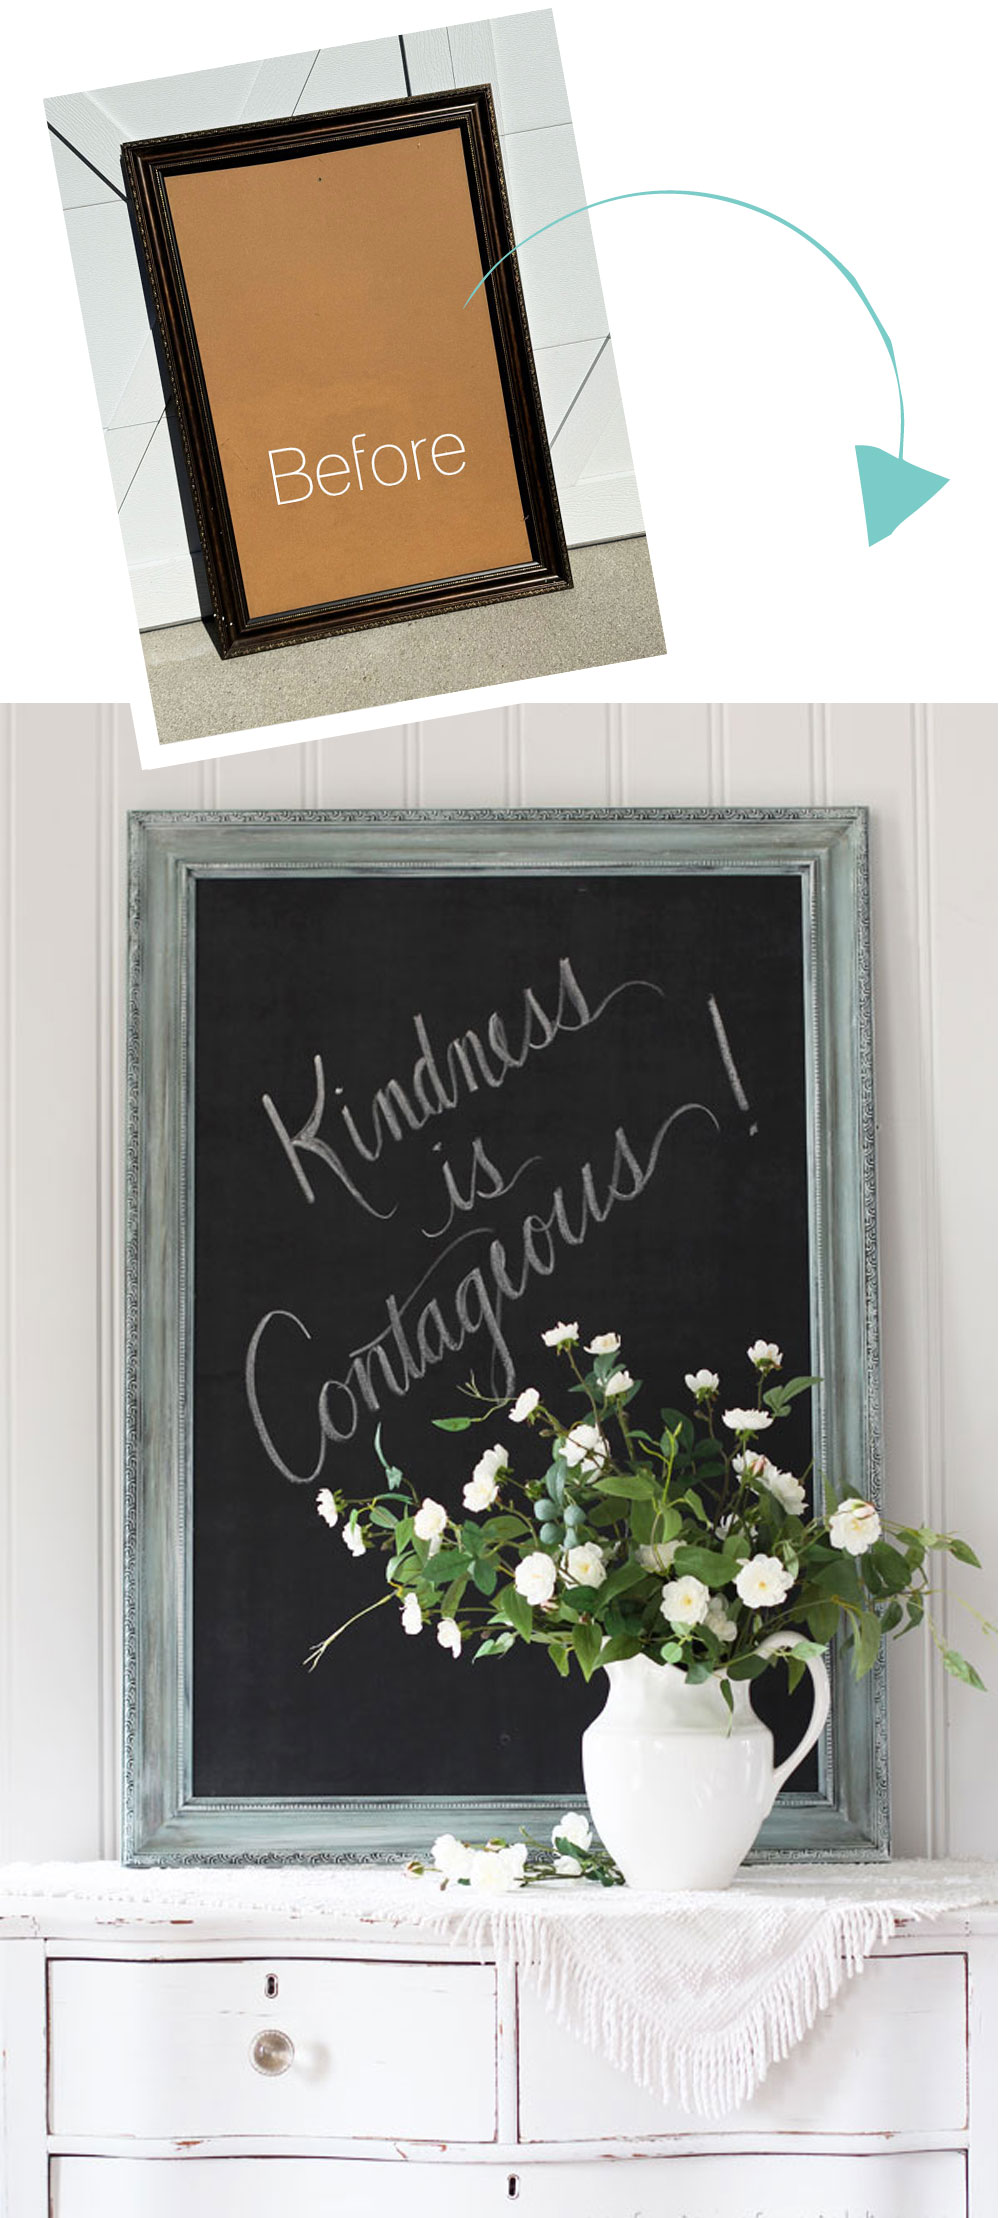
Next up is this giant frame I picked up at a yard sale for all of $2:
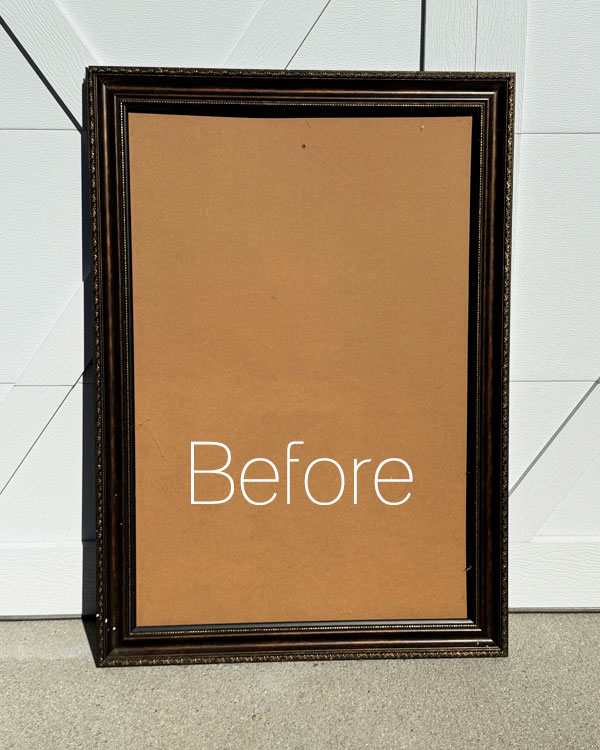
I knew when I bought it that it would likely end up a giant chalkboard, but first I had to paint the frame.
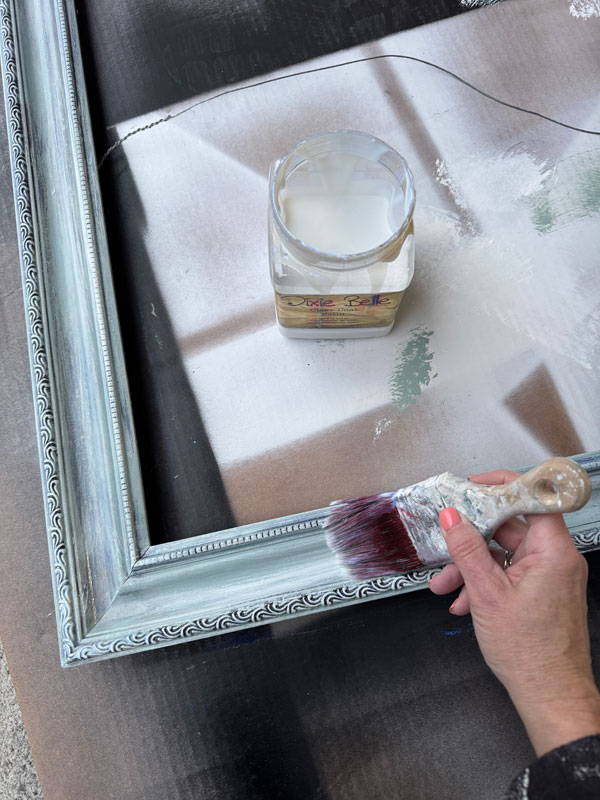
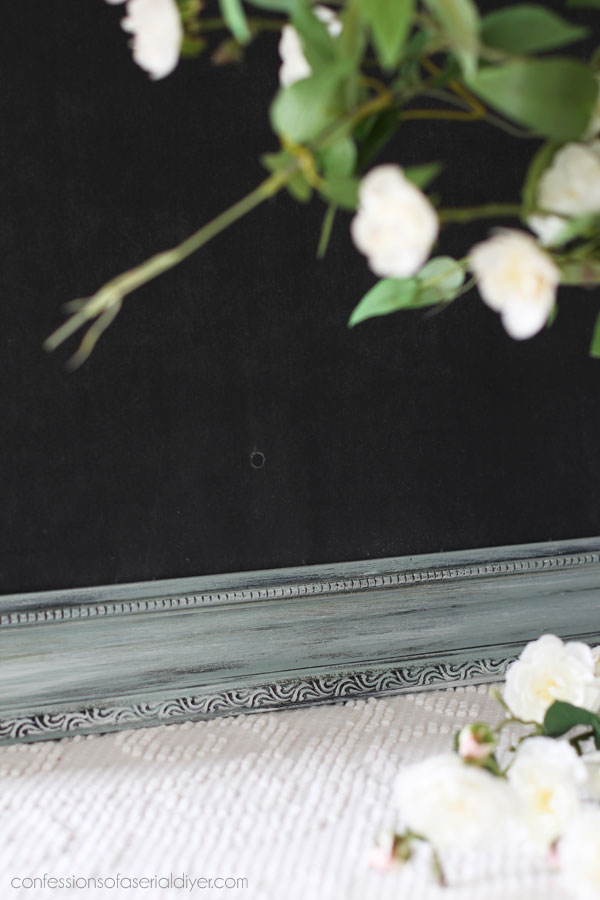
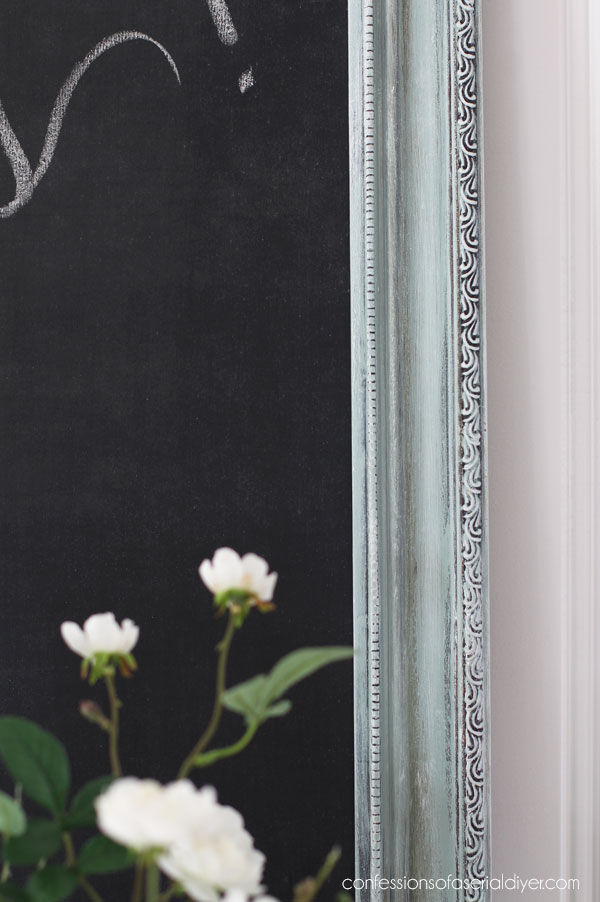
I ended up layering our new blue with white, leaving some areas unpainted to get a worn, coastal feel:
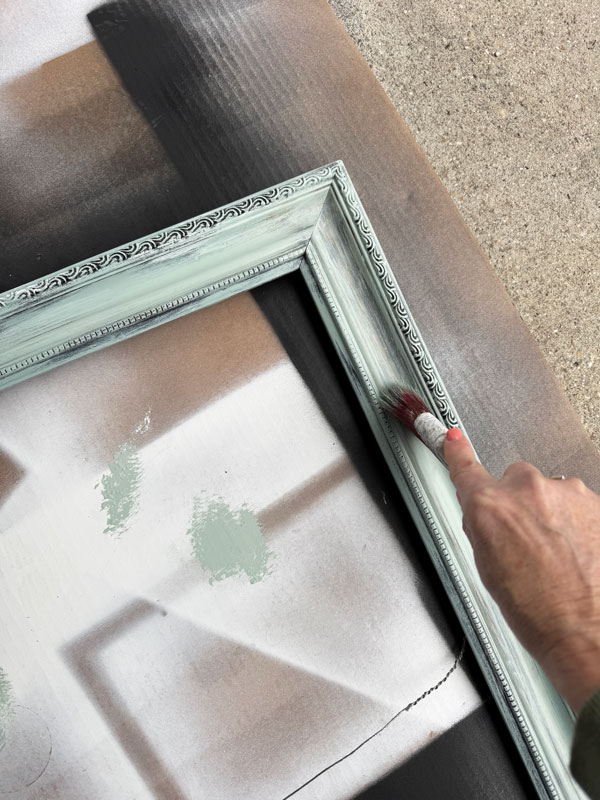
I then sealed with Clear Coat in satin, applying it with the brush also since I already had it out:
Making the Chalkbaord
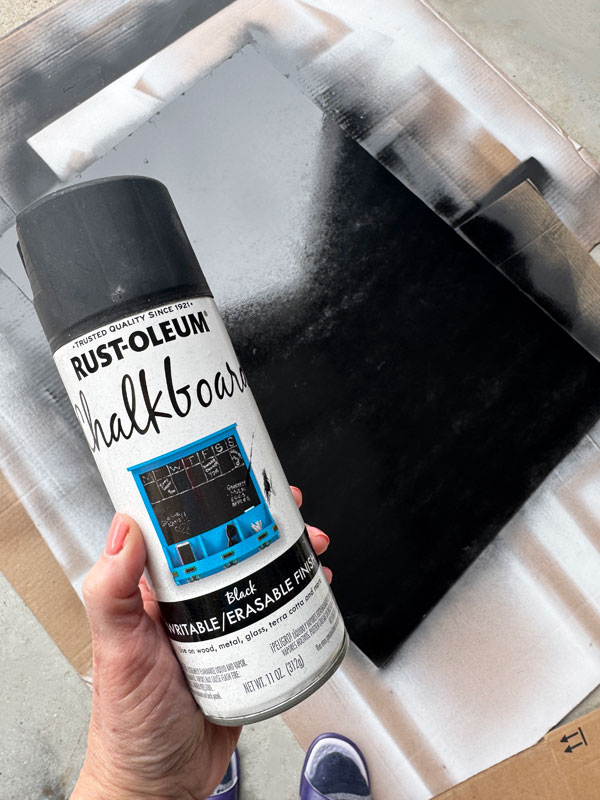
The board that was already in this frame was hardboard which is what I buy to make my chalkboards, so it just made sense to make this one a chalkboard too!
I like the Rustoleum Chalkboard Spray Paint for this, and gave it two coats, applying it vertically, and then horizontally:
Once it was dry, I needed to season it so the first thing that was written on supposedly it wouldn’t be “burned” into the surface. I’ve actually never tested this lol.
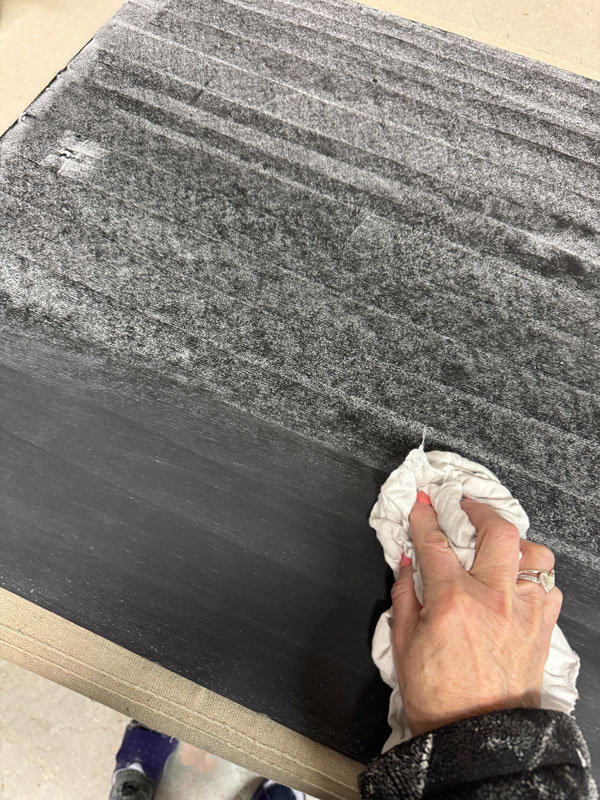
I applied the chalk to the surface all over:
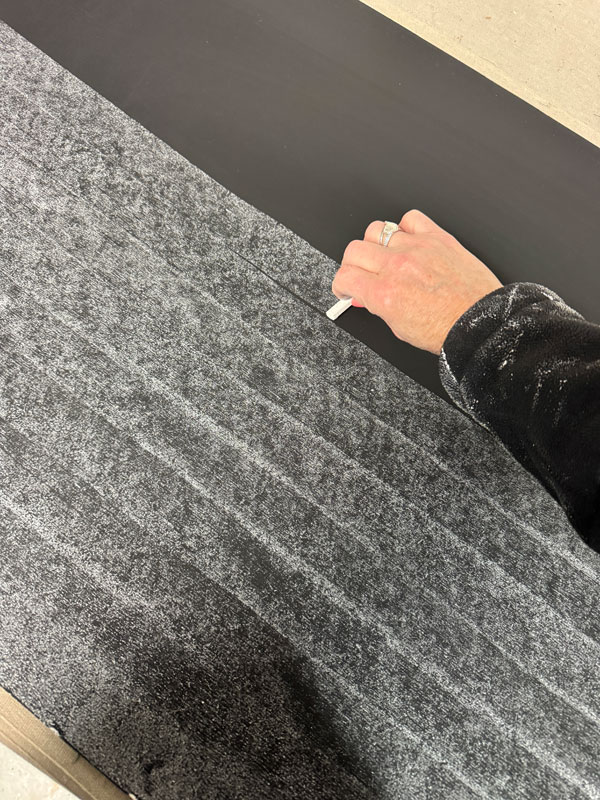
Then I removed the chalk using a clean, soft cloth:
I used my Logan Point Driver to secure it back into the frame, and this makeover was complete!
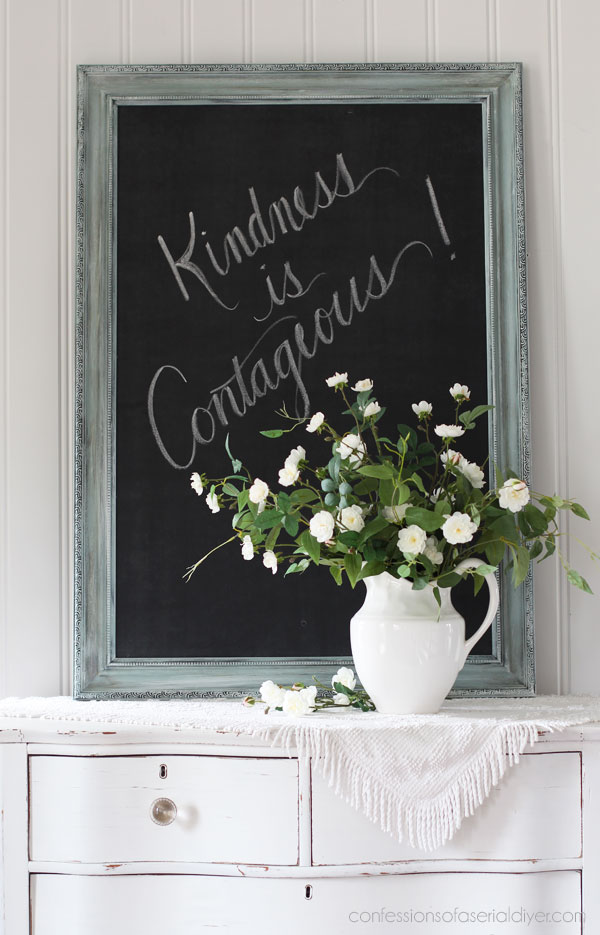
Mini Makeover #3 After
This is one very large chalkboard!

We have one in our kitchen that we still use all the time!
Here’s a closer look at that weathered finish:
And here is a tip for writing on chalkboards…write your message in your neatest handwriting, and then accent every down stroke with a thick stroke of the chalk:

My “K” was a little wonky, but that makes your writing just a bit prettier!
Already having the hardboard made this one much easier!
Mini Makeover #4
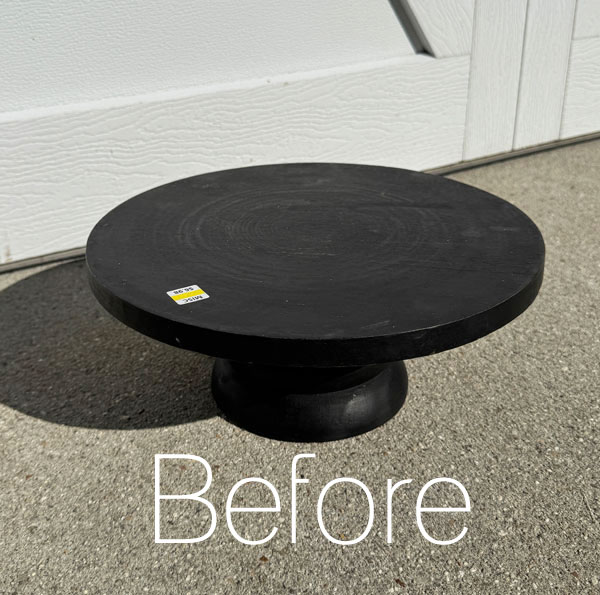
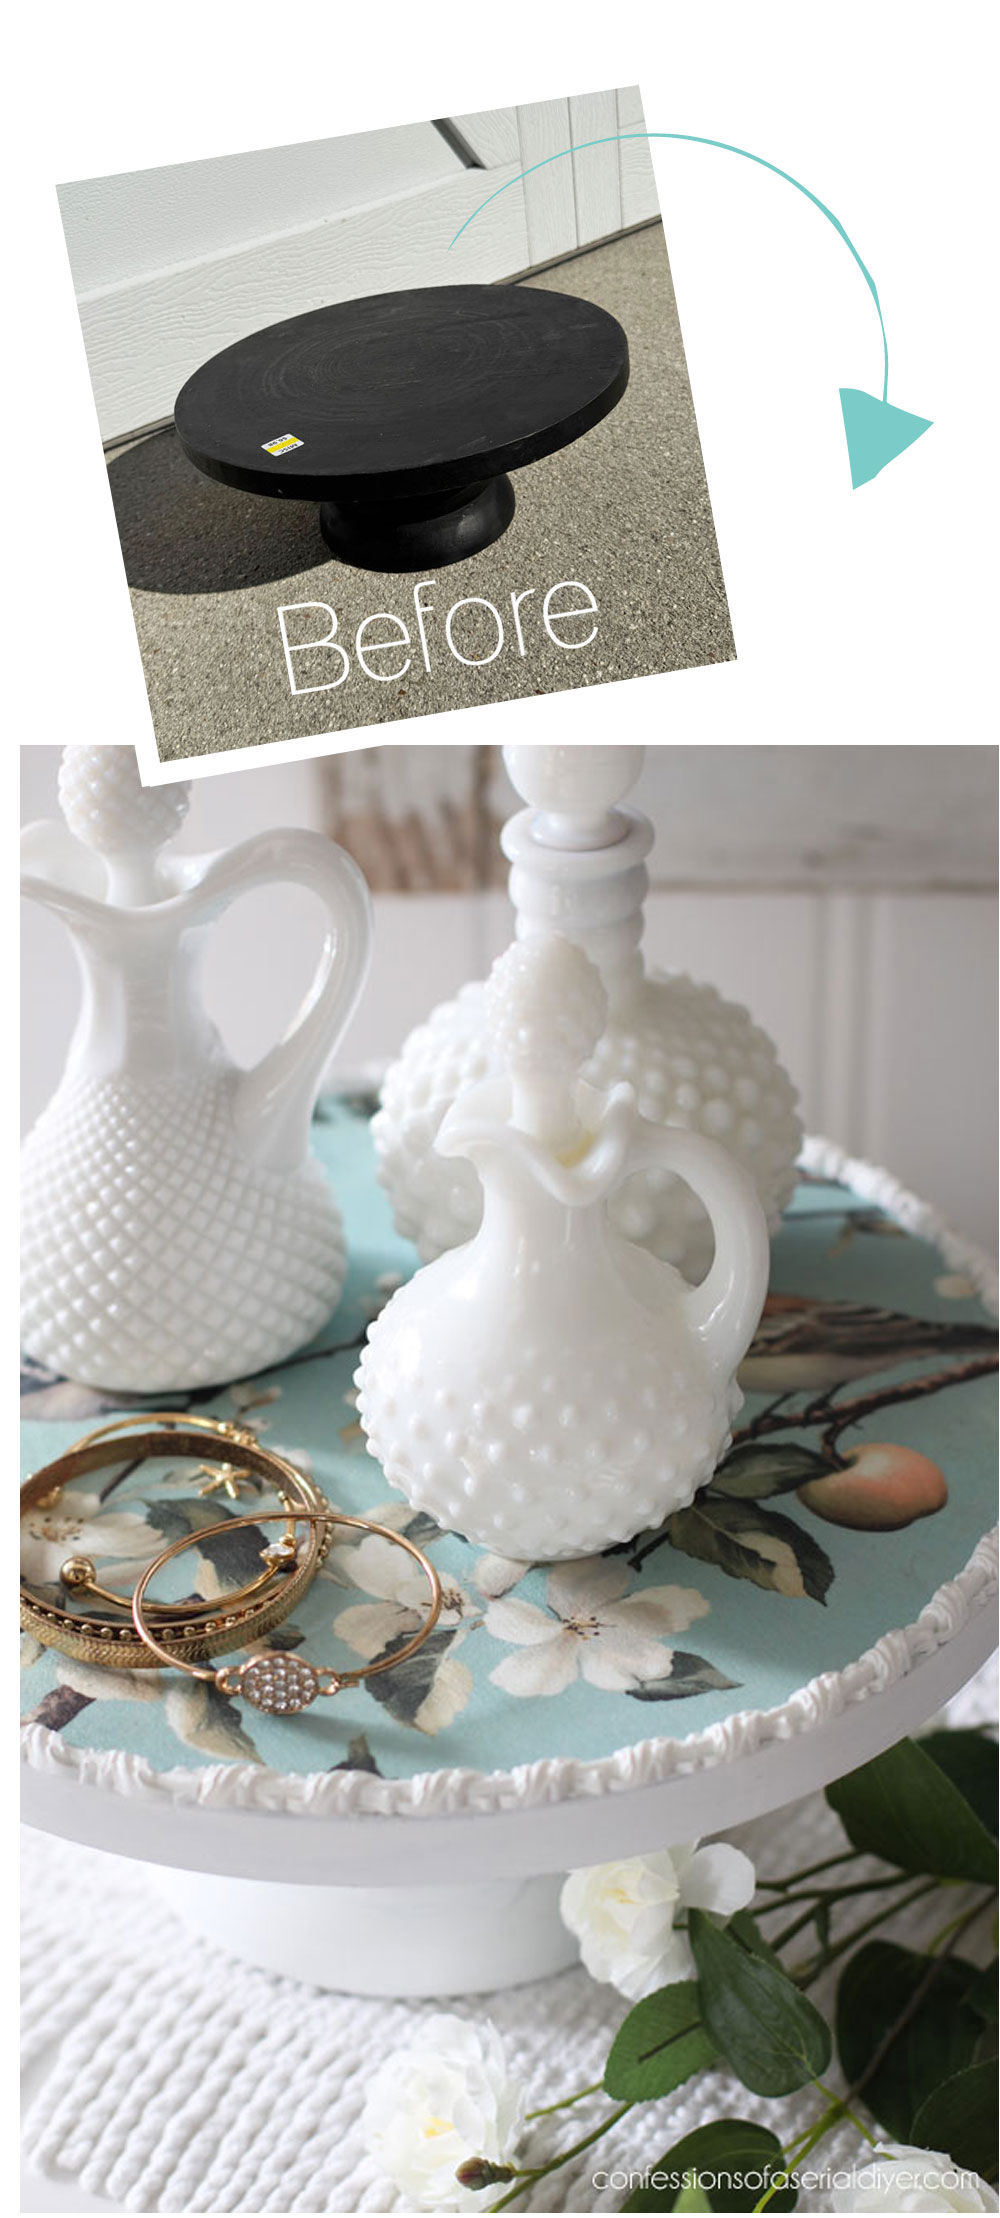
Mini makeover #4 might be my favorite! It started out as this wooden pedestal stand I paid $6.98 for at the thrift store:
Paint
I had no idea where I was going with it, so after cleaning, I started with a couple of coats of Dixie Belle’s Cotton…
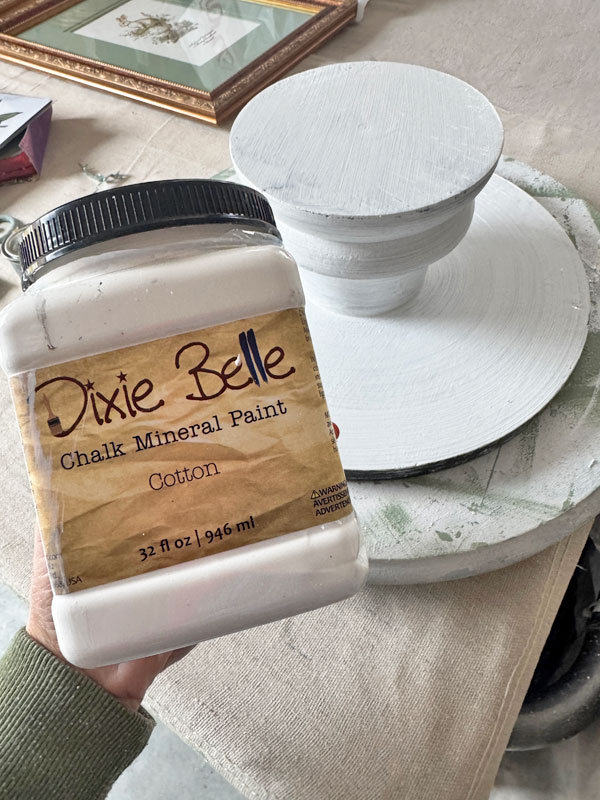
I gave it a quick sanding and then went to look for something I could add to it.
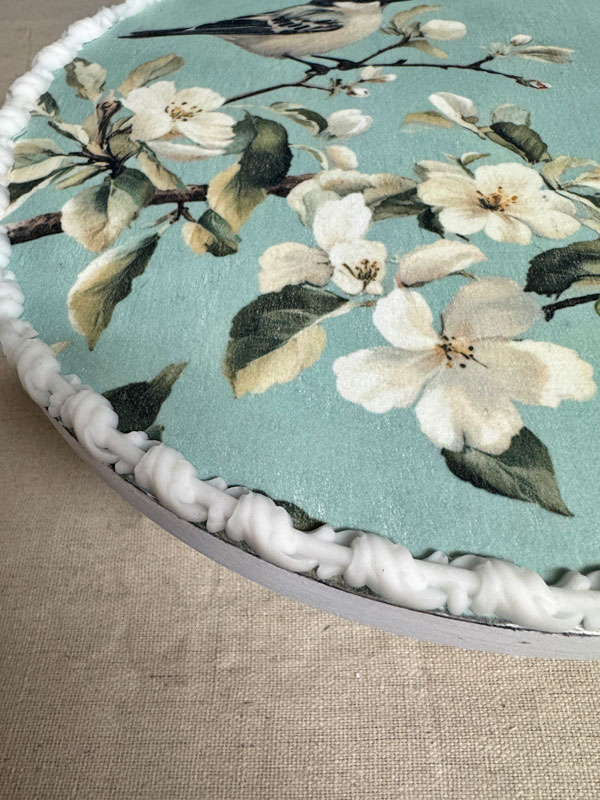
I landed on one of the new mini decoupage papers called Whispering Wings:
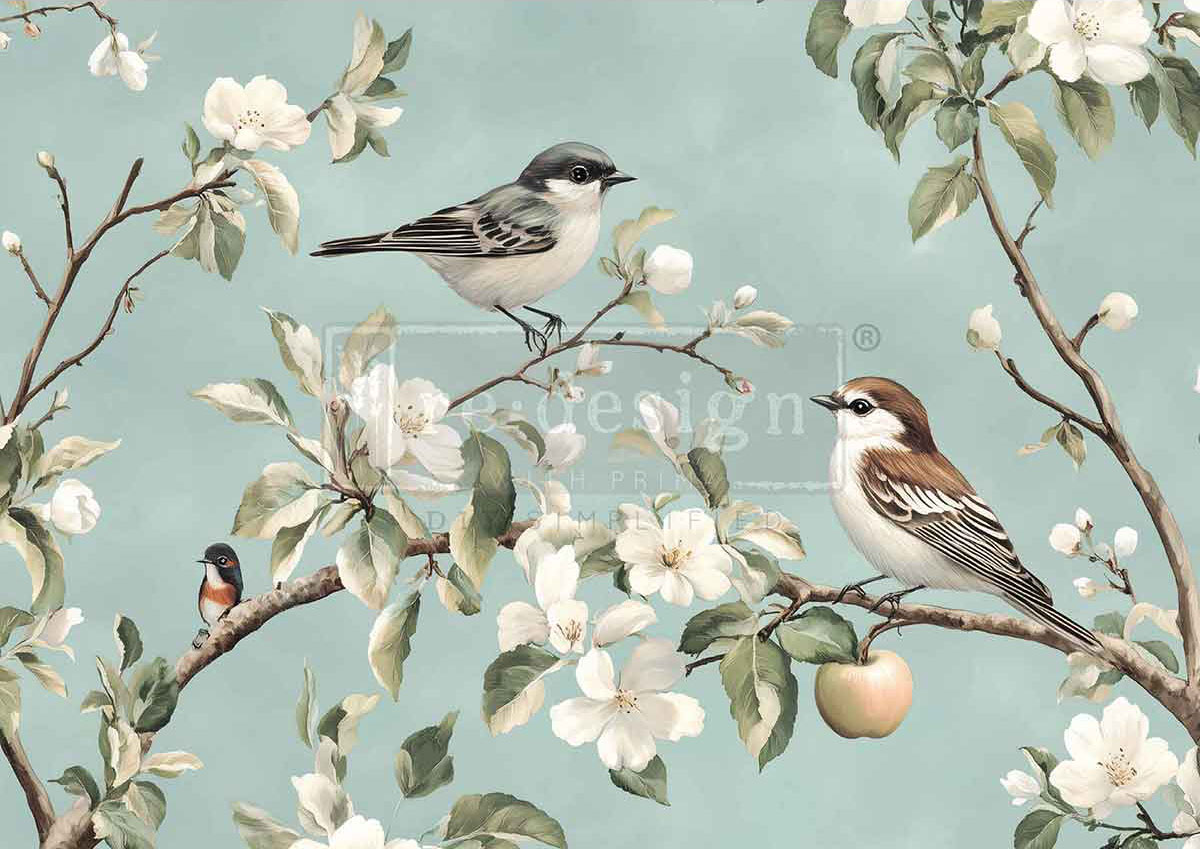
These only measure 11.7” X 16.5” but are great for small projects. I decided I would add this to the top of my pedestal stand.
See all the designs in this size as well as all the new arrivals in my Etsy Shop HERE.
To remove the folds, I used a WARM hair dryer. You can use a warm iron also.
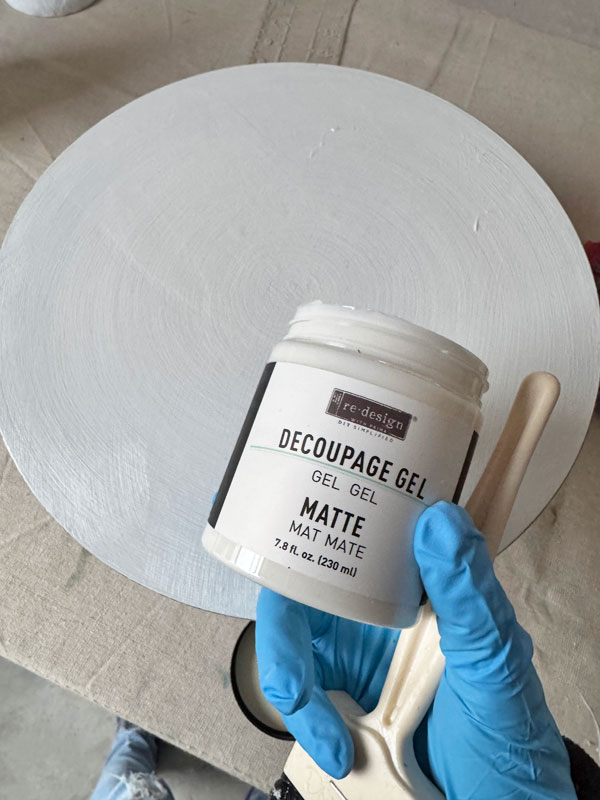
Then, I applied a coat of Matte Decoupage Gel to the surface with a Foam n Dandy brush in the 2″ size:
I added the paper right away and then used a bit of saran wrap to rub over the surface to smooth out any wrinkles. The saran wrap helps it to glide easily across the surface. I then used a razor knife to trim the edges.
And finally, I added another coat of the Decoupage Gel over the top.
I wasn’t quite done
I didn’t stop there. I then pulled out my Regal Flourish Mould, and using Amazing Casting Resin, I cast four of these trim pieces:
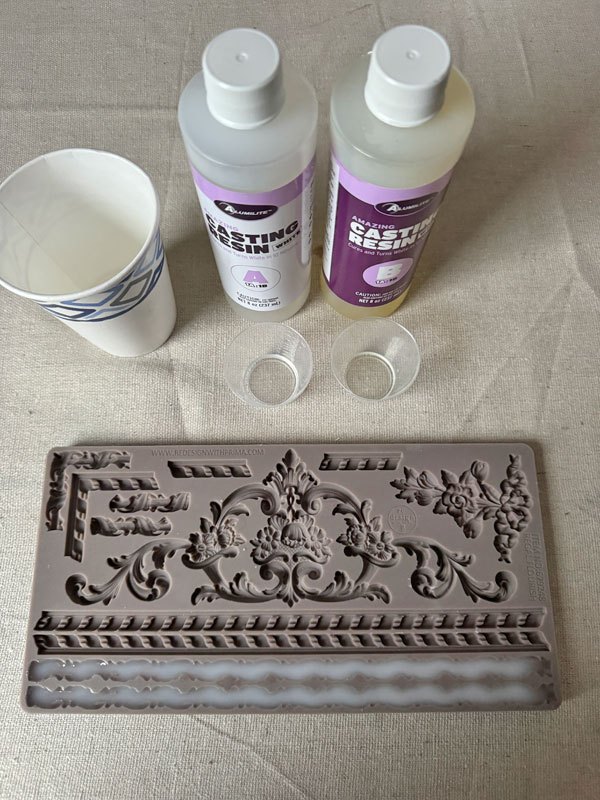
They are super flexible as soon as they are done. (They’ll turn completely white when they’re ready…10-15 minutes.) I lined them up with the edges of the stand as soon as they were done:
And I left them to cure like that overnight.
The next morning, I was able to paint them since they were now stuck in that position…
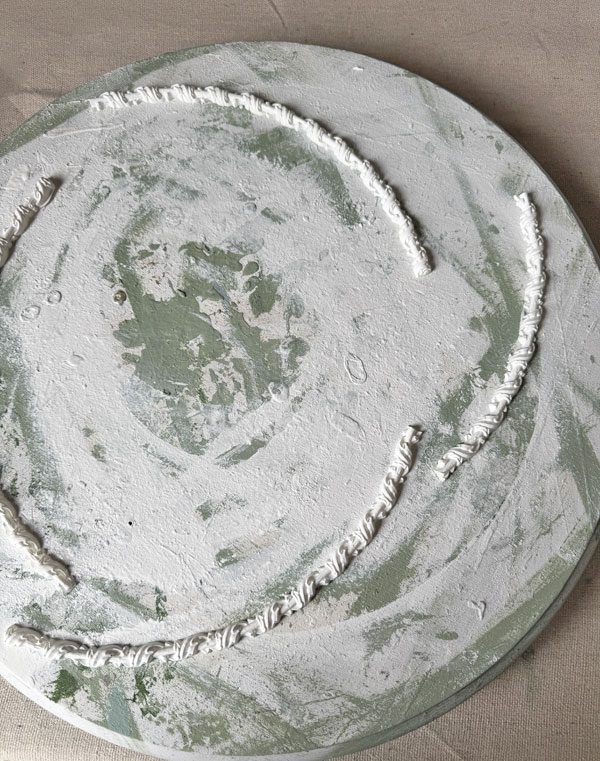
(You can make them pliable again with a hair dryer or by placing them in the microwave for about 15 seconds.)
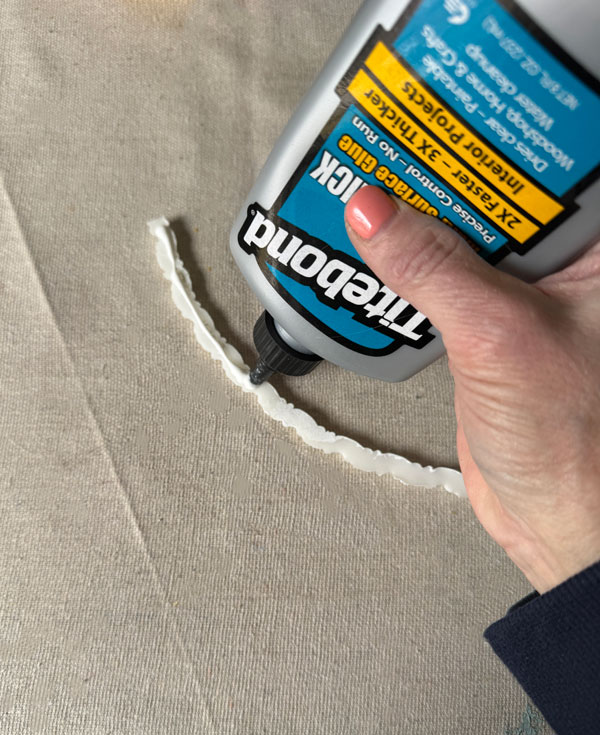
Everything was sealed with Clear Coat in satin and these pieces were attached with Titebond Quick and Thick Glue:
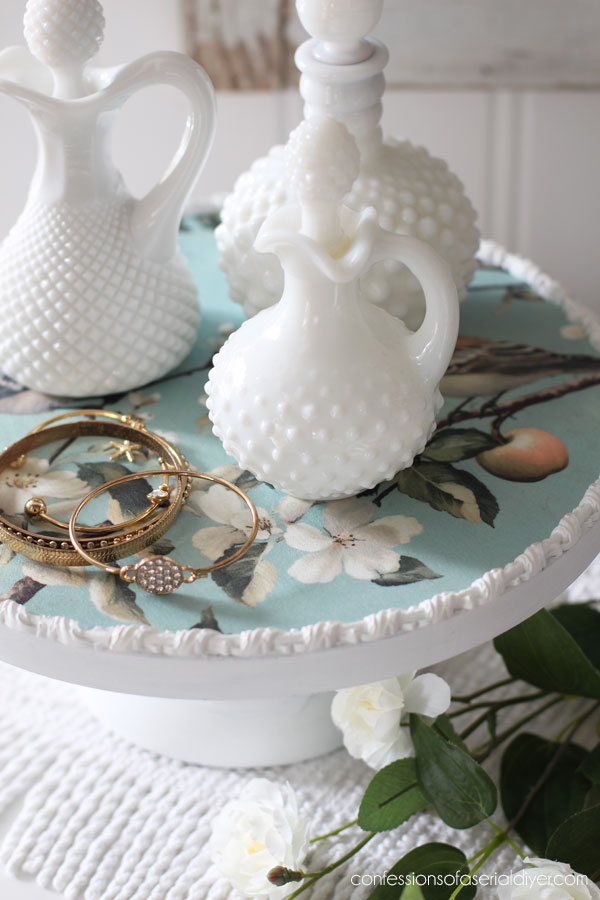
Mini Makeover #4 After
And here is how this not so pretty pedestal stand looks now!

It’s pretty now!
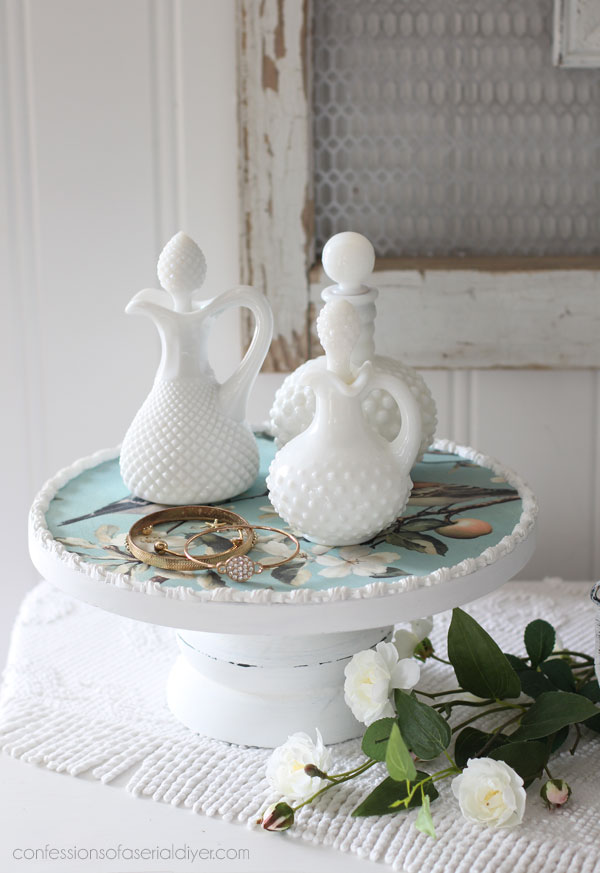
And that bit of trim adds so much! I know a lot of you purchased this mould at the holidays.
You could use this trim to trim out boxes and other small projects too!
See a mirror I embellished with this mould HERE.
Here’s a peek with nothing on it so you can see the sweet paper:
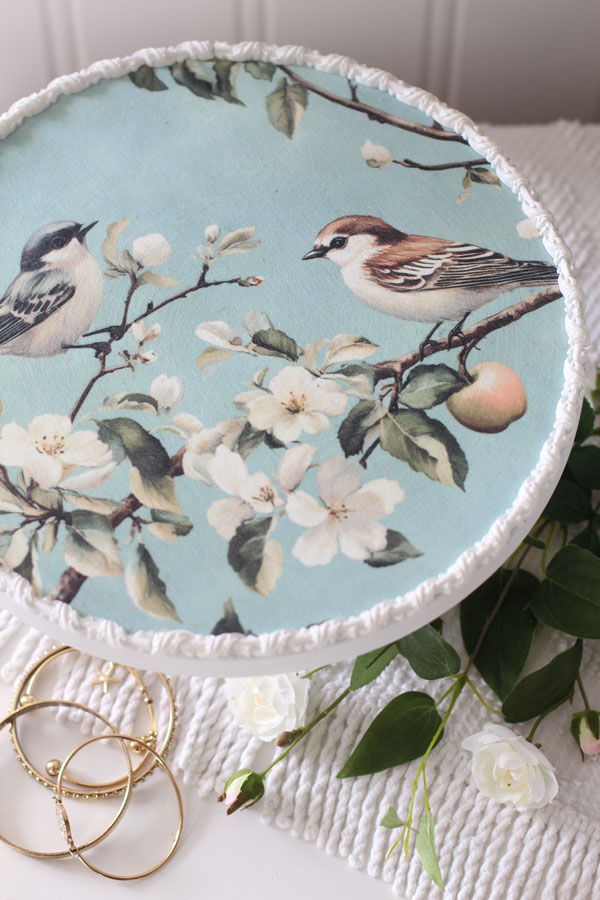
This one was definitely an improvement!
Mini Makeover #5
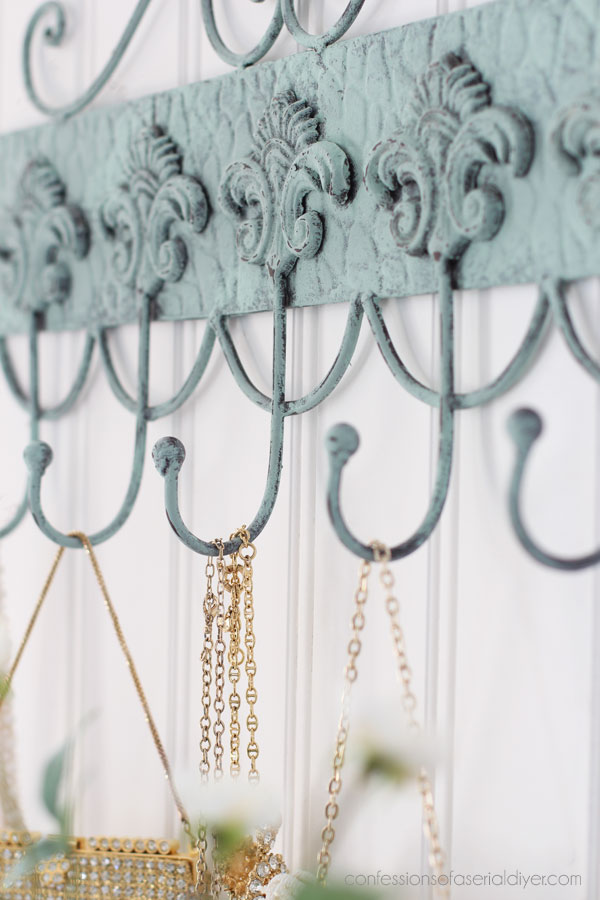
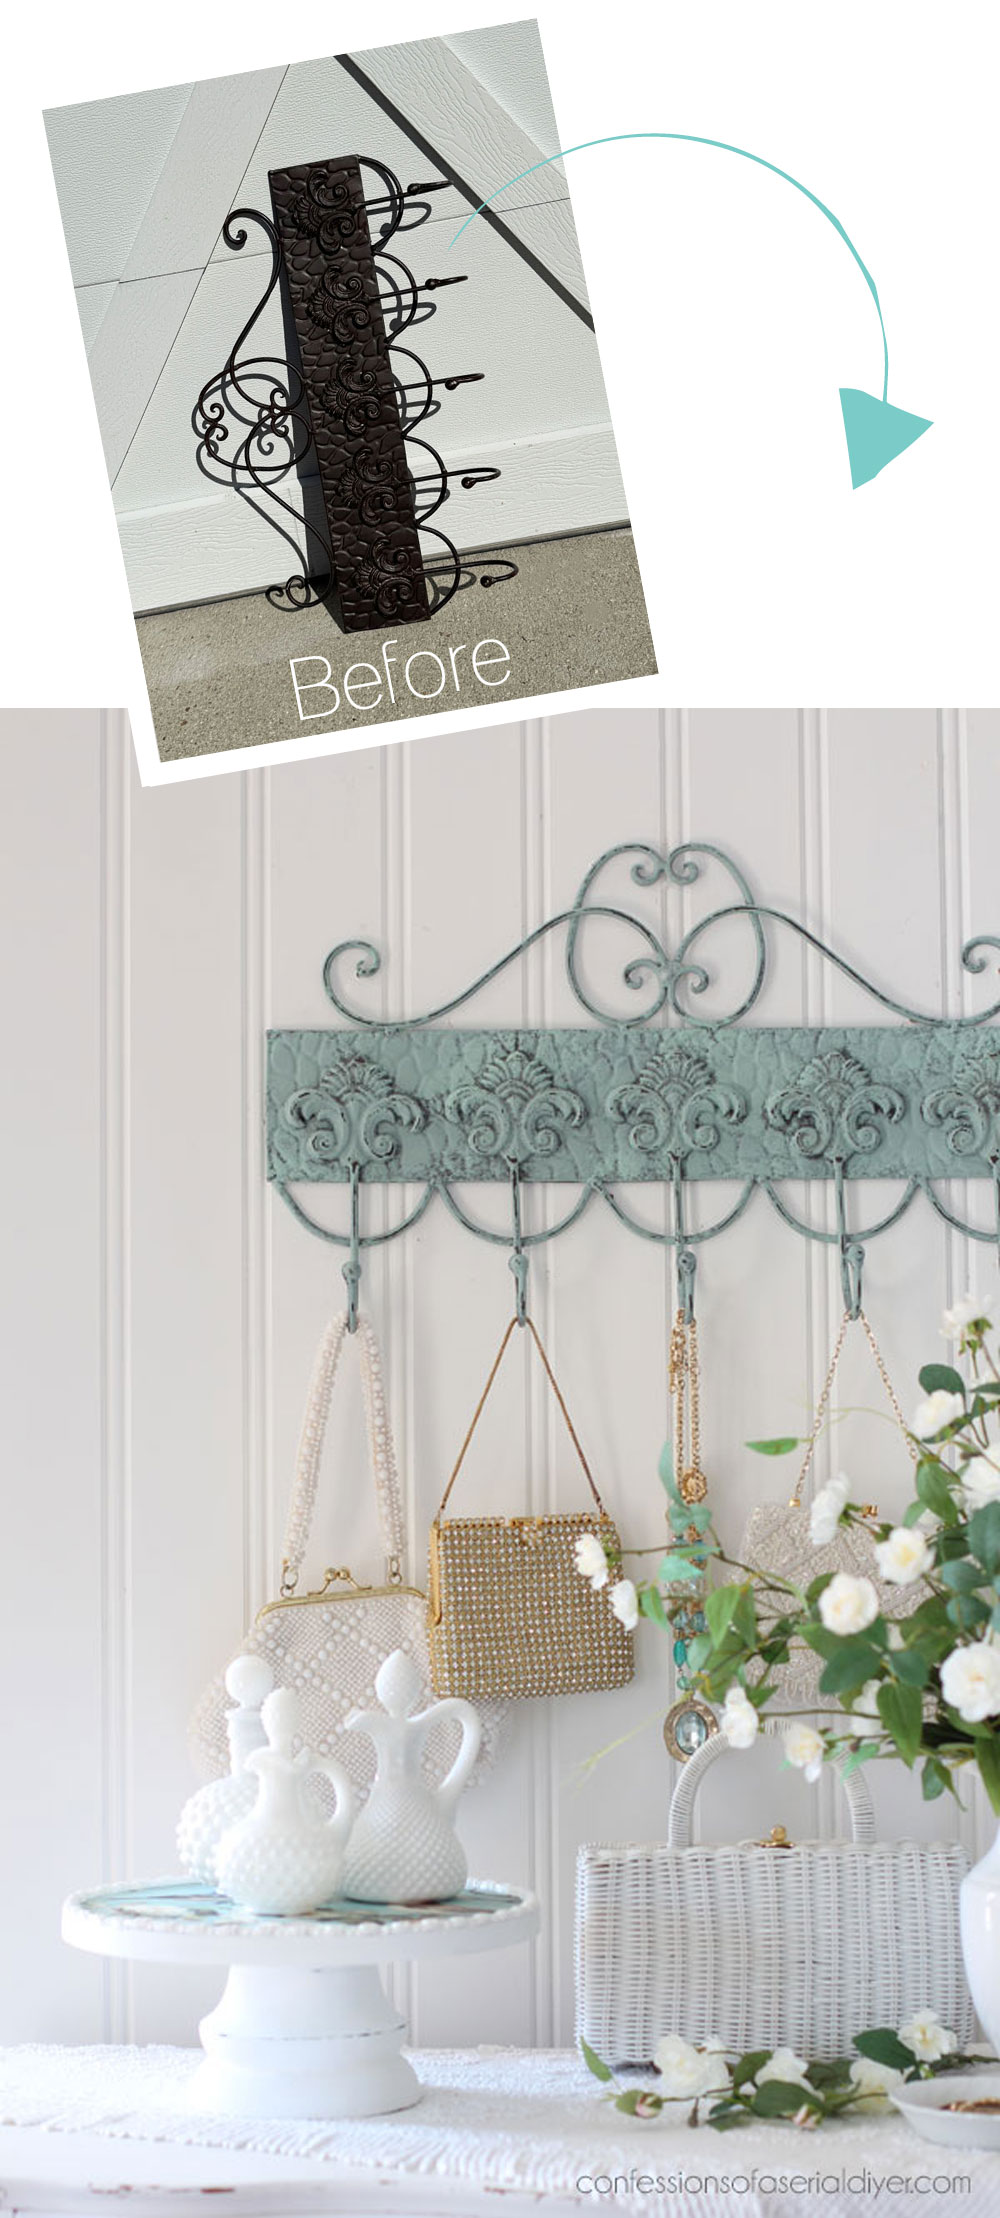
Next up is this metal hanging organizer I found at the thrift store for $6.99:

It had some great fleur de lis detail that is hard to see in it’s before state.
Paint
What color do you think I painted it? The same beachy blue…why not?!
I was going to do a minimal dry brushing on this one like I often do with these metal pieces…
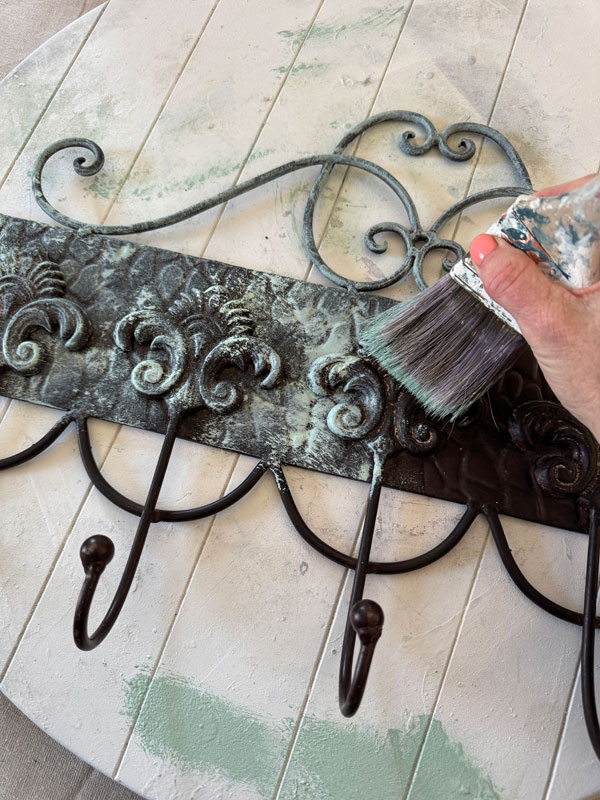
But I ended up going heavier. I still pounced it on though to leave some areas unpainted. I sealed with Clear Coat in Satin once again.
Mini Makeover #5 After
Here is how this one looks now!
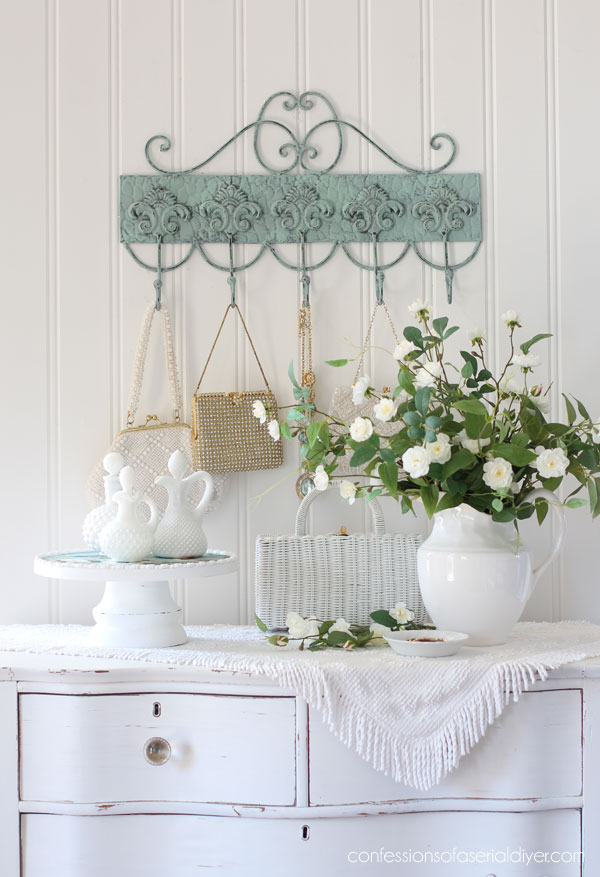
You can see the detail much better now…
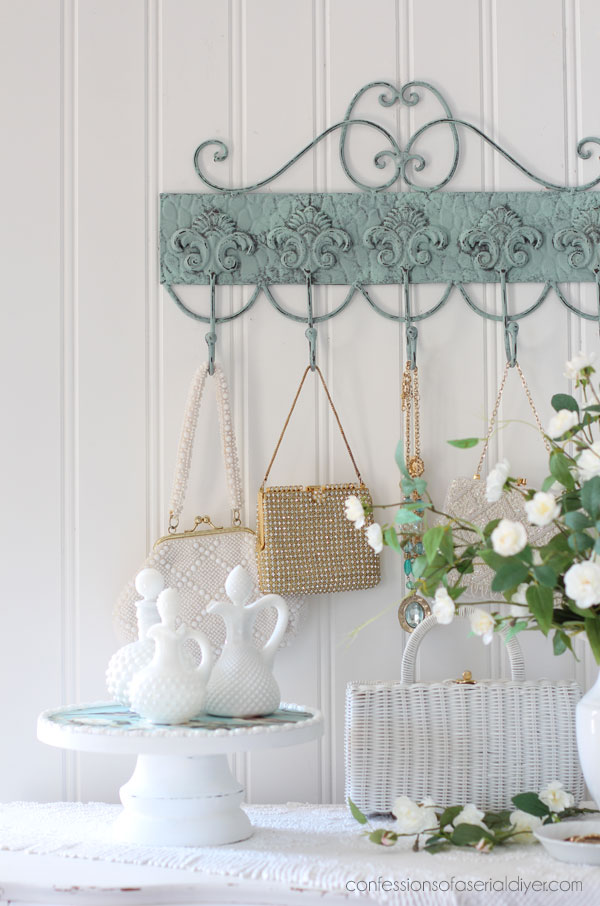
It still has kind of a worn look.
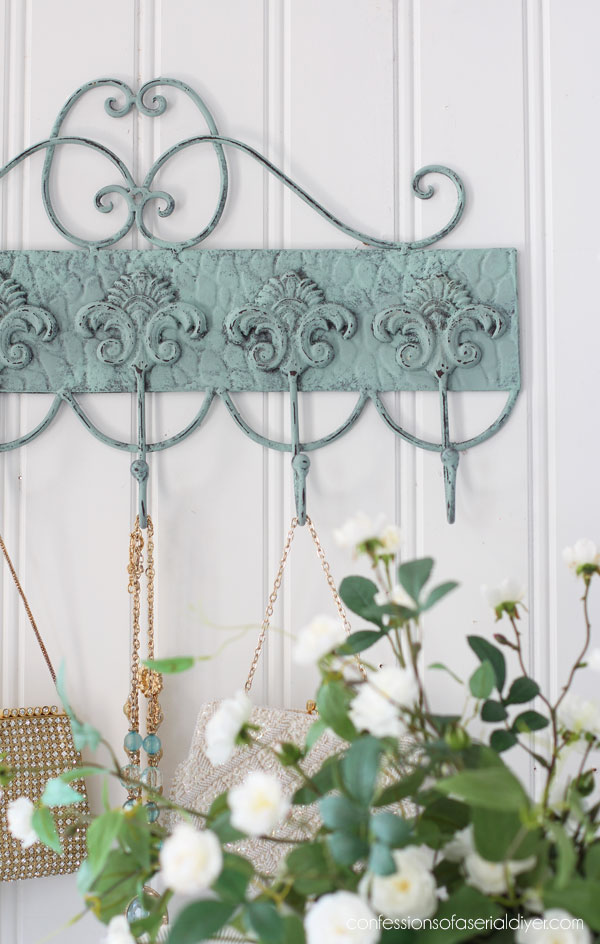
SO much better than that dark metal!
Mini Makeover #6
Mini makeover #6 was supposed to be these frames:
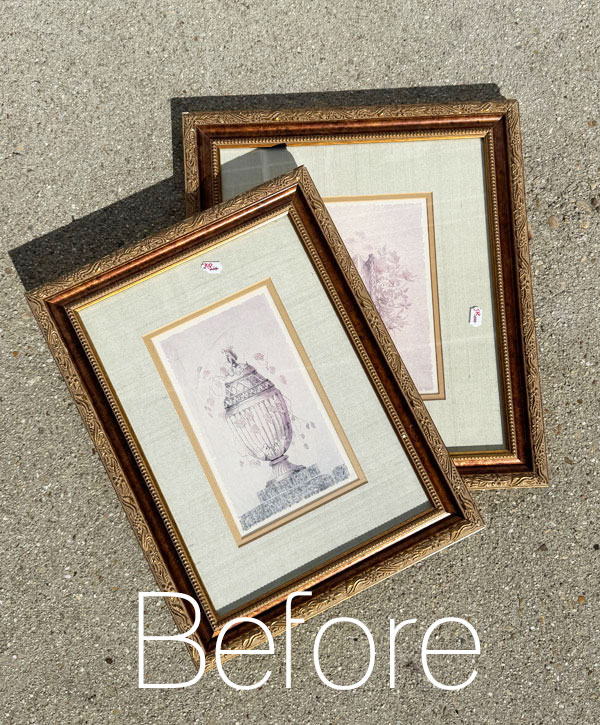
But as I mentioned at the top, I already shared them in my last post HERE.
And that’s six more mini makeovers complete!!

I always enjoy having new smalls to fluff my booth, and boy do I need them!
If you want even more smalls inspo, check out a bunch more here:
And if you’re curious how I price the smalls, you can see that here:
And that’s six more pieces I get to cross off the list!
That is honestly my favorite…crossing SIX pieces off at once! Only 22 more pieces to go!
Let me know if you have any favorites this round in the comments!
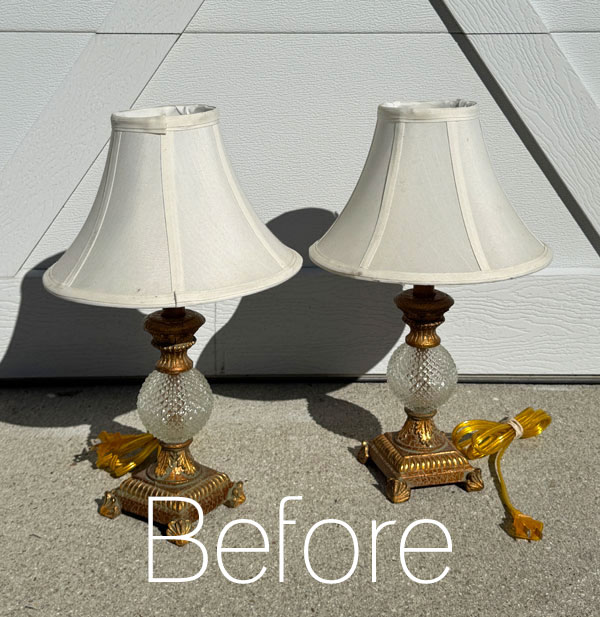
I’m working on a large piece for next Thursday’s Furniture Fixer Upper Tour, so I’ll have a simpler one for y’all on Tuesday, this set of lamps:
Have a fantastic weekend!
UPDATE: Check out how pretty this set is now HERE!
XOXO,

Don’t Miss a Thing!
If you like what you see, there are several ways to follow along!
EMAIL * INSTAGRAM * FACEBOOK * PINTEREST


Get FREE SHIPPING on all orders over $50. No code needed at checkout! Orders under $50 always enjoy $8 flat rate shipping! Most orders ship same or next business day!


Mary Kaiser says
Oh they all turned out so beautiful! My favorite is the cake stand. I love the paper and moulds on that! That will all be sold in your booth very fast. I love how all the pieces coordinate together in paint color. The person that buys one item might buy them all because they coordinate so well.
Christy says
Thank you, Mary! That stand is my favorite too! I don’t normally use the same paint color on just about everything, but I couldn’t help myself this time ha ha! XOXO
Cyndi says
I love all of these. The new paint color combination is wonderful. Very coastal!
Christy says
Thank you, Cyndi! Yes, I will definitely be using this one again! XOXO
Cecilia says
I love seeing what you do to these smaller pieces! My favorite might be the metal piece but the pedestal is a close one! All look so much better now. It never fails to amaze me what a fresh coat of paint can do! Hope you give us a booth tour soon. That’s always fun! Have a great weekend!
❤️Cecilia
Christy says
Thank you, my friend! This color could fix just about anything lol! And yes, I am overdue for a booth visit, but it looking very thin in there right now…hopefully after I load in the piece I’m sharing on Thursday, I’ll be ready to share again! XOXO
Jackie C says
I swear, every time I see your writing on the chalkboards you make, it just blows me away. Beautiful.
The vintage basket was the best purchase. Rattan and wicker, the real thing, sells for big bucks nowadays. People snatch it up. Great find. Everything is just lovely! 🥰
Christy says
Aww thank you, my friend! You are so sweet! I attribute that to a student teacher I had in 6th grade, Ms. Rice, who had the absolute neatest handwriting I had ever seen…that made me practice a lot ha ha! That basket was an awesome find for sure! XOXO
Cindy D says
Hi Christy. I think I love how you can make a chalkboard out of an old beautiful frame. I also have a question for you. Can you ever do a video showing us how you do your cursive in chalk on your freshly painted chalkboards. Just gorgeous. 🙂
Christy says
Thank you, Cindy! I just love a chalkboard! I did take a photo while I was writing with the chalk, and I just added that photo, along with tip, to the post that might help with the writing! XOXO
Sandra says
The pictures you did …will the paint not stick to the glass when framed..they were lovely..I’m.enjoying my gold girl I ordered from you
Christy says
Thank you, Sandra! I haven’t had any issues with the mat sticking with the chalk paint, but I have had that happen when using spray paint before. And yay! Glad to hear that! XOXO
Michele M. says
WOW!!!!! Now THERE is the power of paint and an artist’s imagination.
They look fabulous. LOVE that custom blended color too – it’s fabulous.
Christy says
Right?? Paint is amazing!! Thank you, my sweet friend! XOXO
p says
All the smalls look so much better now. My fav is the metal hanger.
Hmmm your moulds do add such a special detail. I may need to look into picking some to try.
Can’t wait to see your next set of lamps. I’m always amazed at your transformations!
Christy says
Thanks so much, P! That hanger looks so much better, right? It was hard to see the detail on it before. Have a wonderful weekend! XOXO
Lizzy says
They are all so pretty. My favorite are the candlesticks.
Christy says
Thank you, Lizzy! Those were probably the best before and after…so much better now! XOXO
Lorri says
My favorite was the Fleur de Lis hanger. It is simply gorgeous now..
I love metal and Fleur de Lis anything …lol.
Yes you are a Super Star in Curvise Writing.❤️
Christy says
The Fleur de Lis hardly showed up before, but painting them highlighted them much better! I love Fleur de Lis items as well and always pick them up when I see them. And thank you! I spent a LOT of time in middle school trying to perfect my handwriting ha ha! Another thing I can tell my kids I did for fun before the internet was invented ha ha! XOXO
Linda says
You are absolutely 💯 amazing!!! I see how you create such beautiful pieces!! Thank you for inspiring so many of us!!!! You are truly a blessing!!
Christy says
Aww I appreciate that so much, Linda, thank you! I am so happy to have you following along with me! XOXO