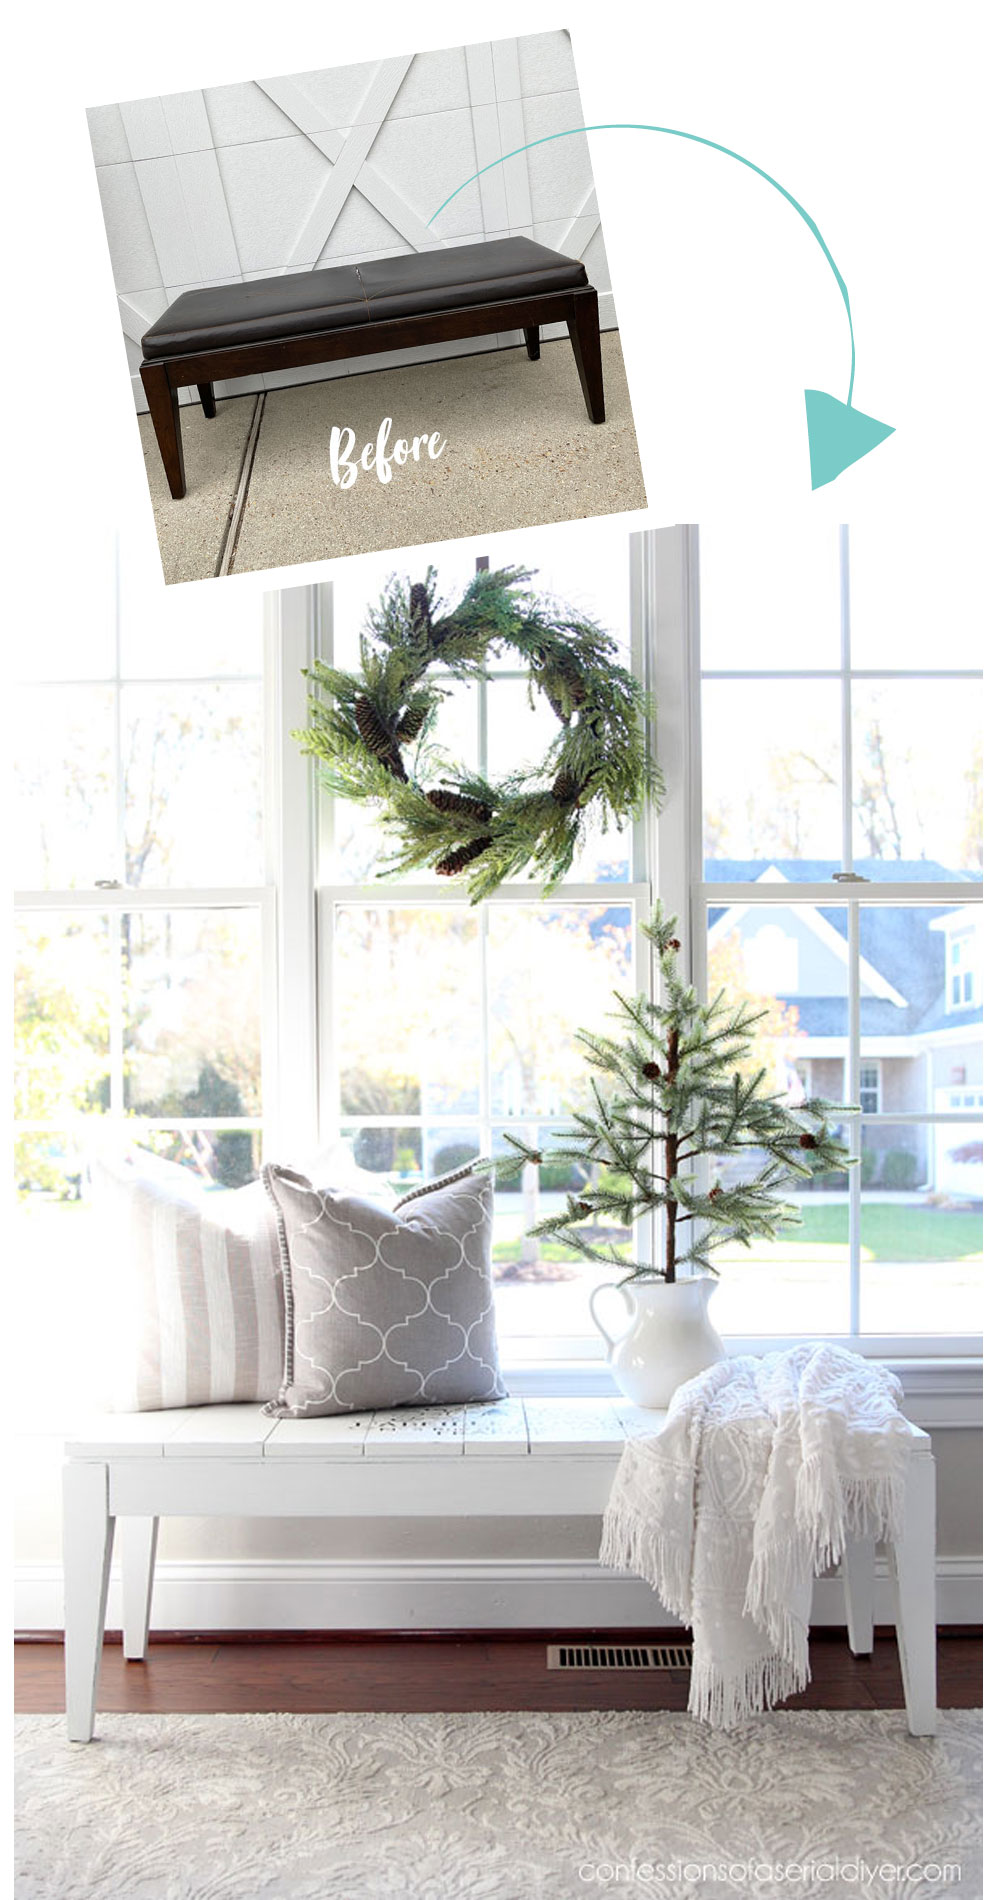
Beautiful friends, I have the cutest stenciled bench makeover to share with y’all today! This is another piece from my Free Haul that was given to me by my awesome MIL.
This bench looked like something from a big box store:
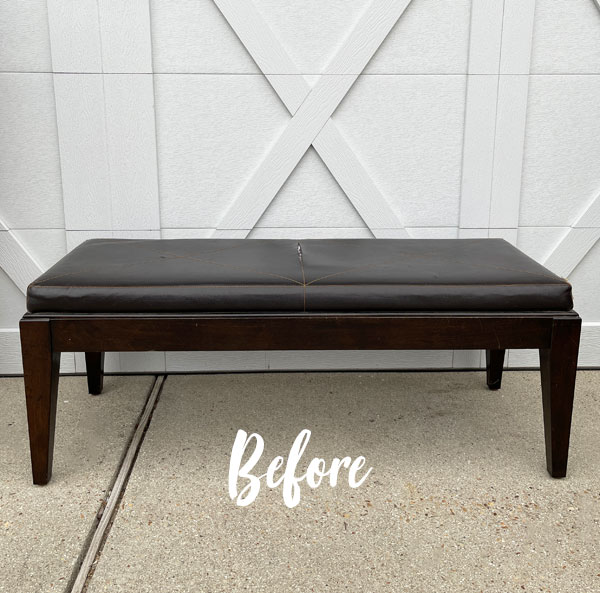
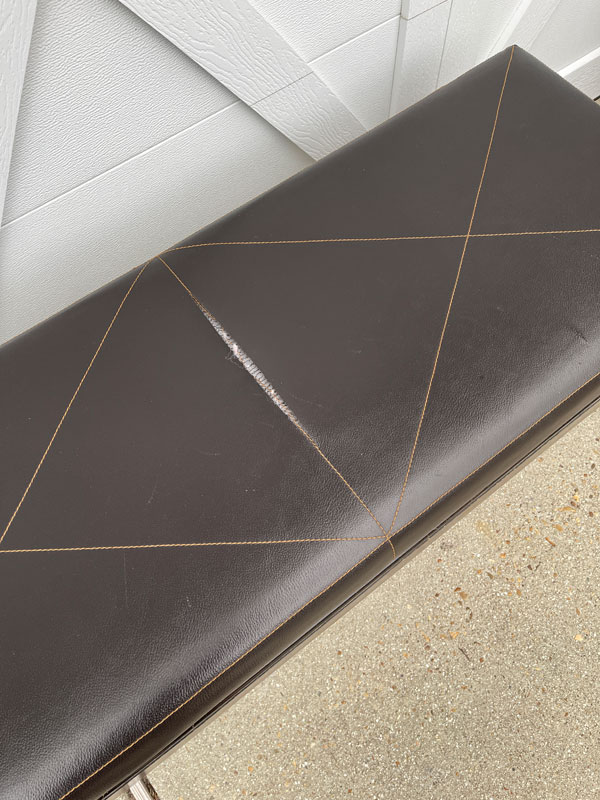
Totally function over form here for sure. They had it in the garage for sitting on to put on shoes, but it was starting to show some wear on the top:
My first idea for this piece was to replace the legs with something curvier and recover the top.
So, I set out in search of a furniture piece I could steal the legs from, but after several trips to several thrift stores, I came up empty. Buying new legs was just not an option as they were super pricey.
Plan B: Stenciled Bench Makeover
I could feel wood beneath the padded top and decided to open it up and see if it had a nice piece of wood under there that I could stencil but underneath was this odd situation instead:
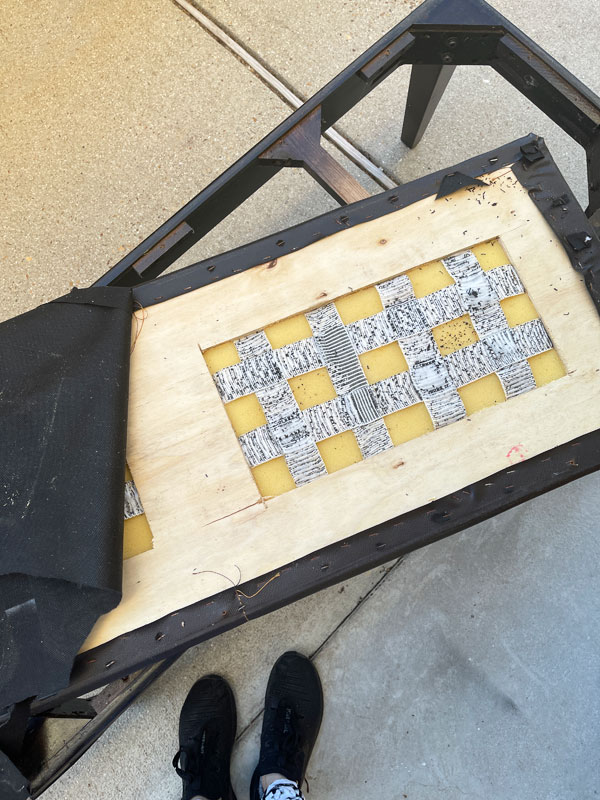
What??
I would need to purchase wood if I wanted to go that route.
Lumber nowadays is insanely high priced, so I decided to see what I could pull from my dwindling stash that might work instead:
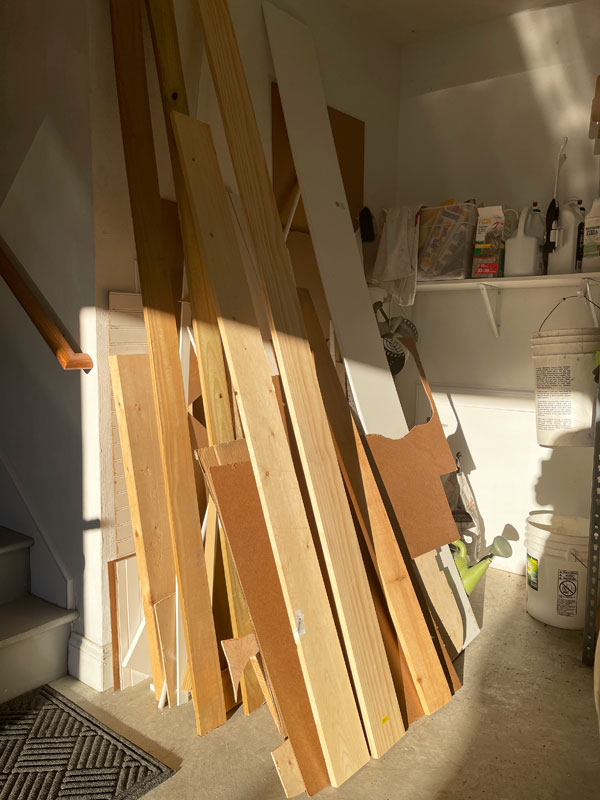
I pulled these two pieces…
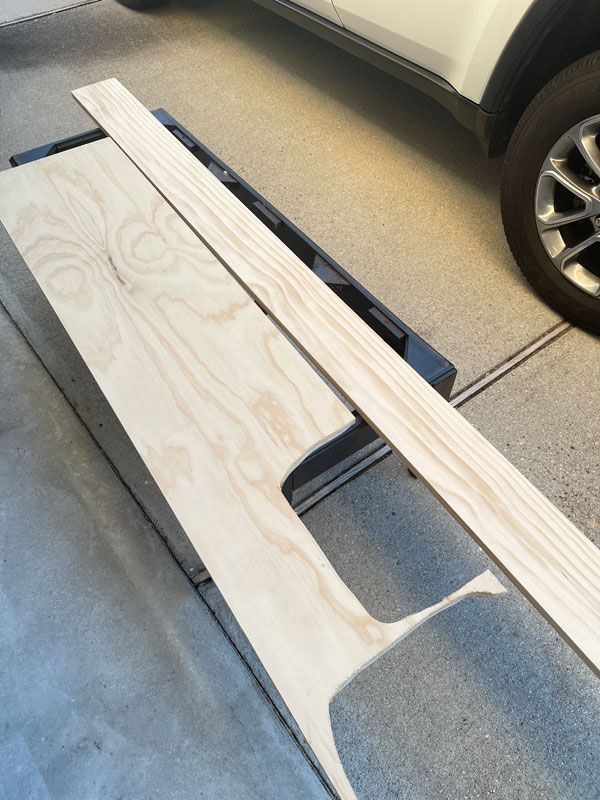
One very nice, very pricey prime piece of lumber that we had leftover from our pantry makeover and a plywood scrap from another project.
A new seat
I cut the plywood in strips to match the prime lumber using my table saw:
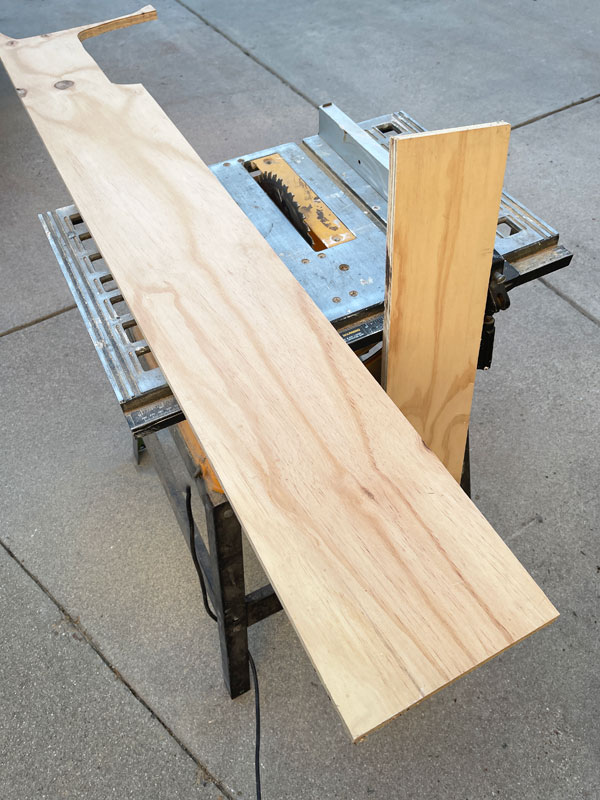
Then I used my miter saw to cut the strips to fit the bench:

I ended up cutting one more narrow strip for the center so the gaps wouldn’t be so large in between.
Then I used my smaller Ryobi sander to sand all the planks, including the edges, smooth using 220 grit sandpaper.
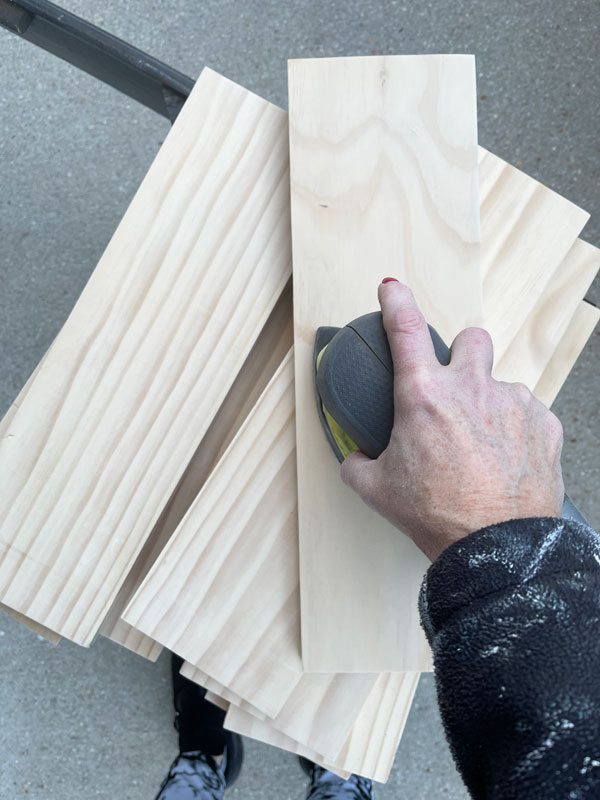
This did a fantastic job of smoothing out even the edges of the plywood, so it looked like solid wood planks once painted!
Once I vacuumed up all the dust, I gave the base and the new seat planks two coats of Cotton:
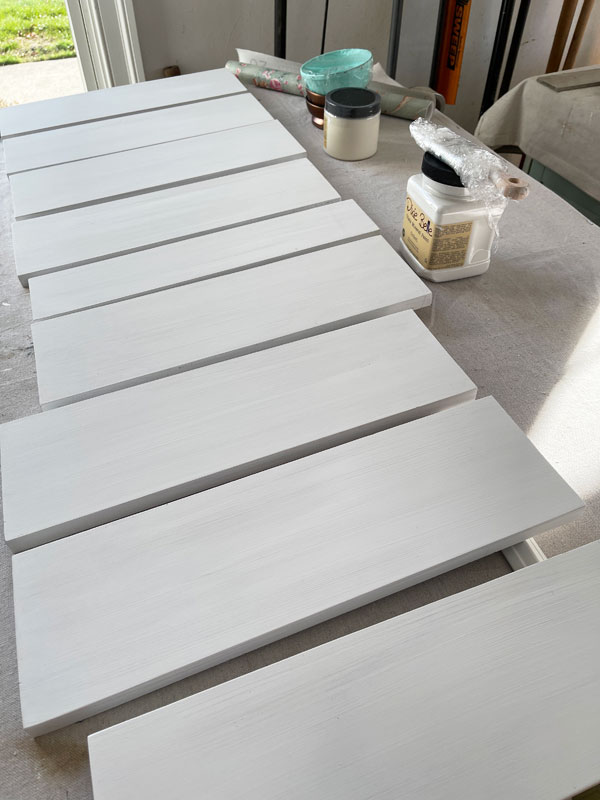
(That was after just one coat.)
Then I attached my new seat to the base using my Ryobi nail gun:

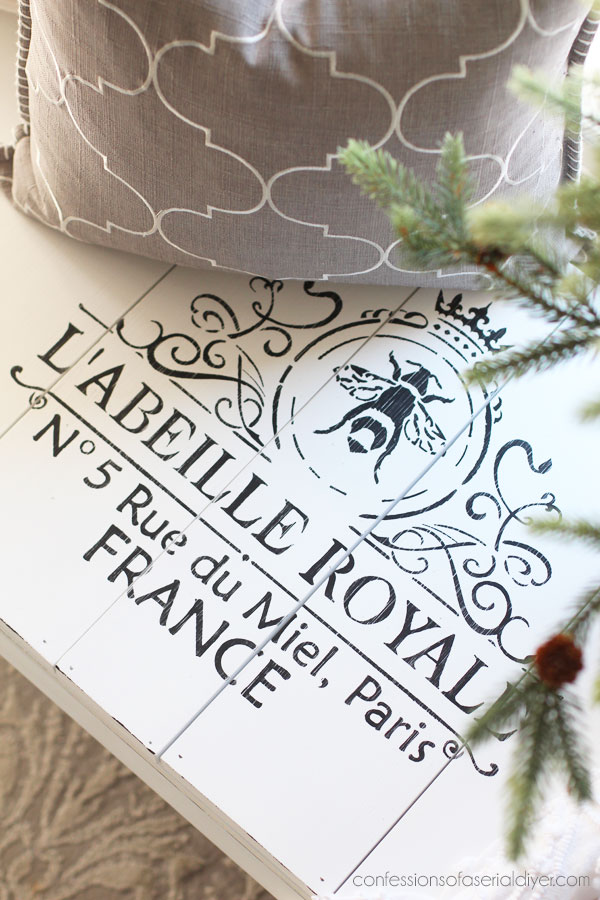
Adding a stencil
To add a little more personality to the top of the bench, I chose this stencil I found on Amazon:
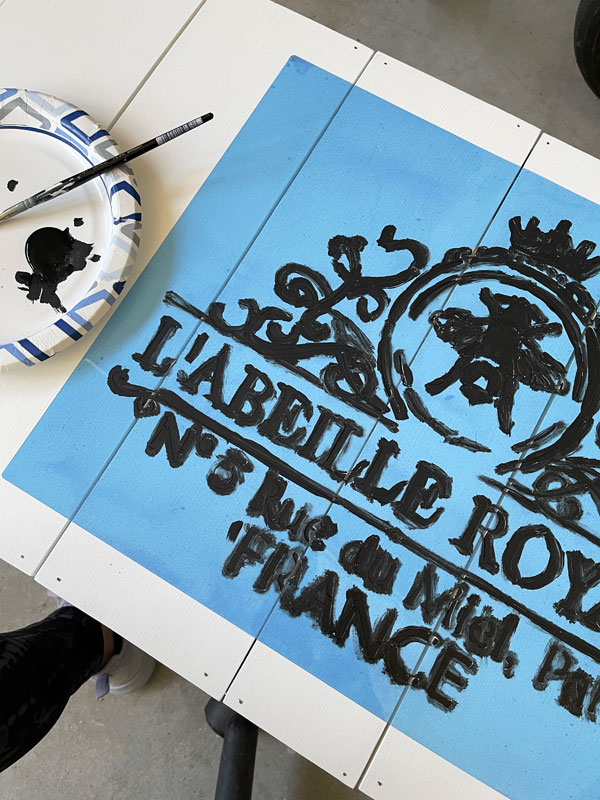
I like to add a little spray adhesive to the backs of my stencils to hold them in place and prevent paint from seeping under. Then I use a small brush to fill in the stencil. I prefer acrylic craft paint to fill them in since it’s easier to wash off the stencil than chalk paint.
As soon as the second coat went on, I pulled the stencil off:
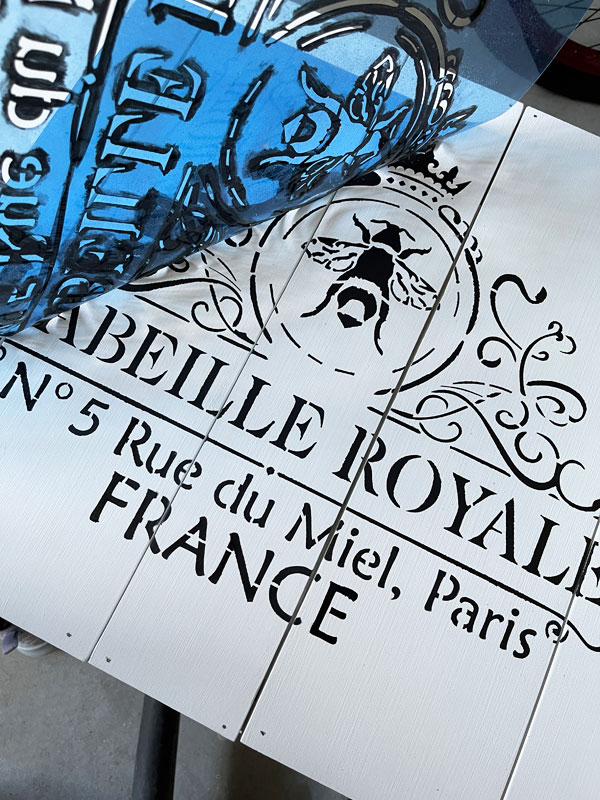
Then I like to go back and fill in the small breaks that give it away as a stencil using a liner brush:
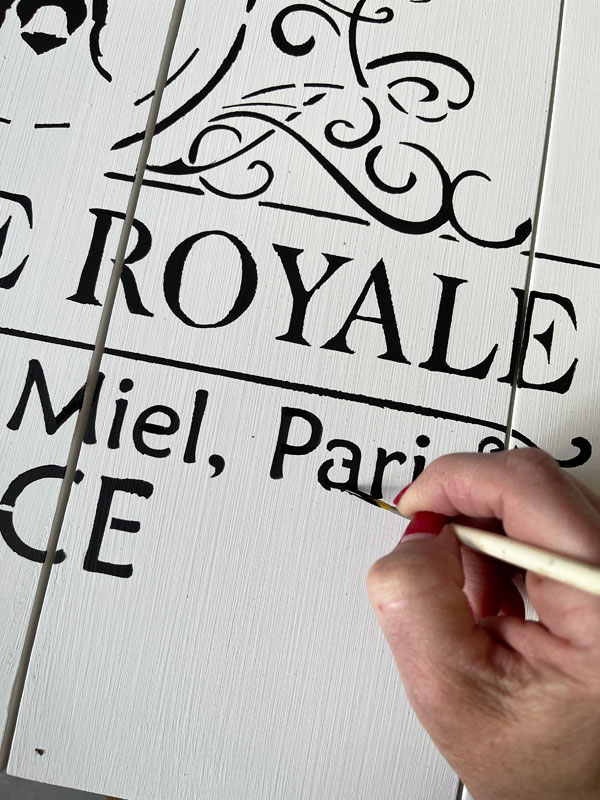
Once everything was dry, I went back with 220 grit sandpaper wrapped around an old sanding sponge and sanded all over, including across the stencil, to smooth everything out.
The base was black to start, so in order to give the appearance of black beneath the wood planks on top as well, I used the cheat method to “distress” the edges:
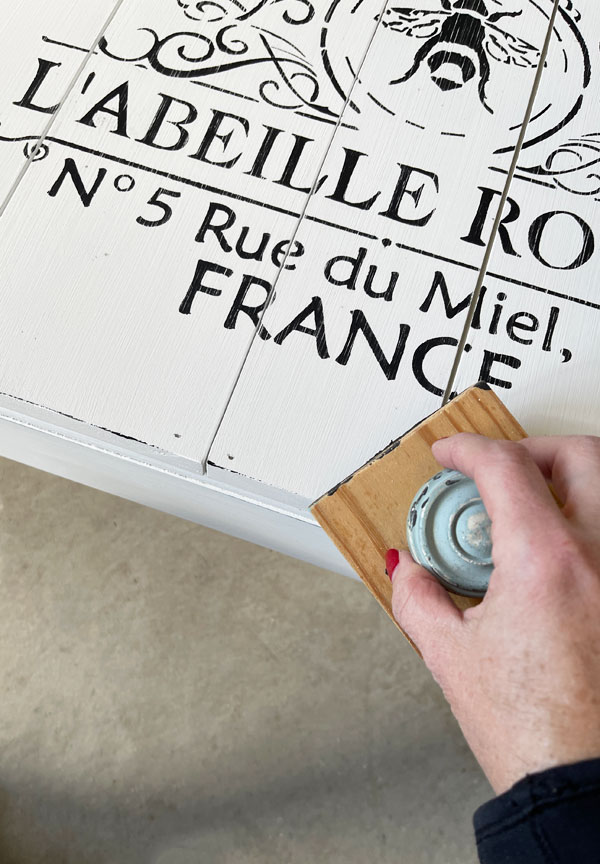
I used my distressing block and Caviar paint.
See more on how I do that in this short video:
If you have any trouble viewing, you can see it on YouTube HERE.
Everything was sealed with Clear Coat in Satin using the blue sponge applicator.
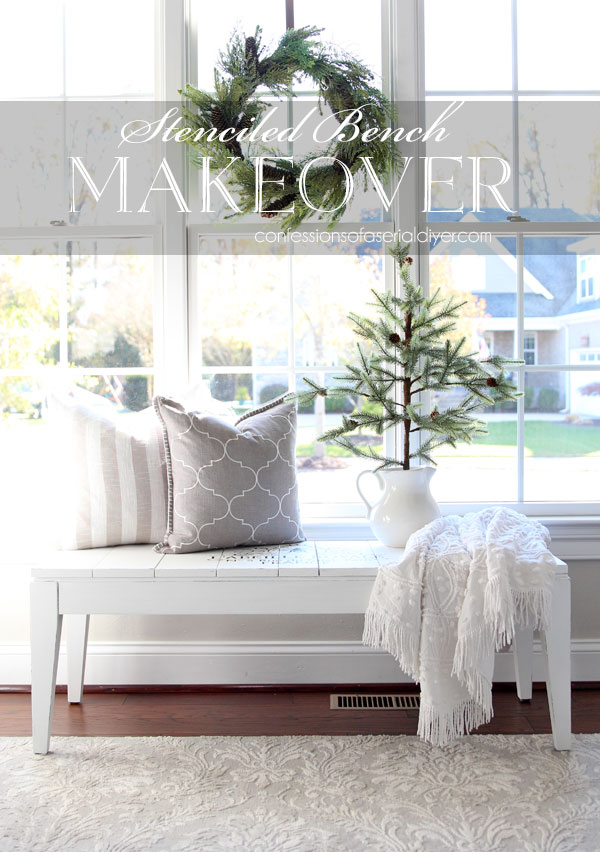
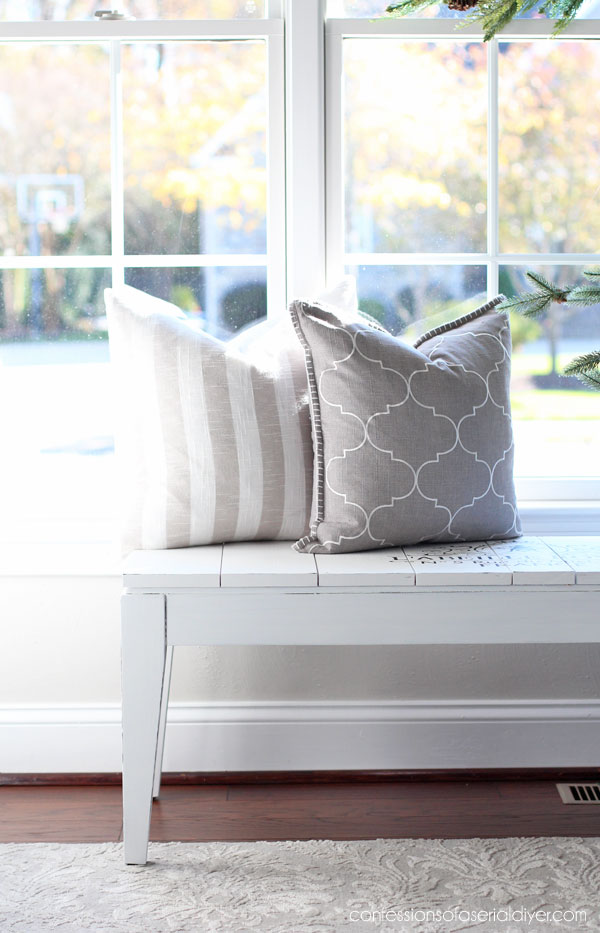
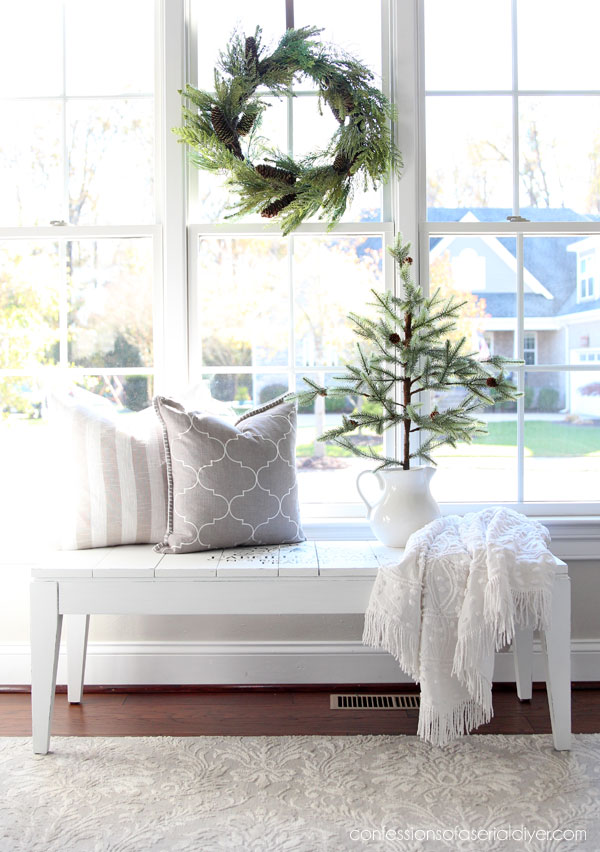
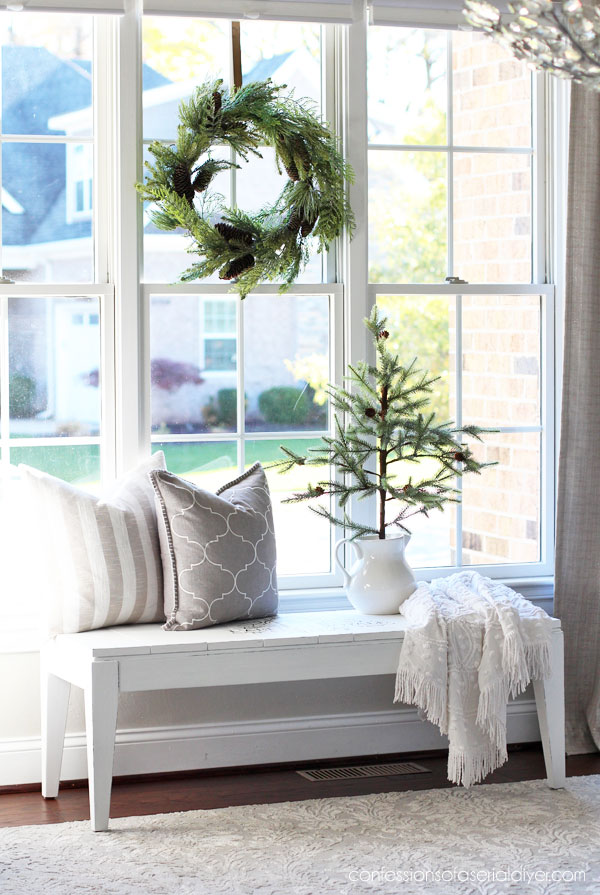
The After
Here is how this box-store special looks now!
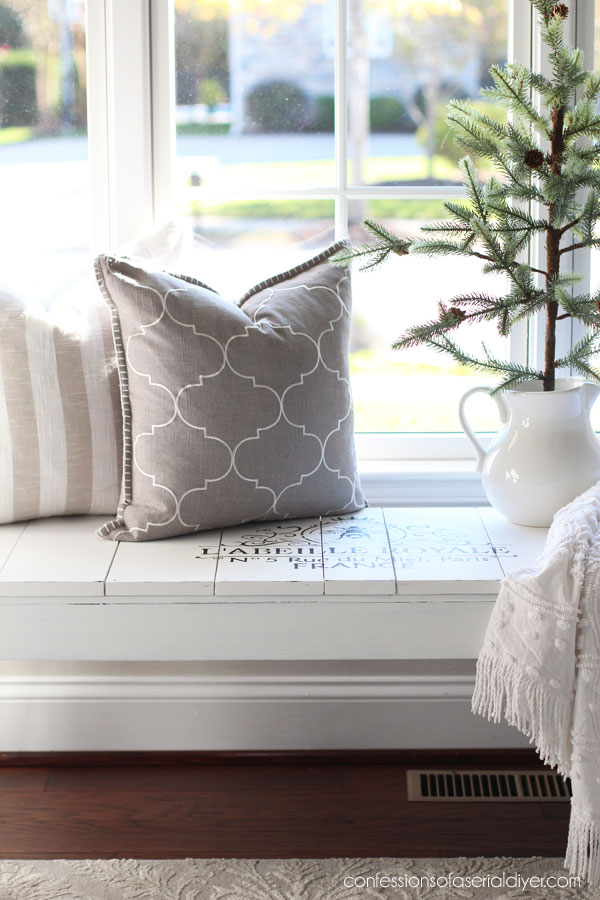
Let’s get a closer peek at that stencil…

Just enough to make this bench a bit more special!
The simple planked top is so much cuter than the original padded top.
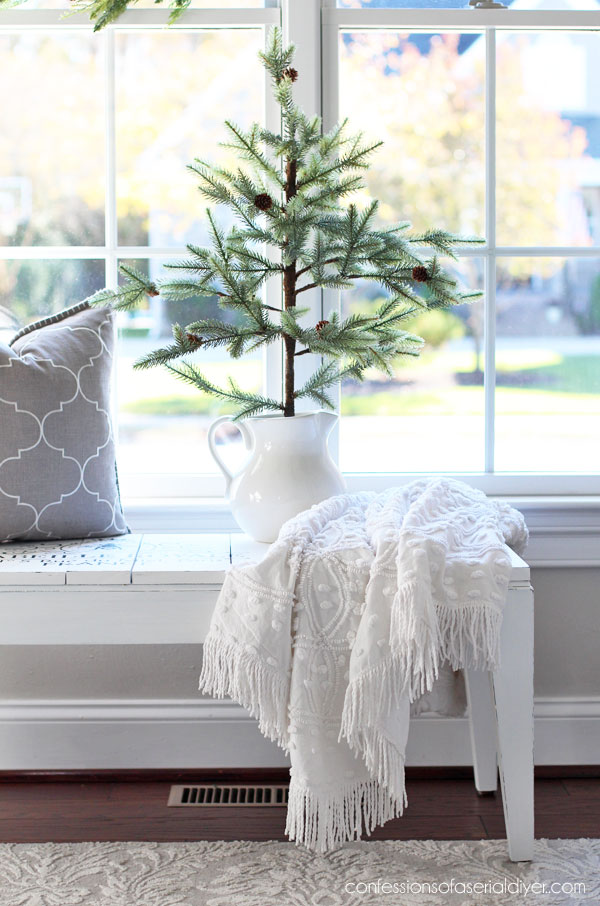
This would be great on one side of a dining table or at the foot of the bed. It would also be perfect in an entryway!
Here you can see the faux distressing more closely…
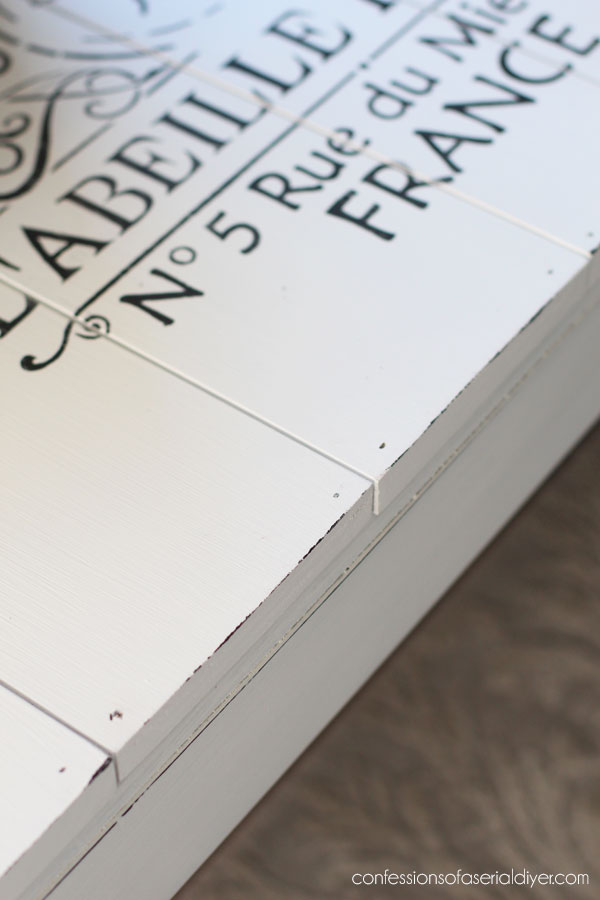
This is such a cute stencil!
I probably wouldn’t have brought this home had I spied it at a thrift store or yard sale, but I loved giving it an update!
And I get to cross another project off my free-to-me pile!
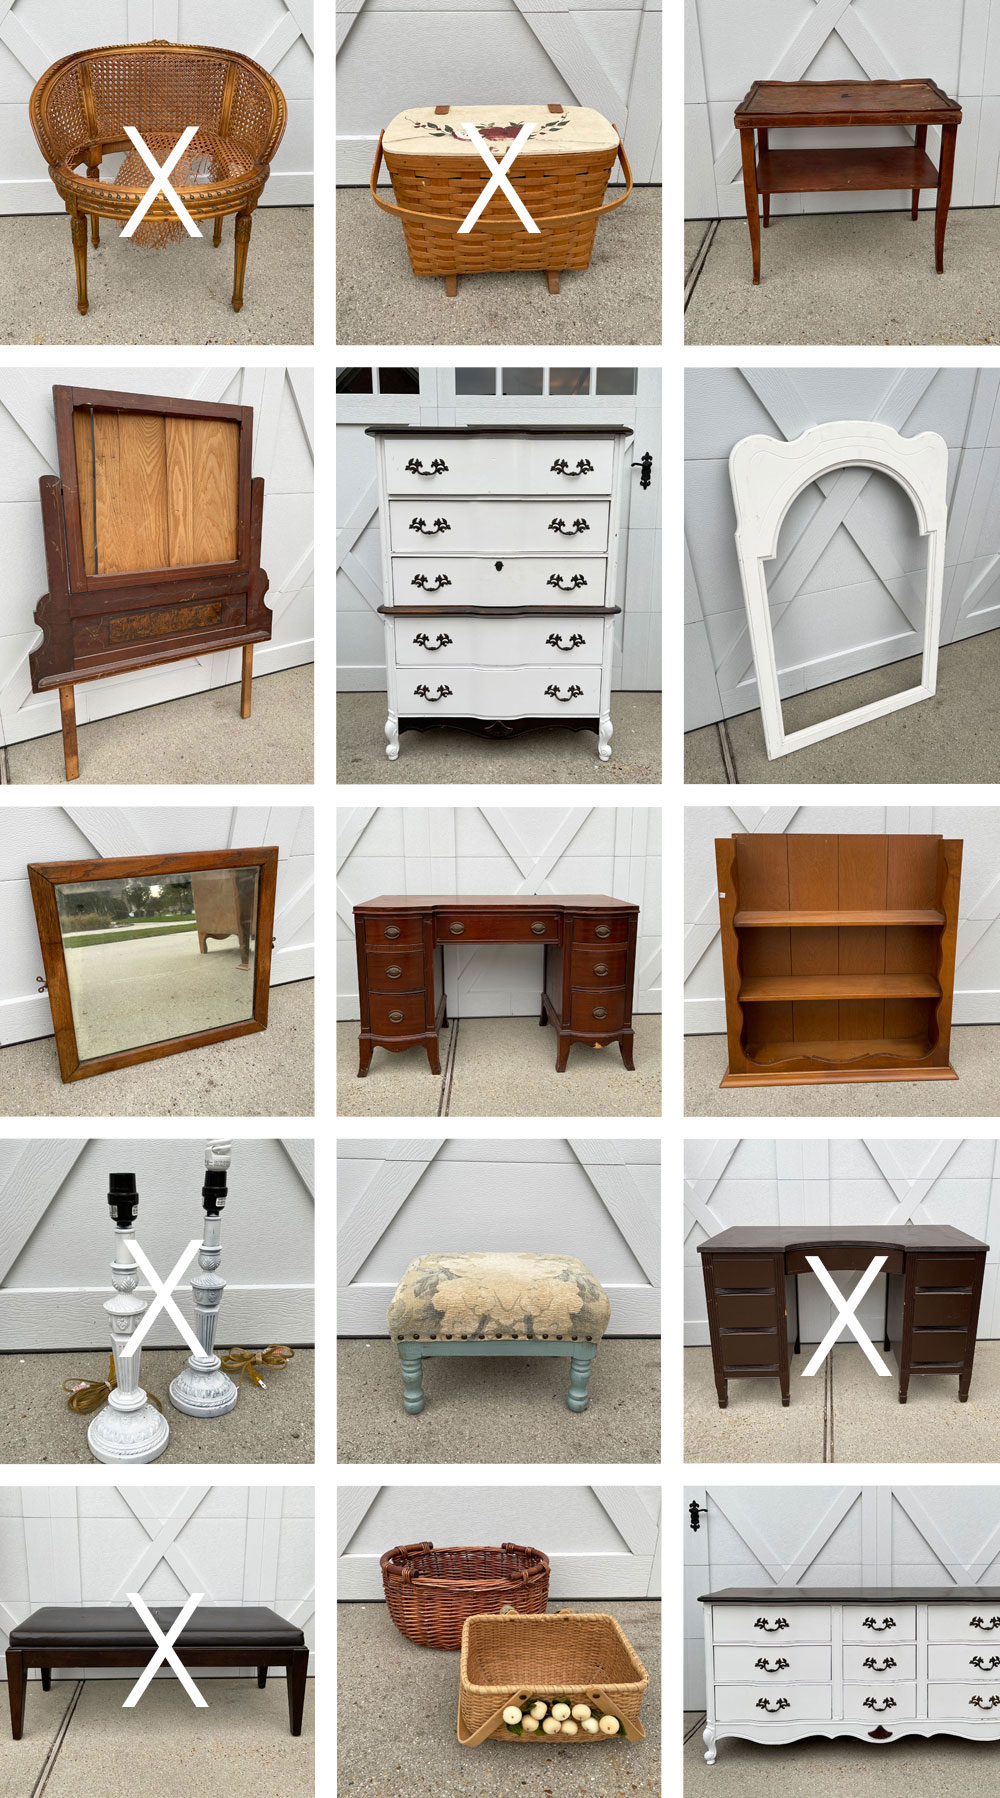
See any you may have missed so far at the links below:
Stenciled Desk Makeover
Curbside Lamp Makeover with Wax
Longaberger Basket Makeover
How to “Fix ” a Broken Cane Chair
I’ll be back on Thursday with my Christmas Village. I don’t share it every year, but I’m excited to share the new idea I came up with for displaying it!
update: Check out my idea for displaying our christmas village that doesn’t take up any extra space here now!
See y’all then!
XOXO,
![]()
Don’t Miss a Thing!
If you like what you see, there are several ways to follow along!
Email * Instagram * Facebook * Pinterest * Twitter


Mary Kaiser says
Wow that turned out so cute! It looks so good now. I would love to have a bench in my entry way to sit down to put on shoes. You are so creative to find ways to make something work that is not expensive, I love it! Looking forward to seeing your Christmas Village this year!
Christy says
Thank you, Mary!! This would be perfect for sitting on to put on shoes! Glad you enjoyed this one! See ya Thursday! XOXO
Sheila Pack says
Absolutely gorgeous, and a tremendous improvement over the original look of this bench! LOVE the stencil you chose… simply perfect.
Christy says
Thank you so much, Sheila! It came a long way ha ha! XOXO
Janice Holt says
No matter how ugly something is, you will turn it into something beautiful. What a great idea for this bench. You would never know it is the same piece of furniture. Your MIL will be wanting this back (ha).
Christy says
Aww thank you, Janice! I do love a challenge! My MIL hasn’t seen it yet, but you might be right lol! XOXO
Robin Stephens says
Wow…. Your creativity is endless. I love the bench. So useful….and sooo beautiful!! (I’d like to make a small suggestion. You can paint your in-floor heat/air registers to either contrast the floor or blend in with the floor. One day a few years ago it hit me how dated mine were (and some even bent in places). I’m not “crafty” so I merely bought attractive black ones from Home Depot. Instant and cheap upgrade! It’s so easy to overlook the little things sometimes, isn’t it???III Ugh.
Christy says
Aww I appreciate that so much, Robin! Thank you! And yes…I have been wanting to do that for forever with our registers and just haven’t gotten to it yet. I remember every time I take photos ha ha! XOXO
Robin says
So hard to “do it all” isn’t it???!!! All of a sudden I see something and wonder why in this world I have not changed it, cleaned it, moved it…tossed it!! Love your posts. Always!
Christy says
Ha ha yes!! And see..I forgot all about it again lol…I’m making a note this time! Thank you, my friend!! XOXO
Robin says
I’ve done the same thing as R.S., Christy. In the big house one floor was Canadian maple & the other was Brazilian tigerwood. Rustoleum had 2 shades of a copper color spray paint where one matched each type of floor. A great transformation from cream floor registers to copper where they totally disappeared!!!!
Christy says
Oh yes…I bet! 🙂
Lori says
You have the most creative makeovers and I look forward to each and every one that you do! Wish I lived closer, I would love to come and browse in your shop.
Christy says
I love that, Lori! Thank you so much!! I wish you lived closer too! XOXO
Cara says
What a cute bench makeover. I especially loved the stencil. You have some true talent.
Christy says
Thank you so much, my friend! XOXO
Christina says
Christy you get a gold star for figuring this one out! Beautiful! I think the stencil is perfect. The bench looks bright and beautiful. We both know this won’t last long in your booth! Have a wonderful, holiday-licious week!
Christy says
Ha ha thank you, Christina! I honestly had no idea what I would do with this when I got it, but I’m glad I figured it too! You have a wonderful week too!! XOXO
Becky says
Wow! What a transformation! You actually made that base look good! Well done!
Christy says
Thanks so much, Becky! I’m so glad the original base worked out!! XOXO
Donna Nance says
So cute and such an improvement! You have so many good ideas!
Christy says
Aww thank you so much, Donna!! XOXO
Cecilia says
Oh so much better! Love the stencil. It’s a bench anyone would love to have now.
😊Cecilia
Christy says
Thank you, Cecilia! This is a great stencil! XOXO
Donna Moore says
Greetings Christy,
I was somewhat skeptical where you were going with this project as I was reading. But you did not disappoint. As usual, you pulled if off. You made an ugly ducking into a gorgeous bench that would make just about anyone proud to display in their homes. I applaud you for having an eye for just the right twist to turn any object into an eye-catching jewel. Thank you for posting and allowing me to peak into your world of beautiful transitions.
Christy says
Aww thank you, Donna! Sometimes I’m not sure where a project will end up, and I was skeptical that I could do something with this one myself ha ha! I’m so glad it worked out though! XOXO
Peggy says
🤍🤍🤍🤍🤍🤍🤍🤍🤍🤍🤍🤍🤍🤍🤍🤍🤍🤍🤍🤍🤍🤍🤍🤍🤍
Christy says
XOXO 🙂
Denise says
I like it right where it is! Looks amazing under your window. 💙💙💙
Christy says
Thanks, my friend! It will be tough to part with this one! XOXO
Cecilia from Georgia says
What a difference! I would not guess it was the same bench. At first, I thought you were going to do stripes, but glad you didn’t. The solid with that beautiful stencil is perfect!! Can’t wait to see your village!
Christy says
Thank you, Cecilia! I agree…the stencil was the way to go! See ya Thursday, my friend! XOXO
Amy Giannini says
Love how this one turned out! I never would have thought to dump the upholstered top.
Christy says
Thank you, Amy! I’m so glad it worked out! XOXO
Ashley says
I love how the bench turned out. It is beautiful!
Christy says
Thank you so much, Ashley! XOXO
Katie says
How do you remove the spray adhesive from the stencil back and does it leave any residue on your piece? Love everything you do!
Christy says
Thank you, Katie! There really isn’t any way to remove the sticky residue without damaging the stencil, but it will just be slightly tacky. I just store them flat in a cabinet with other stencils so they don’t pick up any fuzz, etc they might come in contact with otherwise. And I have not had a residue issue with this brand of spray adhesive, but I have with others in the past. I ended up waxing those to seal them and the wax allowed me to buff the residue off. Hope that helps! XOXO
Sharon Miller says
That looks so pretty!! It was great running into you at your both in the mall. The Dixie Bell finsh & sponge is a game changer while doing projects inside through the winter. You are right about that!!!
Thanks again, Sharon
Christy says
Thank you, Sharon! I enjoyed chatting with you! And yes, the sponge and Clear Coat are the best!! XOXO
p says
Thats an attractive and solid transformation. 🙂
It looks wonderful. Great decision !
I so wish I had more skills with basic carpentry. You do it so well. 🙂
Thanks for sharing.
Happy Holidays.
p
Christy says
Thank you, P! I used to have my hubby do all that for me, but one day I got tired of waiting for him ha ha! XOXO
Deanna says
Love the bench makeover and the staging. I wish I lived near your shop, I would grab this (and a few other things 🙂 in a heartbeat! Your creativity and fresh new ideas are so inspirational!!
Christy says
Aww thank you so much, Deanna! I really enjoy the staging part. Wish you lived closer too! XOXO
Rose Lefebvre says
It is lovely and so versatile. Love it!
Christy says
Thank you so much, Rose! XOXO
Cynthia Quintanilla says
Hi Christy,
The bench tuned out so lovely. I can see it in a beach cottage! I must tell you though, that those of us more “mature ladies” find a hard unpadded benches a bit difficult to manage! LOL & TMI ☺️. I do love when you show us a gorgeous repurposed upholstered bench!💕
As always I enjoy your work and inspirational posts. 🤶🏻
Cynthia 🌺
Christy says
Thank you so much, Cynthia! And I hear ya ha ha! Maybe it’s better suited to just look pretty under a window lol. Have a fantastic day, my friend! XOXO
Kimberly Wollmer says
This turned out so beautiful! And I love the legs as they are. By the way, I don’t know about Goodwill stores in other areas, but in my town they no longer take or sell furniture 🙁 I’m glad there is a Habitat Restore close by. I am very impressed with your electric tool skills. I still wait for my hubby to cut up lumber for me. haha!
Christy says
Thank you, Kimberly! What a shame your GW stores aren’t taking furniture. Good thing you have a Habitat store! I used to have my hubby cut all my things, but then one day I got tired of waiting on him lol! XOXO
Leslie says
Hi Christy, another fantastic makeover. Only you can take a tired looking bench and make it look brand new.
I have a friend who is about to retire and do what you do.
Any advice you would give her before she begins her new dream job?
All my best …./leslie
Christy says
Thank you so much, Leslie! One thing that has helped me is working on “hauls” crossing all the pieces off the list before buying more. It is really easy to get carried away buying and before you know it, you have a full garage and less interest in recreating the things you found long ago. Also, I would suggest she paints what she personally loves. Don’t try to please everyone. It is so much more enjoyable that way! Best of luck to her! XOXO
Leslie Delanty says
Thanks Christy, I will pass on your advice to her. She is a pretty colourful character …. more of a Glamma than a Gramma ……/leslie
Christy says
My pleasure! XOXO
Marcie Lovett says
I was so sure it was getting reupholstered. Should have known better. Nice use of leftovers, I’d say!
I understand the original weird cutout top – the woven straps are to make the cushions more comfortable, like on an upholstered chair, but I’m guessing it was done in a way to save money on construction so it could be sold for less. No matter, because it looks completely different now, and probably is going to fly out of the booth.
Christy says
Thank you, Marcie! I had originally planned to reupholster, but I didn’t think pretty fabric worked with those simple legs. When I had no luck finding curvier legs, I moved onto plan B, and I’m so glad now that my first idea didn’t work out! And that makes sense with original seat! XOXO
Gloria Stage says
Most definitely love this bench. The planked top makes so much more sense then the padded top. Gives it that homey feeling. The stencil was just perfect andxwith the pillows and tree it looks beautiful in front of the window. 😊 Love it!
Christy says
Thank you so much, Gloria! I’m so glad you liked the outcome! XOXO
Petra says
Lol so glad you painted it Cotton! What an improvement and SO many uses. Thanks for reminding me also of the faux distressing, I really must try that. Have a great week 🙂
Christy says
Thank you, Petra! I am so happy my original plan didn’t work out! And that faux distressing sure comes in handy! XOXO
Robin says
I think I’m your classic armchair ‘furniture refurbisher’. It’s wonderful to see how each is repurposed by going the extra mile beyond just paint. It is something I would not necessarily do for a variety of reasons. Keep ’em coming, please. Even this type of remake inspires one to ‘adopt’ certain techniques for smaller, simpler remakes.
Jeanne says
I agree with everyone. You have an eye and you’re “real.” I feel like we are kindred spirits. 🙂 Keep up the impressive makeovers!
* * * * * * Reduce * * * * * * Reuse * * * * * * Recycle * * * * * *
Christy says
Aww thank you, Jeanne!! I appreciate that! XOXO