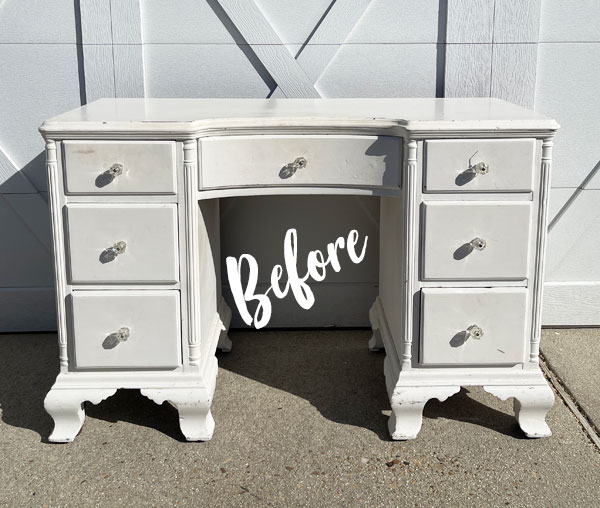
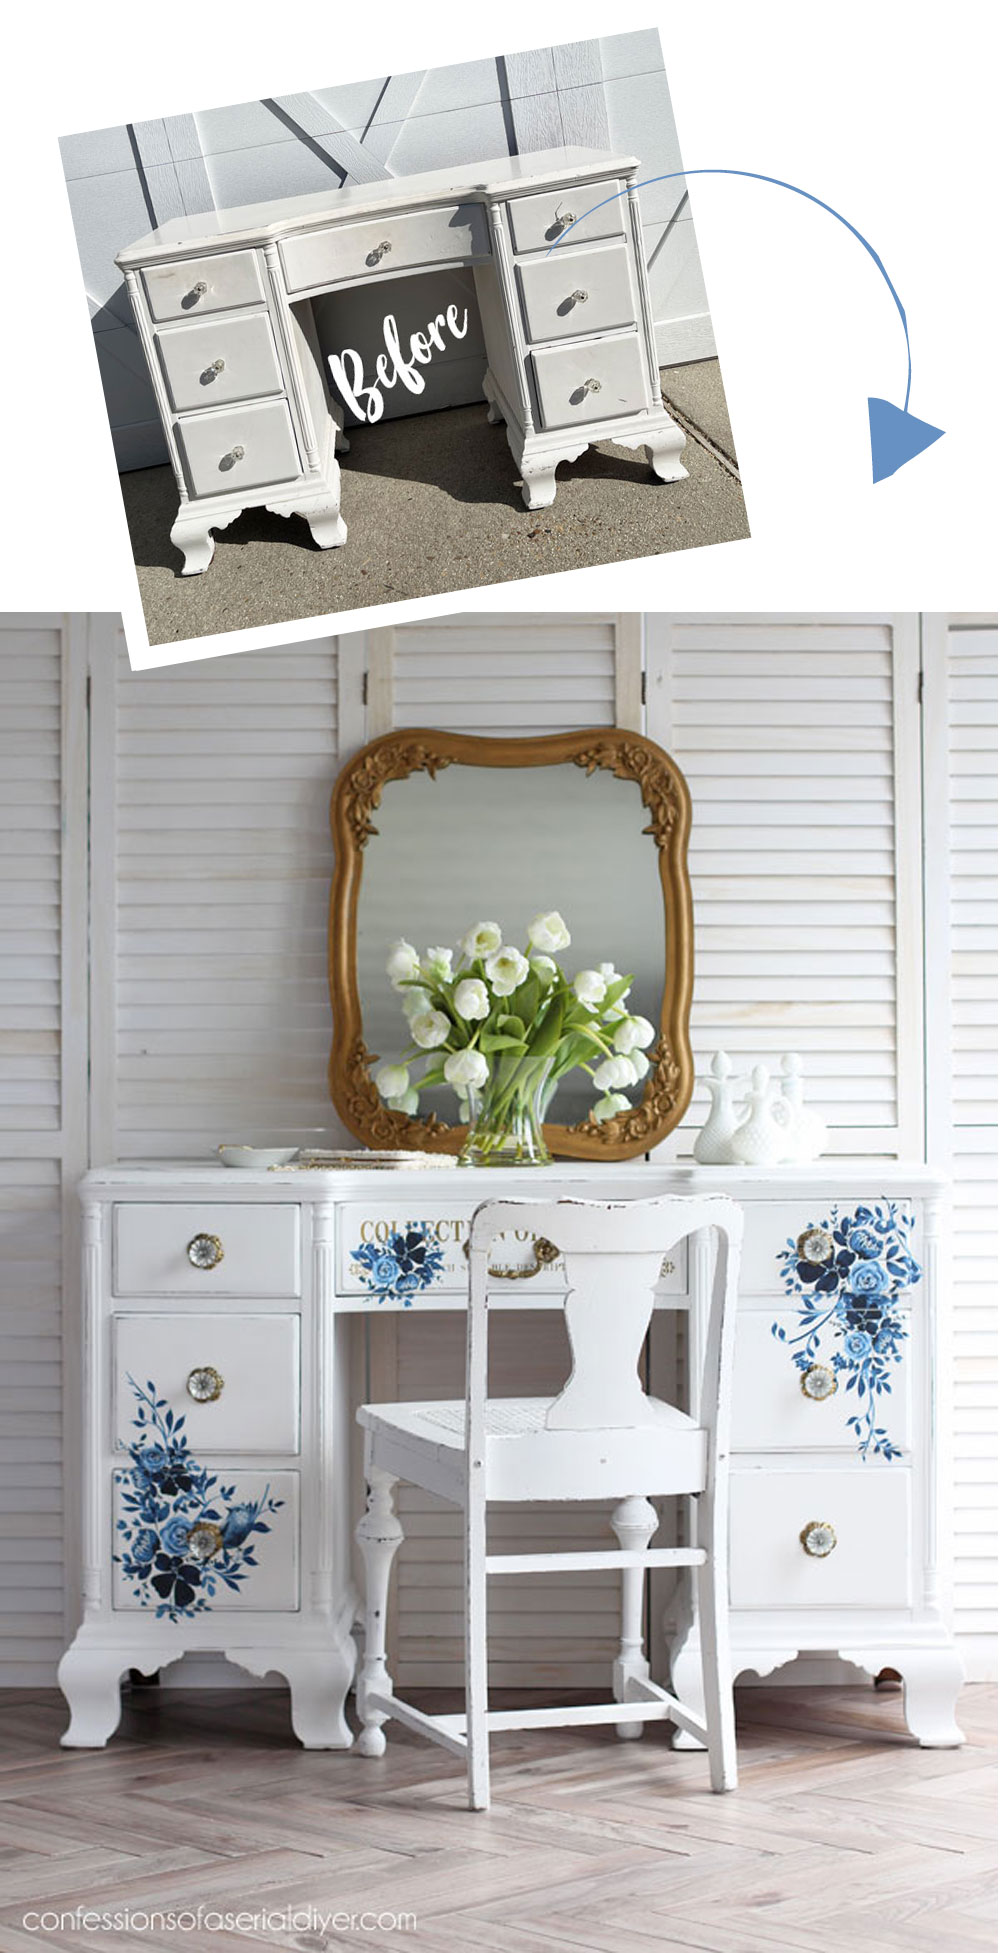
Who’s ready for a furniture makeover today?? Hello, dear friends! It’s Furniture Fixer Upper time again, and my fixer upper this month is this white painted desk I found at the thrift store for $49.95:
Be sure to look for my friends’ makeovers at the bottom as well, and be on the look out for nine BRAND NEW TRANSFERS that were just released yesterday that I’m sharing at the end as well!
If you missed my post on Tuesday, I shared my brand new haul which included this treasure of a desk! Or at least I thought it was a treasure.
SO easy, right? I’ll paint it in one of my favorite coastal blues, shabby it up a bit to show some white peeking through. Easy!
Um. no.
Bree….what were you thinking?
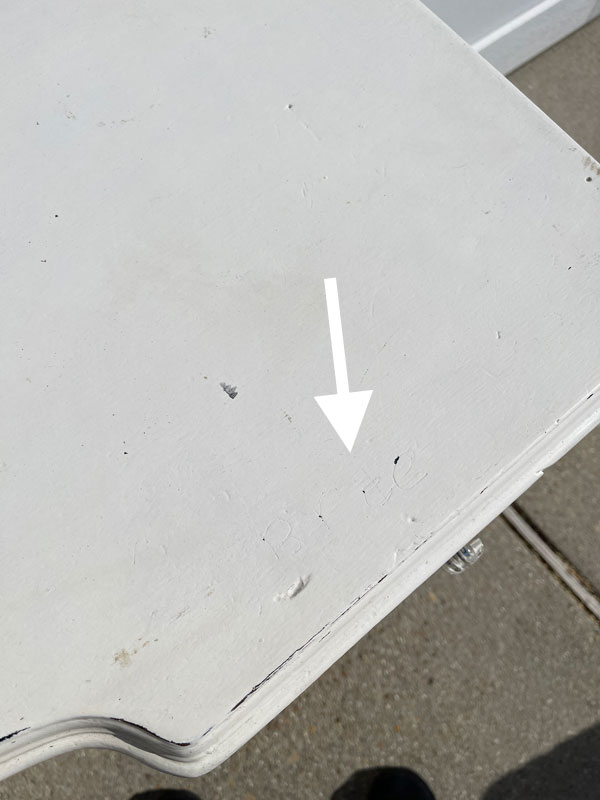
She thought she’d make sure everyone knew this was her desk by carving her name in it. You can see just in that one photo alone that this thing was not in the best condition. It was truly a hot mess.
I’ve included a few affiliate links so you can find the products I love.
Do I need to remove the old paint first?
The answer to that question depends on whether the original paint is well-adhered or not. This was on there good. You also need to be sure you’re not dealing with lead paint if you’re not sure of the age of the paint. I used this lead tester, and this desk passed the test.
See more on How to Paint Already Painted Furniture HERE.
Sand
I started by sanding the top to try and smooth out all those imperfections and ended up sanding just about all over, enlisting the help of both my rotary sander and my corner cat sander:

Those are both the cordless ones that require the pricey batteries, but if you already have the batteries from other Ryobi tools, it’s awesome to not have any cords in the way. They both come in a corded version also.
Once I was finished sanding, I vacuumed up all the dust with my shop vac.
Clean
Next, I gave everything a good cleaning with White Lightning.
Most of the drawers looked like this to start:

So I started with them first…
Do you see that water?
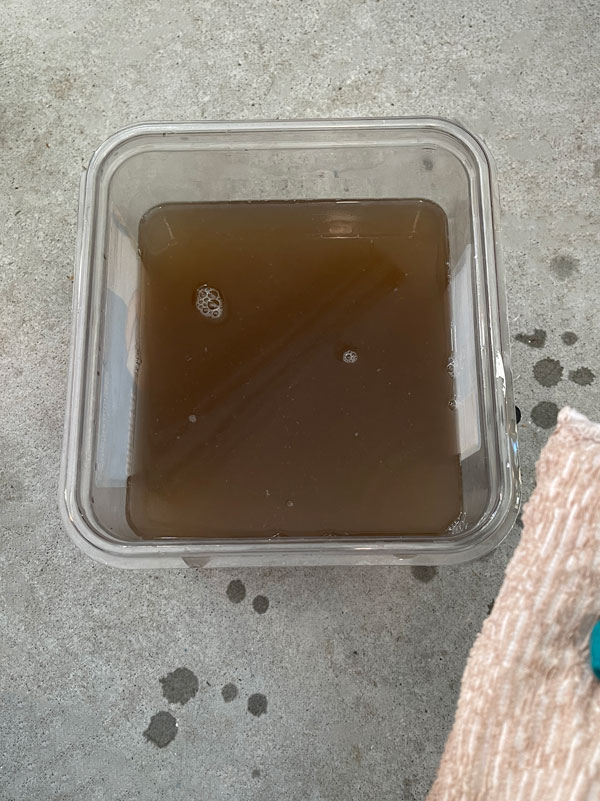
That was just from the drawers! How do the insides of drawers get that dirty?
Those terrycloth pads can be found HERE, and come two to a pack.
I swapped out my water for clean water and wiped them all down again to remove any remaining dirt and residue. Then I mixed a fresh batch for the rest of the desk…one TBSP of White Lighting added to half a gallon of warm water.
I like to clean before filling the holes and gouges.
Fill holes and gouges
There were still several areas that needed filling, and I did that with Dixie Mud in the white this time:
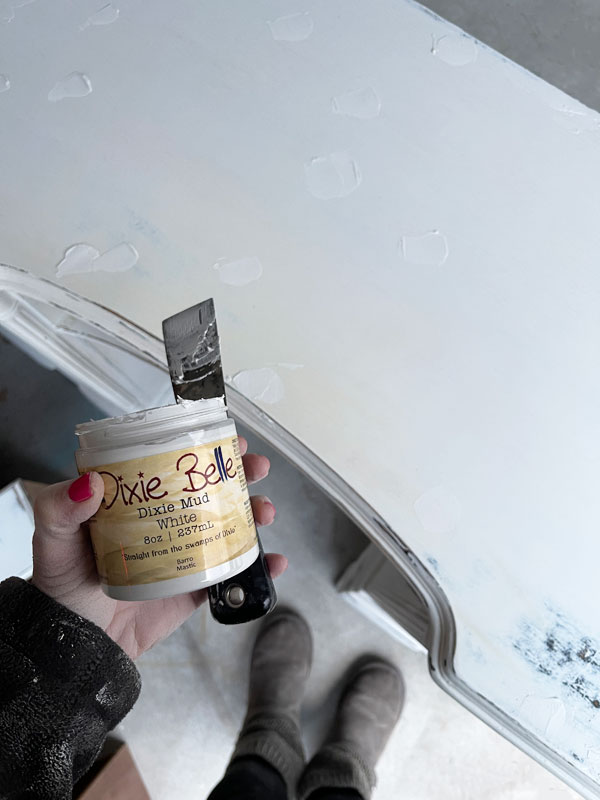
I like to leave the Mud to dry for a few hours before sanding for the best results. Then, I sanded with 220 grit sandpaper and vacuumed once again, then wiped with a clean, soft cloth.
Block the Bleed
If you noticed in the photo above, there is bleeding occurring in the front, center of the desk, but also in several other areas as well.
So, I gave everything one coat of BOSS in White and let that sit overnight:
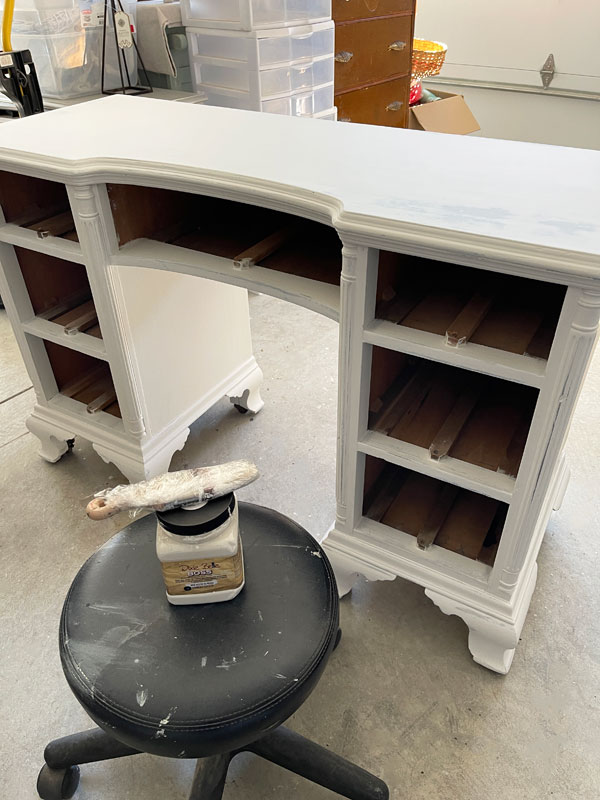
Paint
Finally, the fun part!
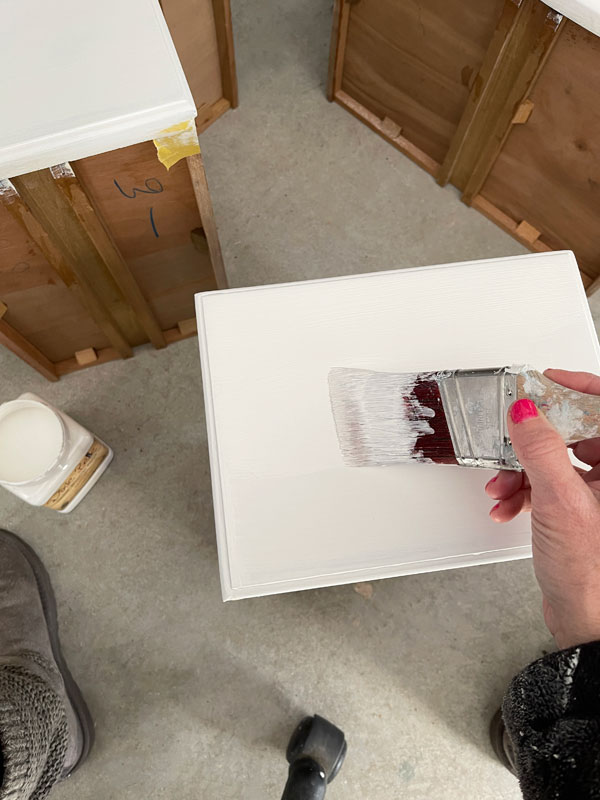
I decided to abandon my plan of a dreamy coastal blue, and gave it two coats of Cotton instead, sticking with the white and using my favorite Mini Angle brush to apply it:
I also like Purdy brand brushes as they are very similar except the metal part on the Purdys will rust while Dixie Belle’s are made of stainless, so they won’t.
Once I had all the painting done, I sanded all over to smooth, hitting the edges a bit more to distress just a bit.
Adding the Pretty in Blue transfer
Here’s where the real fun happens!
This is one of Redesign’s newer transfers, released in the Fall called Pretty in Blue:
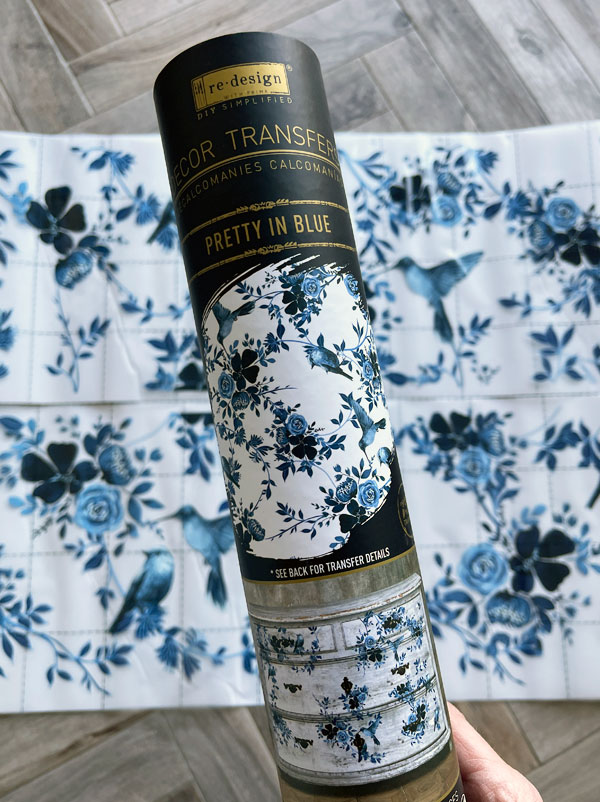
I love this one so much!
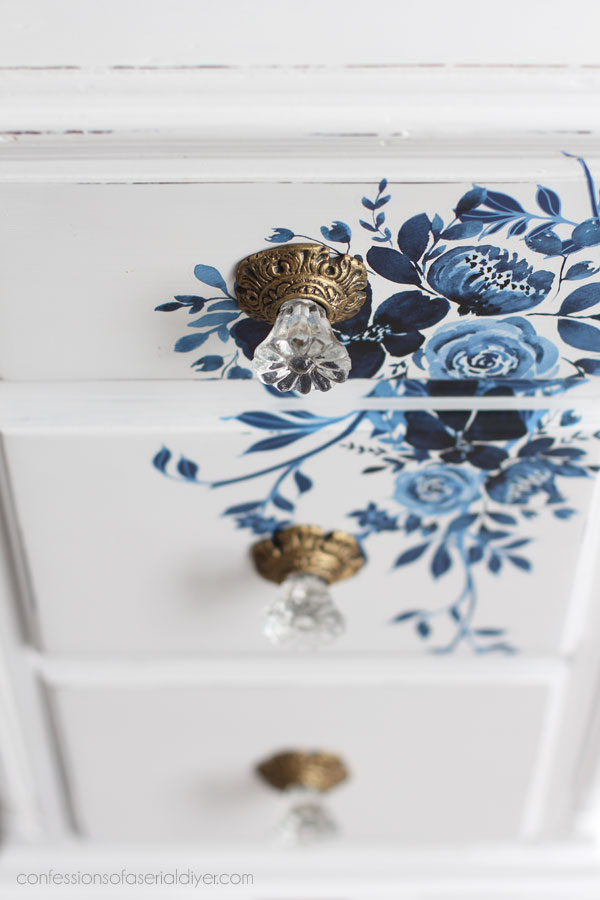
The pieces in the design are all connected though, so I carefully cut them apart, arranging them in a way I liked for this desk:
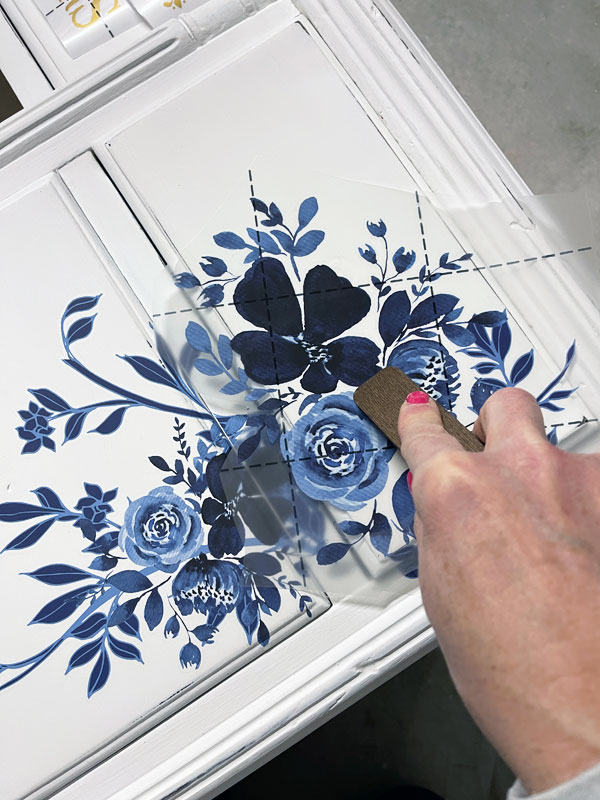
If you haven’t used a transfer before, there isn’t much to it.
- Get an idea of where you want it first. Transfers can be cut apart and combined anyway you like.
- Peel off the white backing.
- Lay it onto your surface.
- Use the enclosed stick (or this fancier tool) to burnish (rub with pressure) to release the image from the clear top sheet onto your surface.
- Once the image has been transferred, peel back the clear top layer and remove.
- Then take your fingers, a clean cloth, or a finishing pad and rub it across the surface to be sure it is adhered well all over.
I layered some of this transfer over a couple of leftover pieces I had from the Flower Collector transfer also:

Seal
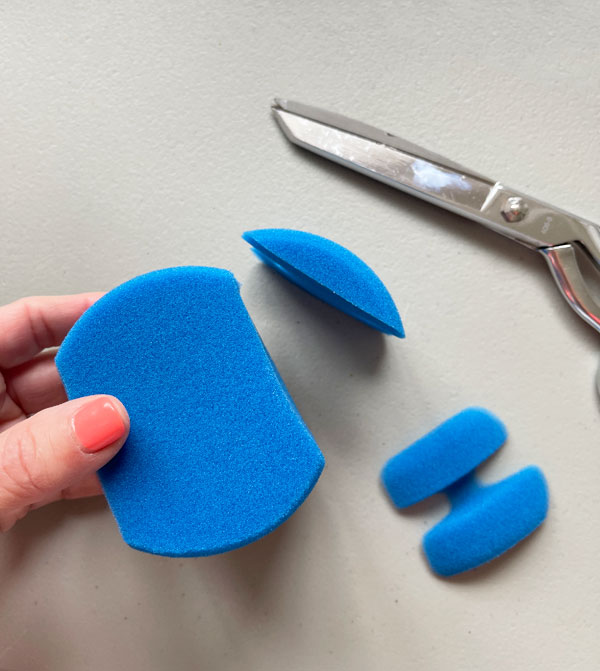
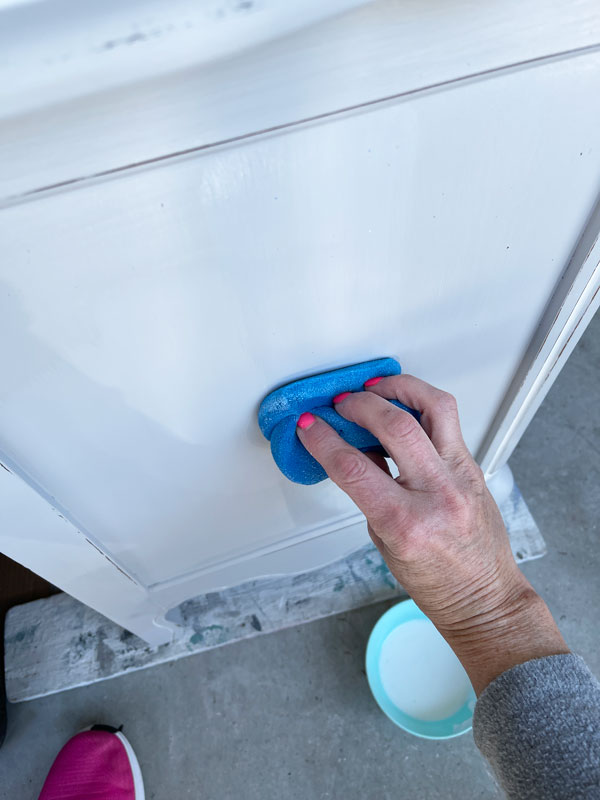
The final step was to seal this lovely piece! I sealed everything with Clear Coat in Satin using the blue sponge applicator to apply it.
If you cut just the very edges of the sponge off, it will get right up against those flat edges:
This is another piece, but here is a visual:
The Satin Clear Coat is an excellent sealer and perfect for most furniture projects, but since this desk will likely get heavy use, I may go back over the Clear Coat just on the top with a coat of Gator Hide for maximum protection.
*NOTE*
If you want maximum protection over a transfer with Gator Hide, be sure to apply a coat of Clear Coat first before applying the Gator Hide as the water repellent properties in the Gator Hide can cause the transfers to lift.
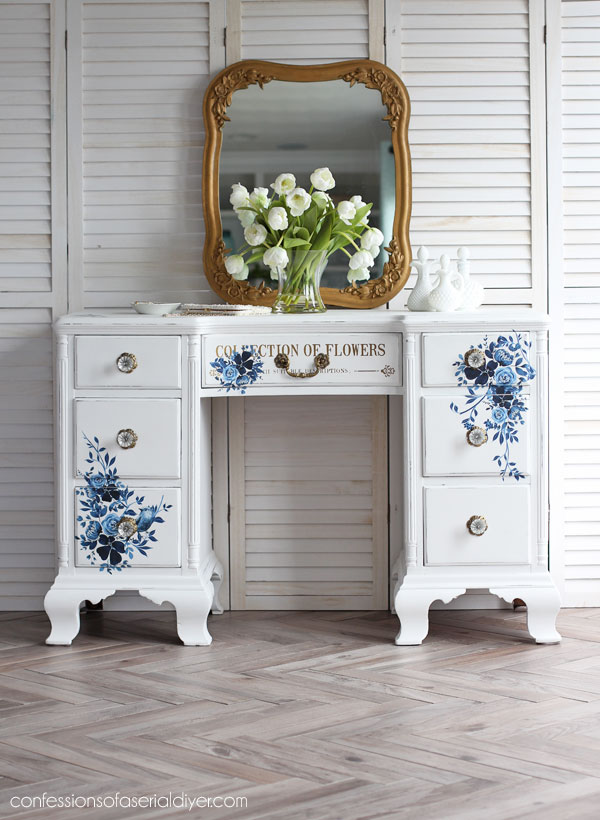
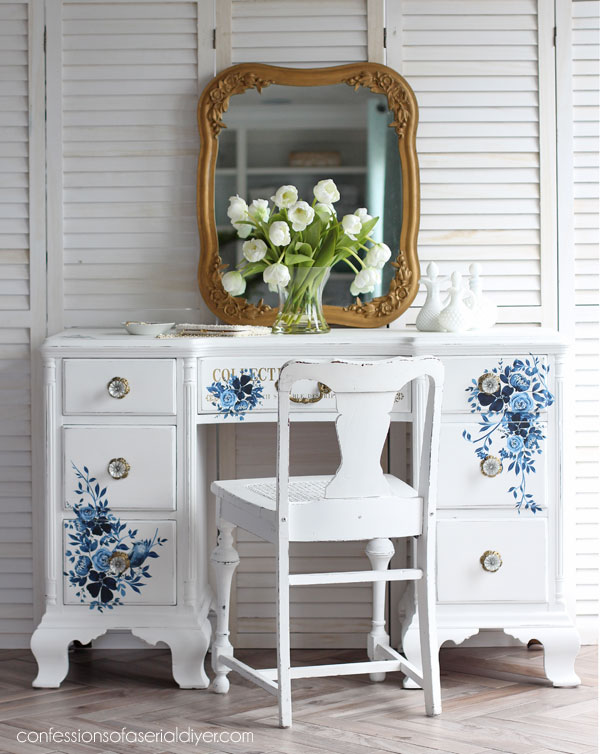
The Big Reveal
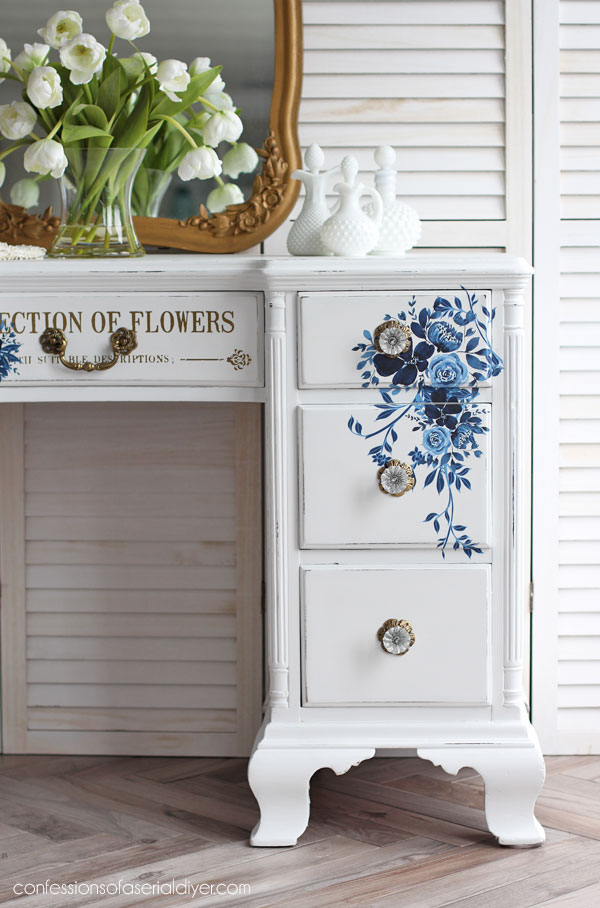
Here is how this pretty lady turned out:
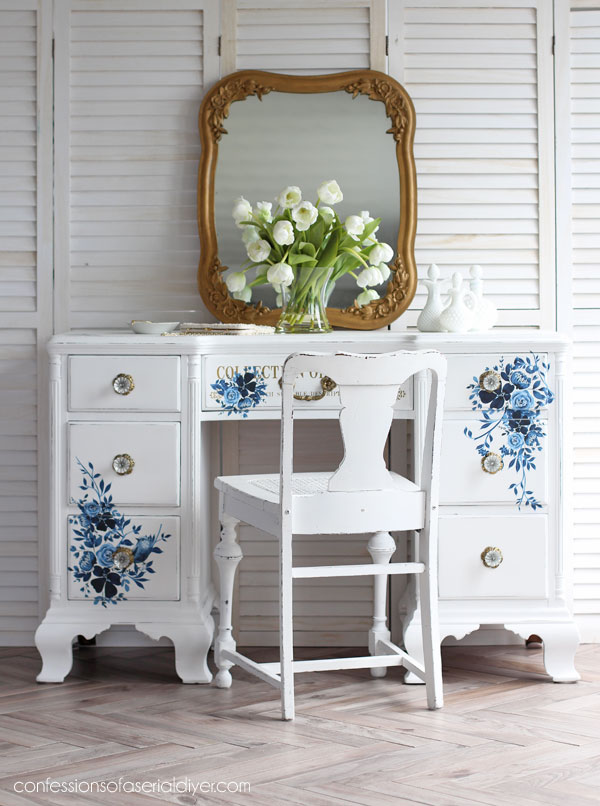
I love this transfer against the crisp white:
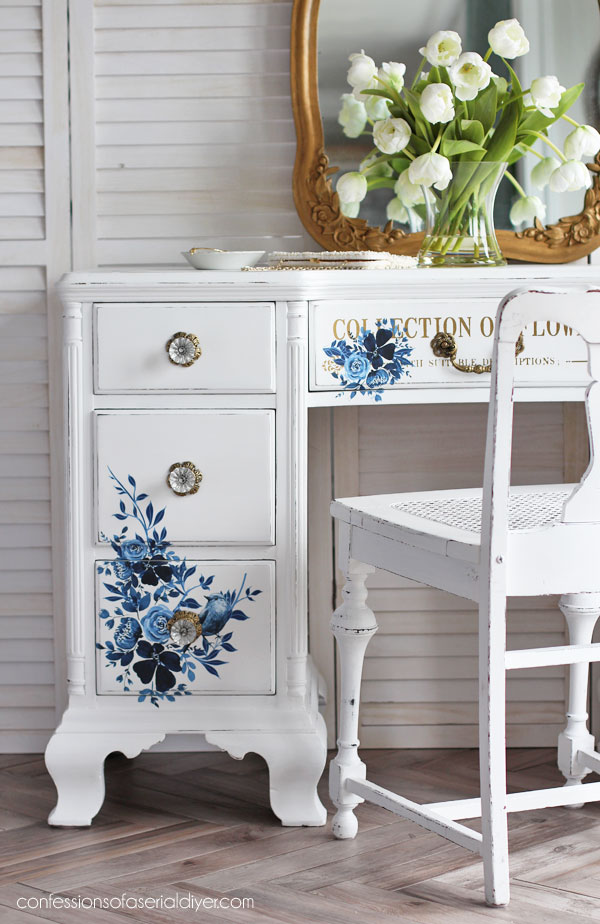
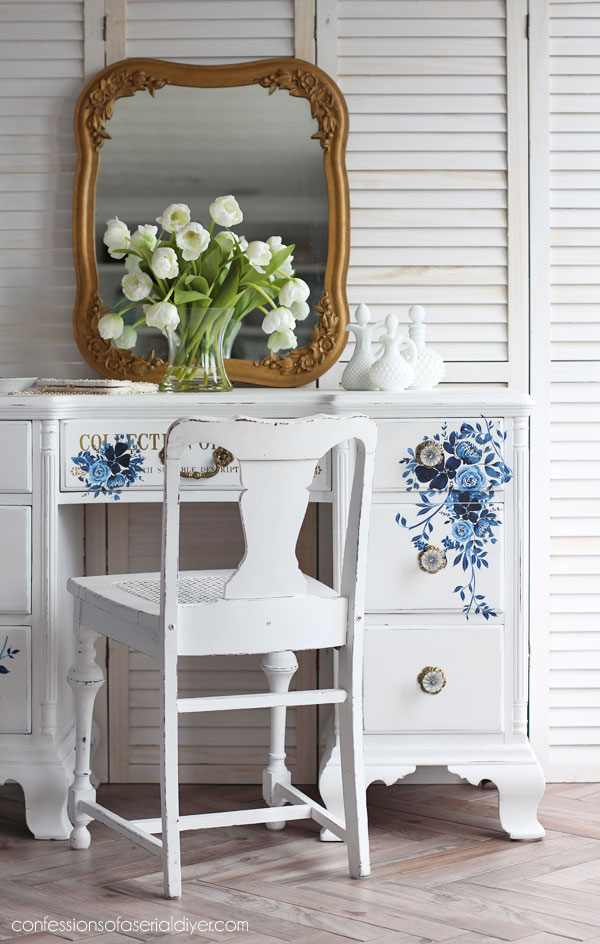
Here’s a look without the chair in the way…
I had these pieces from the Flower Collector transfer left over from another project and thought it would be pretty to layer the gold and blue:
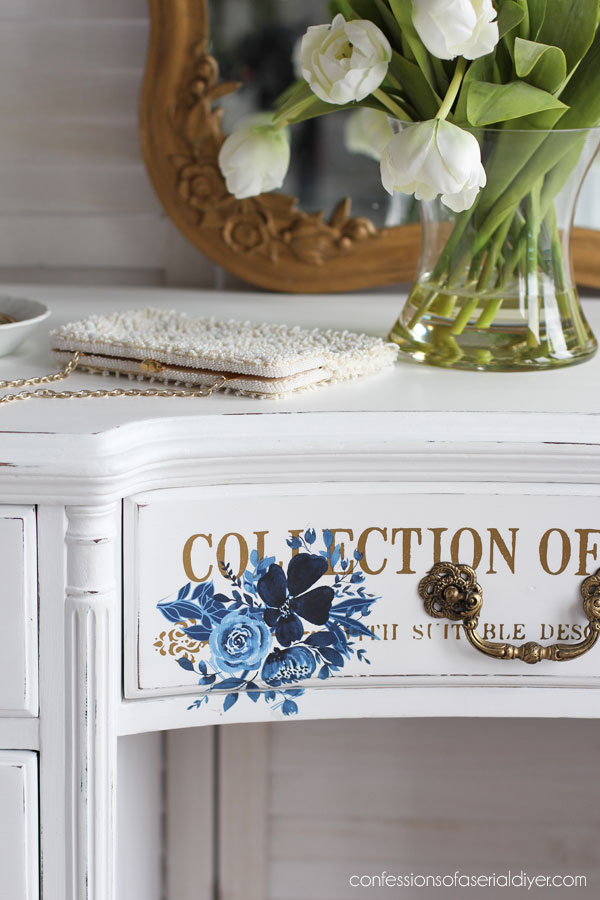
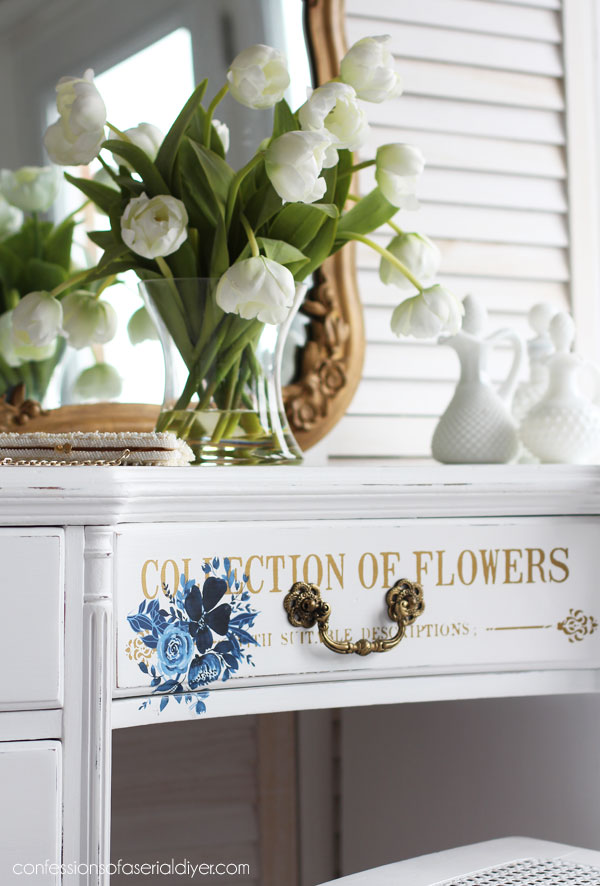
That pull is one I had in my stash that I brought to life with a little Gold Gilding Wax:

It was originally the same color as the the knobs that weren’t done yet. Those came from Hobby Lobby…
I often get questions about how I cut the long posts on the Hobby Lobby knobs down. I use this Black and Decker rotary tool that is similar to a Dremel tool:

I had to buy the metal cutting disk separately though which I believe I found at Home Depot.
Just be sure to use extreme caution since it is like a mini saw!
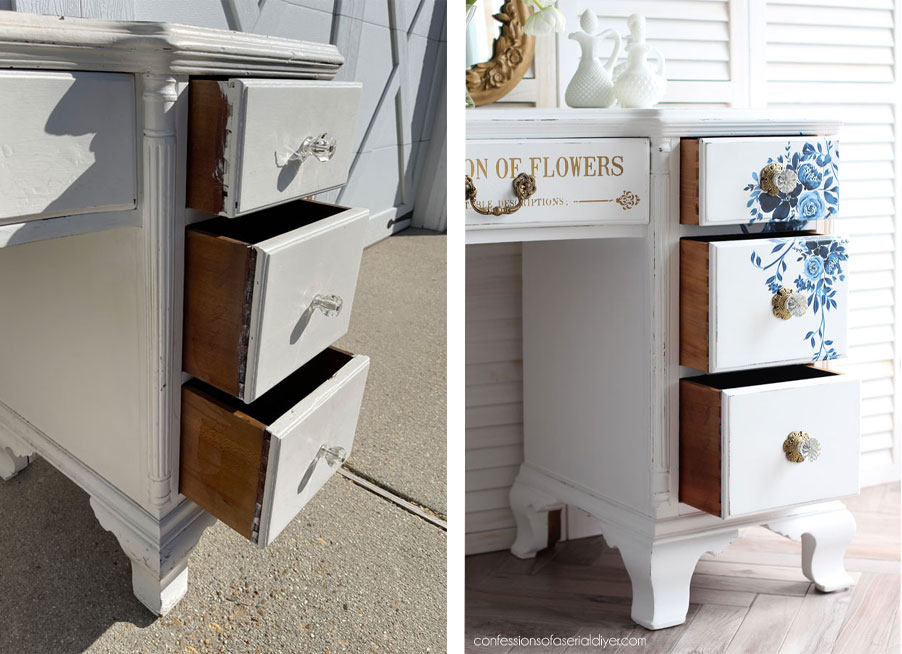
The drawers
The drawers were disgusting. Not only were they filthy, they had gotten paint over the edges and onto the dovetail joints. I sanded those as best as I could along with the entire outside of each drawer:
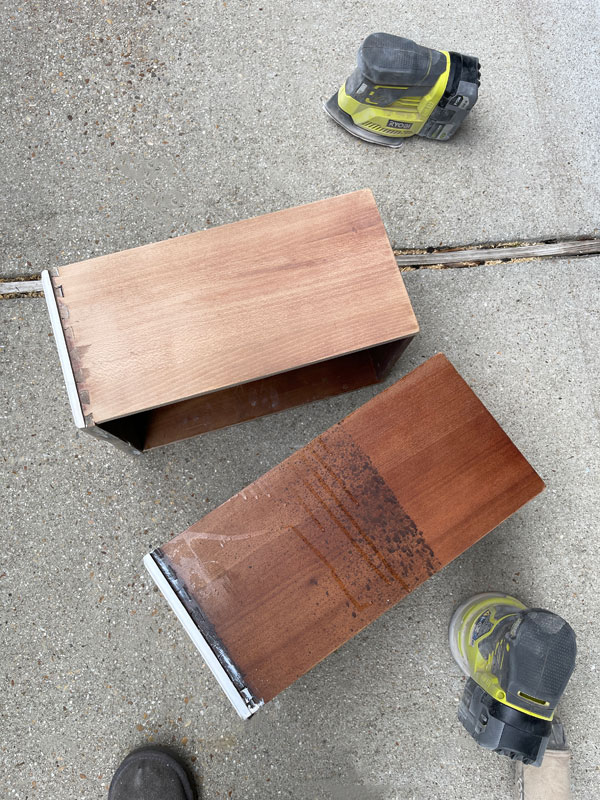
Then, I hydrated them with Big Mama’s Butta in Suzanne’s Garden scent:
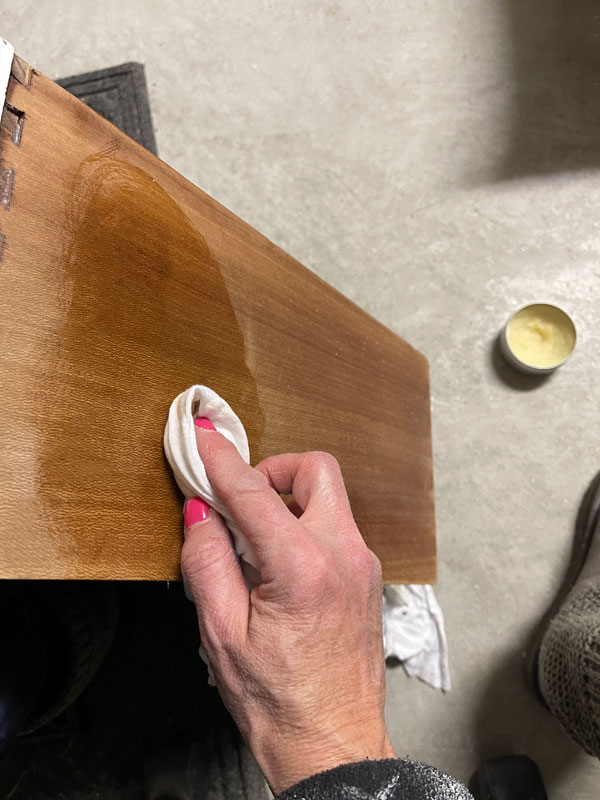
The Butta seals and protects and when added to the bottoms where they slide, it helps them to slide more easily. It is oil based though, so I just use it on the raw wood as not to discolor the white paint.
So pretty now when you see the sides!
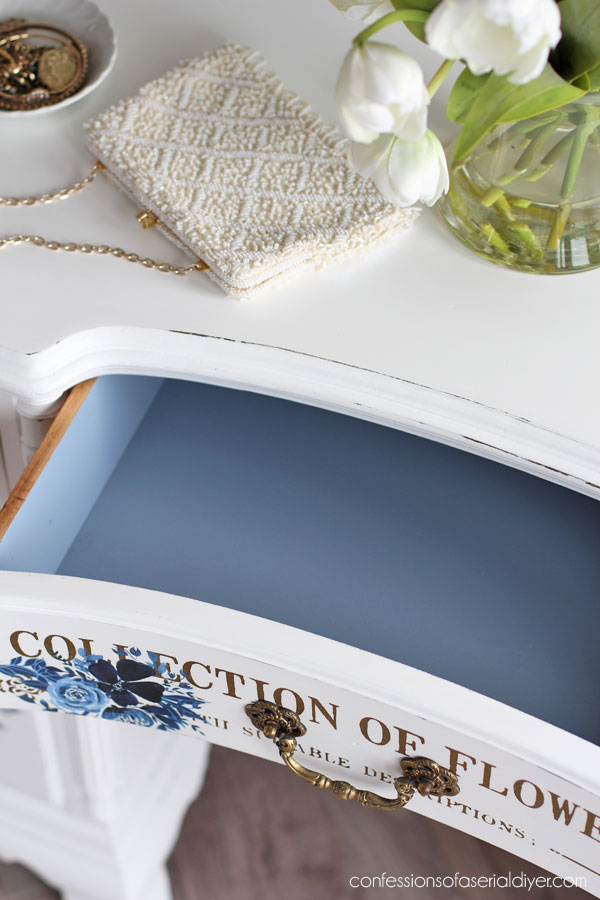
The insides were painted in two different colors, Quiet Cove in Silk Mineral paint for the top drawers:
And I used Nautical from the Silk line on the bottom two drawers…
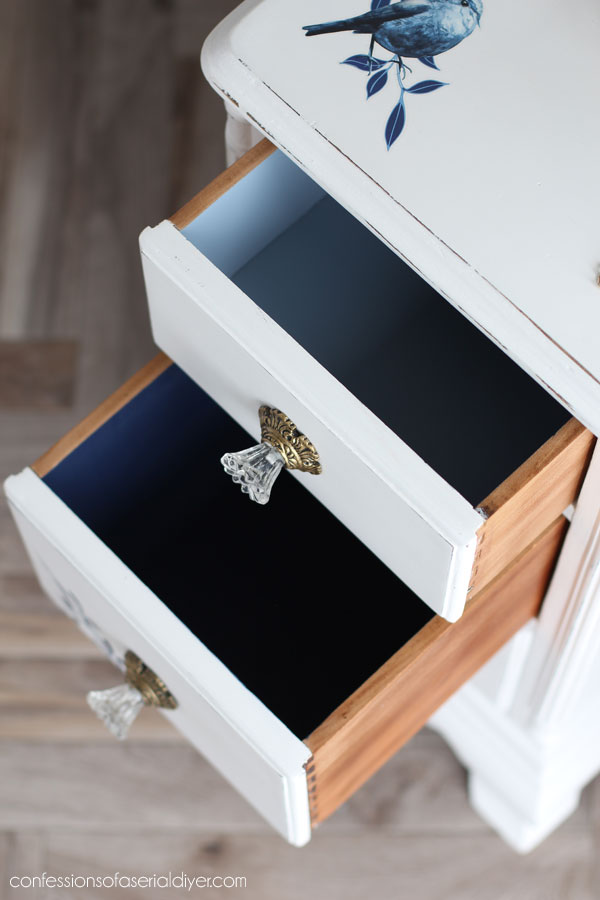
Silk does require a light sanding to prep except on raw wood, so it is perfect for the insides of drawers. Plus, it has a built-in topcoat. Win win win!
I am so smitten with this pretty little thing now!
She hasn’t been living her best life, but hopefully, she will now be loved for many years to come!
Don’t forget to check out what my friends are sharing today as well:
*Shop news*
In shop news, Redesigned with Prima just released several BRAND NEW Redesign with Prima transfers!
I’m especially excited about this bunch because I love them all! Click on the images or on the links below each to see them in my shop!
First up are two larger transfers:
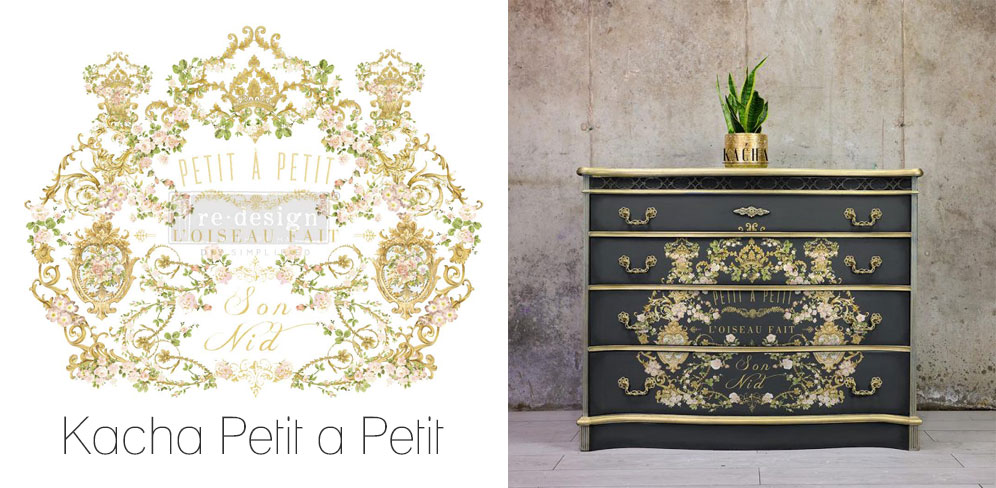
Petit a Petit by Kacha
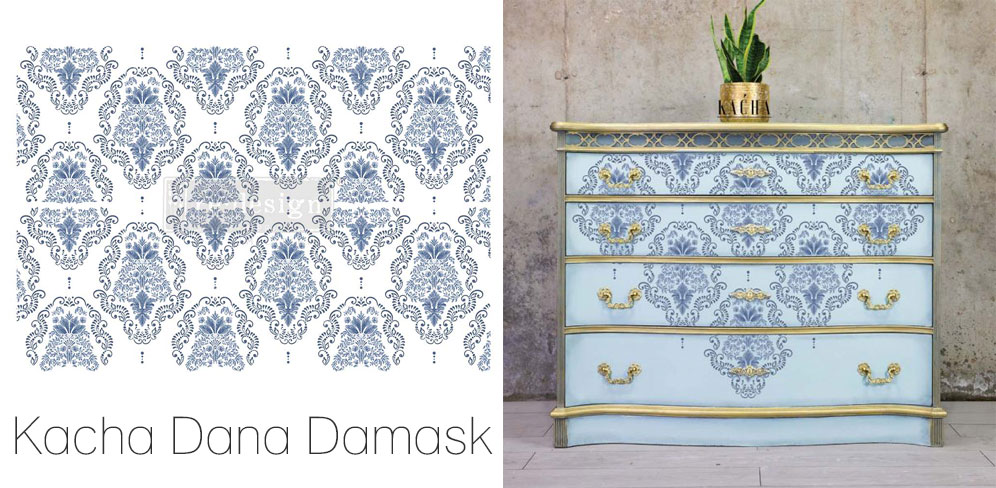
Dana Damask by Kacha
And there are seven smaller Middy transfers that include three 8.5″ x 11″ sheets of designs in each package:
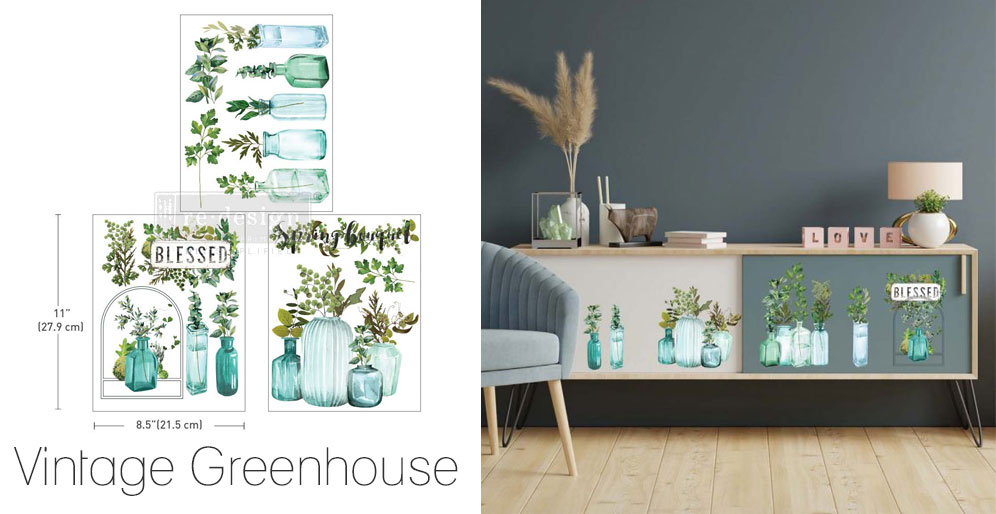
Vintage Greenhouse

Lovely Labels
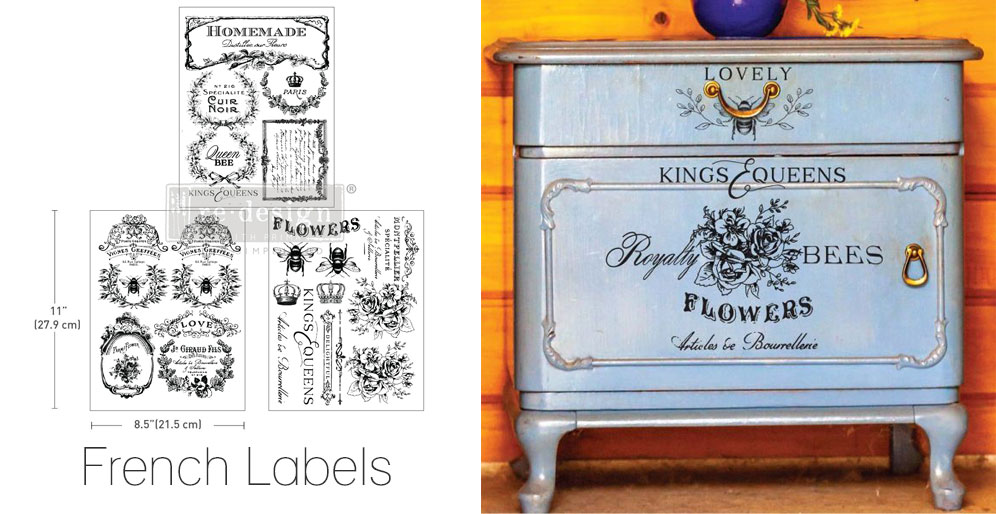
French Labels
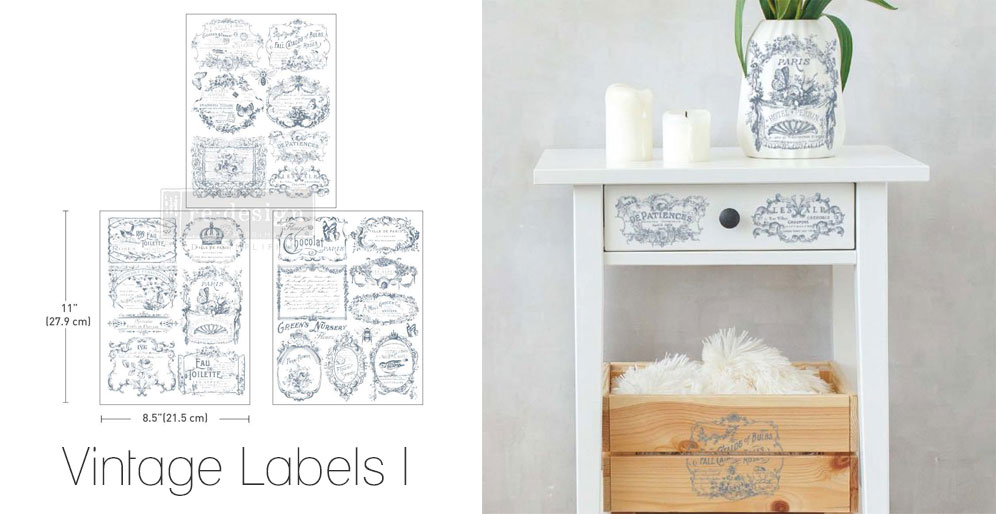
Vintage Labels I
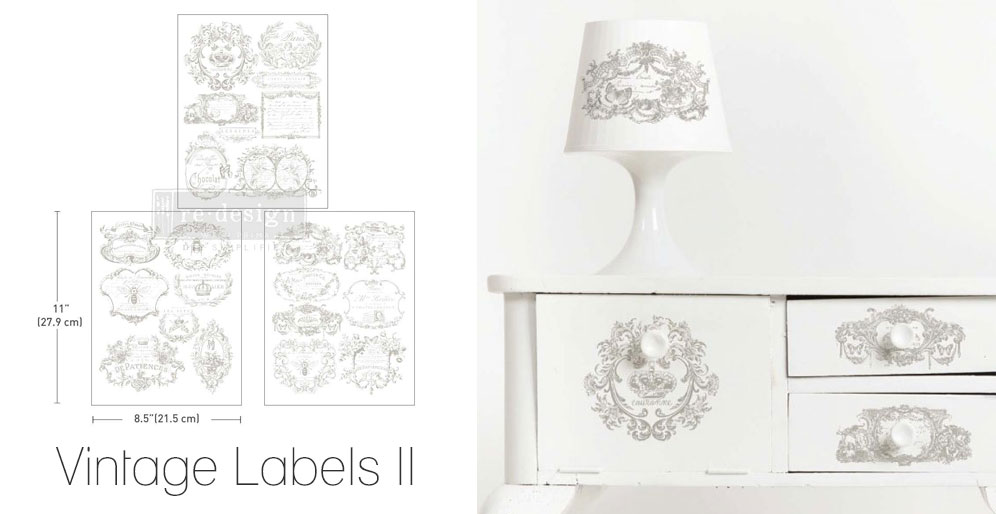
Vintage Labels II
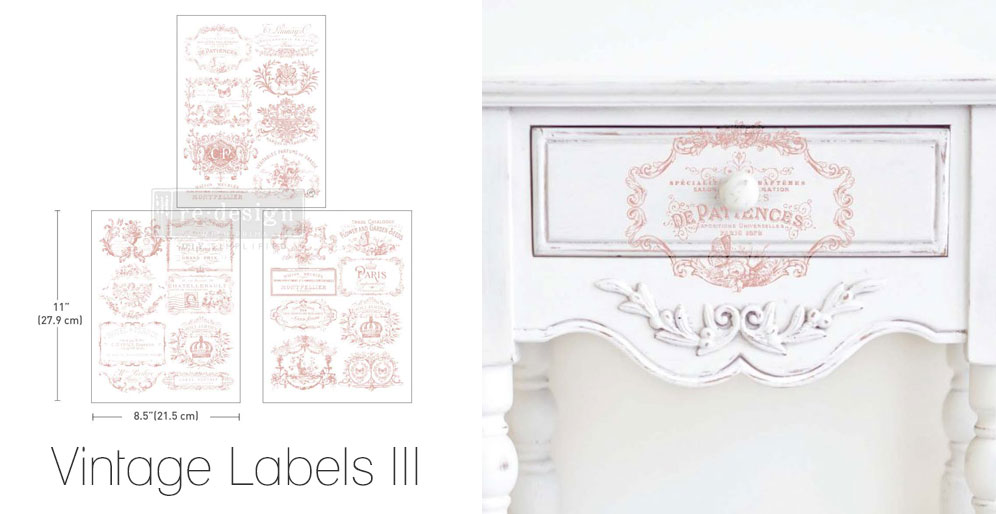
Vintage Labels III
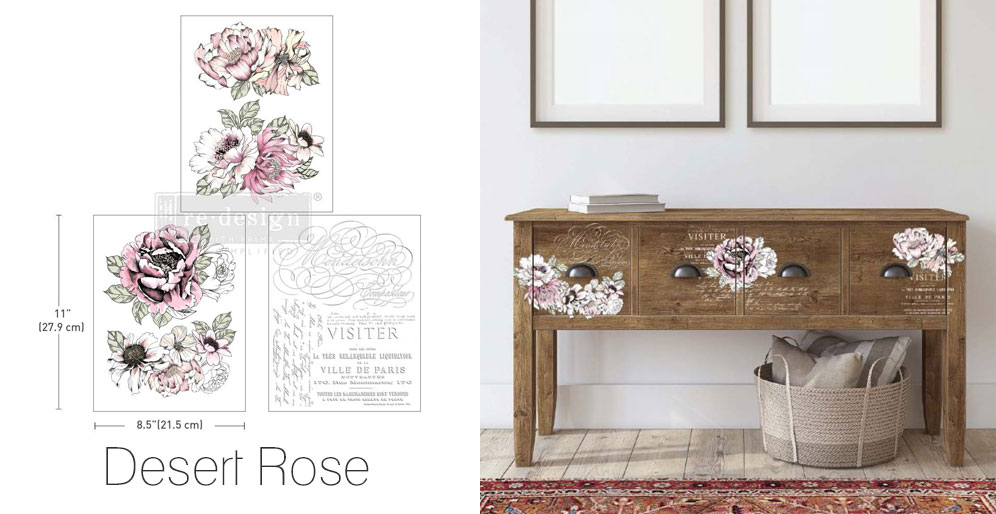
Desert Rose
Y’all know I adore the French transfers!!
And that’s it! I hope you enjoyed the first project completed from my brand new haul!
I’ll be playing with those new French transfers on some of these smalls for Tuesday’s post:
UPDATE: See all six of these mini makeovers HERE now!
I hope you have a fantastic weekend!
XOXO,

Don’t Miss a Thing!
If you like what you see, there are several ways to follow along!
EMAIL * INSTAGRAM * FACEBOOK * PINTEREST


Get FREE SHIPPING on all orders over $50. No code needed at checkout! Orders under $50 always enjoy $8 flat rate shipping! Most orders ship same or next business day!


Janette says
It looks beautiful and I love the transfer, so pretty, if Bree ever sees it she will be truely miffed haha.xx
Christy says
Thank you so much, Janette! Ha ha, yes she will! XOXO
Mary Kaiser says
Wow she is a beauty now! I bet she just sighed with relief when you were working on her, like she had a complete spa treatment! What a beautiful desk now! I love the transfer you used, and especially loved the colors you painted inside the drawers! I new transfers are all so beautiful!
Christy says
Thank you, Mary! It is such a treat to watch these pieces come back to life with each step. She is so happy now! And aren’t those new transfers SO pretty?? Have a lovely weekend! XOXO
Denise Cox says
Christy it’s absolutely GORGEOUS!!
Christy says
Thank you so much, my friend! XOXO
roe squire says
This was such an informative tutorial- thanks! And I love the finished desk! It is so pretty with the bright white paint and beautiful transfers. Love it.
Thanks!
Christy says
I’m so glad this was helpful, Roe! Thank you! XOXO
Barbara Warner says
You did a beautiful job on this desk. From frumpy to fabulous! I love how you clean ALL of the desk and pay so much attention to the drawers. The knobs add a lot to the overall look I love the gold and blue transfers!
Christy says
Thank you, Barbara! This little lady needed all the cleaning for sure…it didn’t even look that dirty when I started cleaning until I saw the water lol. The drawers are always fun to add a little something to! XOXO
Janice Holt says
This turned out so pretty with the blue transfer and then the inside of the drawers painted that blue color just finished it off perfectly. Love it and have a great week-end.
Christy says
Thank you, my friend! I love when all the elements come together in the end! Enjoy your weekend too!! XOXO
Jan Gibson says
This came out beautiful!
Christy says
Thank you so much, Jan! XOXO
Cheryl says
It’s amazing how dirty drawers get!! Great job and I love the after!
Christy says
OH yes, this must have been stored in a garage or something to have gotten so dirty. Thanks, Cheryl! XOXO
Niki says
The blue flower transfer looks so striking against the white! I like the two tone blue in the drawers as well. This is a pretty little desk Christy!
Christy says
Thanks so much, Niki! It was never my intention to keep it white but glad I did lol! XOXO
Gin says
I love blue and white together. It’s fresh and lovely and makes you feel good just looking at it. Once again this is a winner Christy.
Christy says
Ooh yes, me too! Thank you so much, Gin! XOXO
Sharon L Austin says
SWOON! The minute you pulled out that transfer, I knew I was going to love this one!! And the different color drawer interiors, don’t even get me started!! Love, love, love it!!
Christy says
Aww yay! That transfer is so pretty and I’m so happy I finally got to use it! Thank you, Sharon! XOXO
Michele M. says
Saved by the belle! DIXIE BELL, that is! And you – a true belle! Your talents in making this into such a beauty is incredible. WOW. She is gorgeous!!
Very well done, Christy.
Christy says
Ha ha I love that! Saved by the (Dixie) Bell! Thank you so much, my friend! Have a great weekend! XOXO
Denise Zdziennicki says
ohhhh, gorgeous! I’m smitten with how you made over this desk to Christy! The blue transfer is stunning against the white and the drawer details and hardware are the icing on the cake! Pinned! XOXO
Christy says
I’m so glad you like it, Denise! Thank you, my friend! XOXO
Geri Kauderman says
Hi would love to see the hope chest from your friend you posted. Please post or send link
Thank you
Christy says
Hi Geri! The link to it was just below the photo, but you can get there here: https://petticoatjunktion.com/painted-furniture/whitewash-technique-painted-wood-furniture/. XOXO
Lizzy says
It’s beautiful. The paint and transfers you chose are perfect.
Christy says
Thank so much, Lizzy! XOXO
Charleen says
She is beautiful indeed. How lovely. The colors inside the drawers are lovely. Blue being my fav color,I am always up for the blues. Lol Have a blessed day.
Christy says
Thank you, Charleen! Blues are always fun to work with! XOXO
Addie says
GOOD JOB!!!! I like your redos because you pay attention to details…the cleaning, the knobs, the transfers AND the insides of the drawers. Some little lady would love to have this finished piece. I LOVE those knobs!!!!
Christy says
Thanks, Addie! I try lol. Hopefully, it will find a loving new home quickly! XOXO
Constance Colvin says
Wow! 👍❤❤
Christy says
Thank you, Connie! XOXO
Rebecca says
GORGEOUS! Love the blue and white.
Christy says
Thank you, Rebecca! XOXO
Rose Lefebvre says
LOVELY LITTLE DESK!
Christy says
Thanks, Rose! XOXO
Gloria Stage says
Beautiful, Christy. Love the blue against the white. Those are my favorite colors. Gives me an idea for my bureau. Wish me luck.
Christy says
Thank you, Gloria! I love when I get to use those pretty blues somewhere! Best of luck with your bureau! XOXO
Kathy says
Gorgeous 😍 The placement of the transfers is perfect.
Christy says
Thank you, my friend! XOXO
Cheryl Atkinson says
Hi Christy!! Love that transfer!! I am not super excited about the big gold transfers by Kacha. How would you. Compare the new label transfers to the existing label transfer? Desk looks fabulous!!
Christy says
Thank you, Cheryl! I love Kacha’s blue one…I’m not sure about the goldish one just yet, but I did see it on something pink and it was pretty. I’d like to see it against white though. The new labels are very similar to the Classic Vintage Labels except in different color options and there are less since the sheets are smaller. The new black labels are bit bolder also. XOXO
Debbie in TX says
Woohoo! This makeover is off-the-charts beautiful! Your talent never fails to amaze. Love the layering of the transfers as well as the elegant hardware. And that little bird on top caught my eye! Super job 🙂
Christy says
Aww you are always the sweetest, Debbie, thank you!! XOXO
Kristin says
Hi, Christy! Your project is so gorgeous! I was super inspired by your creativity. I would love to invite you to link up your project at Whimsy Home Wednesdays to inspire others and have a chance to be featured – find the party here -> https://fifthsparrownomore.com/whimsy-home-wednesday-blog-link-party-no-14/
Christy says
Thank you so much, Kristin! Your party has ended but maybe next time! XOXO
Robin says
A nice fresh look.
Christy says
Thank you, Robin! Happy weekend! XOXO
Terri Rozaieski says
Hi Christy,
I never subscribe to DIY blogs. They’re either incredibly boring or WAY too complicated. But I happened upon yours and fell in love with the white desk with transfers and it actually left me (who has not an artistic bone in her body) thinking, “Hey…I think maybe I can do that.” So…thanks for the inspiration. I can’t wait to see more!
Christy says
Aww I love that so much, Terri! It really helps to see things broken down step by step and you CAN totally do that! I’m so glad you found me! XOXO
Trudy says
I’ve been trolling…I mean scrolling…through your site and am having such fun! This makeover is nothing short of gorgeous. I’m doing lots of pinning. I thought I was at least decent at painting furniture but I’ve learned so much here. I’m also a recent convert to transfers. I’m going to have to browse through your shop and hold myself back from buying one of everything.
Christy says
Ha ha you made me chuckle out loud! Thank you so much, Trudy! Transfers are so much fun!! XOXO