
Hi Friends! Welcome to day #8 of my 31 Days of Thrifty Makeovers Series! Today is extra special because it’s also Trash to Treasure Tuesday (my favorite!), so my creative thrifty friends will be sharing a makeover of their own as well. 🙂
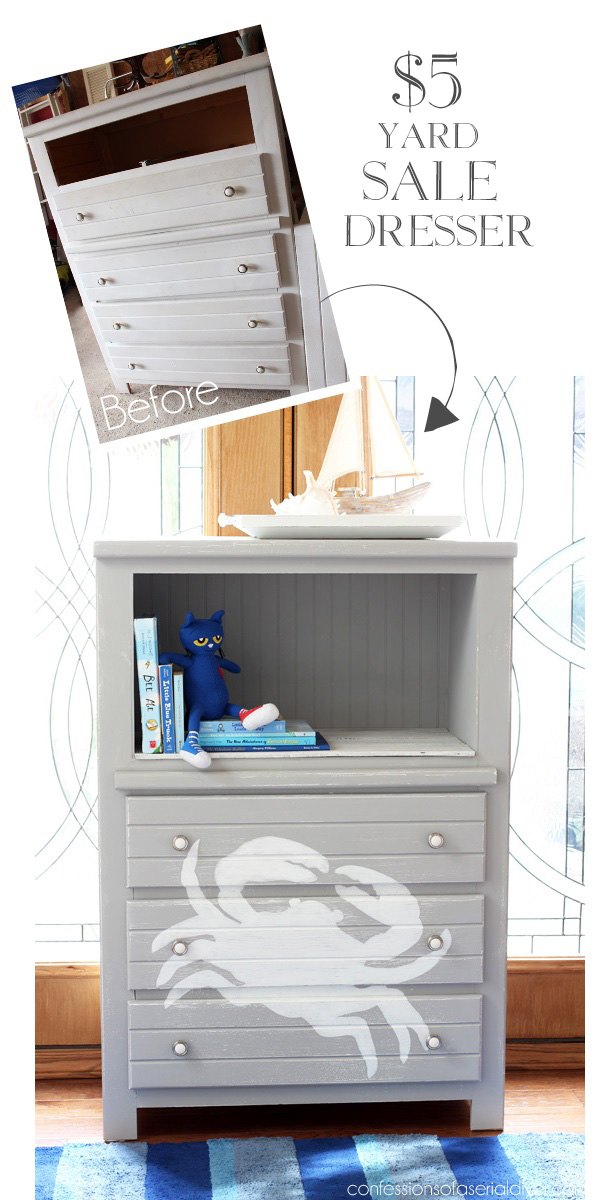
Let’s get to it! Today I am sharing the makeover of a dresser that cost me all of $5 dollars at a yard sale last Summer:
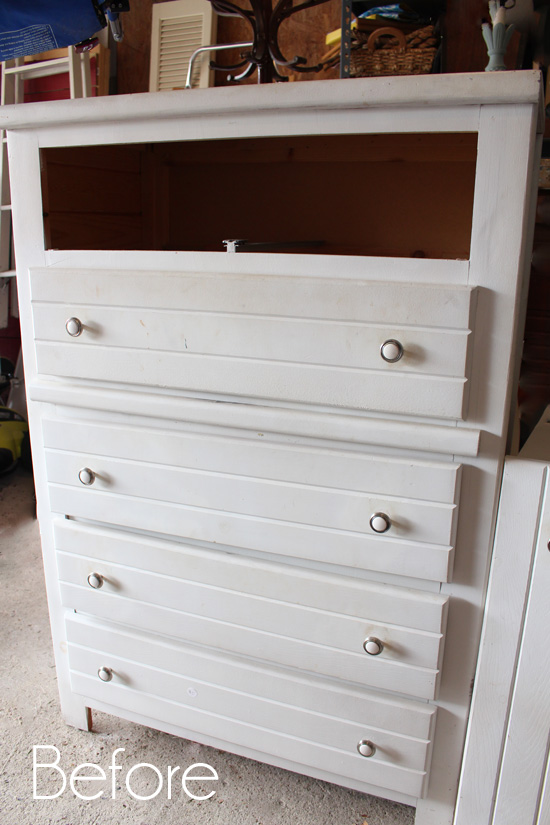
Yup. Five whole dollars. That was the price marked on the bottom drawer there. I think this was one of those purchases where you buy it because it’s so dang cheap rather than because you think you can really do something with it.
I didn’t have a clue for this dirty thang.
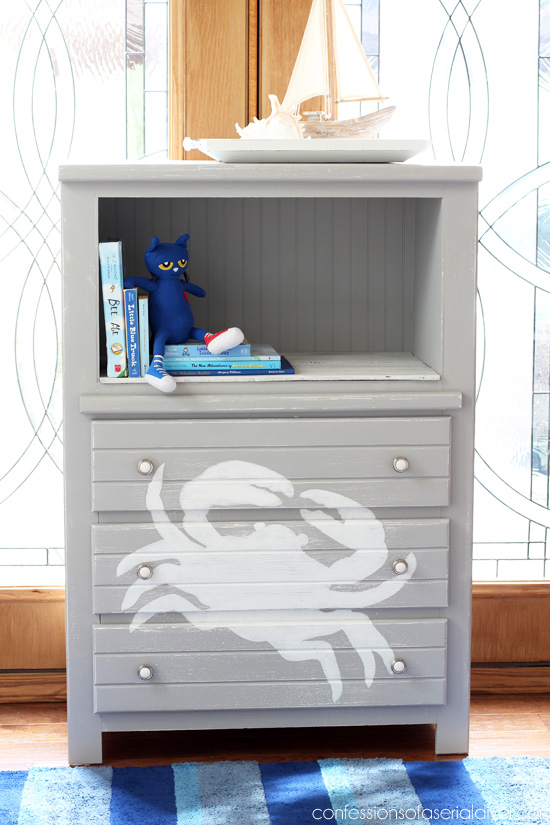
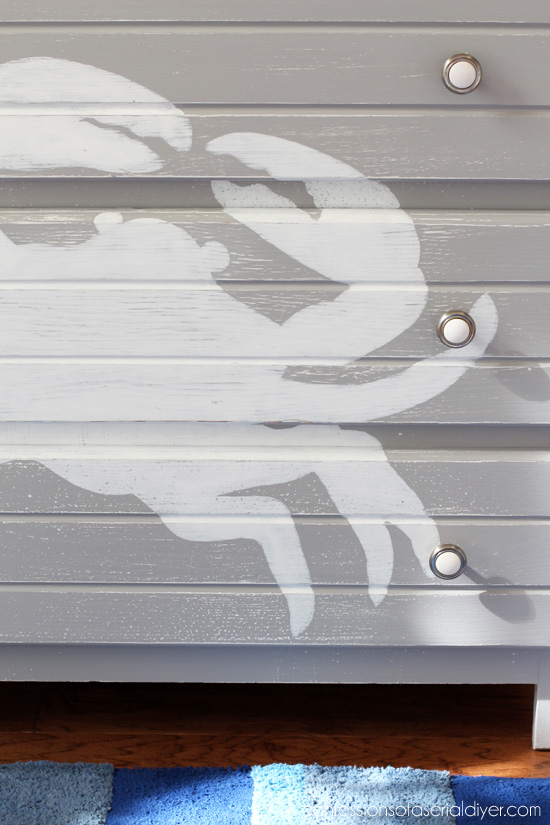
Then inspiration struck…in the form of a crab!
The top drawer was not functioning properly and rather than try to fix it, I decided to take the top two out completely.
I built in a frame to support the new sides, bottom, and bead board back.
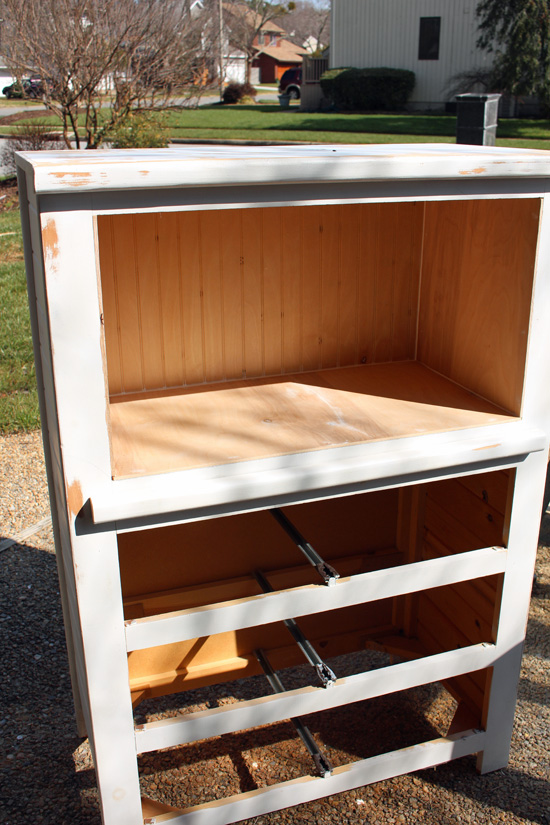
It was a lot of work actually and if I had to do it over again, I would have fixed that stubborn drawer!
I do love how it turned out though.
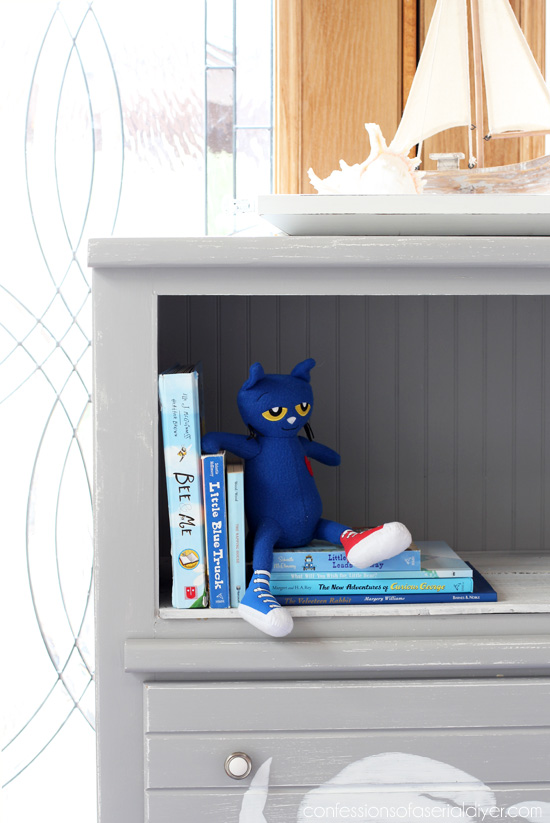
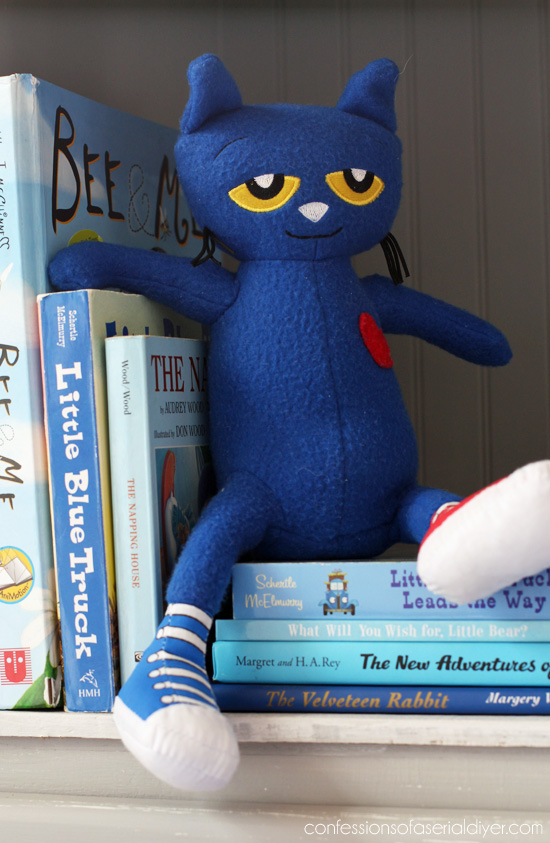
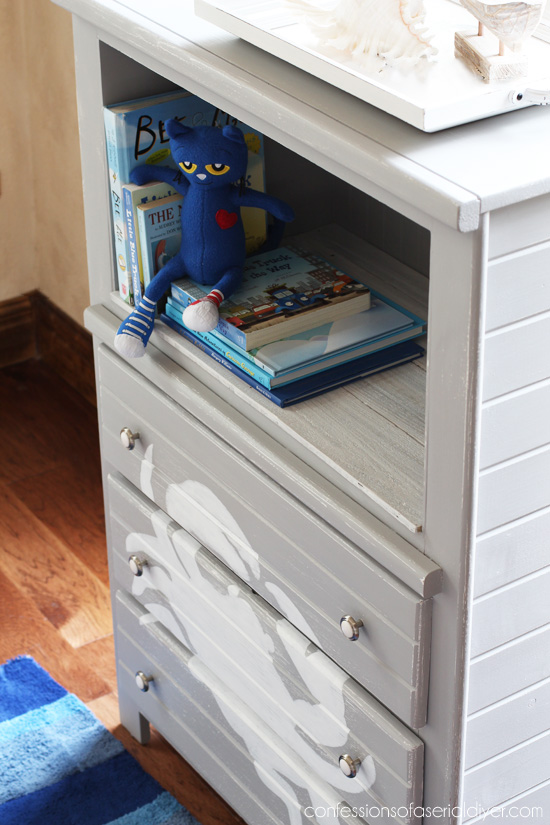
This would be so cute in a child’s room. I imagine the top filled with books. My boys love their books, well my 13 year old not so much these days, but my youngest still loves them!
This is Pete the Cat. If you have littles, his book series is a fun one.
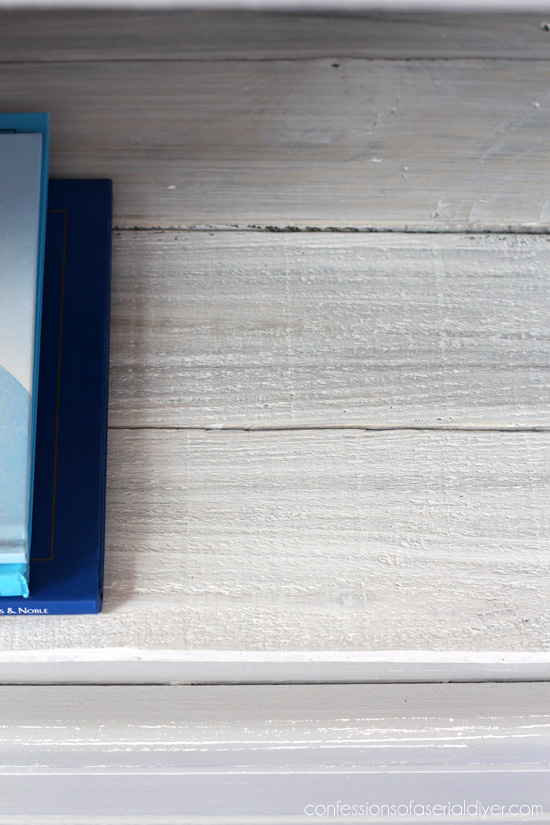
The bottom of the storage area is covered in reclaimed fencing that I whitewashed. (See how I did that HERE.)
I painted the dresser in Sparrow by Behr, made into DIY chalk paint. I already had this on hand. Then sanded so the white beneath would shine through. I did sand and prime it in some areas first because it was in really bad shape:

Now you know why it was only five bucks. I sealed the whole piece with Annie Sloan’s Clear wax. See my Chalk Paint Tutorial HERE.

For the crab I found the silhouette of one that I liked online ( I just googled “crab silhouette”), then saved it and uploaded it to blockposters.com…
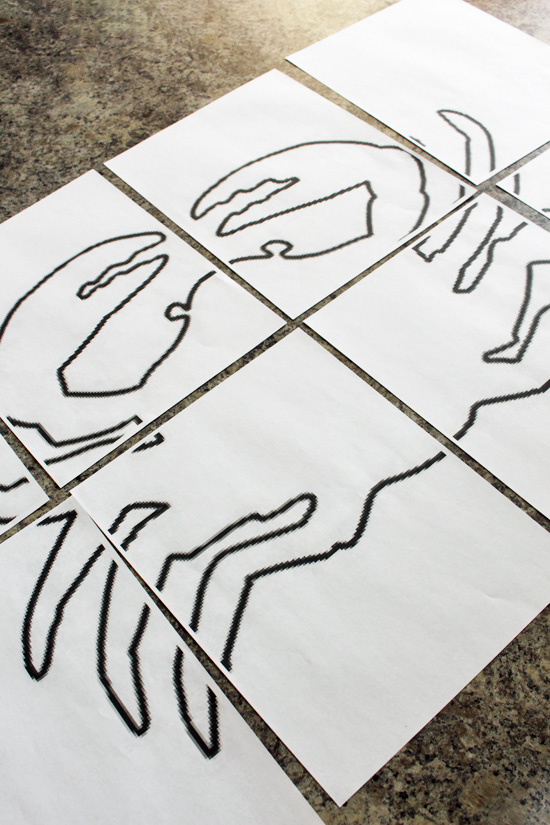
Then I traced around it while the dresser was on its back.
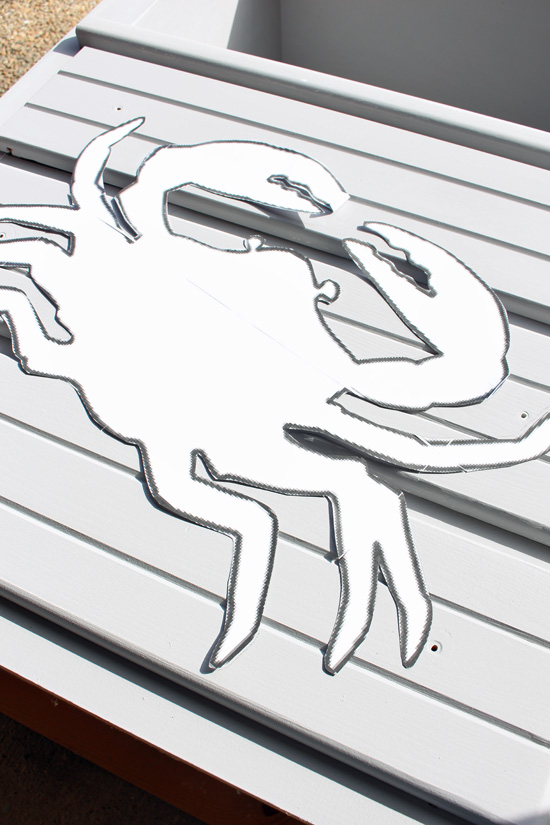
And painted it in with acrylic craft paint.
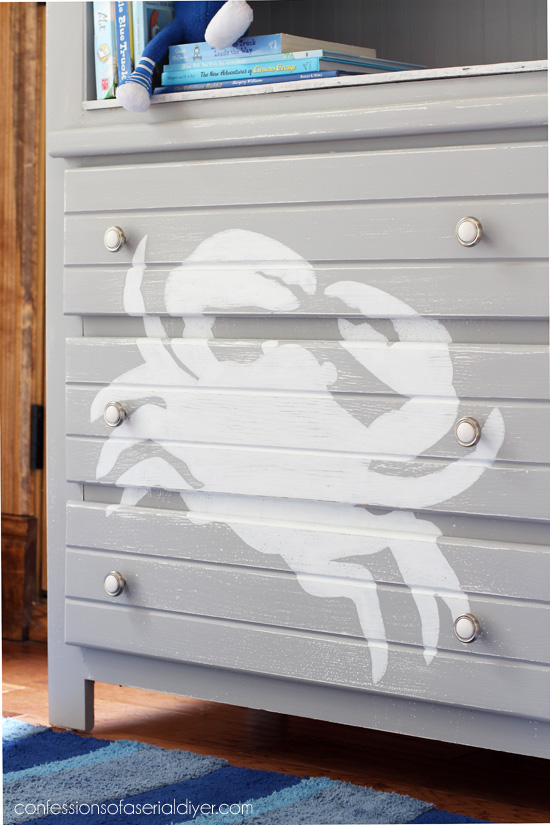
Kinda cute, huh?
I sanded with 220 grit sandpaper to knock down any rough areas from the paint.
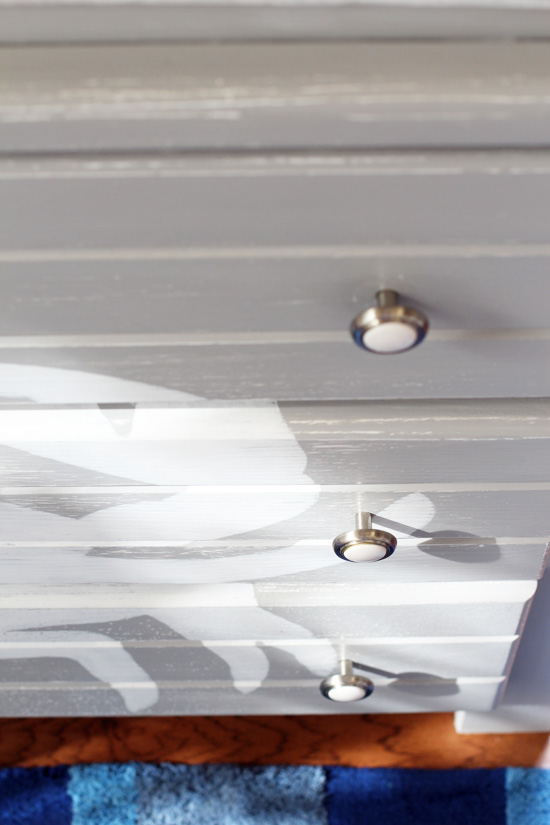
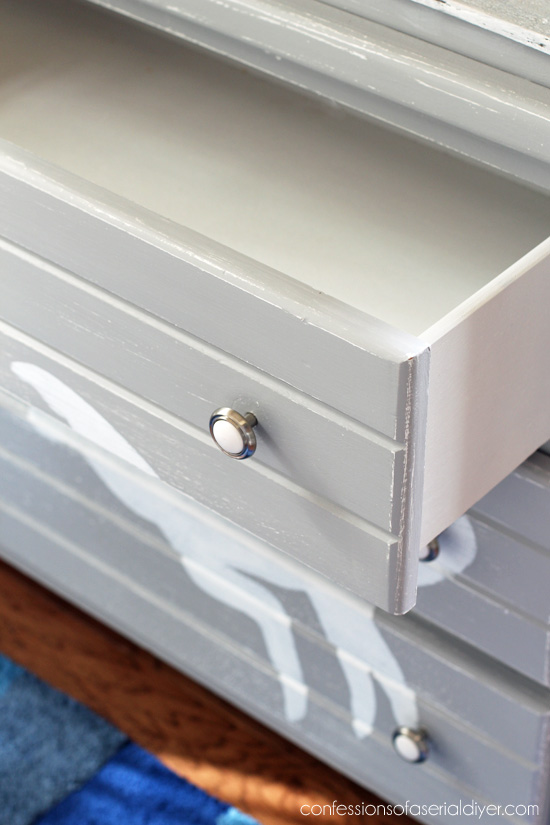
I kept the same hardware that was on it originally since it was perfect…
The paint job on this was a hot mess, including the drawers. I usually don’t paint the insides of the drawers, but these needed fixin in a bad way. Spray paint was perfect for the job. I did that before I painted the drawer fronts.
Not too bad for $5, huh?
Don’t go anywhere! My fabulous thrifty makeover friends are sharing trash to treasure transformations of their own!

Check out what they did with these finds at the links below!
1. Artsy Chicks Rule 2. Prodigal Pieces 3. Girl in the Garage
If you missed any of the thrifty makeovers in my fun March Madness Series so far, you can catch up here:

1. Mini Shelf Makeover 2. DIY Tray from an Old Picture 3. Antique Mirror Repurposed 4. Patterned Sofa Table
5. DIY Wooden Tote Redo 6. DIY Jewelry Storage 7. Oval Rosette Mirror
I’ll be back tomorrow sharing how I gave this old TJ Maxx piece new life:
UPDATE: You’re in luck! You can see it HERE now! 🙂
XOXO,
![]()
Don’t Miss a Thing!
If you like what you see, there are several ways to follow along!
Email * Facebook * Pinterest * Hometalk * Twitter * Instagram

I love to share at these great parties:
The Happy Housie Design Dining and Diapers Liz Marie Blog Funky Junk Interiors Savvy Southern Style Tatertots and Jello DIY Show Off Between Naps on the Porch Just a Girl and Her Blog Sand and Sisal Interior Frugalista


")


Joanne Taggart says
Hi Christy! Taking the second drawer out and making a shelf was sure the way to go with this piece. I can see why that darn thang was only five dollars, but what a buy! Great job! And thanks for sharing your friends creations!
Christy K. James says
Thanks, Joanne! I think so too! XO
Mari says
Love this piece! Three questions: Did you make the Behr paint into chalk paint or use it as regular latex? Is the paint flat or satin? Is there wax or any other protective finish on it?
Christy K. James says
Thanks, Mari! I did make it into chalk paint, and I like to use flat for that. Then I sealed it with Annie Sloan’s clear wax. If I didn’t plan to sand the edges here and there, I would have used regular satin latex which would need no sealer for a piece like this. Hope that helps! I updated the post with that info as well. 🙂
Larissa ~ Prodigal Pieces says
Your creative additions to this once-sad chest take it to a whole new level, Christy! I love the beadboard and crab. Cute!
Christy K. James says
Thanks, Larissa! Glad to have another piece done and out of the garage lol. XO
Shirley Dunn says
I know it was a lot of work but it looks great! Love the colour & it certainly looks like the space had always been there.
Christy K. James says
Thanks so much, Shirley! I saw your beautiful hutch come up again on the FB site…I can’t believe that hasn’t sold…wish I had a place for it!! XO
Sandra@lookingforpotential says
That is so creative love this, the whole look is great! I’m sure someone will scoop this one up for a kids room, great job Christy!
Christy K. James says
So glad you like it, Sandra….thank you! 🙂
Cecilia says
Love it! The hard work was worth it. It turned out great.
Christy K. James says
Thank you, Cecilia! Paint works wonders! 🙂
Jolinda says
Your extra work made it wonderful. Love the crab.
Christy K. James says
Thanks, Jolinda! I thought he would be a fun addition! XOXO
Jen @ Girl in the Garage says
Eeek! So adorable! I love what you did with the top cubby and the beadboard. It would look so perfect in a coastal or nautical bedroom. (and my boys love Pete the Cat!) 🙂
Christy K. James says
Thanks, Jen!! I wish I had room for it in my son’s room, but we just bought him a bed with huge drawers underneath to make more room in there! And yes, Pete the cat rocks. 😉
Nancy @ Artsy Chicks Rule says
How cool is Pete the cat!! lol Love the dresser Christy! 🙂
xo
Nancy
Christy K. James says
Thanks, Nancy!! Pete is one cool cat! XO
Melissa's Antiques says
How lovely!
Christy K. James says
Thank you, Melissa!
Marie, The Interior Frugalista says
Nice dresser restoration Christy, and can’t beat that price! Pinning to share ☺
Christy K. James says
Thanks, Marie! I had no clue what I was going to do with it, but for that price, I had to take it home! 🙂
kate says
i love the bead boarding in the back..super cute touch and it really brings the whole nautical theme together. What is the color of the dress…is it a darker white or a grey….hard to tell on a computer screen..i really do like the color combo you chose!
Christy K. James says
Thanks, Kate! It is a grey color. 🙂
Treva says
You have done it again. That is just the cutest little chest. You never disappoint.
Christy K. James says
Thanks so much, Treva! I just found out today it that it sold…hopefully it’s new home is in a sweet boy’s bedroom. 🙂
Carole says
Another great solution to a big problem. I remember when I was young and would take on something like this; not anymore though. I am saving those for you.
Christy K. James says
Ha ha! Thanks, Carole! I did this to myself I guess…I really do try not to take on projects that need a lot of work these days, but this one was kinda fun to do. 🙂
Rose says
I love how it turned out great color and for five dollars it looks perfect.
Christy K. James says
Thanks, Rose! $5 was a fabulous deal for this even in the state it was in. 🙂
Heather @ Viral Upcycle says
Adorable! I love the gray and it works perfectly with the crab.
Christy K. James says
Thanks, Heather!! XOXO
Amy says
One of my favorite so far! I loved every single thing you did to it! 😀
Christy K. James says
Thanks so much, Amy! XO
Cristina says
Gorgeous makeover, Christy! The crab is adorable and so is Pete the Cat. <3
Christy K. James says
Thanks, Cristina! XOXO
Sharilee says
I love the tall open shelf above the drawers. I’m definitely going to have to copy that idea!
Christy K. James says
Thanks, Sharilee! I’m glad this hack worked out. You just never know when you’re starting a project like this! 🙂