Hey there amazing Friends, and welcome to Trash-to-Treasure Tuesday!!
Ya’ll know I love this day…not only am I sharing a much-needed makeover, but I get to do it with five of my favorite treasure-maker friends! I can’t wait to see what they transformed. Be sure to look for links to their projects at the bottom of this post!
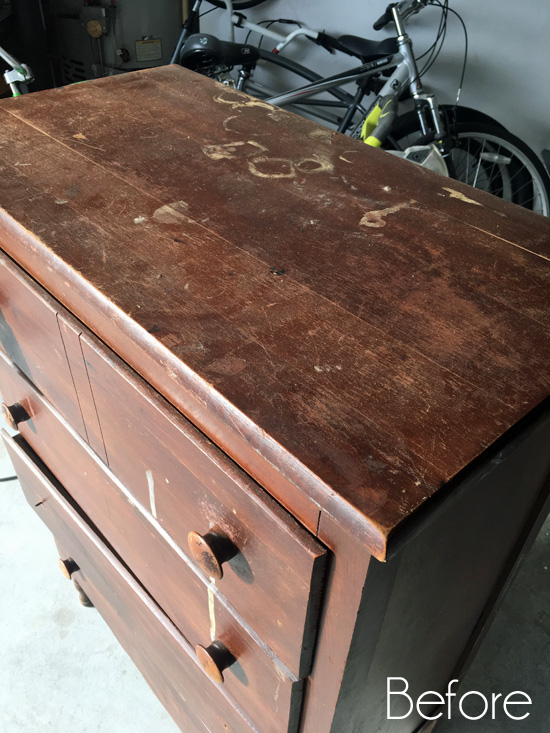
Today’s project was in desperate need of some TLC:
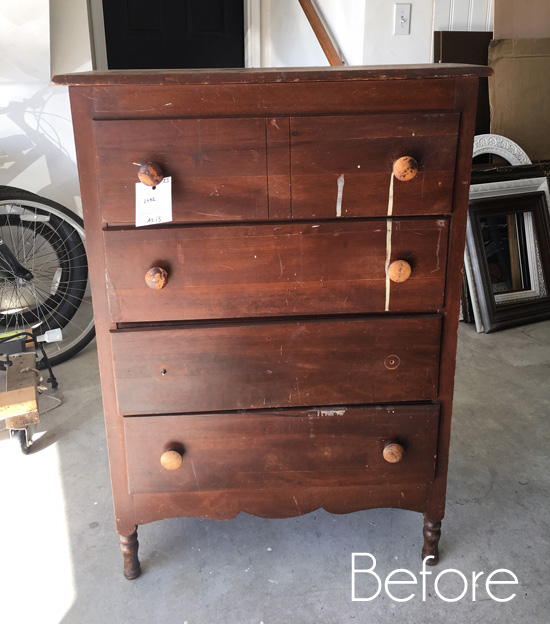
I picked this up at the thrift store for $25, hoping I could love it back to life.
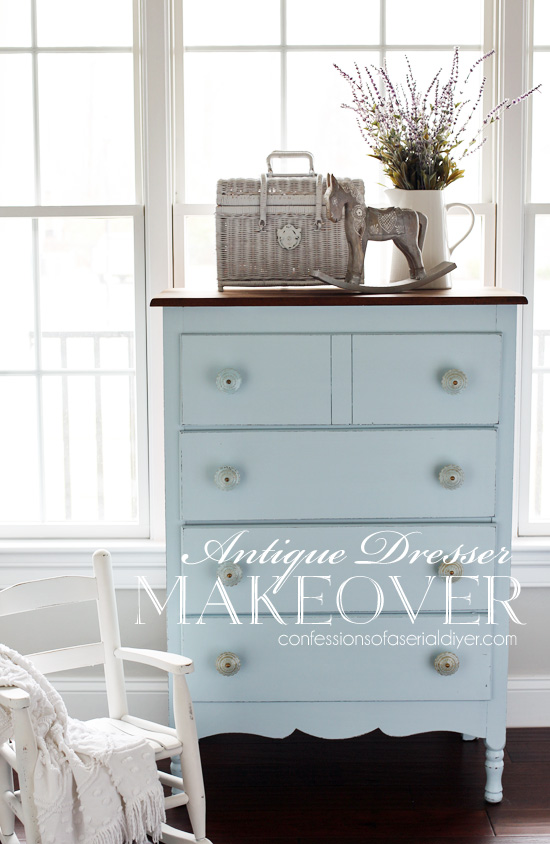
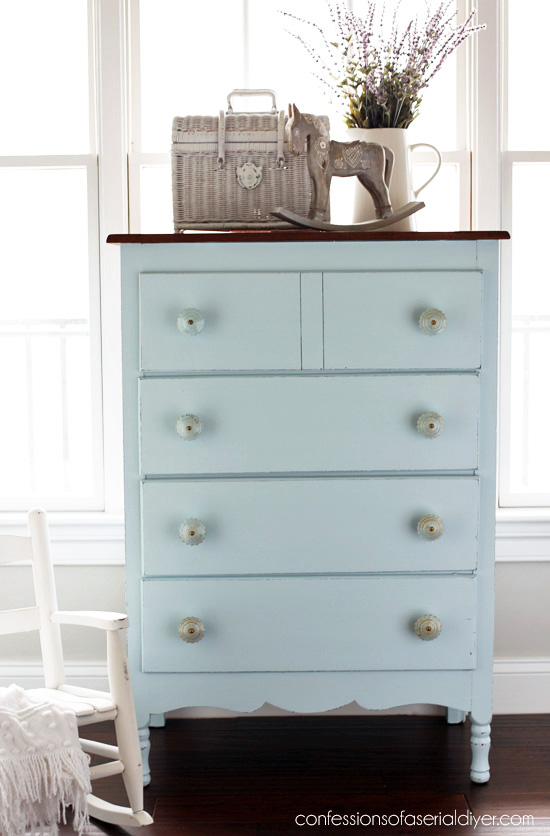
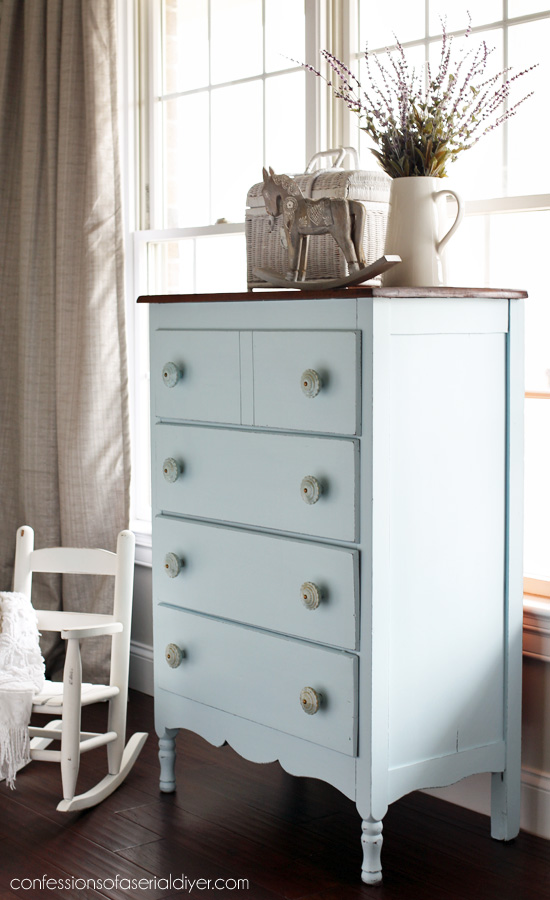
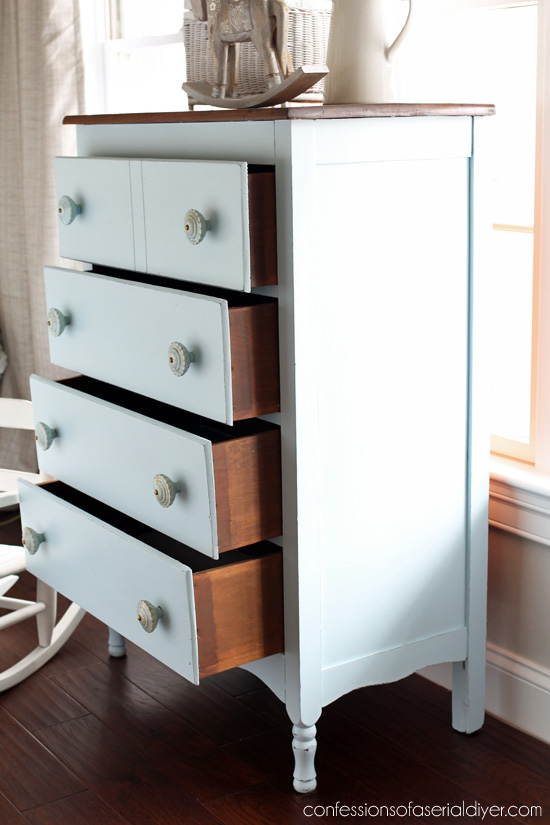
And that is just what I did, with paint of course:
Funny story…I decided to go to Hobby Lobby and pick out new pulls in hopes of inspiring an idea for this makeover. I always look at these beauties every time I stop in, wishing I had a project to use them on, so I decided this was the one.
Aren’t they perty?
Well when I got home and pulled out my paint deck to find a paint to match, I found the perfect color to go with them:
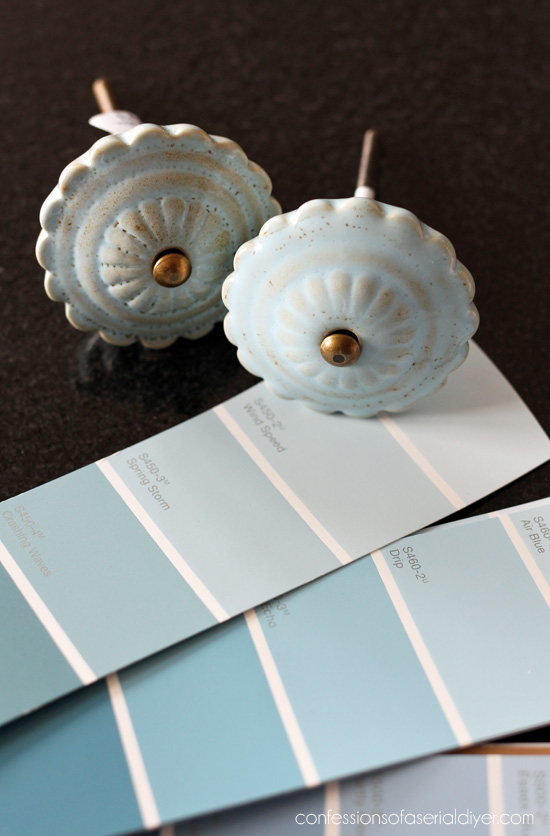
Wind Speed by Behr. What are the chances that I would just happen to have a half gallon of this beautiful soft blue in my garage?
This is the color I used in the boys’ bathroom!

See that makeover HERE if you missed it.
How cool is that??
It was perfect!
I’ve included a few affiliate links so you can find the products I love.
One minor detail though…the paint I purchased for the boys’ bathroom was in a satin finish, and to make DIY chalk paint (recipe with video HERE), I usually use flat paint. I have had several inquiries as to whether you can use another finish other than flat to mix DIY chalk paint. This was the perfect chance to give it a try…
I am happy to report that it worked just fine!
I actually started this makeover by sanding the top. Here is what it looked like before:
My rotary sander and about six minutes later, it looked better already:
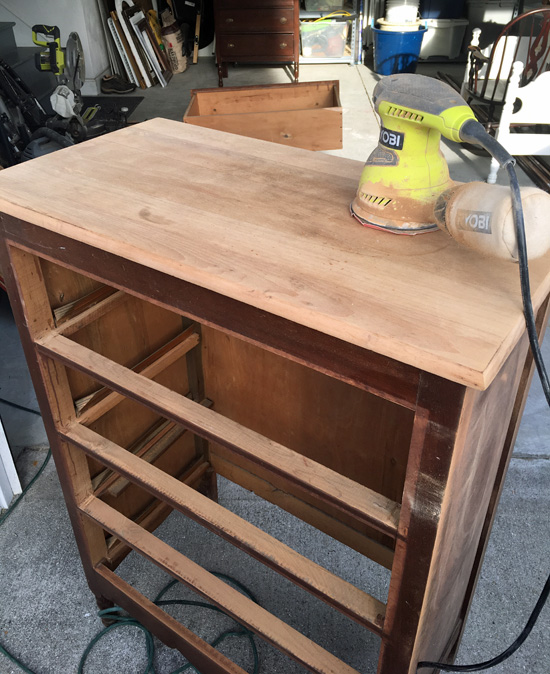
I started with 100 grit, then 220 grit.
Next I sealed the rest of the dresser with shellac (applied with a foam brush), knowing it would likely be a bleeder. Then I painted like normal. It took just two coats for solid coverage.
Visit my complete tutorial for chalk painting furniture HERE.
Then I sanded lightly here and there with 220 grit sandpaper, and sealed with Annie Sloan’s Clear Soft Wax.
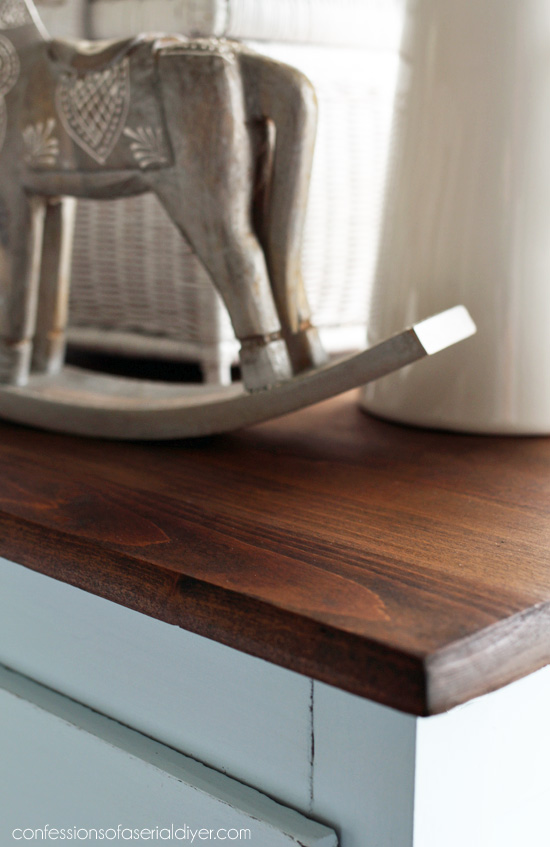
I stained the top with Minwax Dark Walnut and sealed with Wipe-On Poly.

The top came out really nicely.
The drawers weren’t in the best shape either. The layers of wood that made up the sides and back were separated in several places. Wood glue and some clamp action fixed them right up:

There’s a good reason that clamps made it into my Top 10 Essential Tools for the Workshop list!
The inside of top drawer was the worst:
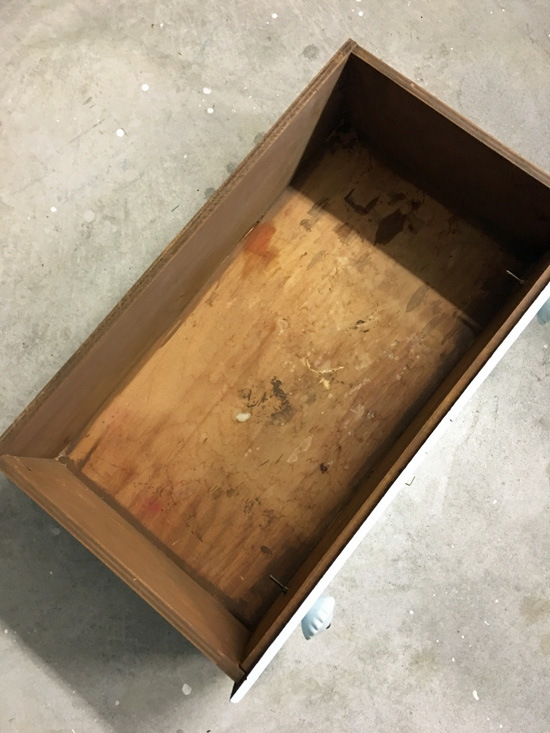
This was AFTER a good wipe down. That red spot is where a warhead candy had melted. I decided to stain the sides of the drawers as well to make them look better. I used my Minwax staining cloths in Walnut. They sometimes go on kind of opaque, so I used a rag to wipe off the excess.
I didn’t get a before of the sides, but trust me…they look much better now!
I considered painting the sides, but with this dresser having so many issues to begin with, I didn’t want sticking drawers to be another!
I primed the bottoms of the drawers with leftover primer from my bathroom cabinets:
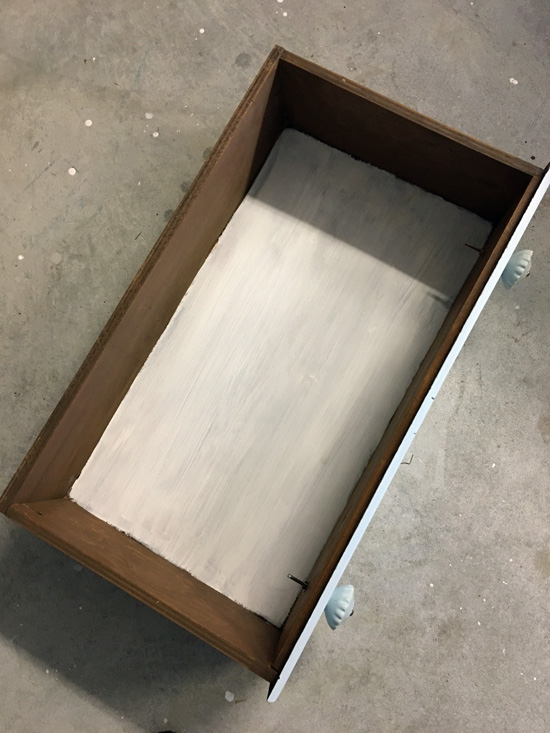
I have had stain and whatever else bleed through my fabric before, plus I wanted a nice white backdrop for my fabric…
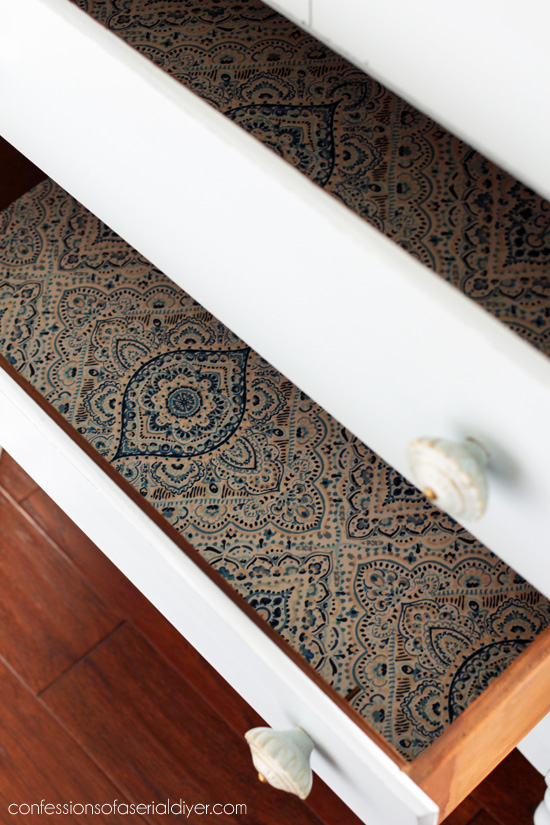
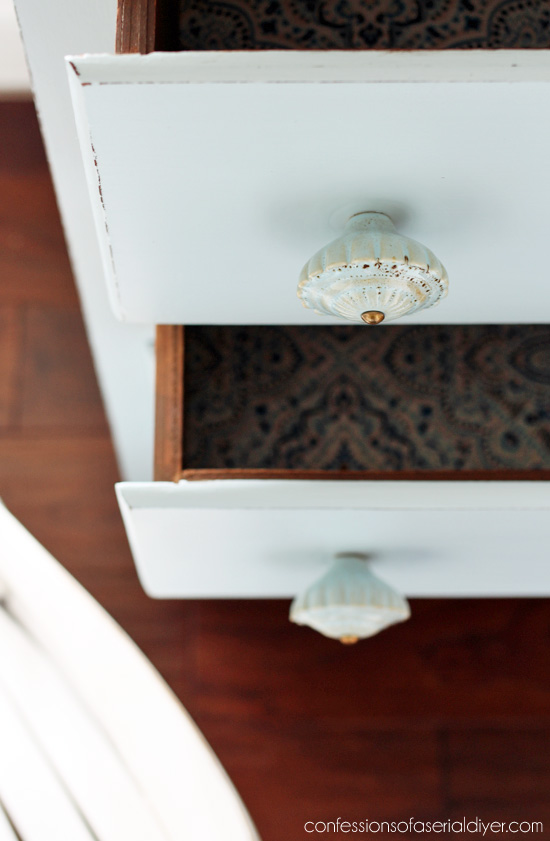
How pretty is that? I found this at JoAnn Fabrics. I love this pop of fun color when you open the drawers!
I used my rotary cutter and cutting mat to cut the fabric, then adhered it to the bottom of the drawer with matte Mod Podge.
You can see exactly how I line my drawers with fabric in the video below:


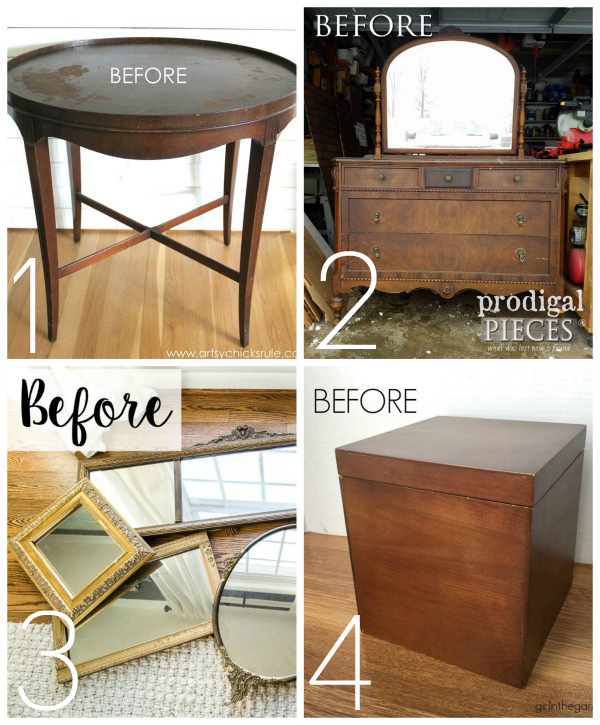
Don’t forget to visit my friends’ makeovers too!
Looking for even more makeover inspiration? Visit all my Trash-to-Treasure makeovers in one place HERE!
I hope to see some of you this afternoon…if not have a happy Valentine’s Day and I’ll meet you back here on Thursday! I’ll be sharing what I did with this little lamp:
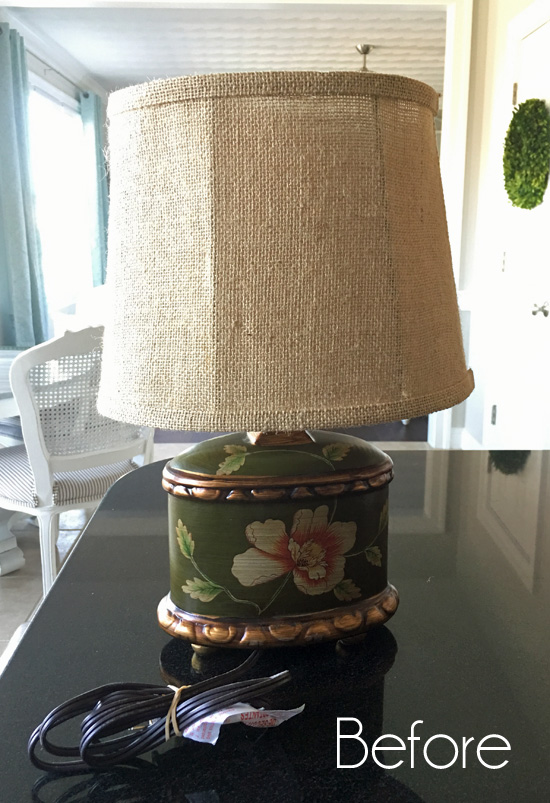
UPDATE: Check out how this lamp got a coastal-inspired update HERE now!
Have a great day! 🙂
XO,
![]()
Don’t Miss a Thing!
If you like what you see, there are several ways to follow along!
Email * Facebook * Instagram * Pinterest * Twitter


Mary Kaiser says
I Love it. That turned out so beautiful. I think you are amazing! Thanks for testing the satin finish into chalk paint, I always buy satin finish, now I know it will work for chalk paint. That piece is adorable. I do not have a face book account, can you join without one?
Christy says
If I could hug you, I would…thank you, Mary! (Virtual hug ha ha!) Yes I too am glad to know that the satin paint worked just fine. 🙂 Unfortunately the video can only be seen via Facebook. I did try to link it here, but it would not let me. So sorry about that! XOXO
Linda at Mixed Kreations says
Gorgeous makeover! Love the color, and that you stained the top. The pretty little pull knobs are the perfect addition in finishing it off.
Christy says
Thank you so much, Linda! I am excited that I finally had a project for these knobs! XOXO
Susan says
I just knew it was going to be great when I clicked on it Christy! It is beautiful!!! The color is perfect and so is the knobs. I’d love something like that in my home 🙂 Nice job girl!
Christy says
Aww thank you, my friend!! I love that I was able to finally use those pretty knobs on something! XOXO
Christina in SW FL says
Oh Christy, she is beautiful! Look at those “stud earrings” on the drawers! Perfect! She is a beauty. I adore the drawer details with the stain, painting and fabric. Beautiful.
Sorry I’ll miss you live today (due to my job) but, hopefully, it is up as a video and I can watch it later.
Have a super rest of your week and weekend.
Christy says
Thank you, Christina! So glad you like it, and yep… the video replay is up on both the Make it New FB page and my own FB page! 🙂
Larissa ~ Prodigal Pieces says
What a beauty of a find and your recreation of it is spot on. Well done, Christy!
Christy says
Thanks so much, Larissa! XOXO
Michelle says
Love it….great color and I like that you left the top in the natural wood. So pretty!!
Christy says
Thank you, Michelle!! 🙂
Anne says
Beautiful job Christy!!
Christy says
Thanks so much, Anne! XOXO
Marcie Lovett says
Just lovely, Christy! The dark top looks beautiful against that blue.
Christy says
Thanks, Marcie! XOXO
Cindy says
I can’t join the live demo of how to line the drawers with fabric; will you be saving the video so we can watch it later? I would love to see how it’s done.
Christy says
Hi Cindy! The video replay is available on the Make it New FB page and on my own FB page as well! 🙂
Norma Rolader says
Beautifully done
Christy says
Thank you, Norma! 🙂
Trina Price says
Christy-
Great job on this project! I hope you and your hubby have a great Valentine’s Day!
Christy says
Thanks, Trina!! As long as it includes chocolate, it will be perfect! 🙂
Cricket Lawler says
Oh my…you did a fabulous job of bringing this sweet dresser to life again. Thank you for sharing because it inspires me to pick up a few tools and go to work on the antique dresser that I’ve had for 30 years (in the same sad shape as when I purchased it). lol Also have a VERY old china cabinet that I just might paint as well. 🙂
Blessings on your day~
Christy says
Thank you so much, Cricket! Yes…go dust that baby off and get paintin! Glad to give you that push lol! 🙂 XOXO
Nancy @ Artsy Chicks Rule says
Looks SO much better than when I saw it the other day!! 😉 And that fabric is gorgeous!! xoxo
Christy says
Ha ha yes it does! Thanks, girl! XOXO
MaryJean says
I have so much to say about this post it might be a long one! First, love your boys’ bathroom! Next, great tips on fixing things that are damaged. And, lastly, thanks for the links to other posts you have done.
I was at one of our local Goodwill stores this morning and I picked up a suitcase. Thinking of doing something like you did in one of your posts. I spied a cute little pedestal table but while I was thinking, could I ship it if I sold it in my Etsy shop, someone else snapped it up! We’ll you what they say, you snooze, you loose!
Anyway, love the way the dresser came out and nice to know you don’t have to use flat paint to make chalk paint.
Christy says
Thanks, MaryJean! I love finding old suitcases…they are fun to redo. Too bad about the table! I tend to shove things in my cart while I think about them so no one else takes them while I decide ha ha. And yep, I too am happy to discover I could use satin paint! XOXO
MaryJean says
Yes, I remember to do that next time!
Mariele says
Gorgeous job! The repairs you made were much needed and made it much improved. 😉 That fabric is perfect with the color and knobs!
Christy says
Thank you, Mariele! I was so happy to be able to finally use those knobs on something! XOXO
Linda Petersen says
It’s beautiful! One would never guess how sad it was before you worked your magic. The pulls & paint color are pure serendipity????. Thanks for sharing all your knowledge with us. Have a Happy Valentine’s Day❤!! XOXO, Linda
Christy says
Thank you, Linda! I just love being able to turn something old and tired into something pretty and functional again, and I am SO happy I was able to use those gorgeous pulls on something! Happy Valentine’s Day to you as well! <3 <3
Terri Hughes says
Very pretty….I love it!
Christy says
Thank you, Terri! XO
Jen @ Girl in the Garage says
Christy, you did a fabulous job with that dresser! I love the new color, stain, pulls, fabric inside – well, everything! xo
Christy says
Thanks, Jen! I seriously have nothing but a chair in my furniture stash now, besides a couple of pieces of my own that I didn’t find a place for in the new house. I need to get shopping so I can find something for FFU next week!! 😀 XOXO
DIY Home Sweet Home says
It turned out beautiful. Love the fabric you used inside.
Christy says
Thank you! XO
Julie Briones says
Perfect, Christy! So crazy that the hardware and paint matched! Yay! Really enjoyed the FB Live, though I had to watch it later. I should be getting me rotary kit today! 😉
Christy says
Thank you! I know… I can’t believe the paint I already has was a perfect match! What luck! It is totally fine if you only caught the replay of my FB Live…I appreciate it just the same! You will love your rotary cutting kit!! XOXO
Becky says
So pretty! Simple and beautiful! The drawer liner is gorgeous! Some new owner is going to get lucky… : )
Christy says
Thank you, Becky!! XOXO
kathy says
Hi Christy,
I just had to tell you, the dresser turned out beautiful. I loved the stain top and the knobs. To me the knobs really made it pop. When you paint a large piece like this, do you hand sand or with sander lightly? When you finished with the stain on top, do you put a sealer on top? Thank you very much for sharing.
kathy
Christy says
Thank you, Kathy! I only sanded the top and for that I used my rotary sander. For the body of the dresser, there was no need to sand since I used chalk paint. If you have any questions about using chalk paint, you can visit my chalk painting tutorial here: https://www.confessionsofaserialdiyer.com/how-to-paint-furniture-using-chalk-paint/ 🙂 For the stained top, yes I did seal it with wipe-on Polycrylic. I linked to it in the post. 🙂 XO
Susan says
I’m curious how you address the excess screw sticking into thedrawersfrom the new knobs. I’ve passed on this type because I fear clothing getting damaged or someone reaching into adrawer and getting cut. Do you hacksaw off the extra? That would still leave a sharp edge.
Christy says
Hi Susan! I trimmed off the excess using my dremel tool. I have used a small hacksaw in the past as well. The edges are a bit sharp, but I cut them pretty close so it shouldn’t be an issue. ????
Dee says
Hi Christy… I’ve visited your blog many times & find your work awesome!! So, I finally signed up for emails today 🙂 I have one question about this piece: did I understand correctly that you used shellac on the dresser BEFORE you used the chalk paint? Thanks for the great tutorials!
Christy says
Yay! I’m so happy to hear you have decided to officially follow along with me! I did use shellac before to seal the wood so none of the tannins would bleed through. That often happens with older cherry and mahogany pieces. 🙂