Amazing friends welcome back! It’s Furniture Fixer Upper Day which means not only do I have a furniture flip for y’all, so do my talented friends! You can find their projects at the bottom!
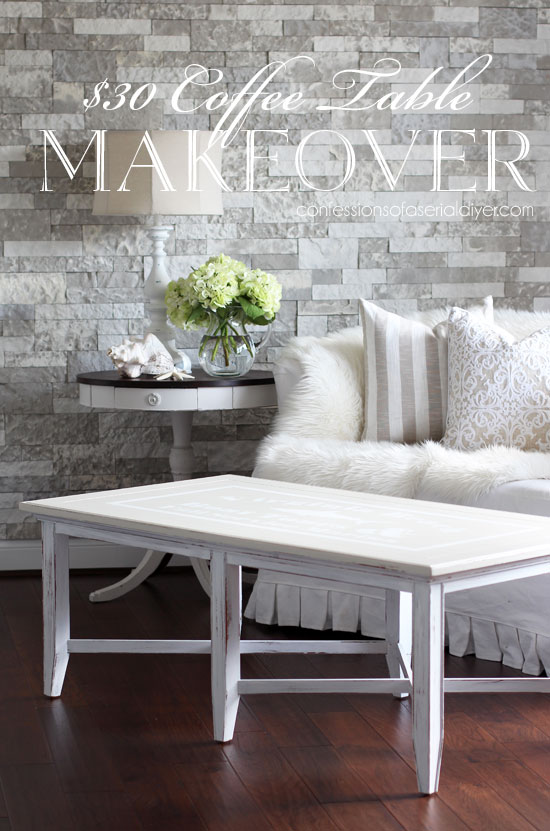
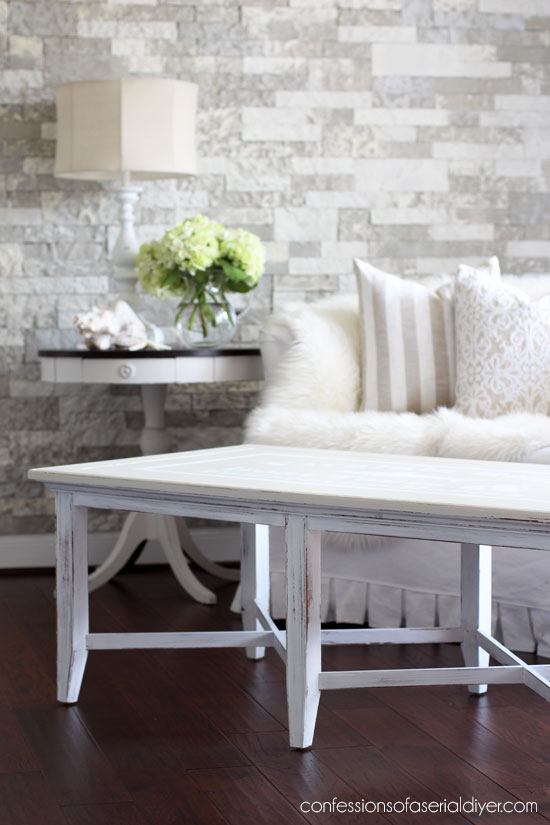
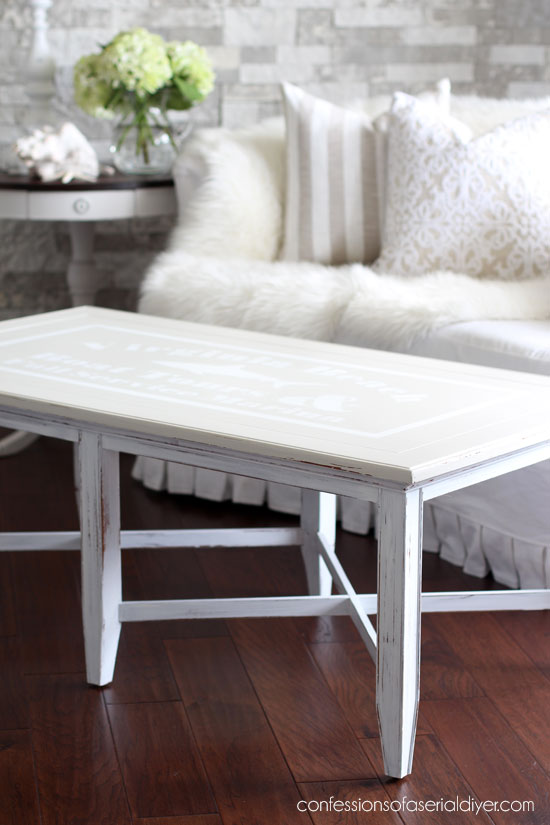
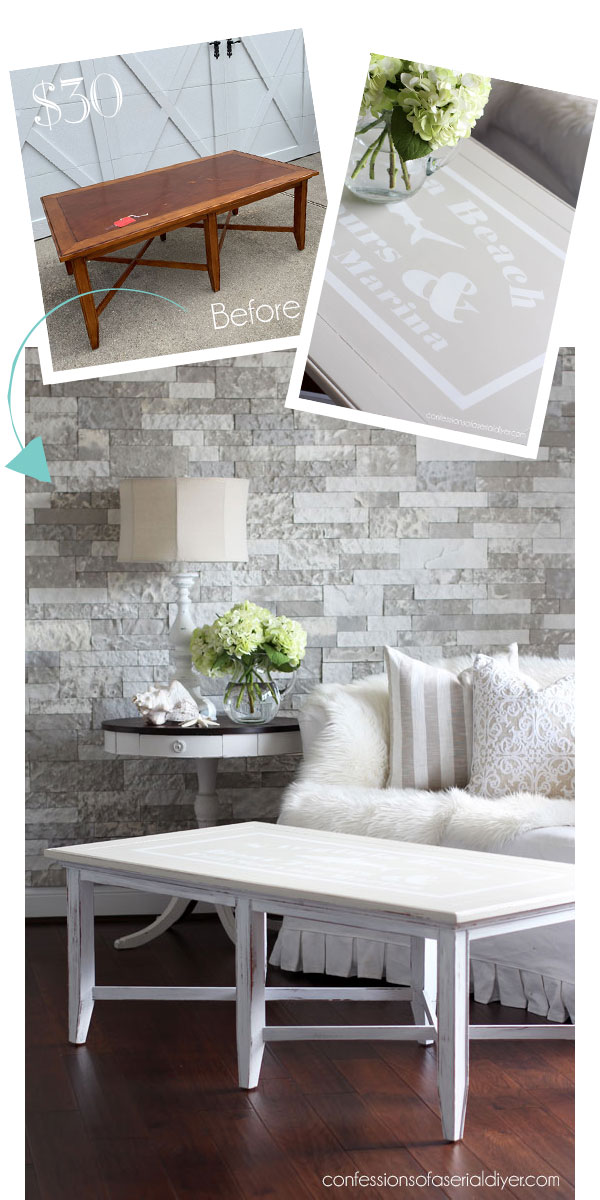
My project piece for today is this coffee table I picked up for $30:

I was having terrible luck thrifting the day I found this and was about to call it quits. Then I decided to make one more stop and found this! It had just been brought out onto the floor that day. Sometimes you just have to be in the right place at the right time to get the good stuff.
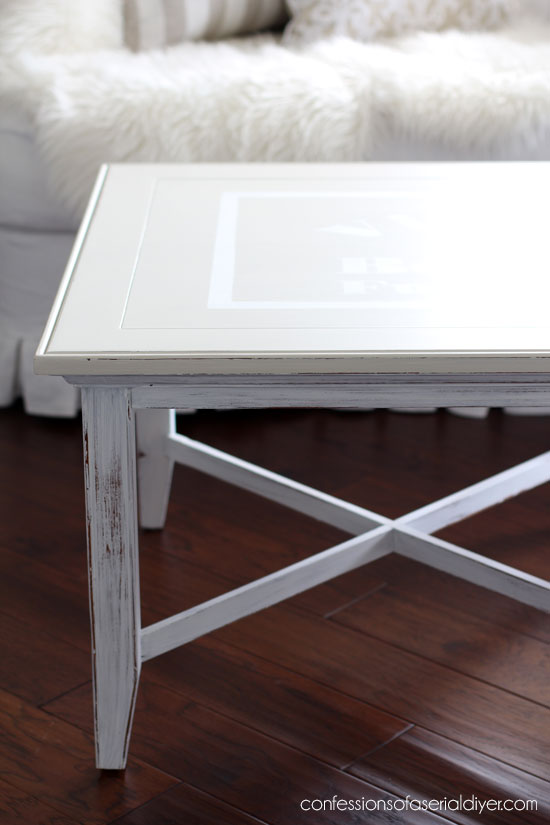
I loved the height of this table as well as the criss-cross detail on the bottom, and this thing is huge!
I thought it was a perfect candidate for a coastal-inspired makeover:
Have you ever tried to photograph a huge coffee table?
Not easy! I don’t think the photos do it justice at all.
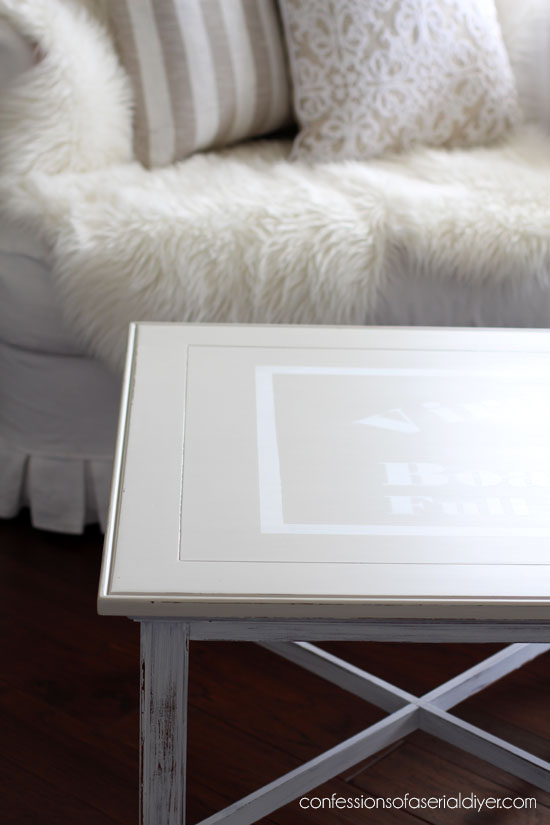
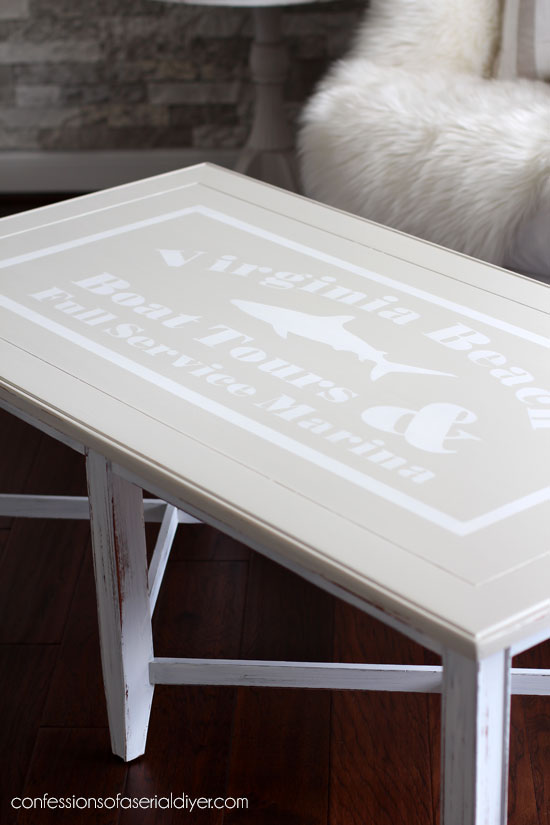
I decided to add a graphic to the top for something fun:
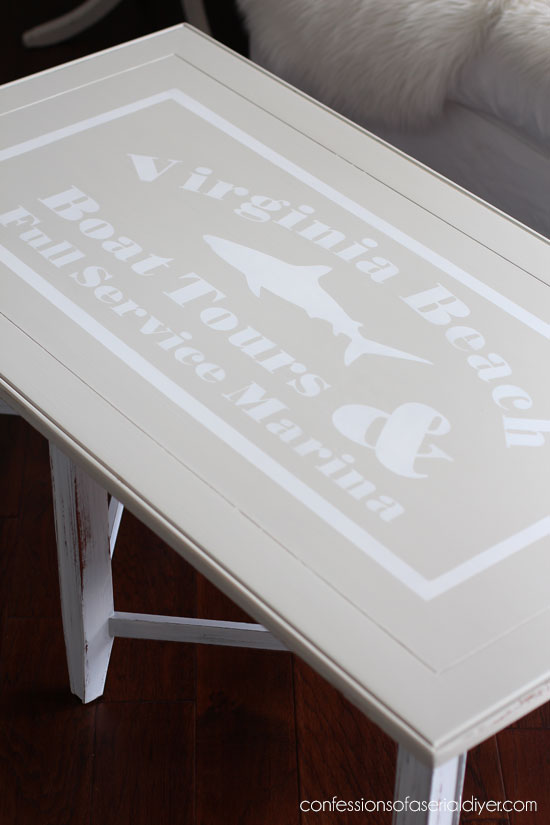
Any time I add the name of our city to a piece of furniture, it sells quickly, so here’s hoping this one will too!
This is a new color for me. This is Toasty Gray by Behr that I made into DIY chalk paint of course. (Recipe HERE.)
I’ve included a few affiliate links so you can find the products I love.
I was torn between restaining the top and painting it, and it had a few blemishes that I had to contend with:

I was able to sand them away with my rotary sander:
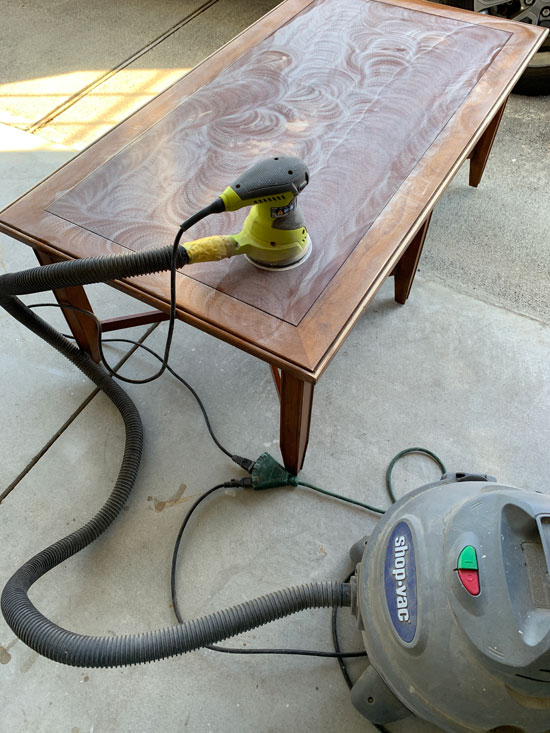
Hooking the sander right up to my shop vac has been a game changer! Thanks again to my Furniture Fixer Upper pal, Kandice for that genius tip!
It took a lot of effort to just get the blemishes sanded out smoothly, so I opted for paint instead.
I painted the legs first with only one coat of my favorite, Bit of Sugar by Behr. Then I distressed with 220 grit sandpaper to get a really worn, coastal look…
To add the graphics to the top, I first created what I wanted in Photoshop Elements. Then I uploaded it to my Silhouette machine. I shared a post on how to do that a few years ago, but they have since updated their software and simplified things a bit, so the tutorial needs to be updated as well. I will try to do that so I have a post I can refer y’all to for that.
I had to print out four different pieces, using my 24″ cutting mat for a graphic this size. It took a while to get them all lined up and centered properly:
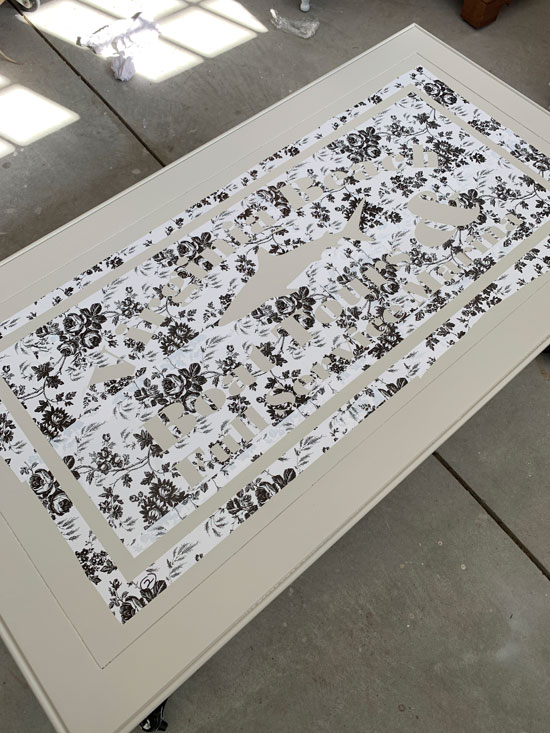
Then I painted everything in with two coats of chalk paint using a small brush:
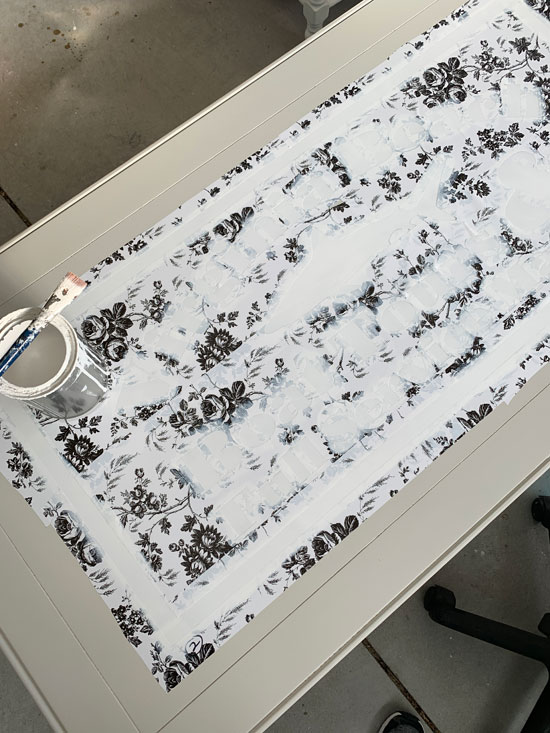
I removed the contact paper as soon as I applied the second coat of paint.
When it was dry, I sanded lightly across the entire table top with 220 grit sandpaper to smooth out any raised areas. I sealed with Dixie Belle’s Satin Clear Coat this time, using this spongy foamy applicator thing that was in my box from Country Chic Paint. That thing is awesome!
And that was that!
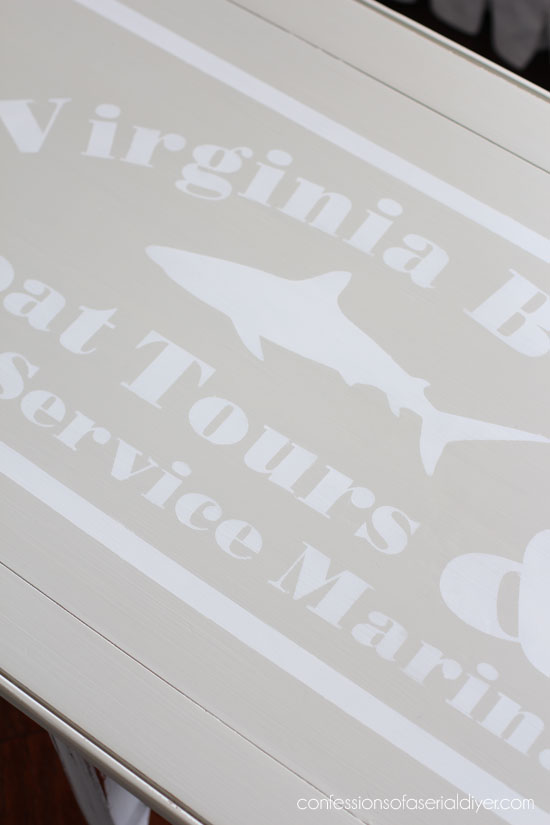
Jack said he wasn’t sure he’d want to go on a boat tour that had a shark in their logo. Umm…well good point. I guess that’s why I don’t design logos for a living!
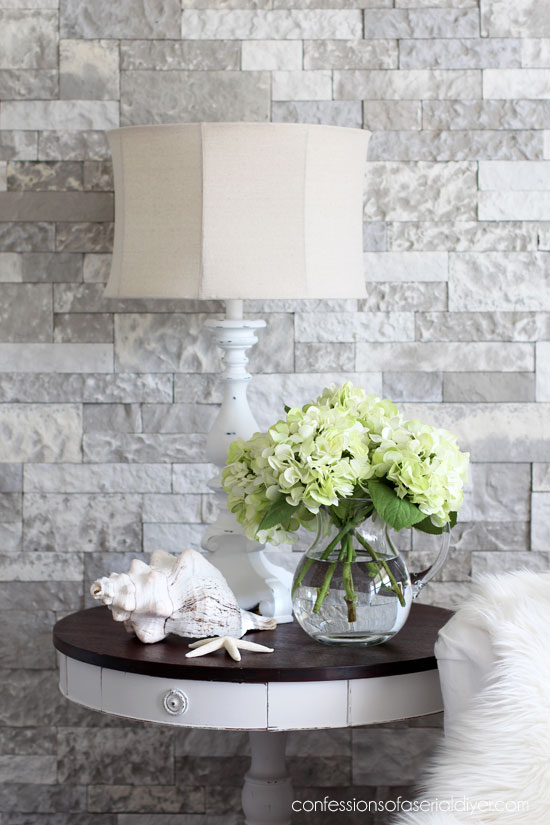
I also redid this lamp last week:
It started out like this:
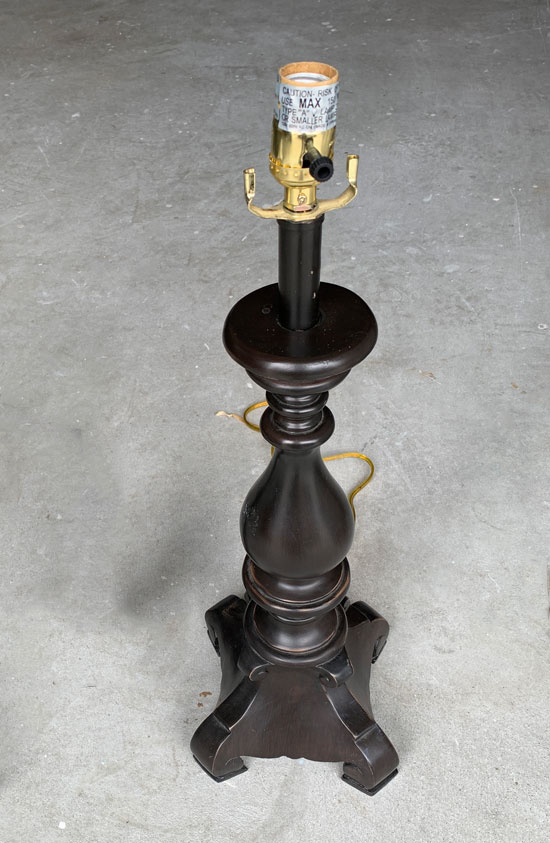
I always hit up the lamp aisle. This one was heavy and solid and had been marked down to $6.98!
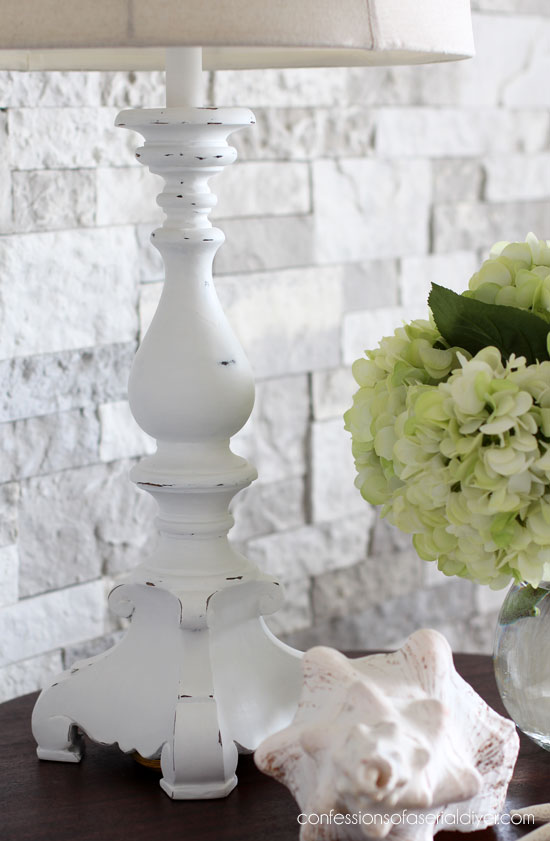
I always like to keep a couple of lamps in my booth for ambient lighting and they always sell. I had this in my pile to take to my booth and grabbed it for these photos. I kind of like it on this table!
I found the shade at HomeGoods for $14.
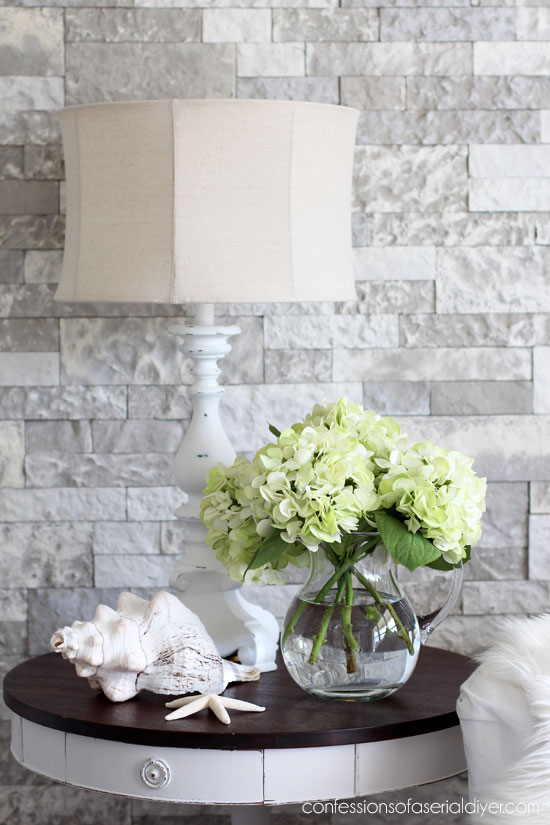
And what about those hydrangeas??
When was looking for flowers for my repurposed drawer arrangements I shared yesterday (See them HERE if you missed them!), I really wanted hydrangeas, but it’s so hard to find really good faux hydrangeas.
These are actually the best fakes I’ve ever seen!
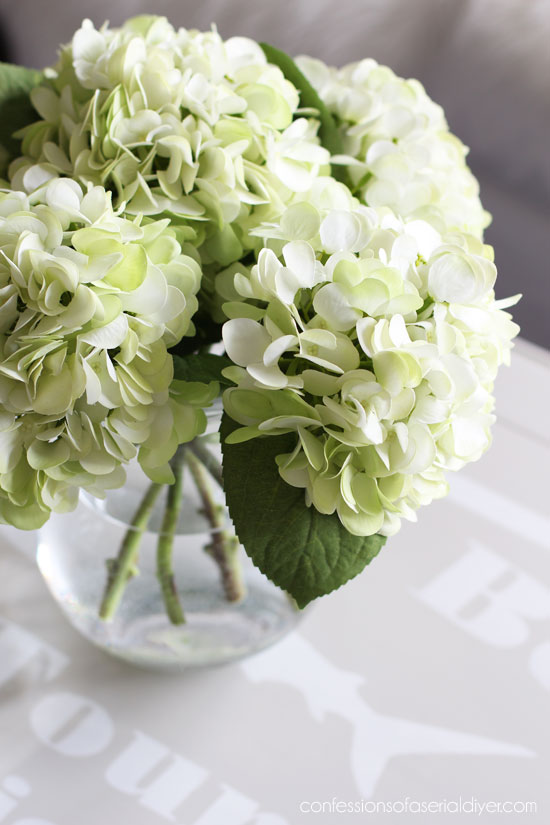
Yes they are fake! Aren’t they SO realistic?? These are just like my Blushing Bride Hydrangeas from our old house! I ended up searching Amazon and found these HERE. They weren’t super cheap, but I will probably end up buying more because they will last forever.
I really wish you could stop by and see my table in person…
It is so pretty in real life.

Don’t forget my girls have makeovers to share today as well! See what they did with their treasures at the links below!

And that’s one more project I can cross off the list!
If you missed any of the other four makeovers, you can see them all here…
How to Recover a Tufted Footstool (The Cheater’s Way!)
Drop Leaf Repurposed (Corbels)
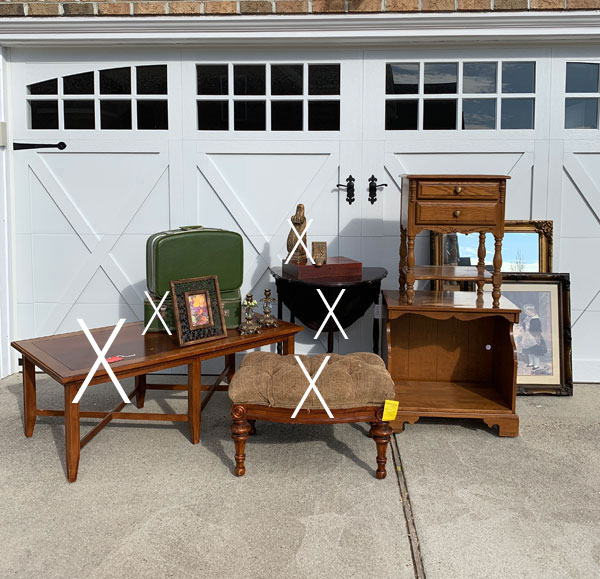
I’ll meet y’all back here on Tuesday sharing what I did with this oak night table:
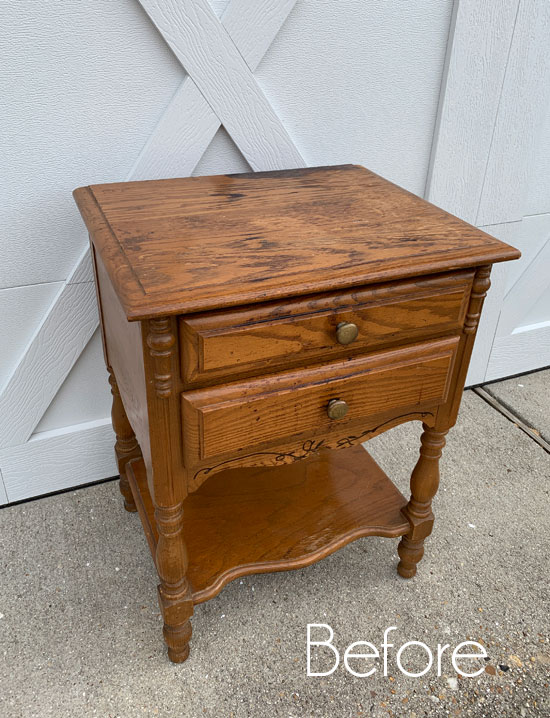
UPDATE: No need to come back! You can see this little cutie HERE now!
Enjoy your weekend!!
XO,
![]()
Don’t Miss a Thing!
If you like what you see, there are several ways to follow along!
Email * Facebook * Pinterest * Twitter *Instagram


Larissa ~ Prodigal Pieces says
Score!! Love the lines of the piece and your update makes it perfect. Beautifully done. Christy.
Christy says
Thanks, Larissa! Score for sure!! XOXO
Christina in SW FL says
Gorgeous table Christy! Jack’s comment about the shark was adorable. 🙂 Another winner of a transformation. Great use of the shop vac too!
Have a wonderful weekend!!
Christy says
Thank you, Christina! I hadn’t thought a thing about the shark until he said that lol. And yes, love the shop vac trick too…have a great weekend!! XOXO
Brenda says
You should keep that lamp. It looks perfect!
Christy says
I think I just might! Thanks, Brenda! XOXO
Ann Williams says
Beautifully done table as usual!! Can’t wait to see the two drawer one. Where did you find the shop vac with a hose that fit your sander??
Christy says
Thank you so much, Ann! The end of my shop vac hose is cracked, so I am able to fit it inside my sander. Then I just tape it up to hold it in place, but you could probably just tape them together if they aren’t a perfect fit. XOXO
Marcie Lovett says
I was loving the mixed wood tones on the before photo and hoped a little that you wouldn’t paint this one. But the after photo says you did the right thing, of course! If it weren’t in sad shape, it wouldn’t need a coat of paint, would it? Love the lamp, too, and the shade is fabulous. I predict they’ll both sail out of the booth, regardless of Jack’s sentiment! Forgot how beautiful that dark stain is on the round table. It sets off all the light colors so magnificently.
As always, thanks for the inspiration, Christy. I was just contemplating painting a favorite (but really dark and dated) lamp. Still trying to get up the nerve to do it!
Christy says
Thanks, Marcie! Yes, the wood was very lovely before. My original thought was to stain the top and paint the legs, but in the end I went for the paint. Sometimes I’m glad these pretty finishes come with those blemishes as it makes it easier to paint them! That round table was SO sad when I found it…I’m so glad I decided to keep that one. Good luck deciding what to do with your lamp! Have great weekend! XOXO
Denise says
You’re a girl on the go Christy! What are you using to create the sillhoutte stencils? I noticed the black and white floral pattern so I’m guessing something like inexpensive dollar store contact paper???
Christy says
Girl, this was a busy week! I’m enjoying a do-nothing day today ha ha! I use contact paper instead of vinyl since it is much cheaper. My favorite is plain white paper that comes in 12″ rolls at The Home Depot, but when I don’t have any of that, I use whatever I have on hand. The busy pattern is a bit harder to work with though. Have a great weekend! XOXO
Marie says
Love the coastal vibe you gave this coffee table, Christy! I’m sure it’ll sell quickly for you. The lamp looks perfect on your table, is it a keeper? Santa FINALLY brought me a Cricut machine but I haven’t learned to use it yet. Can’t wait to make my own furniture stencils like you always do and I’ll be looking for your updated post to learn how 😉
Christy says
Thank you, Marie!! I hope so…it will be taking up prime real estate in my booth because of the size of it! I think the lamp mighty just have to stay. I didn’t have a lamp in that corner where the table lives before and I like it! Yay on getting your cutting machine…once you figure it out, you will love it! XOXO
Laura says
I couldn’t find the color you used on the tabletop. There was no mention in the diy. How many coats did you need on the top? Thanks!
Christy says
Hi Laura! It’s in there…it is Toasty Gray by Behr. This is a new color for me and so far I like it! It’s warm and neutral and has a beachy vibe to it which I love. I painted the entire piece with white first, then added the toasty gray to the top. I only did one coat because it covered so well over the white. I would have needed two coats on the top had I not started with the white. XO
Lizzy Leff says
Beautiful work.
Christy says
Thank you, Lizzy! XOXO
sharon austin says
Beautiful; and it goes well with the pillows on your office couch! Maybe you should keep it 🙂
Christy says
Thank you, Sharon! If it weren’t so big I might be tempted! XOXO
Rose Lefebvre says
As usual, very nice! It is perfect for a coastal cottage especially!
Christy says
Thank you, Rose! Yes it would be perfect that setting! XOXO
Debra A Wise says
Love the coastal table makeover and I didn’t pay attention that the fish was a shark until you pointed it out. It’s still adorable. Love the lamp! Don’t blame you if you keep it. So gorgeous!
Christy says
Thank you, Debra! Ha ha yes…I didn’t even think about the shark until my son mentioned it. And I think the lamp is a keeper! Have a great weekend! XOXO
Kaycee says
What a beautiful table, I really like the colors you used and the graphics are perfect, even with a shark pictured with the advertised on the boat tour!!!
Christy says
Thank you, Kaycee! We had a good chuckle over the shark lol! XOXO
Julie Briones says
Toasty Grey (Gray?)! Did you know Toasty Gray is the exact same formula as Campfire Ash, only 50% darker??? Ask me how I know! Okay, I’ll tell you. I loved your Campfire Ash, but, at the time, it seemed just a wee bit too light for MWA. So, Toasty Gray was my next fave color. Long story short, figuring out the in-betweeny color of the two, the paint gal at Home Depot informed me they were the same colors, just TG was 50% darker! Hehe! So much more than you wanted to know, I’m sure. But now… my room still seems a wee bit too dark (casts shadows). Should have gone with Campfire Ash!
Christy says
Ha ha yes! I was looking for a color similar to my wall color but just a bit darker, and this was the next color in the paint deck! I would have said all that in my post, but I thought it was already a bit wordy. I bet it looks great in your WA…it’s a great color too! 😀 XOXO
Jen @ Girl in the Garage says
Such a pretty table makeover and love the distressed details. Too funny about the shark being on the sign!! LOL I wouldn’t have even thought about that.
Christy says
Thanks, Jen! Yep…not sure I would trust that boat tour company ha ha! XOXO
Donna Bastoni says
As usual pure genius!
Christy says
Aww thank you, Donna! XOX0
Kathy Owen says
I love it all but those distressed legs are my favorite part. Sucker for distressed white paint!!
Christy says
Thank you, Kathy! You know I love me some distressed white paint too my friend!! XOXO
kandice kullmann says
This came out so pretty! I love the logo, but that is kind of funny about fishing tours with a shark on the logo hahaha
Christy says
Thank you, Kandice!! Yeah I don’t know if I would trust a boat tour company with a shark in their logo ha ha! XOXO
Debbie H says
As always great work! How much do you sell your pieces for in your booth?
Christy says
Thank you, Debbie!! It depends on what it is, but I have this priced at $225. XO
Deanna Jones says
I love all your make overs, what do you seal the chalk paint with on a coffee table top
Christy says
Thank you, Deanna! For a long time, anytime I redid a coffee table, kitchen table, or dining table…basically anything that would get high traffic, I would either opt to stain the top and paint the body, or paint the top in something other than white so that I could seal it with Polycrylic. The polyacrylic has a tendency to yellow over white paint. However in recent months I have discovered Dixie Belle’s satin clear coat, which I linked to in this post. I love it so far. It does not yellow over white. They also make a product called gator hide, which is supposed to be super durable and waterproof. I haven’t personally tried that product, but that might even be an even better option. Wax can also be very durable, however you have to be sure that you let it cure for a minimum of 3 to 4 weeks before using it heavily. Hope this helps! XO
Donna says
The table turned out gorgeous! I had to chuckle at the shark logo for a boat tour company…
Christy says
Thanks! And yes ha ha…I never even thought about that! XOXO
Milissa says
I was not impressed with this coffee table until I saw it painted.
I did think the shark was a bit off too but it is eye catching. That’s what makes things sell. So perhaps that is also part of your genius. Thank you for sharing your talent with us.
Christy says
Thank you, Milissa! I think the criss-crosses on the bottom reminded me of a lifeguard stand…otherwise the rest of it wasn’t very noteworthy in my opinion either. Thank goodness for the power of paint! So my son pointed out the shark…but my Hubby said that was a tour he’d like to see lol. Not me ha ha! XOXO
Kelly says
For a high use piece like a clothing armoire, would your chalk paint/Dixie bell hold up, or should I use cabinet paint?
Christy says
Hi Kelly! Chalk paint and Dixie Belle Topcoat should do just fine. I would just give it two coats of topcoat. XO