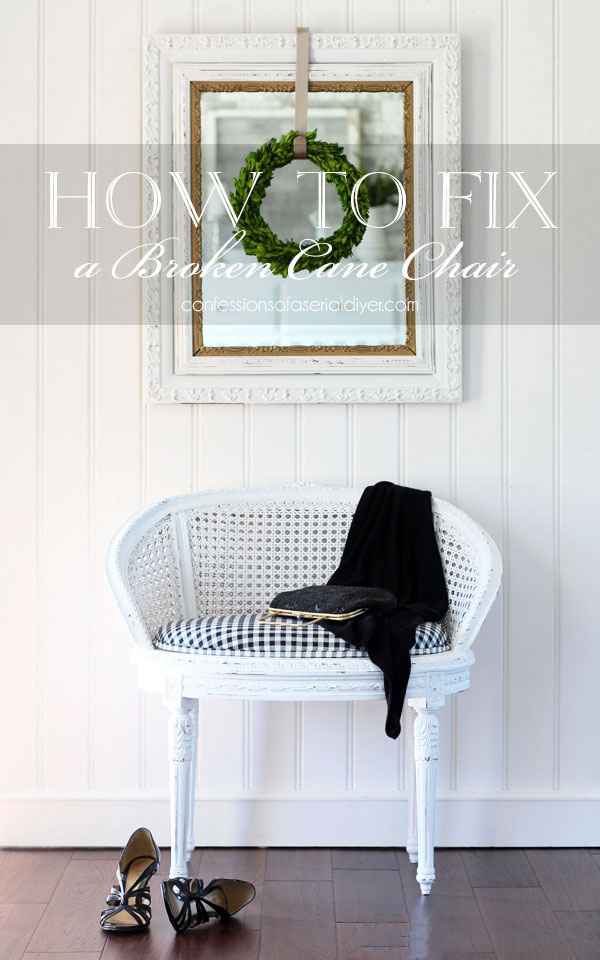
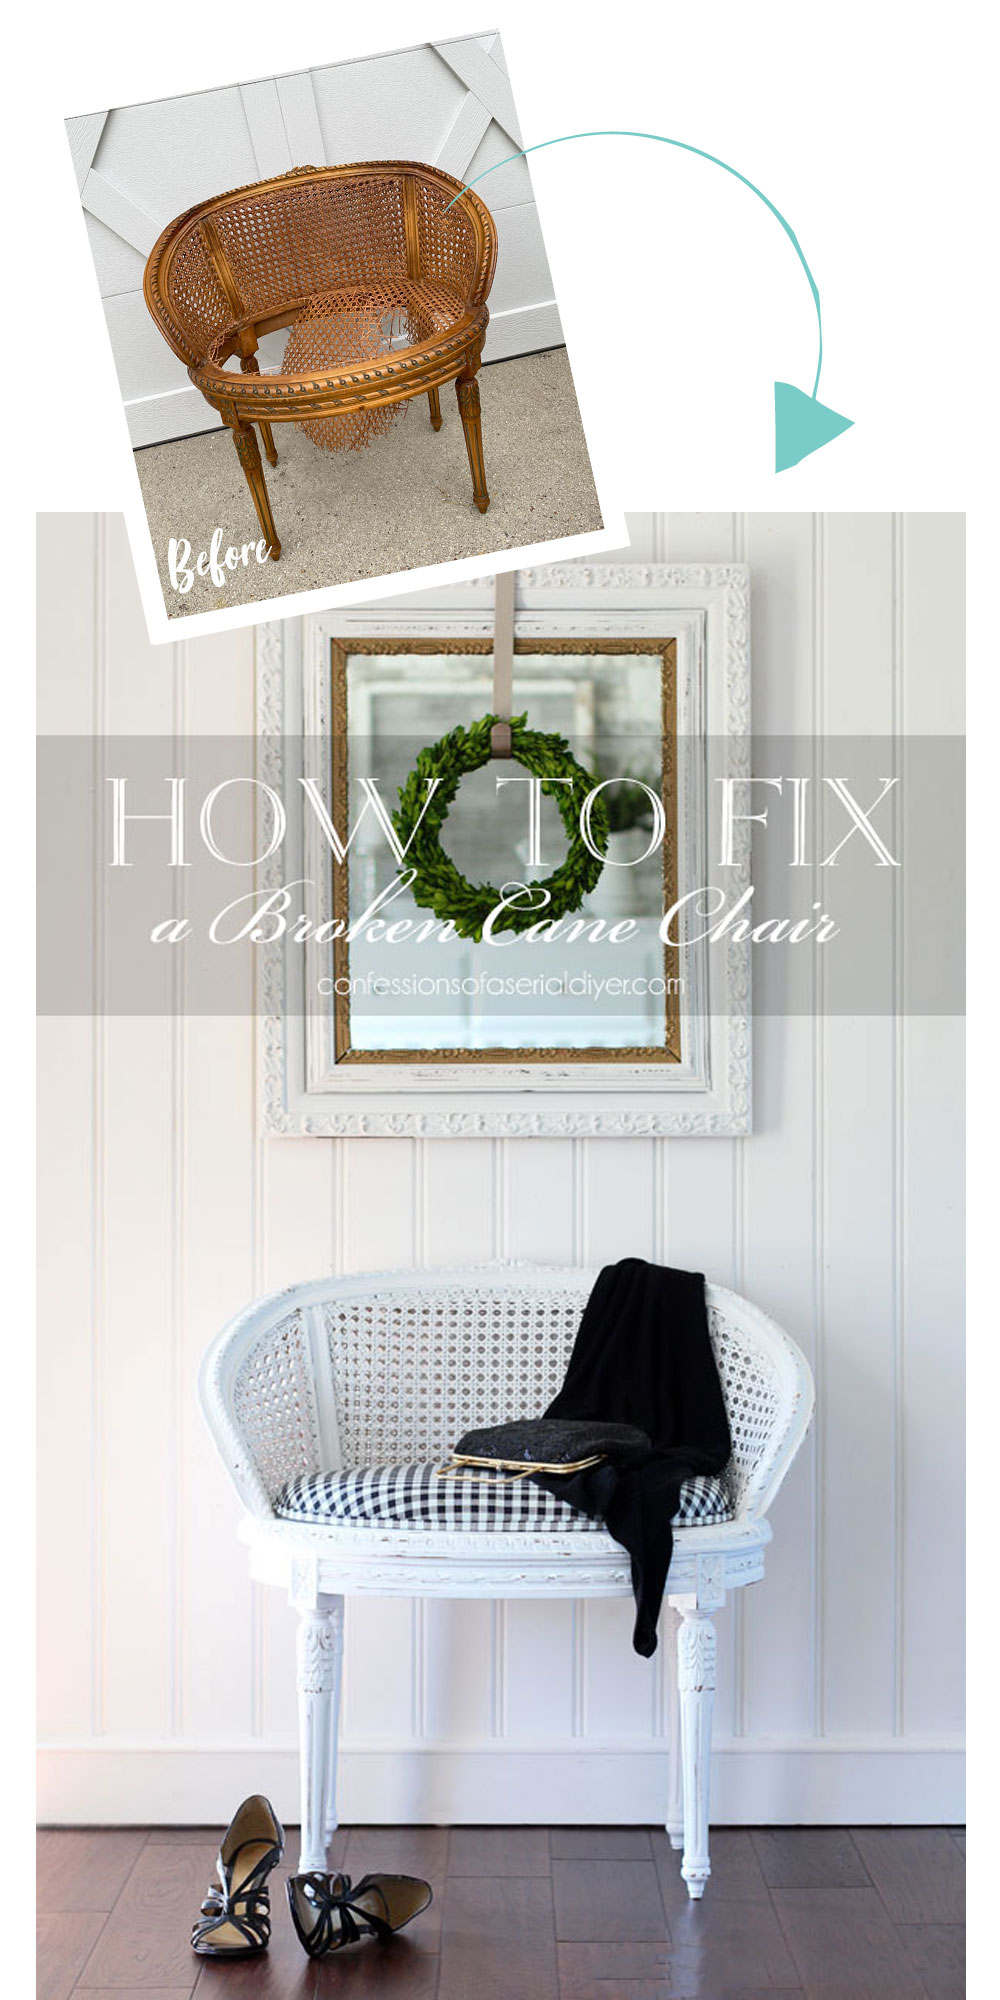
Have you ever completely overlooked a chair at a thrift store or yard sale because the cane seat was broken? Dear friends, I’m hear to share another way to fix a broken cane seat!
I originally shared this makeover a couple of years ago and have been kicking myself for selling it ever since!
My sweet mother-in-law passed this along to me in hopes that I might be able to do something with it:
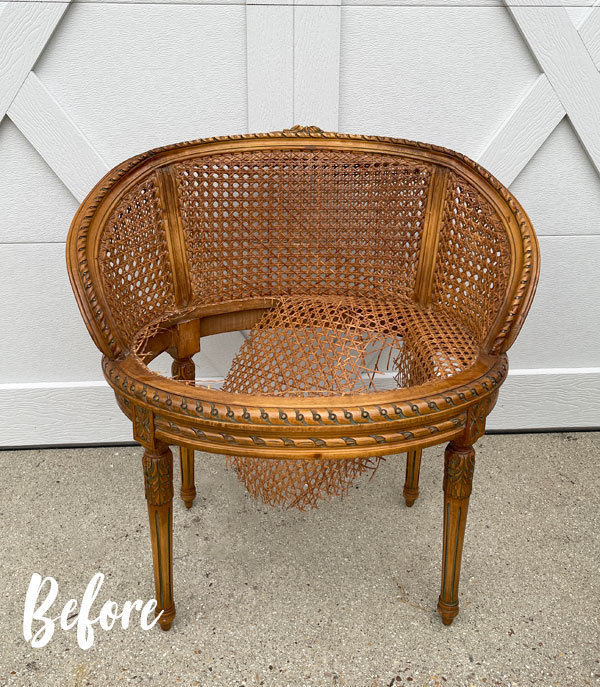
Aside from the broken cane seat, it’s a gorgeous chair! I’ve included a few affiliate links so you can find the products I love.
Unfortunately, my father-in-law put his foot right through it while trying to stand on it. My own hubby did the very same thing with this chair a few years ago lol.
Another Way to Fix a Broken Cane Seat
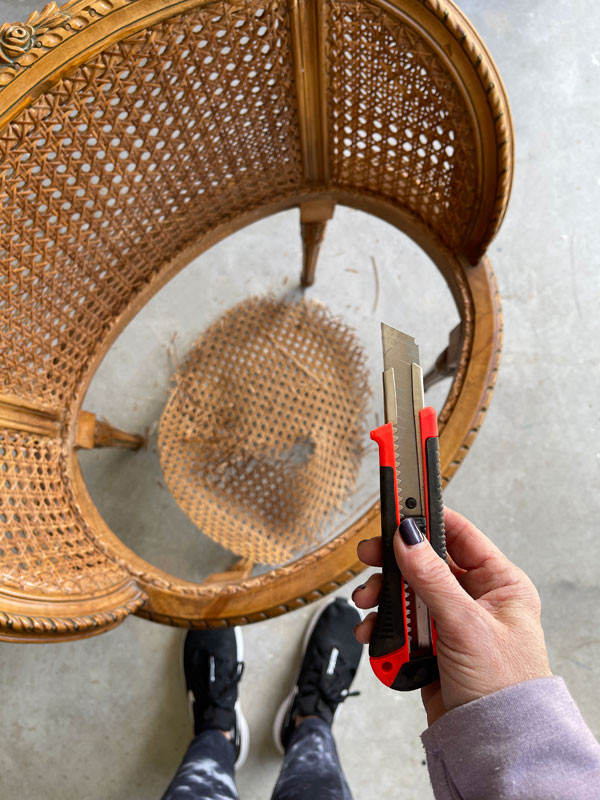
The first thing I did was remove the broken cane seat with a razor knife:
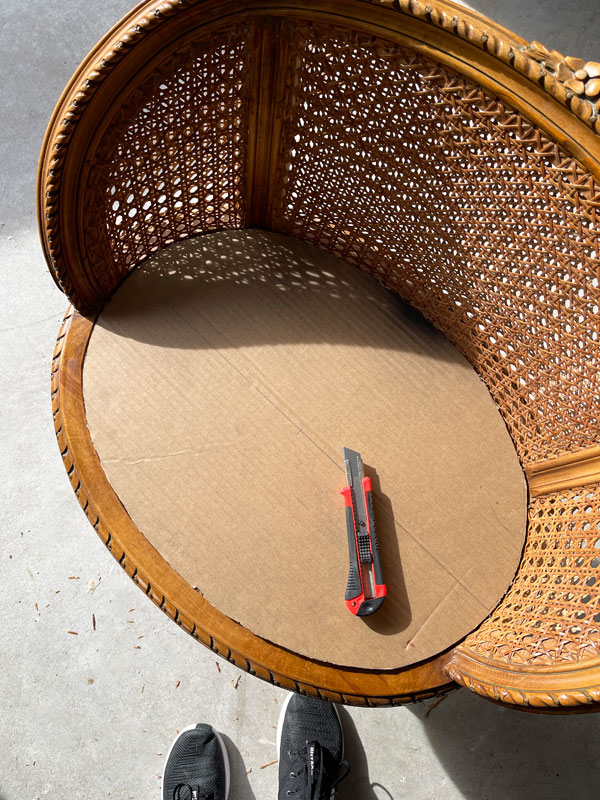
Create a Pattern for the New Seat
Then, I cut a pattern for the new seat using a piece of cardboard:
I traced the pattern onto some thin plywood and cut the new seat using my jigsaw:
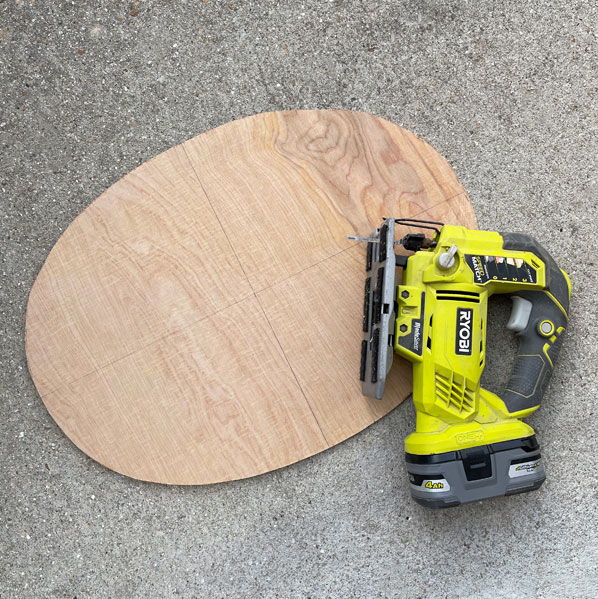
This is a great saw to use on those rounded edges, especially if you swap out the original blade for a smaller scroll saw blade (made for the jig saw). I found mine in a multi pack at the Home Depot.
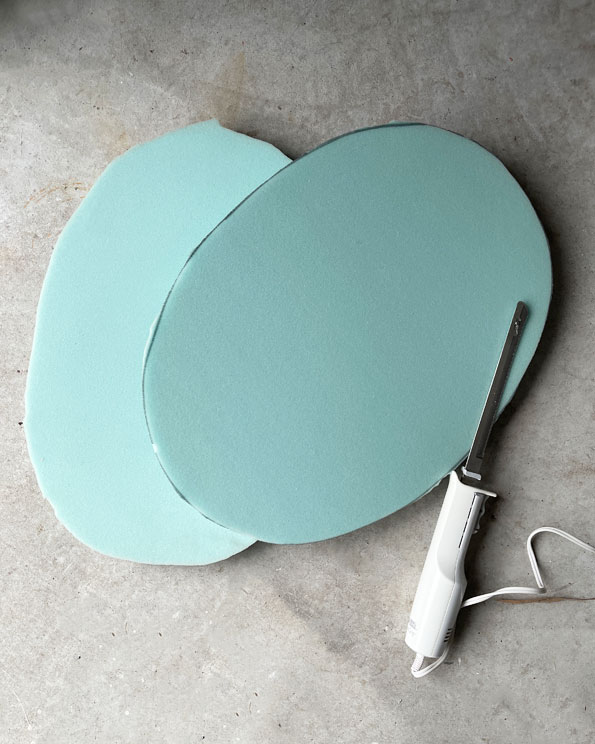
I then cut my foam that I picked up at Walmart, using an electric knife.
The only foam available at Walmart at the time was much thicker than I wanted, so once I had it cut to size, I sliced it in half widthwise:
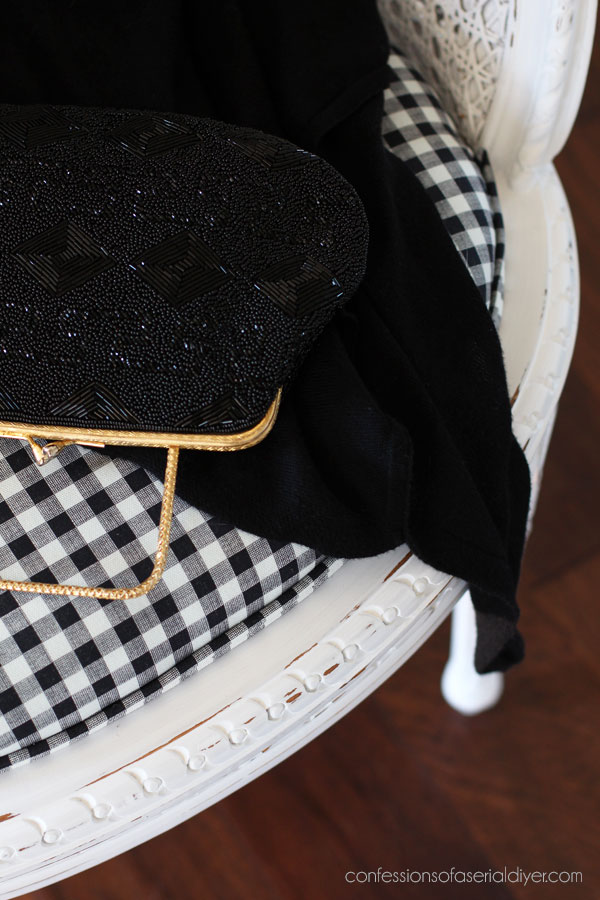
This was a pretty fancy chair and I had a couple of more formal fabrics that I thought would be beautiful on this chair, but I just wasn’t loving them.
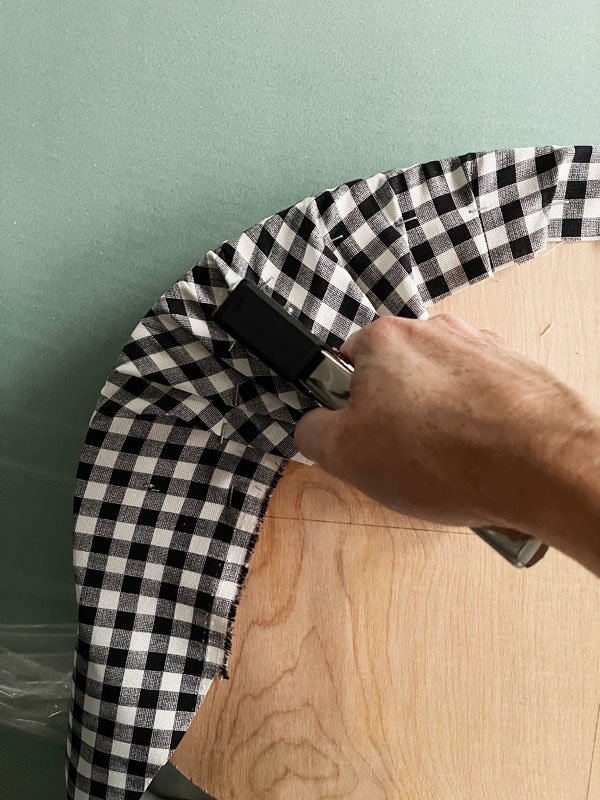
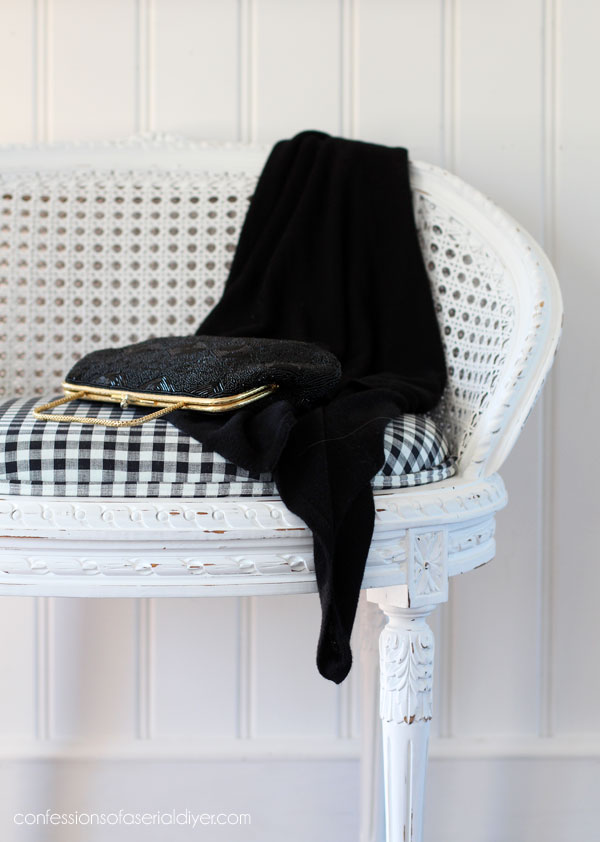
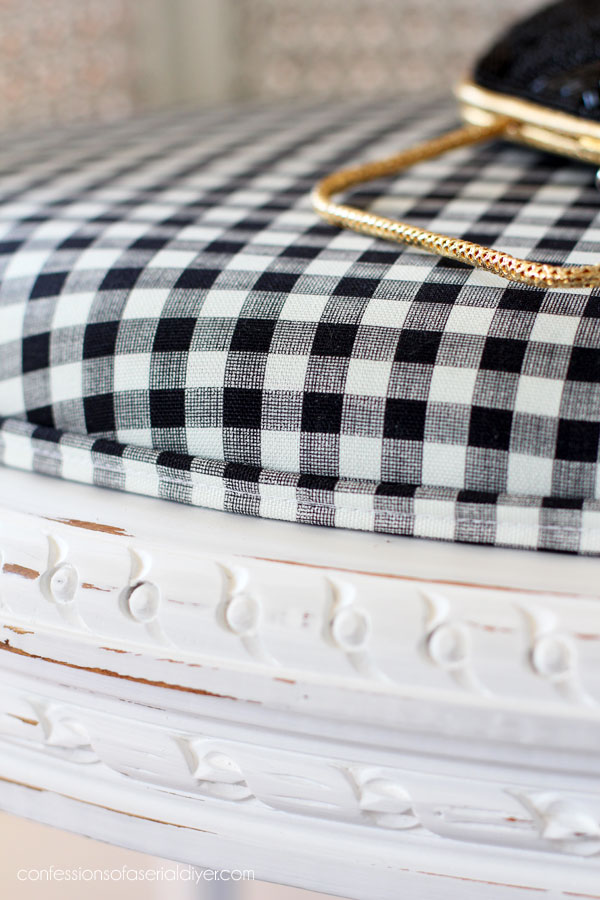
To me, the casual feel of the cane was calling for something less stuffy. Once I laid some black and white gingham check over the seat, I loved it.
I attached the fabric using my cheap light duty staple gun…
Paint
To prep for paint, I gave the main parts of this chair a quick cleaning with White Lightning and used my shop vac on the cane parts.
Before painting cane, you will want to prime it or the paint can flake off over time, so I went ahead and hit everything with Rustoleum spray primer:
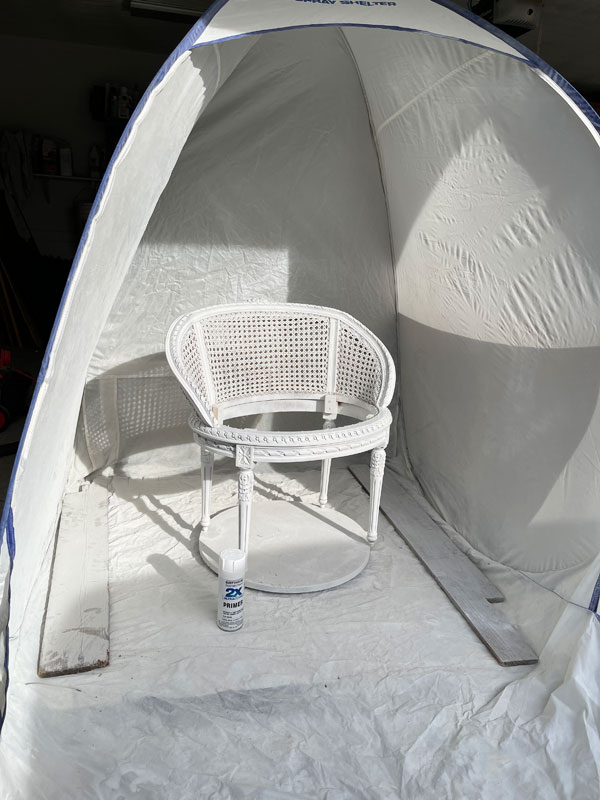
This is my medium spray tent and it is awesome! On windy days, I can sit it just inside my garage and spray away!
Then, I followed up with one coat of Dixie Belle’s Cotton using my Best Dang Brush:
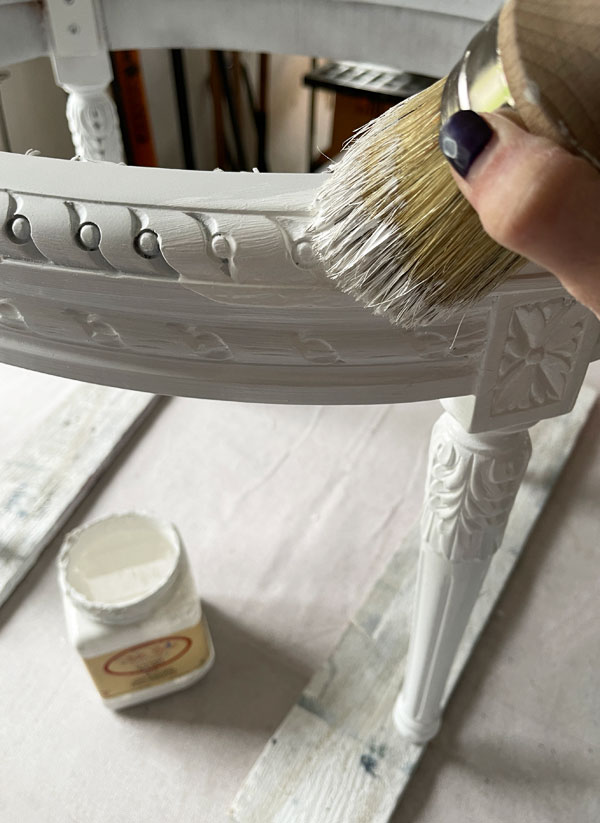
I love it for highly detailed pieces like this one, and it works so well on heavily textured surfaces like baskets and this cane:
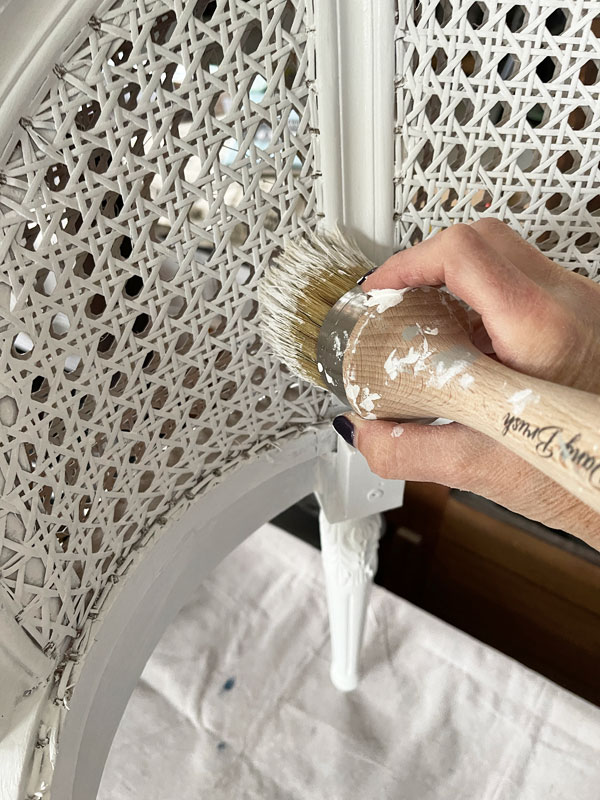
This brush has natural bristles, so you don’t want to let paint sit on it too long like you can with a synthetic brush. It’s best to rinse it as soon as you’re done with it.
Once the paint was dry, I sanded all over with 220 grit sandpaper wrapped around an old foam sanding sponge…
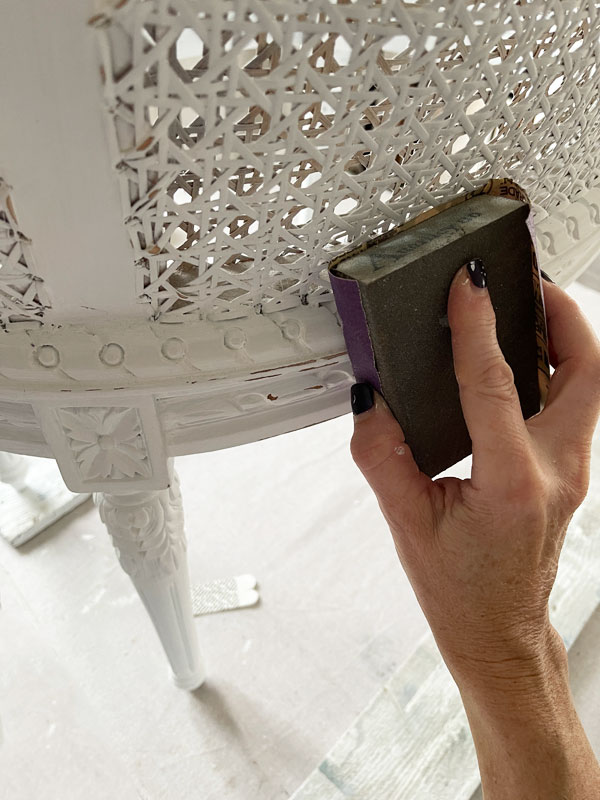
I left the cane parts unsealed and sealed the rest of the chair with clear Best Dang Wax.
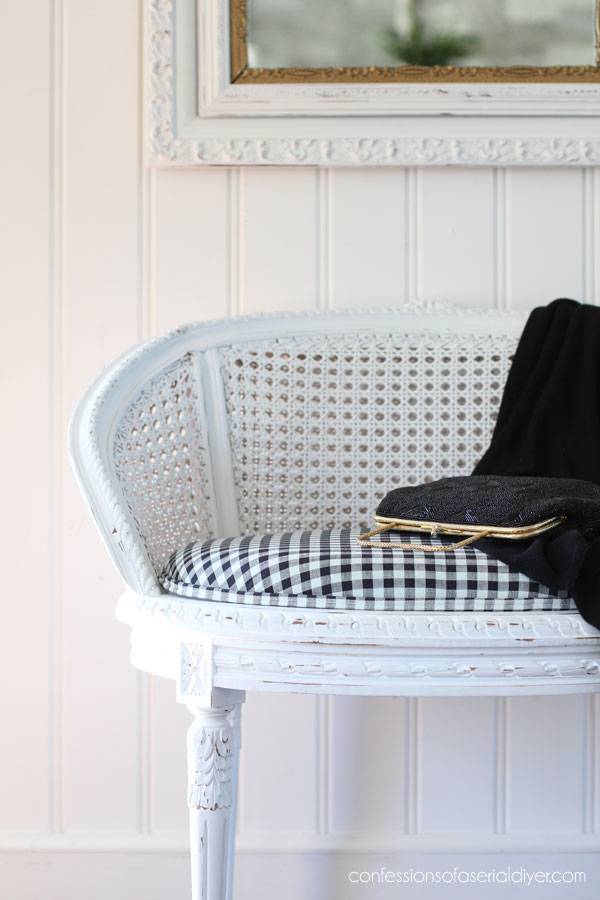
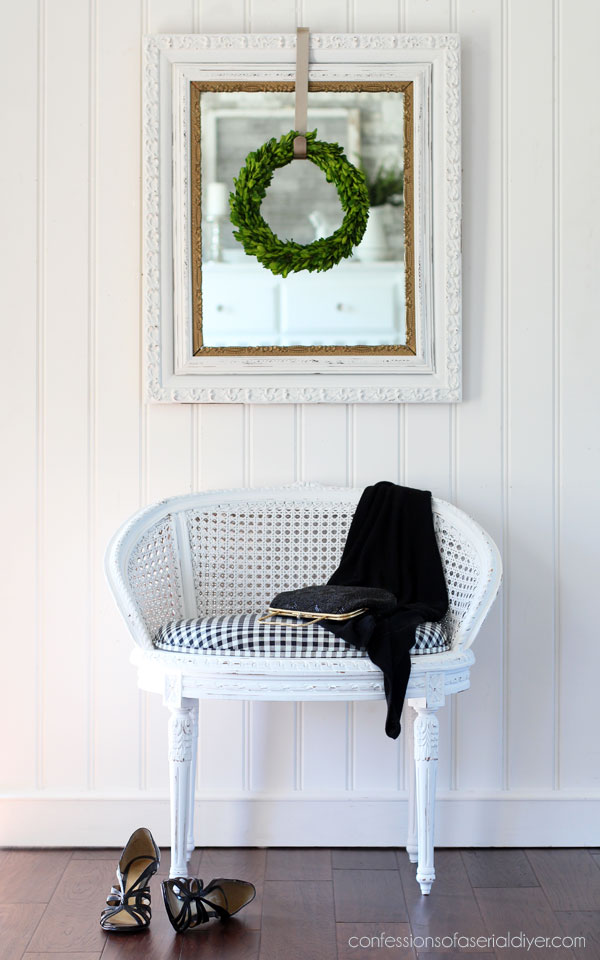
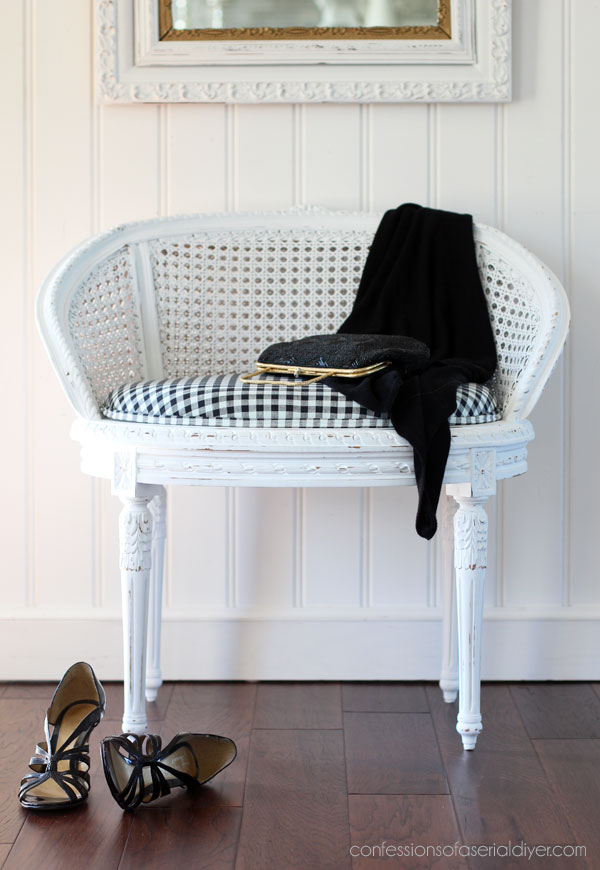
The after
I love a simple, cottage-inspired shabby look for this one!
This was such a beautiful piece already, but the paint and fabric added a little more charm…
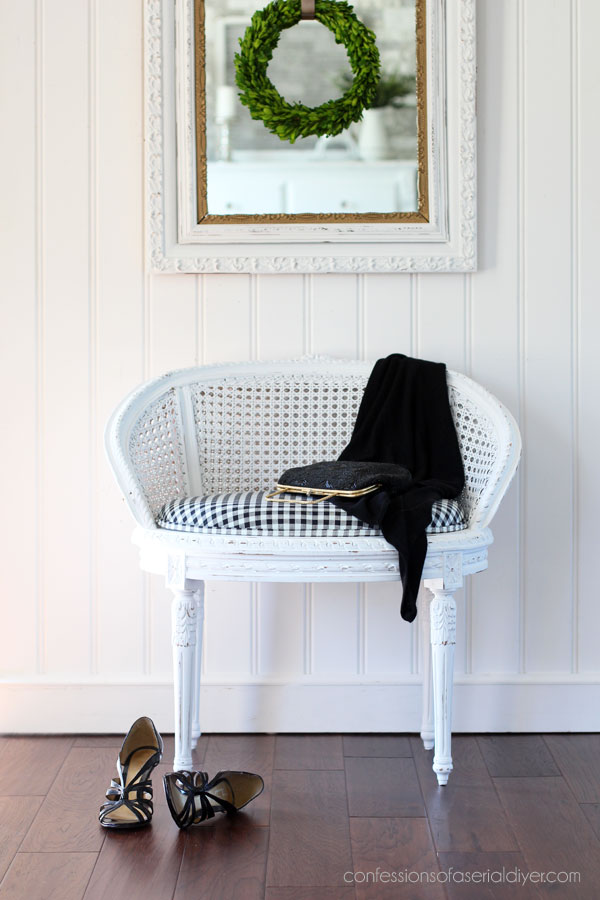
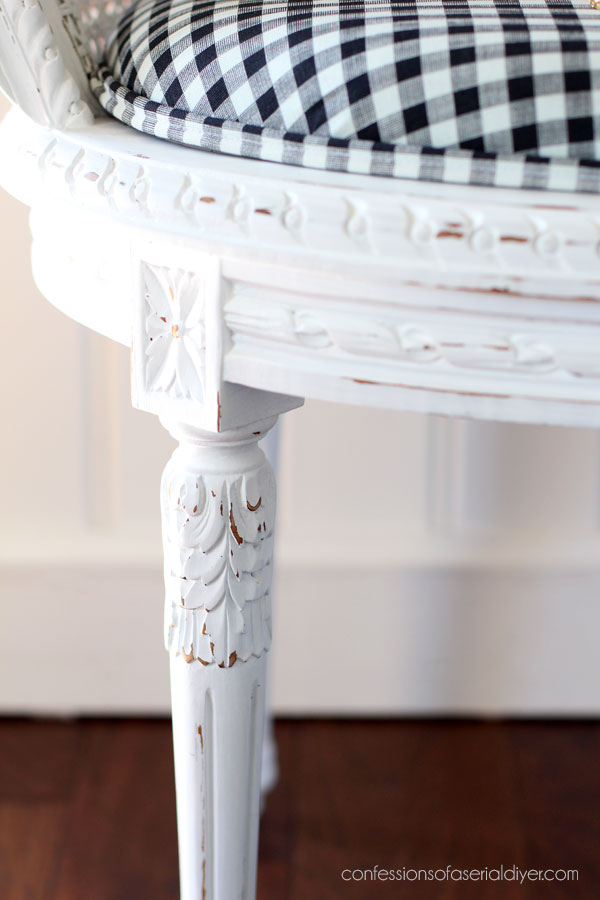
Those details are just gorgeous!
Adding double welt trim
I knew I wanted to trim out the front edge of the seat to give it a more finished look, so I made double welt trim to match:
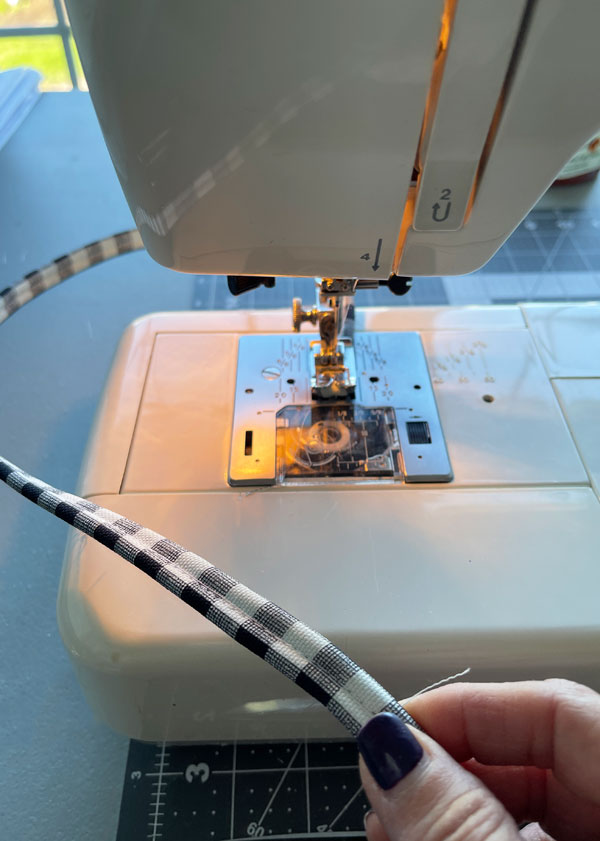
If you can sew a straight line, you can totally make this! See my how-to HERE!
If you don’t sew, you can also use gimp trim like I did on this pretty bench HERE.
It just gives the front edge a more professional and more finished look:
I attached it with hot glue along the bottom edge of the cushion.
And I stopped it where the arms start.
The seat rests on the small lip around the back side and across the front, but I secured it in place to the legs with these L brackets.
And that’s another way to fix a broken cane seat!
This is an excellent alternative to replacing the cane.
And it’s probably a lot more comfy too!
If you enjoyed this makeover, I redid this one similarly:
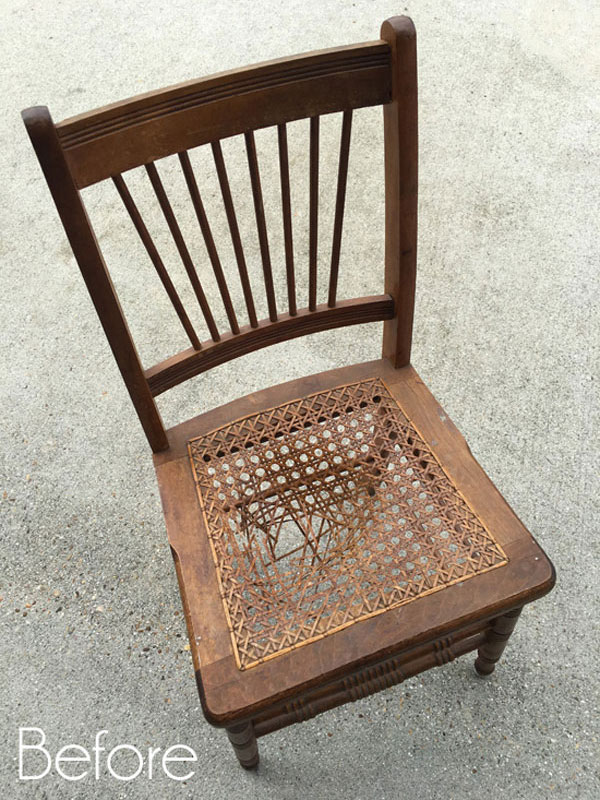
See how I “fixed” this one HERE!
Now that Jack is settled back at school, I’m back at work and will have new makeovers for you next week!
I’ll see y’all Tuesday with this cute sandwich board style chalkboard:
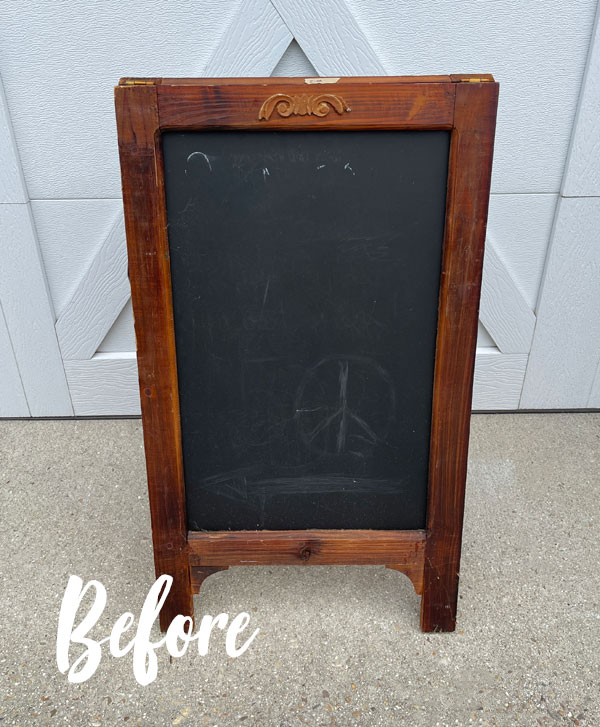
UPDATE: I found some rather naughty language written on this chalkboard, but I was able to make it CLEAN again lol. See it now HERE!
Have a beautiful weekend!
XOXO,

Don’t Miss a Thing!
If you like what you see, there are several ways to follow along!
EMAIL * INSTAGRAM * FACEBOOK * PINTEREST


Get FREE SHIPPING on all orders over $50. No code needed at checkout! Orders under $50 always enjoy $8 flat rate shipping! Most orders ship same or next business day!


Mary Kaiser says
I remember how beautiful this chair turned out! I loved it! How fun that Jack is all settled and ready to learn! Looking forward to fun new projects next week! Have a fun weekend!
Christy says
Thank you, Mary! This one sold really quickly, so I didn’t have time to second guess myself, but I wish I had kept it! It’s a relief to have Jack settled and back at school for sure, and yay! I am ready to get back to work! Have a fabulous weekend! XOXO
Niki says
So darn cute! Thank you for re-sharing Christy. I am in like with chain chairs in all facets! The fabric was a great choice and you can never go wrong with black and white. I’m also so glad that you know the difference between gingham and plaid. Ufdah, if I had a dollar for every time I see it called plaid or checkered pattern I’d be a few hundred ahead. 😂😂
Christy says
Thank you, Niki! I covet cane chairs myself lol. Yes, gingham…although I do sometimes refer to it as a mini check as well, but never plaid ha ha! XOXO
Christine Prowak says
From trashed to cash – excellent transformation!
Christy says
Ha ha I love that saying! Thank you, Christine! XOXO
Peggy says
Quite possibly the BEST fix you have ever done! Looked impossible, but you gave it new life. Can’t beat black and white checks! Just. Lovely.
Christy, you did it again! 🖤🤍🖤🤍🖤
Christy says
Thank you so much, Peggy! Much more fun than trying to mess with new cane lol! XOXO
Jan says
This chair is adorable! I can see why you are sorry you didn’t keep it! So many possibilities of seats too. Thank you for showing how to make the trim too!
BTW I meant to tell you how nice your “new” booth looks also! I’m so glad you have the added space & new neighbors! It’s so nice and open. You always delight & inspire me with your new transformations. You look forward to your posts!
Christy says
Aww I appreciate that so much, Jan, thank you!! Yes, there really are so many options for fabrics out there. My booth has had a slow summer, but it looks like everyone waited until August to shop because ever since I shared it, it’s been busy! Maybe that’s because I shared it? Ha ha who knows but I’ll take it! XOXO
Denise says
I can’t say enough. I would never have believe it was the same chair had I not seen all the steps you shared. It is beautiful and your work is amazing! Thank you for sharing. Take good care. Denise
Christy says
Aww yay! Thank you, Denise! I appreciate that SO much!! XOXO
Fran says
I love cane chairs. I have missed out on them on Marketplace but still keep looking. I love your restoration and the instructions of how to do it. I won’t pass up the next one when I find it!
Christy says
I love them too, Fran! Thank you!! XOXO
Rebecca says
I love this makeover. So cute.
Christy says
Thank you, Rebecca! XOXO
Denise Hubbard says
Hi Christy! What a beautiful job you did on the cane chair! You find such wonderful items to re-make into adorable things. The white chair with the checkered seat is so cute. It’s one of my favorites out of the many projects you have done! Can’t wait to see more!
Christy says
Thank you so much, Denise! This was my MIL’s chair that her hubby put his foot through lol. I was so happy she passed it along to me! XOXO
sharon austin says
Very nice as always. I finally finished the piece I’ve been wanting to redo for YEARS and that white lightening I ordered from you was awesome!
Christy says
Thank you, Sharon! Yay!! I bet it looks amazing! White Lightning finds dirt you never knew was there lol! XOXO
Patty Hubert says
I adore this chair and the finished product. I have a beautiful vintage fan back wicker chair with an upholstered seat seat. It needs a good cleaning and I’d love to paint it. Would the cleaning method and paint you used for this chair, work for mine?
I’m new to your site and love everything you do. I began refinishing furniture when I was 15. Almost 50 years later, still love it.
Christy says
Hi Patty! I’m so glad you found me! I don’t see why you couldn’t use this same method on yours. Painting is so rewarding, right? Good luck! XOXO
p says
So glad you saved this chair !! Sooo much cuter now. The white paint gave it a more casual look, and the fabric is Perfect !
Thanks for sharing your carpentry and upholstery skills 🙂
p
Christy says
Thank you, P! I was so excited when she offered it to me! XOXO
Nancy Brantley says
I’m new to your blog and loving everything you do! I need to find out where your booth is located?
Christy says
Thank you, Nancy! I’m so glad you found me! My booth is located in the Virginia Beach Antique mall here in Virginia Beach, VA. XOXO
Lizzy Leff says
It’s beautiful!
Christy says
Thanks so much, Lizzy! XOXO
Michele M. says
Oh, wasn’t she a cutie????? So well done. No wonder it sold so fast.
Christy says
Thanks, Michele! I miss her!! XOXO
roe squire says
This looks so wonderful. What paint sprayer do you recommend?
Christy says
Thank you, Roe! If you’re looking for an inexpensive option, I have used this one many times in the past and it worked great: https://amzn.to/3OK9Ioq XOXO
Debra Hubbs says
Amazing.
Christy says
Thank you, Debra! XOXO
Teri O. says
I’ve been having trouble hot glueing fabric. Do you use the hottest setting on your gun (mine has two) and is there a specific kind of glue to use? Thanks. Love the chair.
Christy says
Hi Teri! Thank you! I wonder if you are using low temp glue sticks? My gun is larger and just has one setting, and it gets really hot. XOXO