It’s Furniture Fixer Upper day, amazing friends, and when the holidays are upon us, we like to take December to share our favorite Furniture Fixer Upper from the past year, AND we get to pick our favorites from one another to share as well! Look for my picks at the bottom!
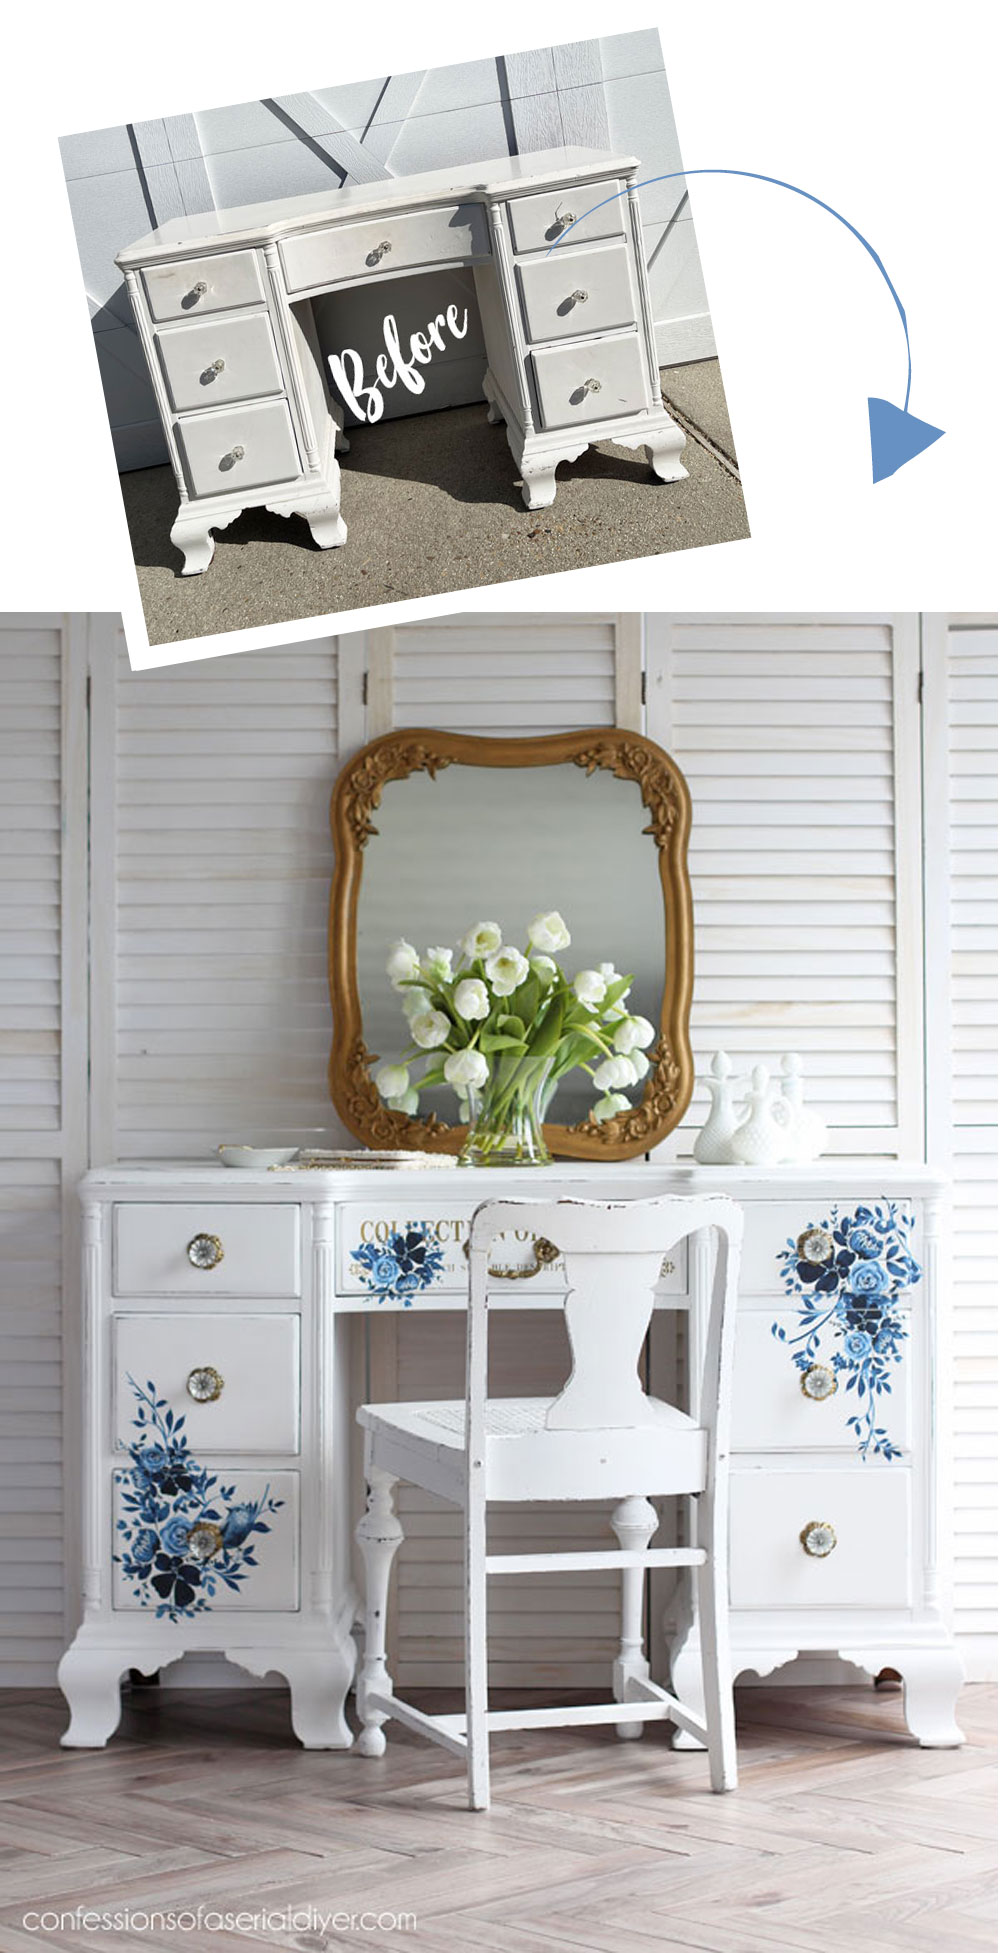
My own pick for this year is this desk I shared last January that I found at the thrift store for $49.95:
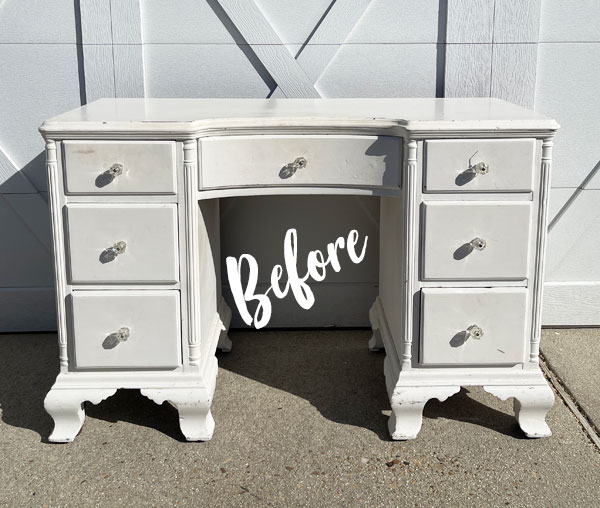
I thought this makeover would be so easy. I would just paint it in one of my favorite coastal blues, shabby it up a bit to show some white peeking through. Done!
Um. no.
Not even close.
Bree carving her name into this desk was just one of the many boos boos on this piece…
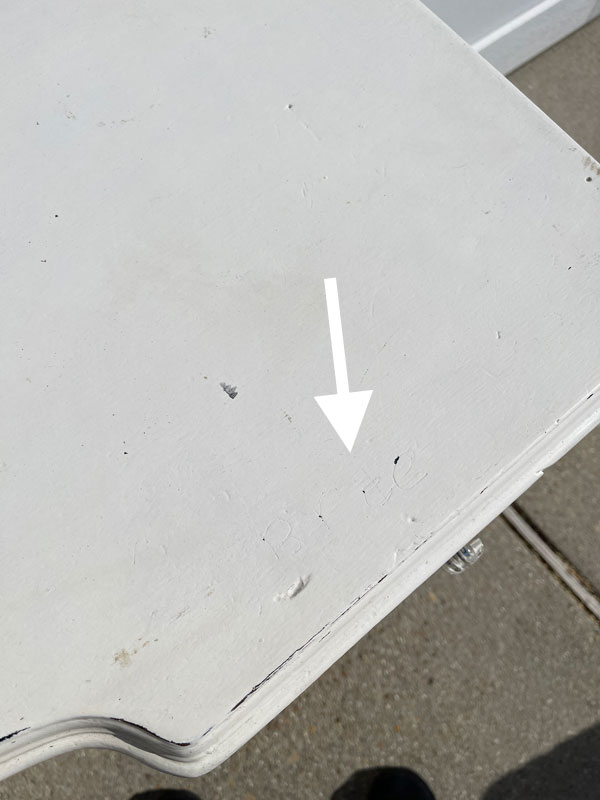
You can see just in that one photo alone that this thing was not in the best condition. It was truly a hot mess.
But one thing you may have come to know about me is that I love a hot mess makeover ha ha!
I’ve included a few affiliate links so you can find the products I love.
Do I need to remove the old paint first?
The answer to that question depends on whether the original paint is well-adhered or not. This was on there good. You also need to be sure you’re not dealing with lead paint if you’re not sure of the age of the paint. I used this lead tester, and this desk passed the test.
See more on How to Paint Already Painted Furniture HERE.
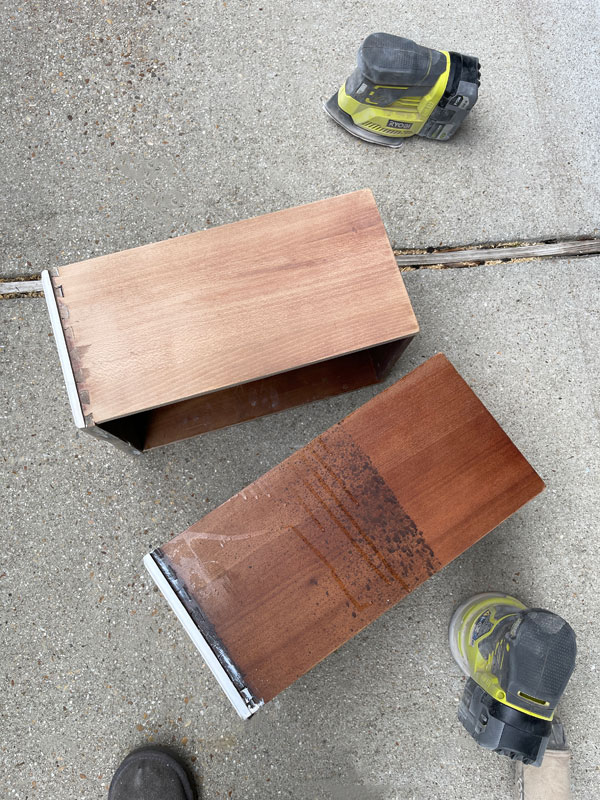
Sand
I started by sanding the top to try and smooth out all those imperfections and ended up sanding just about all over, enlisting the help of both my rotary sander and my corner cat sander:

Those are both the cordless ones that require the pricey batteries, but if you already have the batteries from other Ryobi tools, it’s awesome to not have any cords in the way. They both come in a corded version also.
Once I was finished sanding, I vacuumed up all the dust with my shop vac.
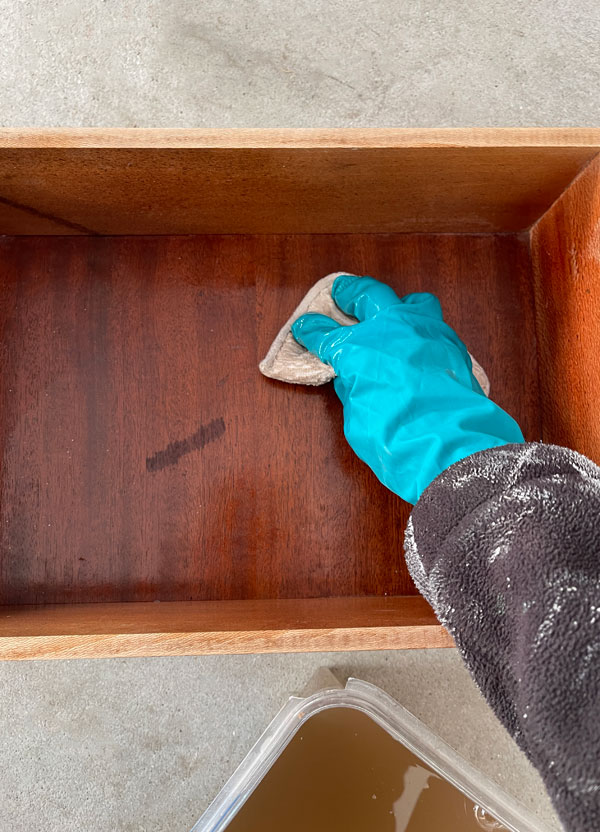
Clean
Next, I gave everything a good cleaning with White Lightning.
Most of the drawers looked like this to start:

So I started with them first…
Do you see that water?
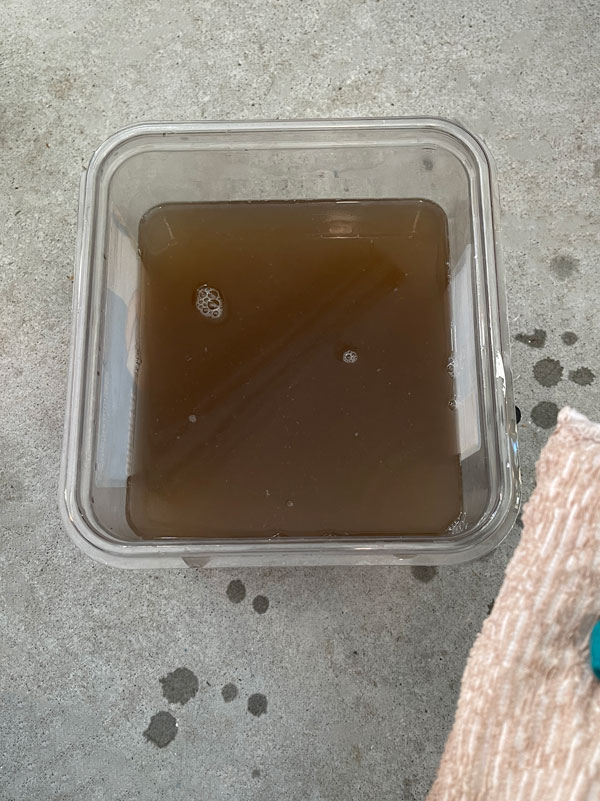
That was just from the drawers…how do the insides of drawers get that dirty? (You know how much I love to show pictures of dirty water…all to say: CLEAN your pieces, y’all!)
Those terrycloth pads can be found HERE, and come two to a pack.
I swapped out my water for clean water and wiped them all down again to remove any remaining dirt and residue. Then I mixed a fresh batch for the rest of the desk…one TBSP of White Lighting added to half a gallon of warm water.
I like to clean before filling the holes and gouges.
Fill holes and gouges
There were still several areas that needed filling, and I did that with Dixie Mud in the white this time:
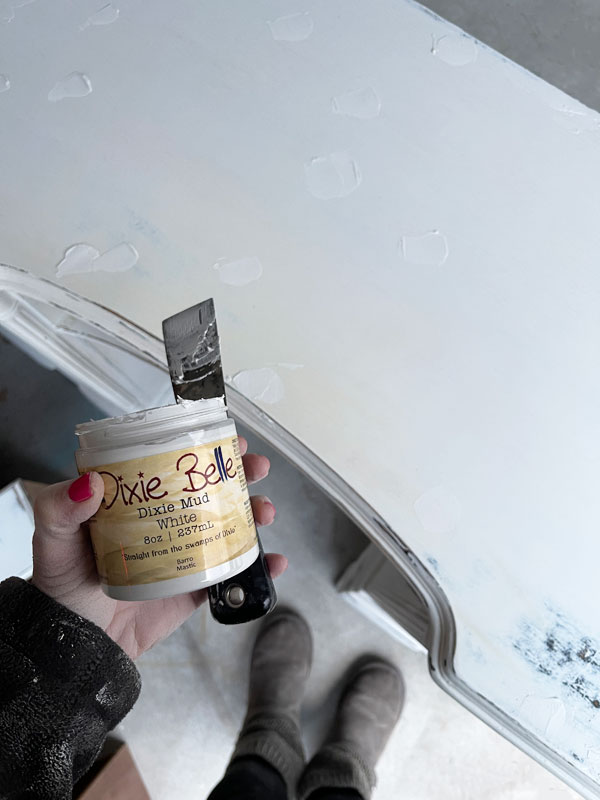
I like to leave the Mud to dry for a few hours before sanding for the best results. Then, I sanded with 220 grit sandpaper and vacuumed once again, then wiped with a clean, soft cloth.
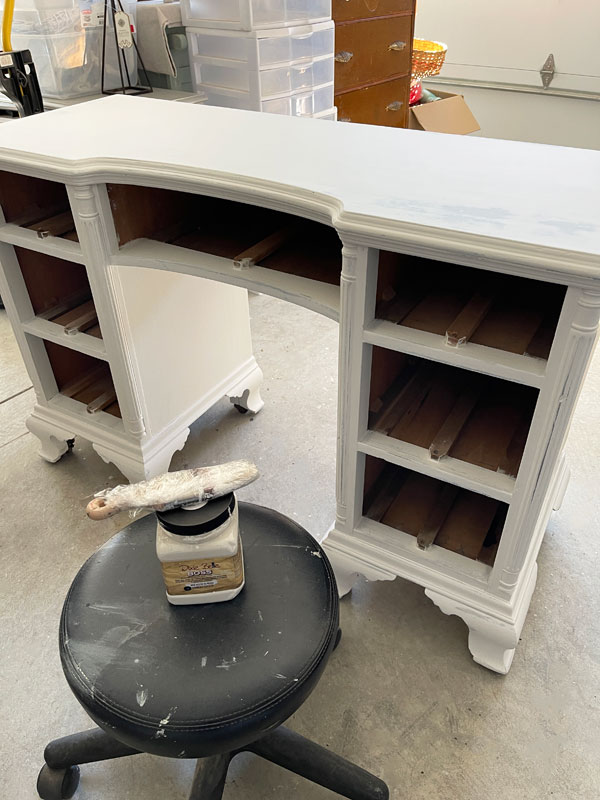
Block the Bleed
If you noticed in the photo above, there is bleeding occurring in the front, center of the desk, but also in several other areas as well.
So, I gave everything one coat of BOSS in White and let that sit overnight:
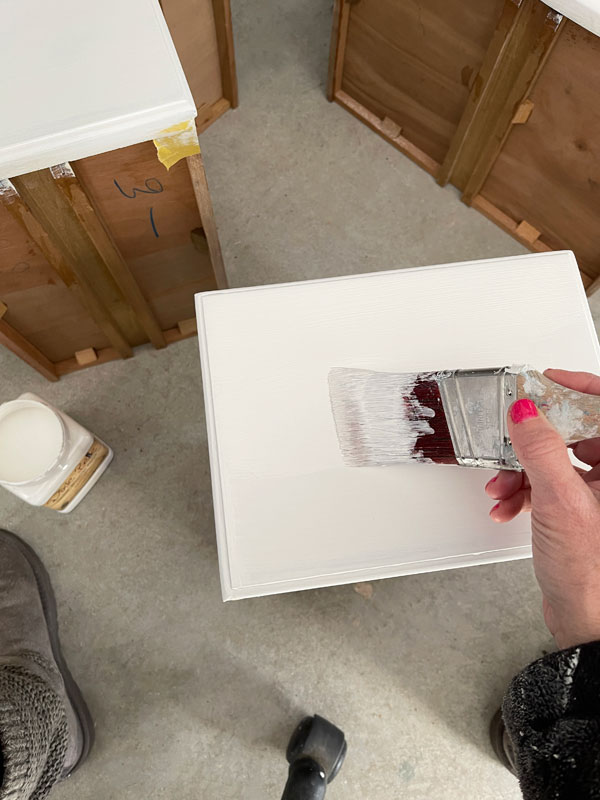
Paint
Finally, the fun part!
I decided to abandon my plan of a pretty coastal blue, and gave it two coats of Cotton instead, sticking with the white and using my favorite Mini Angle brush to apply it:
Once I had all the painting done, I sanded all over to smooth, hitting the edges a bit more to distress just a bit.
Adding the Pretty in Blue transfer
Now for the accessories!
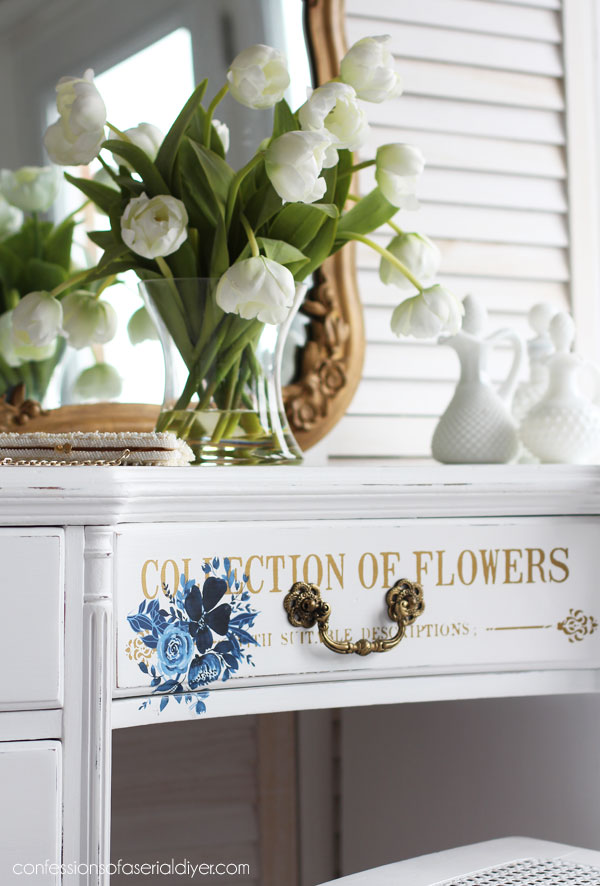
I chose Redesign’s transfer called Pretty in Blue:
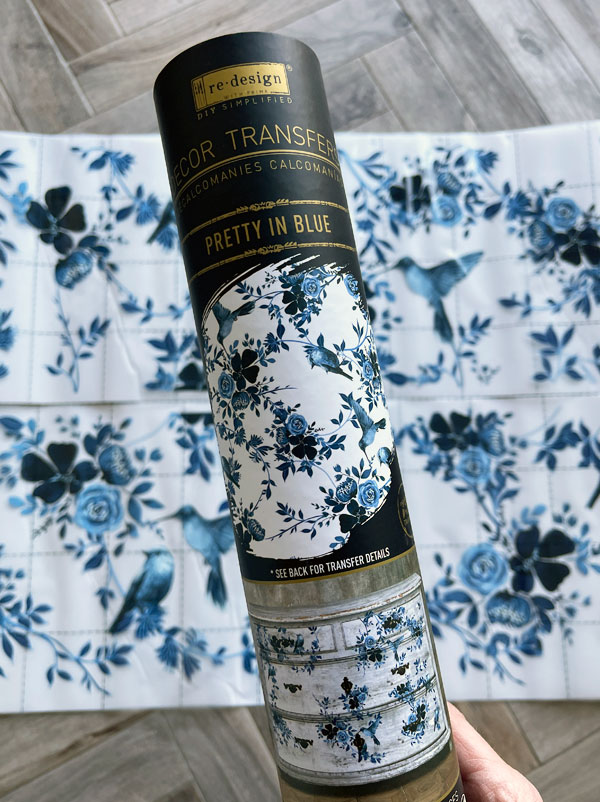
I love this one so much and have used it on a couple of other pieces HERE and HERE.
The pieces in the design are all connected, so I carefully cut them apart, arranging and overlapping them in a way I liked for this desk:
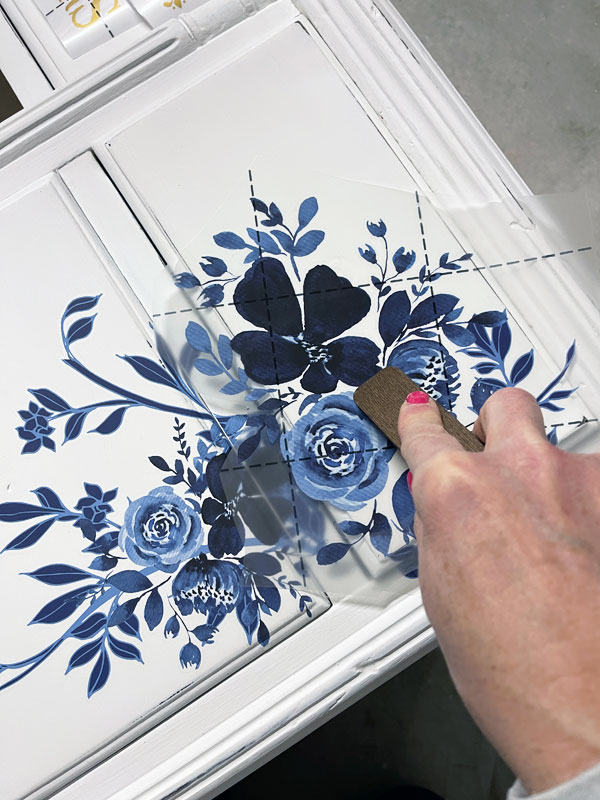
If you haven’t used a transfer before, there isn’t much to it.
- Get an idea of where you want it first. Transfers can be cut apart and combined anyway you like.
- Peel off the white backing.
- Lay it onto your surface.
- Use the enclosed stick (or this fancier tool) to burnish (rub with pressure) to release the image from the clear top sheet onto your surface.
- Once the image has been transferred, peel back the clear top layer and remove.
- Then take your fingers, a clean cloth, or a finishing pad and rub it across the surface to be sure it is adhered well all over.
I layered some of this transfer over a couple of leftover pieces I had from the Flower Collector transfer also:

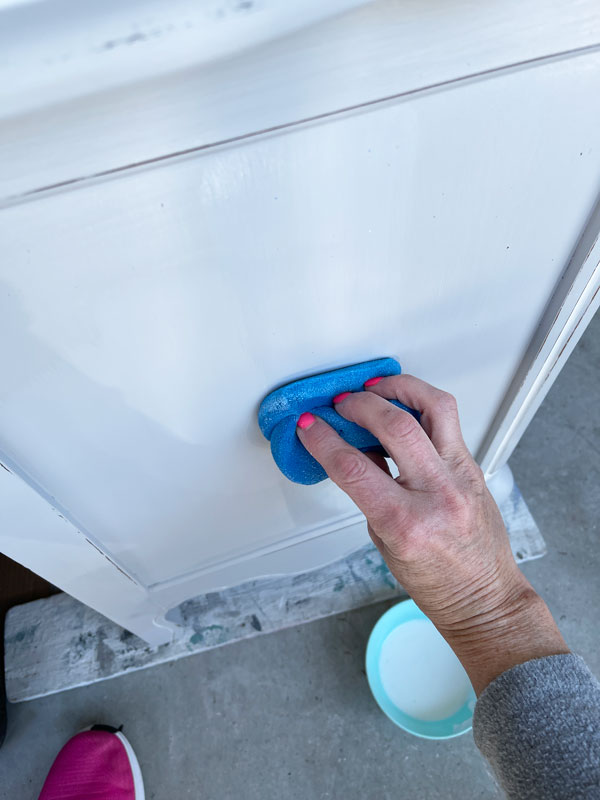
Seal
The final step was to seal this lovely piece! I sealed everything with Clear Coat in Satin using the blue sponge applicator to apply it.
If you cut just the very edges of the sponge off, it will get right up against those flat edges:
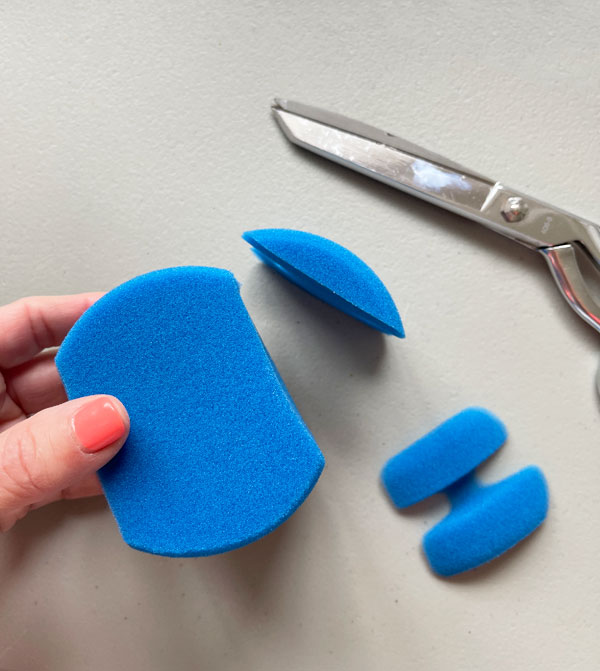
This is another piece, but here is a visual:
The Satin Clear Coat is an excellent sealer and perfect for most furniture projects, but since this desk will likely get heavy use, I may go back over the Clear Coat just on the top with a coat of Gator Hide for maximum protection.
*NOTE*
If you want maximum water-repellent protection over a transfer with Gator Hide, be sure to apply a coat of Clear Coat first before applying the Gator Hide as the water repellent properties in the Gator Hide can cause the transfers to lift.
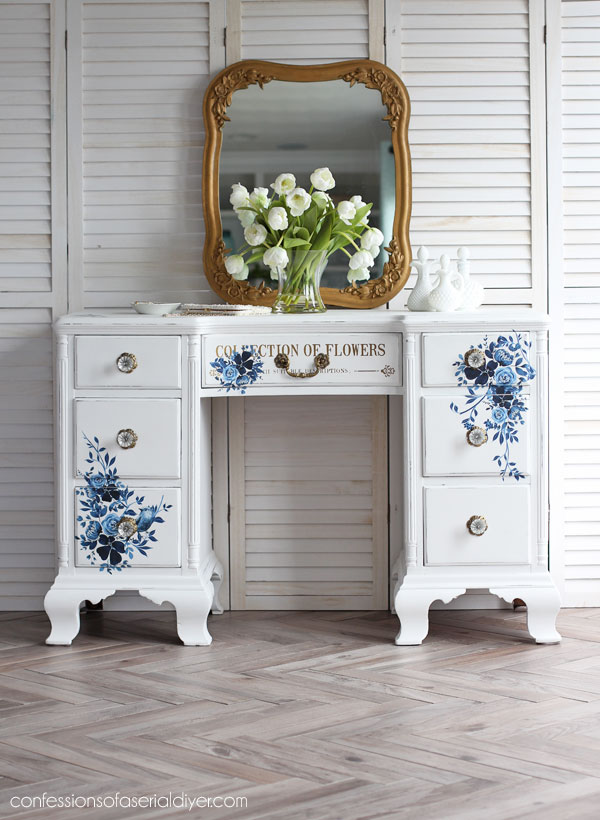
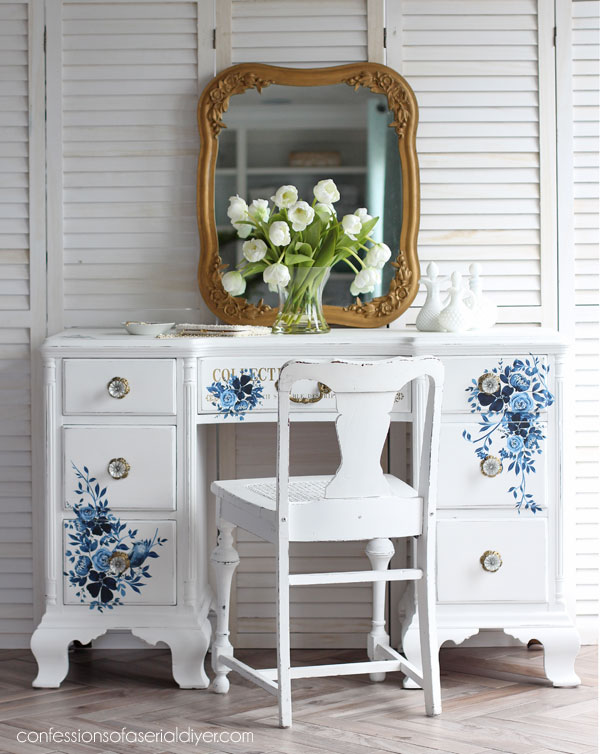
The After
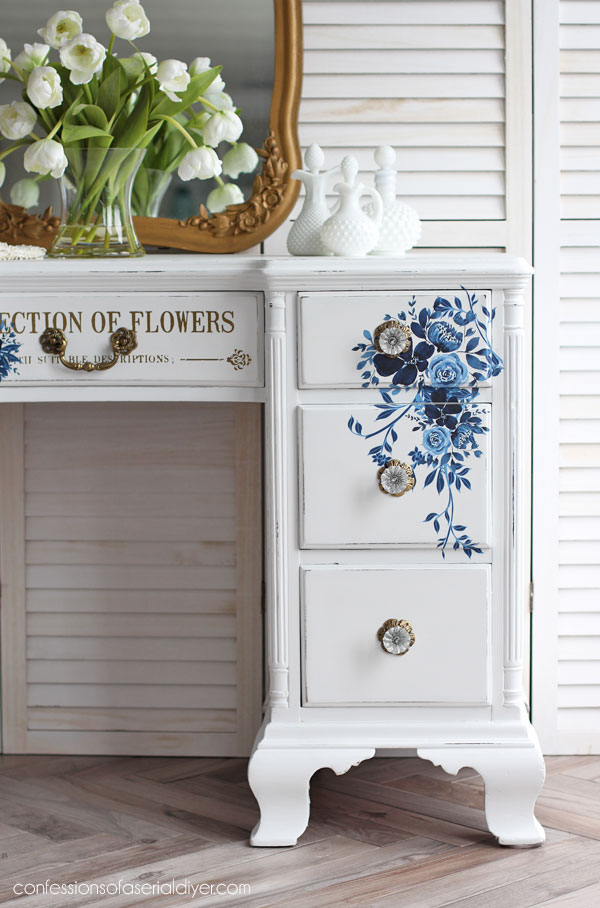
Here is how this pretty lady turned out:
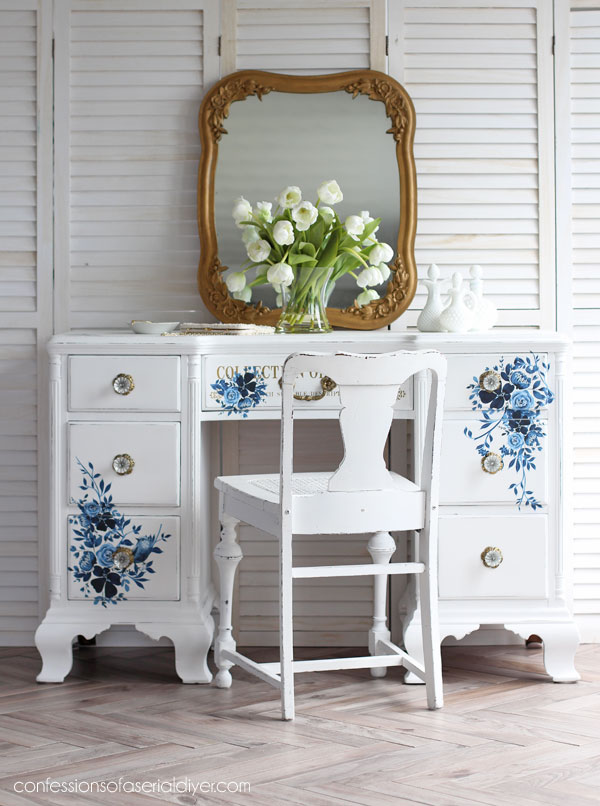
I love this transfer against the crisp white:
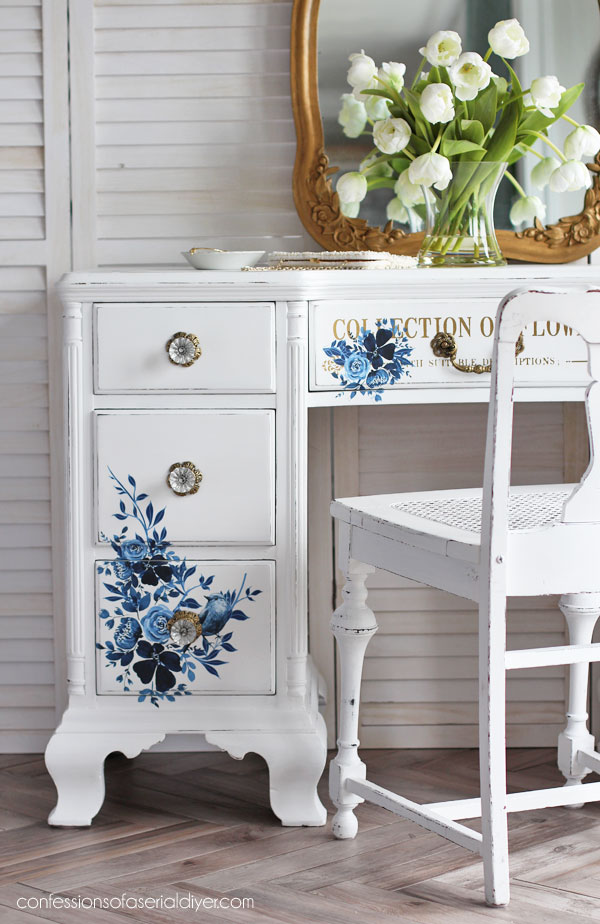
I am always a sucker for that blue and white combination!
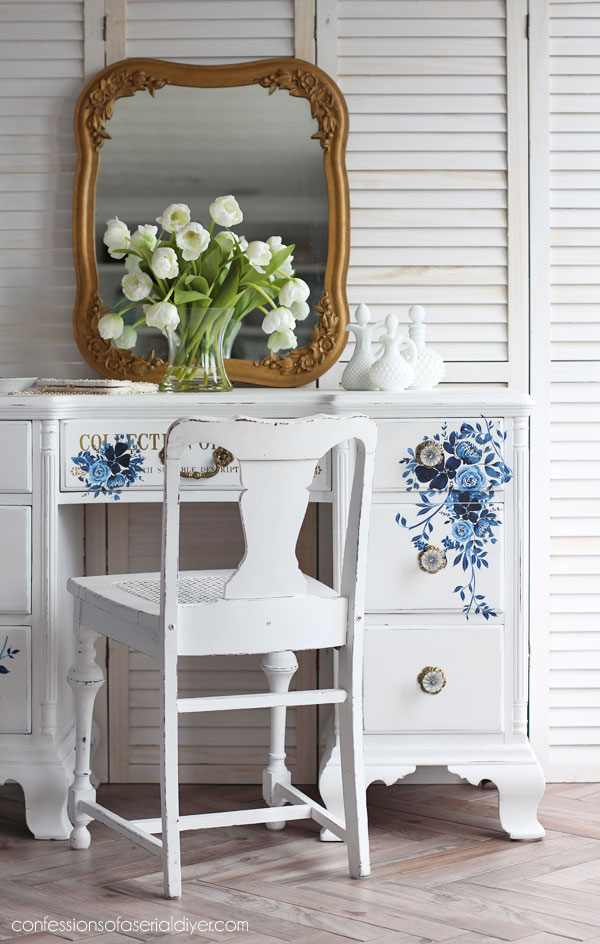
Here’s a look without the chair in the way…
I had these pieces from the Flower Collector transfer left over from another project and thought it would be pretty to layer the gold and blue:
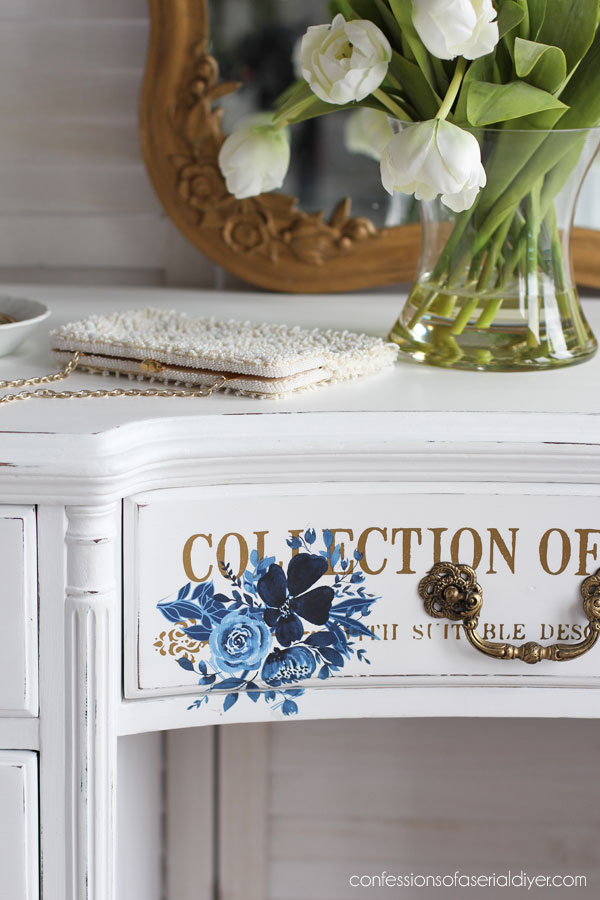
That pull is one I had in my stash that I brought to life with a little Gold Gilding Wax:

It was originally the same color as the the knobs that weren’t done yet in that photo above.
Those came from Hobby Lobby…
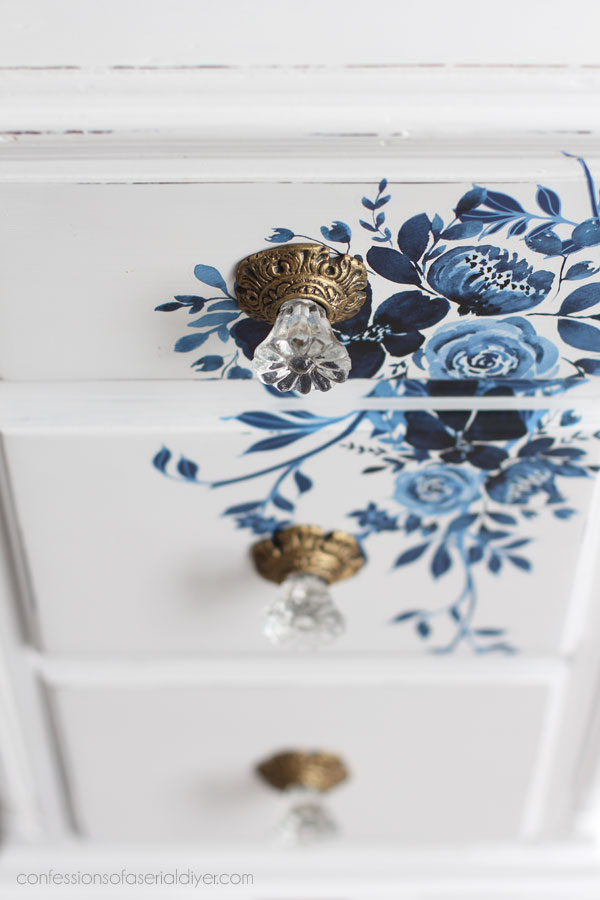
I often get questions about how I cut the long posts on the Hobby Lobby knobs down. I use this Black and Decker rotary tool that is similar to a Dremel tool:

I had to buy the metal cutting disk separately though which I believe I found at Home Depot.
Just be sure to use extreme caution since it is like a mini saw!
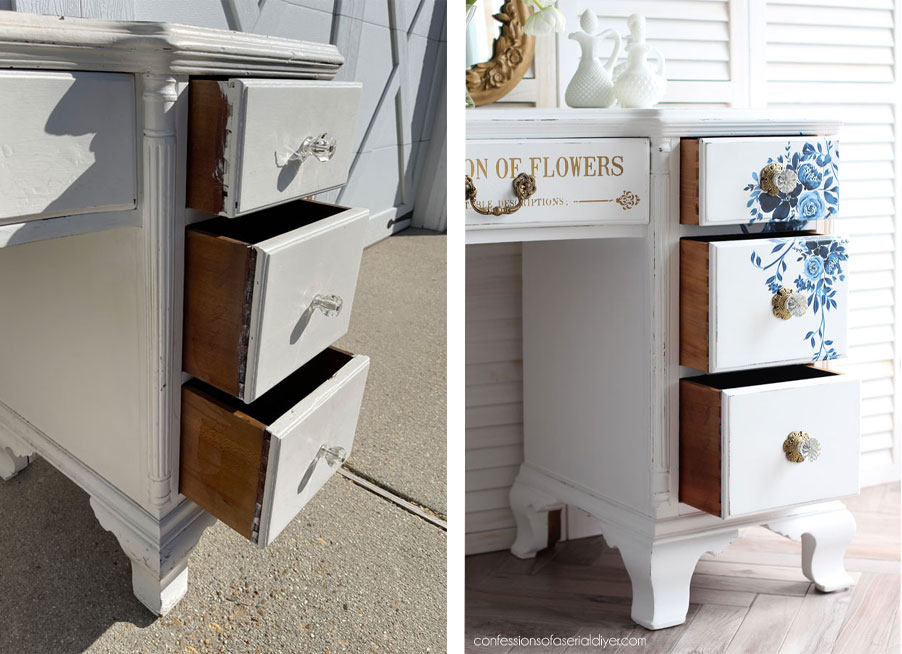
The drawers
The drawers were pretty gross. Not only were they dirty, they had gotten paint over the edges and onto the dovetail joints.
I sanded those as best as I could along with the entire outside of each drawer:
Then, I hydrated them with Big Mama’s Butta in Suzanne’s Garden scent:
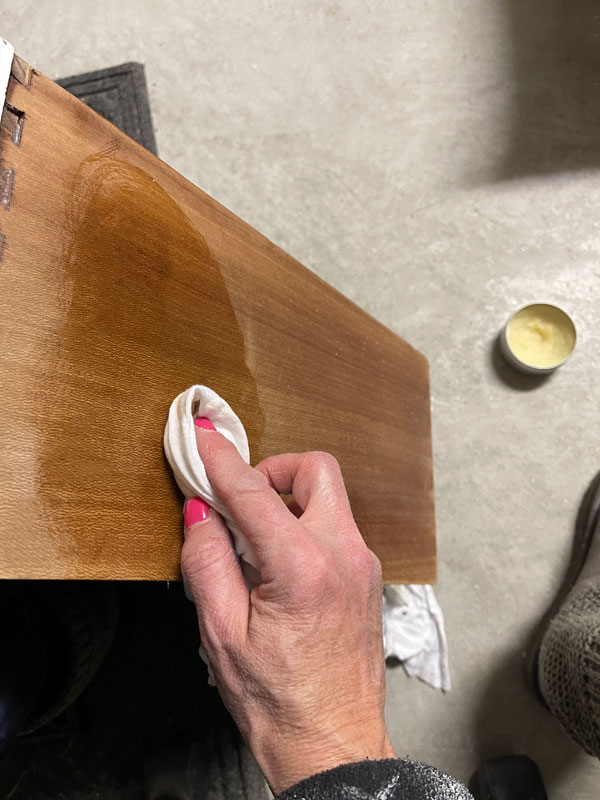
The Butta seals and protects, and when added to the bottoms where they slide, it helps them to slide more easily. It is oil based though, so I just use it on the raw wood as not to discolor the white paint.
So pretty now when you see the sides!
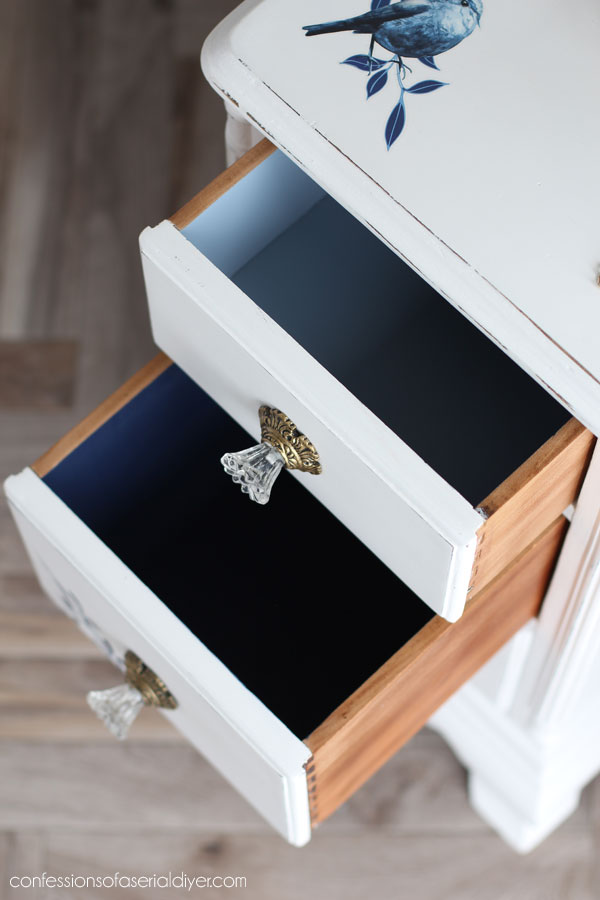
The insides were painted in two different colors, Quiet Cove in Silk Mineral paint for the top drawers:
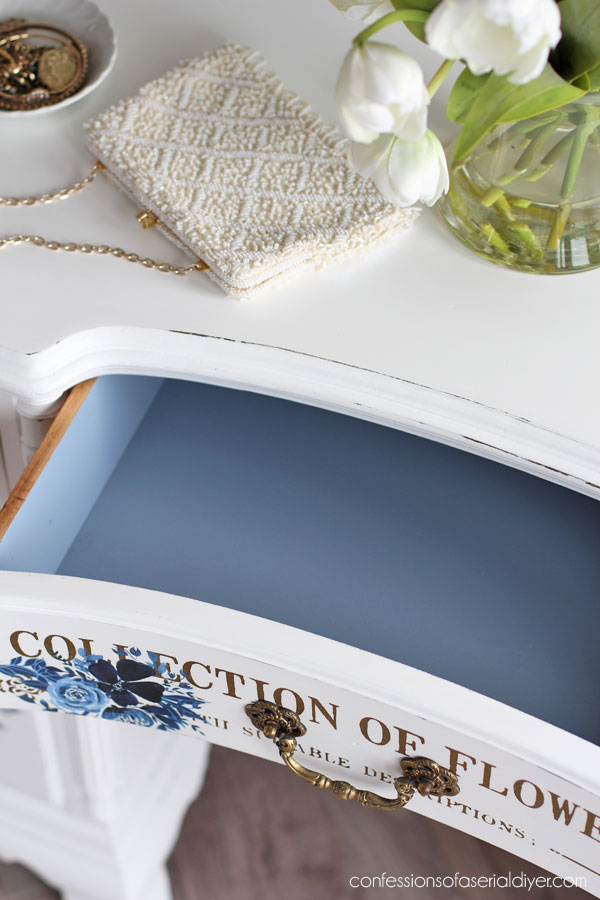
And I used Nautical from the Silk line on the bottom two drawers…
Silk does require a light sanding to prep except on raw wood, so it is perfect for the insides of drawers. Plus, it has a built-in topcoat. Win win win!
She wasn’t living her best life, but she will now be loved for many years to come!
Here are my favorites from my freinds this year! Each of use have chosen different favorites, so be sure to check them all out!
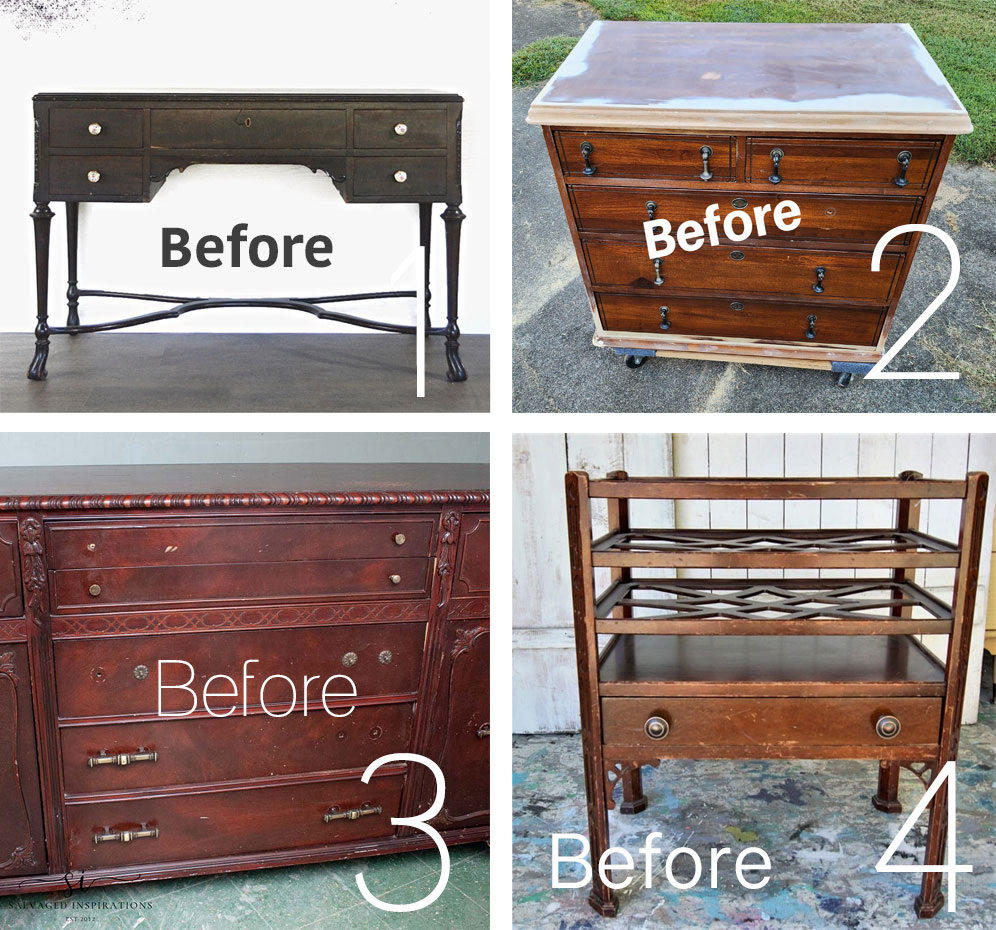
Now visit my friends’ favorite picks below:
1. VISIT KATHY’S FAVORITES HERE
2. VISIT DENISE’S FAVORITES HERE
3. VISIT GAIL’S FAVORITES HERE
4. VISIT NATALIE’S FAVORITES HERE
BONUS!
I ended up redoing this freebie chair to match the blue floral desk:
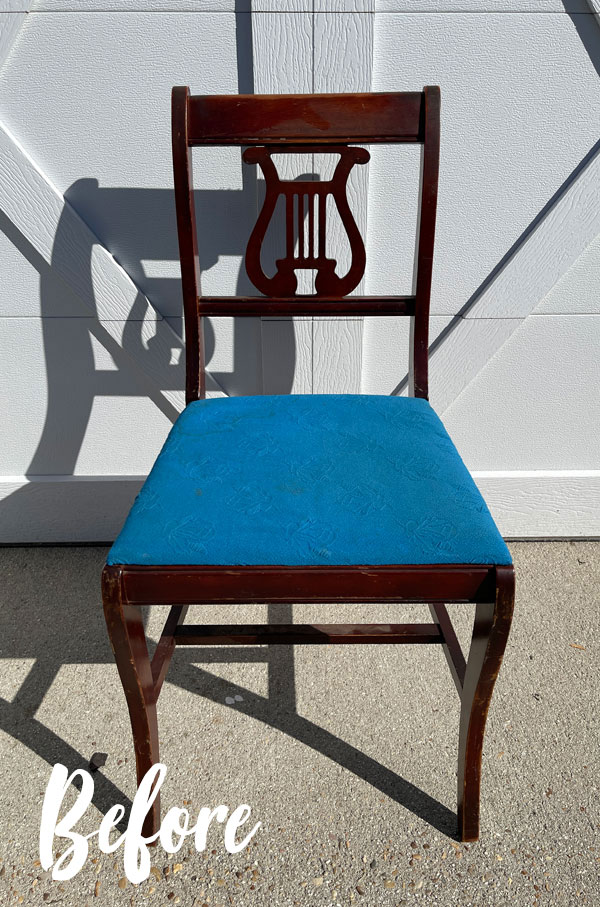
See how I redid it to match HERE!
You won’t believe what was under that fabric!!
I’ll be back on Tuesday sharing our bedroom furniture makeover!
 UPDATE: No need to wait…see how amazing these pieces look now HERE!
Have a beautiful weekend!!
XOXO,

Don’t Miss a Thing!
If you like what you see, there are several ways to follow along!
EMAIL * INSTAGRAM * FACEBOOK * PINTEREST


")

Mary Kaiser says
I remember this beauty! Don’t you ever wonder where this beauty is now, and how she is doing? LOL! She sure turned out beautiful, thanks to you!
Christy says
I do! We did craft markets for years and having a booth, that is one of the things i really miss…getting to see who is taking my pieces home. I know she is better loved than she was before though lol! Thank you, my friend! I think of you every time I seet that sweet mouse in the pocket on my tree! 😀 XOXO
Robin Stephens says
I think what I appreciate more than the pieces you transform, is the tenacity with which you give to every piece. Relentless attention to detail. Commitment to greatness. A love for beauty. I’ve followed you for many years and the consistency in quality brings me back to look again and again. I don’t do projects. I’m a horrible DIY-er. Really. I’m horrible. Stopped trying years ago. But, I appreciate those that are great. ???? Hope your piece sells quickly. A lot of blood sweat and tears went in to that one! Merry Christmas!
Christy says
This has totally made my day, Robin, thank you SO much!! I always appreciate your encouragement and support! Merry Christmas! XOXO
Christine says
I bet that desk sold fast?
Christy says
Good morning, Christine! It didn’t last long at all! XOXO
Mary Lou todd says
White desk with floral transfer came out great !
Inspiring !
Christy says
Thank you so much, Mary Lou! XOXO
Cecilia says
Oh yes. That one turned out so pretty. It feels so good to turn an ugly duckling into a beautiful swan, doesn’t it? I just love seeing what you do to all those tired pieces.
????Cecilia
Christy says
Thank you, Cecilia! It sure does! Hope you are enjoying the holiday season! XOXO
Cecilia says
I am! The house is all decorated, off to see lights tonight, and planning on our family get together (son and wife are coming and we will do a zoom to include our daughter and son-in-law. So while we won’t all be together physically, we can at least use technology to be together to open presents.). I’ve also been happily making ornaments and other Christmas crafts. I just love this time of year! Hope your holiday season is going well also.
Christy says
That is what I like to hear! Enjoy every moment! My babies are all home and we are getting ready to do our baking, so life is good! XO
Denise Zdziennicki says
I’m a sucker for anything blue and white as well. This desk turned out magnificent my friend. Gorgeous! XOXO
Christy says
Thank you so much, my dear friend! Yes, that and gold…can’t get enough these days lol! XOXO
Nana Diana says
That is just beautiful and worth all the hard work you put into it. Have a lovely pre-Christmas week–xo Diana
Christy says
Thanks so much, Diana! I hope you are enjoy the season so far too! XOXO
p says
Thanks Christy !
I do love to see your transformations every week. I don’t know how you keep so fresh time after time. Your detailed process is soooo helpful.
This desk was a great update – verrry pretty.
I look forward to another year seeing your artistry.
Thanks !
Christy says
Thank you so much! I’m so glad the details are helpful. I too am excited for a brand new year of makeovers!! XOXO
Rose Lefebvre says
So lovely!
Christy says
Thanks so much, Rose! XOXO
Hannah Reyor says
I’ve missed the bigger pieces with the transfers! This is a great piece. Well done, again. Hope you have a great holiday.
Christy says
Thank you so much, Hannah! I need to get shopping and find me some more furniture pieces for the new year! Happy holidays! XOXO
Michele M. says
So stunning. Everything is perfect – but I am so surprised at how the gold part of the pulls just make it sooooo much better. Somebody sure was lucky finding that piece!!
Christy says
Aww thank you, Michele! The gold just pops so much better! Have a lovely weekend! XOXO
Petra says
It’s come up beautifully in blue and white but I think any colour would’ve looked good on this piece, and such a versatile piece too 🙂 Happy weekend xo
Christy says
Thank you, Petra! Absolutely! It was a great blank canvas for any color! Enjoy your weekend too! XOXO
Natalie Dayton says
You turned that ugly desk into an absolutely stunning desk! Those flowers are perfect for it! Thanks for including me in your group!
Christy says
Thanks so much, Natalie! I had fun looking through your makeovers to find one for today’s post! So many great pieces. and I am thrilled to have you in our group! XOXO.
Cheryl says
I love how you always go the extra mile with your furniture! I’m sure the people that buy it love it as well! Beautiful!
Christy says
I appreciate that so much, Cheryl! Thank you! I really enjoy the process! Have a great weekend! XOXO
gail says
I LOVE that transfer Christy. The desk is so lovely. I pinned it!
Funny that you chose my first big transfer project for your favorite. I credit YOU for giving me the courage to finally use a large transfer on that poor sad nightstand.
gail
Christy says
Thank you, Gail! I love that! That transfer you used on your nightstand was just perfect for it!! XOXO