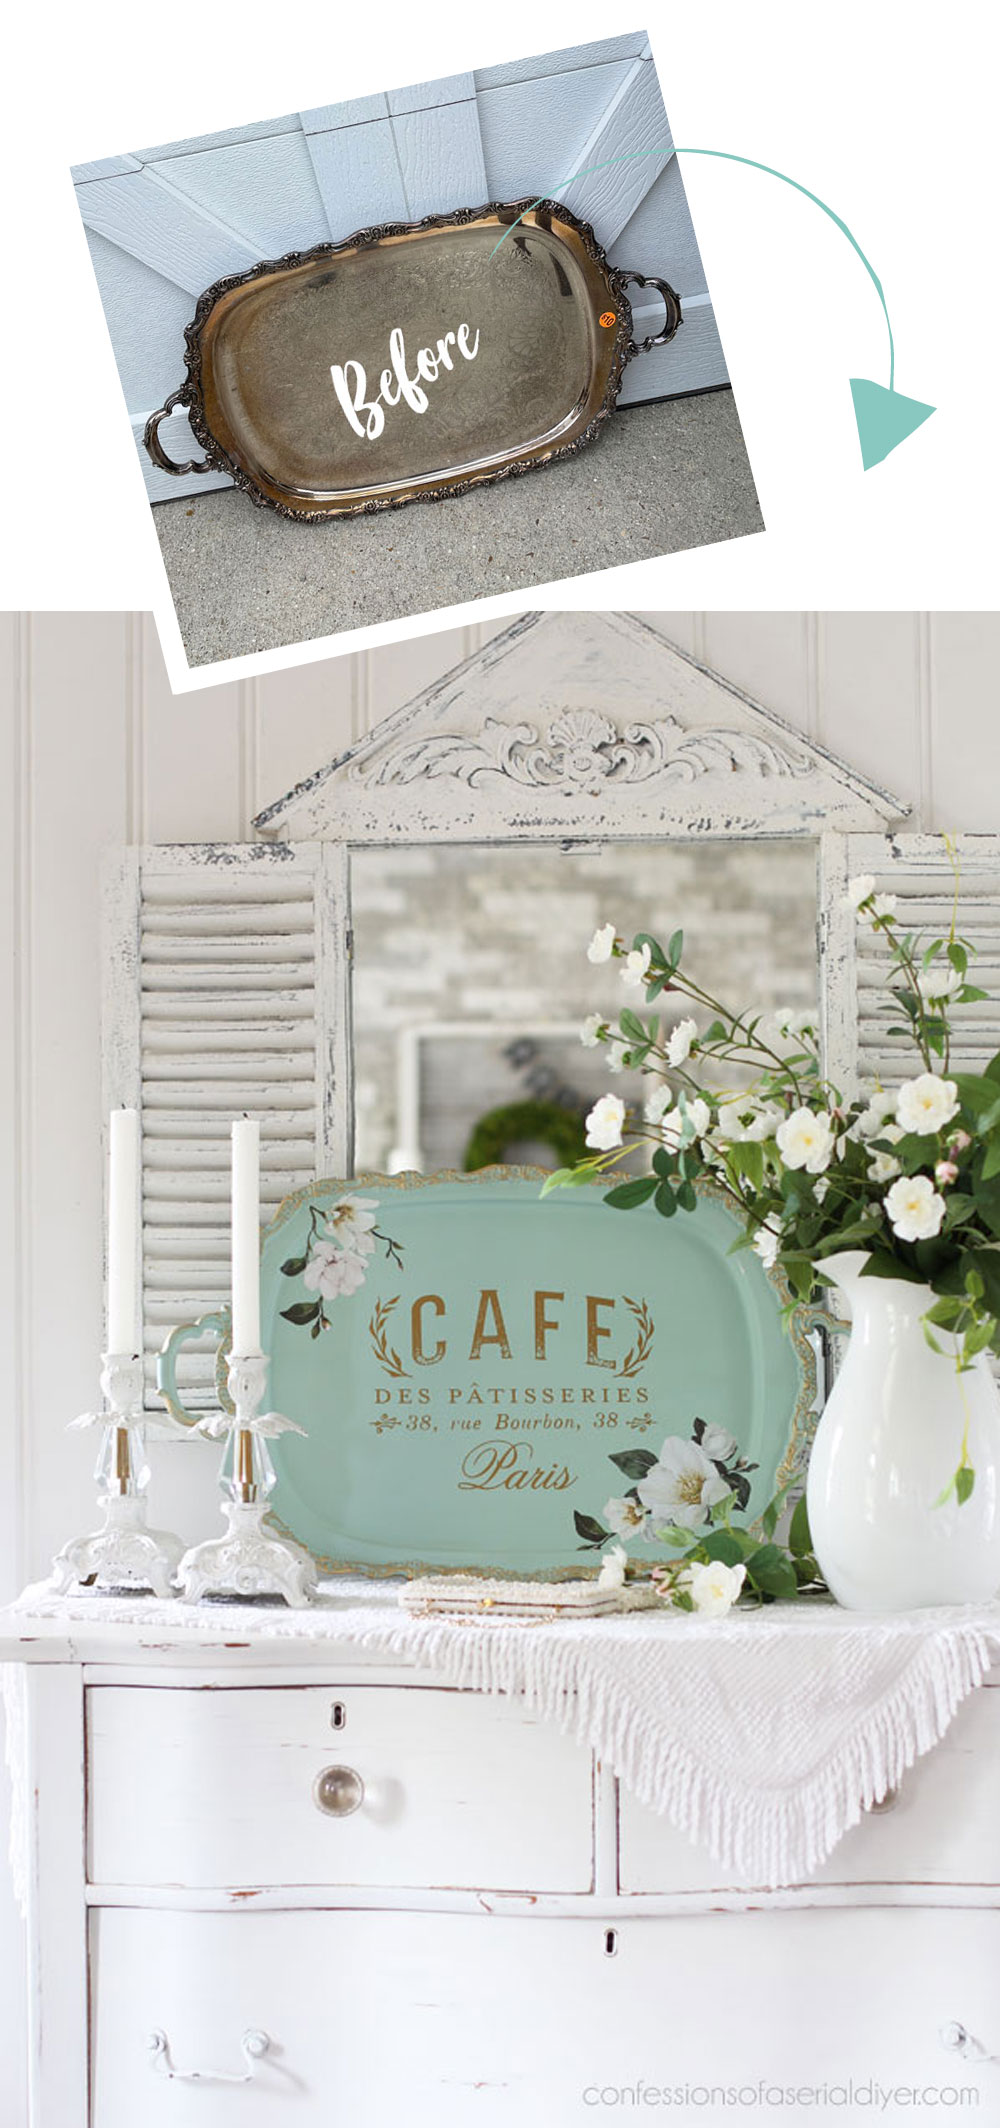
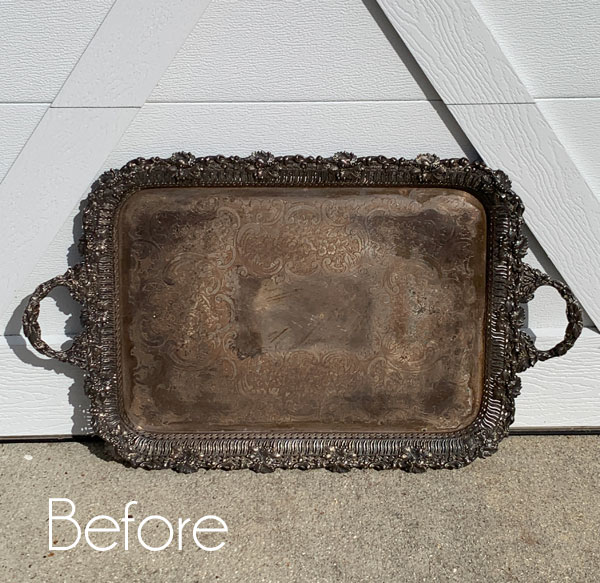
Hello, lovelies!! Today I’m sharing how to easily paint a silver tray. This tray is part of my current haul, and I picked it up for $10 at a yard sale at the start of the season:
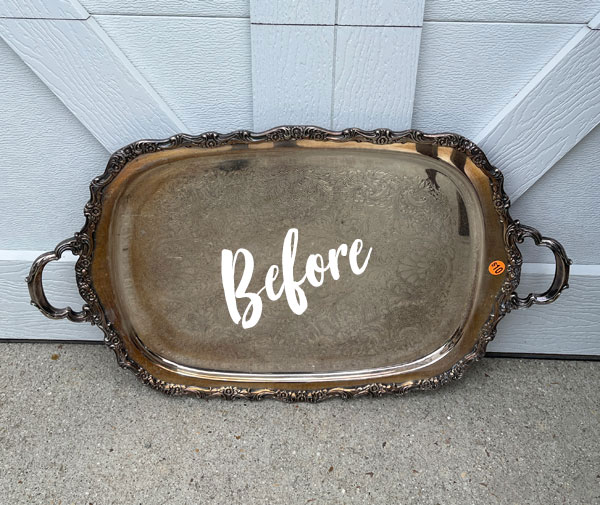
I didn’t even try to bargain…that was a great deal on this tray!
It is silver plated and quite heavy, but what I love about these silver pieces are the gorgeous details on them. They are just begging to be painted!
How to Easily Paint a Silver Tray
Clean
Start with a good cleaning. I cleaned my tray with White Lightning using this terrycloth sponge.
It is a degreaser and will remove any old gunk your tray may have accumulated over the years. Be sure to swap out your water for clean water and wipe down one more time to rinse any remaining dirt residue.
Prep with Slick Stick
Then, I prepped with Slick Stick. Slick Stick is a bonding primer that will bond your paint to non-porous surfaces like glass, laminate, metal, etc with NO sanding required!
I used my Belle Brush for this tray since it covers those details so easily! ( The Best Dang Brush works great for this too, but this is a bit daintier.)
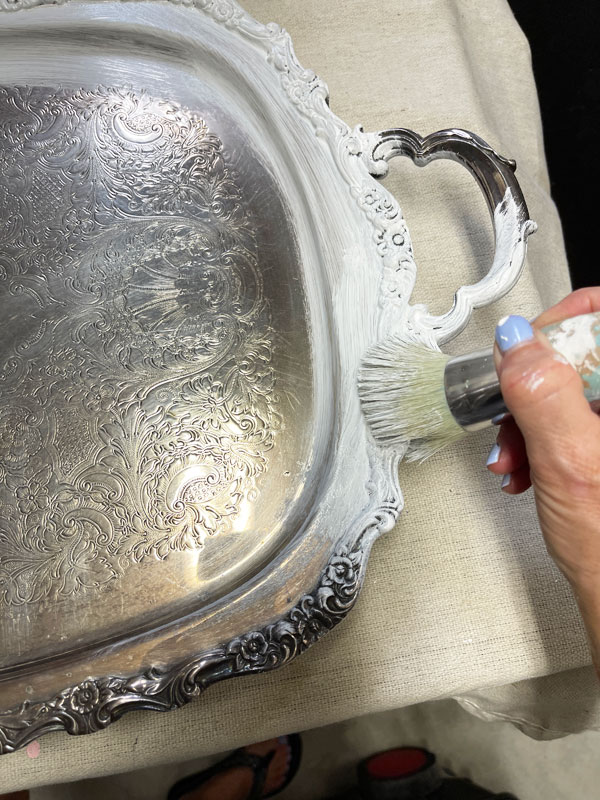
- Apply one coat and allow it to dry for two hours.
- Apply a second coat and allow it to dry overnight.
That’s it! Again, no need to sand first.
Paint
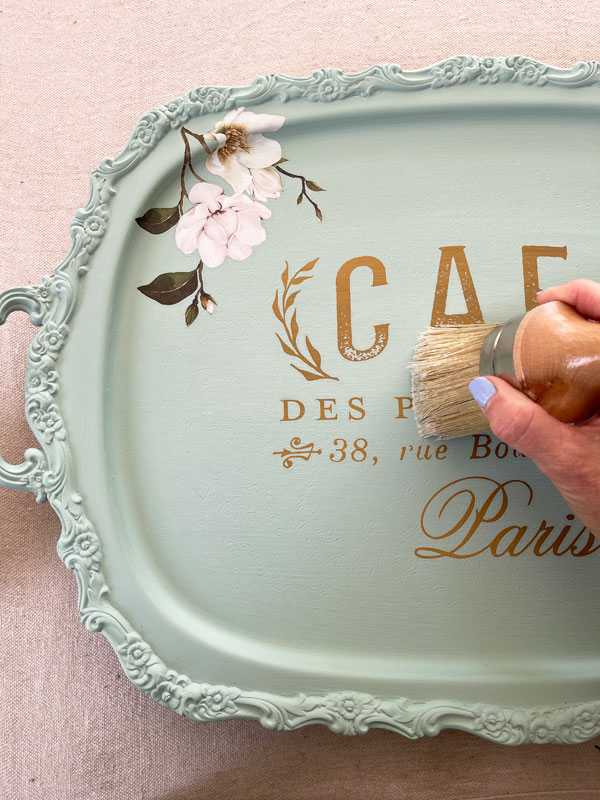
You can get right to painting the next day! For this tray, I chose one of my favorite Dixie Belle colors, Sea Glass:
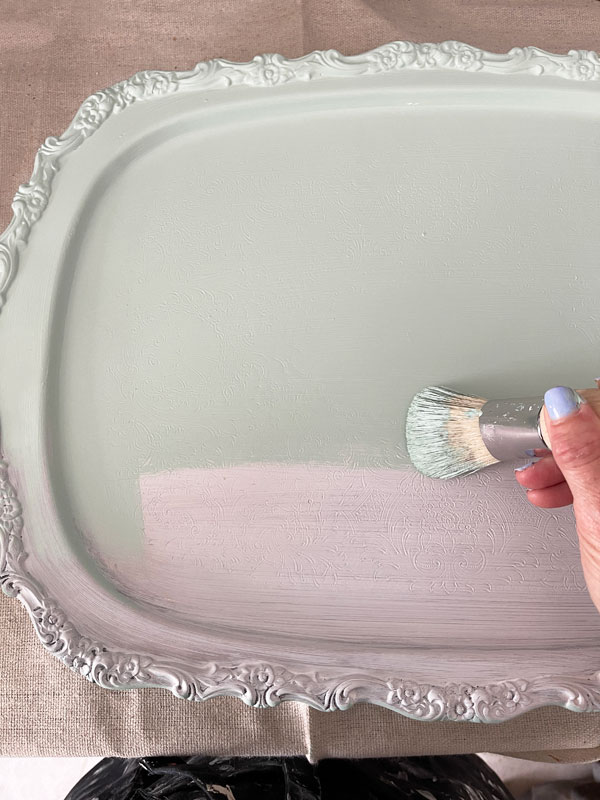
I gave it two coats for solid coverage.
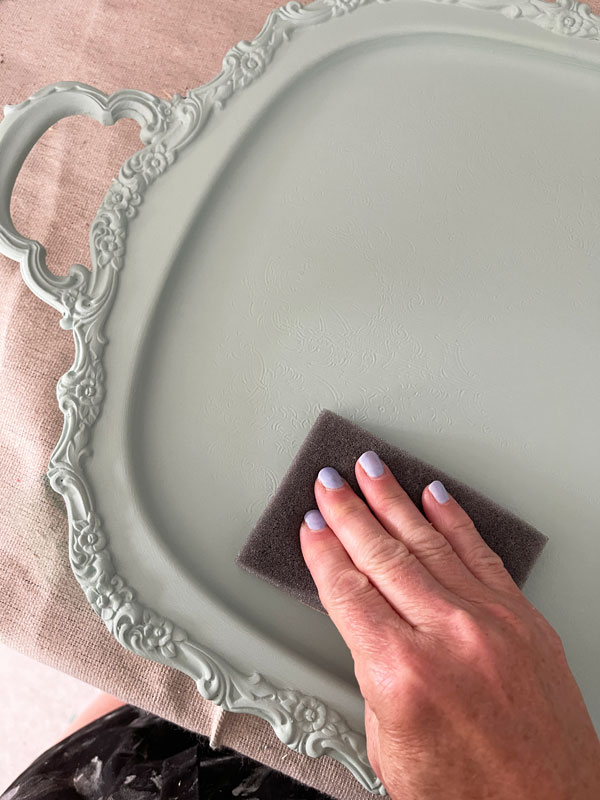
Sand
I had no plans to distress this one, but even so, you want to be sure to lightly sand your surface. Just the lightest sanding will smooth out your surface like butter.
These sanding sponges are perfect for this step!
Transfer time
Of course I couldn’t resist adding a transfer (or two!) to this pretty tray!
I chose two of my favorites, the Somewhere in France transfer and the White Magnolia transfer, for this makeover:
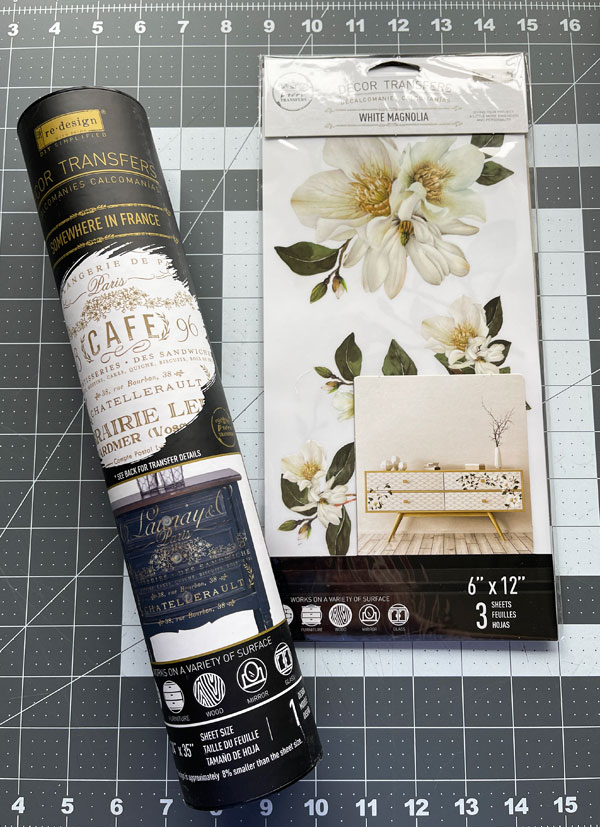
The Somewhere in France transfer is a larger transfer that comes with three sheets:

You can use it on one large piece like I did HERE and HERE.
Or, you can cut it apart and use the pieces on lots of smaller projects! I love to combine gold lettering with floral transfers like I did on this desk.
For this tray, I chose just three lines from this transfer:
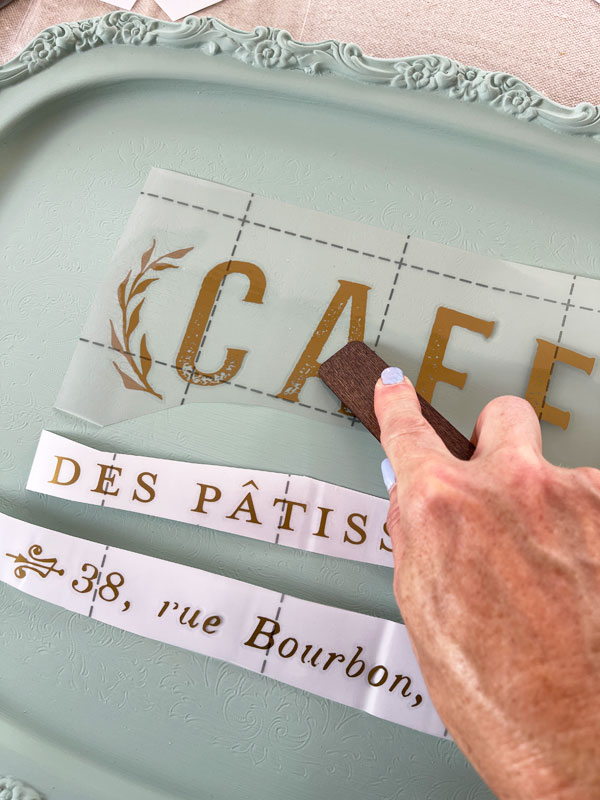
Well, only half of one line there, and then I cut the word Paris for the bottom to even it out.
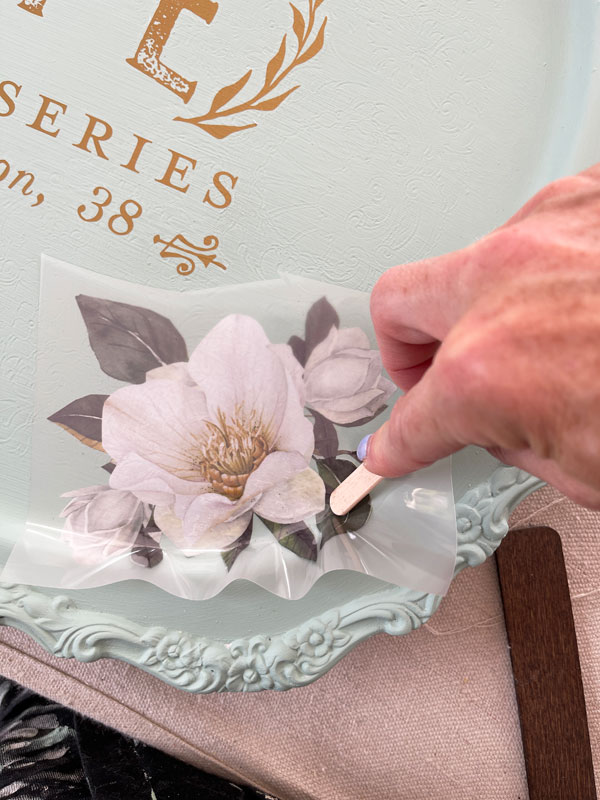
Then I used just three pieces from the Magnolia transfer for this tray. To get into that corner more easily, I used the smaller popsicle stick to burnish it in place…
Seal
Once I was happy with the placement of the transfers, I sealed with clear Best Dang Wax using the Best Dang Brush:
Occasionally, I have had liquid sealers pull funky pink colors through on metal, so I tend to use wax on these pieces instead. After applying it with the brush, I buffed away any excess with a clean, soft, cloth. You can apply it with a cloth also, but the brush makes it easier.
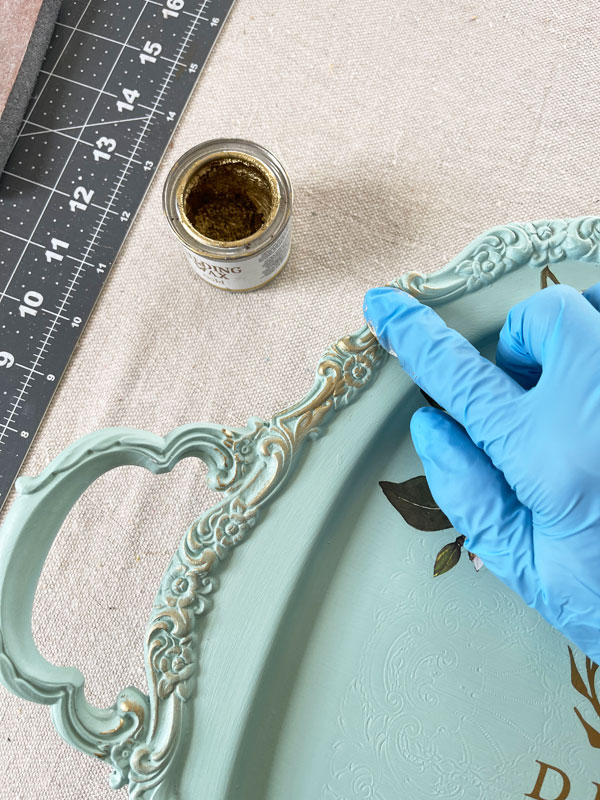
Gilding wax
One more step to go!
To highlight all those gorgeous details, I used Gold Gilding wax:
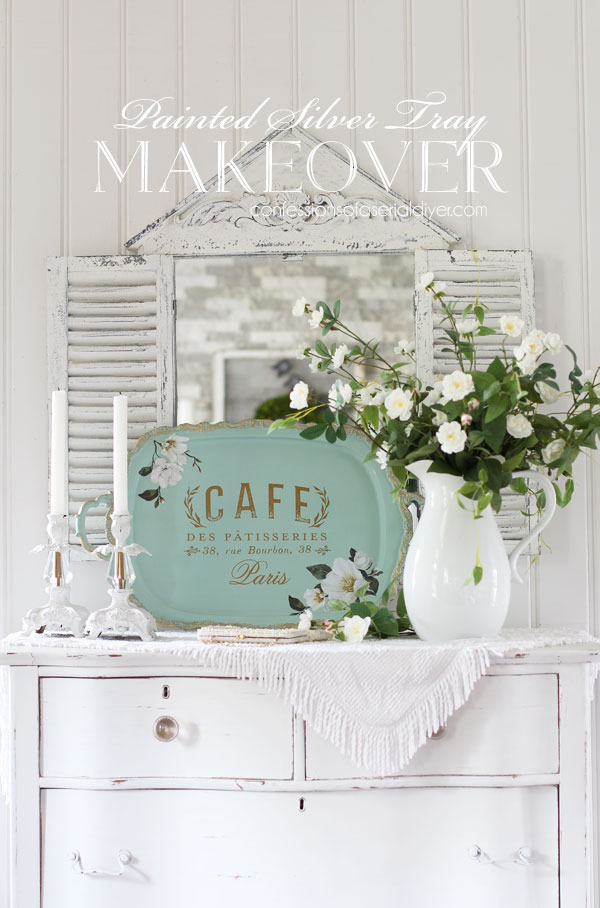
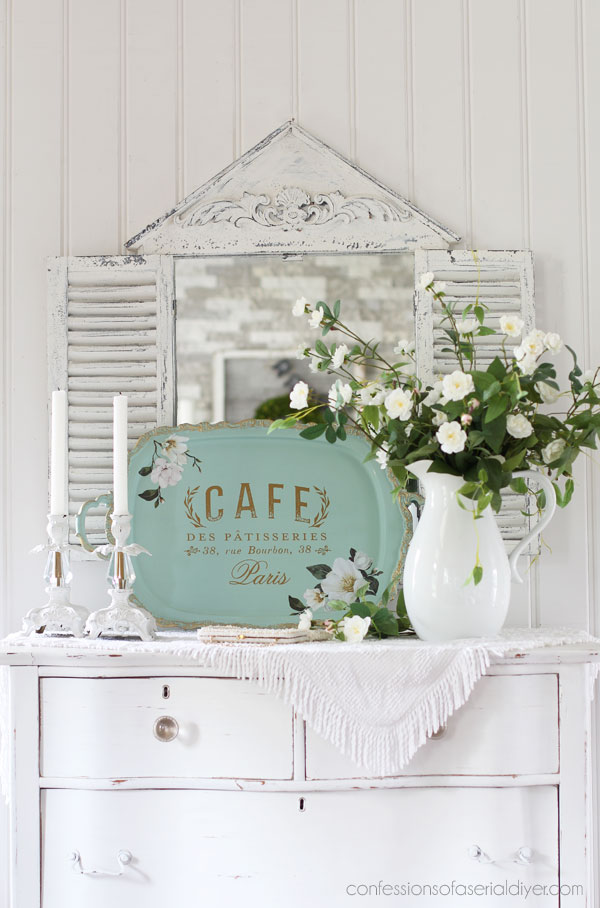
The After
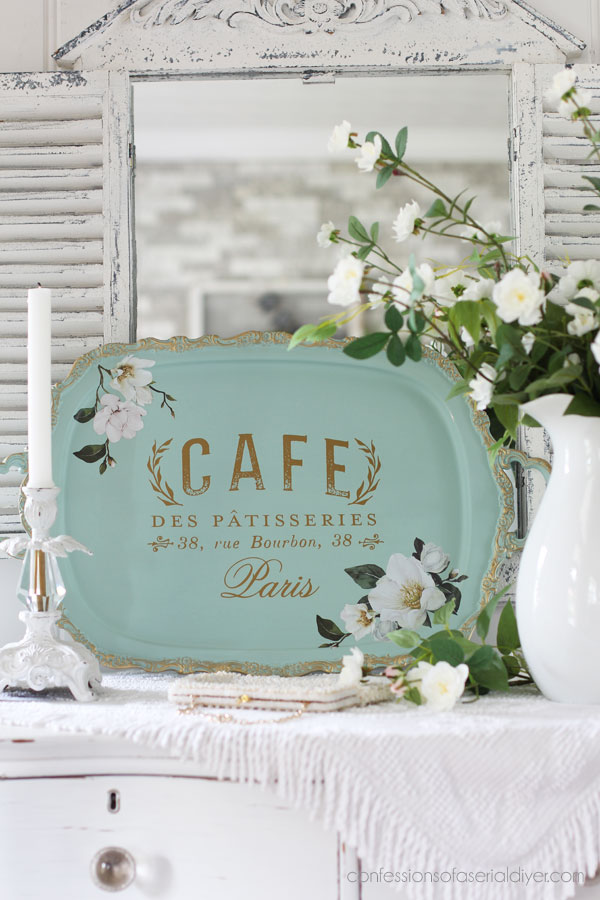
Here is how this beauty looks now!
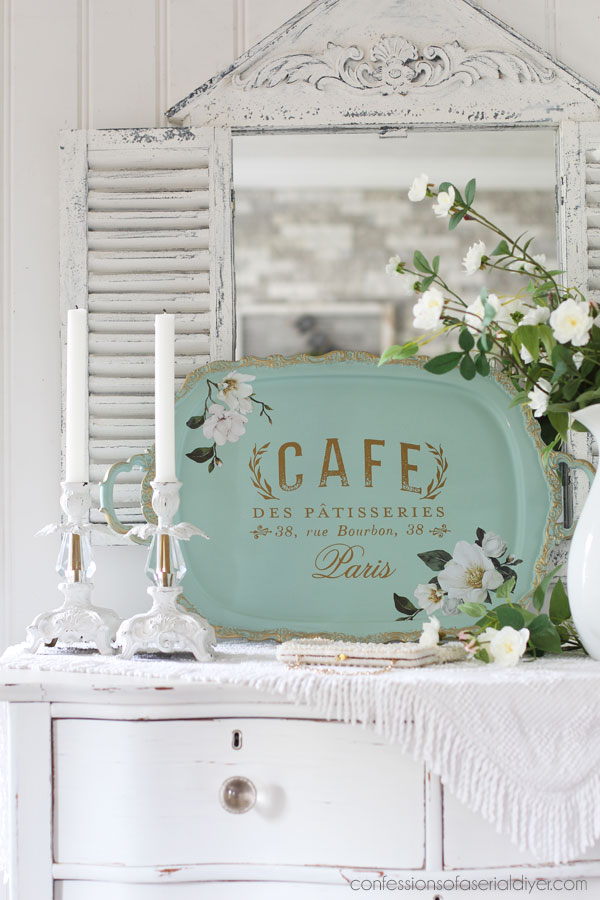
And how about how it looks actually in use…
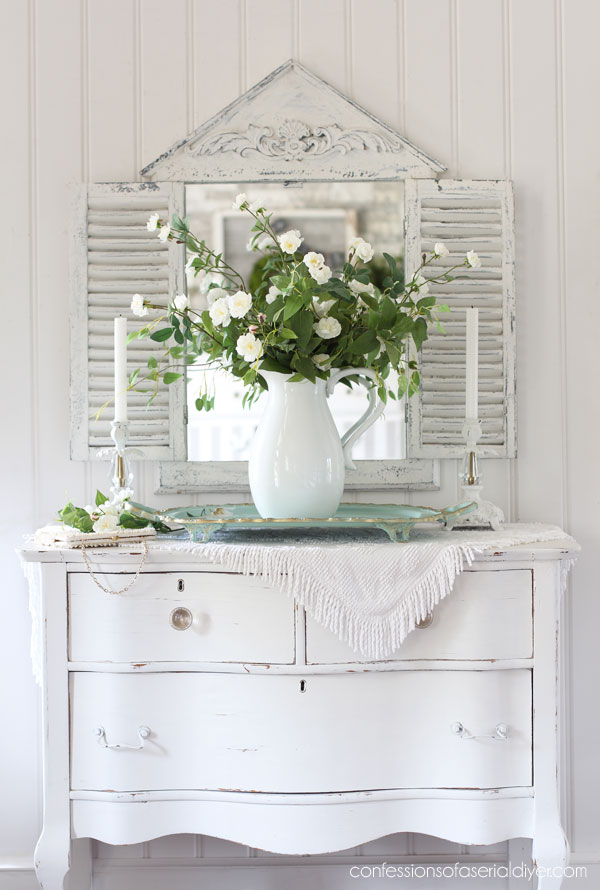
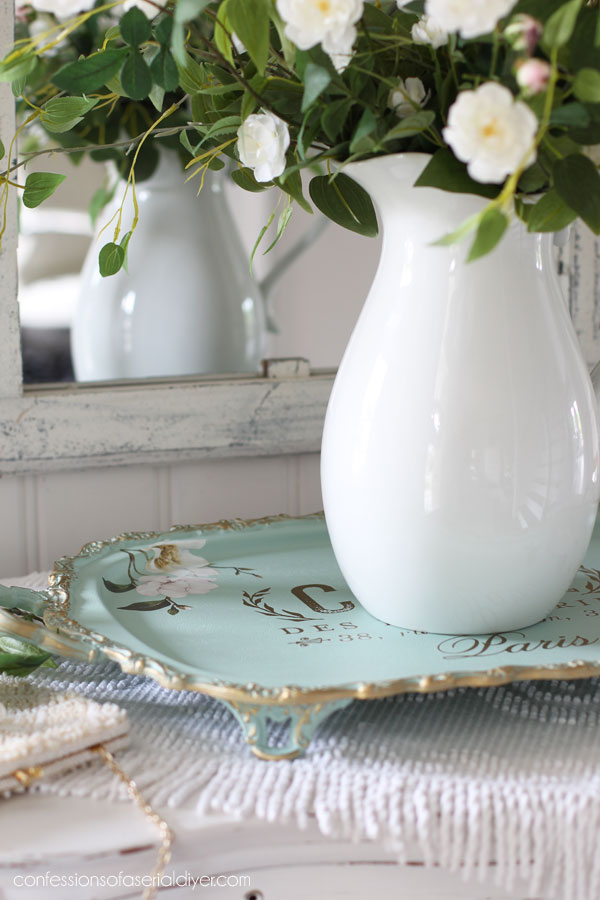
It’s a shame to cover it up, but still pretty!
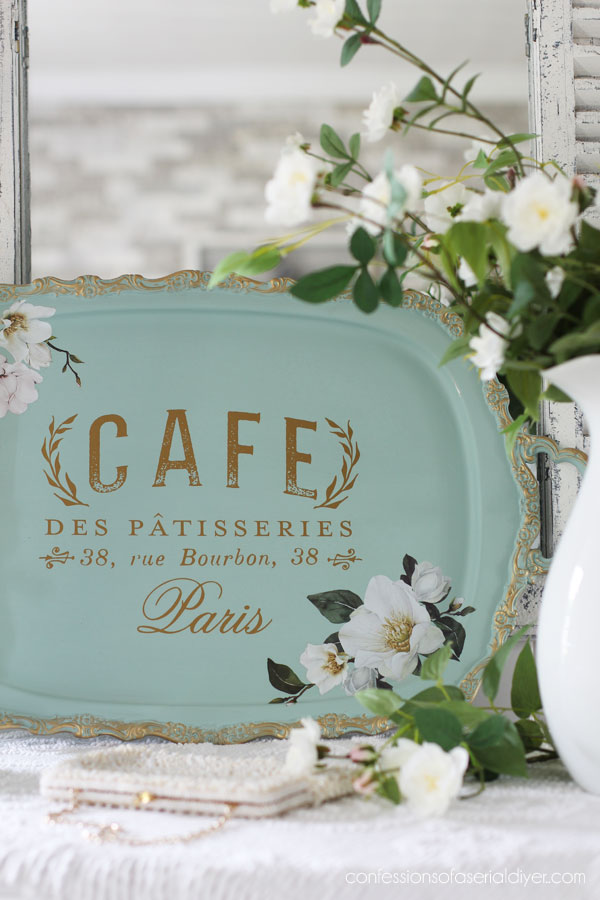
The gold Gilding Wax really adds that touch of glam…
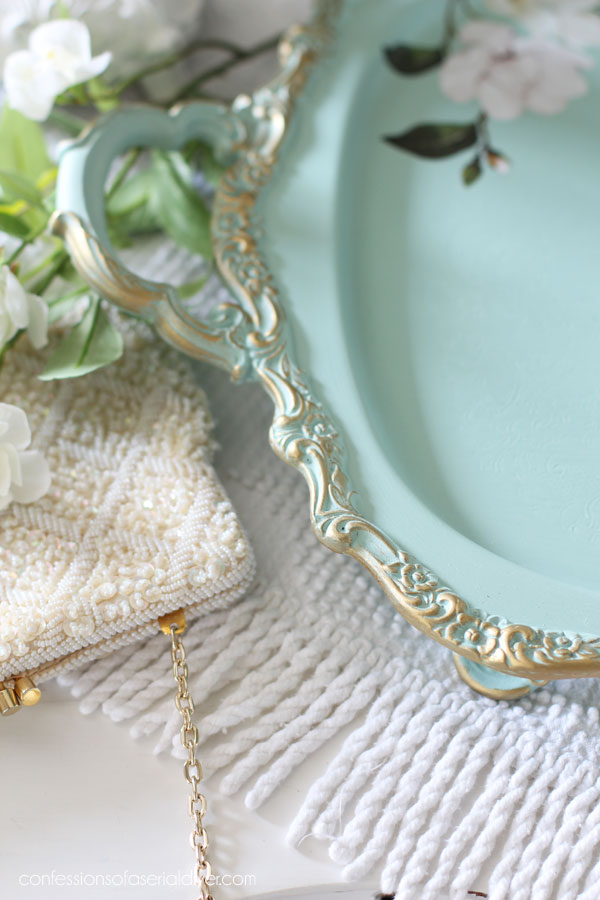
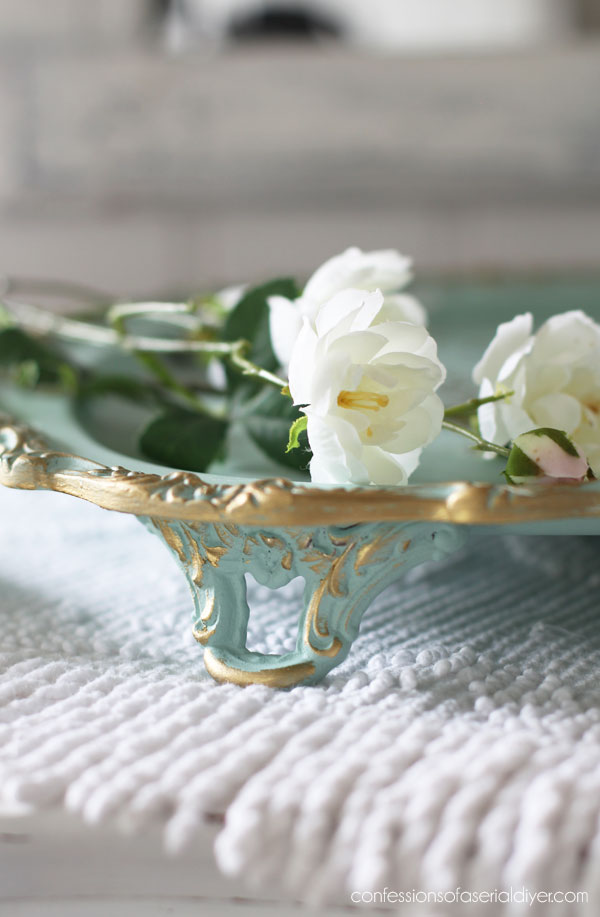
And how sweet are these feet??
I love these transfers together…
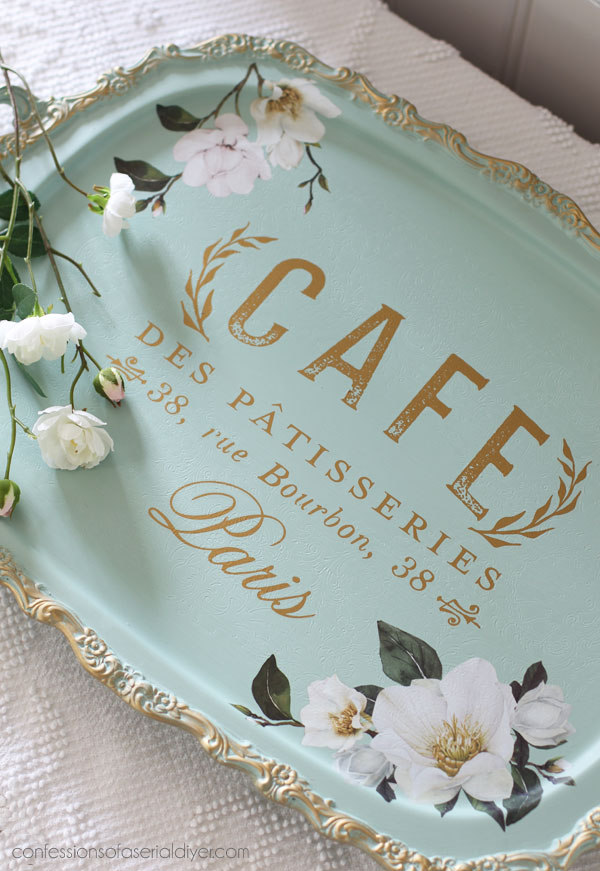 You can see that I added a bit more magnolia transfer to that bloom on the bottom to extend it a bit.
Keep adding and layering transfers any way you like!
You don’t have to stick to trays; You can paint any silver pieces you like.
Here’s a small pitcher I did a while back as part of this smalls post:
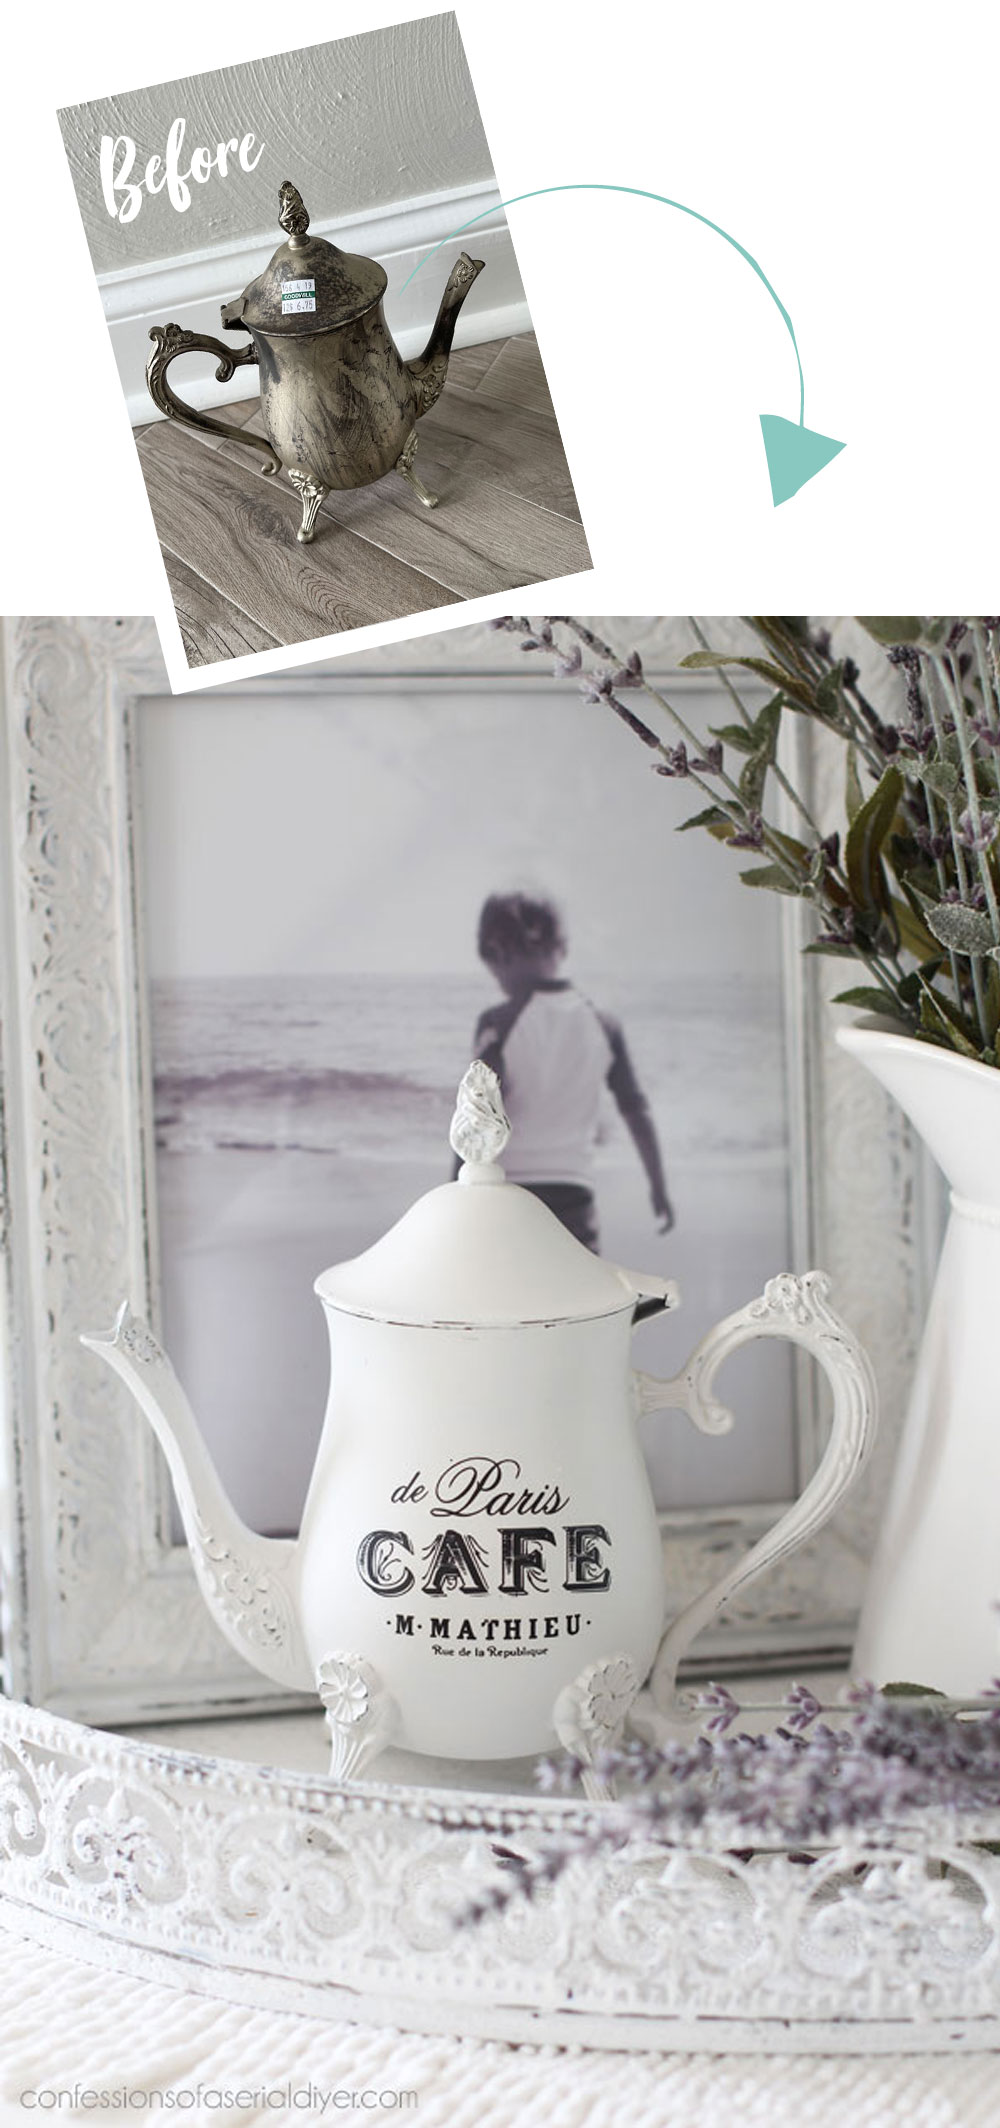
I used one of the mini Classic Vintage Labels transfers on that piece.
Here’s another silver tray I redid a couple of years ago:
You can see how that one turned out HERE.
I’ll be back on Tuesday with a BRAND NEW round of smalls!
Update: See what I did with this bunch HERE!
Have a wonderful weekend, dear friends!
XOXO,

Don’t Miss a Thing!
If you like what you see, there are several ways to follow along!
EMAIL * INSTAGRAM * FACEBOOK * PINTEREST


Get FREE SHIPPING on all orders over $50. No code needed at checkout! Orders under $50 always enjoy $8 flat rate shipping! Most orders ship same or next business day!


Mary Kaiser says
Oh it is BEAUTIFUL!!! Love the colors, and love the magnolia transfer so much! Wow it is so pretty now! You are amazing and I love all the amazing transformations you do!! I am excited about the smalls next week, I love the smalls!
Christy says
Thanks, Mary! You are always the sweetest! Have a lovely weekend!! XOXO
Leticia says
So beautiful! this came out lovely!
Christy says
Thanks so much, Leticia! XOXO
Sandra says
Oooh my! That’s really, really lovely!
Christy says
Thank you so much, Sandra! XOXO
Stephanie Coop says
This is so perfect !! Love the cute little feet 🙂 on the tray. I have one similar and I AM TRULY inspired !!!
Christy says
Aww thank you, Stephanie! I am especially drawn to the ones with feet! XOXO
Cheryl Atkinson says
Hi I Christy! Very pretty. I love painting silver trays. I haven’t found one in a while. I need to keep an eye out. Thank you for sharing!
Christy says
Thank you, Cheryl! They have so many gorgeous details!! XOXO
Marcie Lovett says
Beautiful color, Christy! And the transfers were meant for each other. Some people might object to painting silverplate, but it isn’t valuable and now it will be used and loved.
Christy says
Absolutely! This particular tray was going for about $75 on eBay, so for that, I decided to make it my own…this one will be a keeper! Thanks, Marcie! XOXO
Margie says
Absolutely beautiful. Way to pretty to set anything on it needs to be up 💕
Christy says
Thank you, Margie! I agree! XOXO
Kimmylouwho says
really pretty! Is the french-style super popular still? Are you finding that these French phrase items sell well in your booth?
Christy says
Thank you, Kimmylouwho! I am still selling it and I personally still enjoy it. Plus, the French inspired transfers are the ones that sell the best for me! XOXO
Amy says
I LOVE this one–absolutely beautiful. I have two questions: first, do you paint and wax the back, too? And second, when you sell these, do you put any directions for cleaning/food use on them?
Thanks. I love your blog.
Christy says
Thank you, Amy! I do paint and seal the bottom as well. And I usually keep these pieces in my home for a couple of weeks before taking them to my booth, so the finishes are almost fully cured at that point, and can be wiped clean with most cleaners that people would normally use for those items, so I don’t include care instructions. XOXO
Denise Cox says
It’s absolutely lovely!!! I think it’s the prettiest silver plated tray that I’ve seen you do. It makes me want to go out and look for one and try my hand at it. Then again, your projects ALWAYS give me that surge of inspiration!!
Christy says
Aww I appreciate that SO much, especially coming from you, my super talented friend!! Thank you!! XOXO
Vicki Bray says
Great work! I really do like that sea glass with the gold touches, stunning!
The wheels are turning!
Christy says
Oh yay I love that! thank you, Vicki! XOXO
Janice Holt says
Wow the color of this tray and the colors of the transfers go so good together. It is absolutely beautiful. I see trays many times at the thrift store but they never have the little feet on them. The feet and the gilding adds even more beauty. Have a great week-end.
Christy says
Thank you, my friend! Yes, it’s the feet that make it for me too! I hope you have a wonderful weekend as well! XOXO
Hannah Reyor says
Love the transformation! You and that gold. Not my taste usually but you rock it. I wonder why Paris gets all the fun. There are other nice cities too that are so ignored. 🤣
Christy says
Thank you, Hannah! I love to create with gold! And you’re right…why does Paris get all the fun lol?? XOXO
Lizzy says
Great idea. Pinned!
Christy says
Thank you, my friend! XOXO
Cecilia says
So very, very pretty. Love all the details and how the transfers compliment each other. Another amazing transformation!
Looking forward to the smalls – always fun to see a bunch done.
Have a great weekend!
Cecilia
Christy says
Thank you, Cecilia! These transfers do play so well together. And yes…the smalls are fun for me too! See ya then! XOXO
Cyndel says
You make me feel so conflicted, Christy! I LOVE the way this tray looks with paint and transfers, yet part of me squirms at the thought of painting over silver. I’m perfectly fine with painting tin, lead, aluminum, iron, zinc, copper, steel, etc. But something about gold and silver put them in a DO NOT PAINT category in my mind. Oy!
Christy says
Ha ha! I totally get it! It is only silver plated though. This tray is going for $75 on eBay at the moment. For that, I’d rather paint it and make it my own. Now if it were solid silver, paint wouldn’t touch it, even from me ha ha! You might feel better about it if you saw all the silver plated pieces I see at the thrift stores that people no longer want. XOXO
Cyndel says
I’m sure you’re right and my squirming is just some misplaced sense of reverence for the kinds of “nice things” people used to value much more than they do now. As a Southern expat who has lived in the northeast for 40 years, I’m still shocked when people put fine china on the curb during our annual Bulk Waste Throwaway Week. It would be easy to score a whole truckload of free well-made wooden furniture during Throwaway Week, plus lots of decorative items like mirrors, frames, candlesticks and lamps; larger things like wooden shutters, doors and old windows; and a wealth of garden furniture and accessories — gates, urns, orbs, plaques, statues, fountains, arbors, bistro sets, etc. It’s astonishing what people throw away. Which is part of why I enjoy following your blog so much and seeing you give new life to castoffs.
Nana Diana says
That is really, really lovely. I am lucky enough to have my hubby’s grandmother’s silver tea set…solid silver and gorgeous…which reminds me, I need to polish it again. It has the coffee pot, large server, tea pot, tall creamer and large sugar bowl and matching candlesticks. After seeing the one you did I almost wish I could paint it…almost….lol…. You did a wonderful job!
Christy says
Thank you, Diana! Ooh your set is worth a pretty penny being solid silver! Enjoy that treasure! XOXO
Darlene says
I can’t be sure but it appears that by all the layers on the body of the tray, that the detail was all filled in. Is that correct? I have a tray that I want to paint but still see the etched work on the body of the tray. It’s monogrammed. Any suggestions?
Christy says
Hi Darlene! The detail is still clearly visible in person. I hope that helps! XOXO
Darlene says
That does help. Thank you.
Christy says
You’re welcome! 🙂
Cyndi says
Beautiful! And I’m glad you included the tip on using wax instead of the liquid sealer. I have often wondered when to use one instead of the other. ??? Do you have a post about that on your website? I’ll look. 🙂
Christy says
Thank you so much, Cyndi! I use liquid sealer (Clear Coat in Satin) for just about all my larger pieces or pieces without lots of details as the liquids tend to nestle in those details. I use wax for smaller pieces that won’t be handled as much and for metal items that can pull funky pink hues through when sealing with liquids. I like to have both options on hand. I hope that helps! XOXO
Cyndi says
TY!
Christy says
You’re welcome! 🙂
Robin says
I did a tray following one of your older posts using DB Cotton & distressed a tiny bit to show a peek of silver. I sealed with Clear Coat Satin (not wax). I haven’t used the tray much, but I think that the finish should hold up well, right?
Christy says
Hi Robin! Yes, it should do fine! XOXO
Jill says
Love this (and the earlier pink one as well)! Do these sell well for you? (I can’t imagine they don’t: useful AND beautiful.)
Also, I feel somewhat strange asking, but how do you price them? No need to respond if too intrusive, but even just a general range would be helpful. (Mine would be a donation value, so perhaps not directly applicable/ relevant: looking for ballpark figure.)
In any event, thanks for all the inspiration and information — as always!
Christy says
Thank you, Jill! They do sell well for me! This tray is going for about $75 on eBay, but I won’t get that much for it in my booth. And honestly, there aren’t many who’d buy a tray like this in the original state for that price, so I price them around $45-$50. I hope that helps! XOXO
Michele M. says
I absolutely LOVE how you did up that tray, Christy! It is soooo pretty now.
I have a tray very much like it that went into my “one of these days I need to paint it” categories…………I have literally had it for at least ten years. You have soooo inspired me. My tray has been neglected and the silver has been buffed so much that it is down to the underlay of brass. It’s never going to shine like it once did. I adore the color and the transfers you chose, too. I may be a copycat! Well done, ma’am.
Christy says
Thank you so much Michele! Copy away, my friend! XOXO
Claire says
Fabulous transformation, love the gilding, colour and transfer. The sweet little feet are unusual and really add to it.
Christy says
Thank you, Claire! I always love the ones with feet! XOXO
Debra Hubbs says
So pretty!
Christy says
Thank you, Debra! XOXO
Janet says
That tray is so beautiful! You certainly have a talent for this.
I’m wondering…I have a sweet little silverplate footed candy dish I thrifted this weekend. I love the dish but not a fan of polishing silver. If I paint it, are there any sealers I could use to make it still usable for nuts or candies? Or, should I just break out the silver polish every few months?
Christy says
Thank you, Janet! I don’t know if any of the sealers are food safe once cured, but you could still use it for wrapped candies, or just leave the inside unpainted? XOXO
Cathy says
This is gorgeous!!! I was wondering if you used a tray like that for house numbers if it would hold up to the weather??
Christy says
Thank you so much, Cathy! I imagine if it is painted and sealed, it would be okay on a covered porch. My only concern would be that it is quite heavy. XOXO
Kim says
Wow, that is so pretty! I have a silver colour tray that I think I will do that too. Love the colour and as well I love the feet. Thank you for the inspiration. 😊🩵
Christy says
Thank you, Kim! I’m so glad you are feeling inspired! XOXO