Hello, amazing friends, and welcome! If you’re new around here, I am so happy you’re here! Today, I’m sharing how I upcycled sewing machine drawers that evidently had already been upcycled once.
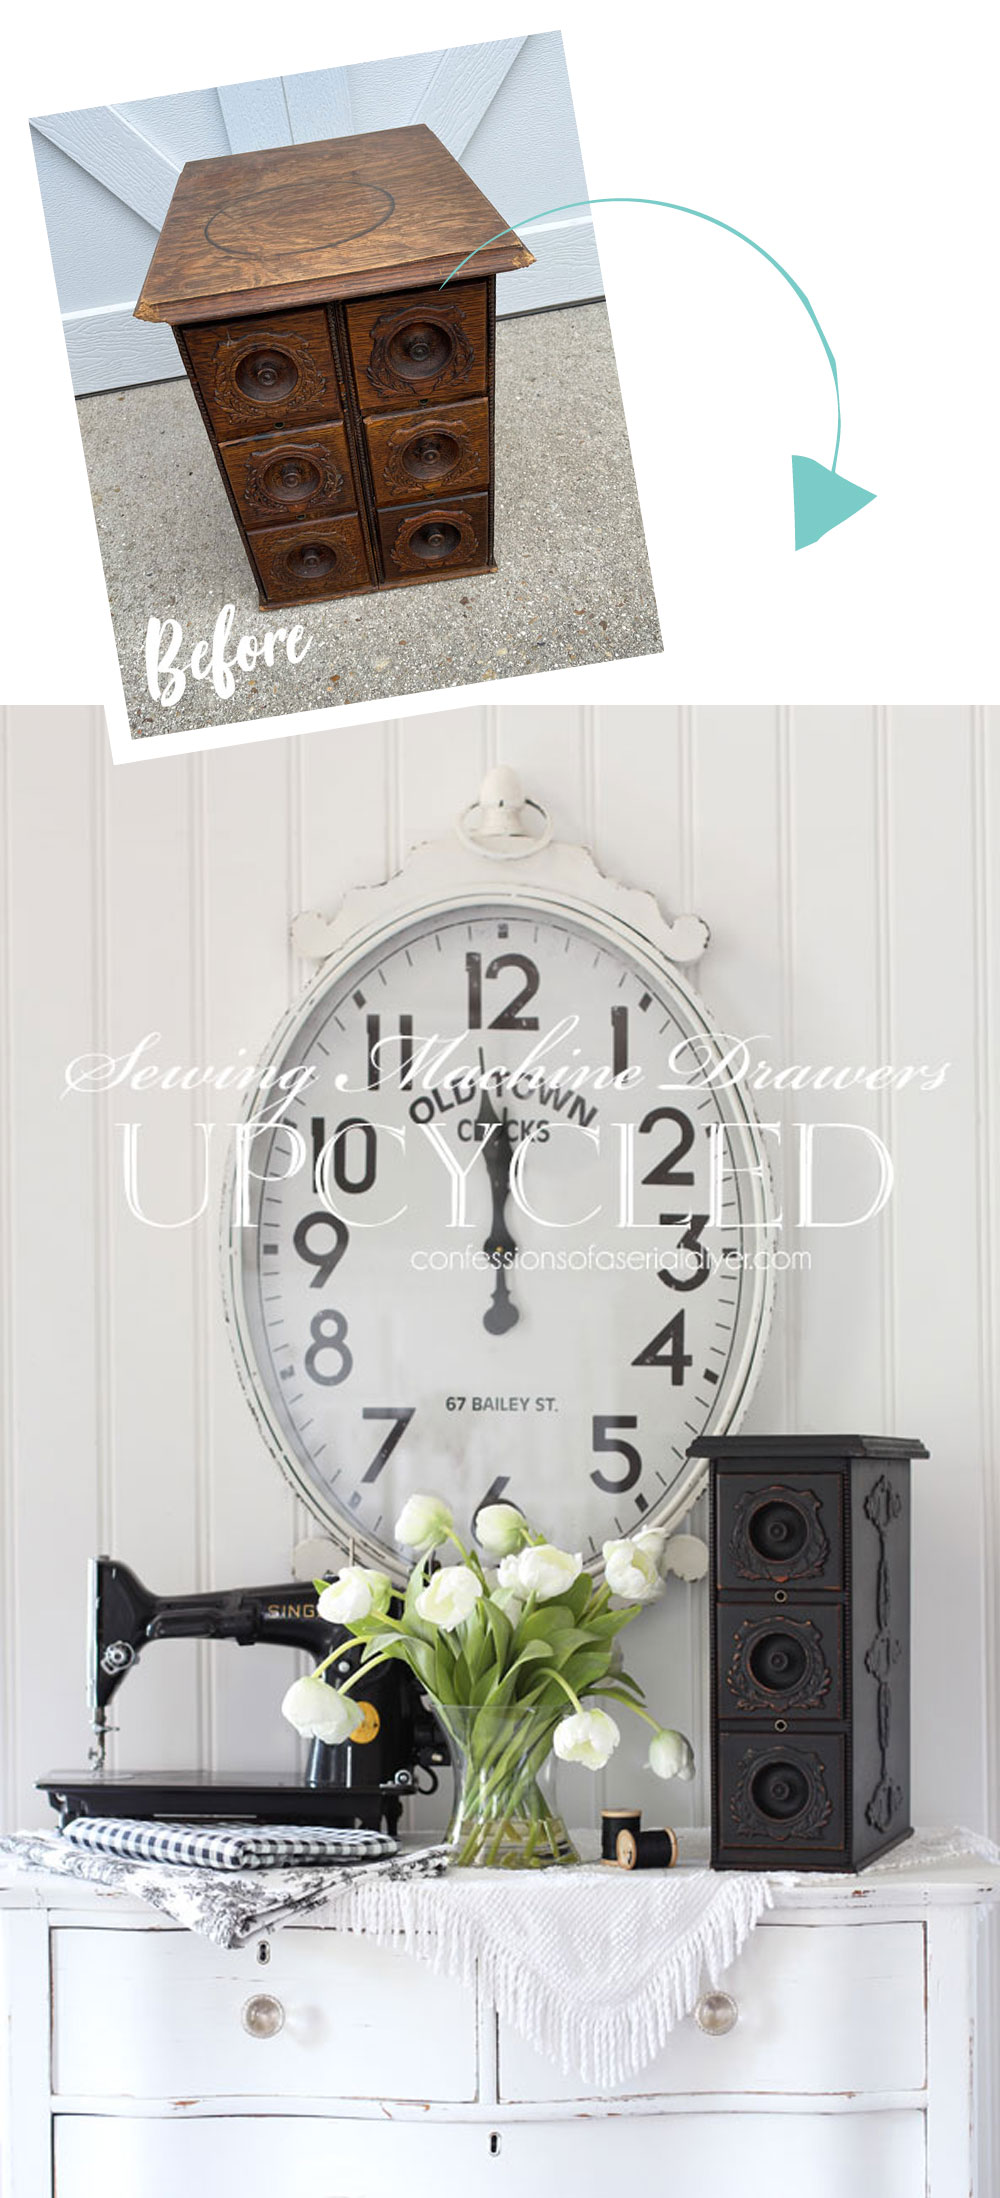
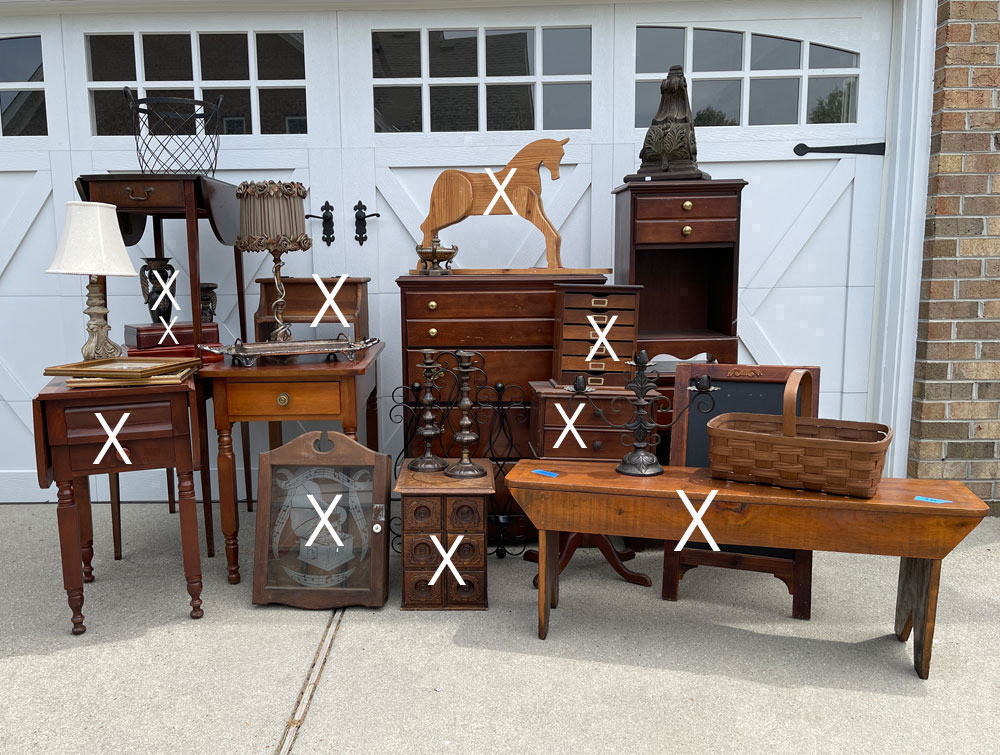
I happened upon these drawers at a yard sale earlier this summer:
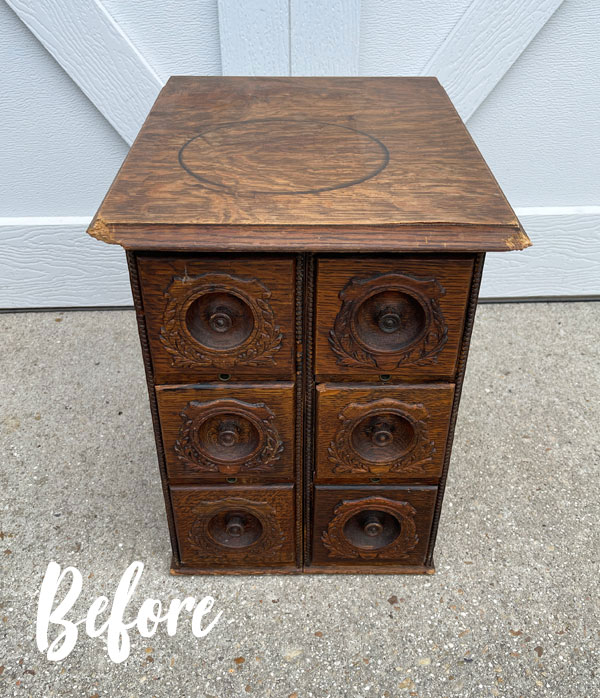
The seller didn’t have anything priced which is usually a deterrent for me. She had things in her driveway and her garage, so without prices, it was hard to tell what was for sale and what wasn’t. When I inquired about these drawers, she said I could have them for $25. I offered $20, and she accepted. What a deal!
I also scored this awesome vintage sewing notions table I redid a couple of weeks ago at the same sale for the same price!
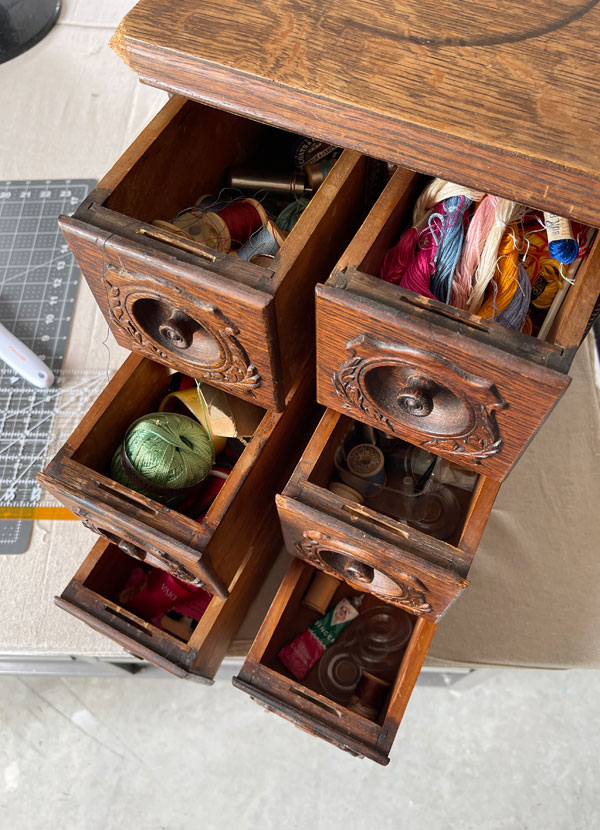
Both pieces were still filled with notions:
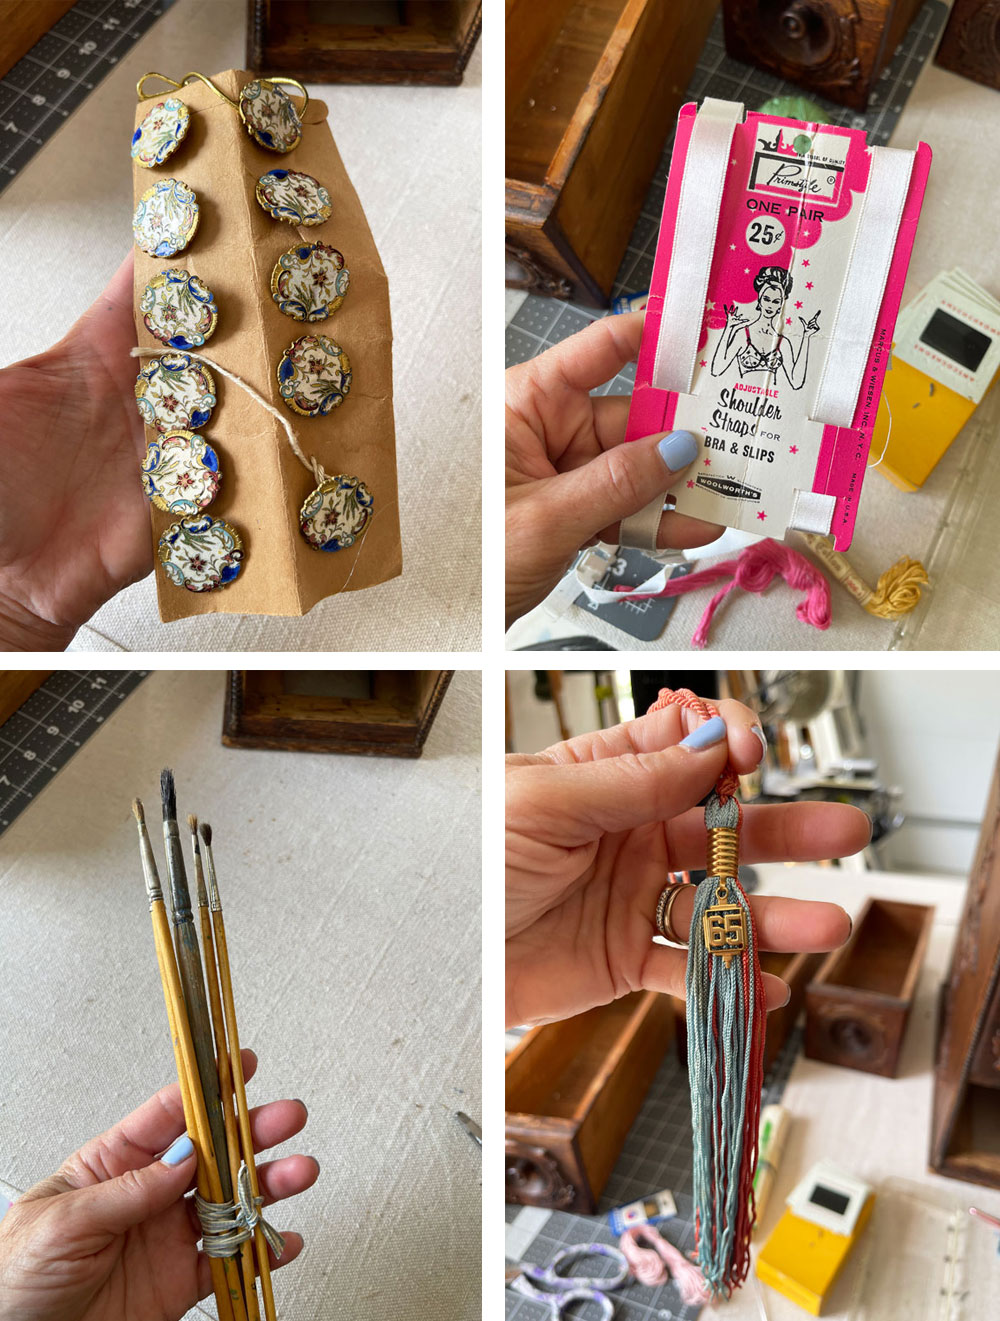
And various other items including some gorgeous buttons and someone’s tassel from the class of ’65:
But the coolest thing I found was a set of slides…
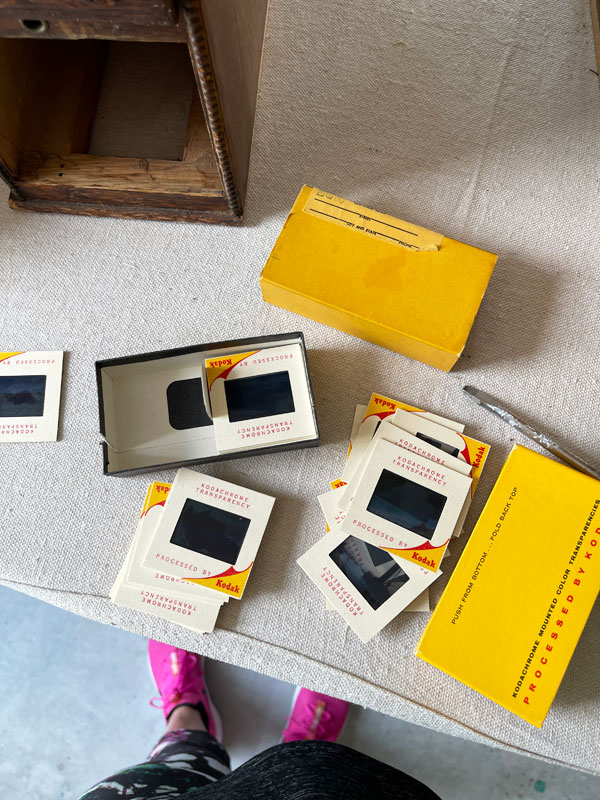
These must have captured someone’s time by the sea. Most of them included people in scenic spots, but this picture perfect seaside cottage was in there as well:
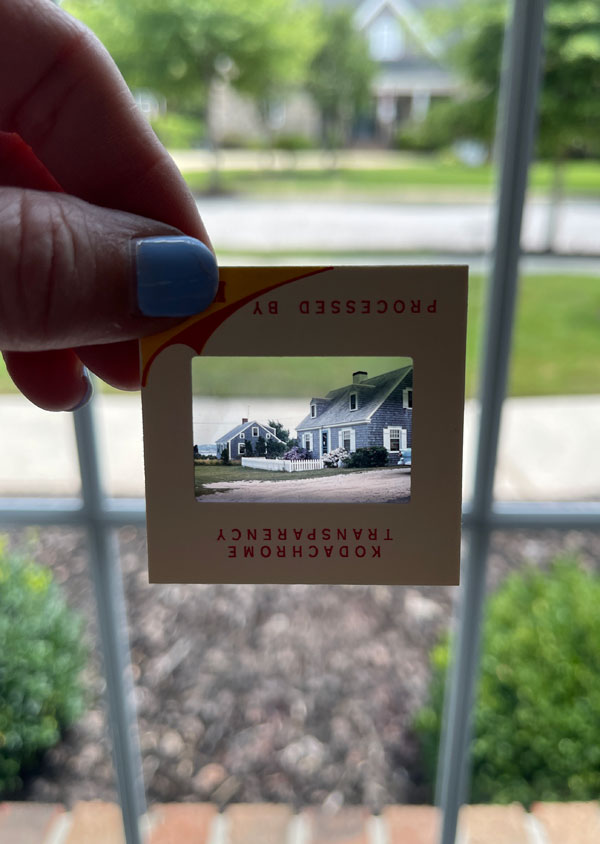
This gorgeous Cape Cod on the sea is my dream!
The date on the slides is from 1962. How cool is that? Unfortunately, there is no identifying information, and I have no idea where the house I purchased them from is.
Upcycled Sewing Machine Drawers
I had never seen a set of four drawers like this and figure they likely started out as part of an antique treadle singer sewing machine like this one:
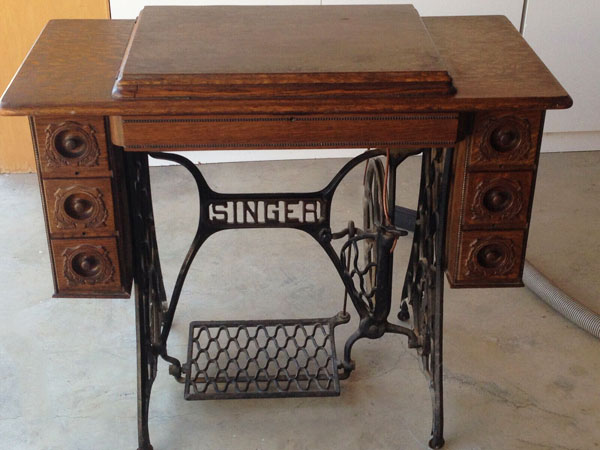
That is not my image; I actually found that image on eBay. According to the listing, this table dates back to 1910, includes the machine, and can be yours for $400 HERE. (Local pick up only.)
a Clever redo
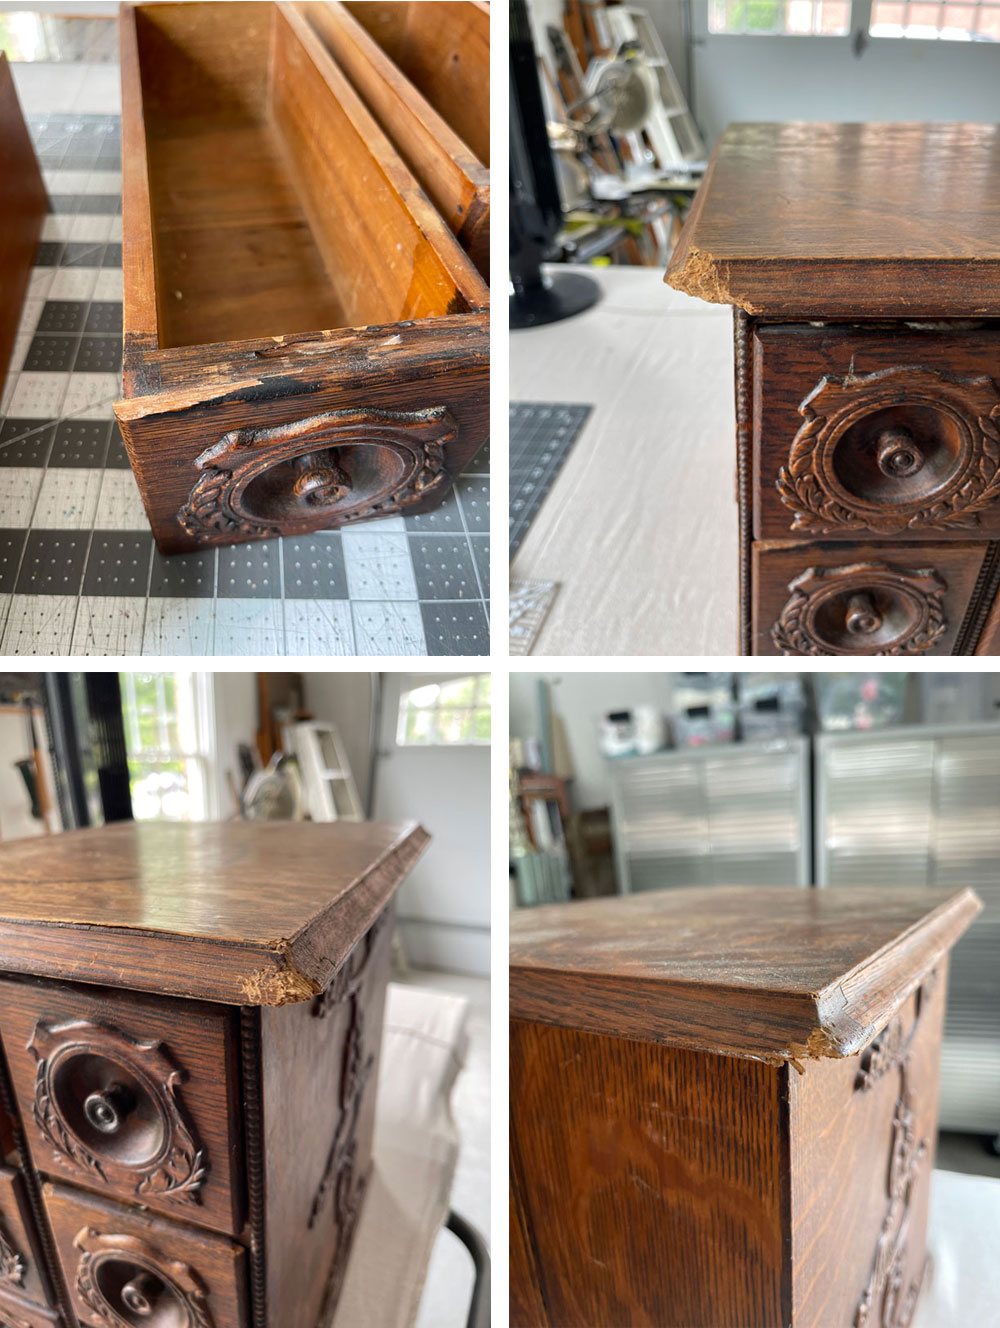
At some point, whoever had these parts from one of those tables must have decided to put the two together and perhaps use part of the top of the machine to cut a new top and create a set of six drawers.
That was a fantastic idea, but three of the four corners of the top were now in rough shape.
Also, a couple of drawers had some damage as well:
My original plan
When I first found this set of drawers, I knew the top was no good and planned to remove all the drawers and paint them all individually selling them just like that…really have fun with them! I knew I could probably make more selling them individually too.
Plan B
However, once I got started, I just couldnt’t do it. I felt like I needed to stay true to the original style and function of these antique beauties.
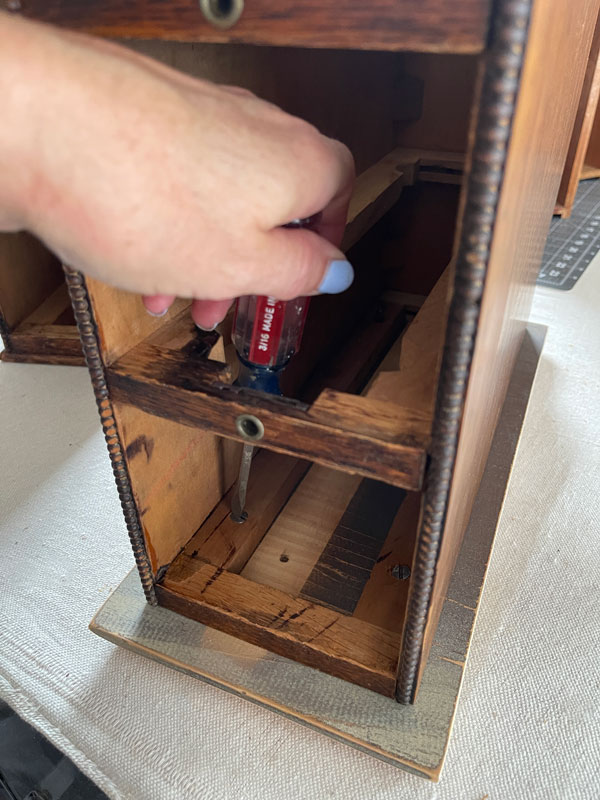
To start, I removed the damaged top which was held in place with screws from underneath:
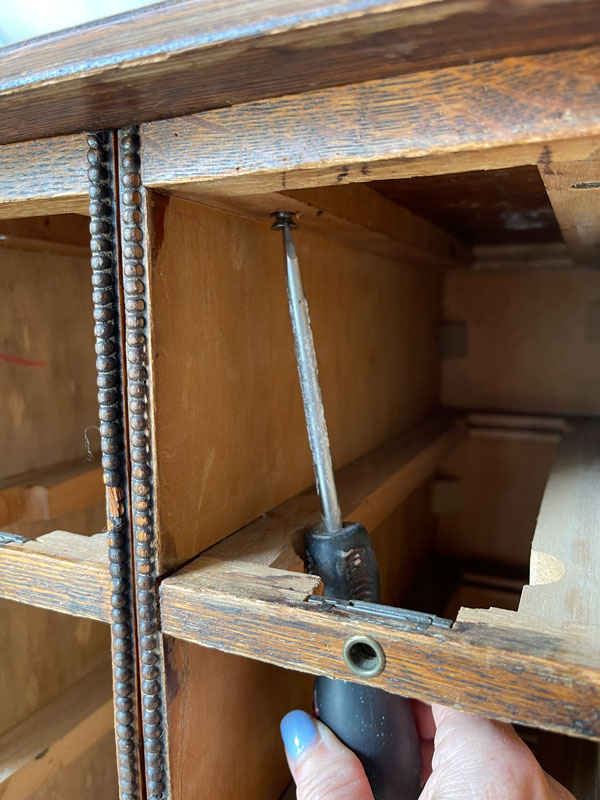
That top is all that was holding both pieces together:
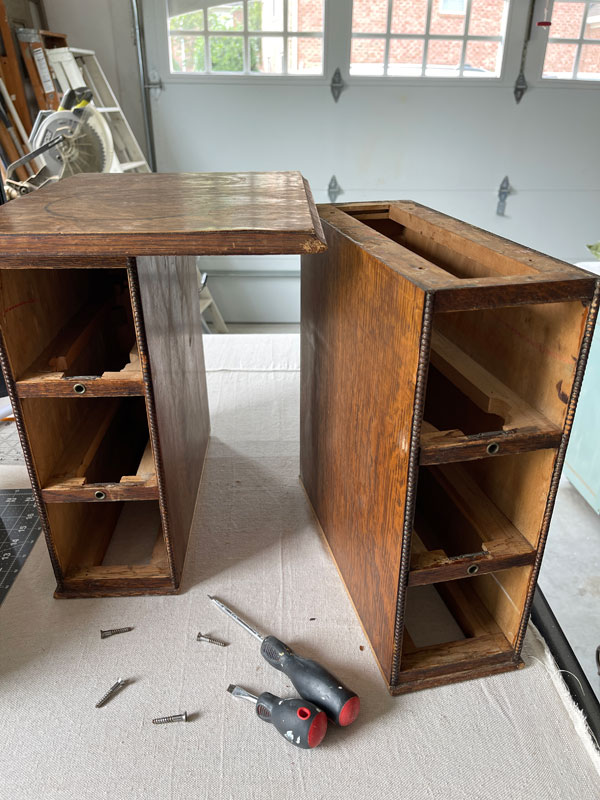
Clean
Next, I gave everything a good cleaning. I used White Lightning for that, mixing one TBSP into a half gallon of warm water right into my bucket there. It’s a degreaser and a deglosser so gloves are recommended. These pads are perfect for wiping everything down and come two to a pack. Then, you can just toss them in the wash.
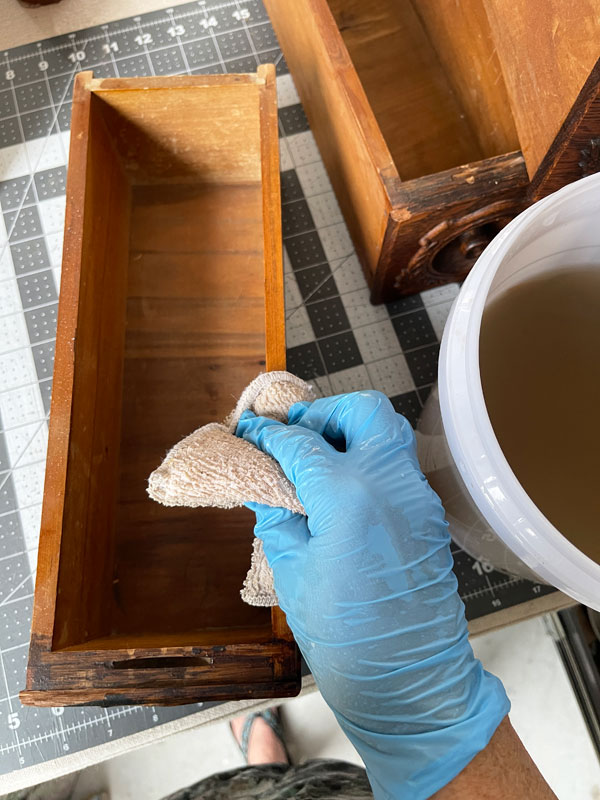
Don’t forget to swap out your water for clean water and give everything another wipe down to remove any residue.
Creating new tops
I decided that instead of replacing the one top for both sets of drawers, I would separate them and create two sets of three drawers as they had been originally.
New lumber is very expensive these days, so I dug through my wood scraps and pulled out what was left of this solid wood headboard:
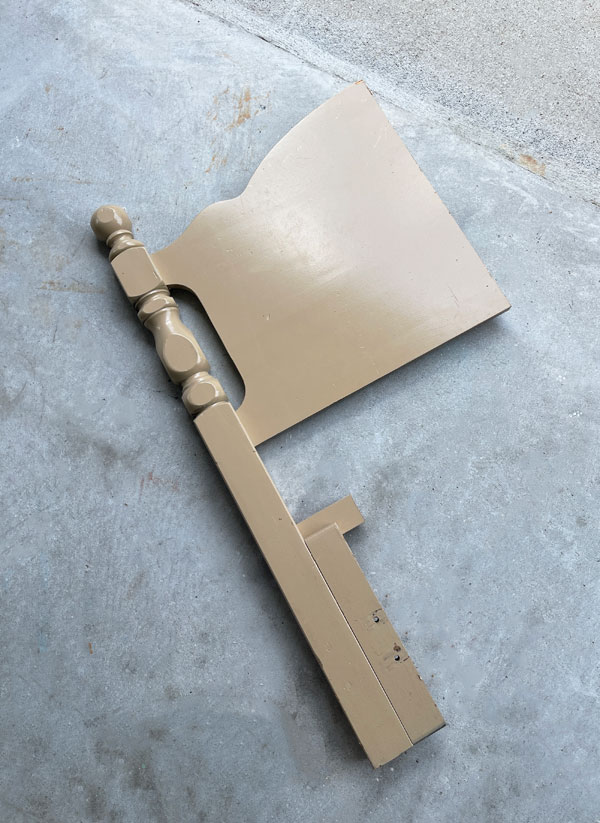
I went hunting for prime lumber for another sewing machine table project (I’ll link that at the bottom!) a couple of years ago and ended up trying to find something I could cut down at the thrift store instead to save some money. This headboard was only $10 and was perfect!
I cut two new tops for my drawer towers, but I didn’t want them to have a chunky flat edge.
Using a router
So, I finally got to play with my BRAND NEW RYOBI ROUTER I’ve had for over a year! I guess that doesn’t make it brand new? But, I haven’t had an opportunity to use it yet.
After watching two videos on how to use the thing, I practiced on the old top I had removed. (I didn’t have any room for error, so I needed to be able to do it right!)
Then, I went for it on the pieces I cut from the headboard.
I cut each side by running the router along each edge while clamped in place to secure it to my table, turning it and resecuring to my table as I went until I had all four sides routed.
This router is a bit heavy, so I didn’t get any pictures in action. You basically choose the shape of edging you want, insert that bit into the bottom, adjust the depth, and cut!
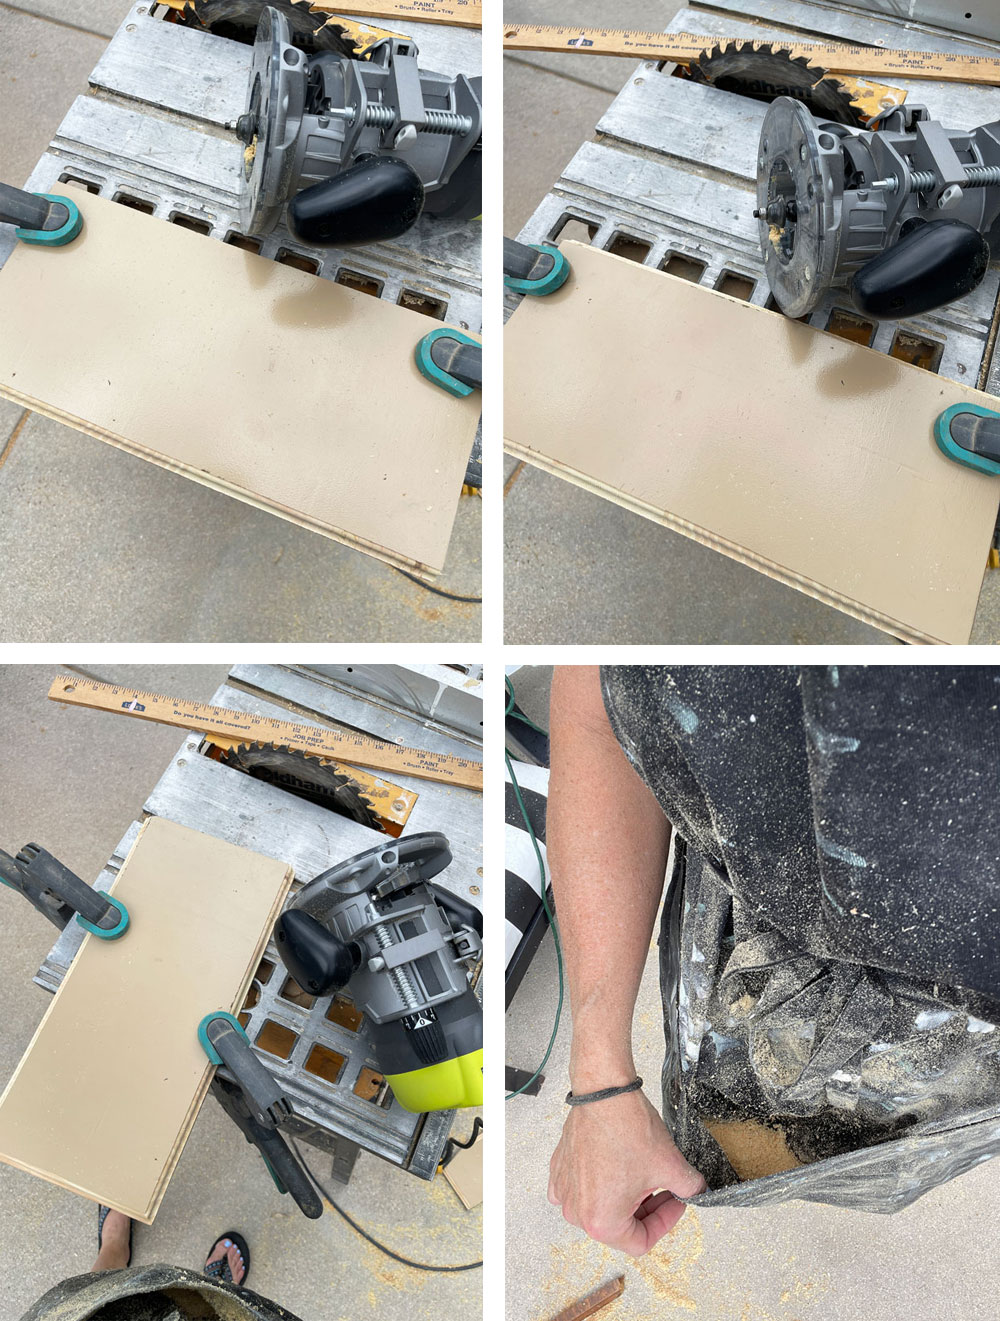
It makes a huge mess! I was covered in sawdust and it filled the pockets in my apron too!
Once I had my pieces cut, I sanded the newly routed edges smooth with 220 grit sandpaper.

Then, I used the same screws that were holding the old top in place before, to add these new tops.
I did predrill them first to make it easier since I was hand tightening them:
Paint
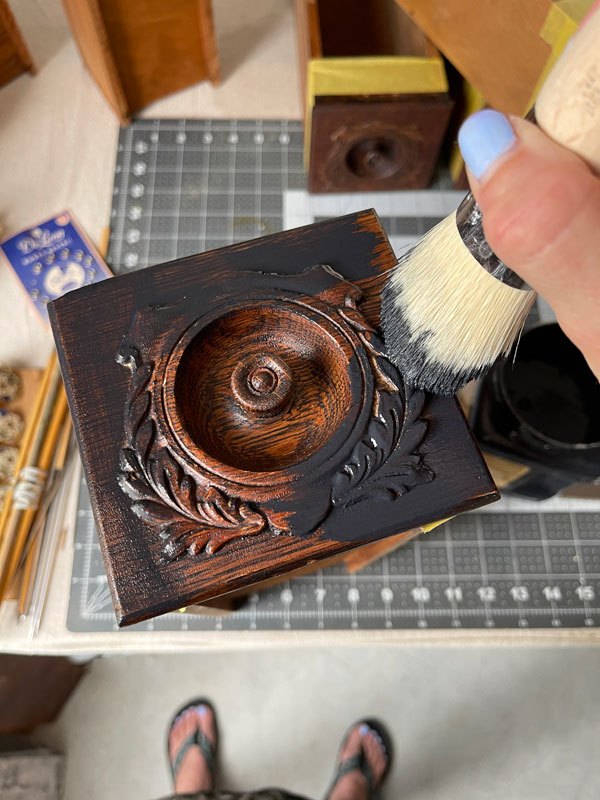
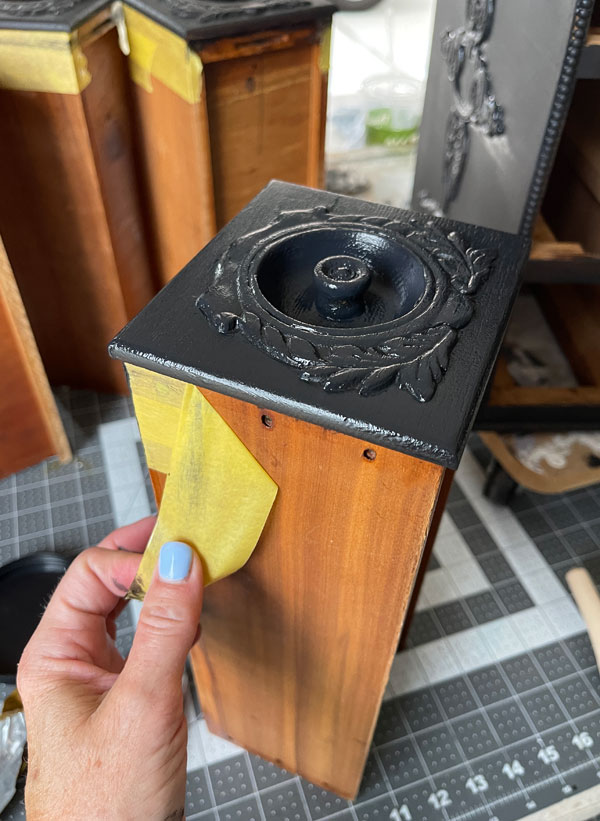
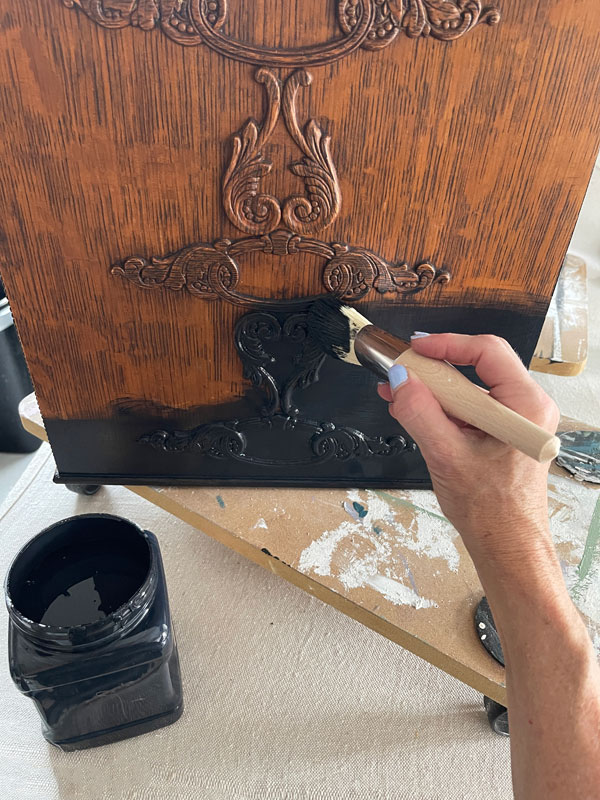
Because I felt called to keep with the feel of the original piece, I went with Caviar, applying it over those details with my Belle Brush:
I gave everything two coats and as you can see I had taped off the sides of the drawers. I pulled that off as soon as the second coat went on:
The bases were painted the same way…
(For smaller projects, I love this mini dolly cart I picked up on Amazon. It allows me to turn my project without touching it, and I can move it out of the way easily too. If you have two, they are fantastic for moving furnture with one on either end.)
Sand
Chalk paint has a bit of a texture to it, so it does need to be lightly sanded once you’re done painting. These sanding sponges are perfect for this step and will make your surface buttery smooth after sanding:
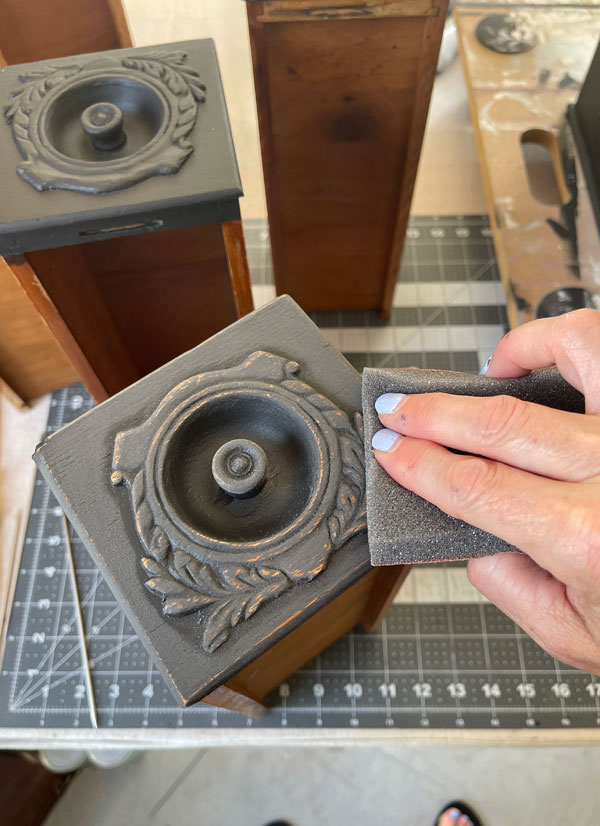
I know it can be scary to take sandpaper to your newly painted surface, but it makes the finish so much better! You don’t have to distress, but if you want to, hit the details a bit harder.
Sometimes I switch to traditional 220 grit sandpaper when I want a rougher grit for more distressing.
Seal
After removing the sanding dust with my shop vac, it was time to seal.
For that I wanted to try Hemp Seed Oil. I had never tried it before and I’ve heard good things about how it does over darker surfaces.
You just buff it in with a clean cloth or applicator pad:
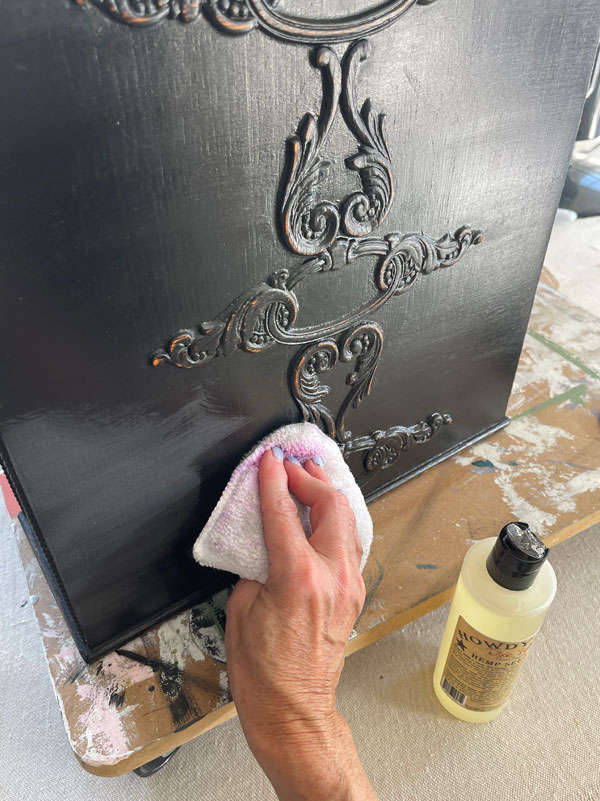
Let it sit for two hours and then wipe away any excess oil. After 12 hours, you can buff the surface. Sounds easy enough, right?
Except, because this was old oak, I think some of the oil kept hiding in the deep grain and I had to continue to wipe it back for a couple of days, but it seems to be good now.
I didn’t have that issue at all with the top that was not oak. It should be cured in just two days and dries to a matte finish.
I think I prefer the ease of the Satin Clear Coat, but I’m eccited to see how durable this will be, and I’d like to try it again in the future.
Butta the drawers
Finally, I wanted to hydrate and enhance the pretty wood of the drawer sides and the insides, and I did that with Big Mama’s Butta in the new Fresh and Clean scent.
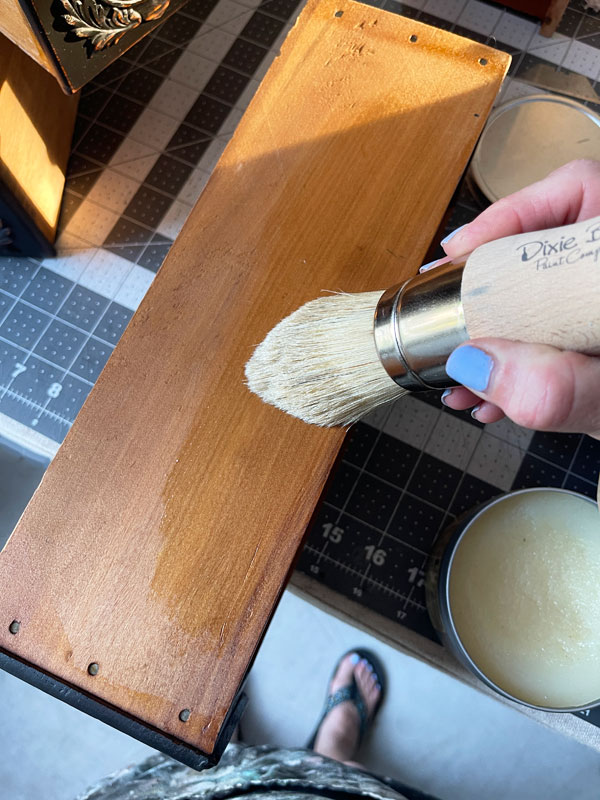
I used the La Petite brush for that.
And this sewing machine drawer upcycle was complete!
The After
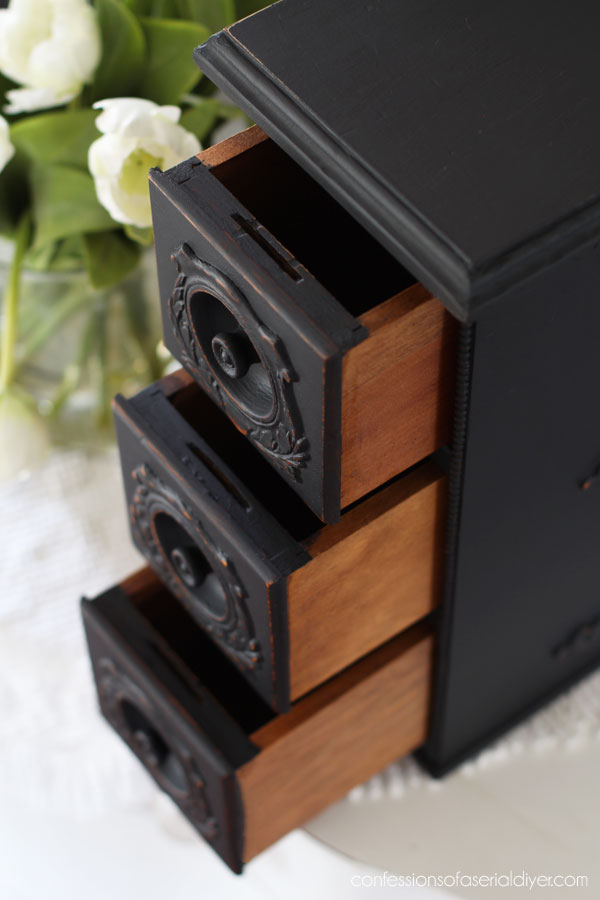
Here is how one of these sets of drawers looks with its new finsihed top!
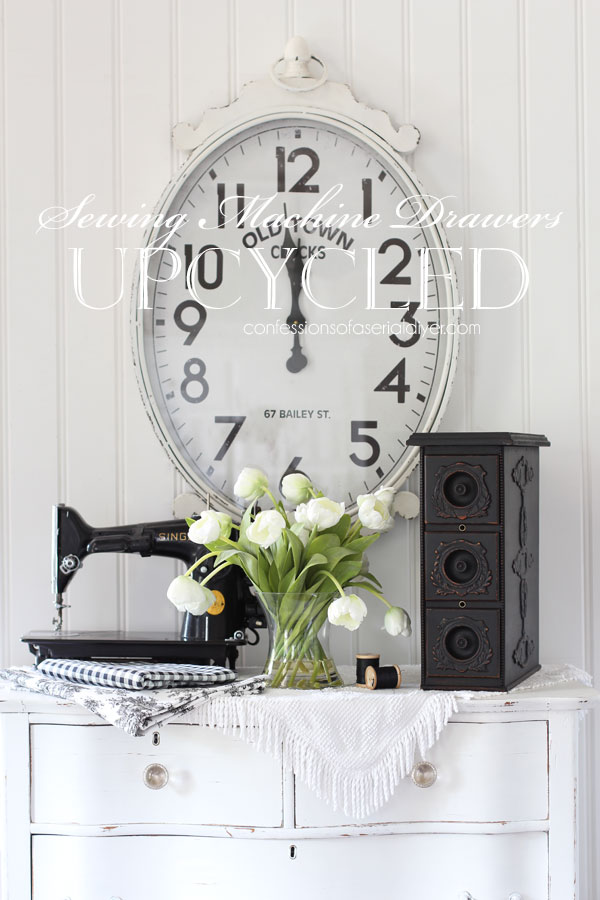
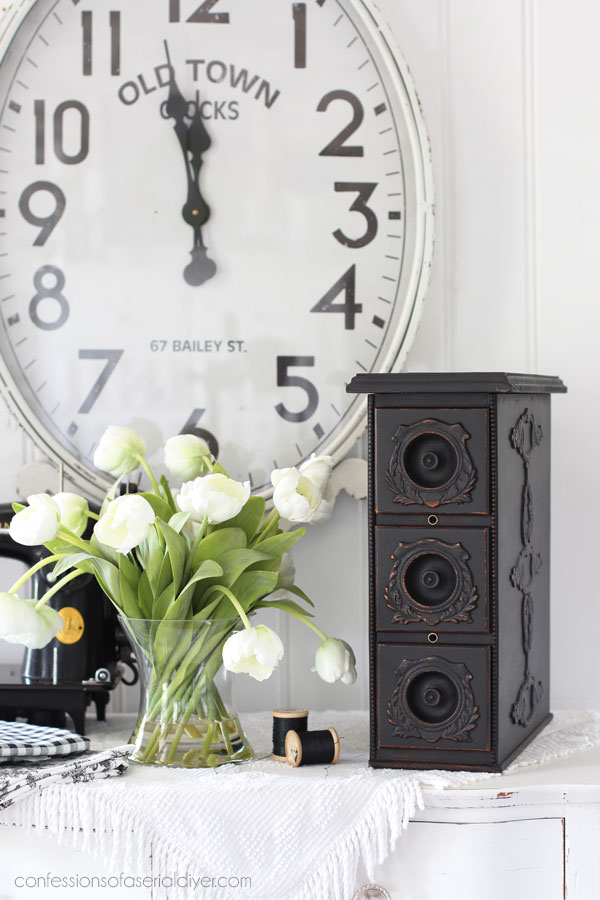
I really love the look of black painted wood once it’s distressed…
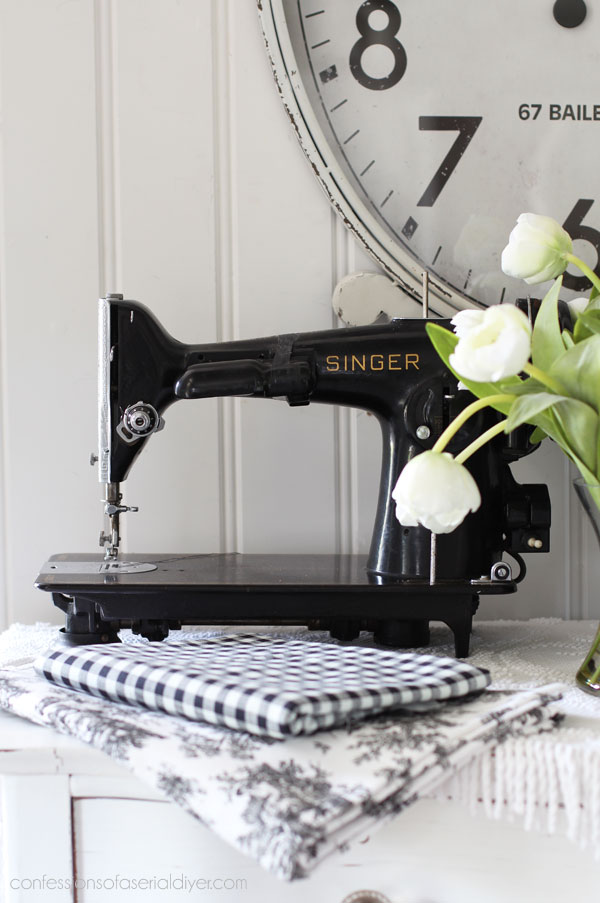
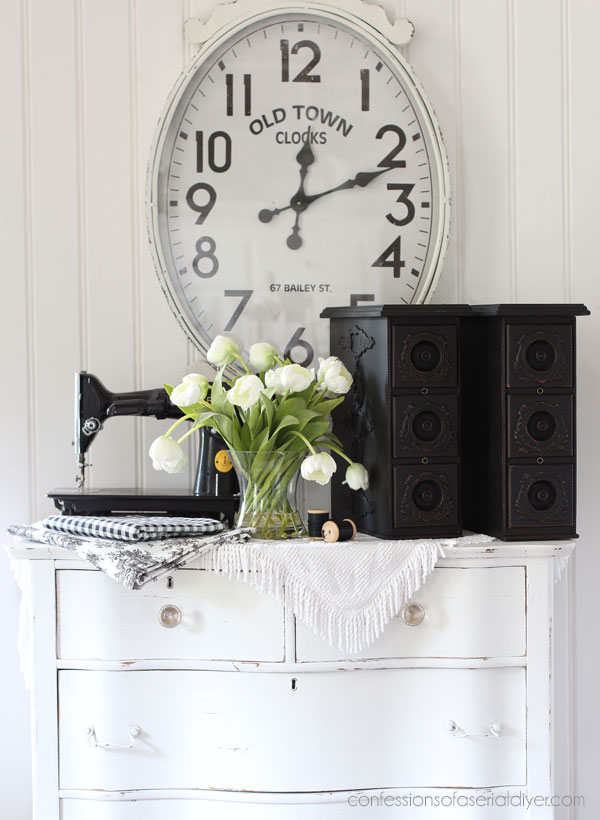
And I love that I kept this machine from the sewing table project I referenced earlier! It made for the perfect prop!
And of course you would have a vase of flowers in the middle of your workspace, right?

This set of drawers could still hold all those sewing essentials, or it could be used for crafting supplies, office supplies, you name it!
Here’s a look at the beautiful wood on the drawers:
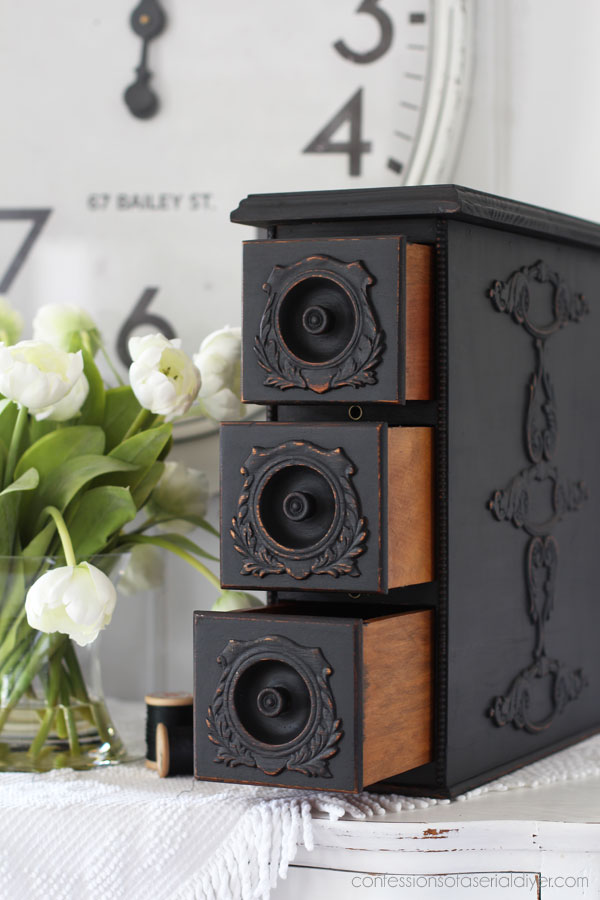
The insides look just the same as the sides.
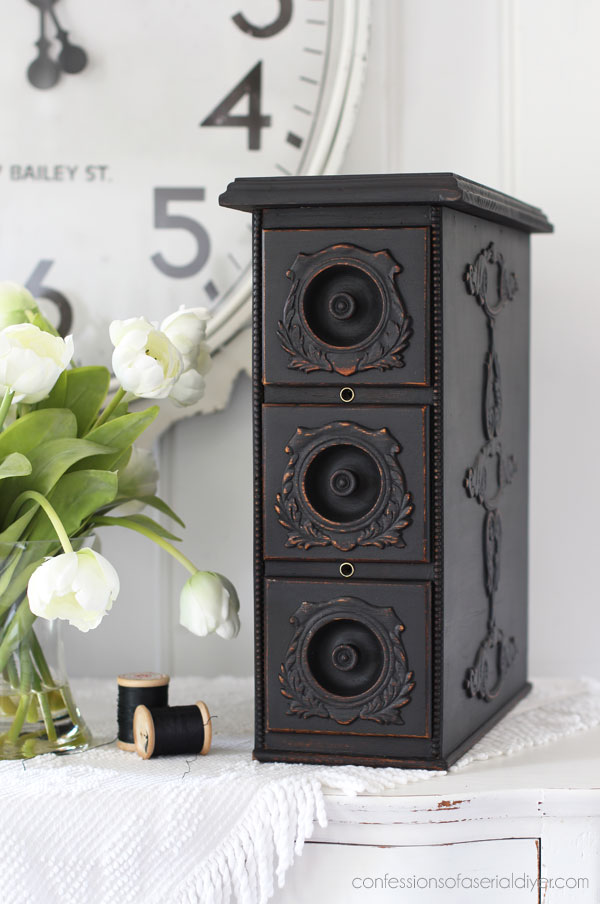
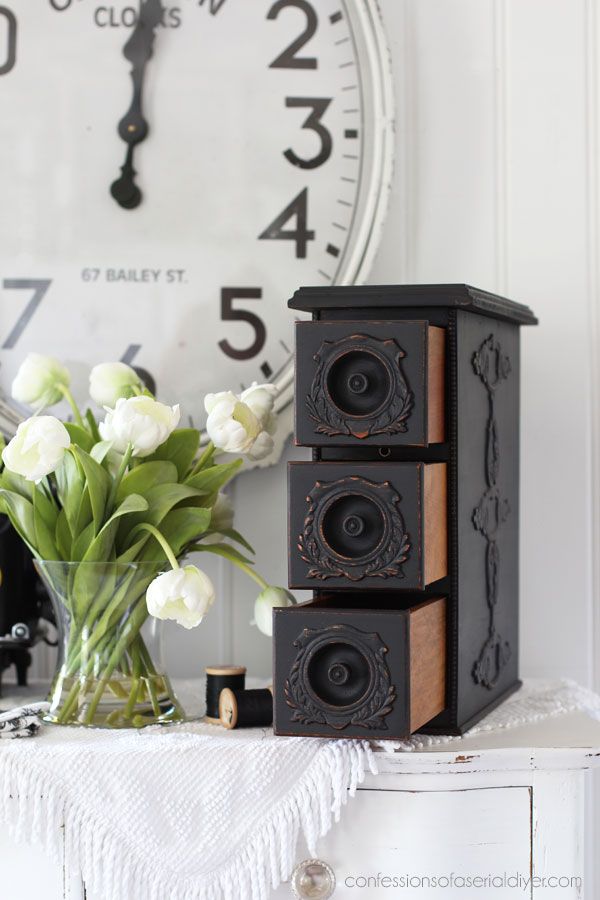
Here you can see the pretty routed edge of the new top…
It really makes it look so finished!
And the detail on these drawers is so pretty:
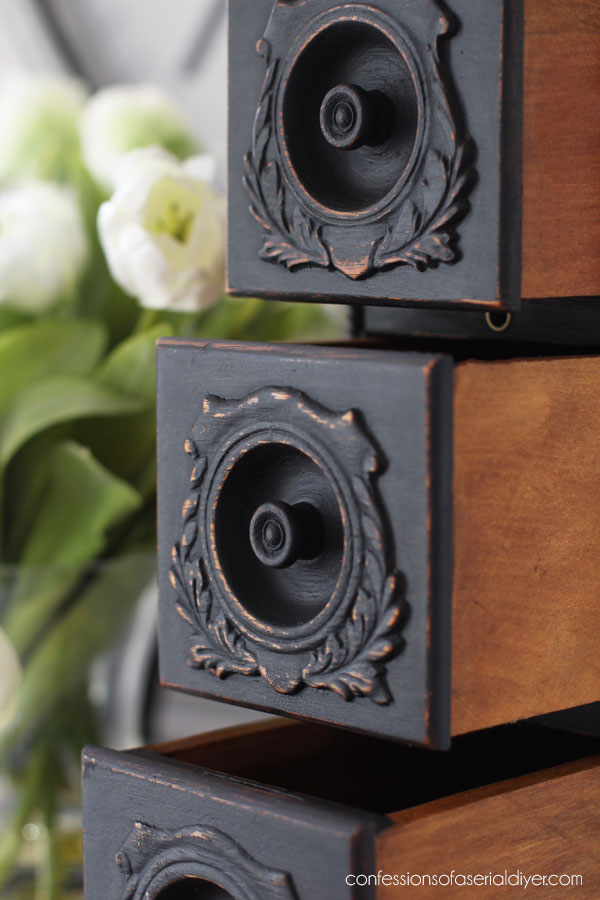
I distressed them, but they would have been gorgeous highlighted with gold gilding wax also.
And here is the pair together:
If I were to keep these for my own workspace, I would put them on either side of my work table and add a piece of wood across the top, painted to match, to create a storage shelf above my work table.

Black is as classic as an Antique Singer sewing machine, so I know it was the right choice.
Another bonus for choosing black for these is that it camouflages the damage to the two drawers in this set:
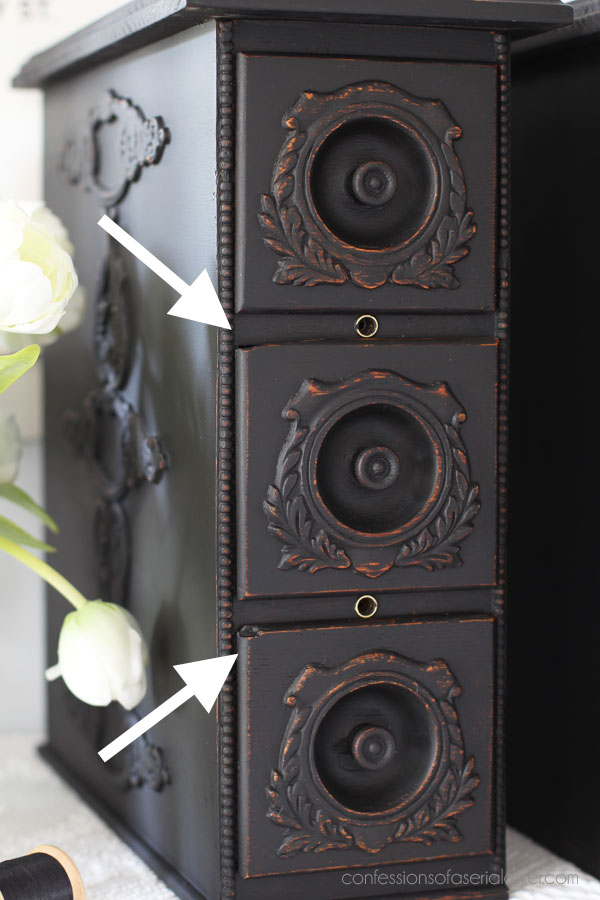
Had these been painted a lighter color, that damage woulad be more noticeable.
What do you think? Should I have kept them as a set of six? Painted all the drawers to sell individually in fun colors?
I feel good about the choice I made to keep them classic.
I hope you like them too!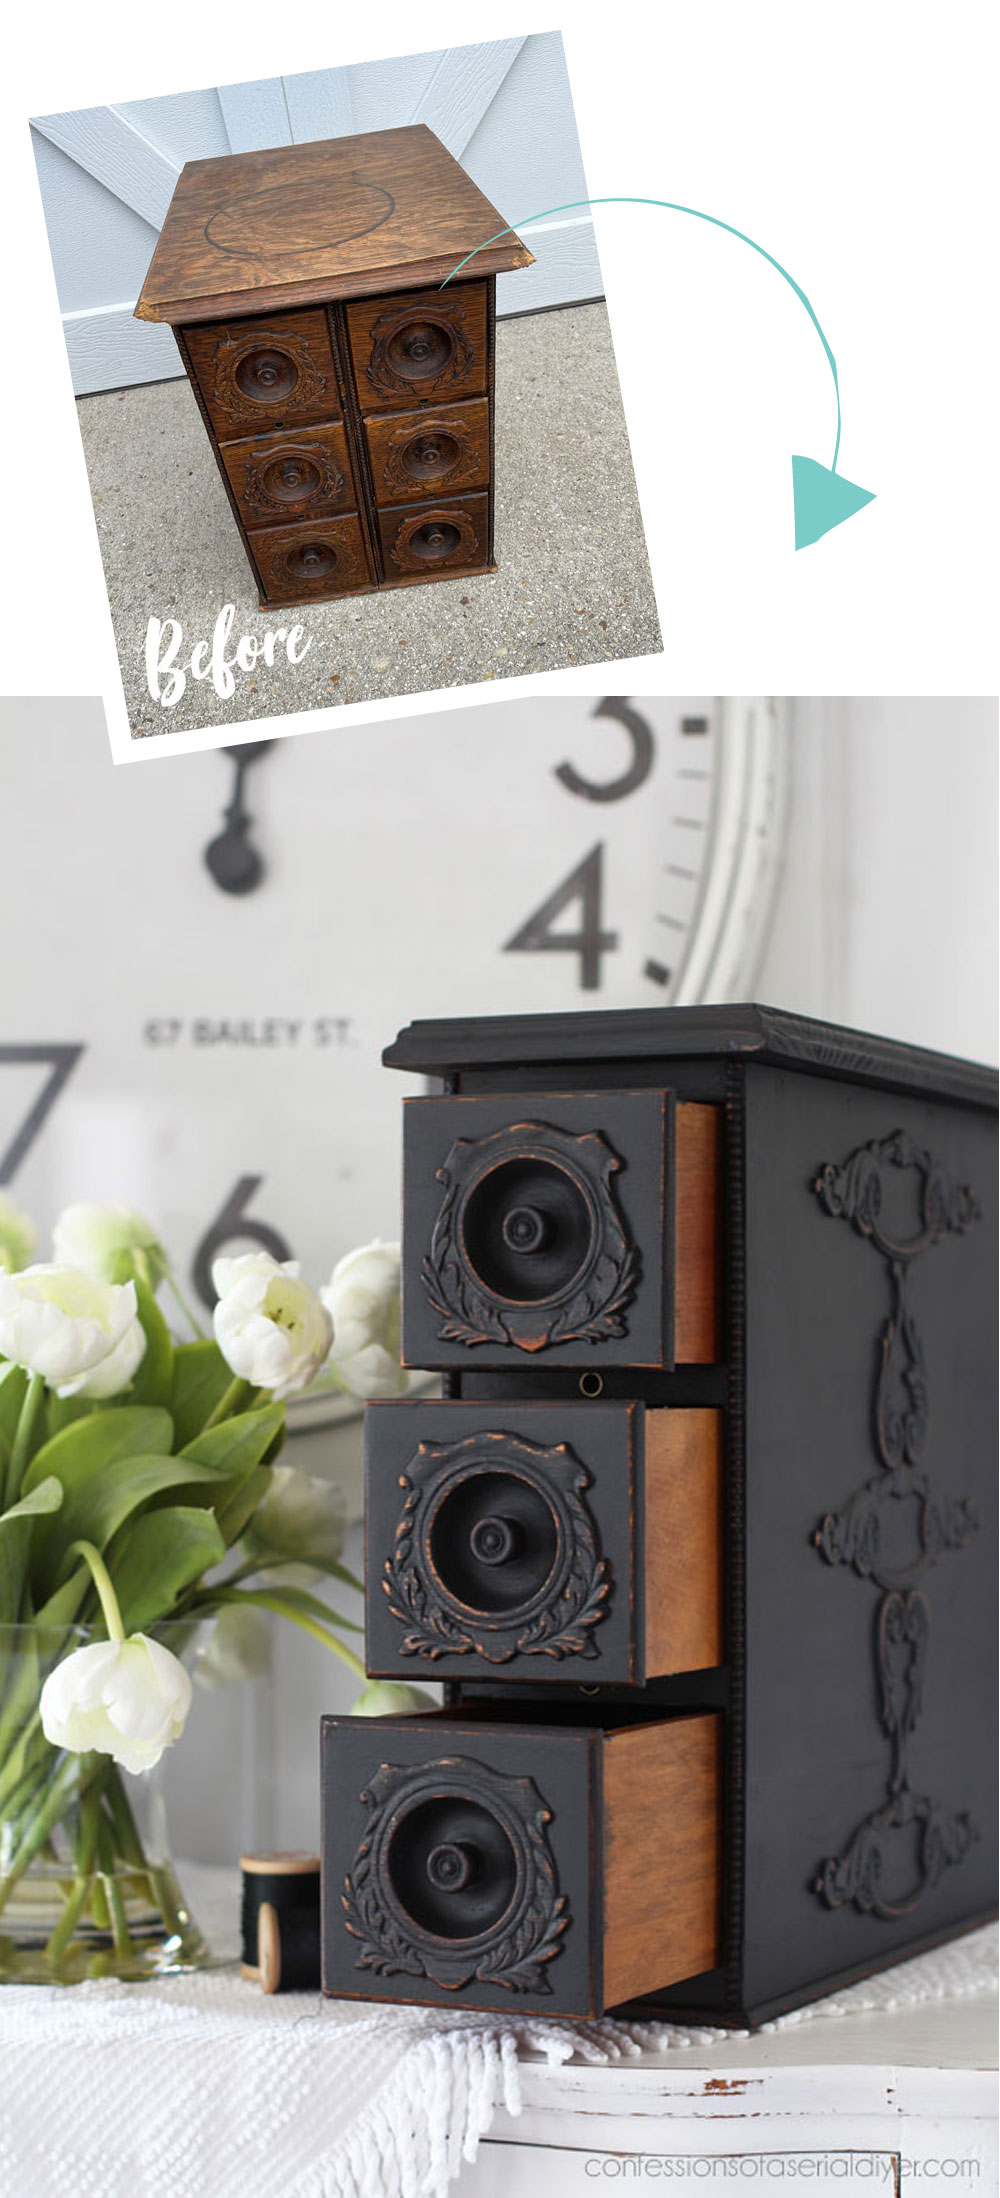
Did you see what I did with this sewing machine table and bench set??
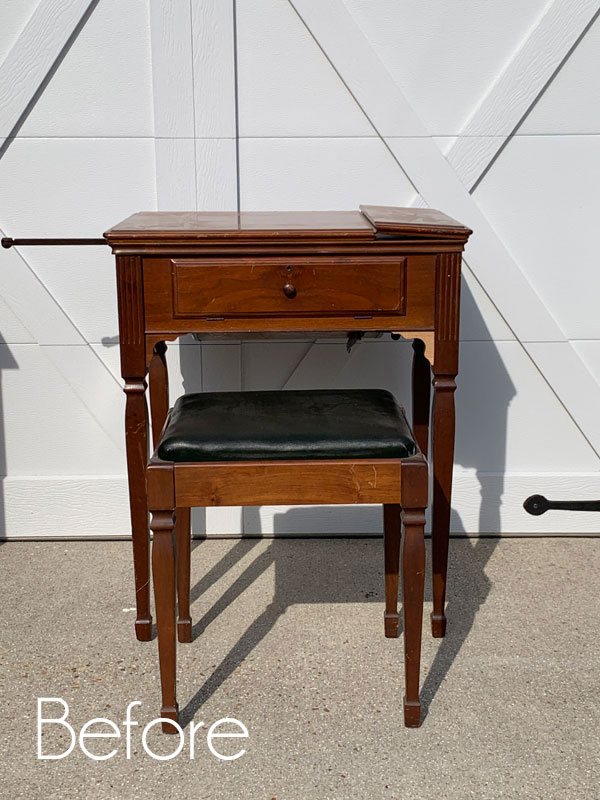
This is the one that had that beautiful antique machine in it! See what I did with it HERE!
And that’s one more done yay!
See anything you missed so far below:
$5 Yard Sale Stool Makeover
$6 Mini Wall Cabinet Makeover
$4 Jewelry Box Makeover
Vintage Sewing Storage Table
Wooden Horse Redo TAKE TWO!
White Painted Drop Leaf Table
Unfinished Wooden Horse Makeover
Updated Candlesticks
Voodoo Stain and Stencil Bench Makeover
Drawer Organizer Makeover
SHOP NEWS
In shop news, I’ve just added SIX brand new Redesign Transfers and THREE brand new moulds to my inventory! They are at the top of my shop’s homepage HERE.
I’ll be back on Thursday sharing what I did with this silver tray that I also found at a yard sale earlier this summer:
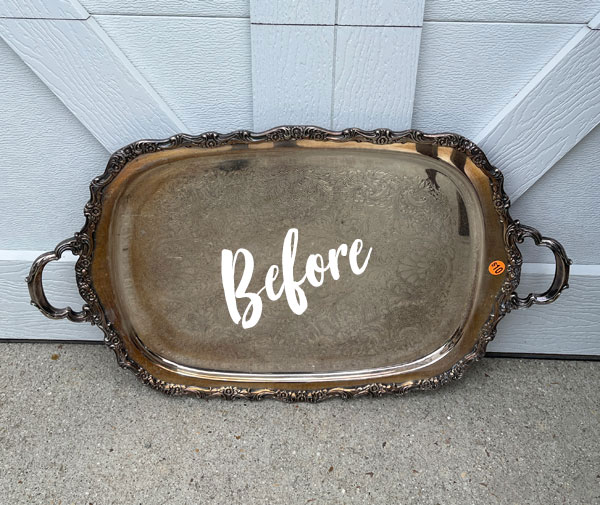
It’s a pretty one!!
UPDATE: No need to come back! See how I updated this tray HERE now!
See you then!
XOXO,

Don’t Miss a Thing!
If you like what you see, there are several ways to follow along!
EMAIL * INSTAGRAM * FACEBOOK * PINTEREST


Get FREE SHIPPING on all orders over $50. No code needed at checkout! Orders under $50 always enjoy $8 flat rate shipping! Most orders ship same or next business day!


Mary Kaiser says
You saved it, and I love it so much! What a beatiful transformation! Fun things you found in the drawers, the buttons are so beautiful, I am sure you will find something fun to do with them! The slides are cool also. My family has a bunch of those slides from when I was a kid, I was one of nine children and we don’t have alot of photos, but we have boxes and boxes of slides. We used to get together once a year and look at them at my brothers house on a big screen with a projector. If you have no use for the buttons let me know as I could use a few of them for my button collection. Love how you seperated the drawers again, so beautiful!
Christy says
Thank you, Mary! I always enjoy looking through the items I find in these pieces! We are the same in our family…we have a ton of slides and set the projector up every once in a while to enjoy them all. It’s funny that those probably get seen more often than the photos I have in albums lol! XOXO
Janette Deans says
They look wonderful don’t they but, I found it so sad that all those ‘memories’, were just lost to someone somewhere, I never really understand anyone not cleaning out cupboards or drawers before they get rid…How awful. xx
Christy says
Thank you, Janette! It is a bit sad, but that tells me that the person getting rid of those items had no love for them, whereas looking through those items brought me so much joy. Just another way to look at it. 🙂 XOXO
Carolyn says
Beautiful! Perfect choice of color of paint! I’m talking to a friend about taking a vacation to Virginia Beach, so, I can visit your booth! The beach is a big pull, but, I really want to visit your booth!!! Your work is fantastic!
Christy says
Thank you so much, Carolyn! And I love that!! I hope you get to come visit!! XOXO
Cecilia says
I love them! The black was a perfect choice to show off the pretty designs in the wood. I’m glad you kept them together although separate and colorful would have been fun too. This time, a classic look was spot on. 😊
Cecilia
Christy says
Thank you, Cecilia! I’m glad I went in that direction too! XOXO
Laura says
As always, I love everything you do!
I purchased a Singer machine in its cabinet at a thrift shop at a very good price.
Haven’t touched it yet and not sure if I would.
Thanks
Christy says
Thank you, Laura! Those pieces are real gems. Imagine all that was created with yours! XOXO
Nana Diana says
Those little drawers are really sweet. When I got my gramma’s sewing machine, she had a small matching piece for ‘notions’. I think it was a promotion for the sewing machine. It was like the 6 drawers connected together but in miniature. Maybe 10″ x 14″. I had it for years and then when we moved the movers lost some of our things. I didn’t realize it was gone for at least a year. So sad. I still have the sewing machine–did, that is. I gave it to one of my kids. Diana
Christy says
Thank you, Diana! That is interesting! This set of six drawers could have possibly been something like that. It did not appear to be a DIY job at all. I just assumed someone had created them from the machine drawers…you never know! And what a bummer that some of your things were lost. I’m so sorry! Glad the machine is still in the family! XOXO
Marcie Lovett says
Oh, Christy, they’re fabulous now! Someone is going to love having these storage pieces. I didn’t realize the drawers were just taken off a table and stuck together. As lovely as they are separately, they’re so much better together. And how much fun was it to break out the router? It makes the new top so much better. I think someone’s puppy was teething on the original one 😂 I bet there’s a way to make a mold off those wood appliques so you could recreate them on another piece, they’re amazing. The featherweight sewing machine is also pretty amazing. They’re really popular now, if you decide to sell it.
Christy says
Thank you, Marcie! I really enjoyed playing with the router. And I think so…it does look like a furry friend went to town on those corners lol. What a fabulous idea to make a mould!! I love that idea! XOXO
Lorri says
I love the way you refinish these drawers. Simple but elegant..what a treasure for someone. I liked that you kept the sides of the drawers clean..they look so nice this way.
Christy says
Thank you, Lorri! I know I could have gotten really creative with these, but that just felt wrong lol. Glad you like them too! XOXO
Jackie C says
These drawers are BEAUTIFUL! I love the sunken knobs. I have my Grandma’s treadle machine she got in 1944 when she was 35. When I got it in 1995, I still used it until the belt broke a few years later. I haven’t looked for a replacement. What a great job with your router!
Christy says
Thank you so much, Jackie!! How awesome that you have your Grandma’s machine and that it still worked for so long? What a treasure! XOXO
Cyndi says
Sooo cute! And I like your idea of putting a piece of wood between the two and using them that way, like a desk hutch. Good job with the router. It really does make that top!
Christy says
Thank you, Cyndi! I am happy to have finally tackled the router lol! XOXO
Janet says
As usual, your instinct on this project was perfect.
They are gorgeous AND utilitarian.
Christy says
Aww thank you so much, Janet! I’m glad I kept them classic! XOXO
Niki says
Interesting find! It amazes me what people use or refashion to serve a different or better function. I like the caviar color on these, and I’m sure the draws are much better with the butta!!
Christy says
Thank you, Niki! Right? It was smart to join two sets together. Then I had to go and split them apart lol! XOXO
Hannah Reyor says
You outdid yourself on this one. The dark paint made these drawers. Glad you learned routing. It’s a game changer for the things you do.
Christy says
Thank you so much, Hannah! The router is a game changer for sure…I’m so glad I finally had a chance to learn how to use it! XOXO
Donna says
That tassel looks exactly like the ones our school had in our high school graduation!
Arlington high school Arlington,mass
Christy says
Oh wow! By the looks of the photos, it appears very Cape Cod…maybe they were from Arlington and vacationing down there? Thank you for the info! XOXO
Mary says
The drawers are gorgeous! Wish I lived closer..I’d definitely be visiting your booth 🙂 They won’t last long, Christy. Beautiful renewal!
Christy says
Thank you so much, Mary! I wish you were closer too! XOXO
Lizzy says
Really cute and so useful! Black is perfect for it.
Christy says
Thank you so much, Lizzy! XOXO
Nancy @Artsy Chicks Rule says
I love what you did with them! And love that someone else got creative with them at some point too, neat!! Plus the slides, wow, too bad no identifying info but definitely a cool find! xoxo
Christy says
Thank you, Nancy! They were a cool find for sure and those slides…most of the rest were people fishing on the beach…standing by the beach, etc. Very cool! XOXO
p says
It’s wonderful that you can adapt to new power tools so easily !
Your routed edges look verrry nice.
I was surprised at your choice of black – but it IS a perfect choice.
I love them separated too.
I have my grandma’s old sewing cabinet. I also picked up a 3 drawer unit like these you made years ago at a craft show. I use it as storage for small sewing / craft pieces, and I love that it goes well w my cabinet.
Your are right ! – it would be nice to have two and add a shelf. 🙂
Sewing has sooo many accessories / attachments.
Thanks for sharing ! I hope to find a piece I can paint black soon.
It looks so elegant – and vintage.
p
Christy says
Aww thank you, P! It took a bit of practice to get the router down, but I finally got there lol! How nice that you have your grandmother’s cabinet…what a treasure. And yes, I think black was definitely the way to go. Have a great week! XOXO
Michele M. says
Well I am a huge black paint fan so I was happy you did such an amazing job on those. What beauties. But – ouch- painting over such quality tiger oak just brought tears to my eyes. BUT, I have to say I still love it and hope you do lots more with black matte paint because it truly is a favorite.
Such a shame there’s no more wood like that anymore. Wouldn’t our forebears weep at the particle board crap out there today people are buying left and right daily? / cringe.
Christy says
Thanks, Michele! They surely don’t make things like they used to, and it costs a small fortune! XOXO
Rebecca says
I get so excited when you use black! Lol. I live in a part of the country where black sells better than your lovely coastal colors, so I’m grateful, as always, for your inspiration.
Christy says
Oh yay! Black actually sells well for me too…it’s so classic! Thank you, Rebecca!! XOXO
Janice Holt says
Just now getting around to your Tues post. So glad you kept the sewing machine and these drawers look so pretty with it but they would look great anywhere. Love the black and the distressing.
Christy says
Thank you, Janice! I’m so glad I kept that machine too! Glad you enjoyed this one! XOXO
Rose Lefebvre says
Nice!
Christy says
Thank you, Rose! XOXO