It’s one of my favorite days of the month, Furniture Fixer Upper Day!! My dear friends, y’all know how much I enjoy a good furniture makeover, but today’s vintage brother sewing machine cabinet makeover was a DOOZY!! This might be the very definition of a fixer upper ha ha!
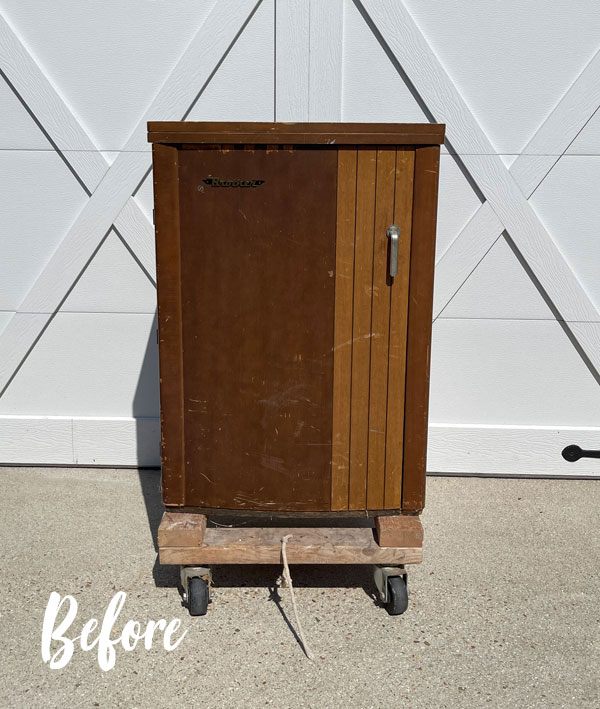
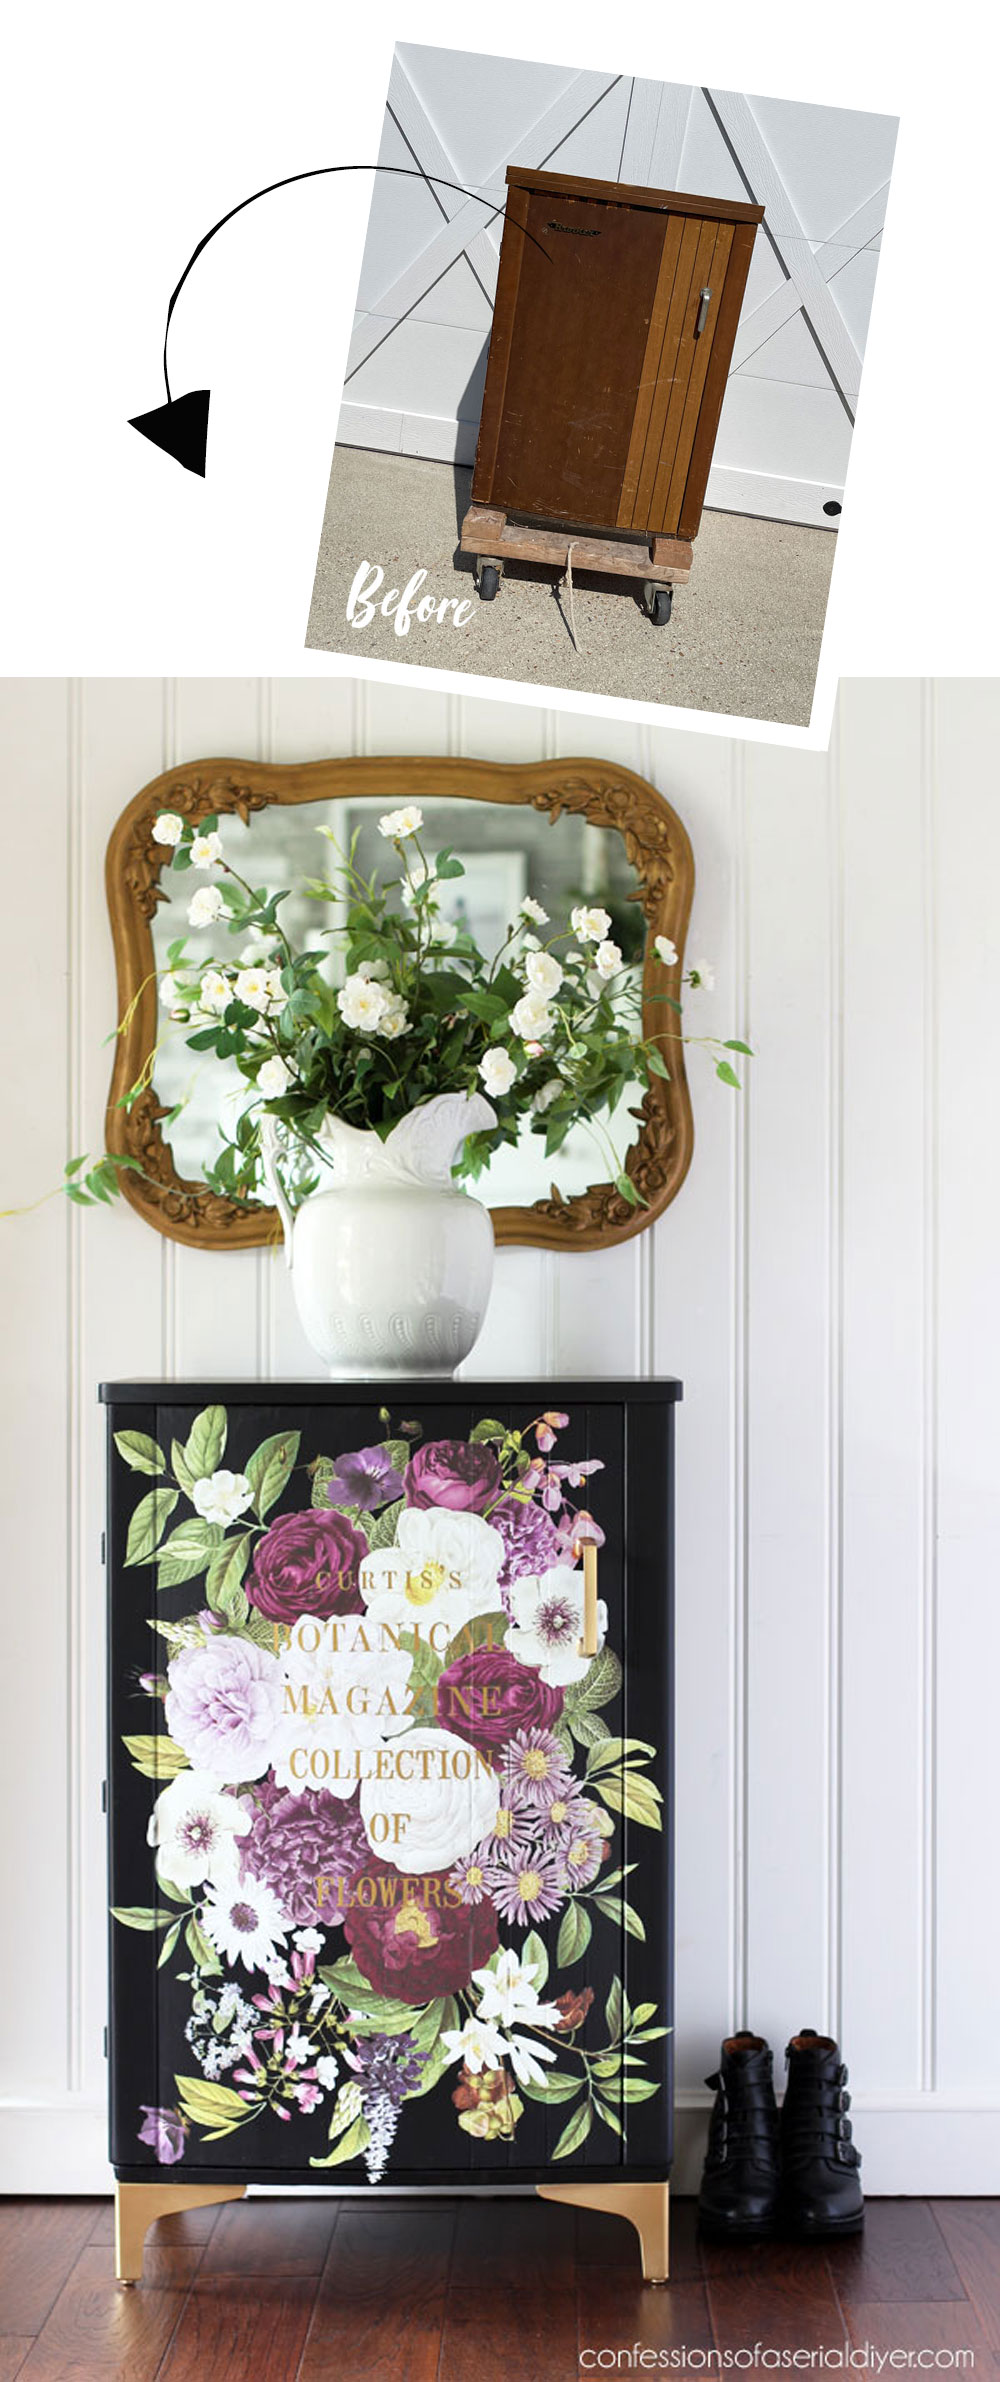
Here she is:
A local gal reached out to me over the summer to ask if I would be interested in a few things her tennants had left behind. She did warn me that it all pretty much looked like trash, but she has seen my work and had faith in me. The fact that she was willing to drive it all to my house sold me for sure. Yes! For FREE? I will take all your trashy pieces, thank you!
I’ve included a few affiliate links so you can find the products I love.
This cabinet was pretty darned cool though.
I mean, it IS ugly, but also kind of retro, and I set out to make it functional again!
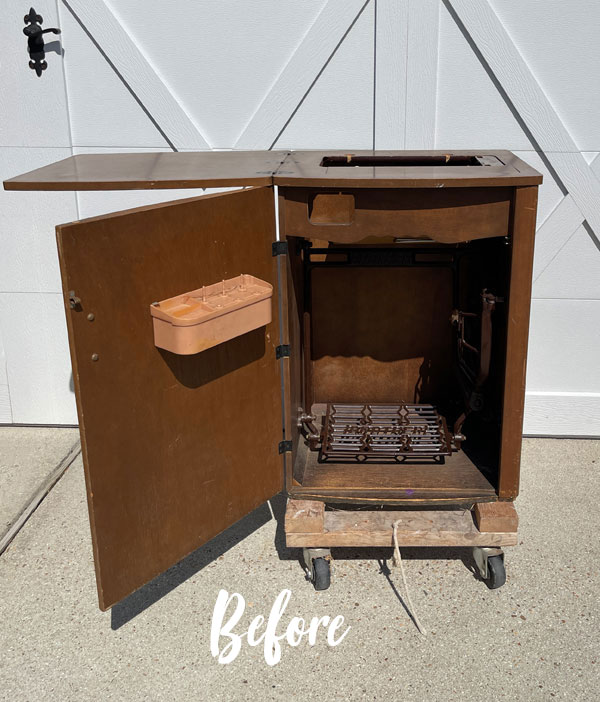
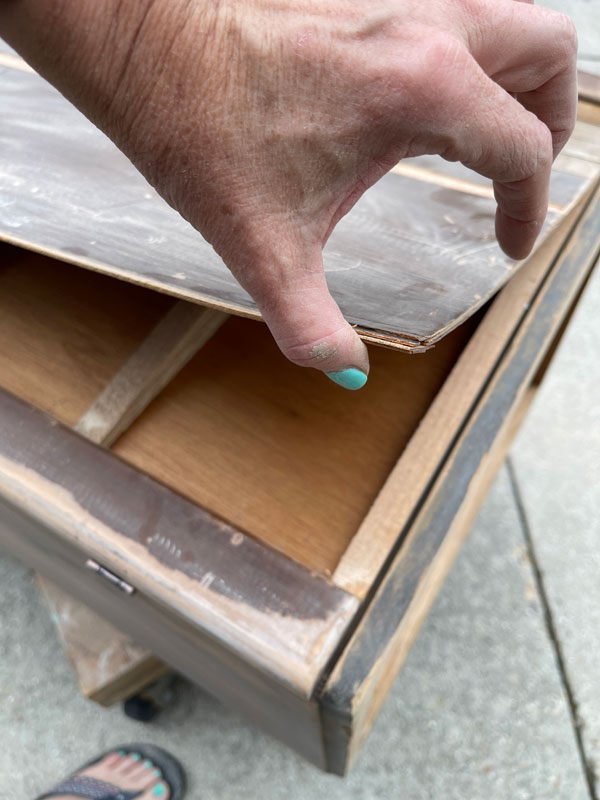
Like most sewing machine cabinets, the top opened up and here is how the inside looked:
Remove the innards
There was no machine, so saving all those parts didn’t make sense, so I started by removing them with a screwdriver…
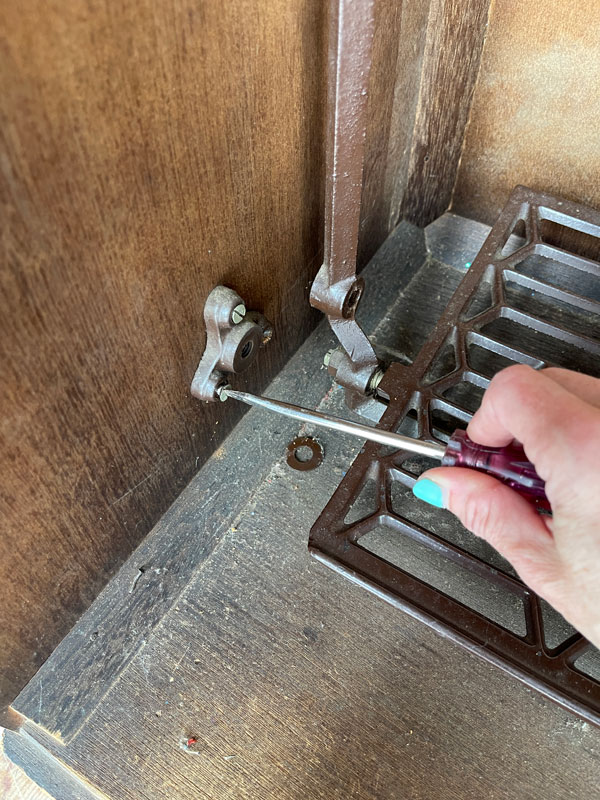
A bunch of screws later and this was what I was left with:

I wasn’t able to remove that funky piece across the top, but I was left with a pretty nice sized cabinet!
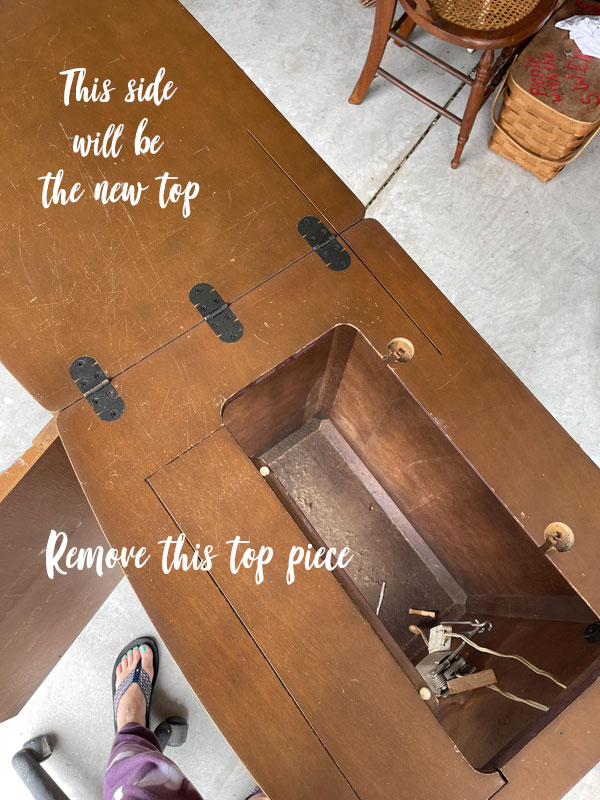
The tops of these cabinets come with two pieces, one that has a hole for the machine and a solid piece to work on.
I removed them both and the solid one will become my new top:
Clean
Once I had that part done, it was time for a good cleaning! I started with my shop vac to remove decades of dust that was below the treadle part of the machine.
Then, I mixed a TBSP of White Lightning into a half gallon of warm water:
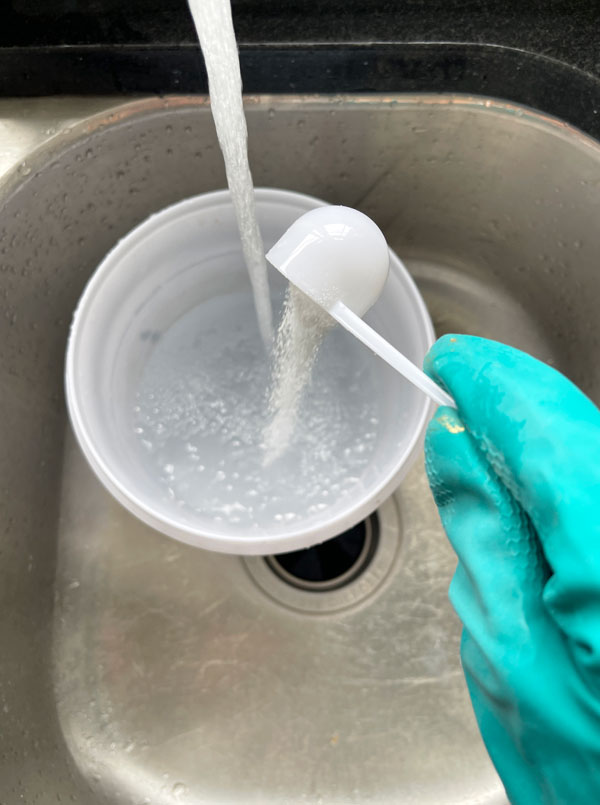
This is my go-to cleaner for prepping furniture for paint.
I cleaned this cabinet inside and out, using a terry cloth applicator pad (they come two to a pack), which is perfect for this step!
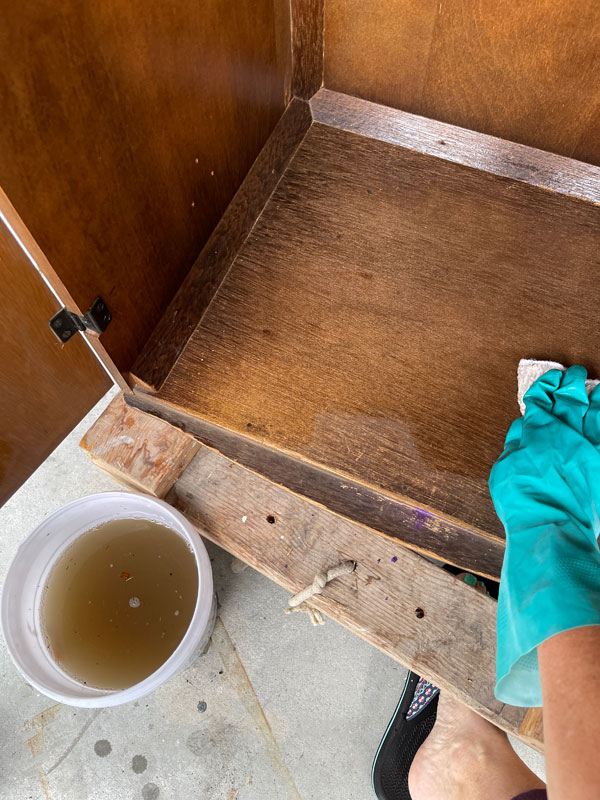
I like to go back and wipe everything down once more with clean water to rinse away any remaining dirt or residue.
This thing actually wasn’t super dirty!
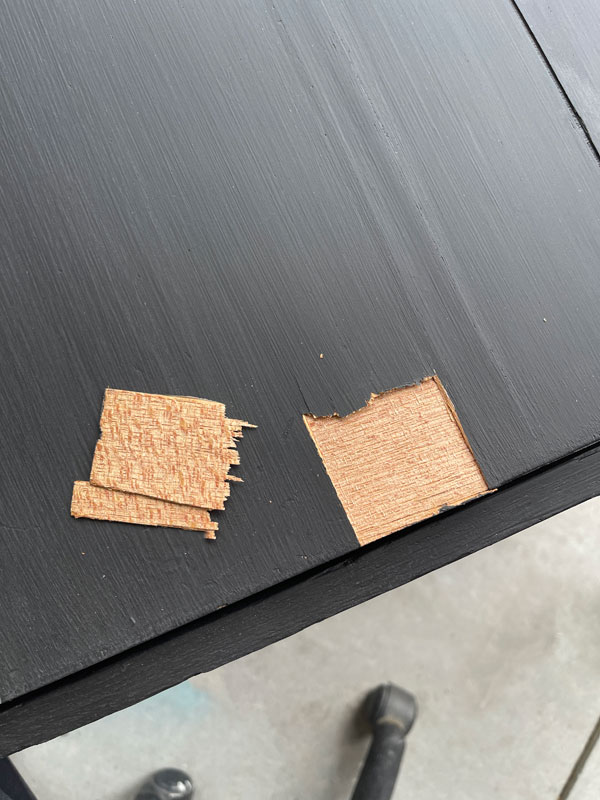
Fill in missing veneer
When it comes to missing veneer, nine times out of ten, I will do the work to remove it if it is in such poor condition. However, for this piece, I decided instead to remove what was easily coming away and then fill it in with Dixie Mud.
I let it dry for several hours so it was good and dry and then sanded it smooth with my Ryobi Cat Sander using 220 grit sandpaper:
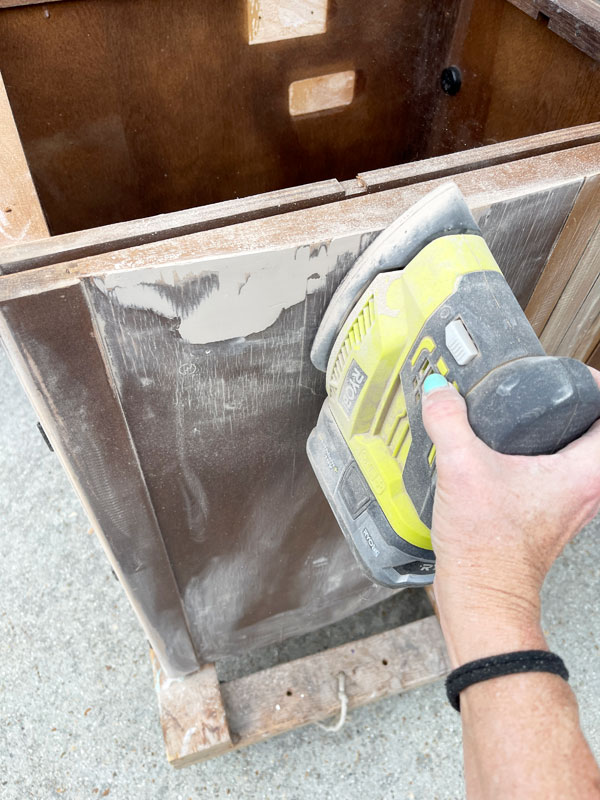
I have the cordless version that uses their multiuse batteries, but they make a corded version too that is a bit less.
Several other smaller knicks and scratches were filled and sanded as well and I was finally ready to get to the fun part!
Disaster strikes
I had it all filled and ready to go when I realized that there was a small area of veneer across the top that was separating. I decided I would just pull away what was not adhered well, thinking that it would be a small piece, and then I would just fill in that small area.
UM NOPE!!
I sure did pull an entire strip of veneer away from the dead center of this cabinet door, top to bottom!
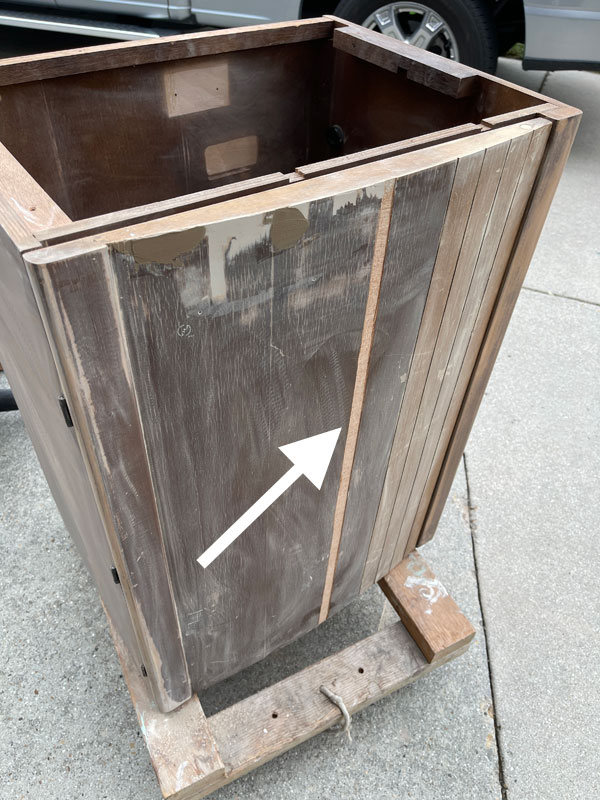
NOOOOO!
So then, I decided that I should have just removed the veneer to begin with. I laid it on it’s back so I could remove all of the veneer.
Nope!!
This door was actually HOLLOW! The only wood on the front was a super thin layer…
Can you believe that? Had I removed that veneer, I would have been removing half the thickness.
So, I glued that back down to secure it…
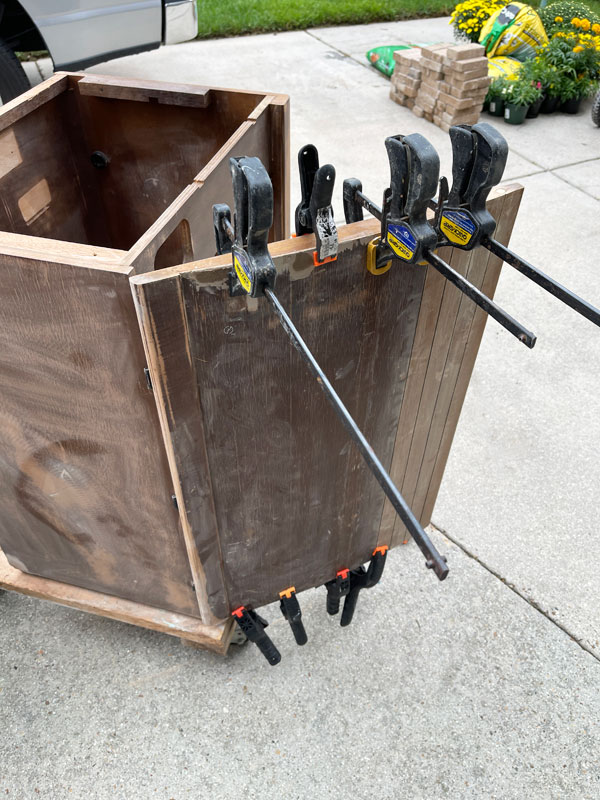
And I had no choice but to reattach the strip I pulled off with Wood Glue and patch it…
Multiple bad words may have been used in the makeover of this cabinet.
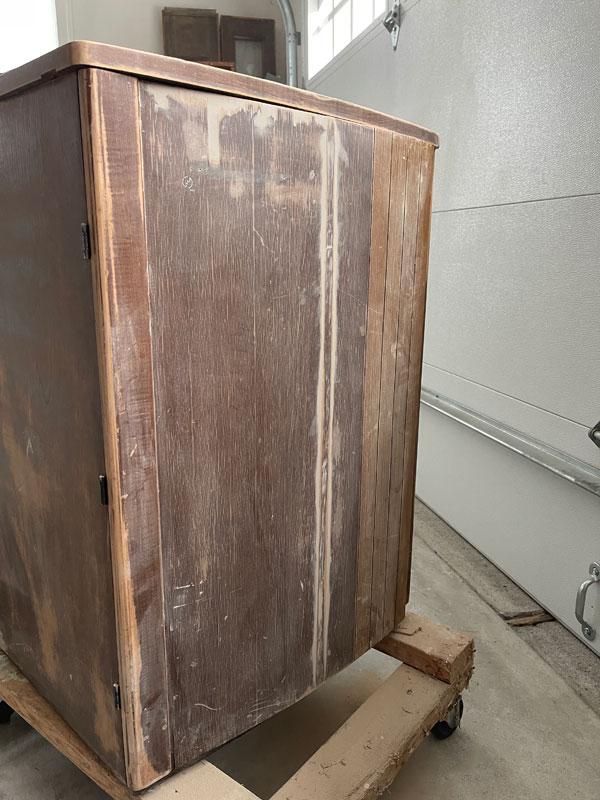
There is really no way to make that patched piece so smooth that it wouldn’t be noticeable through a layer of paint, so I had to scrap my original plan and color and go in a whole new direction. The drama wasn’t over though. Stay tuned!
Paint
I decided to go with the most forgiving color when it comes to imperfections, Dixie Belle’s Caviar, which I applied with my mini angle brush:
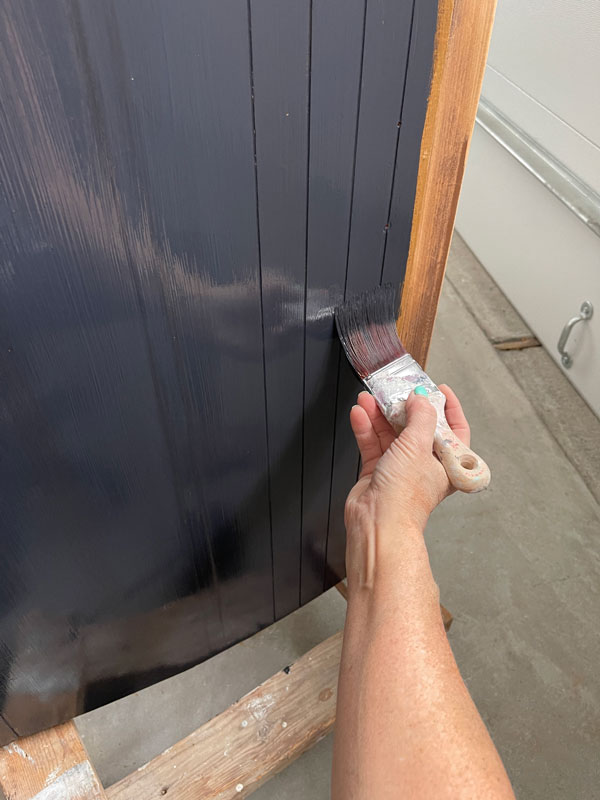
You can see how noticeable my patch job was down the center there.
I gave the cabinet two coats of paint and let it dry.
Then it was time to paint the inside, and to do that I laid it on its back to make it easier and left it to dry.
More disaster ensues
The door ended up closed and because the handle had been removed, I went to open the door by prying it up from the bottom and this happened:
More bad words.
I had to glue that piece back and add more Mud to fill.
Sand
Finally, I sanded everything smooth with a sanding sponge.
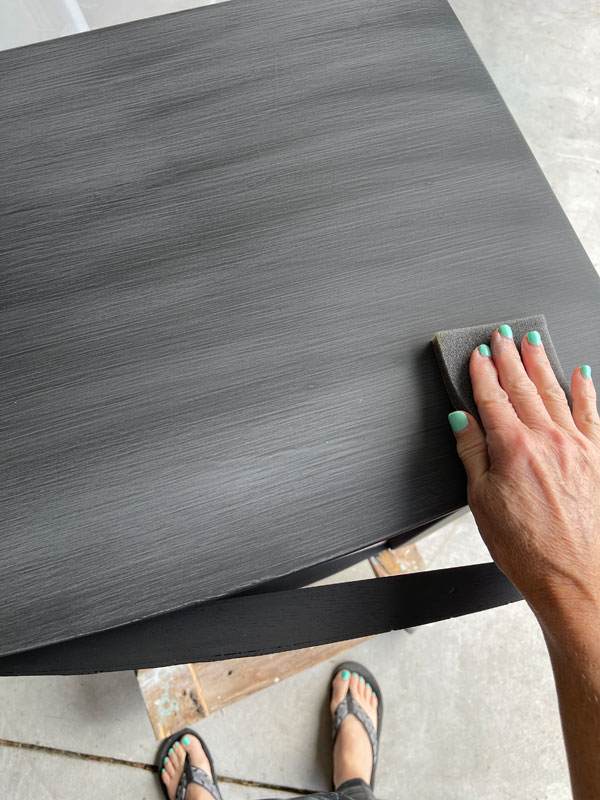
After wiping away any dust with a clean cloth, it was time for Operation Camouflage.
Operation Camouflage
What better way to hide the patch job down the center and on the bottom than with a transfer?
But it had to extend from the top all the way down to the bottom, so it had to be big.
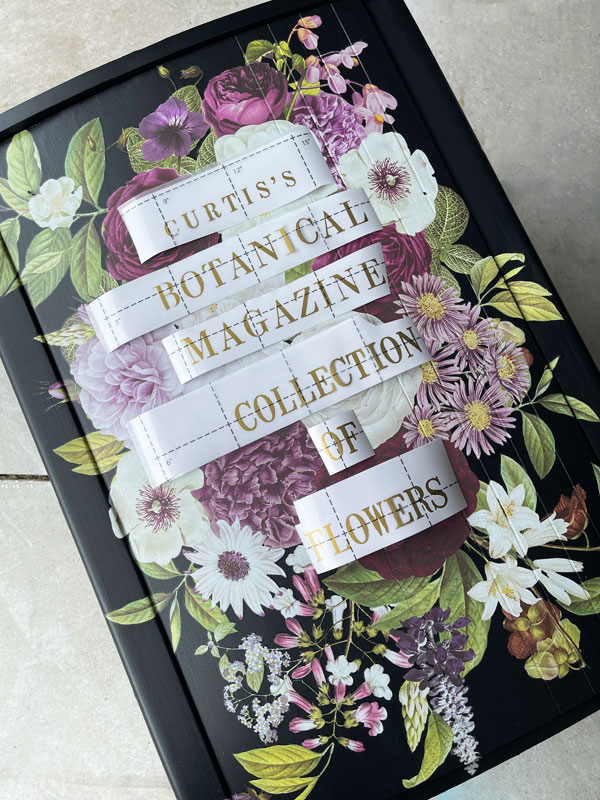
I found a transfer that would work!
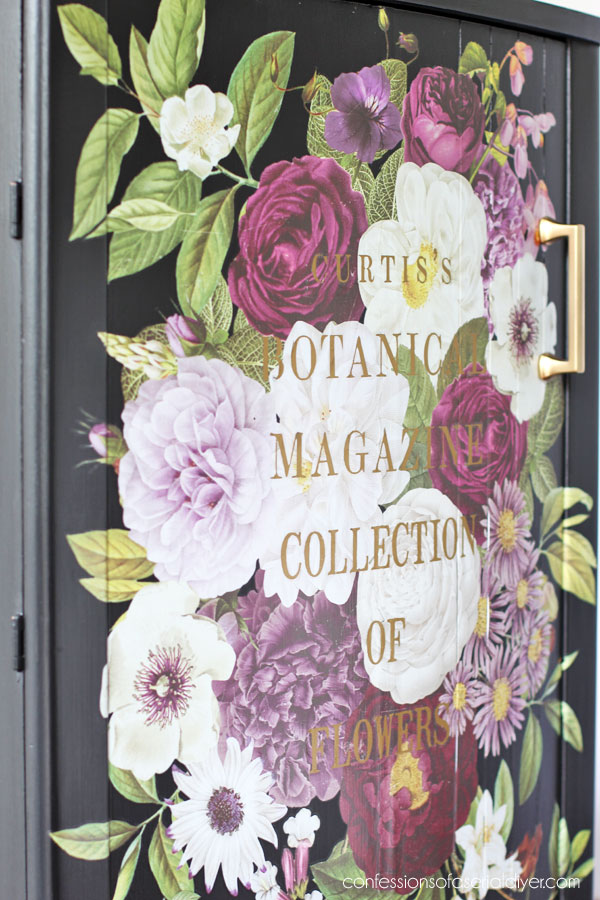
This is a newer transfer called Meet Me in the Garden:

Would it have been my first choice for this piece? No.
Am I going to try like crazy to make it work? YES! I have to lol.
Let’s go!
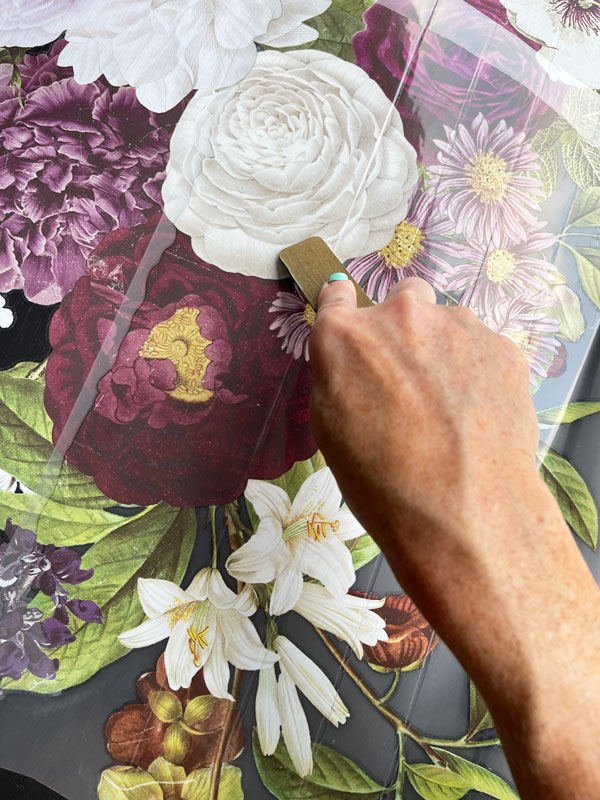
Transfers can leave a slight halo effect that shows up more on darker pieces, but using a finishing pad on it will help to diminish that…
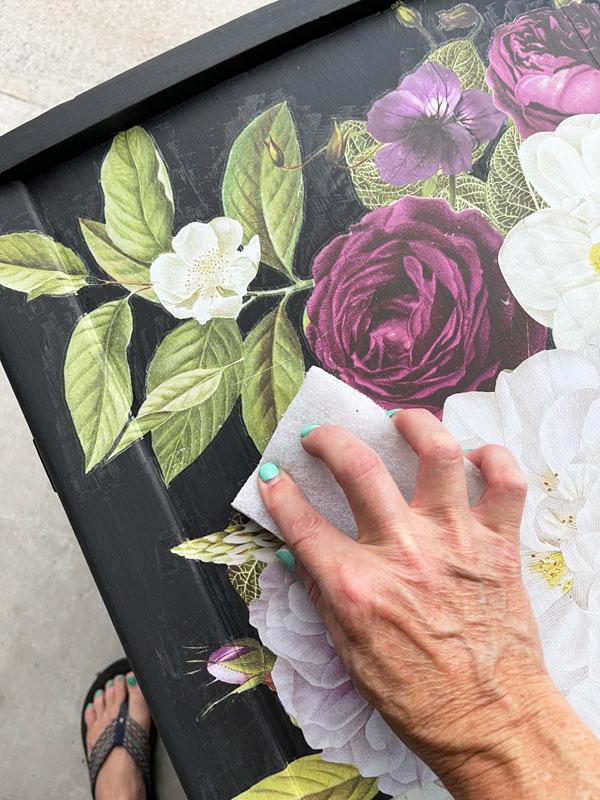
Sealing will take some of that away also. And can you see the marks left in the paint finish from the burnishing tool? Sealing it will make those marks disappear also!
After applying this large transfer, it seemed like it needed something else.
I ended up pulling this Flower Collector transfer out and using it also:

I chose to add these pieces:
Seal
Next, I needed to seal this piece to protect it.
To do that, I used Clear Coat in the satin finish. I applied it as is on the front, two coats, using the blue sponge, and then I mixed in a drop or two of Caviar paint:
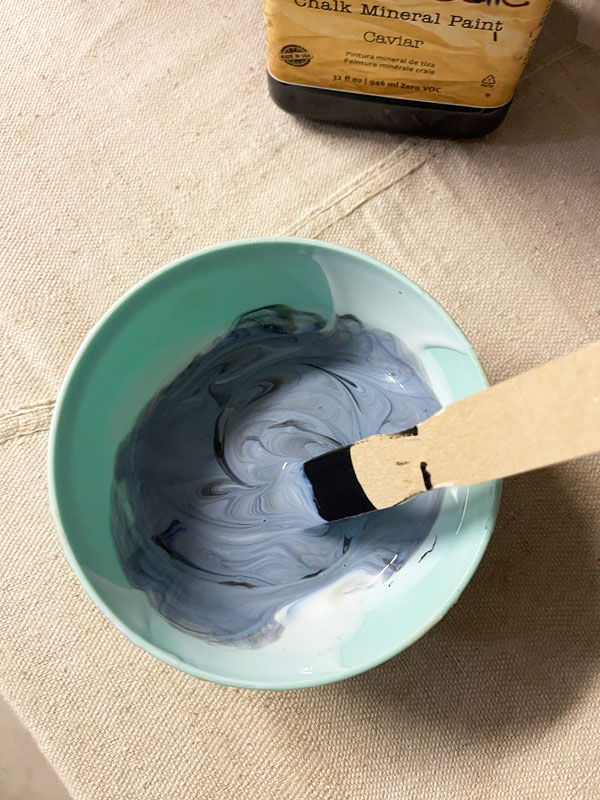
I actually just dipped the stir stick in my paint and then into the clear coat, but this will help to minimize the “ghosting” effect you get when you run your finger across dark painted pieces.
The rest that was solid black was sealed with this mix, two coats.
I have sealed over transfers with tinted sealer before without any issues, but this one had a lot of white in and I did not need anything else to go wrong lol!
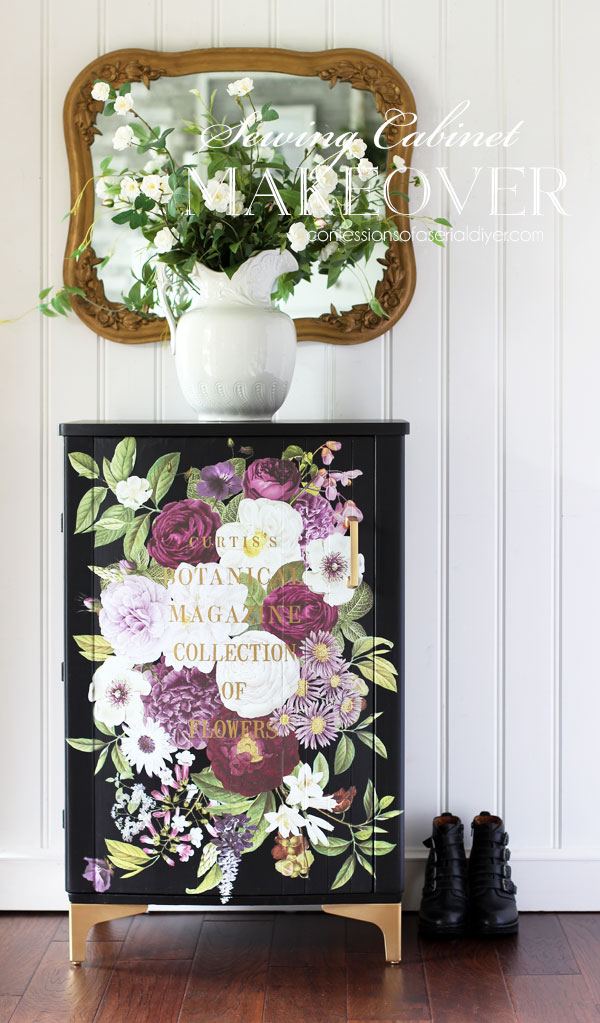
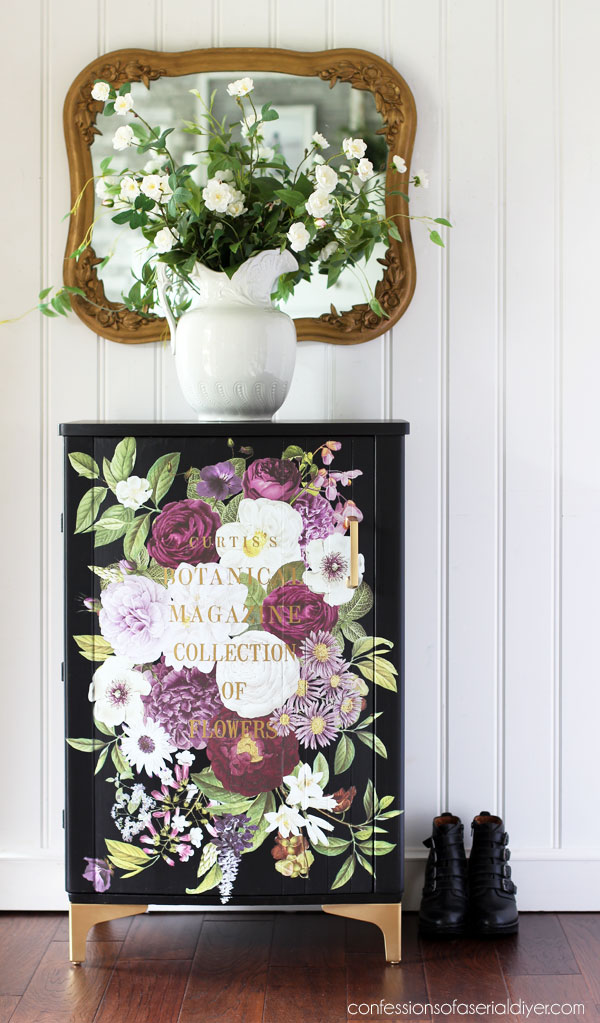
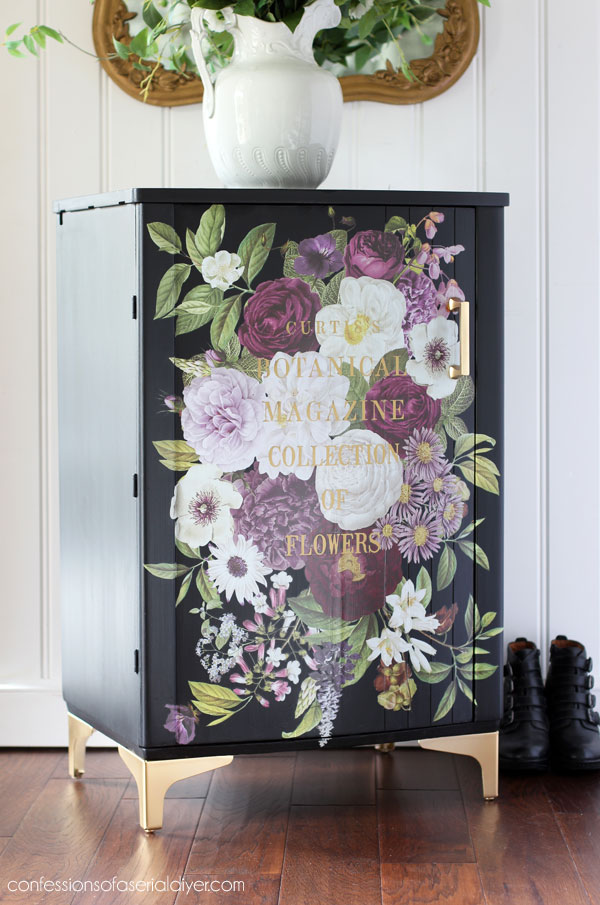
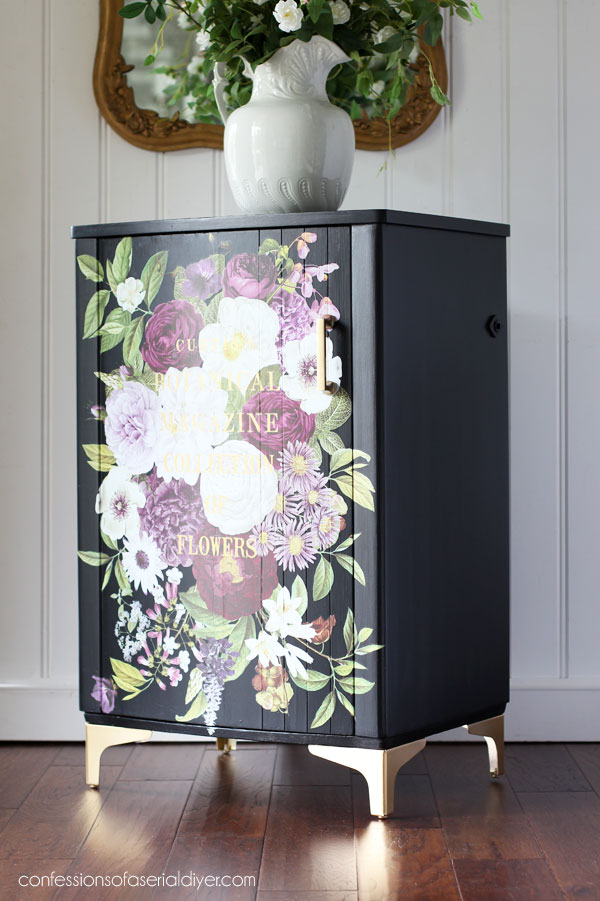
Vintage Brother Sewing Machine Cabinet Makeover: The After
Let’s see if I was able to save this one!
Yes? No? Maybe??
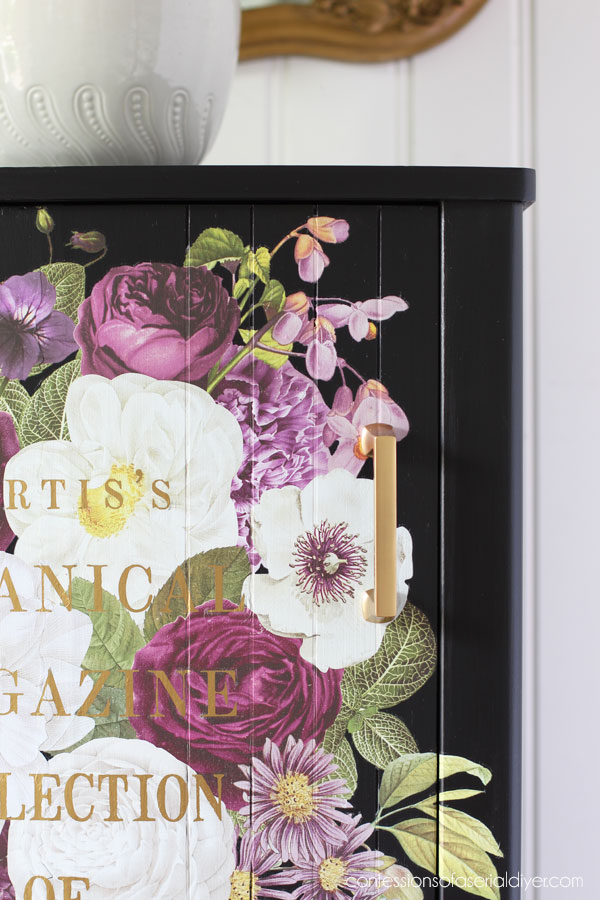
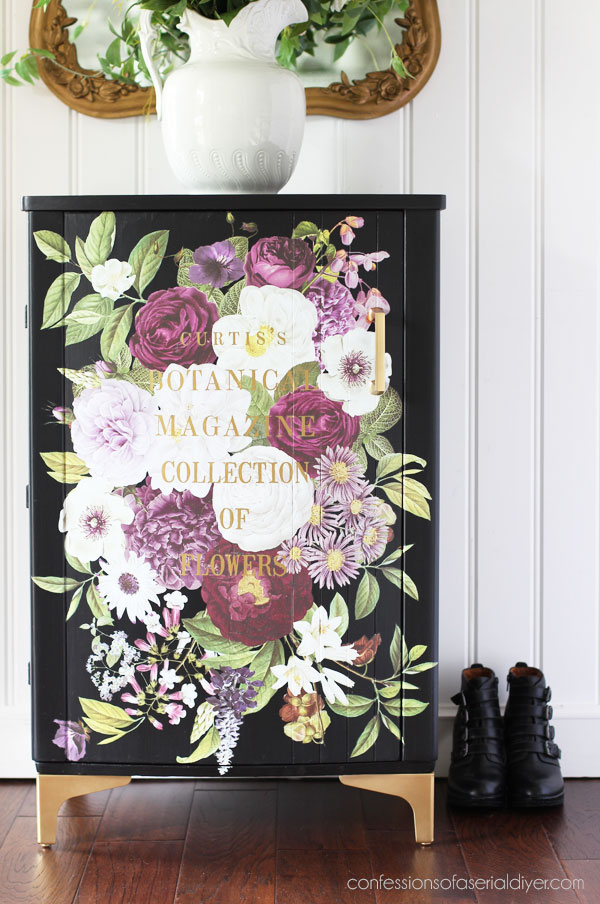
I would not have originally chosen this transfer for this piece, but I am kind of loving it, especially against the black!
I was very pleasantly surprised that the white of the florals were still nice and bright over the dark paint color.
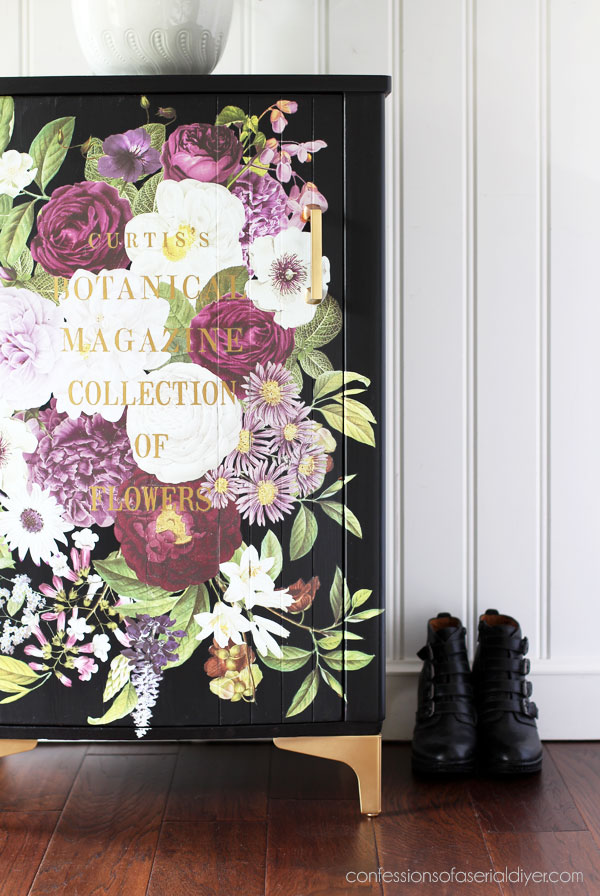
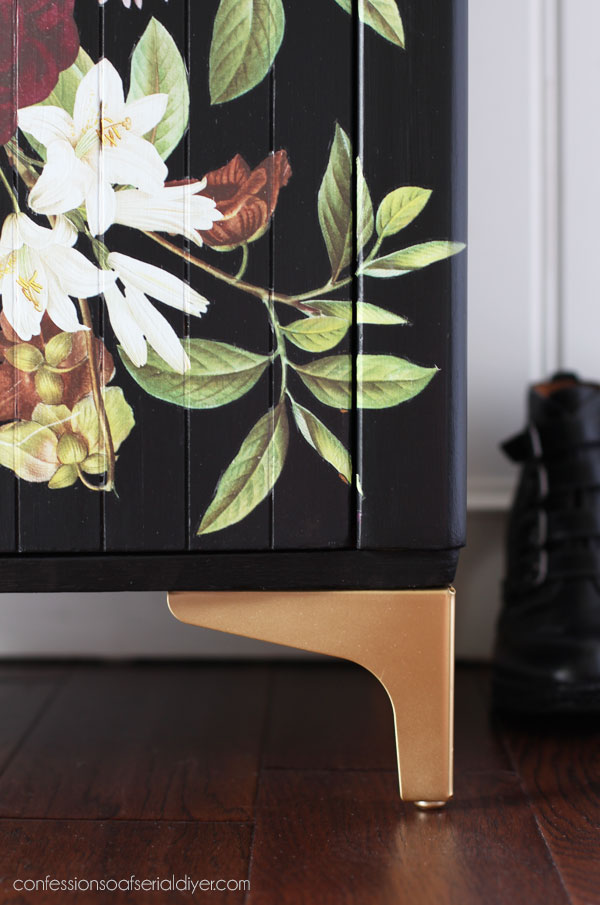
And what do you think about the feet??
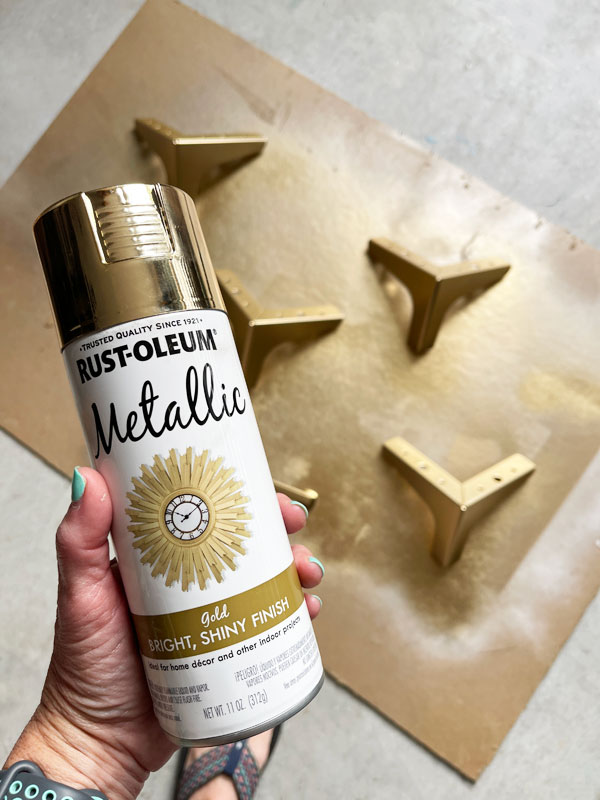
I purchased a couple of options on Amazon but these won out and were very reasonably priced. You can find them HERE.
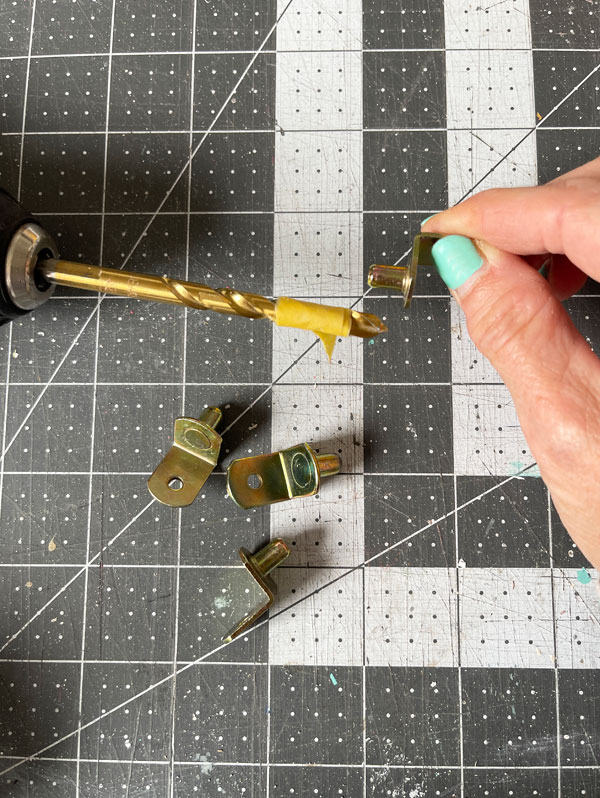
They were a bit on the shiny side, so I did give them a spray of Rustoleum Metallic Gold spray paint:
Then I just screwed them right into the bottom:
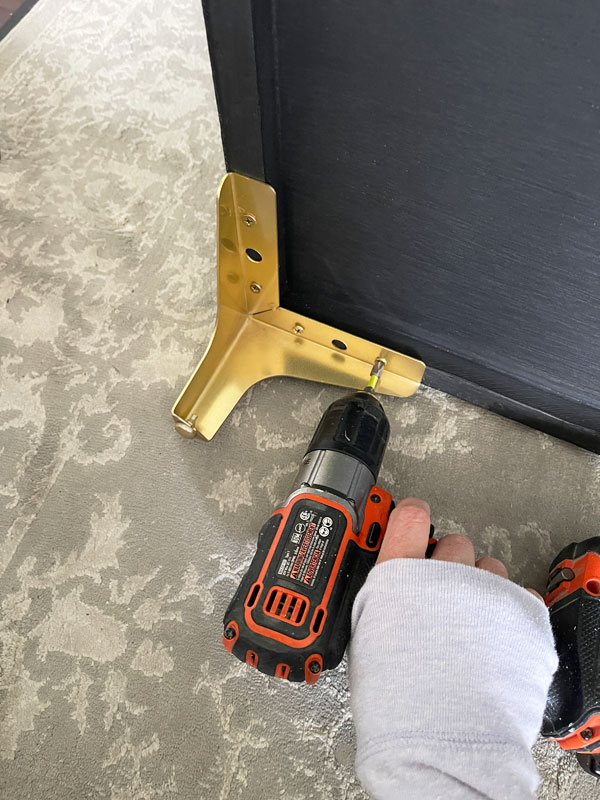
So easy! (And this petite drill is my favorite!)
I picked up this pull at the Home Depot and gave it a quick spray also:
Here’s a bit of side view, and with the light, you can see where the top had the notches cut out for the hinges, but the black paint camouflages them more in person:
They also tell some of the story of this piece!
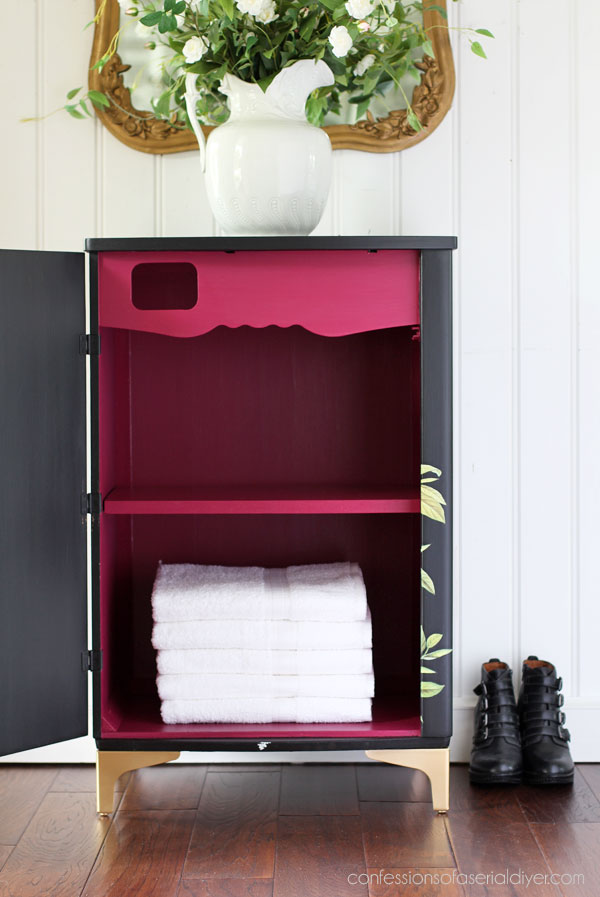
The Inside
And what did I do with the inside?
I chose this gorgeous Plum Crazy:
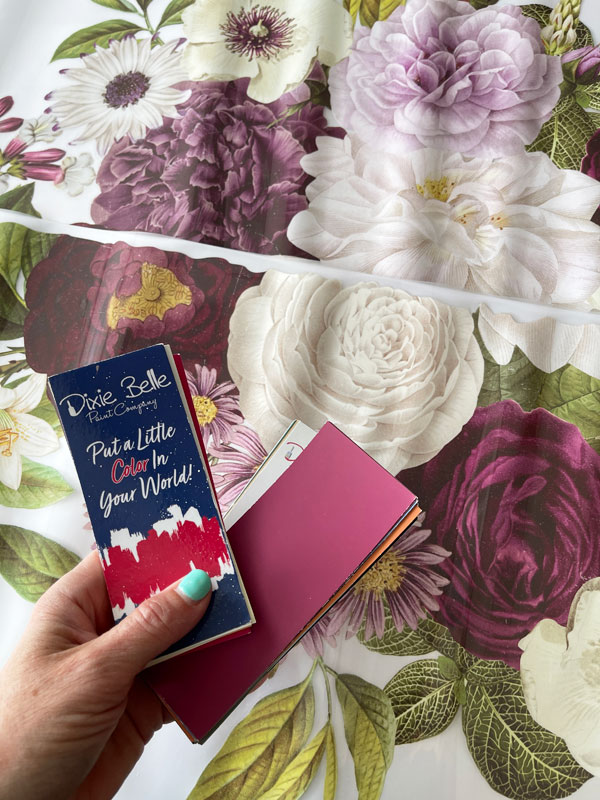
It’s so vibrant!
For the shelf, I had to make a trip to the Home Depot. I had one of the guys there cut it to size for me to save me some time.
Then I sanded all the raw edges smooth before painting in two coats of Plum Crazy. The shelf and the entire inside were sealed with Gator Hide since it might take some abuse.
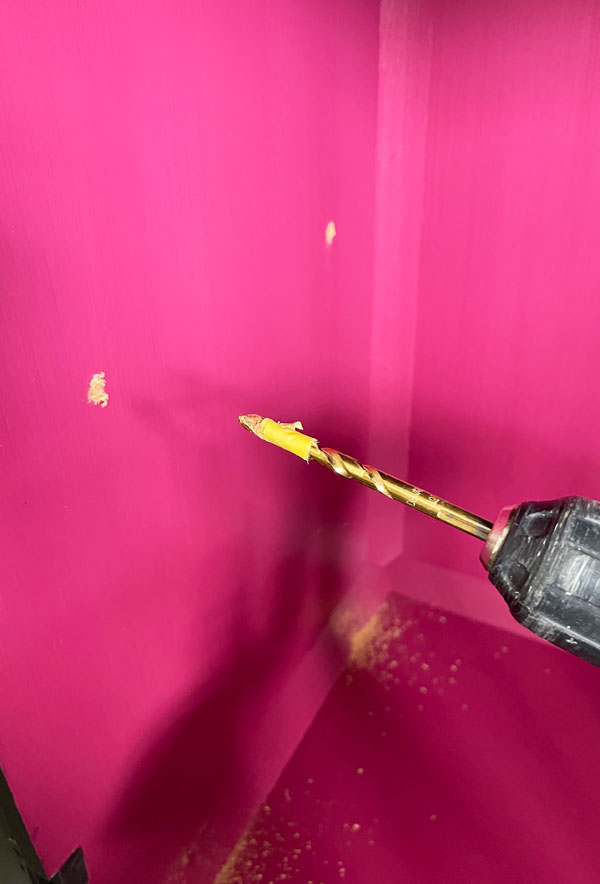
I used these shelf support thingys that I added by drilling four holes to support them…
As you can see above, I taped off my drill bit, so I would know how deep to drill without going all the way through.
I did NOT need another disaster so close to the finish!
Then, I just plugged them into the holes. There are holes in the shelf supports where you can screw them right into the underside of the shelf as well for more sturdy support.
Here’s the inside naked…
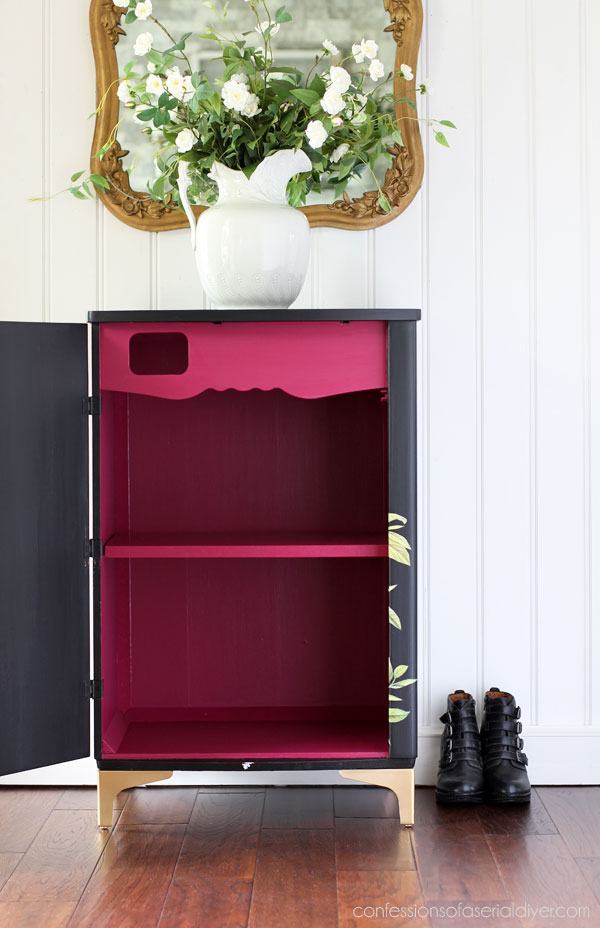
And I don’t mind the funky piece across the top at all.
You can also see the hole where the plug came out on the opposite side in this view:
Again, I left it to tell the story.
And I’m glad I added the gold letters. They help tie in the legs and the pull…
This makeover sure did have its moments, but it now has a chance to function for many more years to come!
Don’t forget to check out what my talented friends have for you today as well!
I get to cross another project off this list!!
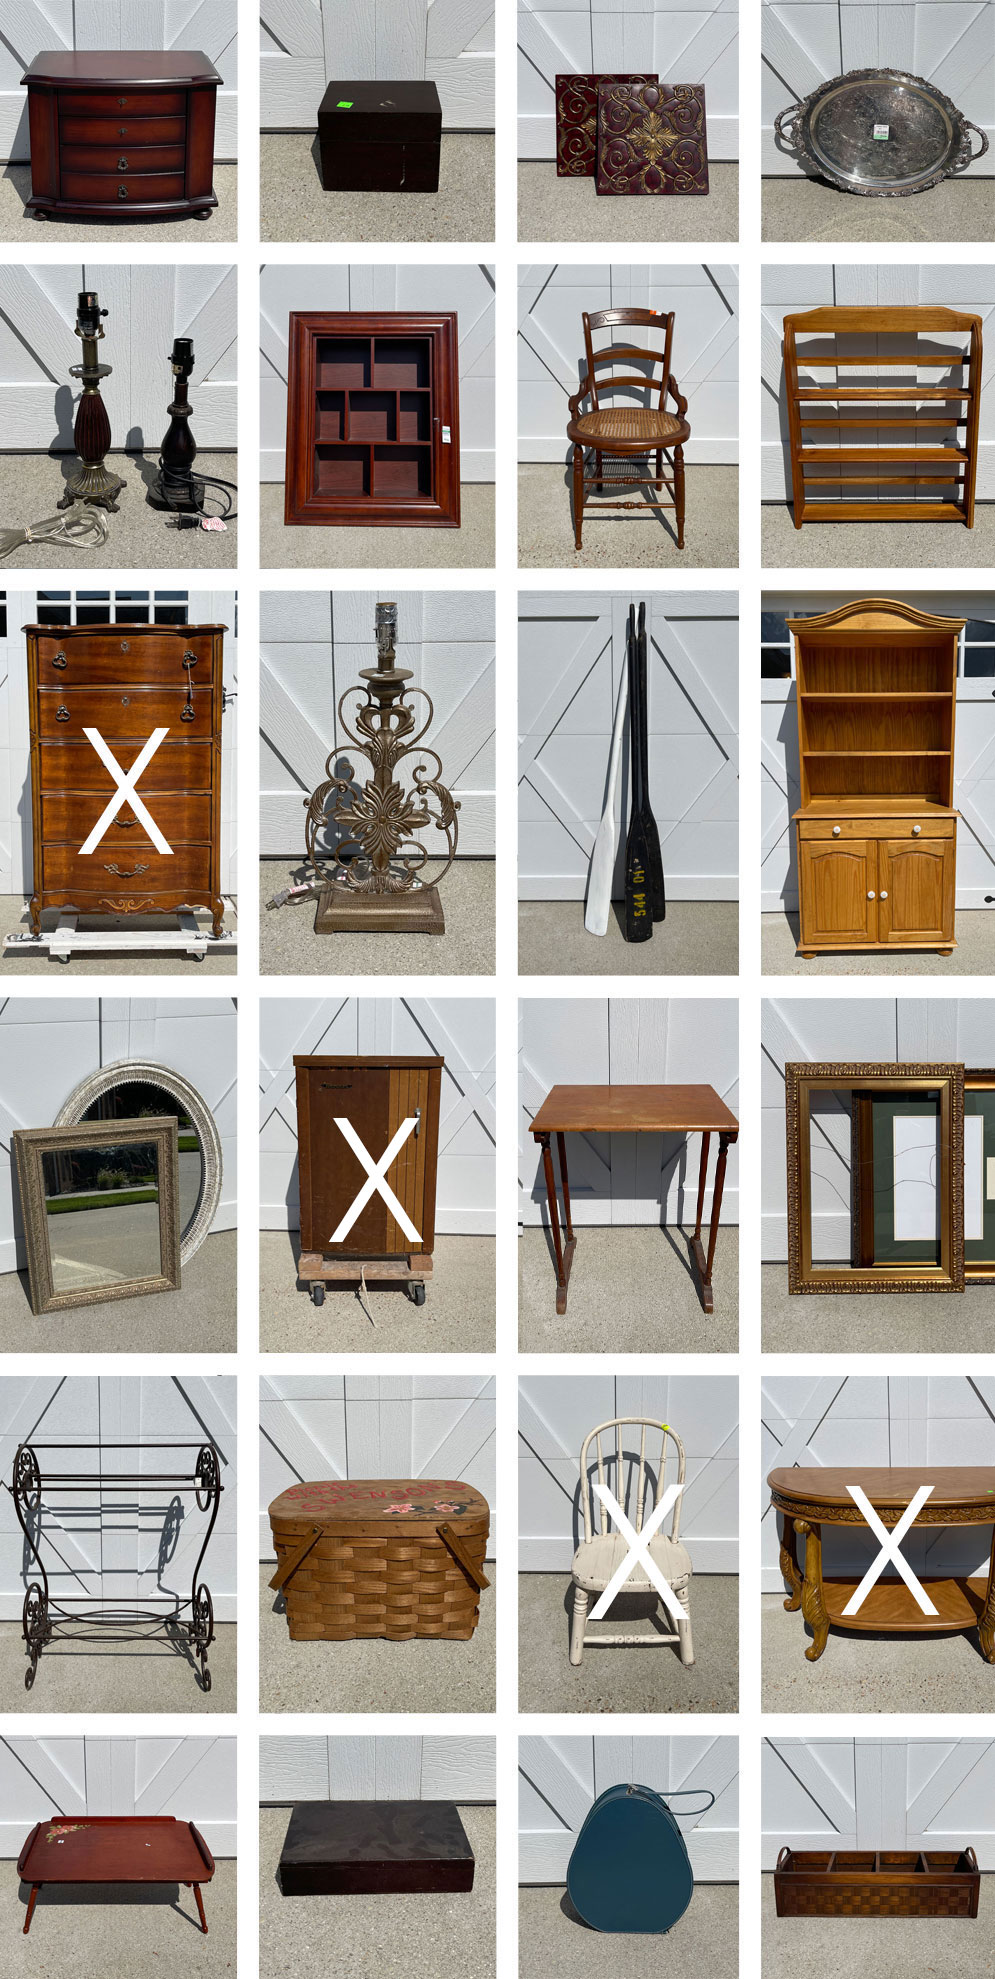
See what I’ve completed so far below:
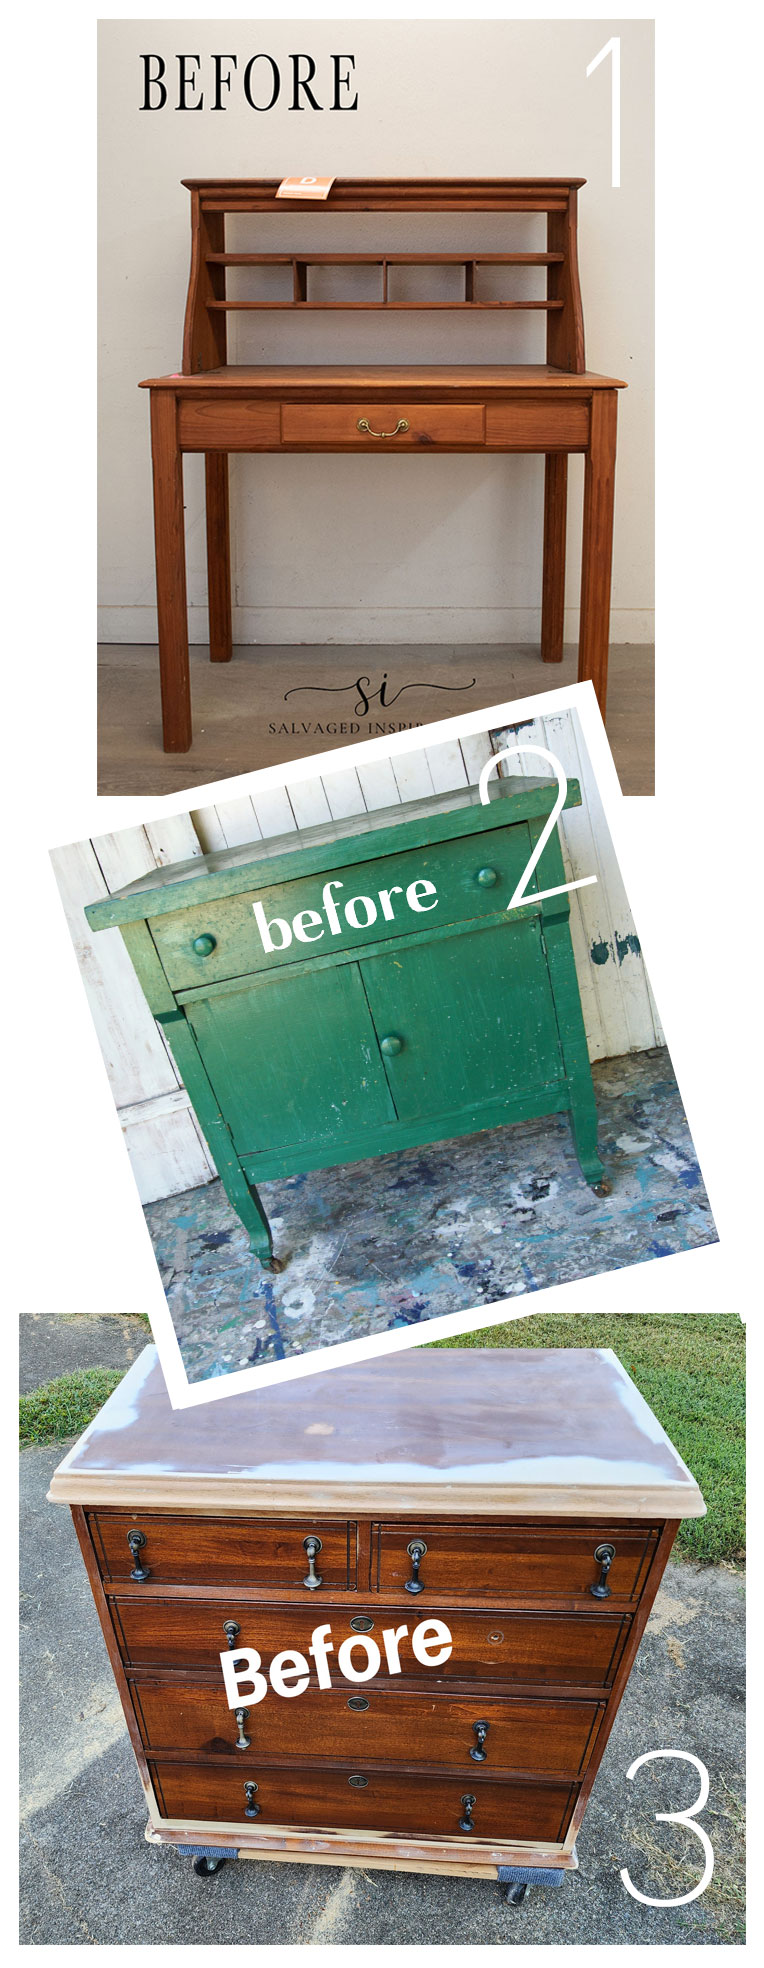
Child’s Chair Makeover
Painted Console Table
French Provincial Dresser Makeover
I’ve now got five pieces of furniture sitting in my house that need to go to my booth lol!
I’ll be back on Tuesday with a much more simple makeover, this metal quilt rack:
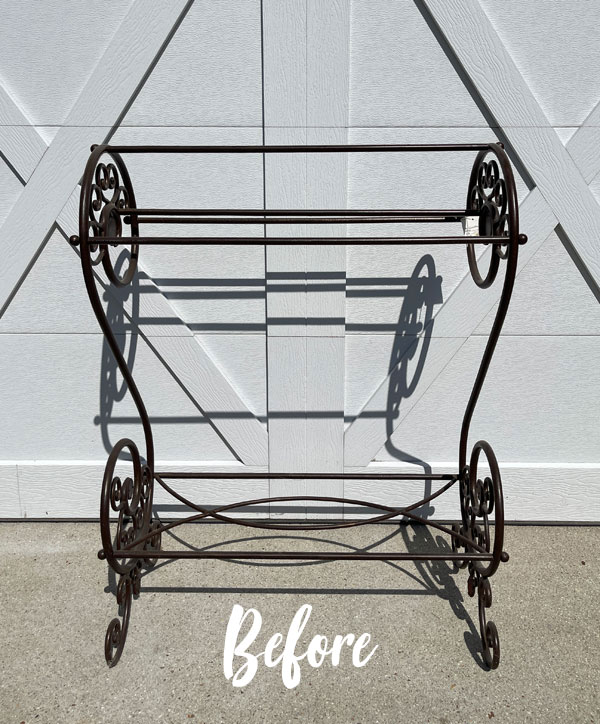
Update! See how paint worked its magic on this piece HERE now!
Have a lovely fall weekend!
XOXO,

Don’t Miss a Thing!
If you like what you see, there are several ways to follow along!
EMAIL * INSTAGRAM * FACEBOOK * PINTEREST


Get FREE SHIPPING on all orders over $50. No code needed at checkout! Orders under $50 always enjoy $8 flat rate shipping! Most orders ship same or next business day!


Mary Kaiser says
Wow, you saved it and it is so BEAUTIFUL now! See I think the curse words you used on it made it turn out better! This just goes to show that you are #1 in doing makeovers that turn out amazing even after all the trouble! It is so great now!
Christy says
Thank you, my friend! The curse words made all the difference ha ha! You are the best!! XOXO
Megan Slifka says
Curse words????
Christy says
The term I used in the post was “bad” words lol. If you saw each step of this makeover as I shared in the post…it was definitely warranted. 😀
Lisa C says
What a save! I am not one for lots of flowers, but this piece is beautiful. I especially appreciated seeing how you pull out of your mishaps – lots of lessons and ideas here.
Christy says
Thank you, Lisa! Not everything goes according to plan sometimes lol…glad I could share that it happens to me too! XOOX
Tracey A says
That is stunning! You are so talented!
Christy says
Aww thank you so much, Tracey! XOXO
Denise Zdziennicki says
Omgoodness, you weren’t kidding about this being a DOOZIE! I said “Ohhhh NOOOO” out loud when I saw that strip of veneer come off and the door was hollow…lol. This is a remarkable save my friend – IT’S GORGEOUS! Pinned! XOXO
Christy says
I told y’all to pray for me ha ha! When I pulled at that strip, I just kept going all the way because I just resigned my self to the fact that I would have to remove the veneer…but then I couldn’t. I wanted to toss this one for sure and I know you totally get it after seeing some of the doozie’s you’ve resurrected lol! Thank you, my friend!! XOXO
Janice Holt says
Wow; you do have patience. So glad you do because the cabinet turned out just lovely. The color inside is perfect with the transfer. Have a great week-end.
Christy says
Thank you so much, Janice! I’m glad I stuck with it! XOXO
Lane Harkey says
Christy, oh what patience and imagination you do have. After all that, did you keep it? Such a beauty. By the way…I’ve never seen a pedal machine like that one. Very interesting also. Thanks for another great transformation.
Christy says
I appreciate that, Lane, thank you! I will not be keeping this one. And I had never seen a cabinet/machine like this one either! XOXO
Regina says
This is just gorgeous!! I love seeing the pieces that are not just scuffed up white. This one gave me inspiration for a piece that I have had for a long time but wasn’t sure what to do with it, now I do!! Thanks!
Christy says
Thank you, Regina! Yay…I’m so glad I could offer some inspiration for your piece! XOXO
Debbie says
I am so impressed how you kept going thru all the issues. This is now such a beautiful and gorgeous piece!! Well done!! You always inspire me!
Christy says
Thank you so much, Debbie! I really appreciate that! It was the cursing that kept me going…that definitely helped lol! XOXO
Sandra r mills says
I’ve been doing this type of thing about fifteen years…and I find that “free”. …is not always free😃
Christy says
That is the truth!! Ha ha! XOXO
Jackie C says
What a challenge! It turned out beautiful!
Christy says
Thank you, Jackie! I had about five easy pieces before it, so it was time ha ha! XOXO
Lorrie Stephens says
Wow 🤩 very impressive!
Looks fabulous and I admire your skill and determination even though you had multiple problems with this piece.
I hope you can make a tidy profit with all the time and aggravation you have put in 😉
Thanks for sharing 💕
Christy says
Aww thank you, Lorrie! Yes, me too!! XOXO
Suzanne Borman says
This is the trashiest to treasuriest piece I’ve ever seen! The “after” is absolutely stunning! If you’ve ever had a doubt about your talents, this, above all else, should lay those to rest!
AMAZINGLY BEAUTIFUL!!!!
Christy says
Oh wow I love and appreciate this SO much, Suzanne!! Thank you! I had to change my whole plan, but I’m so thrilled that it worked in the end! XOXO
Nana Diana says
Well, for all the trouble and all the work—-it was worth it. Absolutely adorable and the big transfer is a smasher. Great job…and it is blessed with holy words now-what more could anyone ask for?! xo Diana
Christy says
Bahahah! It is blessed with ALL the holy words lol! Thank you, Diana, for the kind words and for the laugh!! XOXO
Rosemary Haley says
this is absolutely my favorite piece of yours so far !! I sincerely wish that I lived closer to you so that I could visit your booth !!
Christy says
Oh I love that so much, Rosemary! I am so glad you like it!! I wish you were closer too! XOXO
Lorri says
This Sewing Machine Cabinet is going to live its best life because of you. It is beautiful..love the transfer and the gold lettering makes it!! Yes a few choice words were said but look what you designed!! A one of a kind…Someone is going to be very lucky to have this piece.😉
Christy says
Aww thank you so much, Lorri!! I am so happy I didn’t give up on it! XOXO
Anita S. says
The effort you put into that sewing cabinet was remarkable. You are to be commended for your effort! The cabinet is not my taste, but I can see someone else failing in love with it and excited to add it to their home. You did a great job!
Christy says
Thank you so much, Anita! I hope someone who loves it finds it! XOXO
Beth says
Great makeover! Good thing it was free, huh?
Christy says
Thank you, Beth! Absolutely! XOXO
Berni says
Wow! I liked it with the transfers, then I loved it with the feet, but then I went ‘plum crazy’ for the interior! LOL, that one looked like quite a challenge but as usual you did a great job!
Christy says
I’m so glad you like it, Berni! Thank you! It sure is a long way from where it started lol! XOXO
Nisa says
Beautiful!
I love all of your work, and nice to see a piece completely different than what you usually showcase.
Christy says
Thank you, Nisa! I’m so glad you enjoyed this one! XOXO
Celia says
Are you sure you weren’t writing about my episodes refinishing furniture! This was certainly an interesting piece to start but the more I look at it the more I like it! Good job!
Christy says
Ha ha! It’s nice to know we’ve all been there, right? Thank you so much, Celia! XOXO
Michele M. says
Oh my word, Christy! What a story!! You are much more patient and brave than I, ma’am. I’d have scrapped that even before the expletives were uttered. Well. you did a fabulous job with it – but not sure it was worth all your hard work, gracious me! But it is truly beautiful now!!!
Christy says
Thank you, Michele! This one sure was a troublemaker, but I’m glad I kept going lol! Trust me, I was tempted to scrap it! XOXO
Deb says
First off let me say I loved the interior color you picked for this piece. It is a pleasant surprise when opening the door.
Also let me say that many people ….myself included would have given up when that bottom piece of veneer popped off. I would have taken that as a sign that it wasn’t meant to be. But you have the patience and ability to see into the future and know when a piece can still be salvaged. If that cabinet could only tell it’s stories.
Now it would say….I am all glammed up and ready to go live my best life.
Great job Christy!!
Christy says
Aww thank you, Deb!! I appreciate that so much! I really hated to give up on this one, although I was tempted ha ha! XOXO
Allita says
Christy, this piece is flat.out.gorgeous. You did a beautiful job, truly. Those feet are the perfect addition. I can see someone loving this piece in their home for years to come.
Christy says
I appreciate that so much, Allita! Thank you! I’m so glad I was able to bring it back from the brink of death lol. XOXO
susan says
WOW! Just WOW! 💕💕
Christy says
Thank you, Susan! XOXO
Karen C. says
Wow! That was a true trash to treasure! Your patience and creativity turned this into a stunning piece. It’s lovely!!
Christy says
Thank you so much, Karen! This might be the most trashy piece yet ha ha! XOXO
Mary Smart says
Wow Christy! Talk about making a Silk Purse out of Sows ear. This was awesome and you did have your hands full with this one. I love the gold words over the floral transfer.
Christy says
I’m so glad you like it, Mary, thank you! XOXO
Charlene Godby says
Christy, I heard some cursing all the way to Kentucky! But how beautiful did this turn out! You make ugly into beauty everytime! Love this.
Christy says
Ha ha ha! You might have! Thank you so much, Charlene! XOXO
Terri Patterson says
I wish I had the room and the money. That piece is gorgeous!!! I love all your work and really enjoy reading your blog.
Christy says
I love that you love it, Terri! After all that work, that makes me so happy! XOXO
Cyndi says
I love this! That is one of my favorite transfers, so I was so glad to see it being used here, and the gold-lettered transfer over it is perfect. Also, I’m with you on the remnants of it being a sewing machine cabinet still there. Even if you could remove them, I wouldn’t do it!
P.S. This reminds me of a sign I saw on Pinterest. It said, “If they only knew how much swearing goes into their handmade gifts.” Ha ha! 🙂
Christy says
Thank you, Cyndi! I am so pleased with how this transfer worked too. And yes…so nice to be able to keep some of the history. That sign is hilarious! XOXO
Sue says
Sewing cabinet/Drama: your final product was amazing! I love the colors you chose, someone will find this piece very useful and extremely charming!
Christy says
Thank you so much, Sue! I hope so! XOXO
Sandra W Magle says
You know it is always the ‘tough’ ones that teach you the most…you had to improvise and disguise. Great use of creativity and color, I don’t know if I would have come up with such great solutions. Very interesting and I love the result! Sandi
Christy says
That is so true, Sandi! This one kind of lead me where to go. I’m so glad you like it, thank you! XOXO
Charleen says
It is beautiful!!What a night to day experience. I imagine there were a few choice words during the process. Girl, you process a magic and gifted touch
Christy says
Aww thank you so much, Charleen! Yes, bad words were said for sure ha ha! XOXO
Beth says
I’m glad you persevered—it turned out beautifully! You are always an inspiration!
Christy says
I appreciate that so much, Beth, thank you!! XOXO
MrsSW says
Wow, Christy, you have a lot of time, money and effort invested in that piece! It turned out great – as your projects do.
I know you have explained transfers before but this time something “clicked” for me (yes, yes, I know – it’s about time).
Sheila
Christy says
Ha ha I’m glad you enjoyed this one, Sheila! Thank you! It was very satisfying bringing this one back! XOXO
Stacey says
Ok, I confess, I couldn’t help laughing out loud when reading about when you were working on this baby, but when I saw the finished product… WOW, just. “WOW!!!”, girlfriend!! She turned out amazing!! I cannot believe that is the same cabinet!! You are something else, Christy!! Truly talented!🥰💖
Christy says
Ha ha I’m sure my neighbors could hear me on this one! Thank you so much, Stacey!! That means so much! XOXO
Sharon Haskovec says
I am continually amazed at what you are able to do with with pieces that may have ended up in a landfill! Beautiful little cabinet.
Christy says
I appreciate that so much, Sharon! Thank you! I’m so happy that this unique piece will get a new chance to be loved again! XOXO
Vicki Bray says
Bravo! (insert clapping) What a beautiful makeover! This was the piece I was most interested in seeing and you certainly did not disappoint! Great makeover as always!
Christy says
Thank you, Vicki!! I’m so glad you enjoyed the end result! XOXO
Liz Shivel says
Hi Christy, this certainly was a project with a dozen issues! It’s beautiful! You did an awesome job as always. The two transfers on the front look like they belong together & the black is lovely. The plum crazy is a “surprise” at first glance, but it’s lovely too! Great job!
Christy says
Thank you, Liz! This is no where near my original plan, but I had to roll with it ha ha! XOXO
Janet Filberth says
Christy,
As always, your sewing cabinet project turned out so pretty
Thanks for all your inspiration …. I always recommend your blog to everyone!! ( at least every diyer i meet) now, its time for you to have your own tv show!!!
Janet
Christy says
Aww thank you so much, Janet! My own show?? How cool would that be? But then they probably wouldn’t allow the cursing that got me through this one ha ha! XOXO
gail says
Christy!
What a mess! Veneer can be so problematic. I have covered the sides of furniture with a new piece of luan (underlayment plywood) to disguise the roughness.
I must say I LOVE the legs. I had to scroll back up to see the original piece to see if it had any legs.
Seeing all of your beautiful transfers, I finally had to dip my toes in and do my first large piece.
Pinning!
gail
Christy says
This one was crazy! I also considered adding strips of half dowels (flat on one side and rounded on the other), but time was running out and I didn’t have them on hand. Adding luan is a great idea too. I had two options for the legs and these won out…I think they rally made it. Thanks so much, Gail! And I’m so glad you finally tried a transfer…the piece you used it on turned out gorgeous and it was so perfect for it! XOXO
Joy says
Beautiful! I would never have imagined that this old cabinet could be made over to look so elegant!
Christy says
Thank you, Joy! Honestly, I has some doubts it would make it ha ha! XOXO
Hannah says
Boy, you really earned the success on this one. I’d have cried by the time the second mishap hit. Beautiful success-you are so skilled at tools and artistic too! Love the outcome. xoxo
Christy says
Aww thank you, Hannah! I’m glad I kept with it…the bad words kept the tears away lol! XOXO
Marcie Lovett says
No f-ing way, Christy! (to keep up with the theme 😉) If I hadn’t seen the play-by-play, I never would have believed that’s what you started with. That cabinet is pretty old, I have never seen one with a treadle before. (BTW, there is a market for replacement treadle parts). I’m guessing it’s Depression era, with the cheaper materials to make it more affordable. I was sure you’d cut out the scalloped bit with the hole at the top, but now that it’s painted, it’s pretty charming. The transfer is beautiful, excellent solution for the cosmetic issues. I liked the flowers by themselves, but adding the gold text let you bring out its glamorous side. You better charge a bazillion dollars for this one, given all the work you put in!
Christy says
Ha ha ha!! I just literally laughed out loud!! I tried so hard to find this same cabinet and machine or info about it and came up completely empty. I’d love to know when it was from since I’ve never seen one like it. Your guess is probably accurate. It’s worlds away from my original plan, but sometimes you just have to go with it lol! Thank you, Marcie!! XOXO
Josee says
What can I say, outstanding! Love the feet too.
Christy says
Thank you so much, Josee! XOXO
Jeanne says
Wow! When you posted the original, I thought there was no way to make it decent. It was UGLY! Thanks for inspiring me once again to never give up. This is one of my favs from pieces you’ve done. You should win a contest.
Christy says
Aww you are the sweetest, Jeanne! Thank you! It sure was an ugly one…challenge accepted ha ha! XOXO
Sue Verbaan says
Hi Christy,
Two words: determination and vision.
You have both in spades! I would love to see the new home of this rescued treasure.
I so admire the work of all you and yours DIY
friends.
Sue Verbaan
Christy says
I appreciate this so much, Sue, thank you!! I don’t usually get to see who buys my pieces, but I’d love to see where this one ends up too! XOXO
Lori says
You continue to amaze me, Christy! This piece is gorgeous! Not sure I would have had the patience for all that you had to go through.
Christy says
Aww thank you, Lori! I’m glad I stuck with it lol! XOXO
Rose Lefebvre says
I really like the way this came out but wish the words were not on it. Lovely.
Christy says
Thank you, Rose! I added the words to tie in the gold feet and pull, but it was pretty without it too! XOXO
Nancy says
Christy – that turned out AMAZING!
Christy says
Thanks so much, Nancy! XOXO
p says
OhOhOhMy. This was a journey for sure !!
You did a great job trudging through all the crazy obstacles.
I was wondering how you were going to attack this piece, and an attack it was !
I really like the dark rich paint. I’m not normally attracted to transfers, But… This turned out Stunning ! Such a cheery amazing statement piece.
I love it.
The inside color makes me happy.
The cursing clearly helped. eeeee
Christy says
Thank you, P! This ended up so far from my original plan…I guess it was telling me what it wanted. And the bad words helped for sure ha ha! XOXO
p says
p.s.
And I love the feet. 🙂
Kathy Owen says
Another labor of love and well worth it. A Beauty! I’m ordering some of those legs. Thanks, Kathy
Christy says
Thank you so much, my friend! Those legs made it for sure and they are super affordable too! XOXO
Caye Cooper says
You are one gifted girl! That near disaster turned out to a real swan for sure. Great job! No one would ever know there were multiple curse words said over this piece. I like the transfer very much also.
Thanks for your transparency and allowing us to know that all is never perfect no matter how long one has been at it. I’m proud of you! XXOO
Christy says
Aww thank you, Caye! Working with older pieces often presents challenges, but they are worth the effort…even if they have been cursed over lol. And yes…I’m glad to share that it happens to me too! XOXO
Cecilia says
Bold and stunning! I think I’d have chunked that door when those second pieces came off but you hung in there and really made this piece pretty. Not trashy anymore!
😊Cecilia
Christy says
You know, I never even considered removing the door altogether and just making it a little book case…not a bad idea! Thank you, Cecilia!! XOXO
Sharon L Austin says
OMG that is so RICH; I love it!! Is it just my imagination or have you been moving away from your beachy theme a lot more lately? Doesn’t matter what you do, it always turns out so awesome!
Christy says
Thank you, Sharon!! My original plan for this one was much more muted and simple, but it was not having it at all lol! This style is about as far from my norm as I can get, right? It does seem that I have stretched my wings a bit lately, and it’s been fun! XOXO
Julie says
That is absolutely BEAUTIFUL! I wish I knew how to do that!
Christy says
Thank you, Julie! You could totally do this!! XOXO
Jen says
Very interesting piece of furniture. So glad that you saved it! Can you provide any details and/or pics of how you did the top? I have my mom’s sewing cabinet that I want to redo. I was thinking of doing the same thing for the top. Thanks.
Christy says
Thank you, Jen! The top was just held in place by screws underneath that I was able to remove pretty easily. Then I removed the hinges that attached the two top pieces together. However, there was a strip of metal that ran in a groove that helped to support the opened portion when it was open and I was not able to remove that. Instead, I bent it back and just used a screw to secure it to the underside of the top piece that I kept. I don’t have photos, so I hope that makes sense! XOXO
Cheryl Atkinson says
I thought I would never get to the end of the replies. Lol. I love how it turned out. I thought I had problems. I painted my very first stand up jewelry armoire and I used a different kind of paint. I used a clay based. Well I have always sealed my paint before I put on a transfer but I noticed not very many people do so I took my brand new French Ceramics transfer I bought from you and I laid it on there and nothing would come off. I totally ruined my transfer and one side of my jewelry box. I almost cried because I have been waiting to use this transfer. So it is sitting here waiting for me to come up with another idea. I will top coat my paint from now on ,😭
Christy says
Oh no! Clay based paint does need to be sealed before applying a transfer. If you still wanted to use it, just seal first. The chalk and silk paint do not need to be sealed first. I also learned that clay based paint needs to dry 24 hours before sealing and you have to use a brush. It does distress and blend so beautifully, but it is a bit finicky to use. XOXO
Naomi S Shelton says
Christy, WOWDY-DOW! That piece was a real humdinger! I LOVE the way it turned out! A great example of the results of perseverance and a few cuss words!! A girl after my own heart! The transfer makes the piece stunning. It could be a real focal piece in the right room. You done good, girl!
Christy says
Thank you so much, Naomi! I am so happy I stuck with it..the cursing definitely helped!! XOXO
Corrine says
You really had a time of saving that piece! But you are the woman to do it, and it turned out so lovely! I’d use it in my home. Thank you for always showing us the real gritty truth. It’s so helpful!!!
Christy says
I’m so glad you enjoyed this one, Corrine! Thank you! It was a trip getting to the finish line but worth every curse word lol. And yes…y’all need to know it isn’t always smooth sailing for me either ha ha! XOXO
Diane Isely says
That’s a beauty! Well done! About the funky piece…it is very cool but…could it be even cooler and become a ‘finishing touch’ if you turned the hole into something….maybe box it in and your keys could go there? or? For now it just looks like an unusable hole on a redone piece of furniture, which is totally ok, but if you could give it a purpose it would give a very different feel when you open the door and kinda bring the redo to a whole new level😉
Again, beautiful work ❣️
Christy says
Thank you, Diane! I don’t mind the hole at all. I kind of like that it tells the story of this piece. Creating a cubby there isn’t a bad idea though! XOXO
Caye Cooper says
All the cussin’ and swearin’ sometimes actually helps! lol
It’s just beautiful! Good on you for hanging in there.
Christy says
Ha ha yes!! Thank you, Caye!! XOXO