Hello, amazing friends, and welcome to our monthly Furniture Fixer Upper day! My piece for today is a really cool vintage cabinet with glass doors.
I redo furniture often, but it’s even more fun when I get to do it with friends. Look for their projects at the bottom!
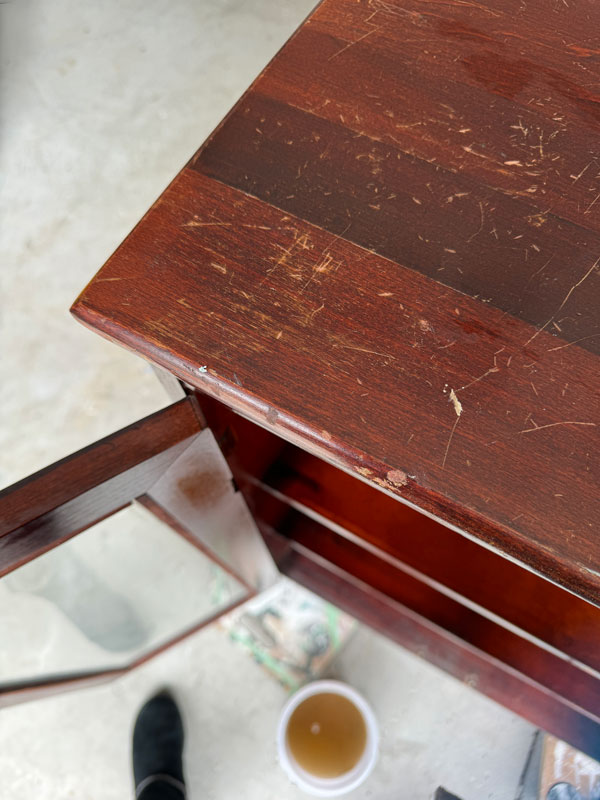
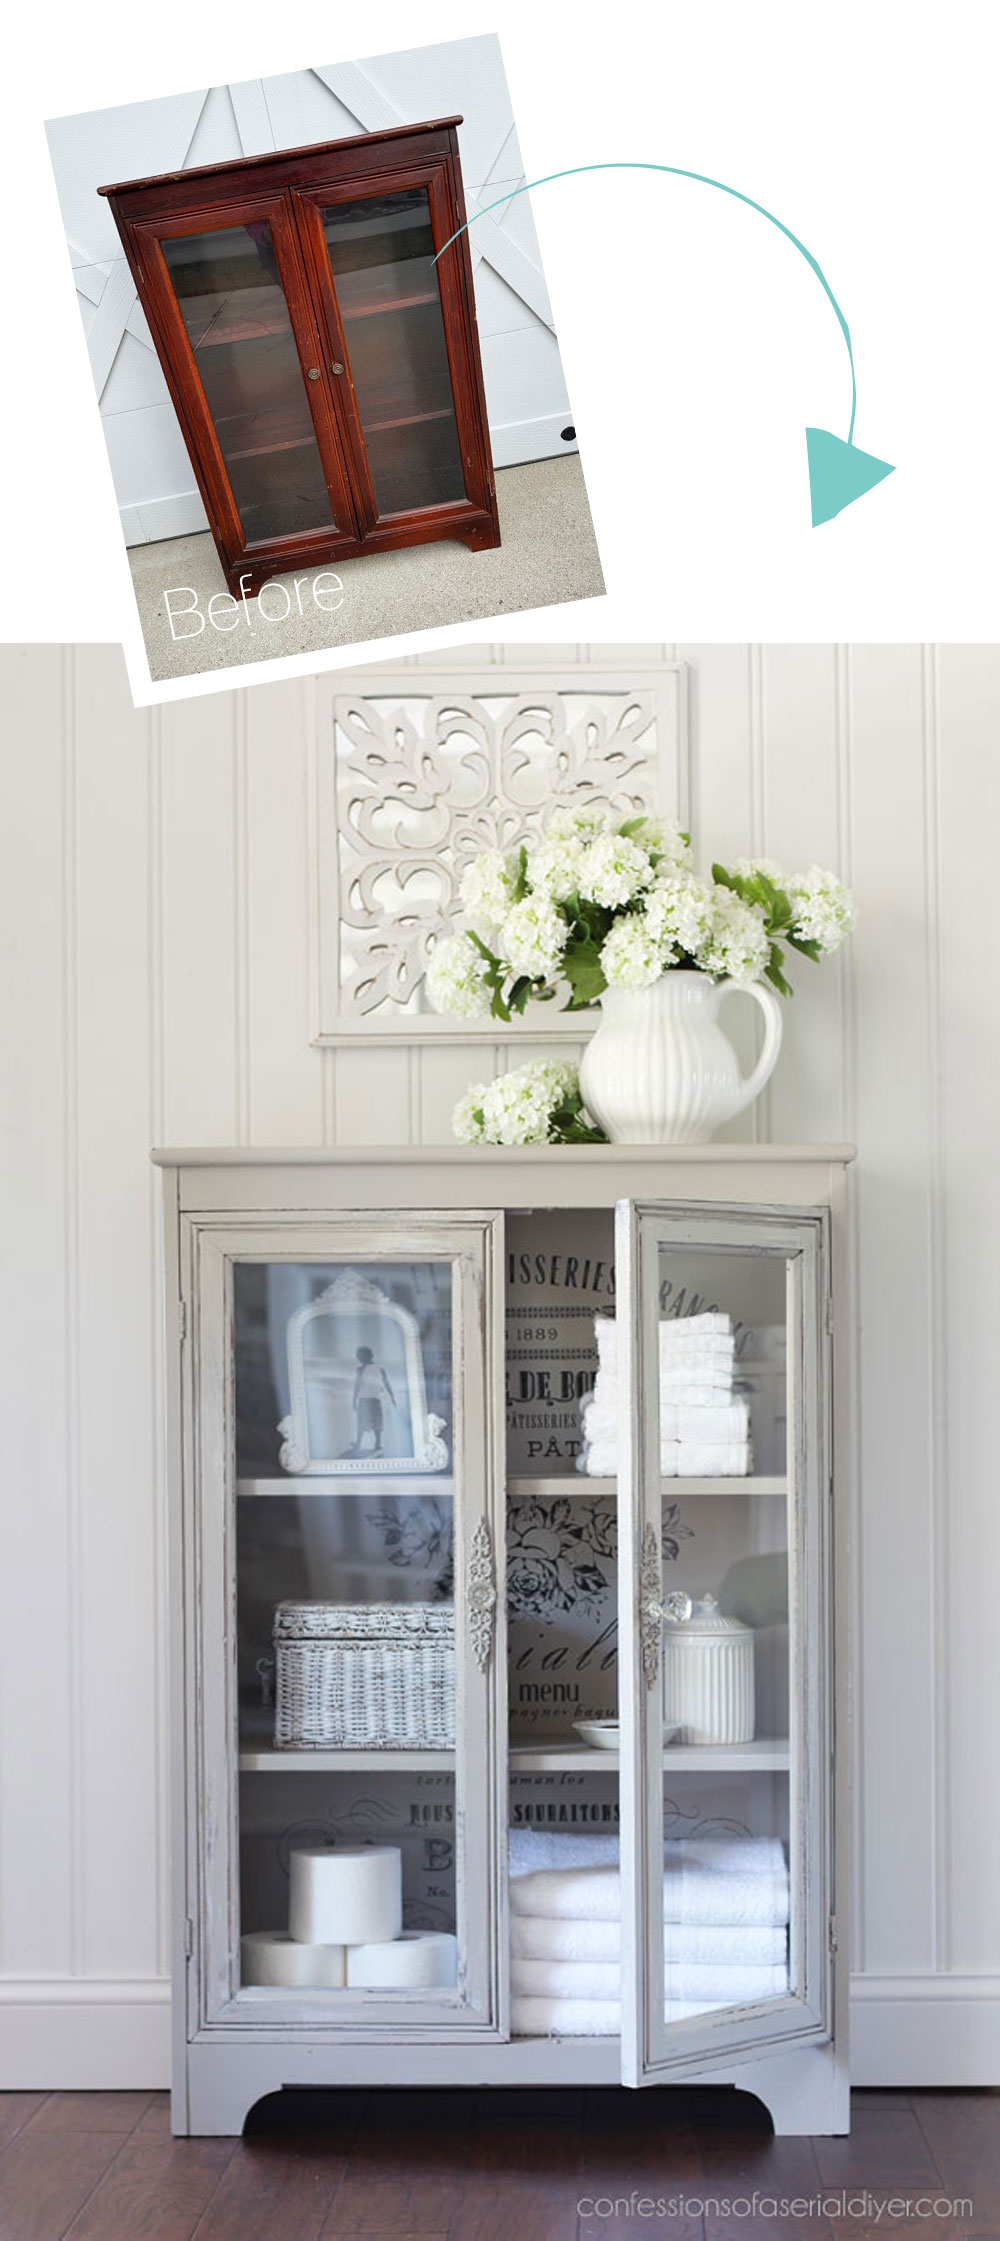
Here is how today’s cabinet started:

I found this at the thrift store marked at $50. However, everything was 20% off that day, so I got it for $40 woo hoo! SOLD.
I just love this versatile little storage piece and set out to redo in a style that would match my own home…you know…just in case.
It looks in pretty good shape there, but it had been knocked around a bit…
I’ve included a few affiliate links so you can find the products I love.
Remove the Backing
I knew it would be easier to paint if I were able to remove the backing, so I started there:
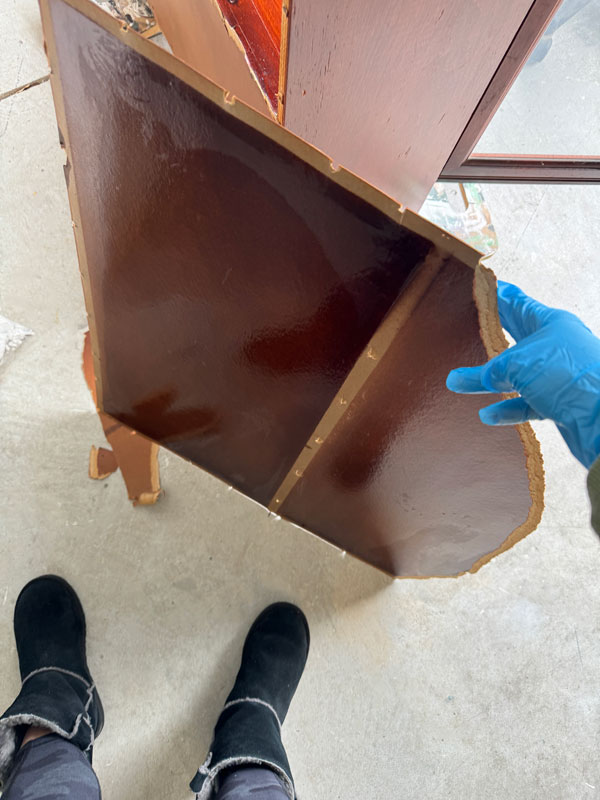
Turns out it was just cardboard, so that got tossed.
Clean
Next up was a good cleaning!
To give my pieces the best prep possible, I use White Lightning to clean them, mixing one TBSP with a half gallon of warm water.
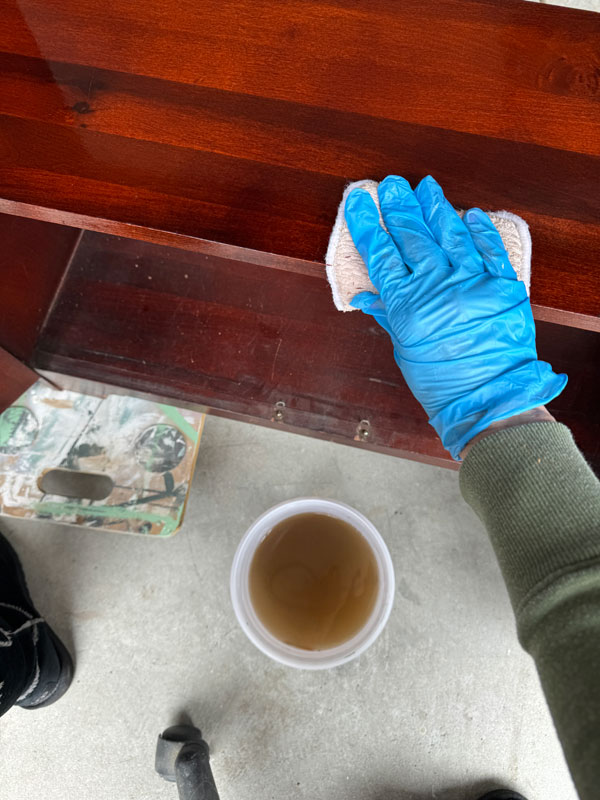
Be sure to swap your water for clean water and give it another wipe down to remove any residue.
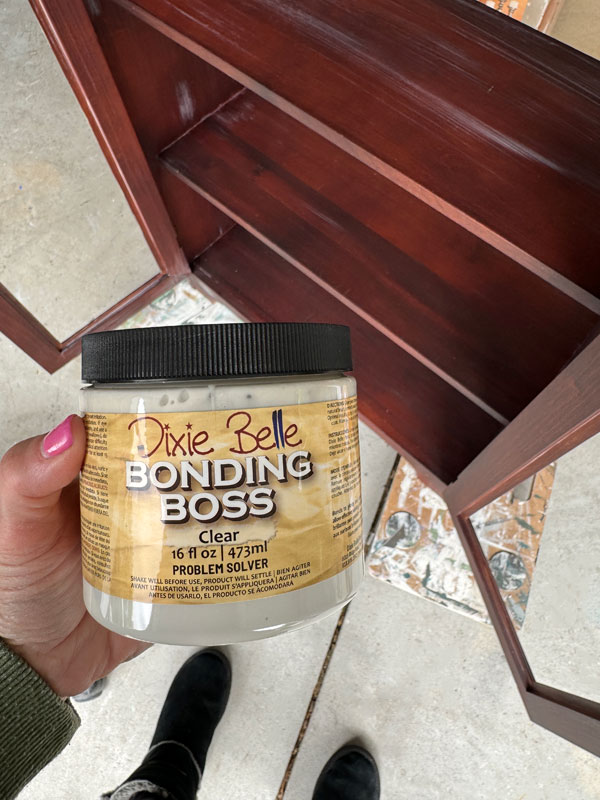
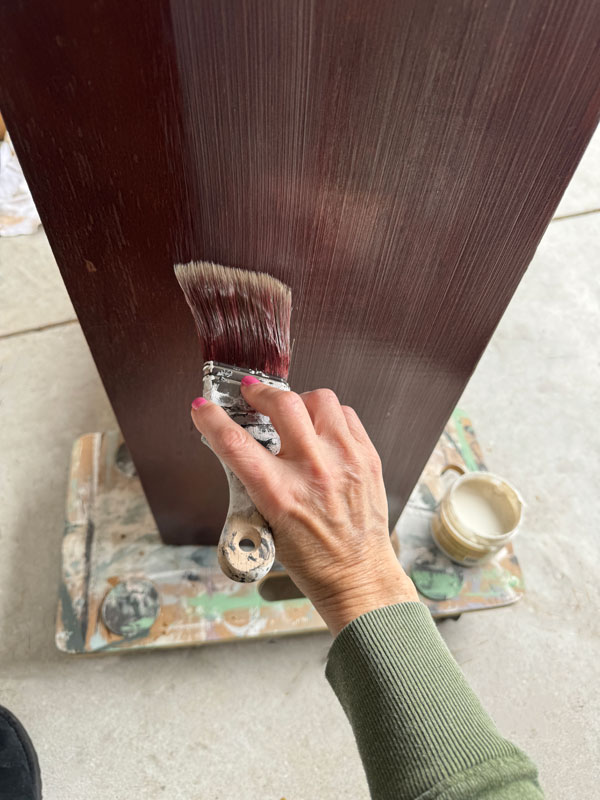
Prime for Bleed-through
This was bleeder city with all that red stain, so I immediately reached for Bonding BOSS! (Formerly Boss, but now made to combine the stain blocking power of BOSS with the adhesion properties of Slick Stick.)
I opted for the clear formula this time because I had originally planned do to a weathered look and I wanted lots of the wood to show through:
It is almost dry in that photo above, but it goes on milky…
Although it dries clear, it does leave a slight haze and texture behind, so this is only recommended if you plan to paint.
( An exception would be the interior of a dresser that is super musty…it is not noticeable on raw wood interiors.)
The instructions say to apply two coats four hours apart and wait 24 hours to paint.
But I cheated!
I only applied ONE solid coat to test it. Why wouldn’t one work? The key is ADEQUATE DRY TIME!!
I had planned to paint after 24 hours but didn’t get to it until the following morning, and I had NO bleed through at all! YAY!!
One coat totally worked!
Paint
I was so excited, I got ahead of myself there lol!
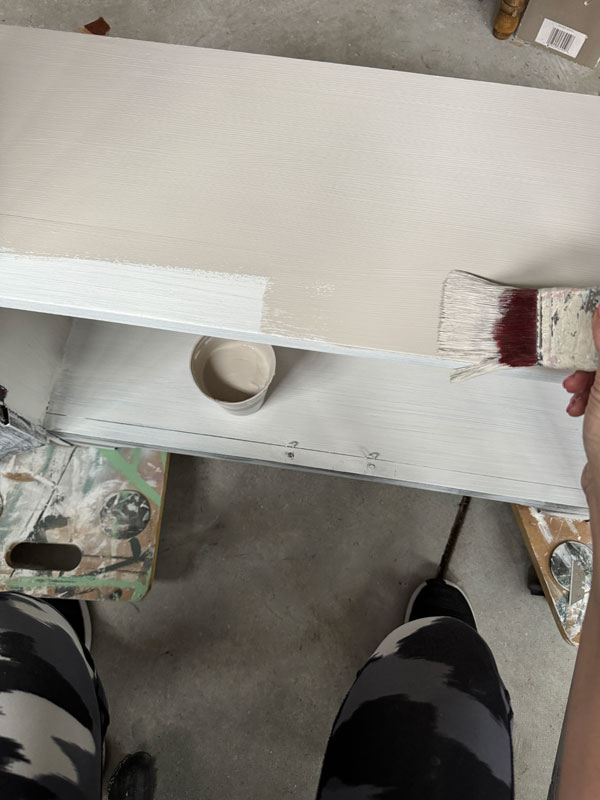
The first coat of paint I used was Fluff:
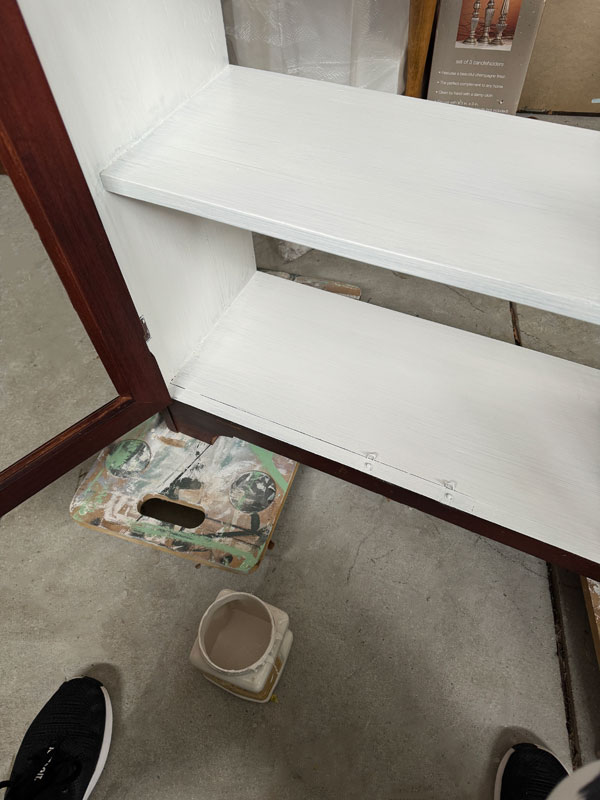
And as you can see.. no bleed through! I had planned to do a weathered/layered paint look all over, but I changed my mind, hence the reason I started with Fluff.
I did decide to give the doors a really weathered look though, so I applied the Fluff more randomly, leaving areas of wood to show through.
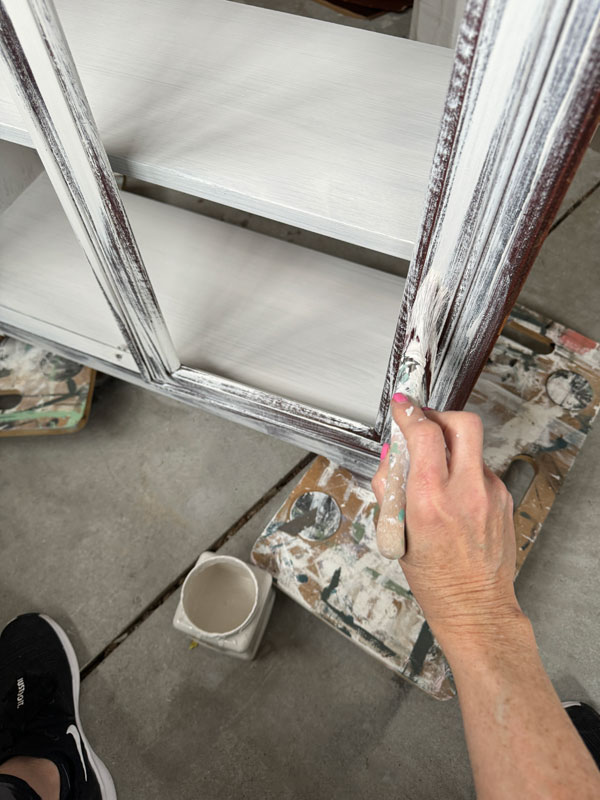
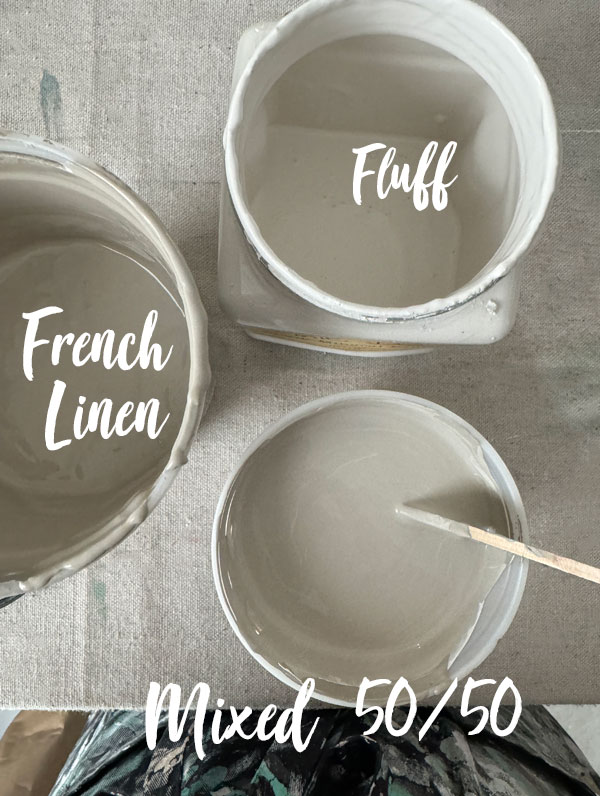
Next, I mixed up two Dixie Belle Colors, French Linen and Fluff 50/50, to get a gorgeous color that wasn’t quite as deep as the French Linen alone:
I applied one coat of that over the white…
Then, I did the same random painting on the door to give it that weathered look I was after.
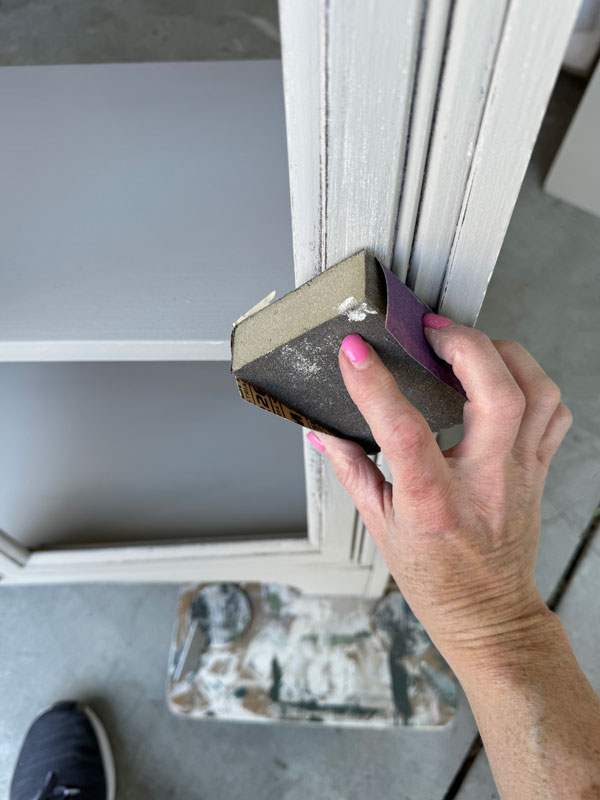
Sand
Once everything was dry, I sanded all over with 220 grit sandpaper:
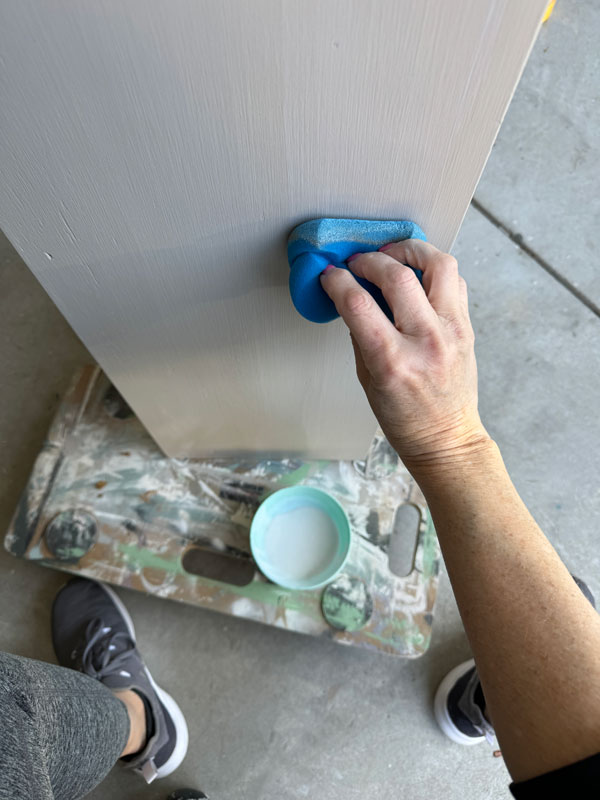
Seal
I sealed inside and out with Clear Coat in Satin using the blue sponge applicator to apply it:
The new backing
I had a piece of bead board in the garage that was smooth on the opposite side, and it was large enough to create a new backboard, so I used that. (The bead board would have only fit with the lines going horizontally, and I didn’t love that look for the back or I might have used that side.)
To cut it to fit, I used my small Ryobi circular saw:
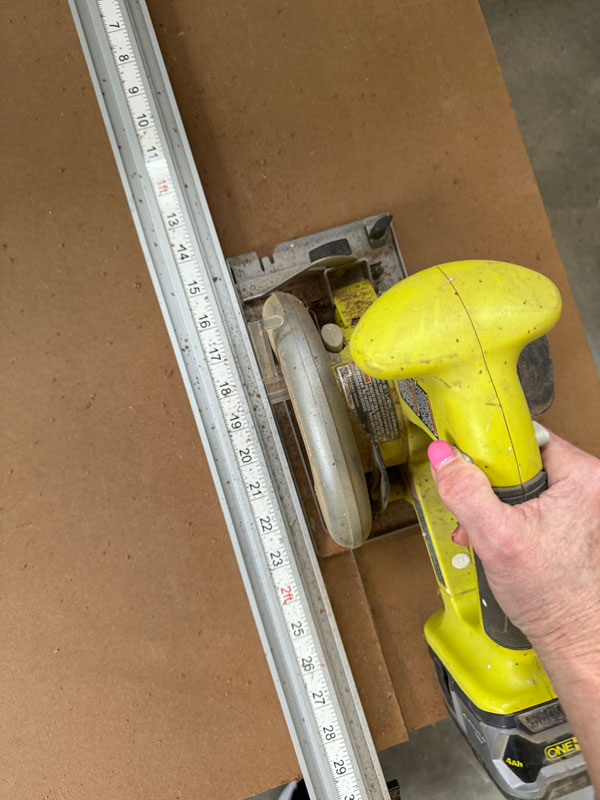
With the help of this straight edge clamp, I was able to get perfectly straight cuts.
Then I painted it in the same French Linen/Fluff mix.
Something special for the back
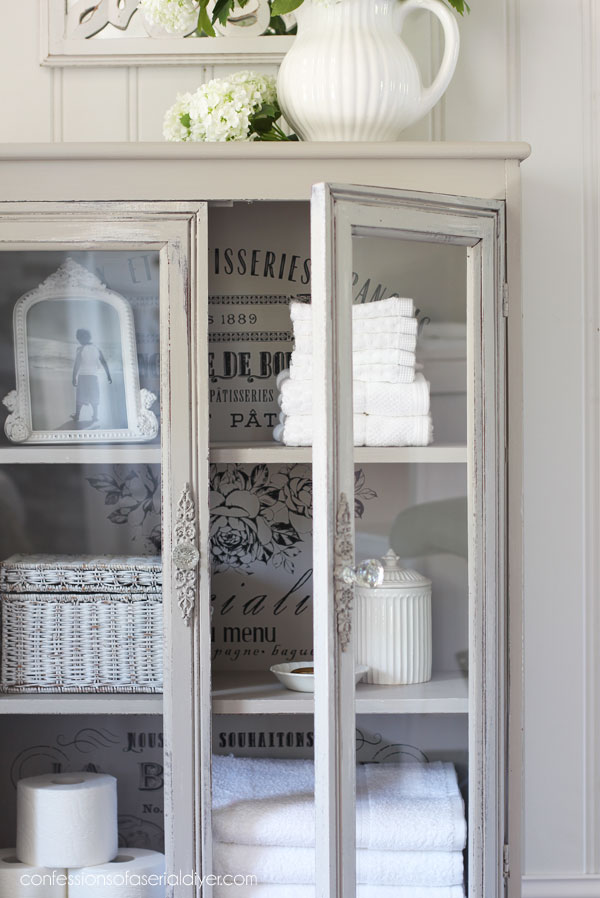
The back was calling out for something special. I considered fabric, decoupage paper and even a stencil for the back, but I ultimately decided on this French Specialties transfer:
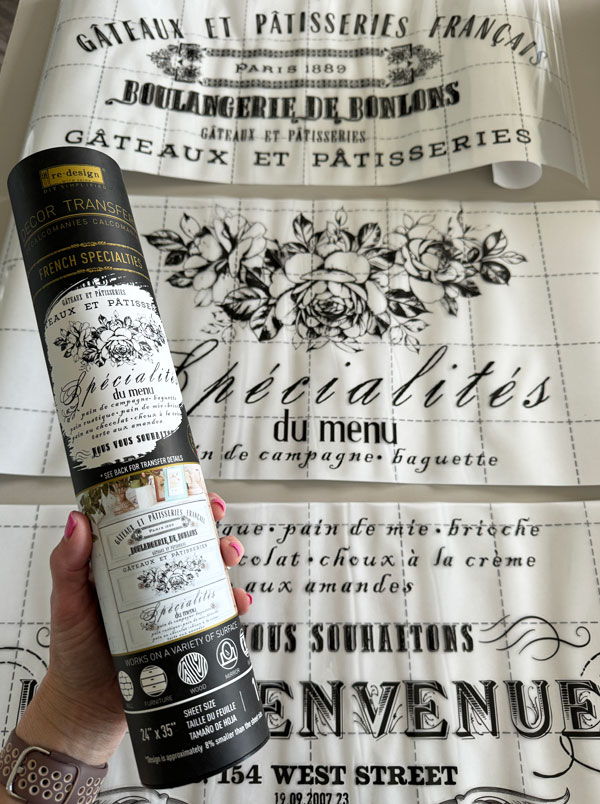
It was the perfect size and each piece fit just right between the shelves of this cabinet!
If you haven’t used a transfer before, it is pretty simple, especially on a flat surface like this.
HOW TO APPLY A TRANSFER:
- Remove the white backing
- Position the transfer where you want it
- Use the burnishing tool included to burnish (rub with pressure) the transfer to your surface
- It is best to start in one corner and pull the clear plastic layer on top away from the transfer as you go.
- If you get any pieces that stick to the clear plastic layer on top, lay it back down and burnish some more

- Once the image is transferred, the top should pull away.
- You can burnish it more by rubbing a soft cloth or a finishing pad over the surface to make sure it adhered well all over.
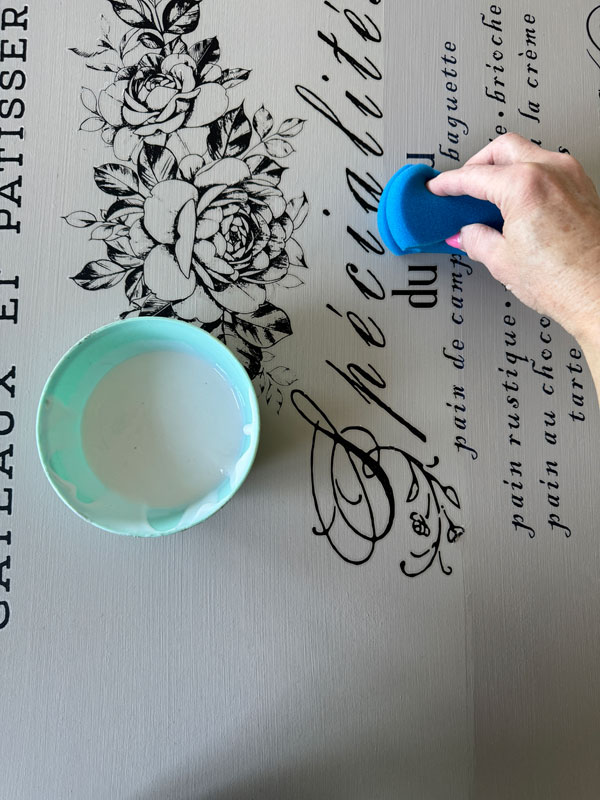
I sealed the backing the same way as the cabinet, once I had the transfer applied, with Clear Coat in Satin using the blue sponge applicator to apply it:
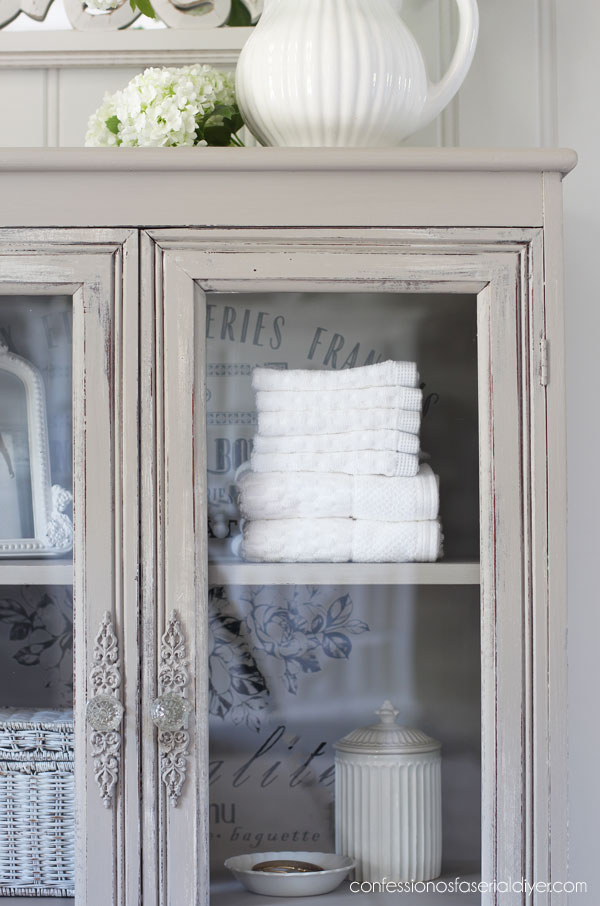
Vintage Cabinet with Glass Doors, The After:
It looks totally different than how it began!
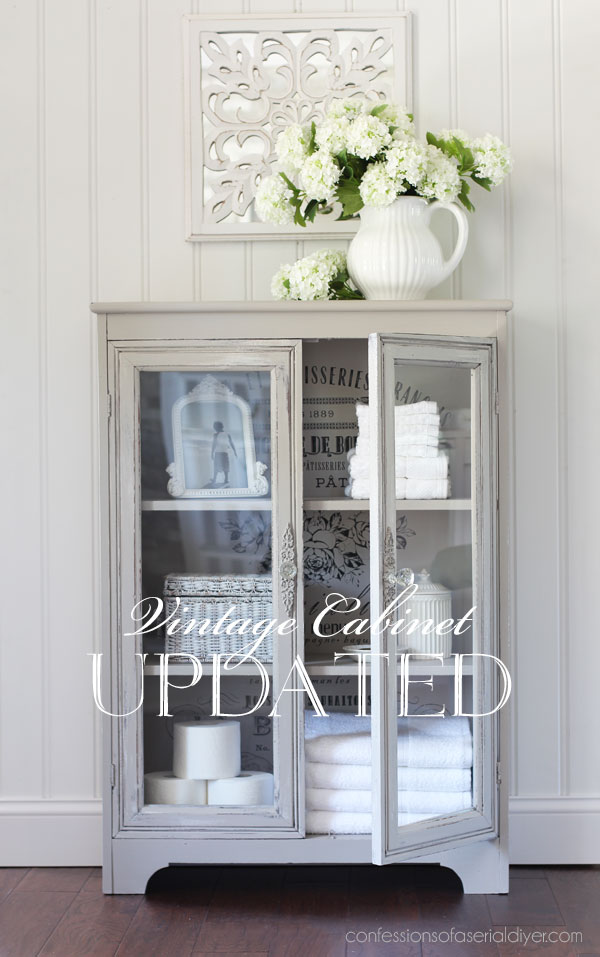
Right??
Here it is with the doors closed…
The doors reflect too much to be able to see the inside clearly.
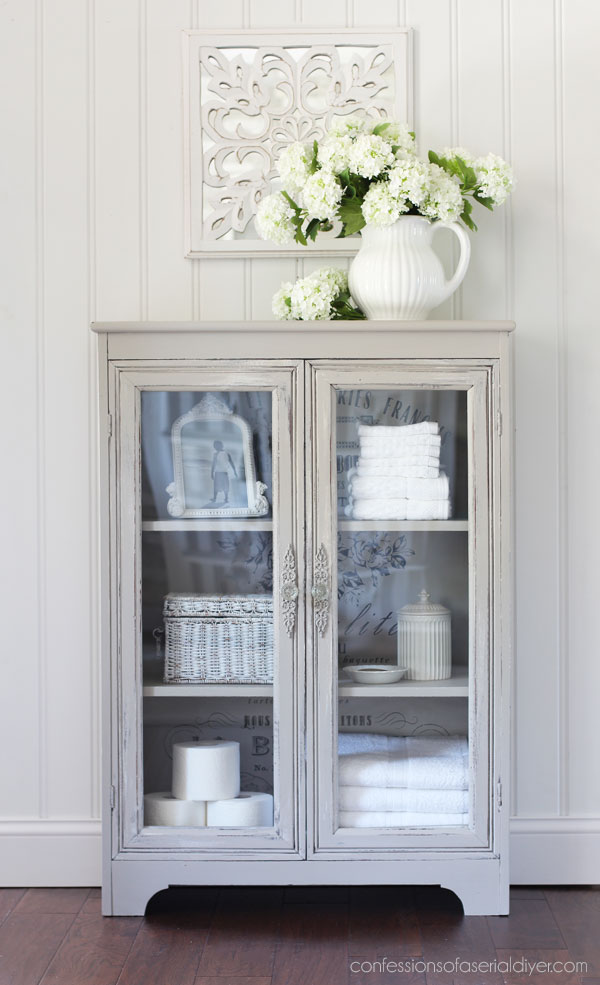
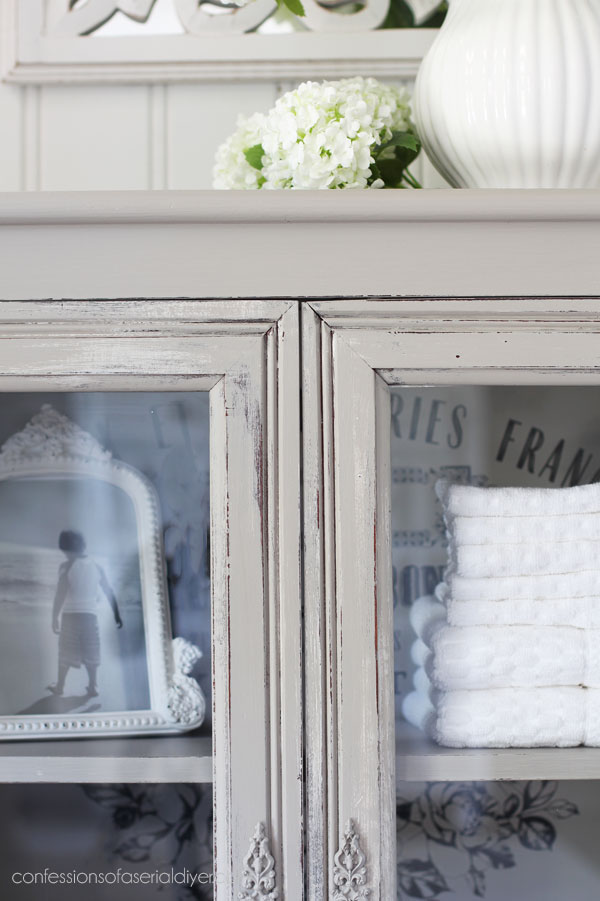
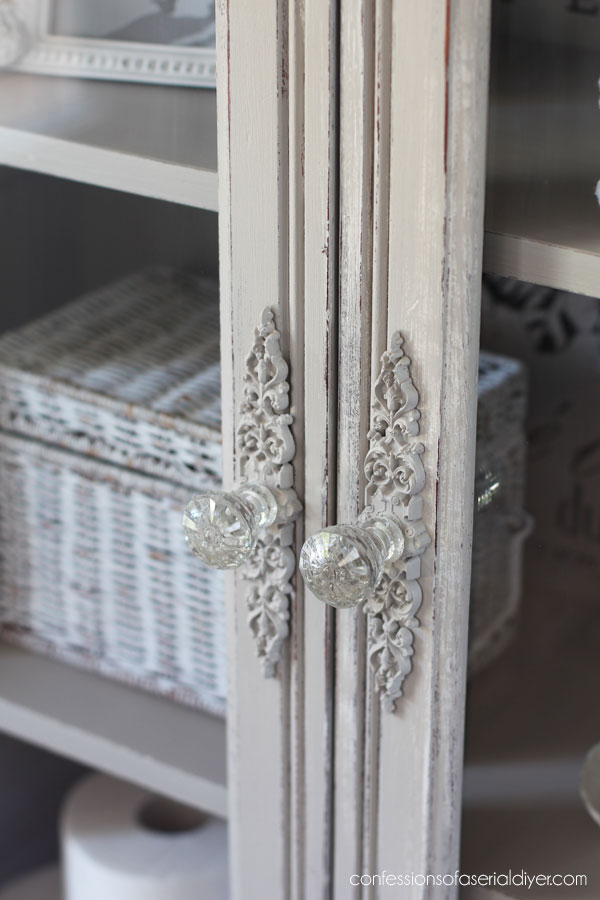
But here you can see how I chose to only distress the doors:
I really like that look.
I could have gone in so many directions with this one…

I usually have an idea of what I might do with a furniture piece when I buy it, but I didn’t have any ideas for this one.
However, I knew I loved it and may want to keep it, so I redid it to match my own decor lol.
And I do believe this one will be a keeper!
The hardware
For the hardware, I had some pretty glass knobs I wanted to use, but I also had these extra mould pieces I cast with Amazing Casting Resin, originally for this bookcase I redid last week:
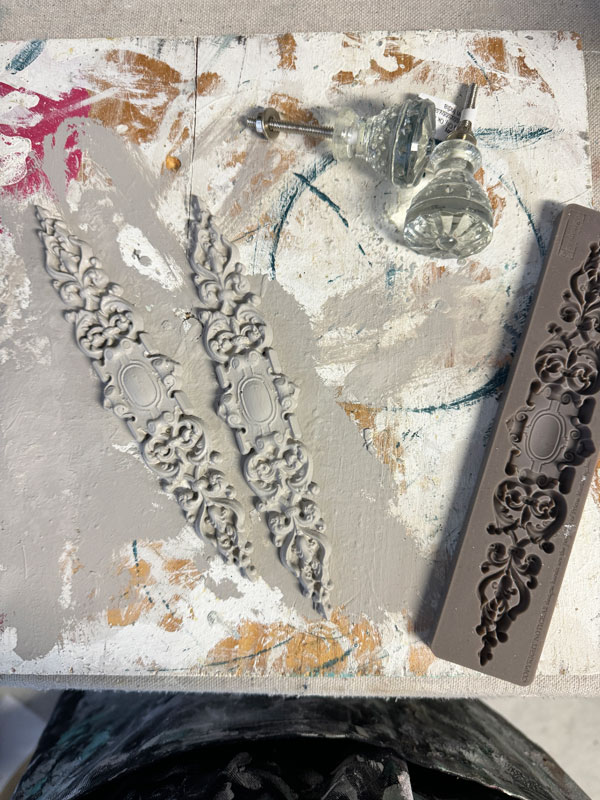
That is the Josephine Mould and you can find that in my shop HERE.
I painted those in the same color as the cabinet and then drilled holes in them for the hardware with my favorite petite drill:
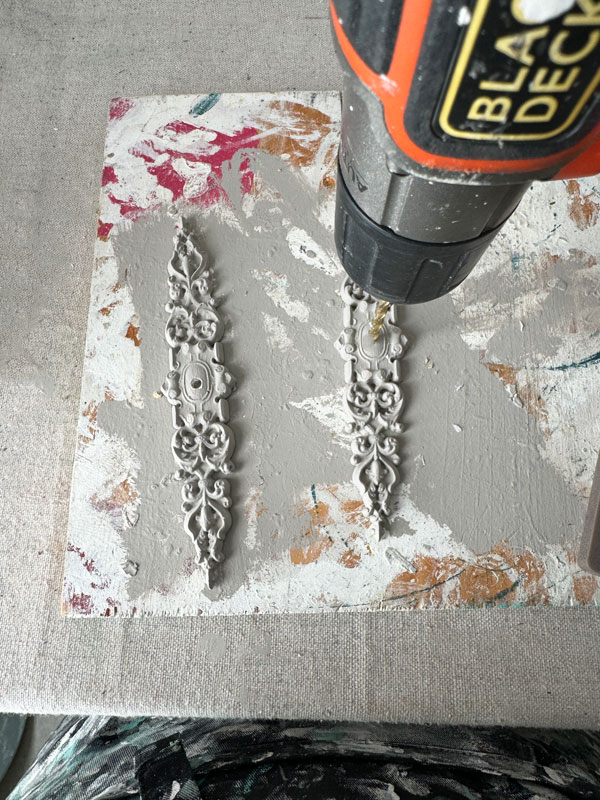
They add SO much!!

I secured them in place with E6000 glue.
You can only see parts of the transfer at the back when it’s filled, but it still adds a romantic touch to this piece!
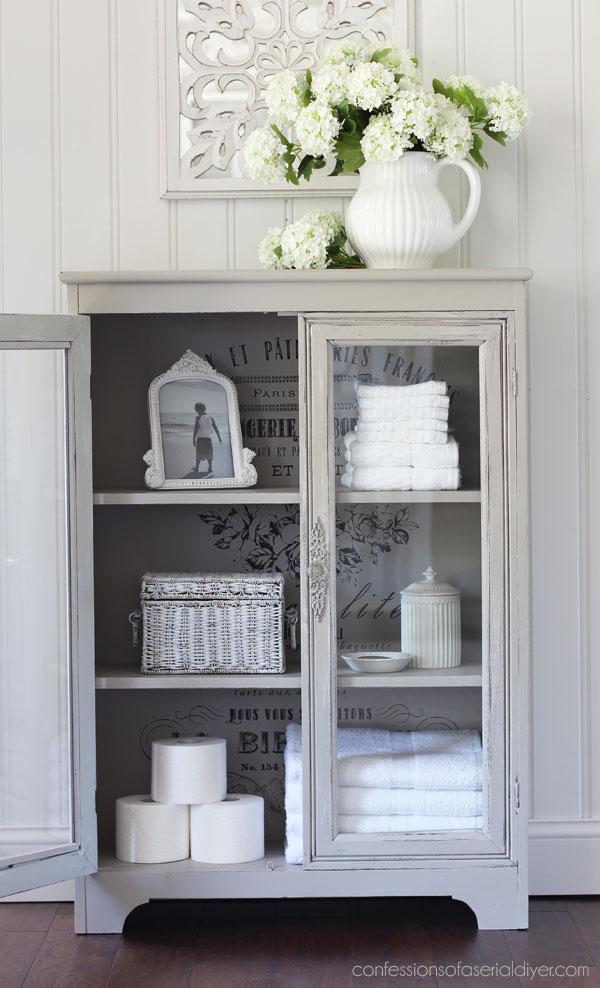
Good thing because I have it staged for a bathroom, but it’s talking about cakes and pastries lol.
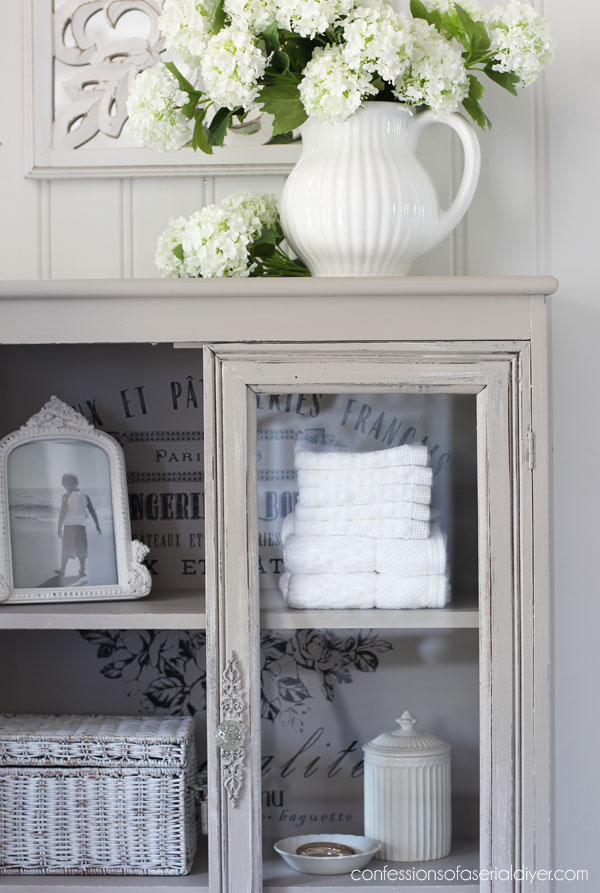
Here it is without anything in the cabinet:

It worked out so perfectly that each section fit between the shelves so nicely!
I hope you like the direction I ended up taking!
Don’t forget to check out what my friends are sharing today too!

That’s another piece done yay!!
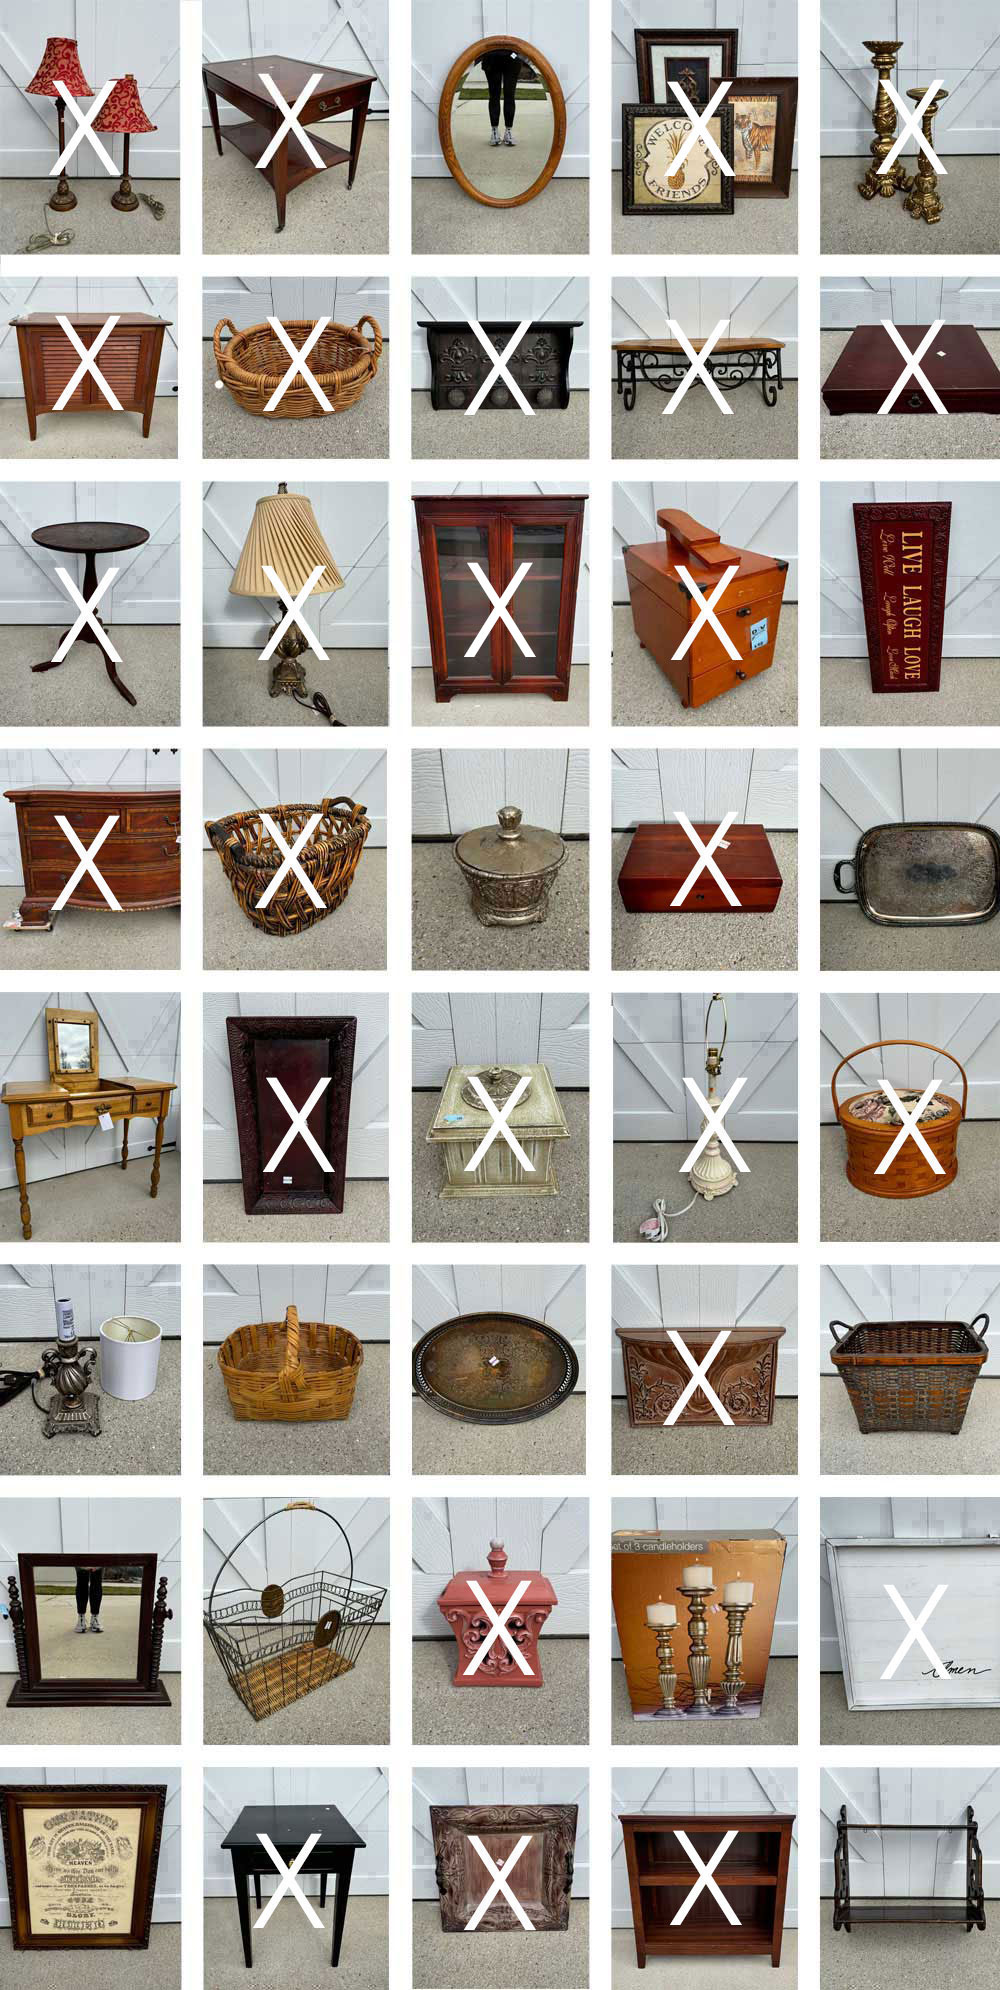
See everything I’ve completed from this haul so far at the links below:
Fun with Cheap Frames
Box Store Bookcase Makeover
Sea Spray Candle holders
$4 Thrift Store Lamp Update
Painting the Smalls #26
$10 Thrift Store Dresser Makeover
French Buffet Lamps Makeover
Painting Furniture with Silk Mineral Paint (The large and curvy dresser.)
TWICE Painted Plant Stand Makeover
Elegant Flatware Box Makeover
Mini Lane Cedar Chest Makeover
DIY Herringbone Tray
Whitewashed Side Table
Sewing Basket Makeover
Louvered Door Cabinet Makeover
Painting the Smalls #25 (SIX mini makeovers!)
Shoe Shine Box Makeover
Metallic Vintage End Table Makeover
I’ll be back on Tuesday with another brand new makeover!
Have a fantastic weekend!!
XOXO,

Don’t Miss a Thing!
If you like what you see, there are several ways to follow along!
EMAIL * INSTAGRAM * FACEBOOK * PINTEREST


Mary Kaiser says
I LOVE the direction you took that! It is so beautiful! I love little storage cabinets that fit nice into a small space, but all alot of storage space! It is beautiful!
Christy says
Thank you, Mary!! I think it will live in my office and hold staging items…it will fit perfectly in there yay! XOXO
Annatjie Kurfurst says
Absolutely love this one!!! I always appreciate how thorough you are when working on your pieces. But today all I focused on was the color and end result. Wow!
Christy says
Thank you so much, Annatjie! I’m so glad you like it! XOXO
Nana Diana says
Love how this one turned out. The appliques on thedoor are the perfect finishing touch. xo Diana
Christy says
Thank you, Diana! I had those resin pieces still lying on my workbench that I never used on my last furniture makeover, so I grabbed them and painted them…glad I had those ready to go! XOXO
Cecilia says
Wow! You did it again….from blah to amazing! Love it!😊
Cecilia
Christy says
Aww thank you so much, Cecilia! XOXO
Gayle says
So pretty, Christie! You have such a great eye for designing a piece and the quality of your workmanship is wonderful. I don’t blame you for keeping this one!
Thanks for sharing!
Christy says
Aww I appreciate that SO much, Gayle! Thank you! I’m so glad I get to keep this one! XOXO
C Kunkel says
So gorgeous! Very refined appearance.
Christy says
Thank you so much, Cheryl! XOXO
Cyndi says
I looove this! Color is great, but sometimes I just want a pretty neutral, especially on a furniture piece like this. Great idea to layer the knobs with the molds as well. Very pretty!
Christy says
Thank you, Cyndi! French Linen is a big seller, but it is a bit dark for me, so lightening it up a bit worked perfectly! XOXO
Christine says
So fresh and updated!
Christy says
Thank you, Christine! XOXO
Amanda says
Love this! Great work, Christy!
Christy says
Thanks so much, Amanda! XOXO
Natalie says
Such great news that the bonding boss worked with only 1 coat! The new look is so pretty!! Pinned!
Christy says
Yes…I was SO happy about that! Thanks, Natalie! XOXO
Sue says
Great project and the colors and special drawer pulls make this a vintage elegant piece! Great idea about turning the left over bead board around!
Christy says
Thank you, Sue! Yes, I am always happy to save myself a trip to Home Depot ha ha! XOXO
Shirley Lange says
You knocked it out of the ball park again. Love ❤️ the hardware on the doors and the colors you chose. Just beautiful…….again, Christy.
Christy says
Aww thank you so much, Shirley! I had fun with this one for sure! XOXO
Kim Wollmer says
Wow! The cabinet turned out so beautiful! I love the color mix and the transfer and everything else about it. I was thinking while reading that you should keep it lol! Great job!
Christy says
Thank you so much, Kim! Ha ha I am so glad I get to keep this one! XOXO
Sandy says
Do you know if you can combine original Boss and original Slick Stick together?
Christy says
Hi Sandy! I was told that the Bonding BOSS was not created by just mixing the two, so I don’t know. You could always test that theory on a scrap. Let me know if you do! XOXO
Lizzy says
What a sweet piece. I love the custom color.
Christy says
Thank you, Lizzy! XOXO
Jackie C says
wow, this might be one of my favorite pieces you’ve ever done. This turned out beautifully. I love the color mixture! And those little molds were the icing on the cake. I love this little cabinet, definitely one I would keep as well
Christy says
Aww yay! Thank you, Jackie! I am so glad I get to keep this one!! XOXO
Denise Zdziennicki says
Ouh là là, this is beautiful Christy! I love the Fluff and French Linen combo… I’m going to use that mix at some point! 🤗 Pinned XOXO
Christy says
Thank you, my beautiful friend! I like French Linen, but I LOVE it lightened up a bit! XOXO
Michele M. says
Oh she is a beauty to behold!!!! WOW- it’s difficult to believe it is even the same piece. I absolutely love it’s beautiful French-y-ness!!!! Oooh-lala!
The color 50/50 is a color I can imagine would sell very well, too. It’s a perfect color doing that. (As you certainly well know, haha, don’t need me to be telling you that, heh.) Glad you are keeping her. SOOOO pretty!!!!
Christy says
I always enjoy your enthusiasm when I share a piece you really like lol! Thank you, my friend! I will definitely be using this color again and again! XOXO
p says
Nice Nice Nice 🙂 The lightened French Linen is a perfect neutral. Definitely my style for anchor pieces. The layered moulds / glass knobs was a great idea ! Perfect addition of bling / detail.
I can see why you’re keeping this for sure.
Thanks for sharing all the process details. So helpful.
Christy says
I’m so glad you enjoyed this one, P, thank you! It really is the perfect neutral. I will be using this mix again for sure! And yes, I am really excited I’ll get to look at it every day yay! XOXO
Marietta R Walker says
Again you amaze me! With the back done so nicely and beauti-frilly, I would not want to put anything in it! I owe you another big thank you! (Since my last shipment.) I also owe you a review. It will bad and nasty like all of mine-LOL.
Christy says
Ha ha…if you were closer, we would definitely be real-life friends! I just love your sense of humor! Thank you, my friend!! XOXO
Janina says
This is a real stunner! I love the colour, the style, the knobs. I totally thought you were going to say you got those handles at Hobby Lobby or somewhere like that! Nope, home-made resin! You continue to amaze me, Christy!
I just love French Linen as a colour, starting with the original Annie Sloan one. This combo is really pretty! I wonder whether Dixie Belle is sold in Canada anywhere yet…I’ll have to check.
Keep making besutiful things and sharing them with us!
Christy says
Thank you so much, Janina!! I did get the glass knobs at Hobby Lobby and had planned to use just those, but I had a couple of those resin pieces that I had made for a bookcase that I ended up not using. They were still on my workbench when I was working on this, so voila! They really do add so much. Dixie Belle is sold in Canada. You can search for a possible local retailer here: https://dixiebellepaint.com/find-a-dixie-belle-paint-retailer/ If you don’t have one close to you, there are a few Etsy sellers that are in Canada also. You should be able to filter sellers to Canadian only on there. Have a great weekend! XOXO
Marcie Lovett says
How could such a beautiful piece have a piece of cardboard for the back, Christie?!? No matter, now that you’ve had your way with it, it has a beautiful back and a color that gives it personality. The moulds you made look like they could have been original. All the changes add up to make it a lovely new cabinet.
Christy says
Right??? I was so shocked when I was removing it. It never occurred to me that it might be cardboard! I definitely had to replace it lol. Thank you so much, my friend! XOXO
Janice Holt says
I finally got around to looking at your post. What a great idea to put the transfers on the back of the cabinet. Also the decals for the handles. Love everything about this. Have a great week-end.
Christy says
Thank you so much, Janice! Enjoy your weekend too, my friend! XOXO
Caye Cooper says
It’s just lovely Christy! Normally I’m kinda “blah” about greys, but I really like this one. Clever idea turning that bead board around! You saved time and money. Woot! Woot!
Your blinging up the knobs is a touch of genius! Good on you.
I always look forward to seeing what you are up to. Keep it coming, and THANK YOU!!
Christy says
Aww thank you, Caye! I kind of feel the same with grays, but this one I really like too. And yes, I am always excited when I can use up leftover pieces in my garage and save me a trip to Home Depot! Have a wonderful weekend! XOXO
Cletia says
Oh wow! Such a perfect makeover!
Christy says
Thank you so much, Cletia! XOXO
Millie Mosley says
I think that this is one of my favorites. It is beautiful and the stencil was the perfect touch!
Christy says
Oh yay! I love hearing that, Millie, thank you! XOXO
Gail Wilson says
Amazing makeover Christy.
I never would have thought about using a transfer in the back of a cabinet, but it looks fantastic.
Beautiful!
Pinned!
Gail
Christy says
Thank you, my friend! I was so excited the transfer fit so nicely! XOXO
Petra says
This is one of my (many) fave pieces of yours 🙂 If I lived there I would buy it off you! Have a great weekend xo
Christy says
Aww yay!! Thank you, Petra! I never keep the furniture I redo, but I just love this one. I set it up in my office to hold staging items, so I get to look at it all the time now woo hoo! XOXO
Bonnie says
It always shocks me when you keep a piece as over the years you haven’t kept much. My girls would say they wish I didn’t keep so much lol. In your line of business you can’t keep a lot or they would call you a hoarder🙀 anyway I love what you did with it and those molds set those knobs off. I hope this finds you feeling well and family Hugs
Christy says
I know, right? I rarely keep furniture, especially. I am one of those people who decorates and then never changes it lol. Having to keep my booth stocked definitely helps me to let go! Thank you, Bonnie! Hugs! XOXO
Cheryl Atkinson says
I love it! I haven’t ever seen this transfer. Is it new? Love the color.
Christy says
Thank you, Cheryl! This one has been around for a while and has actually been discontinued. I have several in stock though because I love it too! I used it on a dresser a couple of years ago. XOXO