Hello, gorgeous friends! After packing away our Halloween display over the weekend, I was left with very little time to create, so while I did bring you this pretty wooden storage box on Tuesday, today I’ve got a fantastic rerun for you! I’m sharing a gorgeous dresser I got from a friend that was desperately in need of a makeover. (The dresser, not the friend ha ha!) It’s the perfect candidate to share how to remove veneer the easy way!
Painted Empire Dresser
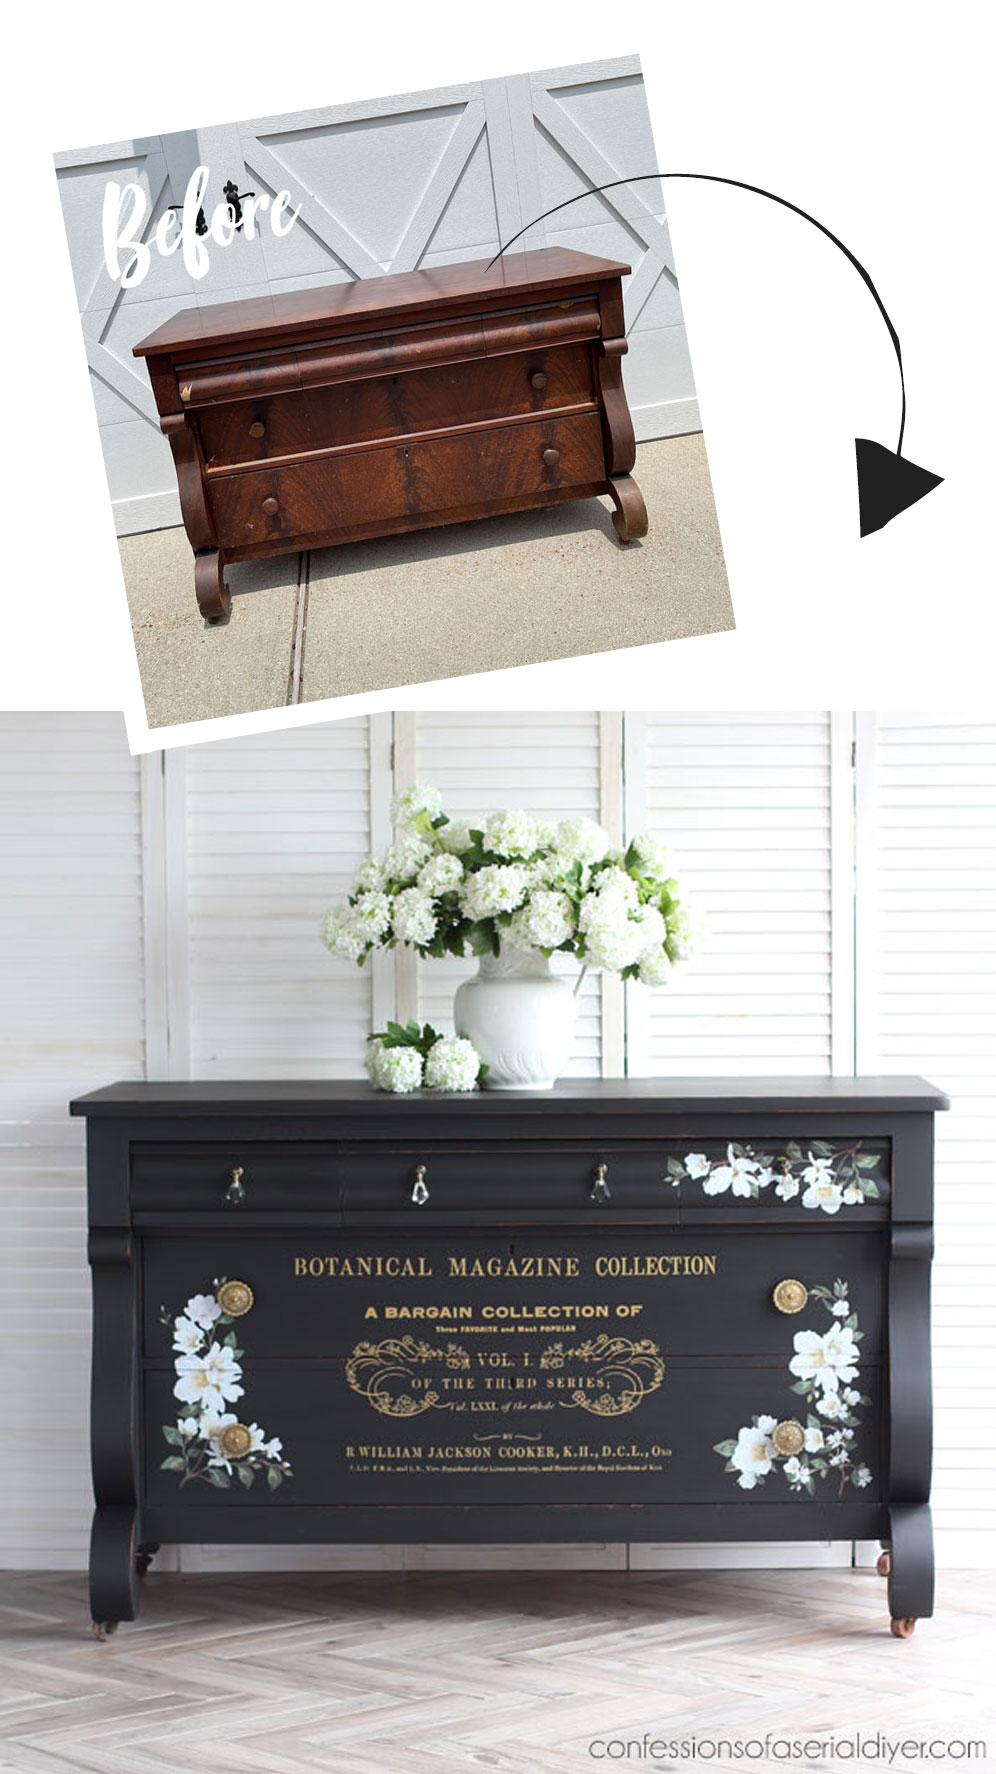
This dresser is an empire style dresser and it is absolutely HUGE:
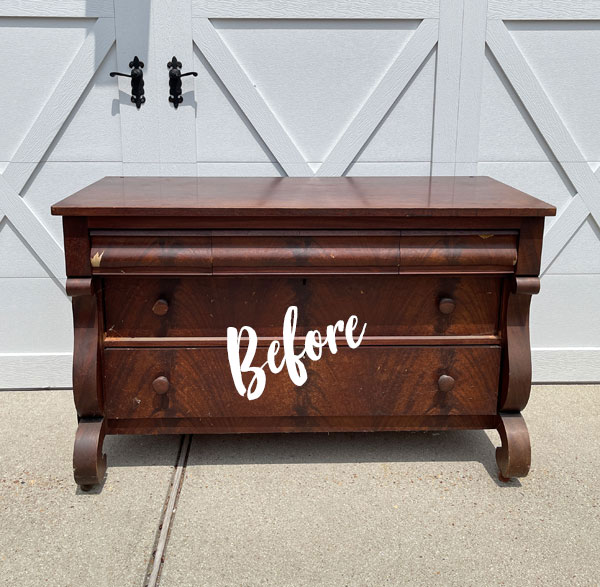
One of my dearest friends reached out to me to ask if I was interested in this dresser that her boyfriend was selling.
In the picture, it looked to be in decent shape and it didn’t look nearly as large as it is in person. I rarely turn down a good deal on an antique, so I said of course!
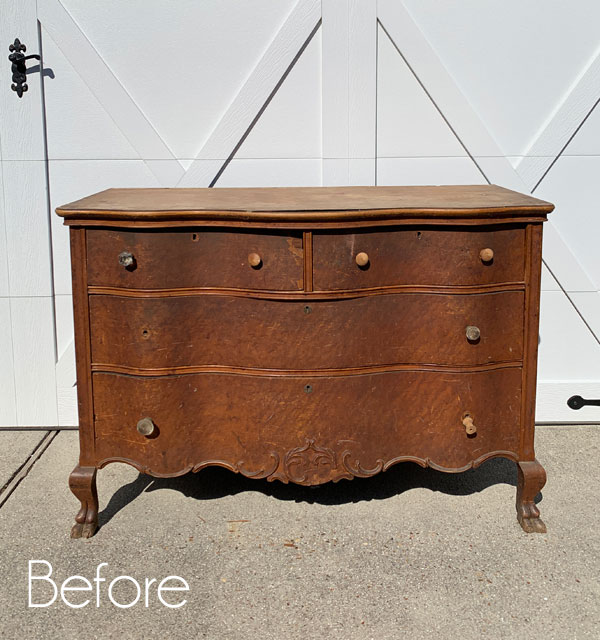
This Dresser had all the issues!
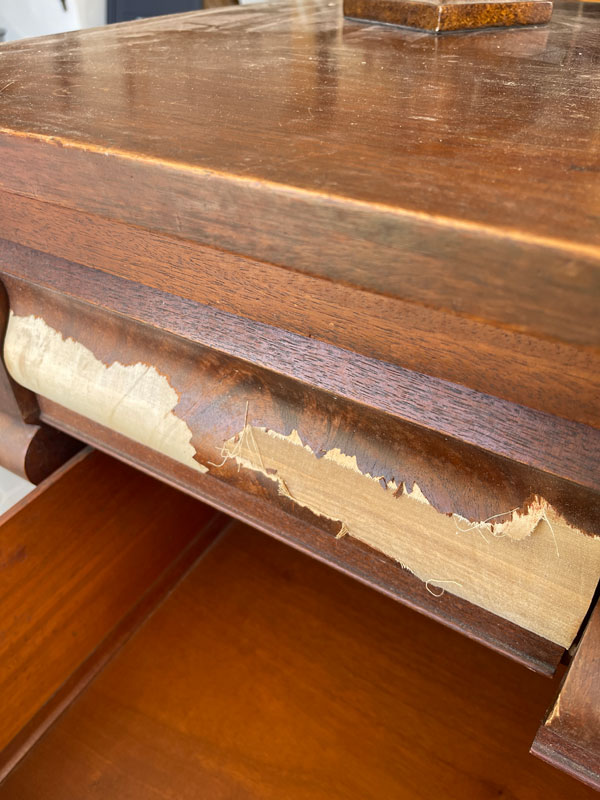
This dresser had lots of issues that cannot be seen in one cell phone photo. It had missing, loose, and cracked veneer all over and the lovely aroma of a 100 year old musty dresser.
I’ve included a few affiliate links so you can find the products I love.
Don’t shy away from a piece like this. All the issues do have solutions. You just have to take it one step at a time.
Remove/Repair Veneer
The first thing I did was tackle all the veneer issues.
The drawer fronts appeared to be gorgeous wood, but it was just veneer and was warping and splitting across the larger two drawers:

There was no real way to save that, so it had to go.
The same goes for the smaller drawers across the top…
How to Remove Veneer the Easy Way
If you’ve ever spent a couple of hours with a metal putty knife trying to pry up veneer only to end up with a bunch of gouges on the surface, there is an easier way!
Some of the veneer on this piece did come off easily, but there were more stubborn areas that were stuck on there good!
To remove stubborn veneer, lay old towels on those places and pour water over the towels until they are soaked.
That is exactly what I did here and then left them to sit like that overnight…
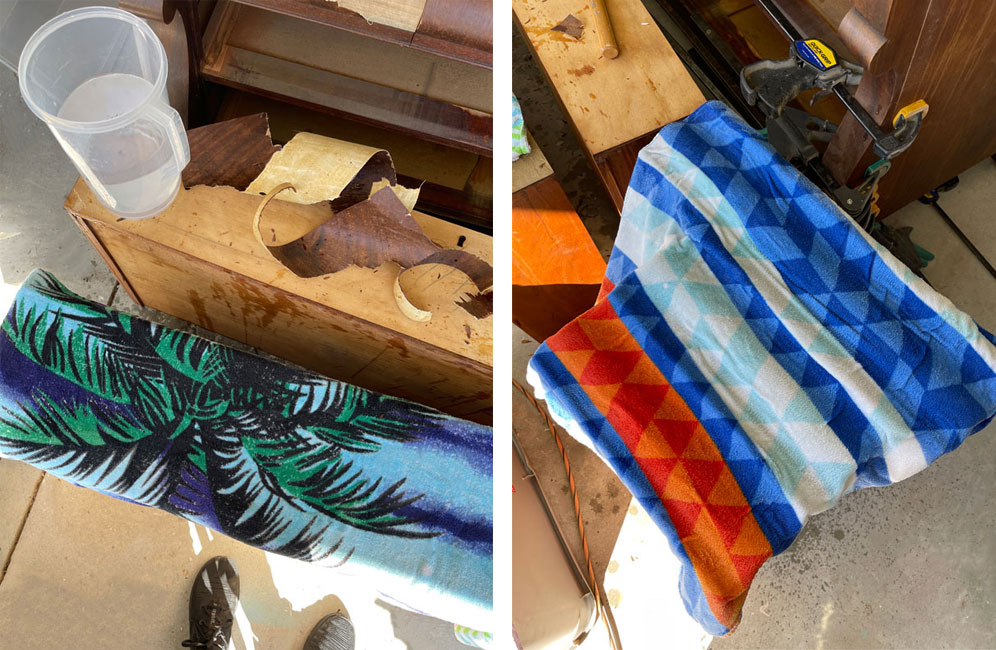
The next morning, I was able to pull the veneer off in large pieces.
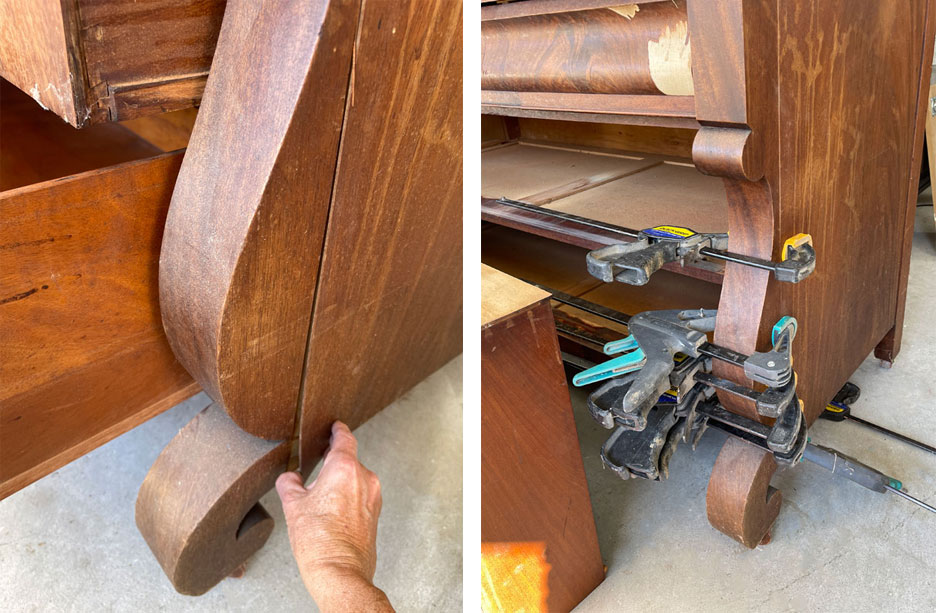
The side panel was just loose, and I was able to glue that back in place with wood glue. I clamped it to secure it until it was dry:
Clean
Next up was a good cleaning!
This thing was so dirty, especially inside the cavity of the dresser which was filled with dust. I vacuumed that up with my shop vac before cleaning the rest with White Lightning using a terry cloth pad:
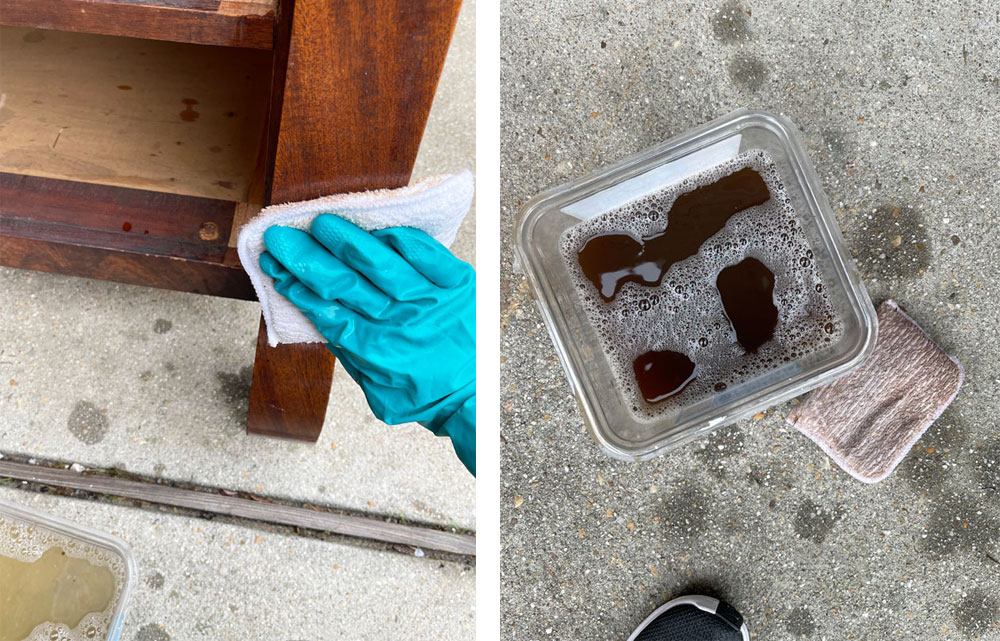
I mixed one TBSP of White Lightning with a half gallon of warm water to clean, and then swapped out the very dirty water for clean water and wiped everything down once more. It preps your furniture beautifully!
White Lightning is a degreaser and deglosser and gloves are recommended.
Fill the holes
Next up, I filled a couple of areas that needed filling as well as the holes where the original knobs had been since they were huge compared to what I would need for the new pulls I found.
To do that, I enlisted the help of Dixie Mud:
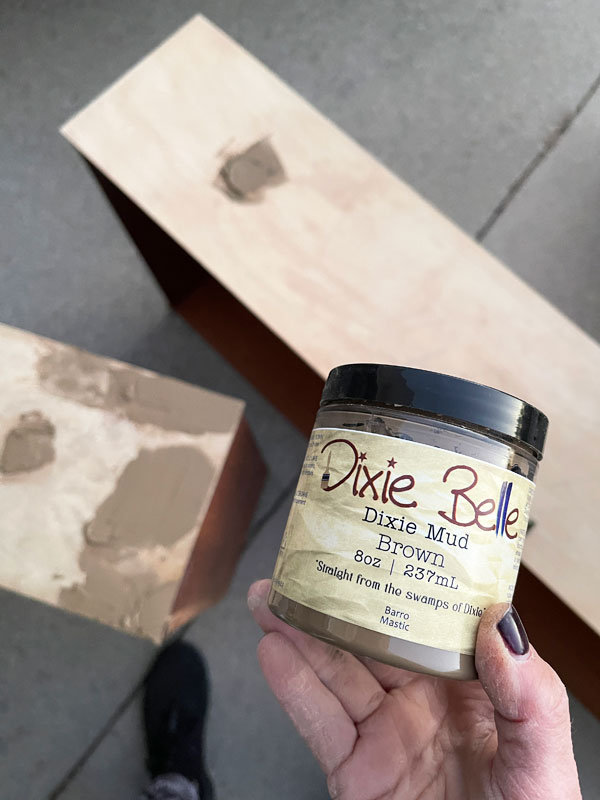
I let that dry overnight to be sure it was good and dry.
Sand
Then, I sanded those areas and the rest of the drawers where the veneer had been using my rotary sander, as well as the top since I had plans to stain that part:
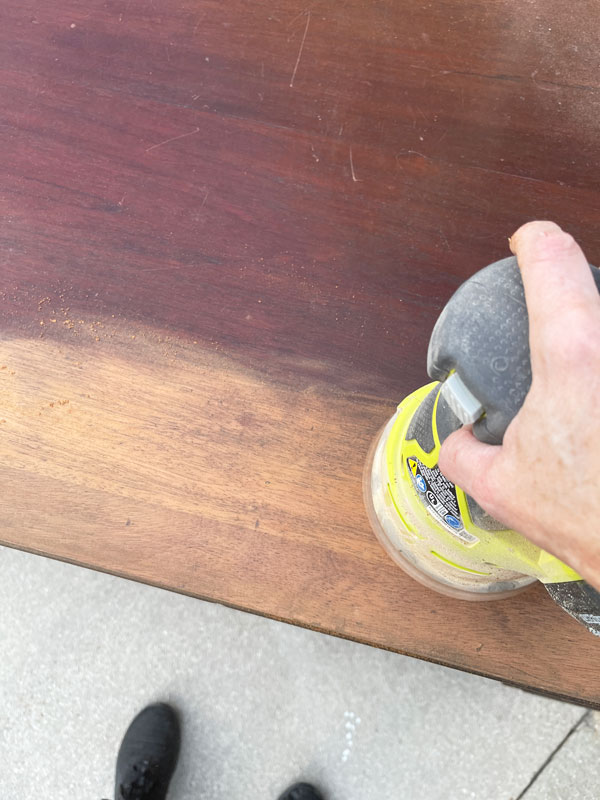
I vacuumed up all the sanding dust with my shop vac and wiped everything down with a clean, soft cloth.
Getting Rid of the Musty Odor
Next, it was time to tame that musty odor.
To do that, I got out my clear BOSS (Now Bonding BOSS) and got to work brushing it onto every surface of the inside cavity of this dresser:
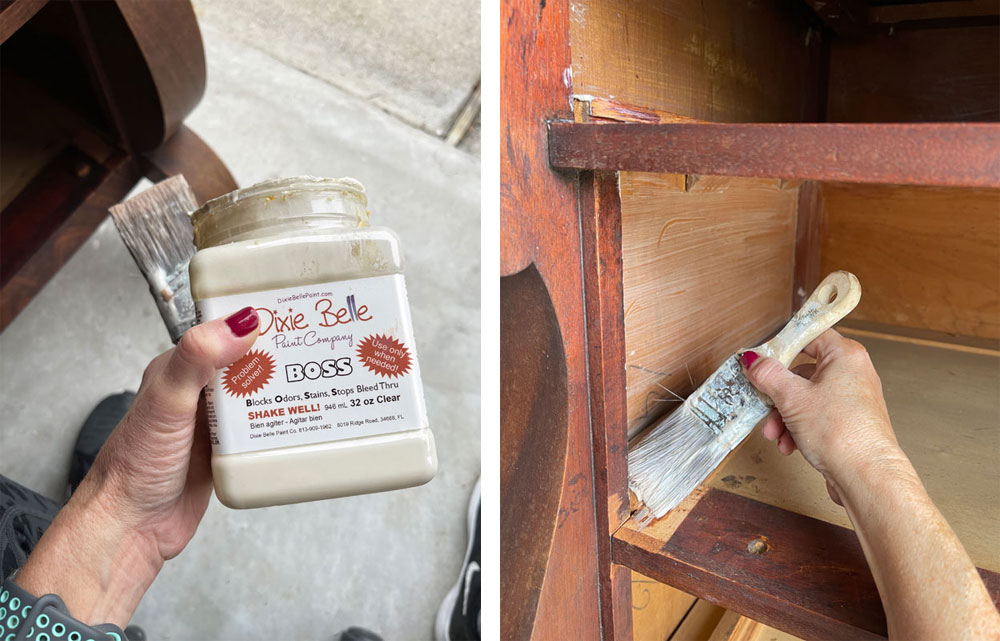
Bonding BOSS works SO WELL on odors, y’all! But, you have to cover all the surfaces that won’t be painted. It will seal in all those nasty odors. (It will leave a slight haze on darker wood, so only use on the exterior if you plan to paint.)
This is water based, so NO STRONG ODORS like shellac. The clear Bonding BOSS likes to separate over time, but just give it a good shake or stir before using.
Paint
I chose Dixie Belle’s Caviar for this piece which is a true, perfect black that I applied with my Dixie Belle Mini brush (although the mini angle is my favorite!):
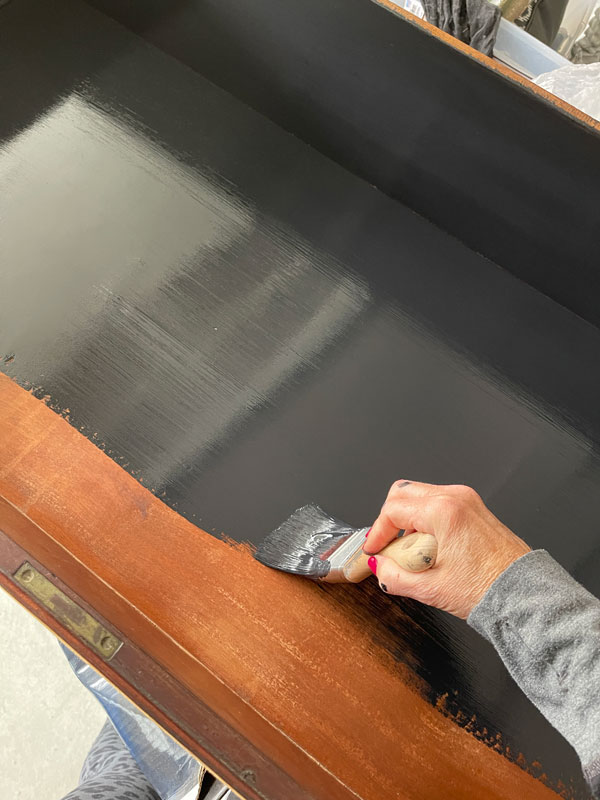
I gave everything two coats.
I had originally stained the top, but I had a change of heart once it was done. I chose Walnut No Paint Gel Stain, which is a lovely, rich color:
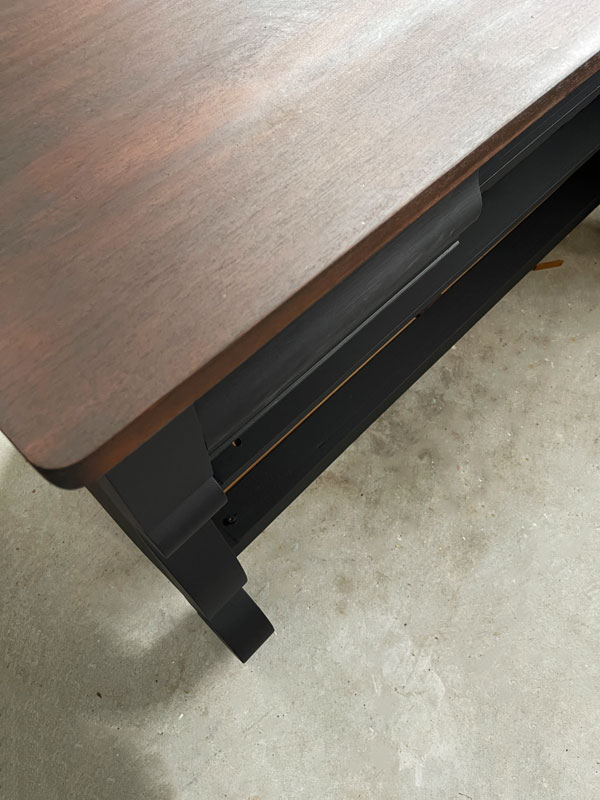
This combination is fantastic, but it just felt too masculine for the look I was going for.
I needed to let it sit for three days to fully dry, and then I painted over it in Caviar. Luckily, I had started on this piece early!
Sand
Chalk paint has a bit of texture to it, but just the lightest sanding with 220 grit sandpaper all over will make it super smooth. I like to wrap it around an old foam sanding sponge to make it easier to handle.
I did that here being sure to hit the edges a bit more as I love the look of wood coming through the black.
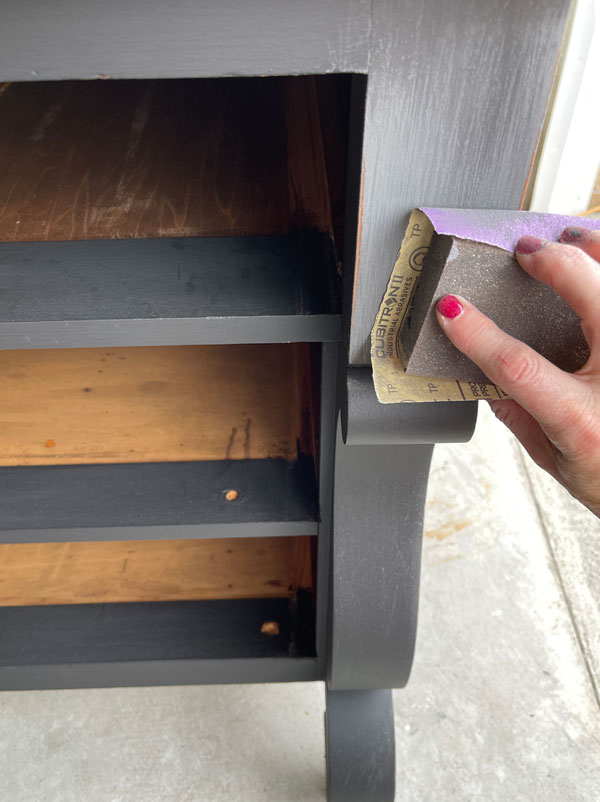
I sanded the drawers also and then vacuumed up any sanding dust with my shop vac once again:
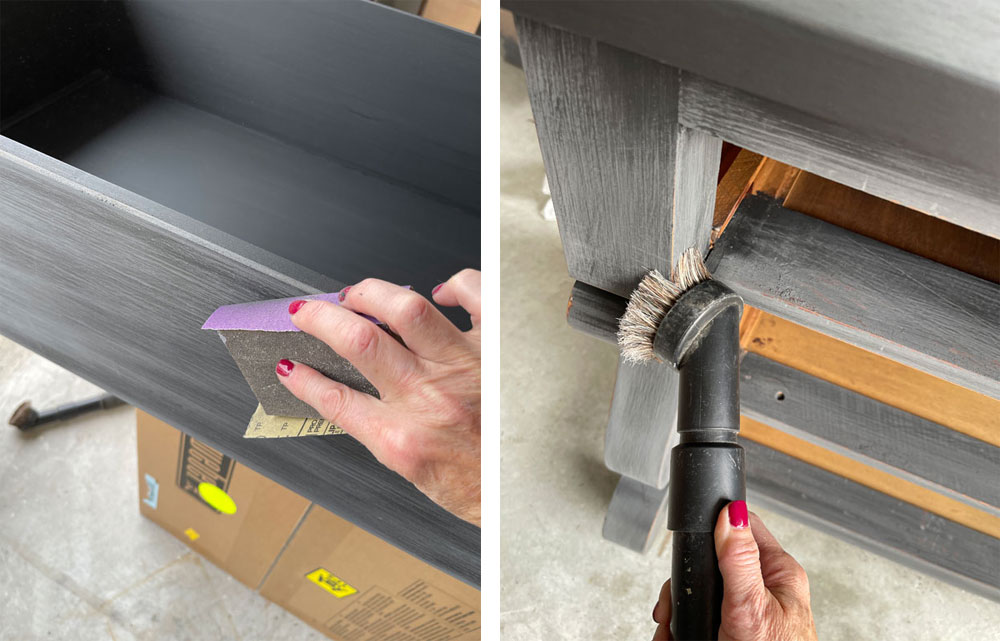
Don’t be scared that your finish now looks like a gray nightmare!
The sealer will make it sing again, I promise!
I wiped the surface down again with a clean, soft cloth to remove any lingering dust.
Transfer time
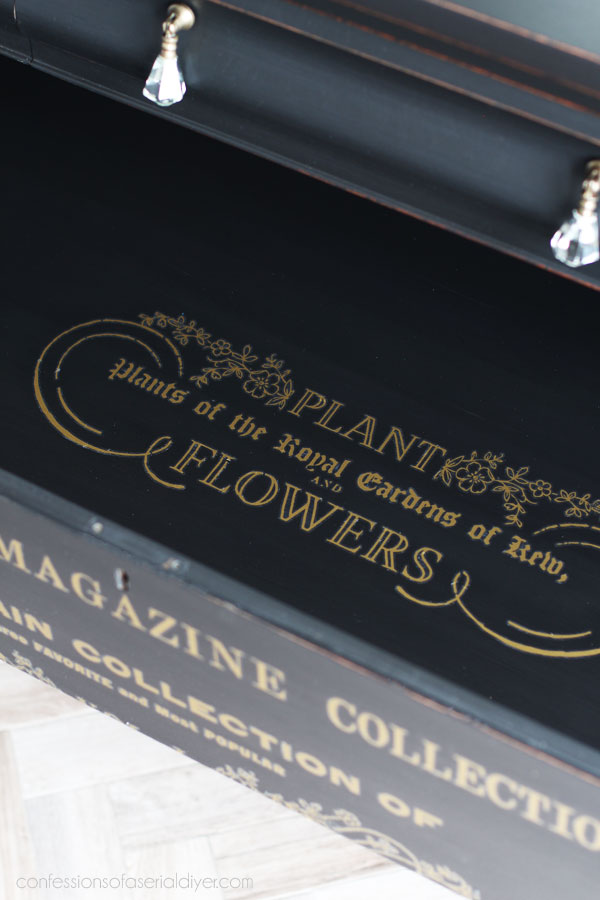
I knew I wanted to embellish this dresser with a transfer for this dresser and I found just the one!
This is Flower Collector:
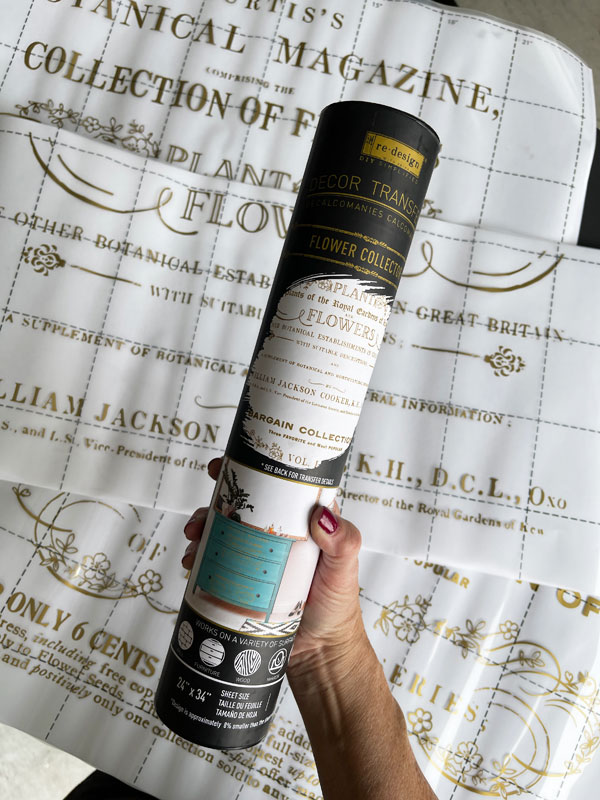
Because my dresser was super wide, I cut the transfer apart and used it a bit differently than it is laid out just to make it a bit wider at the top.
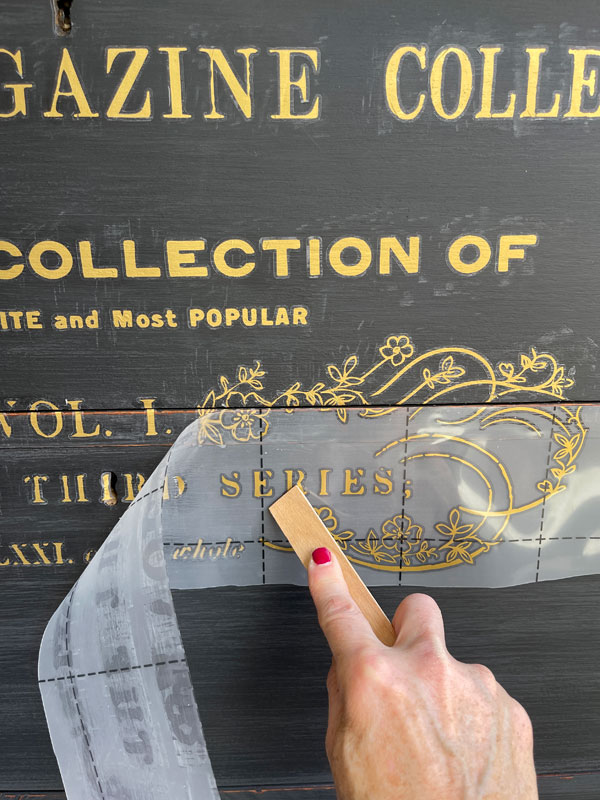
See all those marks left from burnishing the transfer? Those will all disappear when you seal.
**This transfer is currently no longer available, however, a good alternative if you like this look is the Queen’s Glory Middy Transfer, or if you like a shinier gold, the larger Perfume Notes transfer.**
Redesign transfers are often limited run only, so these transfers may no longer be available if you are viewing long after the posting date. See all the transfers I have available HERE.
After adding this transfer, I pulled out another…the White Magnolia Transfer:
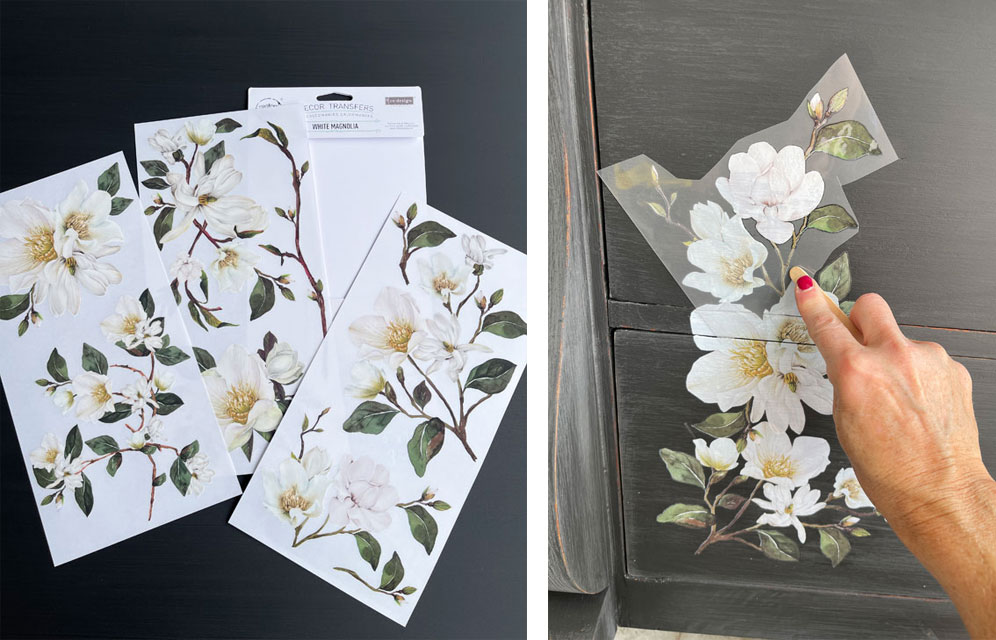
You can keep adding and layering these any way you like! I ended up using one whole set and about a half of another on this large piece.
Seal
Finally, it was time to seal this thing!
With darker pieces, you can get a “ghosting” effect when you rub you finger over the final surface.
To prevent that, I added a just a drop or two of the Caviar to my Satin Clear Coat. (I actually dipped my stir stick into the Caviar a bit and then stirred it right into the Clear Coat, but that would be equal to about two drops…just enough to tint the Clear Coat.)
I used a blue sponge applicator to apply it…
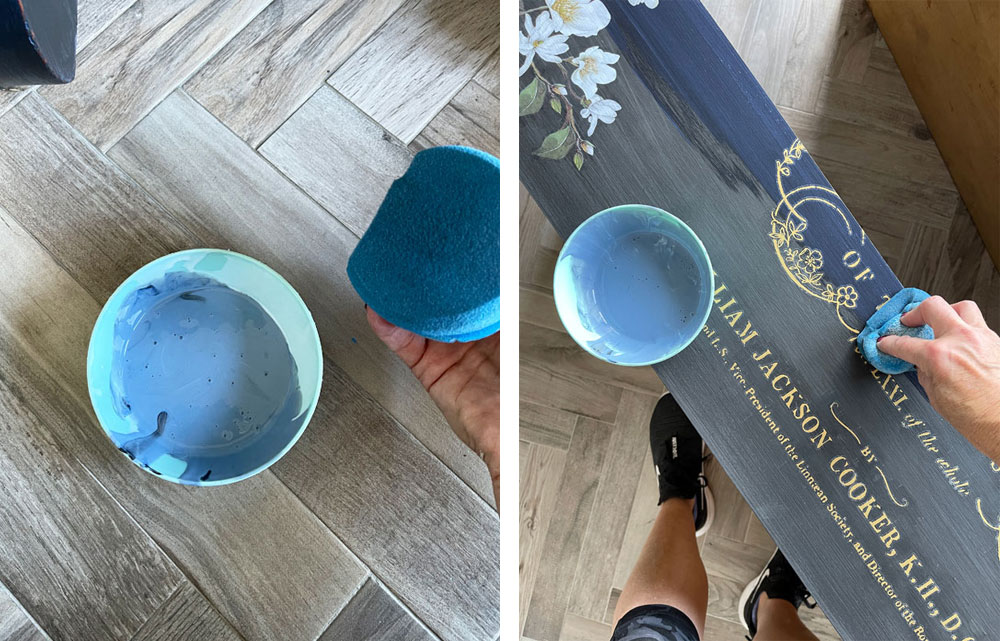
Cutting one or both of the edges of the sponge makes it easy to get right up against flat edges like the tops of dressers.
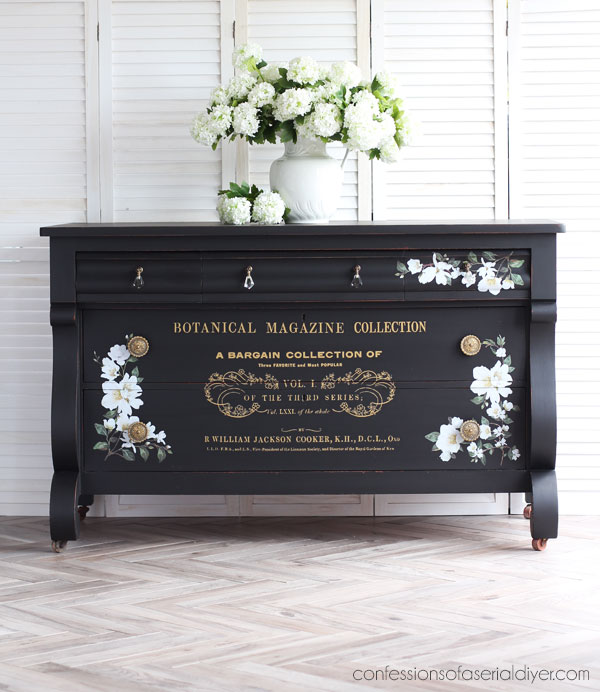
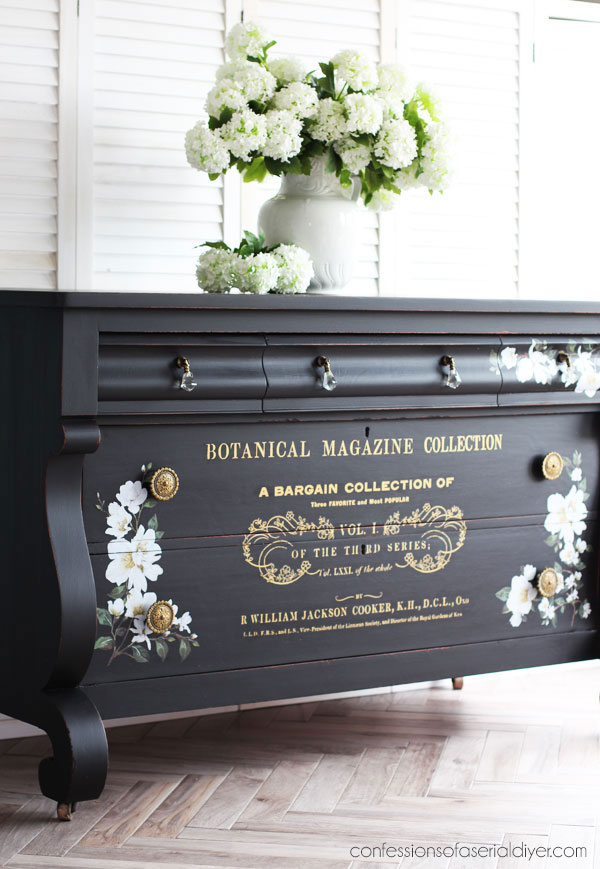
Are you ready to see how this heavy, masculine empire dresser turned out??
So much better!!
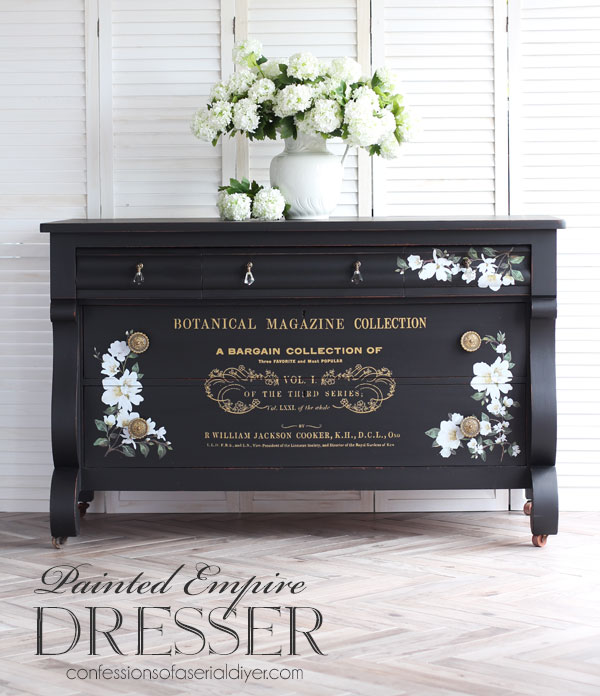
I had put off this makeover for so long because I knew the work involved, but I was so thrilled to finally have it done!

Looking at it now, it was a steal for $75! I was thinking that was a bit much lol…I need to stop being so cheap!
And although this isn’t typically my favorite style of furniture, the curvy details are so striking in this sleek black…
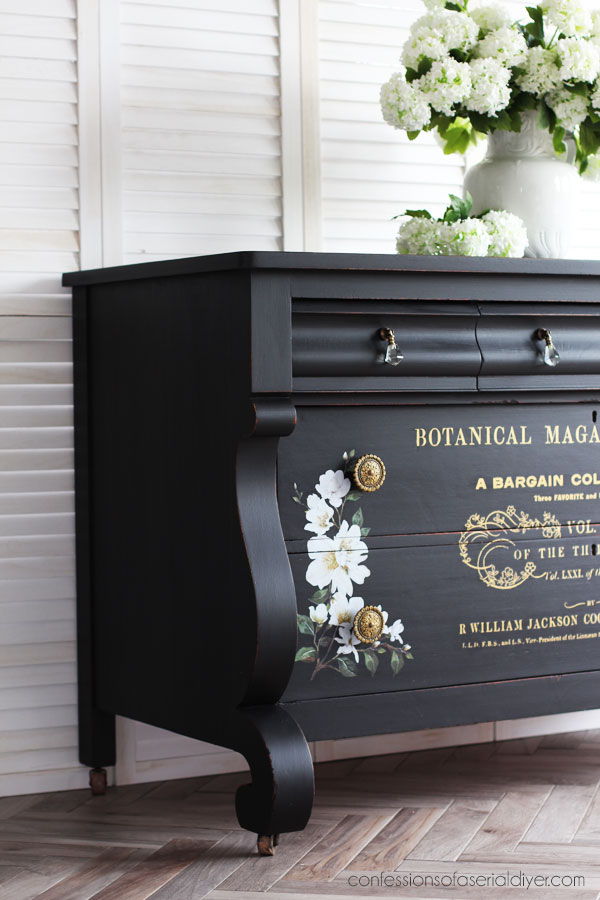
One thing I love about this white magnolia transfer is that they stayed nice and bright over the black…

And how about that gorgeous hardware?
The top didn’t have pulls originally, but these glass ones from Hobby Lobby were just perfect and really fit the style of this dresser:
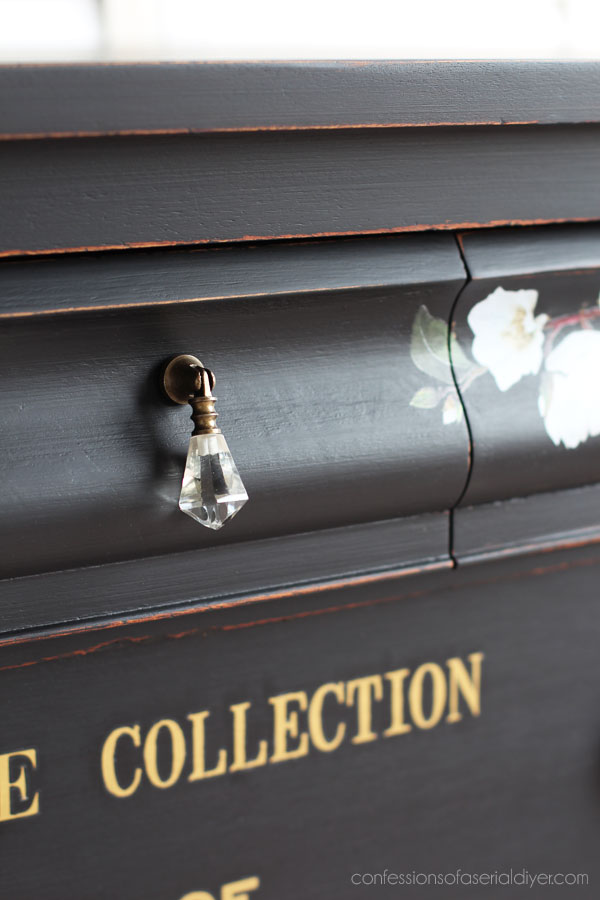
They were originally more of a dark bronze color, but I wanted gold, so Gold Gilding Wax to the rescue!
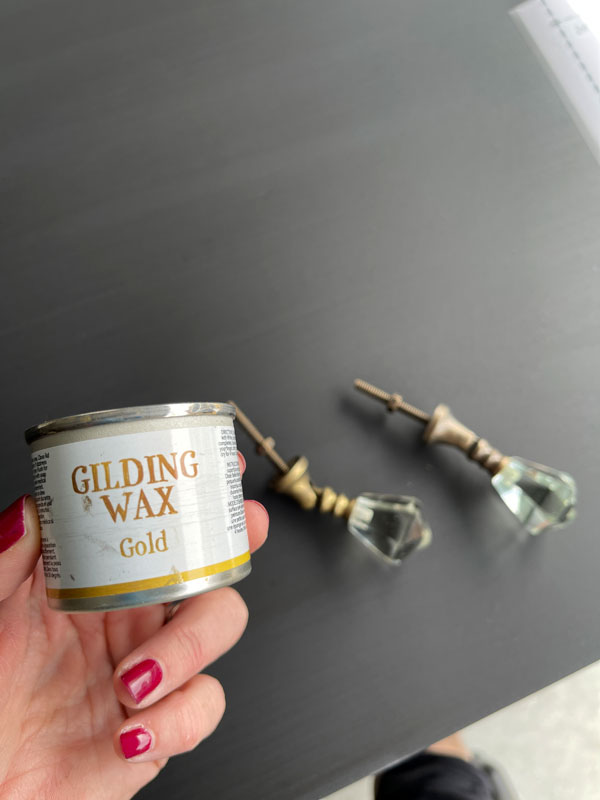
For the larger drawers, I needed something very large and these were just what I was looking for!
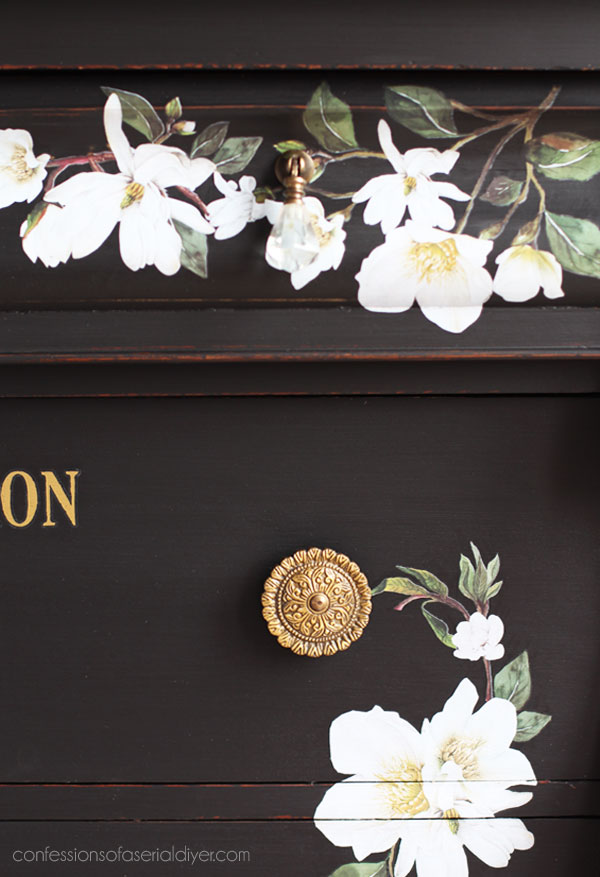
I found these at Hobby Lobby also.
The Drawers
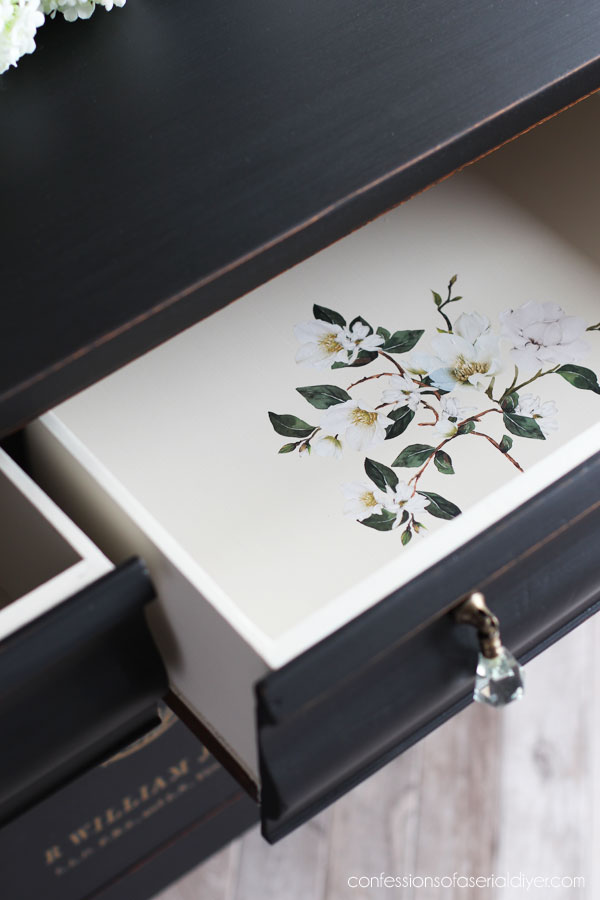
The drawers rarely go untouched and these definitely needed some love, so the smaller drawers got painted in Silk Endless Shore:
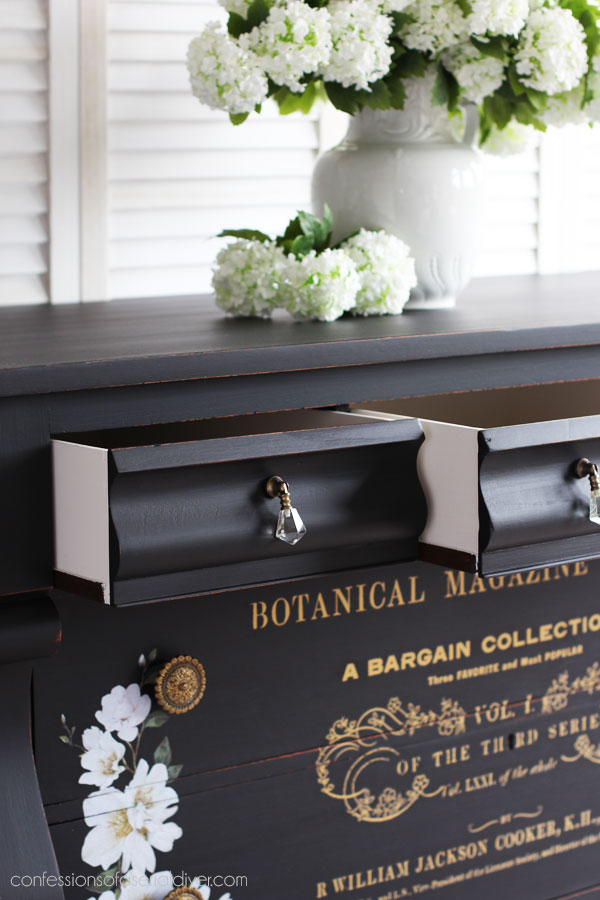
I did apply white Bonding BOSS on these first to prevent any bleed through.
I used some of the White Magnolia transfer on the larger middle drawer:
The two larger drawers were painted in Caviar and I used some of the Flower Collector transfer on one of them:

I hope you enjoyed this one! What do you think about painting the stained top black instead? Was it the right decision?
What you can’t see
Due to settling over time, the top drawer needed to be lifted a bit in order to pull out the bottom drawer. When I took it to my booth, I ended up including a note in the top drawer saying that it had come to me in desperate need of some TLC and that I brought it back as well as I could, including instructions on how to get that bottom drawer to open. I also said that I hoped someone would come along who loved it and would cherish it, flaws and all.
A Happy Ending to this Makeover story
A couple of weeks in, I got a call from a gentleman about it. He wanted me to know that he and his wife had fallen in love with it, saying it was the first piece they had found that they both agreed on. I was so happy! So now it has a happy home!
If you enjoyed today’s makeover, you’ll surely enjoy this one too:
I’ll be back with my Trashy Treasure ladies, Nancy and Denise, on Tuesday sharing this little table:
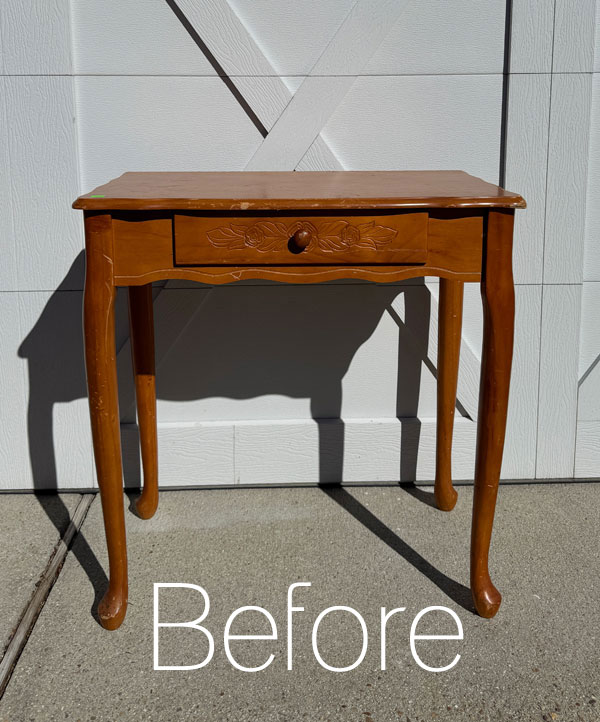
UPDATE: You won’t believe how CUTE this one turned out! See it HERE now!
I hope you all have a fantastic weekend!
XOXO,

Don’t Miss a Thing!
If you like what you see, there are several ways to follow along!
EMAIL * INSTAGRAM * FACEBOOK * PINTEREST


Get FREE SHIPPING on all orders over $50. No code needed at checkout! Orders under $50 always enjoy $8 flat rate shipping! Most orders ship same or next business day!





Marj says
You are so creative. I love this one!!
Christy says
Thank you, Marj! XOXO
Janice Redden says
Christy, i remember this dresser – and still think it is just stunning! The happy ending story is so sweet. Even sweeter that a guy also loves some “whimsy” furniture (that’s my definition vs “traditional, plain” furniture; my husband calls it “froo-froo”..LOL.); anyway, it’s gorgeous.
Also, this week I was working inside on a smaller project and I needed to add Clear Coat, but all my brushes, sponges etc were in my studio; go out andvgrrt ’em, right…nope – having a lazy moment. But, I had a well used/worn DB sanding pad. Hmm, grit on the back but a sponge on the other side. That’s what I used (the sponge side)and it was fantastic!! The edge from the grit side was a perfect guide up against the edge of the drawer and easily into the rounded shapes of the moulding. And, because all the edges are straight, no need to cut up those beautiful blue pads! Washed it, dried it and used it again. So, thank you DB!
Christy says
Thank you, Janice! I love that he loved it as well! And YAY for being “lazy” ha ha!! That is so smart! I will most definitely have to try that now with an old sanding sponge!! XOXO
Jeanne says
Now that’s a makeover! When you do ones like this, that’s when I realize why I look at your page every Tuesday and Thursday. Who would want to miss works like this? As much as I love the original dresser, since it needed TLC, you were the one to take it on and make it right. I appreciate what you do, I’m envious that your hand doesn’t have arthritis and I am a forever fan. Surprised the people who sold it to you didn’t want it back.
Christy says
Thank you so much, Jeanne! I really appreciate all your very kind words! While I wasn’t super excited to tackle this one, I loved bringing it back to life! I never did show my friend the end result or she may have wanted it back lol. I’m so glad it found a great new home! XOXO
Gloria says
Hi Christy. I don’t remember this re do so it was new to me. Yay!! It was magnificent!! 🤩
Christy says
Oh yay!! It was a good one to reshare then! Thank you, my friend! XOXO
Robin Wutzke says
Gosh, I wish I lived in Virginia Beach! My house would be full of your magical makeovers!! This is fabulous!
Christy says
Aww thank you so much, Robin!! XOXO
Janina says
Absolutely STUN-NING!!!
Whoulda thunk that heavy thing in such bad shape could be SUCH a ComeBack Kid?
Wow!!!
Christy says
Thank you so much, Janina! Right?? I never imagined it could be soft and elegant ha ha! XOXO
Mary Jo says
Love the creativity that’s in your bones! What a beautiful makeover. I enjoy reading all of your tips on how to fix things and make them workable again.
Christy says
Aww thank you, Mary Jo! I’m so happy to hear that you enjoy what I share! XOXO
Cyndi says
I remember this one, and I’m glad to see the “rerun” of it. (You always give good tips and how-to’s.) It is stunning!
Christy says
Thanks so much, Cyndi! This one definitely deserved a second look! XOXO
Tia Trevallion says
Beautiful piece and I always love your drawers, LOL. I had never thought about lining the drawers of my project pieces until I saw yours and what a difference it makes. Definitely adds that WOW factor.
I am a huge fan of antique furniture makeovers. The quality, curves, style and detail of antique furniture is something that modern furniture can’t touch, IMO. My only complaint is the drawers. Since antique drawers don’t have any hardware to assist with opening and closing and are always just wood against wood, trying to get some of the larger drawers open (especially when they’re full) can be a struggle. I have a large buffet table that I avoid having to pull out the main drawer at all cost. With the holidays approaching, I’m gonna have to open that dang drawer. 😩Do you have any tips or magic tricks to help make the drawers easier to pull in and out other than waxing?
Christy says
Thank you so much, Tia! I love the surprise of adding a little something extra to the drawers too. As for sticky drawers, if you have any Big Mama’s Butta, that works really well with helping drawers to glide. Apply it to both areas where the drawer is sticking (on the drawer and the interior). Running a tapered candle along that edge has worked for me in a pinch also. Be sure to buff the area really well after adding it to make it slick. Good luck! XOXO
Lani Ichikawa Ennis says
I love, love, love how this turned out. You knocked it out of the ballpark. I especially love it because I have a dresser almost exactly like it except mine has a mirror attached and my upper drawers have glass knobs. I got it to “one day” redo it (I’ve never redone anything before) but still haven’t gotten to it. Mine also has some veneer chips missing. I was thinking of just filling in with the mud from reading some of your other redos.
Christy says
I’m so glad you love it, Lani, thank you! Yes, you can definitely patch smaller areas of missing veneer with Mud. I know the feeling of putting something off for a long time as I did that with this one as well lol. Good luck with yours! XOXO
Liz Shivel says
Hi Christy, I didn’t recall seeing this before, but it’s beautiful! The caviar black is a winner every time! The magnolias are stunning. Nice redos on the drawers too! Lovely as always! Pet Layla for me! 🐈
Christy says
I’m so glad this was a new one for you! Yes, caviar and magnolias are always winners for me! Will do…give your girls some love from me too! XOXO
Addie says
She’s a beauty!!!! I always fall hard for the back ones!!!
Christy says
Thank you, Addie! Black fixes just about anything ha ha! XOXO
Josee Turner says
Just marvelous!
Christy says
Thank you, Josee! Have a wonderful weekend! XOXO
Michele M. says
Oh my gosh, it is STUNNING. You had to work so hard for this item but wow wow wow is it worth it or what??? Just gorgeous, Christy.
Christy says
Thanks so much, my friend! I was not looking forward to working on this one AT ALL, but it was definitely worth it in the end! XOXO
Allison Meadows says
It’s beautiful! Did you put the tinted stain over the transfers, too?
Christy says
Thank you, Allison! I did seal over the transfer with the tinted sealer, and it did not affect the transfer at all. XOXO