Hello, amazing friends! Y’all know I love to redo flatware boxes and pick them up whenever I see a deal on one, but have you ever tried to remove the lining?? That is the hardest part of making over these boxes for sure, so today, I’m sharing how to remove the lining of a flatware box as well as the tools I use to do it. I don’t know that it will make it easier, but if you haven’t tackled this step before, at least you’ll know what to expect.
Let’s get to it!
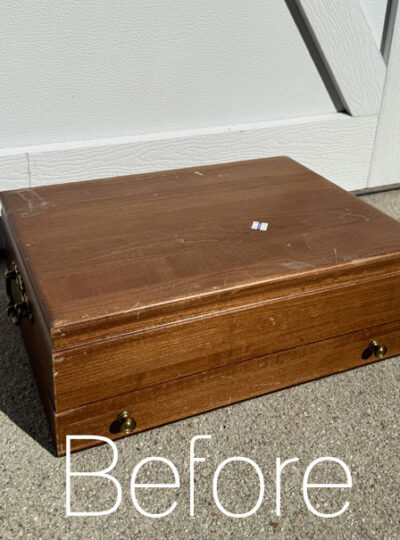
First of all, here is how this flatware box started:

It was originally $9.98 but it was marked down to $4.98. That is in my price range!
It was a little banged up on the outside, but not too bad.
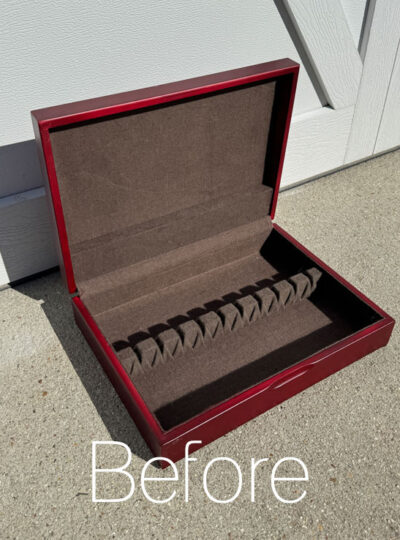
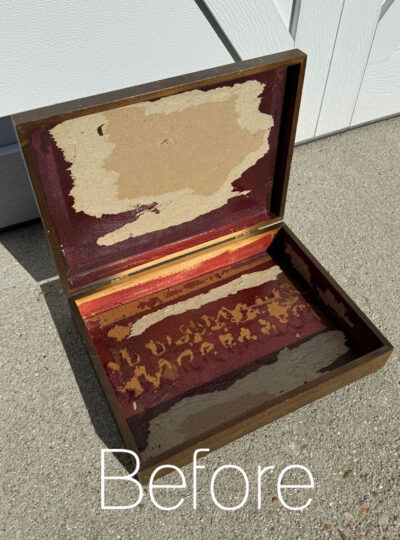
And here is the interior before:

Like most of these boxes, it was in perfect condition. Unfortunately though, it had to go!
How to Remove the Lining of a Flatware Box
Here are the tools I use for this tough job:

- The first step is usually to remove the part that separates the flatware. I do that by rocking it back and forth:

If you can’t get it to budge, whack it with a hammer.
That piece is usually held in place by nails from the bottom, so you can pull it up and out after a few back and forth motions. BE CAREFUL of the nails that may be sticking up below it!
- Now you can get to the unfinished edges of the lining. Sometimes that pulls out easily…

And other times, I need to enlist the help of my needle nosed pliers to give me more grip:

- This box had a lot of glue on the bottom and although that does not need to be completely cleared away, it does need to be more smooth than this one was. (The bottom of each section will be covered with foam core wrapped in fabric.)
I smoothed it out the best I could using a razor blade:

You can also use a metal putty knife.
Do I need to remove the entire lining from the sides?
No. That will be covered with fabric, but it does need to be smooth so any bumps don’t show through the fabric.
Darker fabric will hide those imperfections better, but we are using a lighter fabric on today’s box.
Here is the box with the lining removed:

You can see the sides are pretty clean, but the bottom of each section still has paper remnants. Again, those areas will be covered with foam core wrapped in fabric, so this box is ready to go!
Clean
Now that the hard part is out of the way, this box got a good cleaning with White Lightning.
It comes in a powder and a spray formula, but the powder goes a lot further. I just mix one TBSP into a half gallon of warm water and stir:

It is a degreaser and a deglosser, and gloves are recommended.

Once I had it clean, I used fresh water to wipe it down once more and this box was ready for paint!
Paint
I chose a color from the newer Cottage Collection from Dixie Belle, Cottage Door:

This was after one coat, but I gave it two.
Blend
I wanted to blend a little Buttercream into the top for a highlight. To do that, I added a fresh frame of Cottage Door:

Then I spray misted the area a bit with my mister bottle:

I applied a tiny amount of Buttercream to my Best Dang Brush and swirled that into the Cottage Door border:

See more about blending HERE.
Sand
Once I had a look a was happy with and it was good and dry, I sanded all over to smooth using a sanding sponge.

These are super fine and are great when you don’t want any distressing.
Transfers
I knew I wanted to use another new transfer for this piece and went with this Blushing Blooms transfer:

See all the new transfers, decoupage papers, moulds, and more HERE!
It has lots of smaller pieces that can be put together any way you like, so I started by cutting them all apart:

I laid out some pieces first to get an idea of what I want to use and got started…

I continued adding more pieces to the original one in the corner until I was happy with it:

Seal
Once I had all my transfer pieces in place, I sealed with Clear Coat in satin using the Blue Sponge Applicator.
Flatware Makeover Reveal
Here is how this pretty box looks now from the outside:


I kept the placement of the transfers pretty simple…


The Inside
Of course I had to cover all the ugly on the inside!


Don’t be intimidated by this part at all!
I have a full How to Line a Box with Fabric tutorial HERE.
Basically, you will cut strips for the sides about a half inch wider than the depth, as well as pieces to cover the foam core pieces that you will cut to be covered for the bottom:

I iron one edge over on the strips, and then hot glue the strips in place:

The foam core will be wrapped with fabric also and secured with hot glue. Then, you will glue it in place.
See the link above to my box lining tutorial for more details!
Now this box can be used for so many things!


The Knob
To add some decorative detail to the back of the knob, I used the SOHO Fusion mould:

I used Amazing Casting Resin to make it…so easy!
I painted it to match the box…

That also saved me from having to fill the holes:

The little glass knob came from Hobby Lobby.


This is so far from where is started!

One more done!

I feel like I’ve made a real dent in this haul now!
See anything you may have missed below!
Vintage Louis XVI Armchair Makeover #2
$10 Vintage Folding Game Table Makeover
Painting the Smalls #32
Longaberger Basket Makeover
Bunny Rocker Makeover
Small Glass Door Cabinet Makeover
Estate Sale Dresser Makeover
HUGE Estate Sale Tool Box
Estate Sale Mirror Makeover
$5 Yard Sale Night Table Makeover
Update a Thrifted Box for the Holidays
Black Painted Antique China Cabinet
Turn Old Frames into New Holiday Decor
How to Upholster a Louis XVI Armchair
How to Repurpose a Table Top (&bonus…see what I did with the rest HERE.)
Dated Bar Stool Makeover
Update a Yard Sale Tote for the Holidays
Painting the Smalls #31 (the dollar edition)
IKEA Bookcase Makeover
$5 Yard Sale Night Table Makeover
Want more box makeovers?? Here’s 13 more!
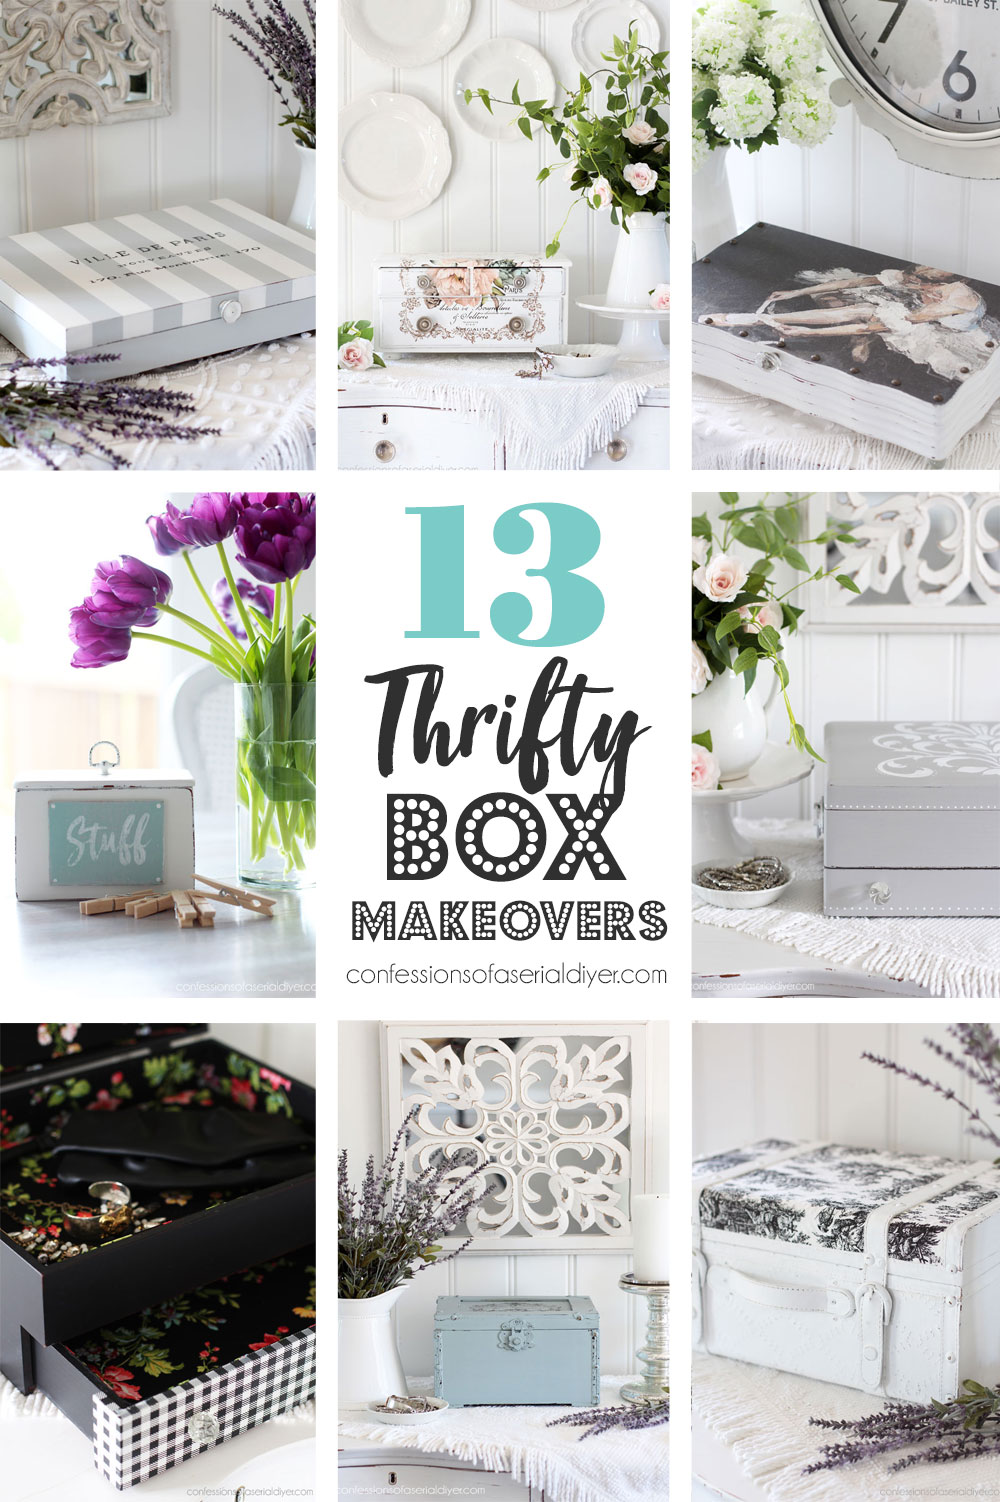
See them all HERE!
I’ll be back on Thursday with a field trip to my booth and some exciting booth news:

Come see where all my pieces end up!
UPDATE: Take the tour of my booth HERE now!
XOXO,

Don’t Miss a Thing!
If you like what you see, there are several ways to follow along!
EMAIL * INSTAGRAM * FACEBOOK * PINTEREST


Get FREE SHIPPING on all orders over $50. No code needed at checkout! Orders under $50 always enjoy $8 flat rate shipping! Most orders ship same or next business day!




Mary Kaiser says
Oh my gosh it is beautiful now. I can’t beleive how well the fabric for the inside matches the paint color. It turned out so nice! Yay, I love field trips to your booth, and I can’t wait to see what the exciting news is!
Christy says
Thank you, Mary! This fabric was in my stash…love when I don’t have to go buy it! Hope your week is off to a great start! XOXO
Kathy W says
Good morning, Christy!!
That color, the transfer…they are just made for each other!! The color really POPS!! Superb!! Thank you for the details for removing the lining!! SO helpful!!!!
Kathy W
oxox
Christy says
Thank you, Kathy! I love this transfer against that color too! Removing the lining is the worst part, but if you can get past that, the rest is fun! XOXO
Sue says
I love your color choices on the outside and interior. This is will be
a great trinket box for someone!
Christy says
Thank you, Sue! I love playing with color on these smaller pieces! XOXO
Teresa Brown says
Yes , I have to agree with the others it turned out really pretty . Love the color too. I have a box similar to that one , just one level. All it needs is to be painted and whatever else I want to do to it . I already removed the lining just waiting till I make my final decision as to how I want it to look.
Christy says
Thank you, Teresa! There are so many ways to reimagine these boxes…nice that yours is ready to go! Enjoy! XOXO
Patricia says
Hello Christy,
I too love old silverware boxes. I find using wallpaper remover to clean up the glue works wonders.
Christy says
Thank you, Patricia! Thanks for the tip! XOXO
Cecilia says
I love it! The transfers go perfectly with the color of the box. And it’s always fun to see your process of readying a piece. These flatware boxes are getting a new lease on life when you redo them…I mean, who uses them for their original purpose anymore?
Yay! A visit to your booth! Can’t wait! Hope your week is off to a great start!
????Cecilia
Christy says
Thank you, Cecilia! These boxes are like blank canvasses, I just love them! And even if you do still have that fancy flatware inside, you can still update the outside! XOXO
Jaye says
Very pretty. Your ability to match colors, transfer and fabric is amazing! You have inspired me to redo a box from my great aunt. Hope my effort turns out half as nice as your boxes.
Christy says
Aww thank you, Jaye! How nice that you have one that has been in the family…enjoy! XOXO
Betty Sue says
Love it! The color and transfers are beautiful. What a fun box.
Christy says
Thanks so much, Betty Sue! XOXO
Geri Davis says
It’s so beautiful Christy!
Thank you for sharing how you remove the inside as it seems kinda daunting to try!
Christy says
Thanks so much, Geri! It is a bit of work for sure but totally doable! XOXO
Cheryl B Acampora says
Girl! That box is awesome! I love the color and the transfers. Lining it with the fabric looks so good. You are amazing!!! Enjoy your week!!
Christy says
Aww thank you so much, Cheryl! These are so fun to play with!! XOXO
Shirley says
Absolutely beautiful! You are one talented lady.
Christy says
I appreciate that so much, Shirley, thank you! XOXO
Caye says
Great job, Christy! The boring box is gone. I love the color you chose because it’s different, and that fabric is awesome. Did you choose the paint color first, the transfer first, or the fabric? Do you often muse, “I love this transfer so let’s see what paints I have to coordinate; ” or, “This is a great color, let’s see what transfers I have to meld”? Then, how do you choose the fabric? I know you have quite a stash of fabric, but do you have to go shopping for a “right” fabric?
Christy says
Thank you, Caye! Great questions! For this piece, I had a transfer in mind first, so I chose the paint color to coordinate. I had redone a smaller box in this color when it first came out and had some fabric left over from that one. If I don’t have a fabric, sometimes I do go looking for one, but more often, I will move onto plan B lol. XOXO
Marcie Lovett says
I cannot believe you found a fabric that matches the paint exactly, Christy! Another beautiful transfer and another outstanding box makeover.
Christy says
Ha ha right?? I had redone a smaller box in this color when it first came out and I had some of the fabric left over. I don’t recall if I bought it specifically for that box, but probably. It’s a great match! Thank you, my friend! XOXO
Michele M. says
Oh my, isn’t this once ugly forgotten forlorn ducking a beautiful stunning swan now!? Who wouldn’t want this sitting on a dresser? What a perfect gift for someone – with Mother’s Day not far off…….that will sell fast.
Christy says
Thank you so much, Michele!! I love these boxes because you can go bold without hesitation and just have fun! Always hoping for a quick sale! XOXO
Cletia says
So precious! Great transformation & love this color!
Christy says
Thank you, Cletia! XOXO
Jackie C says
You always find those great boxes with two drawers! I like the blending, it gave it dimension. Pretty color, and transfer.
Stay warm!!
Christy says
Thank you, Jackie! I get so excited when they have a drawer lol. Just got done shoveling so warming up now! XOXO
Marty K says
This is just beautiful! I’m saving it to a Pinterest board! Love it
Christy says
Thanks so much, Marty! XOXO