Welcome to Trashy Treasures Tuesday, amazing friends! My blogging buddies and I are sharing makeovers on items that could use some love. We do that all the time, but it is so much more fun with friends! I have a fun mermaid box for you that I redid from a flatware box, and I am also sharing how to reconstitute chalk paint that has become thickened.

Here is how this box started when I found it at the thrift store for only $3.99:

This one wasn’t as pretty as some are, especially with those awkward chunky pulls on the drawer.
Remove the fabulous lining
The interior was lined in this bright red felt:

That lining had to go!

See how I remove the linings of these boxes HERE.
Next, I knew I wanted to remove the chunky wood pulls, and I was able to get a spatula behind them and work them loose to get them off.
I’ve included a few affiliate links so you can find the products I love.
Clean
The rest of this makeover started like most, with a good cleaning using my go-to paint prep, White Lightning. I just mix one TBSP into a half gallon of warm water and wipe everything down using an applicator pad:

Then, I swapped out my dirty water for clean water and gave it another once over to remove any residue. Gloves are recommended.
Fill the holes
Before I could get to the fun part, I needed to fill the holes left by the pulls as well as a few imperfections, and I did that using Dixie Mud in brown:

I sanded everything smooth once the Mud was dry.
Paint
For the direction I wanted to go with this one, I knew I wanted to paint this piece in Mermaid Tail from Dixie Belle:

Look at that old label! You know this one had been hanging around in my stash for a long time!
When your jar of paint has a lot of air in it, it starts to thicken and dry out just like this one did:

Sludgy would be a good word to describe it.
How to Reconstitute Chalk Paint
Here is the easiest way to bring it back to life!
I added about a quarter cup of water or so and then grabbed this silicone mixer paddle I picked up on Amazon HERE that just attaches to your drill like a drill bit:

I put it into my paint and started mixing. Here’s how it started…

And look how smooth it became after just a couple of minutes:

Like I just opened it! I was able to use the rest of the jar on this project!
Sand
I gave this box two coats, and once the paint was dry, I sanded all over to smooth with 220 grit sandpaper:

Adding Mermaid decoupage paper to the top
Here is the paper I envisioned using to bring this mermaid box to life:

Isn’t she so pretty?? This is the Mystic Waves decoupage paper from Redesign.
Redeisgn items are often limited run, so this paper may not be available if you are visiting long after the posting date.
I ironed her on low heat using an iron this time to release the folds:

I added the top portion of her to the top of the box, applying Matte Decoupage Gel to the top of the box first, and laying the paper. The front corners were rounded, so they were a bit tricky…

Once I figured out the corners, I added another coat of the gel on top:

Seal
I sealed all over using Clear Coat in satin, applying it with the blue sponge:

(I did apply a coat to the mermaid as well for a little extra protection, but I used a brush for that.)
Mermaid Flatware Box Makeover Reveal
Here is how this once ugly duckling box looks now!

I LOVE this gorgeous color!

Let’s see that beautiful mermaid!

Isn’t she so pretty?
But Christy, you can’t tell she’s a mermaid now!
Here ya go! Boom!

How cool is that??
I’d like to say that I am so smart and planned this from the start, but that is not true!
The rest of this box is lined in this fabric:

See how I line these boxes with fabric HERE.
It was honestly the only thing I could find that worked with this paint. I had also lined the drawer with the same fabric.
But then…
I was so bummed that you couldn’t really tell she was a beautiful mermaid, and it was at that point that I had an epiphany.
What if I continued the image in the drawer??
I busted out what was left of my jar of reconstituted Mermaid Tail and started painting that fabric I had just lined that drawer with…

It wasn’t easy taking a brush to that lol.
Then, I cut the paper with my rotary cutter and mat set, giving me perfectly straight cuts:

I applied it the same way…decoupage gel, then paper, then gel.

Now you can tell she’s a mermaid!

The front area on the top of the box was indented in that are before, so I just covered over it with the paper and added this piece that came off of another project piece:

The two knobs on the bottom don’t seem to match in color here, but they match better in person. I decided not to touch them up with gilding wax as I like the original brassy finish with this look.
Another peek at how pretty she is!

This was a fun one!


I am SO happy I went back and painted the drawer and added the rest of her!
Don’t forget to check out what my friends are sharing today as well:

1. Me! So glad you’re here. 🙂
2. Nancy’s New Look for old Artwork
3. Denise’s Table Makeover at Salvaged Inspirations
One more done woohoo!

I was so happy to get to use this gorgeous color for this project!
I used this same color on this curbside find as well:
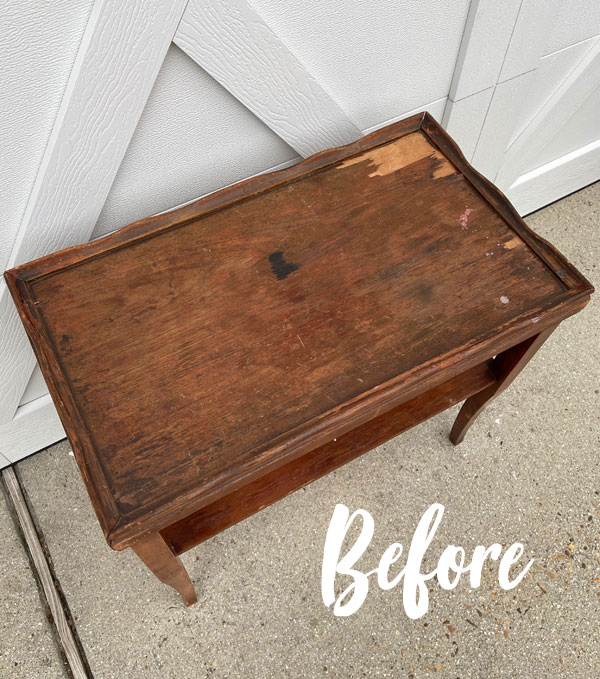
See how it turned out HERE!
And, I shared seven flatware box makeovers last week. If you missed, them you can see them all HERE!
I’m a huge Washington Commanders fan and chose to watch the first game on Sunday instead of work on Thursday’s project (slacker!), so I will have an oldie but goodie for y’all on Thursday, this super sad hutch that Jack helped me with:

Update: This piece is an ugly duckling no more! See it now HERE.
I hope your week is off to a great start!!
XOXO,

Don’t Miss a Thing!
If you like what you see, there are several ways to follow along!
EMAIL * INSTAGRAM * FACEBOOK * PINTEREST


Get FREE SHIPPING on all orders over $50. No code needed at checkout! Orders under $50 always enjoy $8 flat rate shipping! Most orders ship same or next business day!




Mary Kaiser says
Oh it is so pretty now! Good job using the rest of the mermaid in the drawer! Someone will be so happy to open that and see the rest of her in there! Thanks for the tip about the thick paint, I might have some jars that I need to refresh, now I know how to do it! Your the BEST!
Christy says
Thank you, Mary! I am so happy you can see she is a mermaid now lol! And yes, don’t toss that thick paint. This one was a few years old and came back good as new! XOXO
Jeanne says
It’s times like this, or projects I should say, that make me realize why I follow you and look forward to Tuesdays and Thursdays. This is fabulous! I’m not often a fan of these boxes–I could take or leave them, and I usually leave them, but you have changed my mind. This is so pretty and unique. I can imagine it selling quickly. How smart to add the mermaid body to the drawer. I loved your mic drop! LOL! Keep it up!
Christy says
Aww I love that so much, Jeanne, thank you! I have always loved mermaids, so this might be one of my favorite projects! XOXO
Cecilia says
Oh, I like that you added the rest of the mermaid inside the drawer! That’s a fun feature. And a gorgeous color too. Funny how I never see those silverware boxes around here…people either still use them or never had them. I like how you give them new purposes! Have a great week!
❤️Cecilia
Christy says
Thank you, Cecilia! I’m so glad you can see she’s a mermaid now, and yes this color is so pretty! Funny how you don’t find these boxes near you. Hope your week is off to a great start! XOXO
Jackie C says
Brilliant!
Christy says
Thank you, Jackie! XOXO
Tracey A says
That is cool!
Christy says
Thank you, Tracey! It’s a fun one! XOXO
Mary Smart says
Christy, What a brilliant idea to continue the image in the drawer! I will remember that idea!
Christy says
Thank you, Mary! Fun for sure! XOXO
Fran says
Hi Christy! this turned out beautiful! I love the bottom drawer that completes the image. One question. I did one of these and the drawer does not slide in and out easily. I’ve sanded and waxed it but no luck. Do you think it’s because of temperature changes or just that the box itself has ‘warped’.???
Christy says
Thanks, Fran! If you take the drawer out and lay it on a flat surface, you will be able to see if it is warped. I added some Big Mama’s Butta to this one to help it glide, but candle wax usually helps too. Maybe it has sustained moisture damage at some point? XOXO
Barbara says
I’ve been following you for a lot of years Christie and I must say this is my all time favorite piece! Carrying the mermaid into the drawer did it for me. Now I want one… is this box for sale? ☺️
Christy says
Aww yay! I’m so glad you love it, Barbara, thank you!! This one will be for sale. XOXO
Sharon L Austin says
OMG, she is GORGEOUS! The tail trick was genius. I still happen to have a flatware box to use, so thanks for the inspiration! lol
Christy says
Thank you, Sharon! I am so thrilled that it worked out so well…she is so pretty and you have to be able to see her tail! XOXO
Cyndi says
So pretty! I’m so glad you were able to get the rest of her on this! 🙂
Christy says
Thank you, Cyndi! Me too! XOXO
Jill T says
Beautiful box! I’m going to try one. But, my Dixie Bell paint is completely dried up. Is there a way to salvage it?
Christy says
Thank you, Jill! I would try adding some water and letting it sit for a bit. Then see if you can stir it up. I have brought back some pretty dried up ones, but some have been beyond help. Good luck! XOXO
Rhonda Dunaway says
Wow, Christy! That is one of my all-time favorite project of yours! I don’t even like mermaids generally speaking. I’m probably in the minority, but mermaids have always creeped me out. But if I were in your shop, I would swoop right in without a second thought and grab this jewelry box to take it home with me and put it smack in the middle of my dresser, and I would smile every time I looked at it. What you did with the mermaid’s tale is genius. I like how your brain works to come up with surprise twists or details. I’m trying to train my brain to do that too. Thanks for sharing!
Christy says
Aww thank you so much, Rhonda! I’m so glad you love this one, and I am thrilled that this idea worked out! It’s a fun twist for sure! XOXO
Denise - Salvaged Inspirations says
That lining was scary devil red! 👹😆 This mermaid box is so creative and beautiful my friend, I LOVE it! Pinned! XOXO
Christy says
Ha ha it sure was! Thank you so much, Denise!! XOXO
Ellen Shook says
This is just so uplifting — to see something that is just for fun! I love that color (I used it on the inside of a hutch a few years ago), and the mermaid is fabulous. Great tip about the silicone paddle bit — I am keeping that one in the back pocket. Years ago I bought a cheap immersion blender at Walmart for $10 that I only use for paint. If it ever quits, I will get a paddle bit.
Christy says
I’m so glad you enjoyed this one, Ellen, thank you! It was so fun to do! And yes, keep that paddle in mind…it works wonderfully! XOXO
Caye says
That little bird onb your shoulder really gave you a great idea! I’m so glad you listened because this is really a beauty! Great job, as always.
Christy says
Ha ha thank you, Caye! I’m glad I listened too! XOXO
Michele M. says
Oh. My. GOSH! Genius. Gorgeous. Just wow.
That piece is STUNNING.
Christy says
Thank you so much, my friend!! She was a fun one to do! XOXO
Nancy @ Artsy Chicks Rule says
What a sweet little box it is now, Christy! And I love how you did the drawer. Perfect decision to paint your pretty fabric to add that! xoxo
Christy says
Thank you, Nancy! It wasn’t easy to take a brush to that fresh fabric liner lol but totally worth it! XOXO
Geri Davis says
That box is just beautiful! I love the split mermaid surprise as did everyone else looking at your comments! As always you inspire me to think outside the box, or should I say inside?!
Christy says
Thanks so much, Geri! I was so excited to be able to share all of her!! XOXO
Linda says
Better than you planned, that drawer surprise turned out fantastic!! I really like to top piece of hardware too. I can see my granddaughter loving this piece ♥️
Christy says
Yes, it sure was better than my original plan…so fun! It would be perfect for any young lady! Thanks so much, Linda! XOXO
p says
I love the tail in the drawer ! She is complete now.
Gota be a slacker sometimes. Enjoy the game 🙂
Christy says
Thank you, P! Absolutely lol! XOXO